- Start
- FILE INCLUDES
- INTRODUCTION
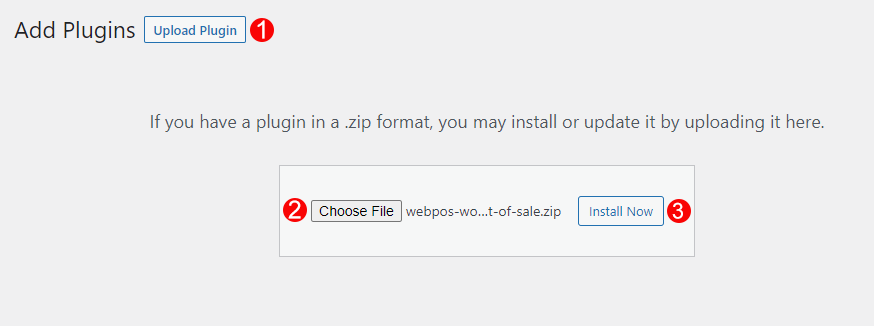
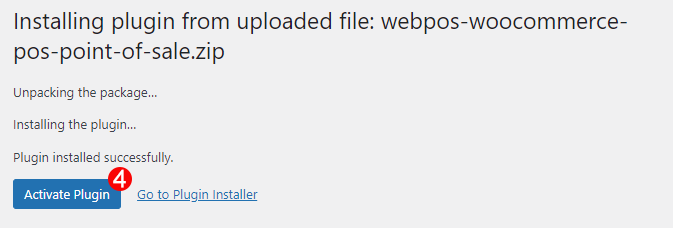
- INSTALLATION
- HOW TO USE
- HOW DOES IT WORK
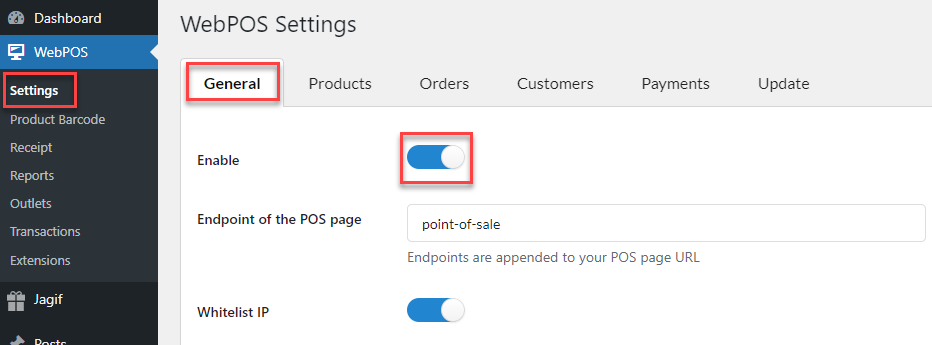
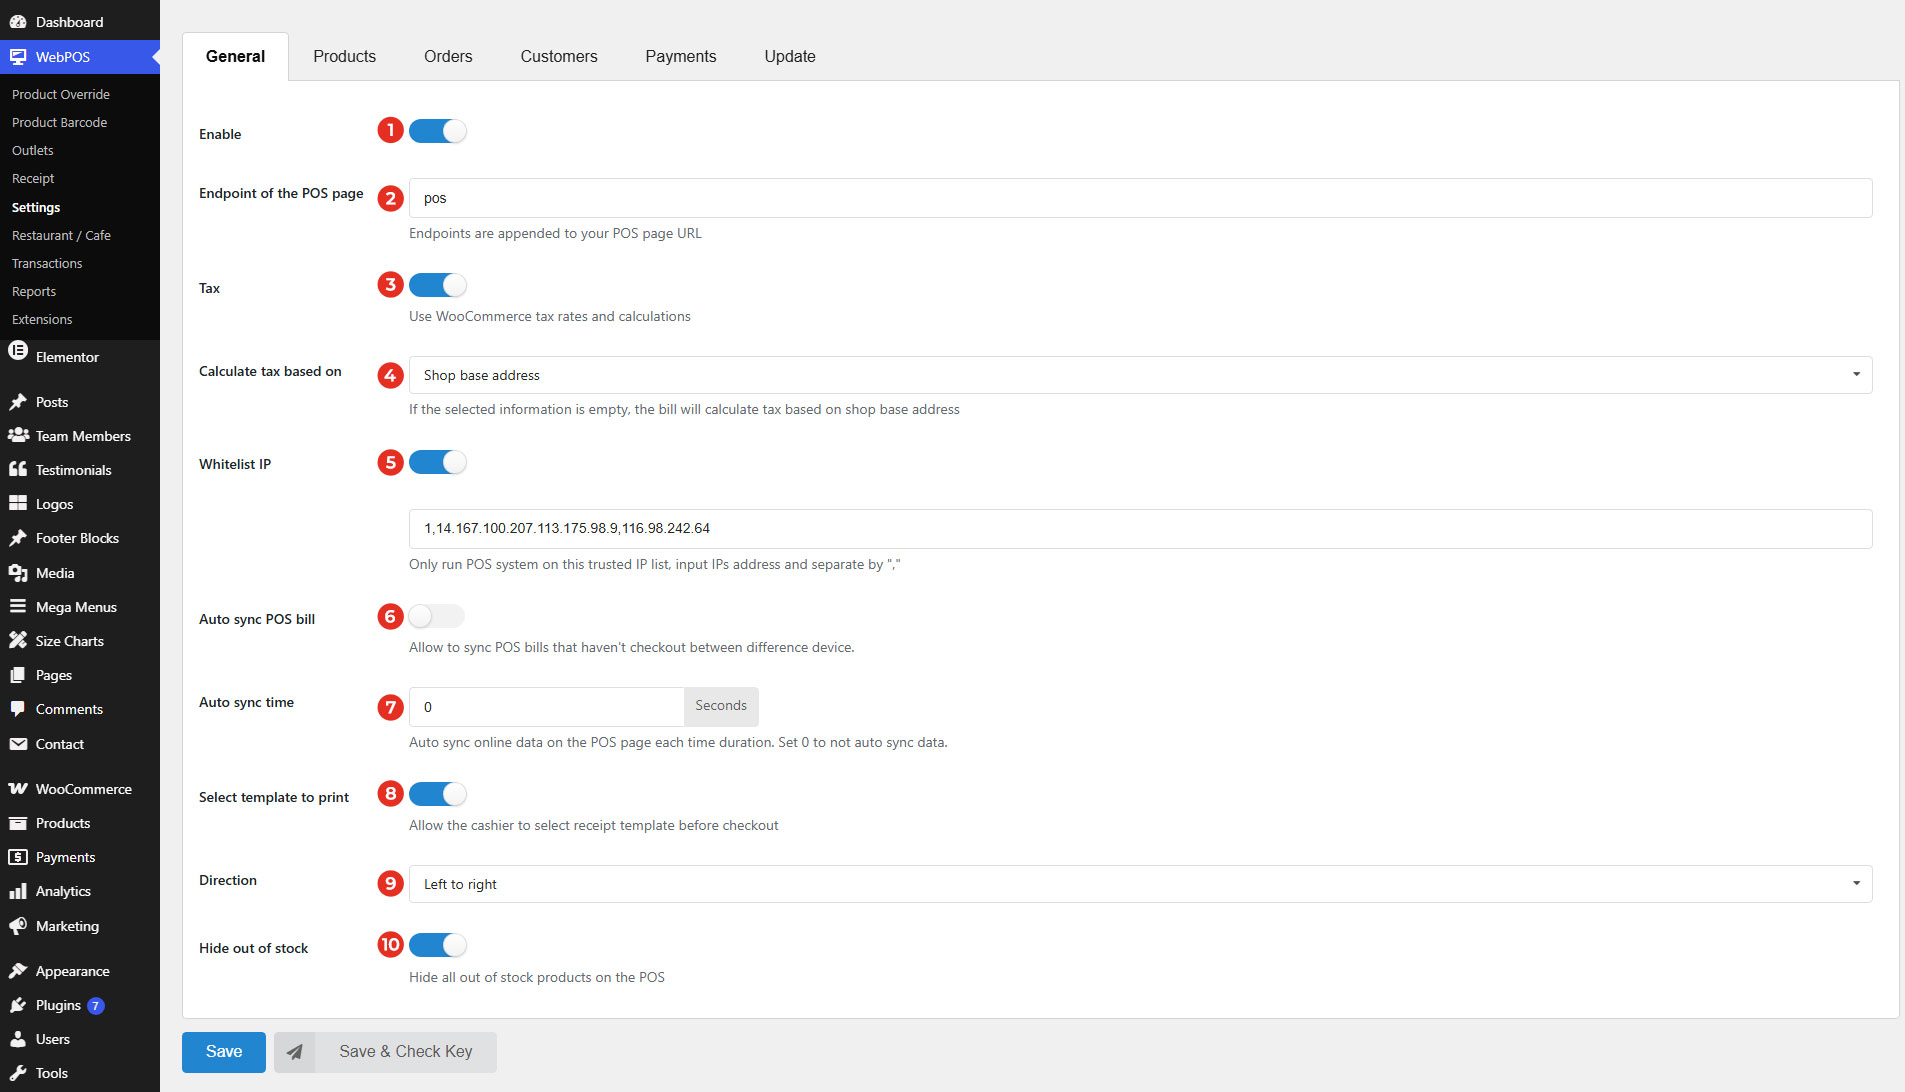
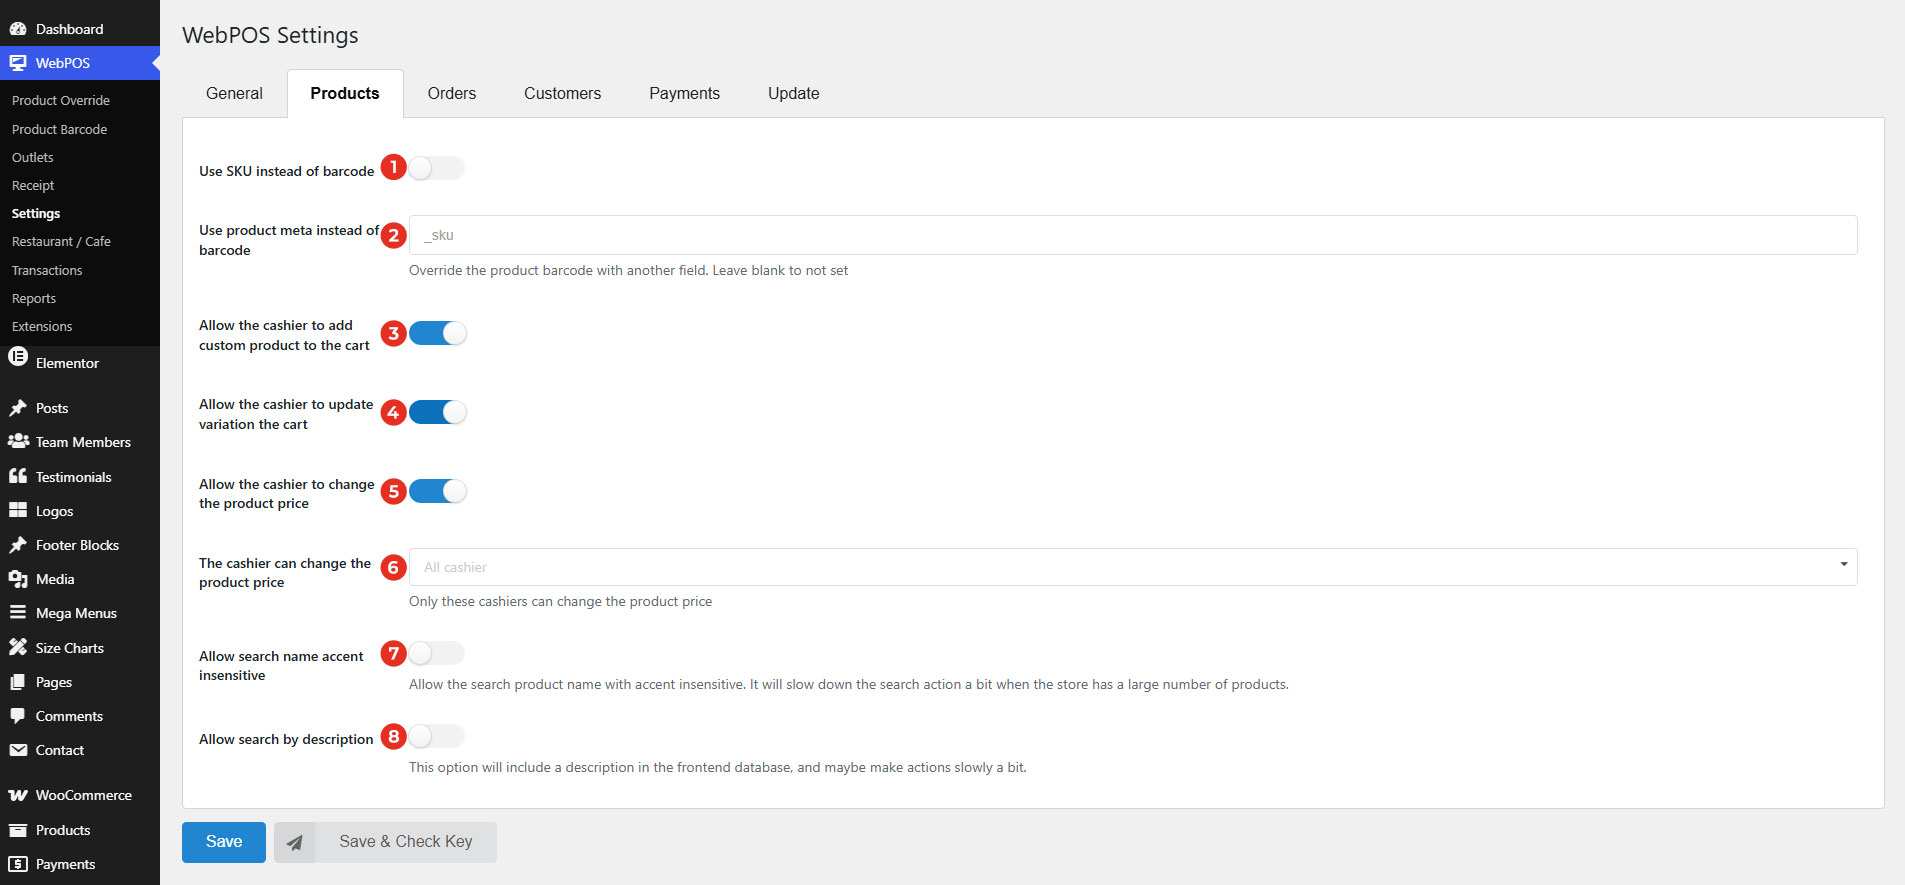
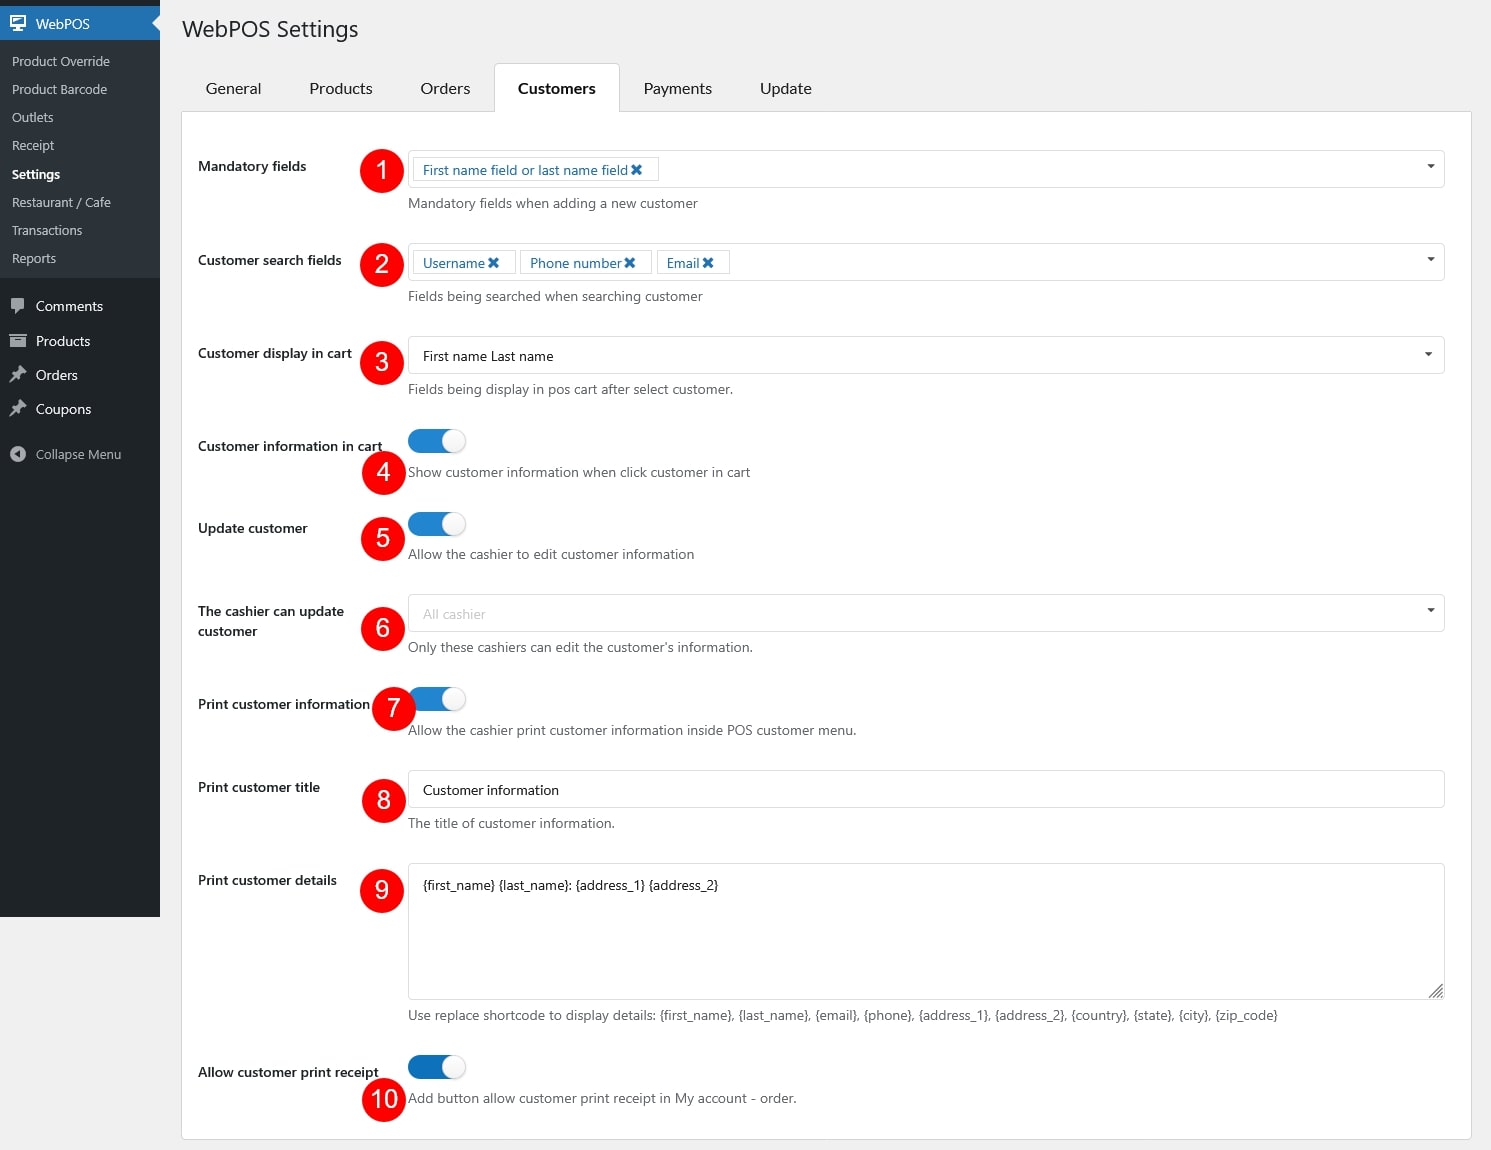
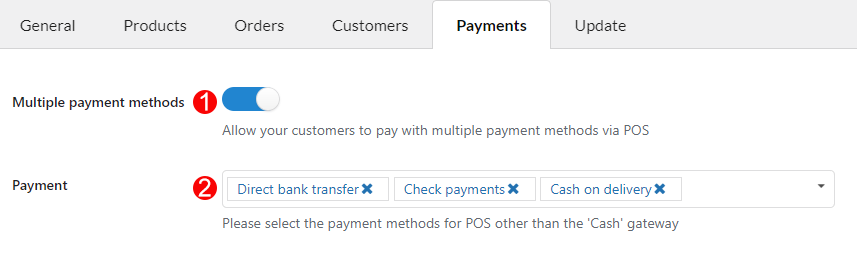
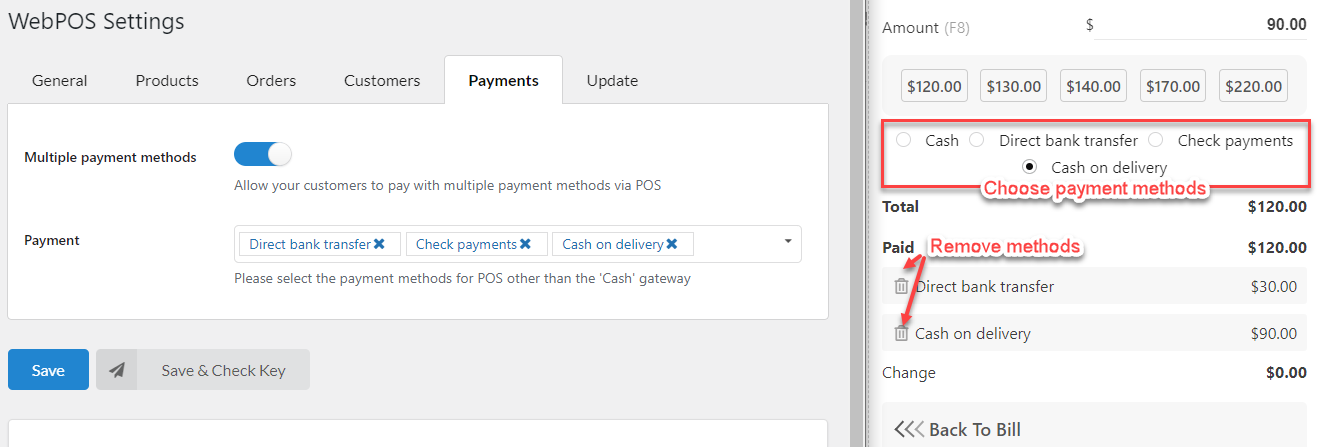
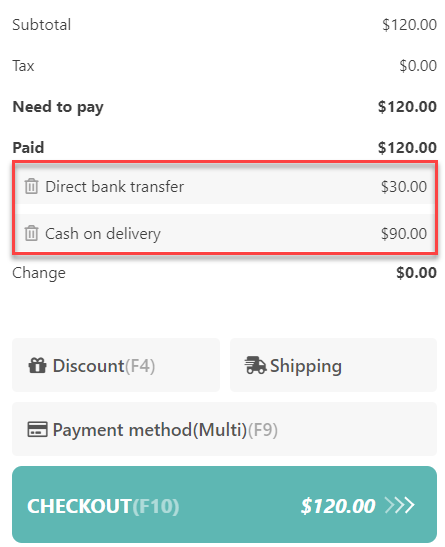
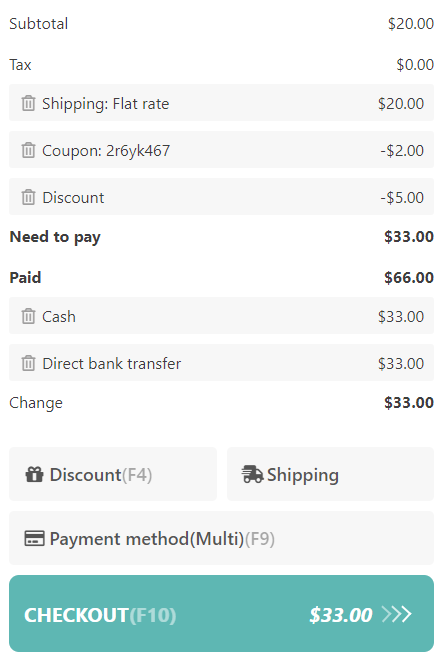
- Settings
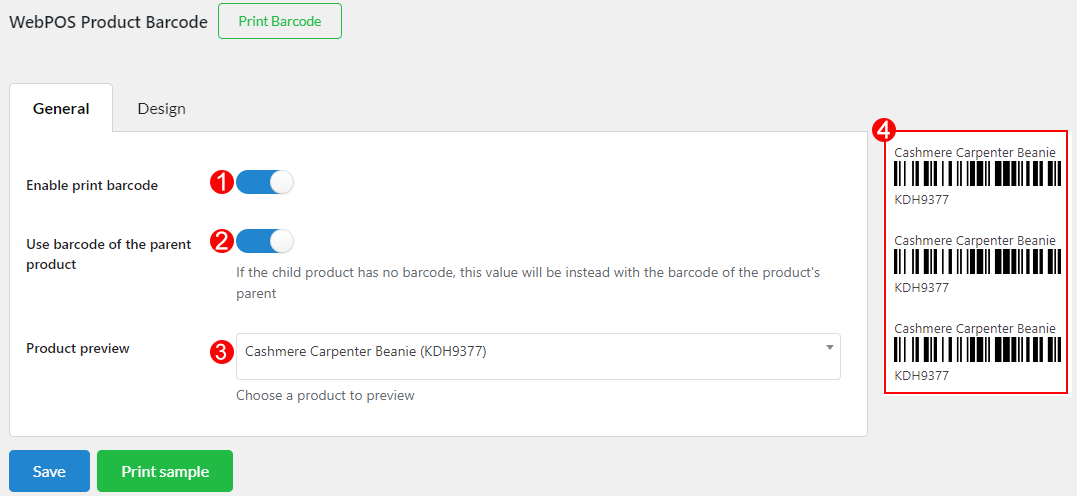
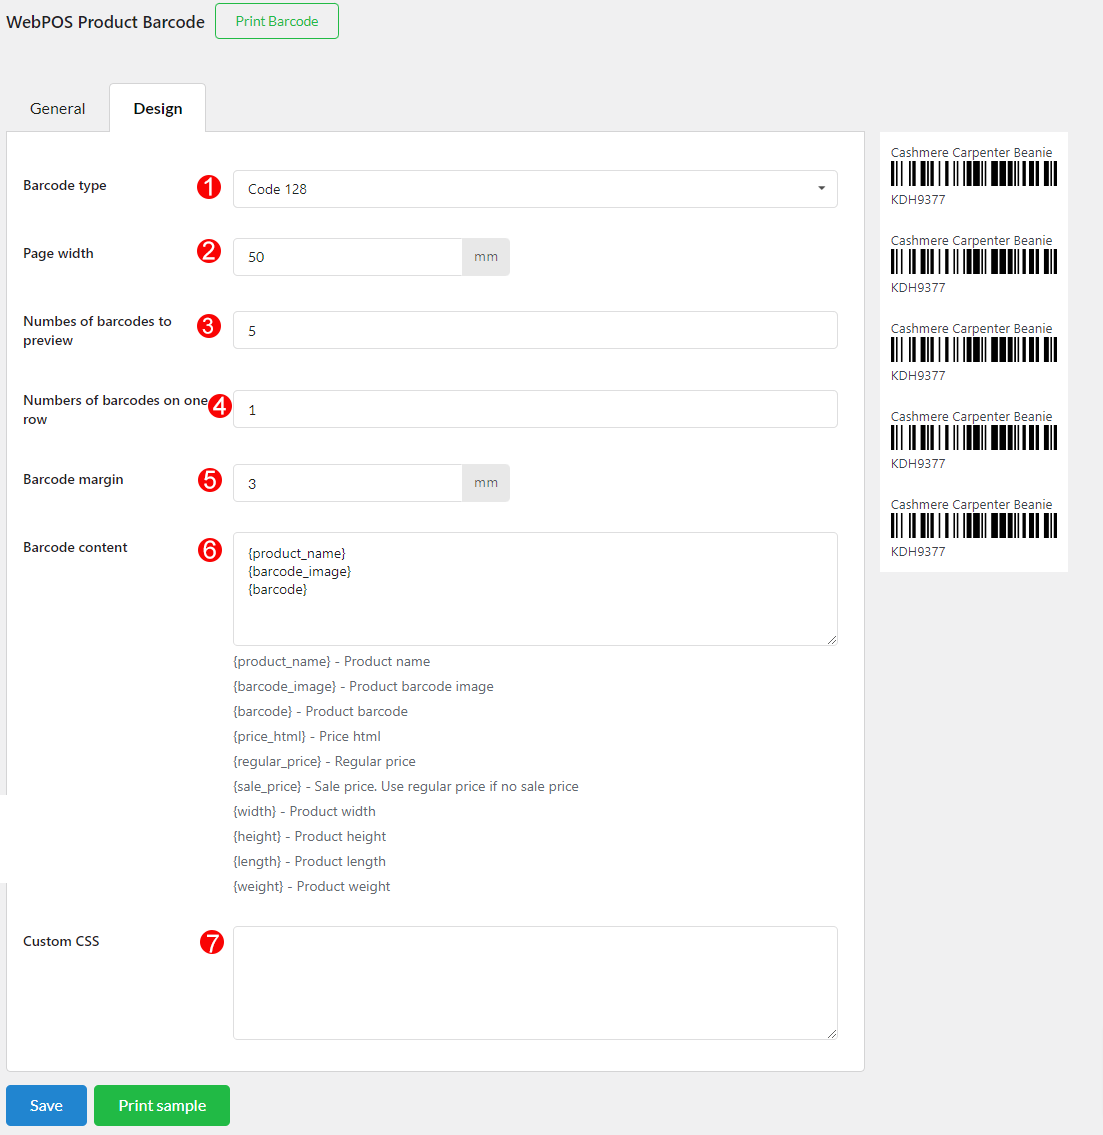
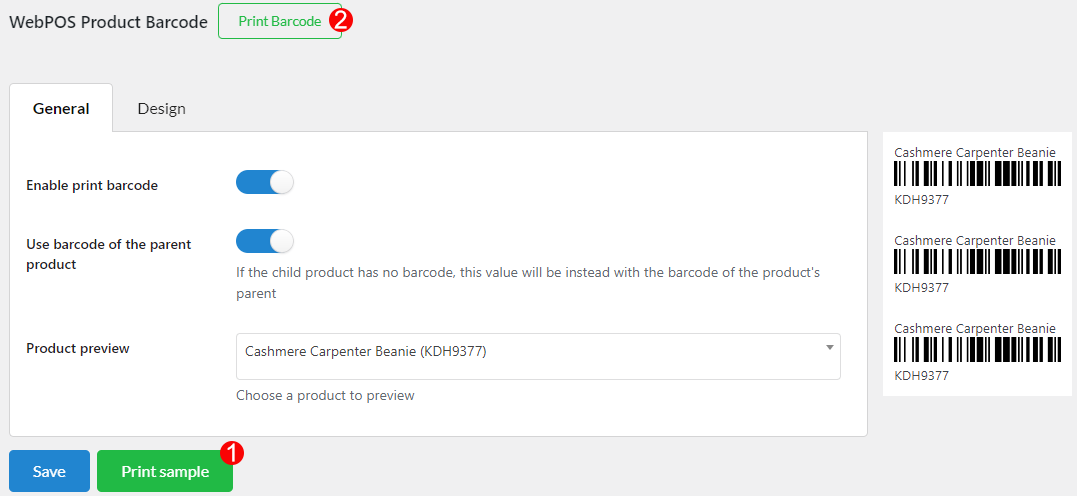
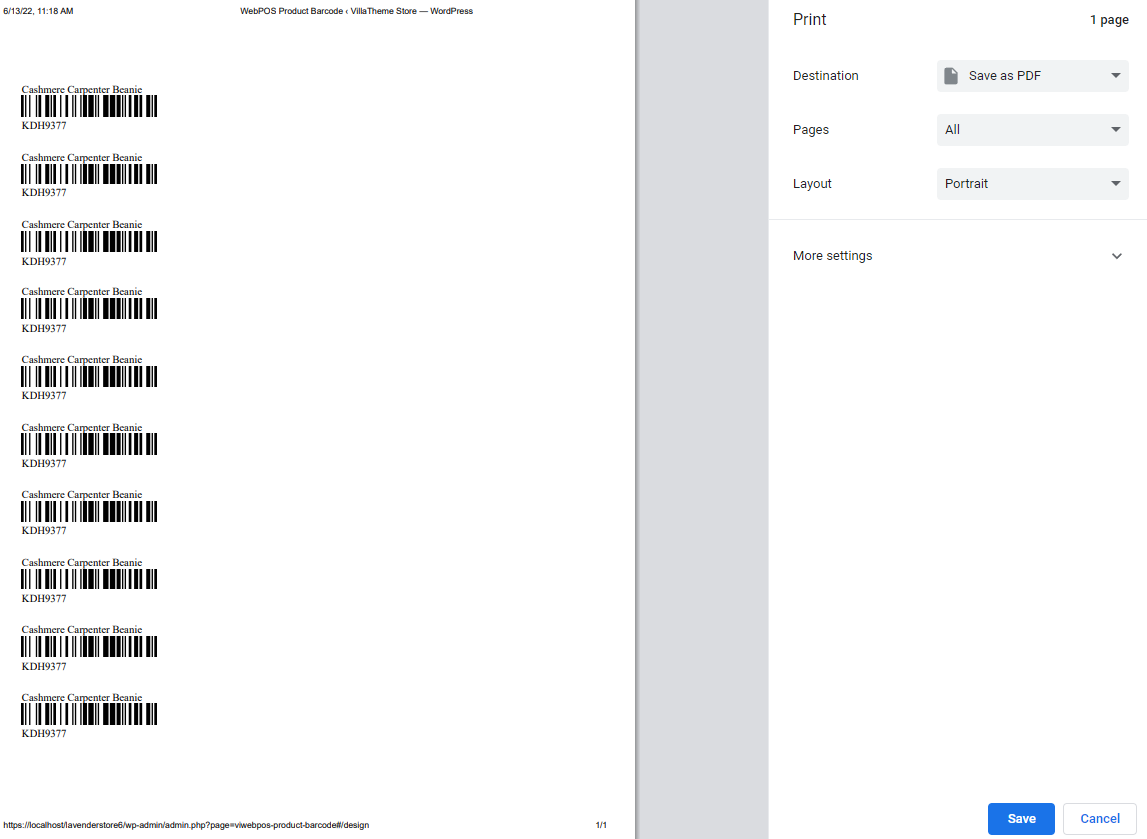
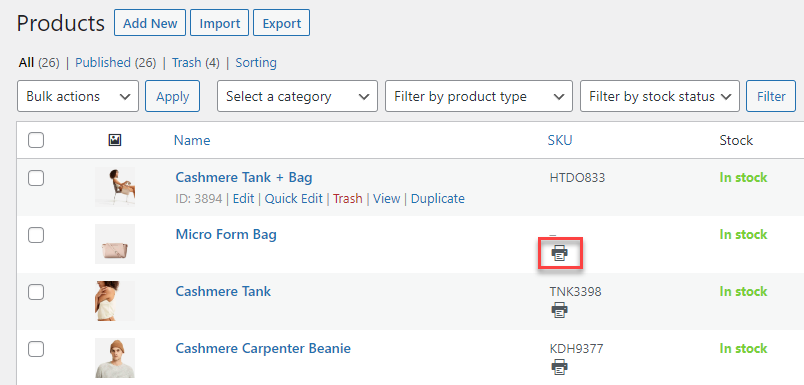
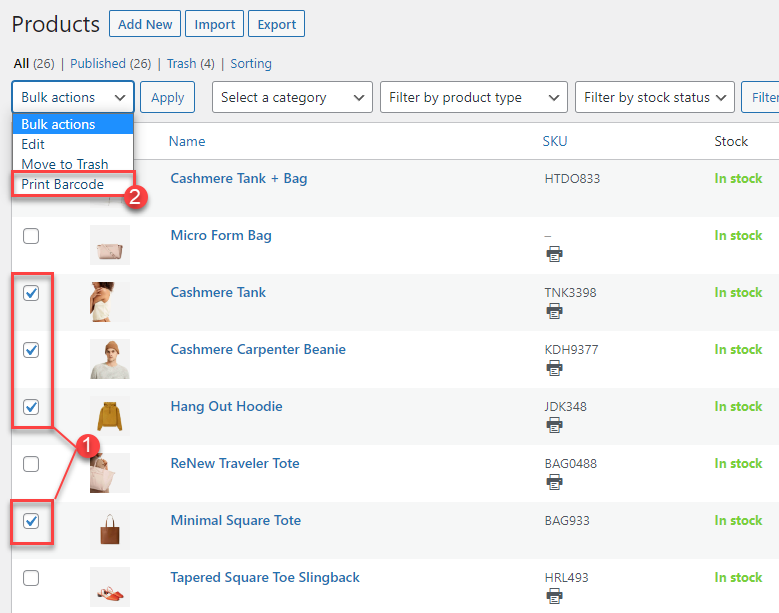
- Product Barcode
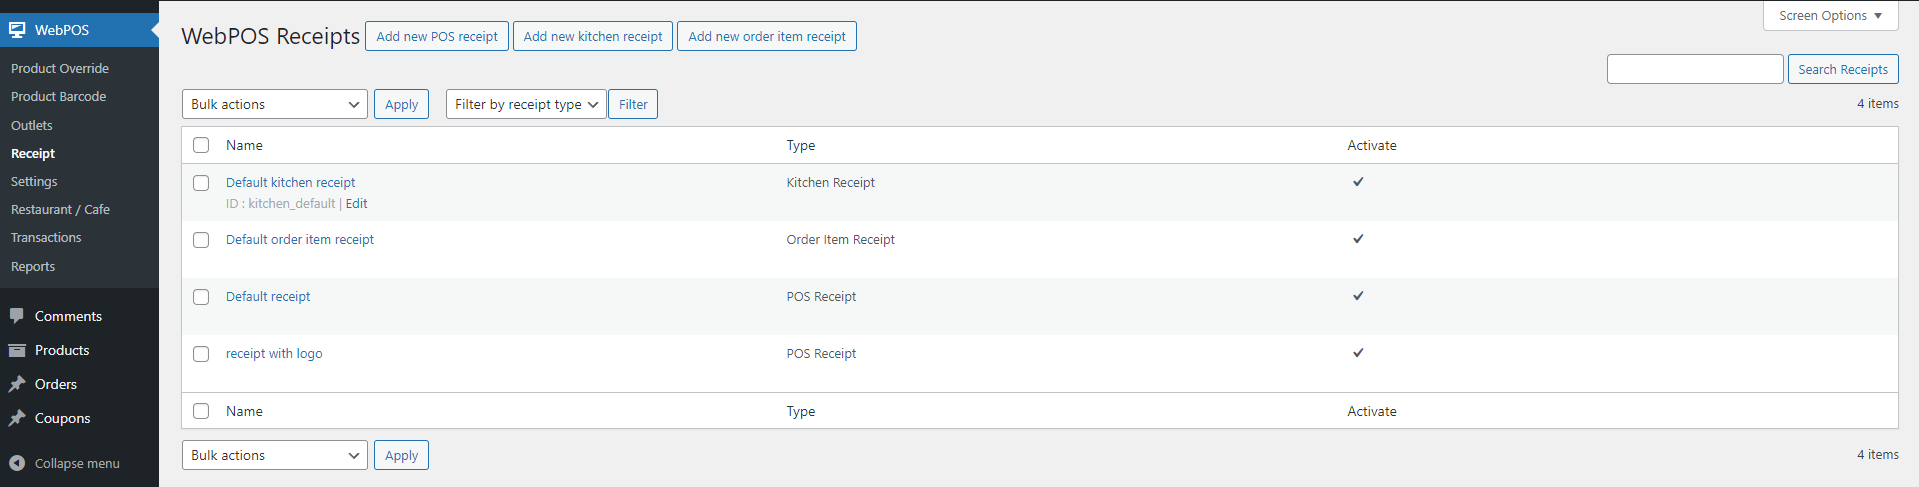
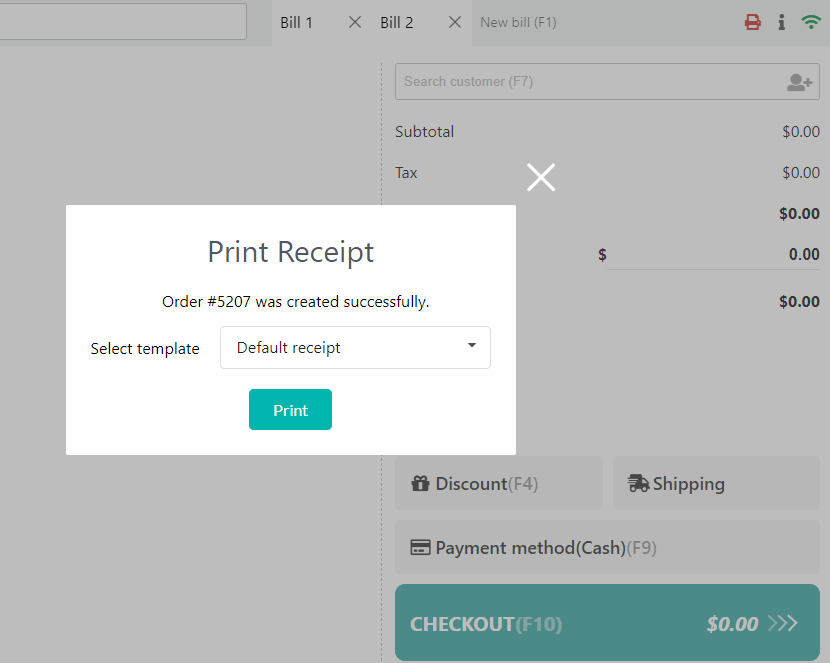
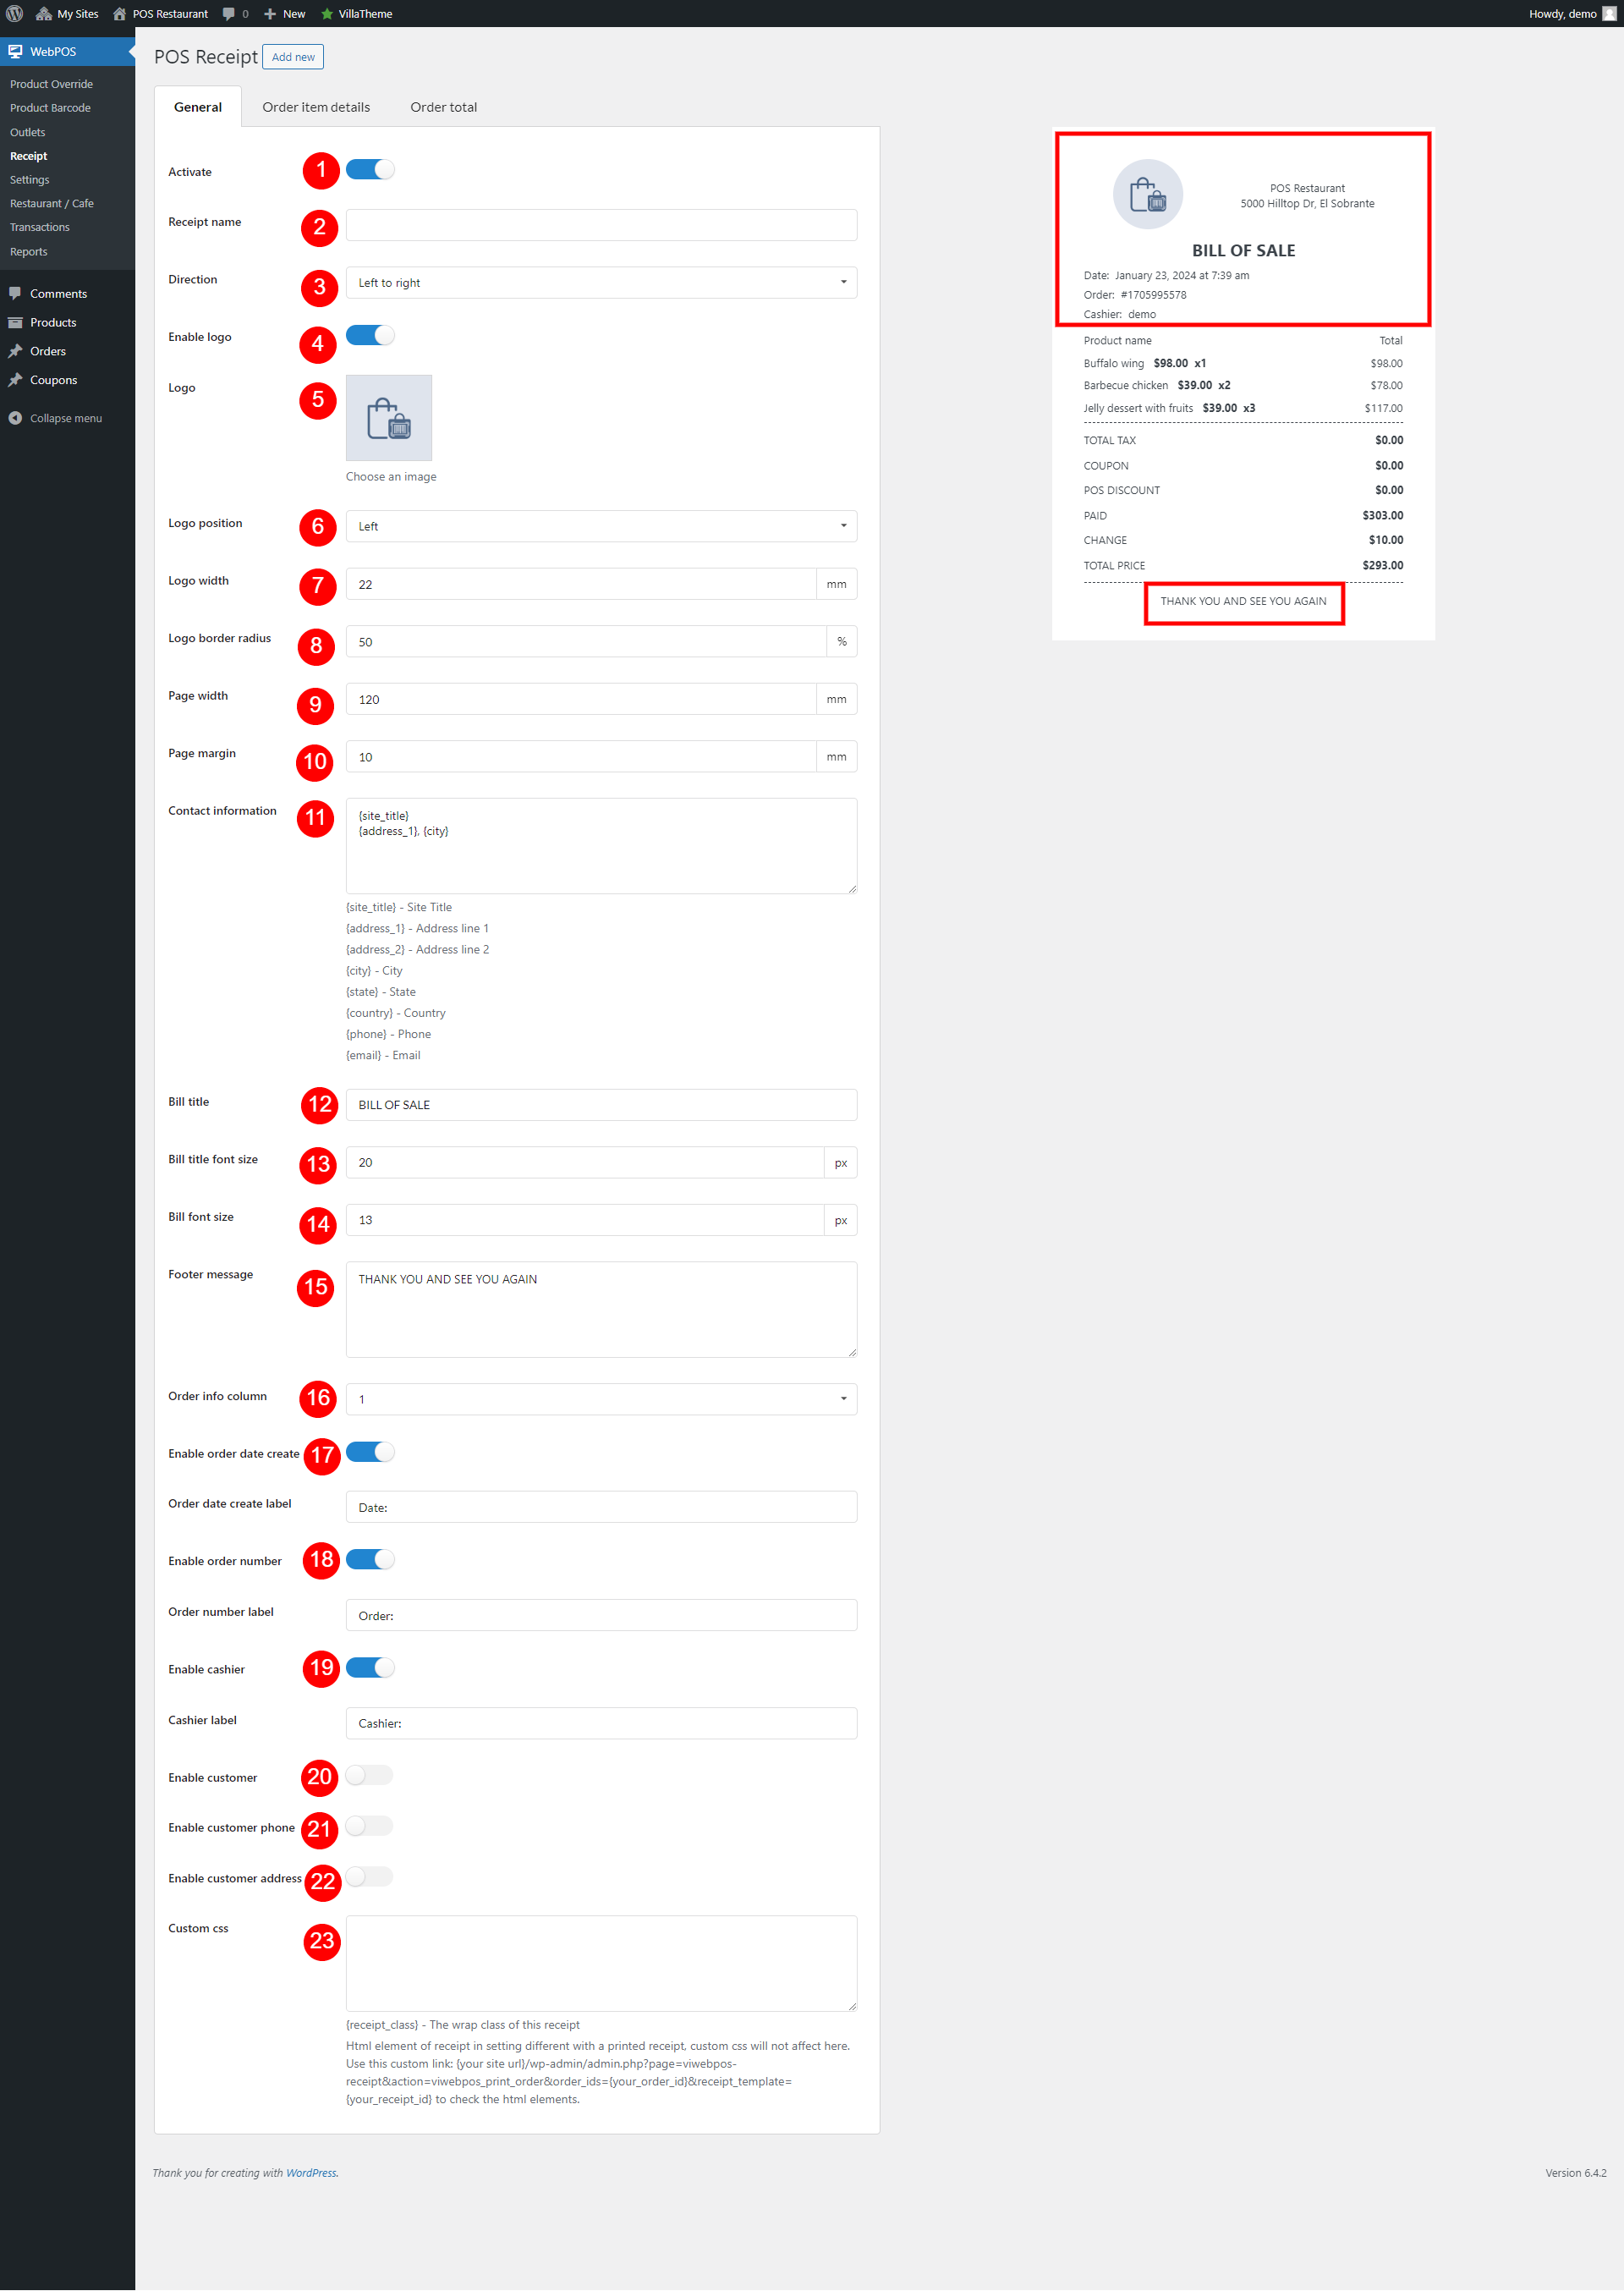
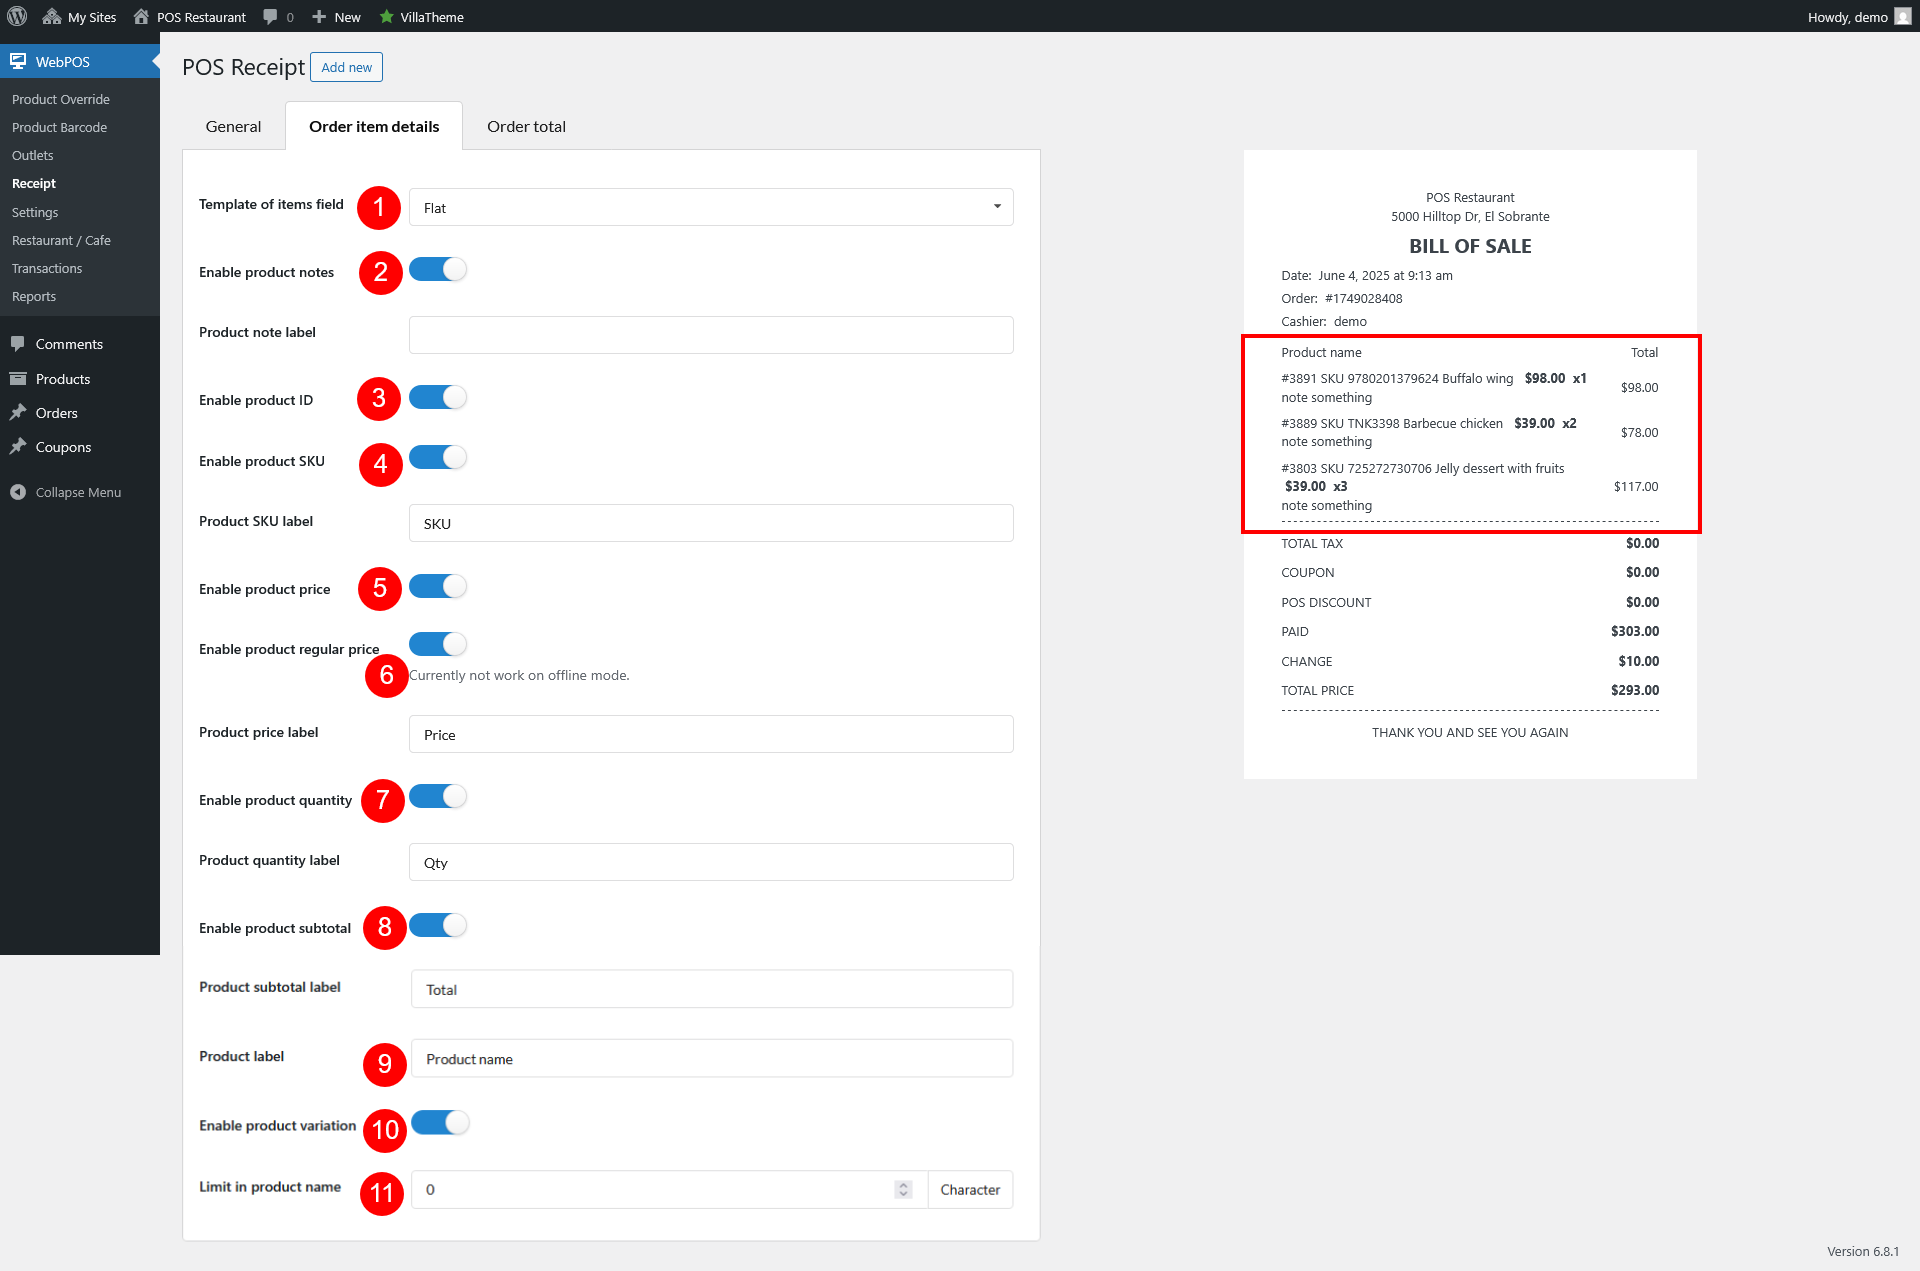
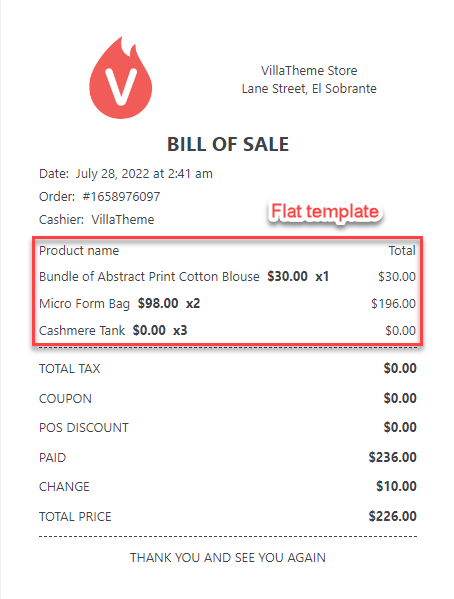
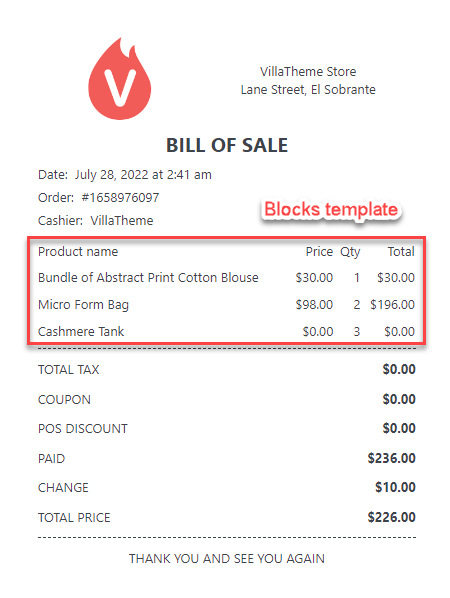
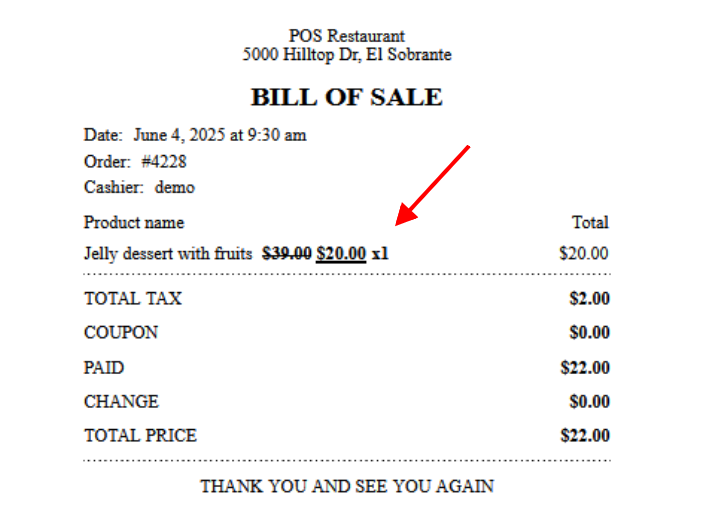
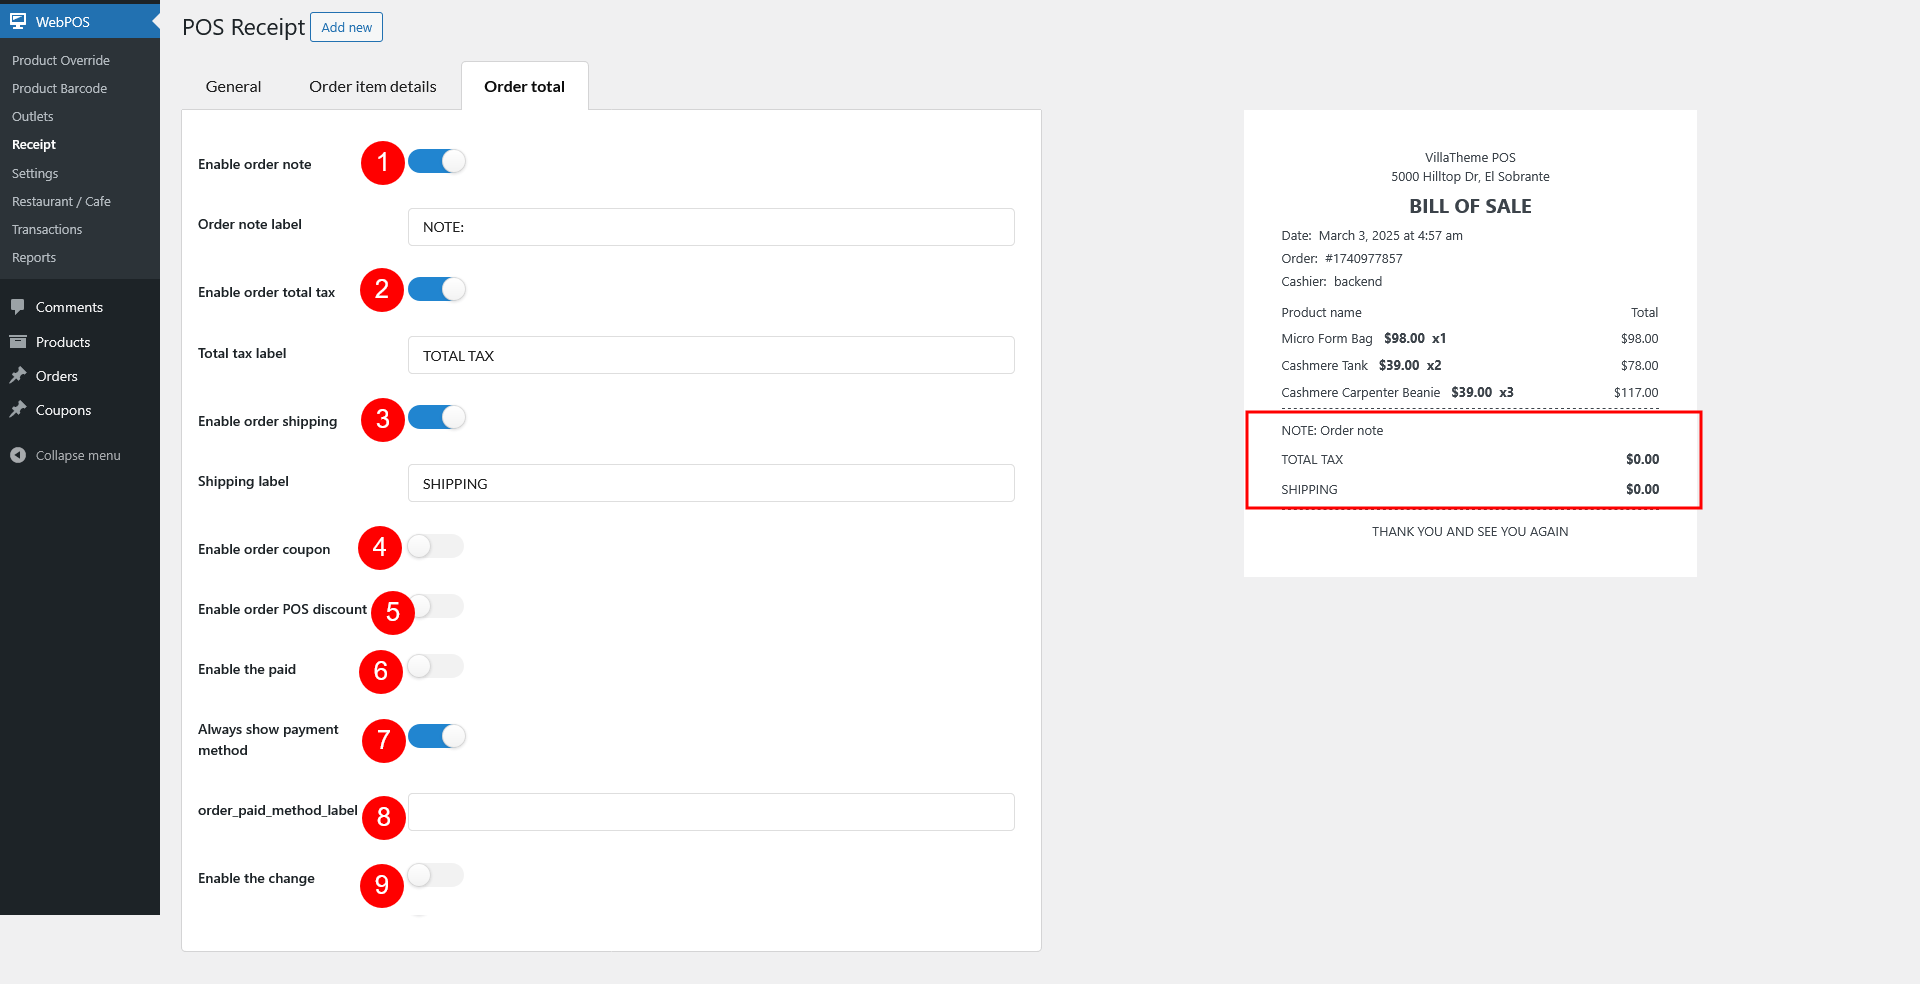
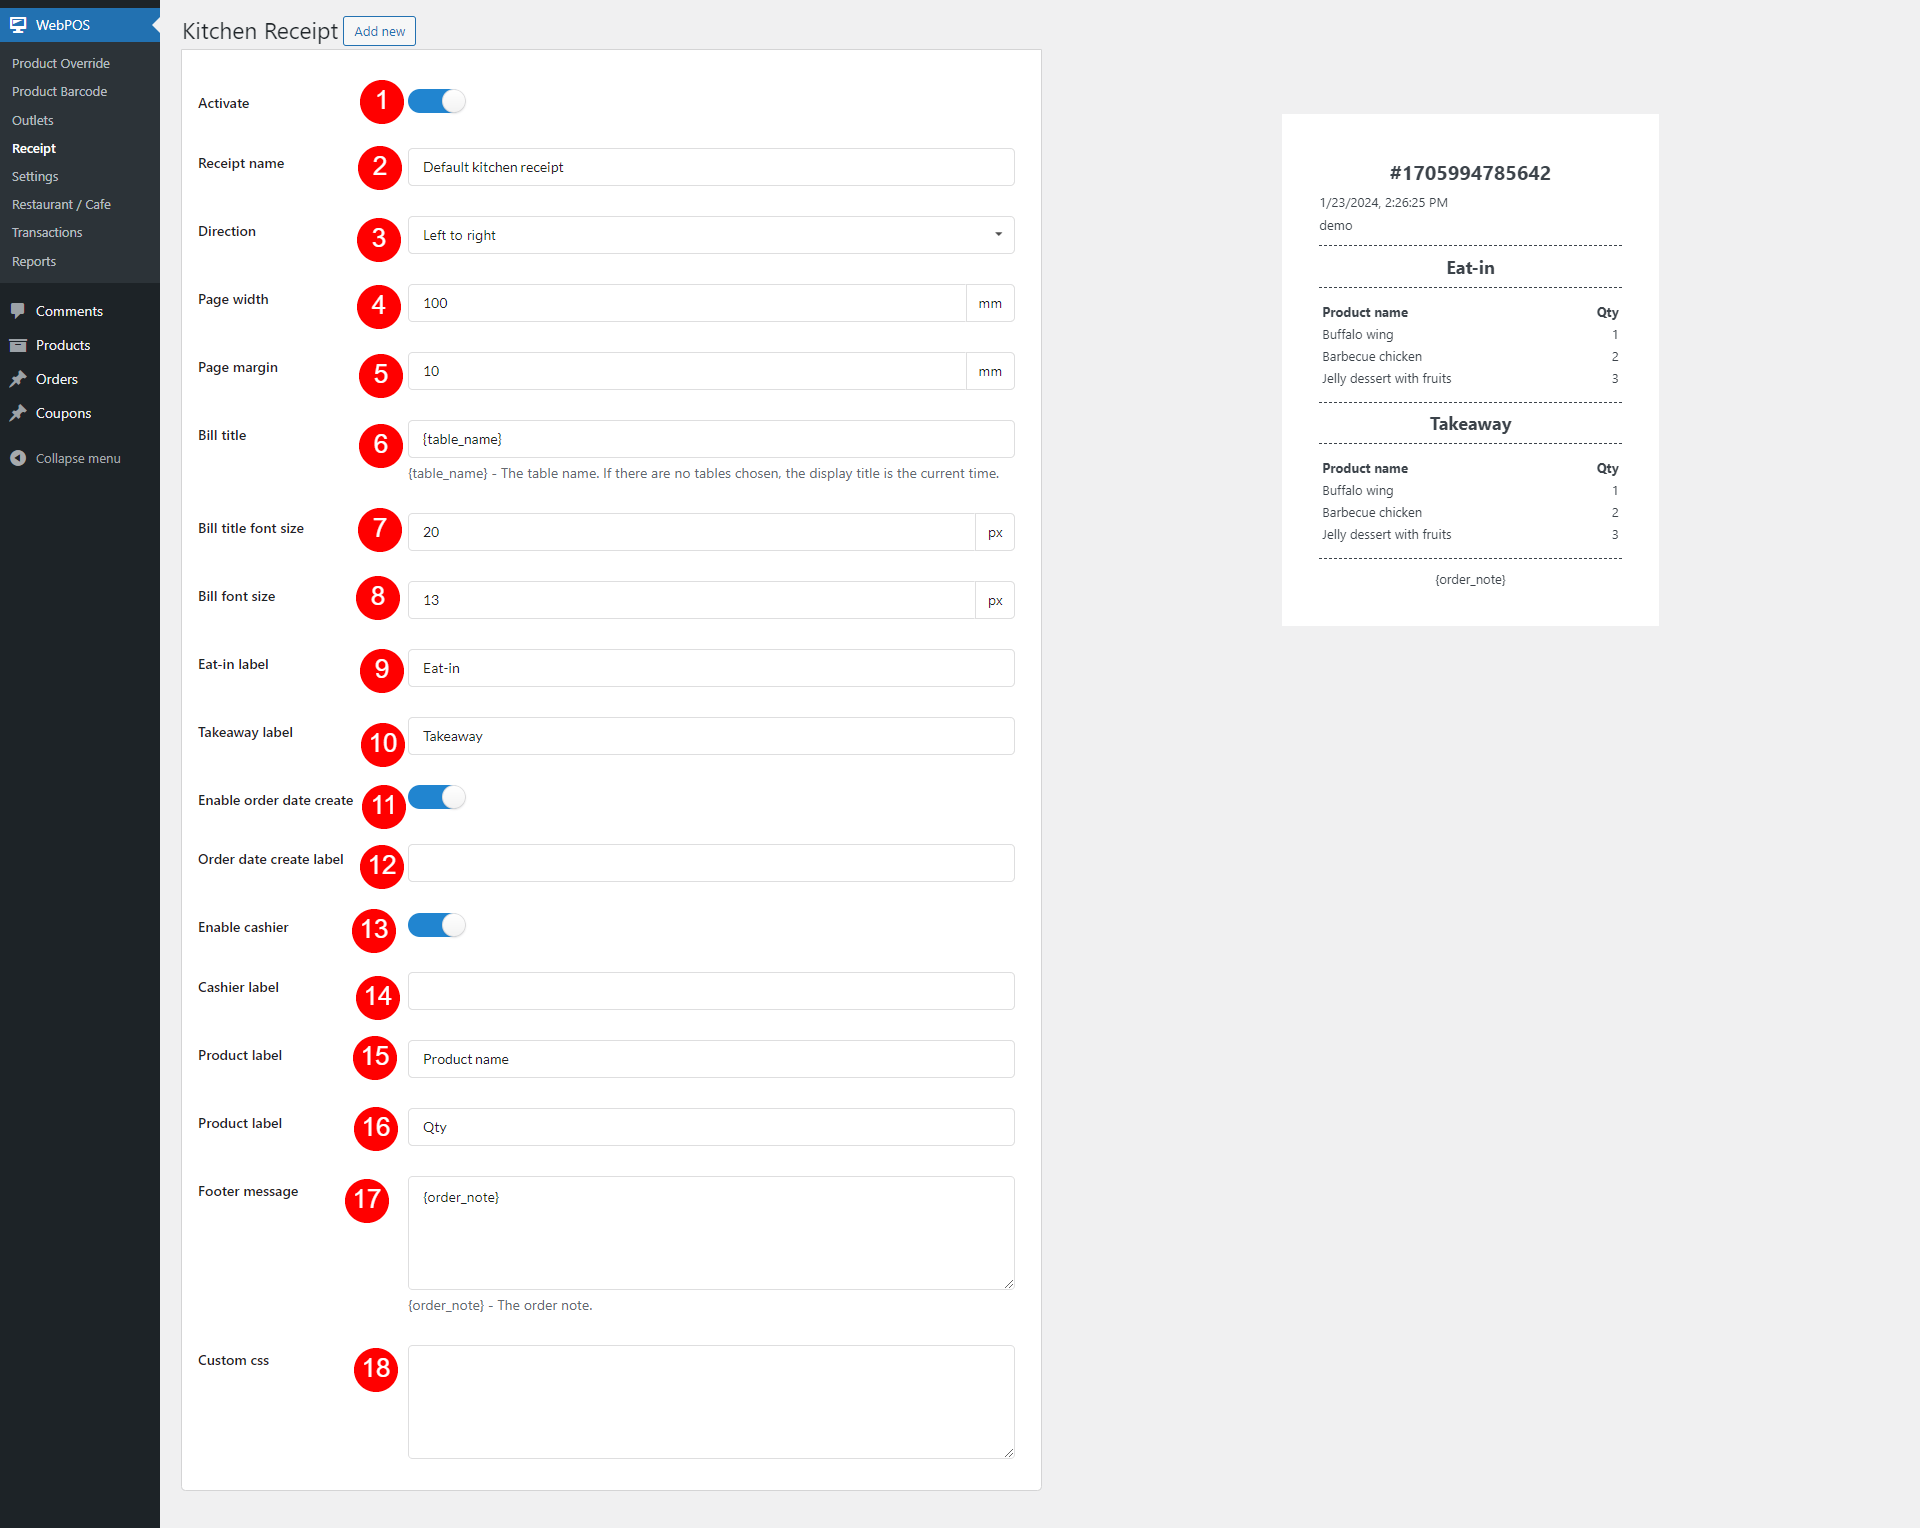
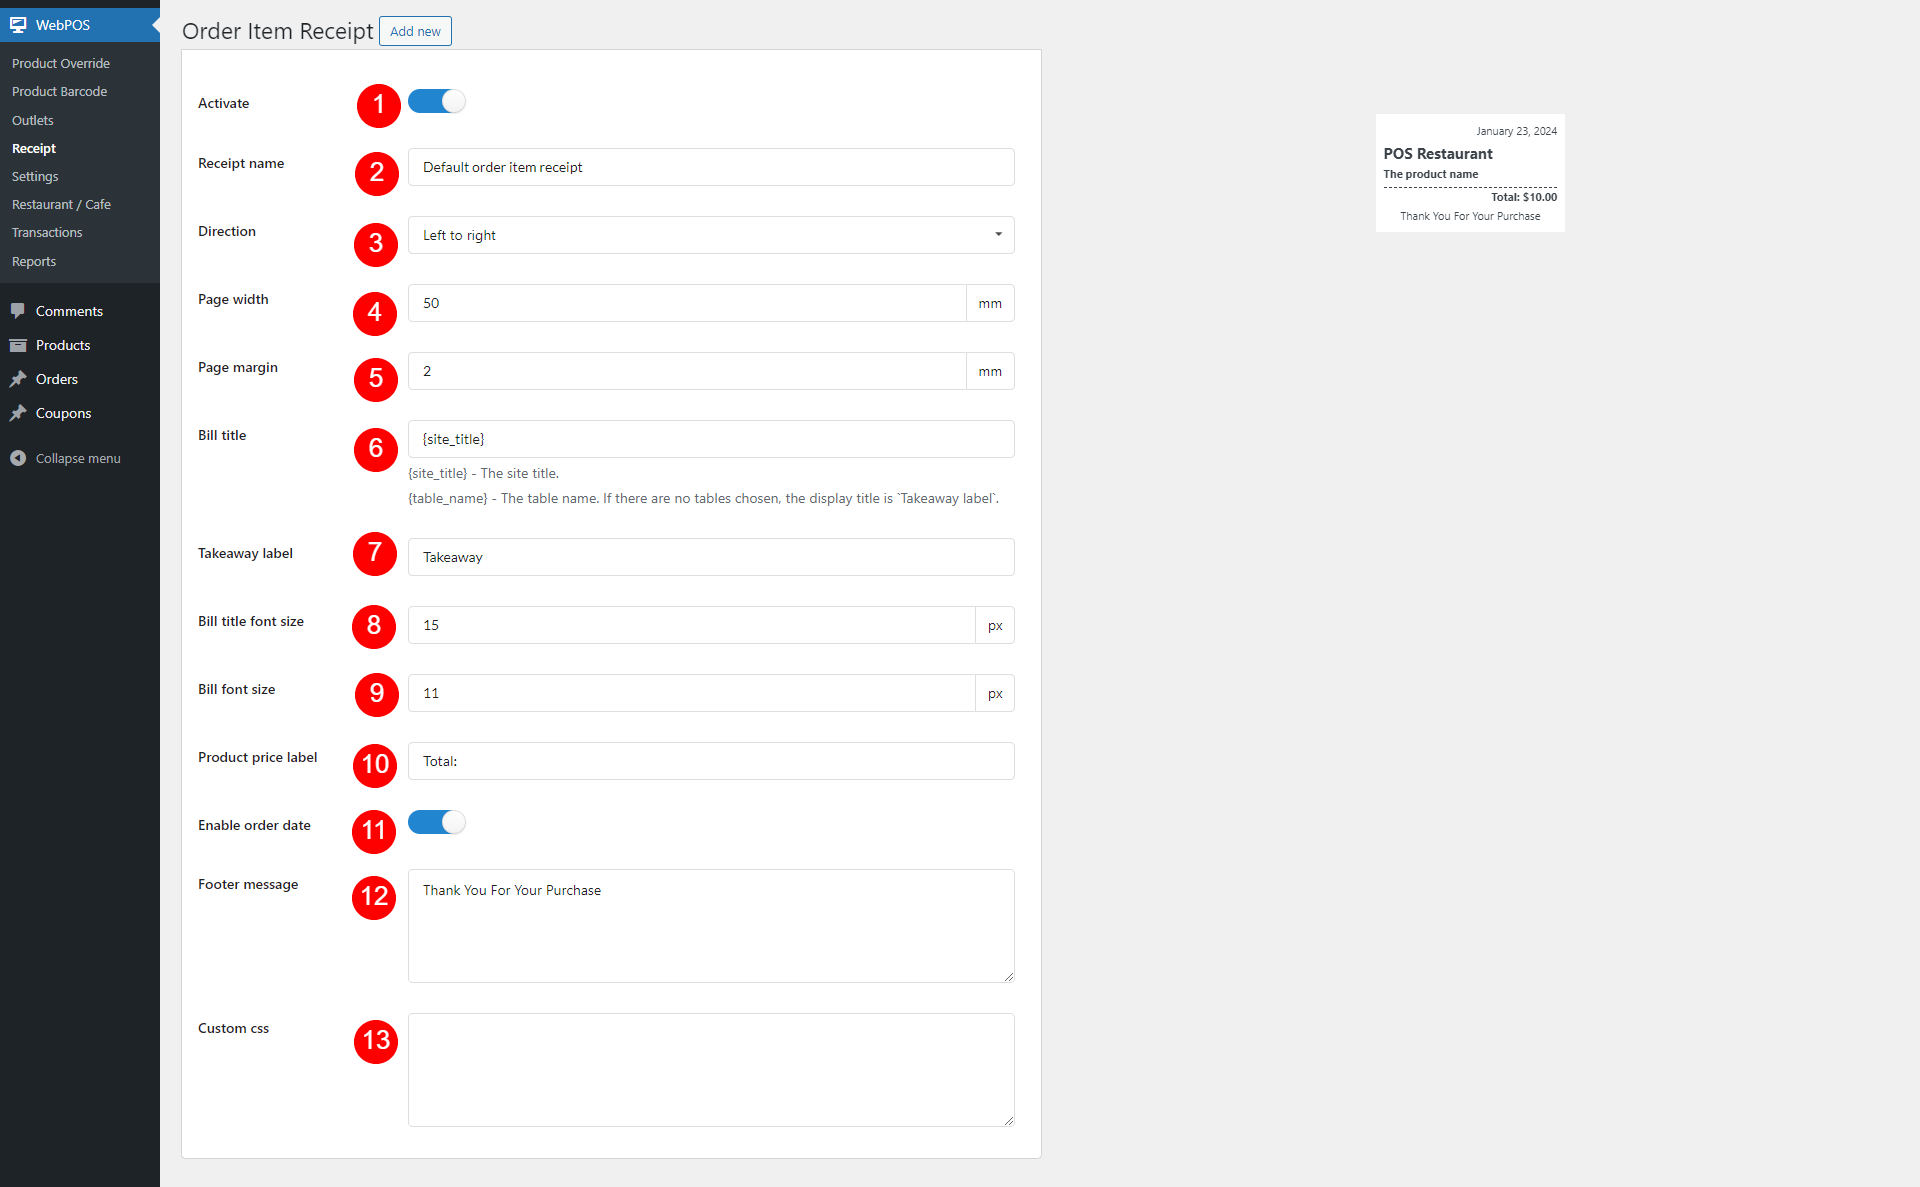
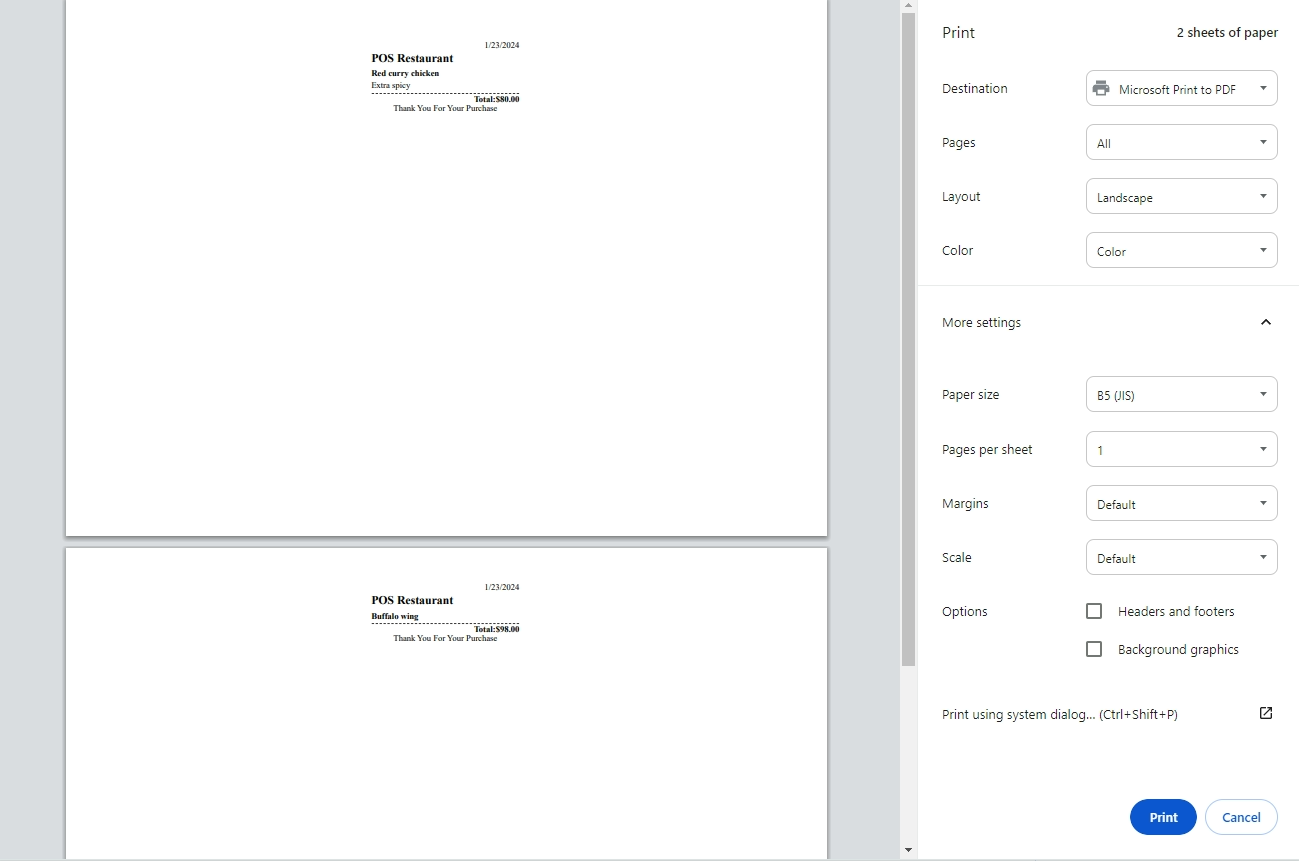
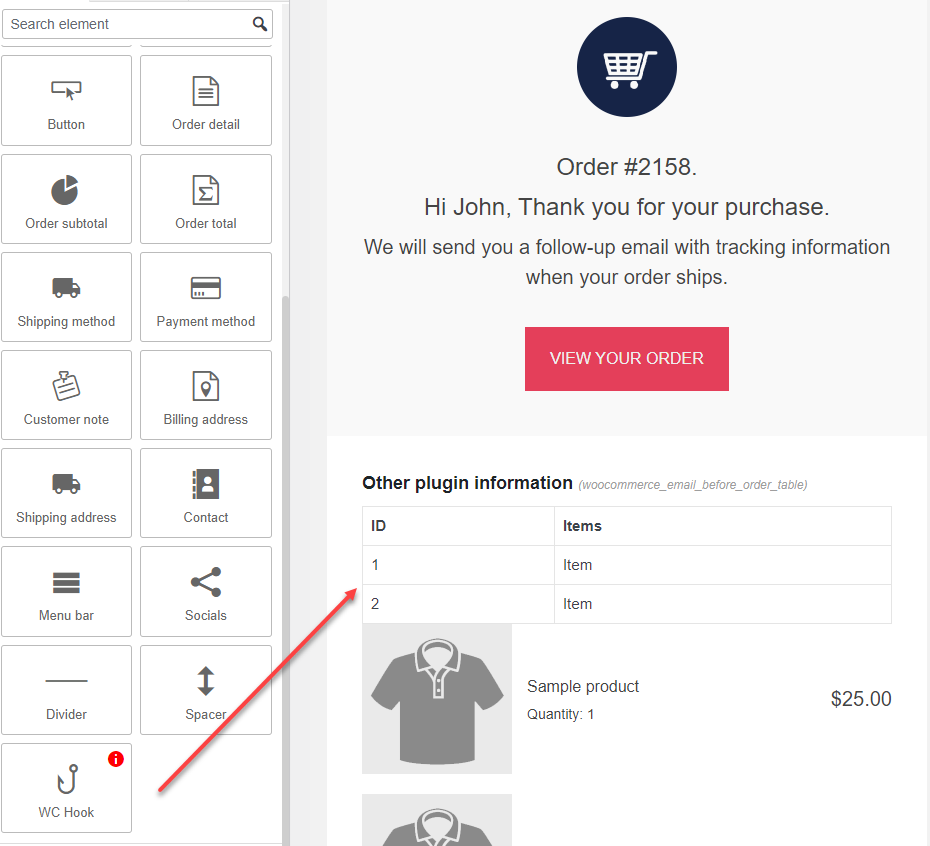
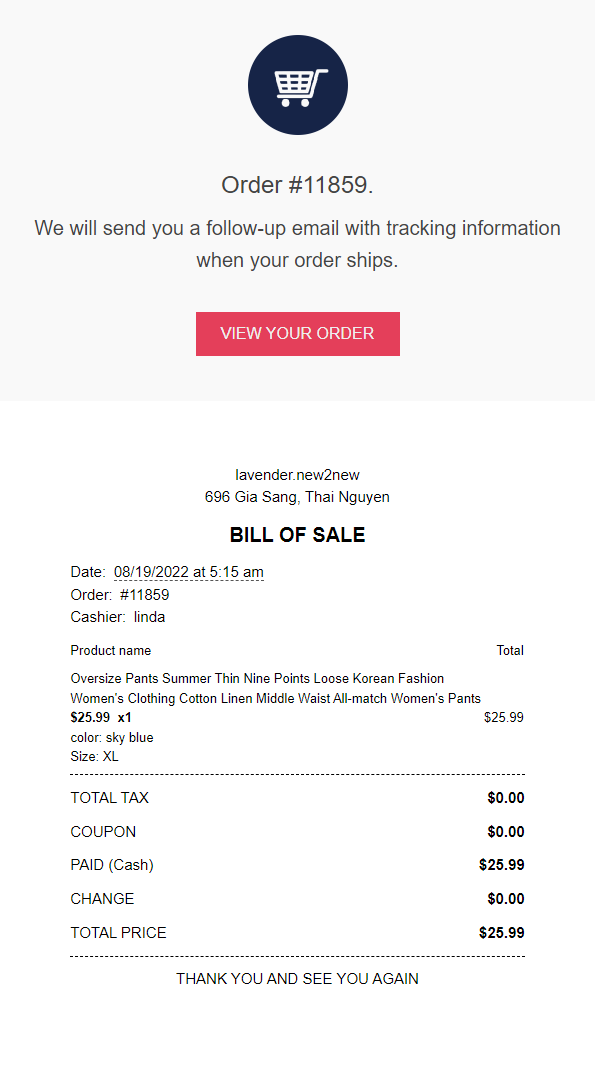
- Receipt Template Configuration
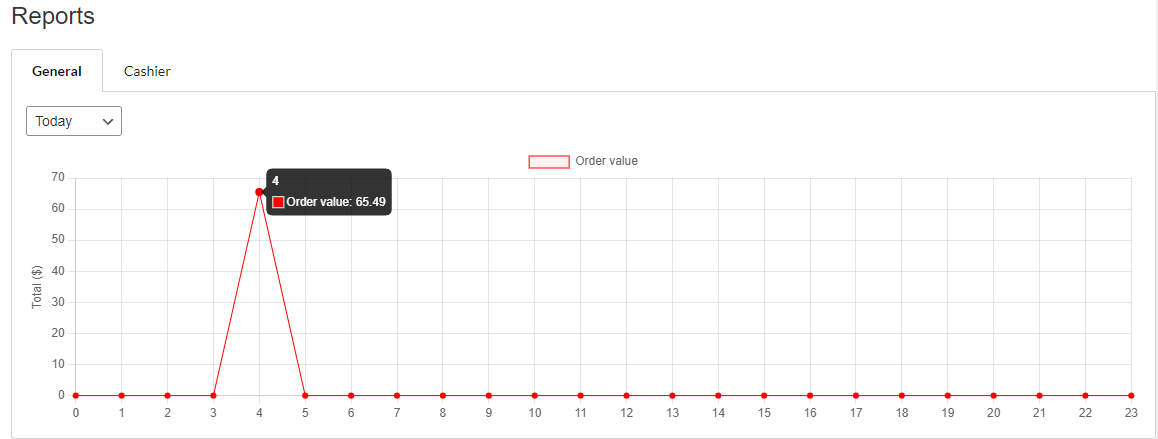
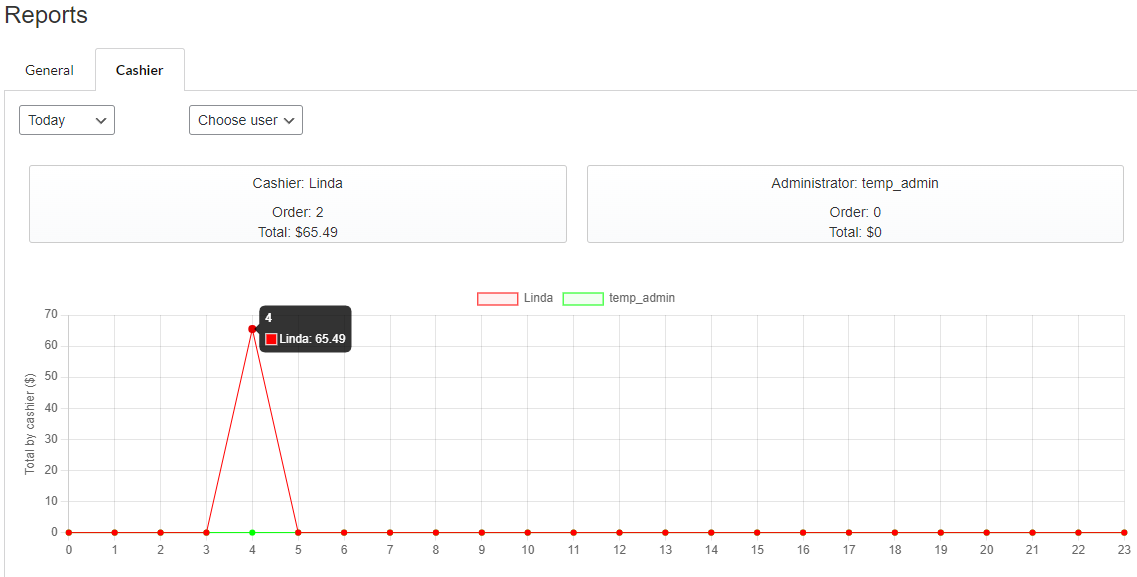
- Reports
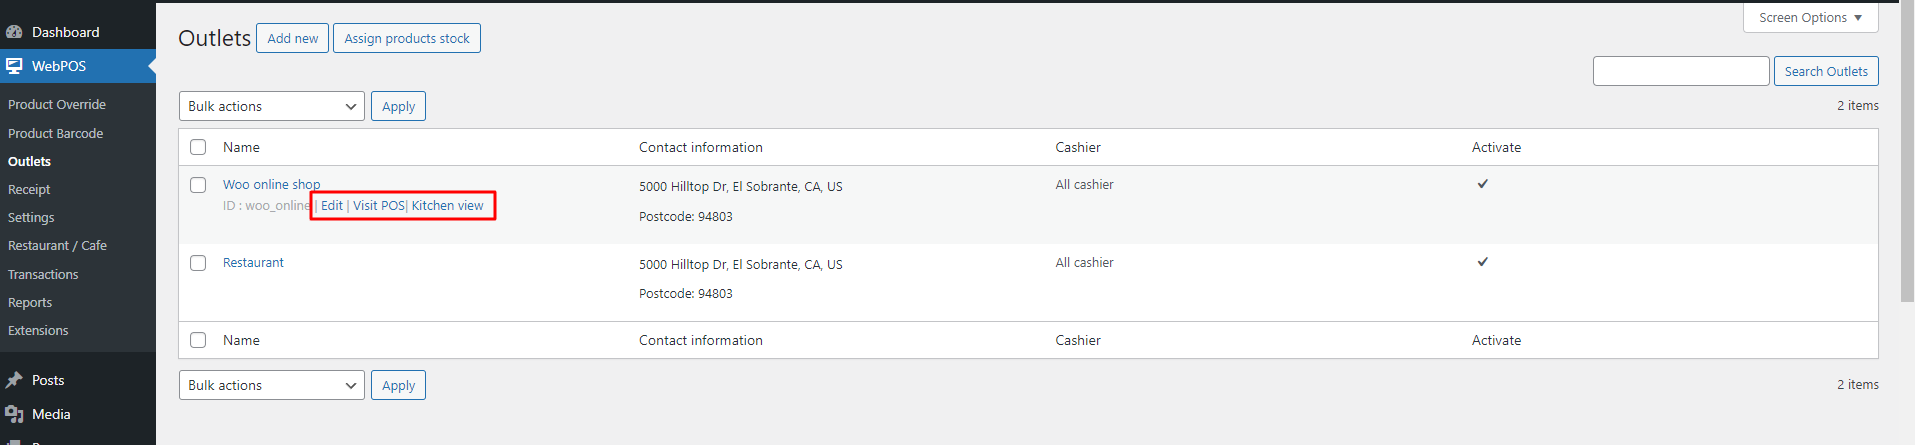
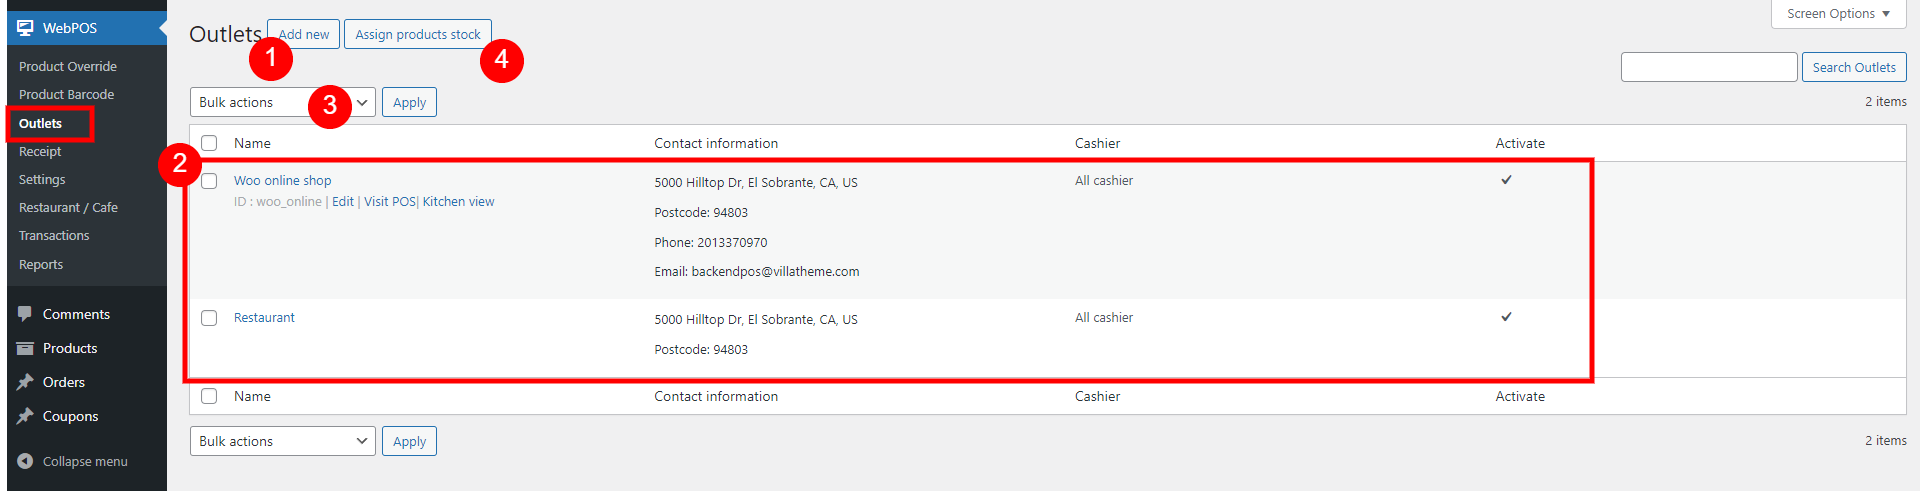
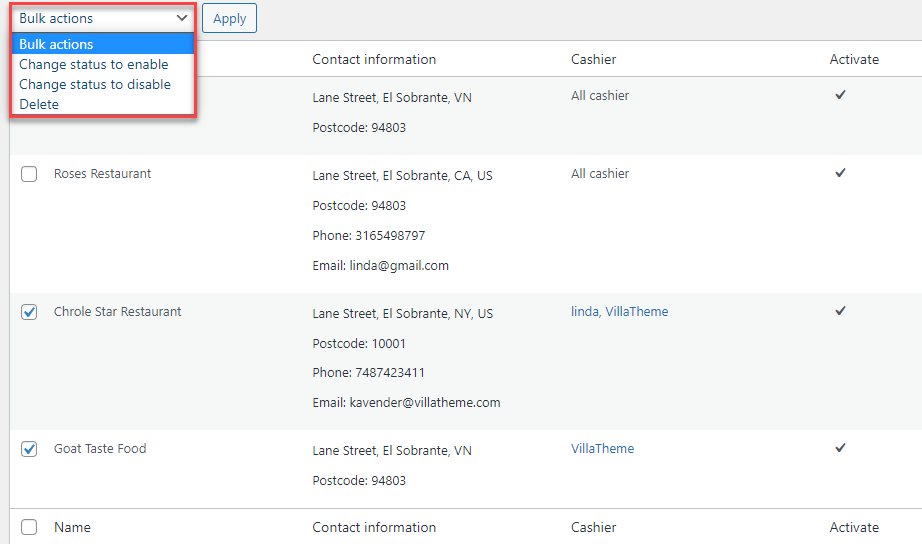
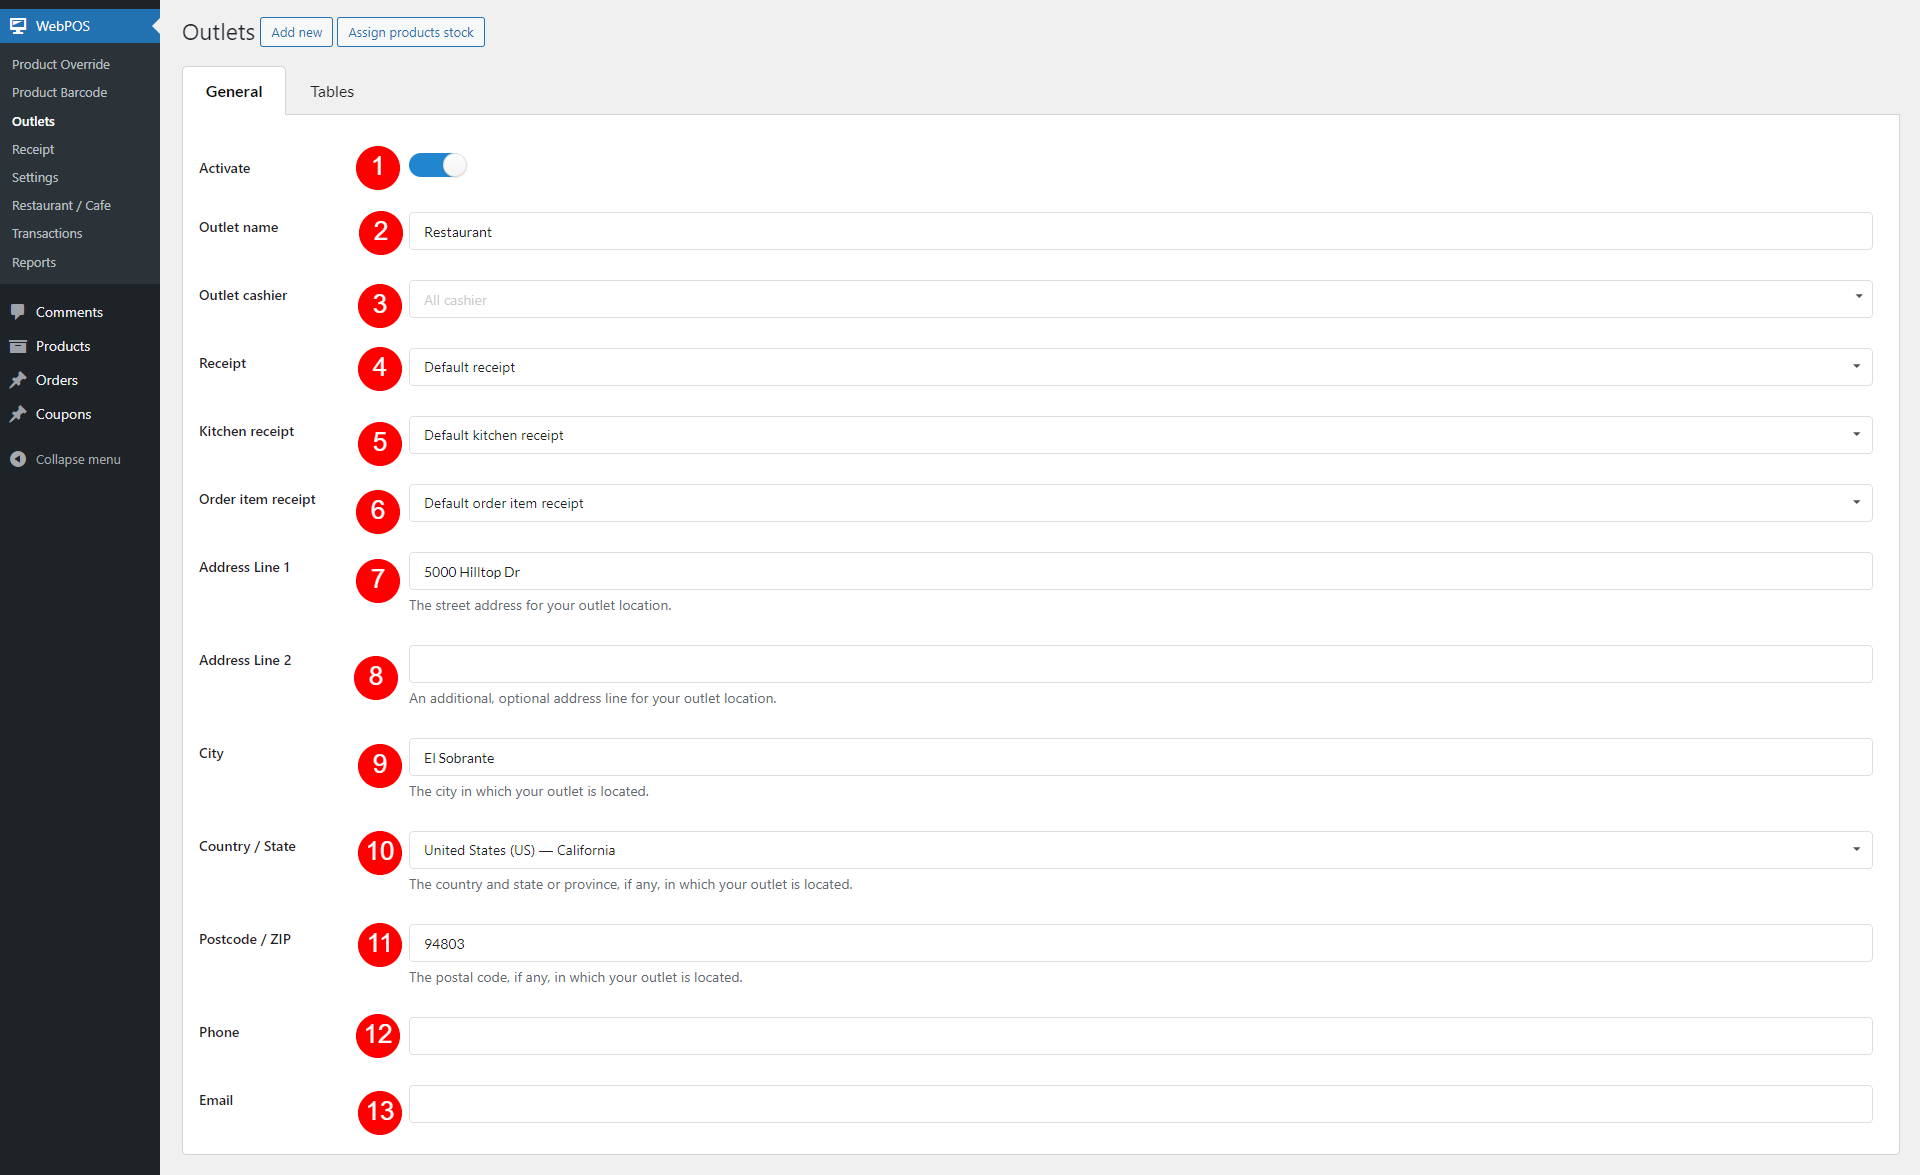
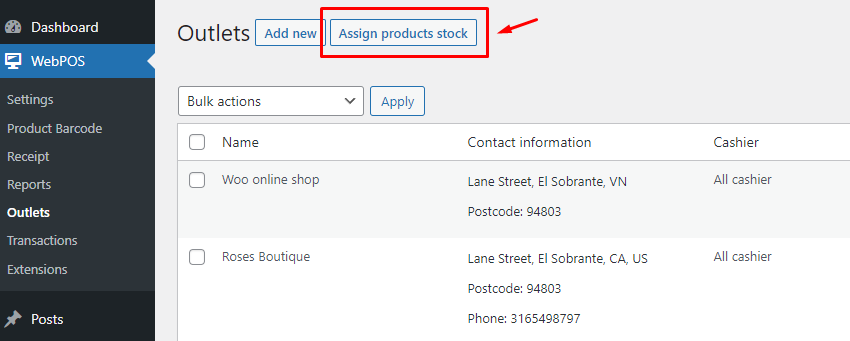
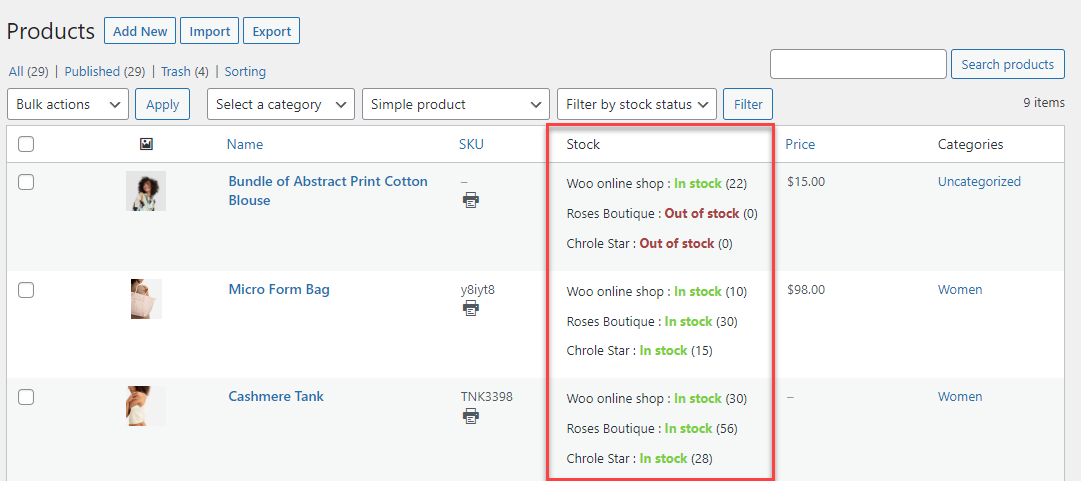
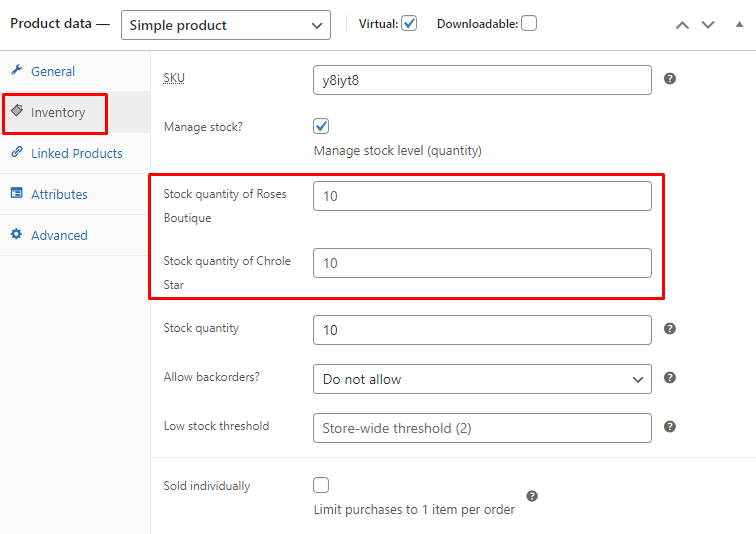
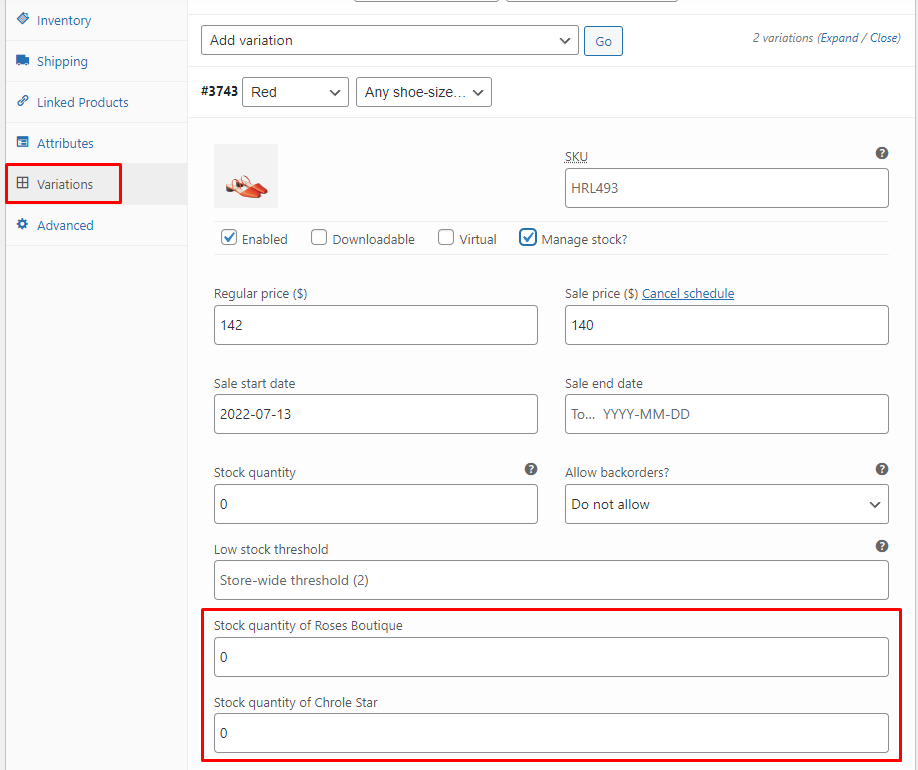
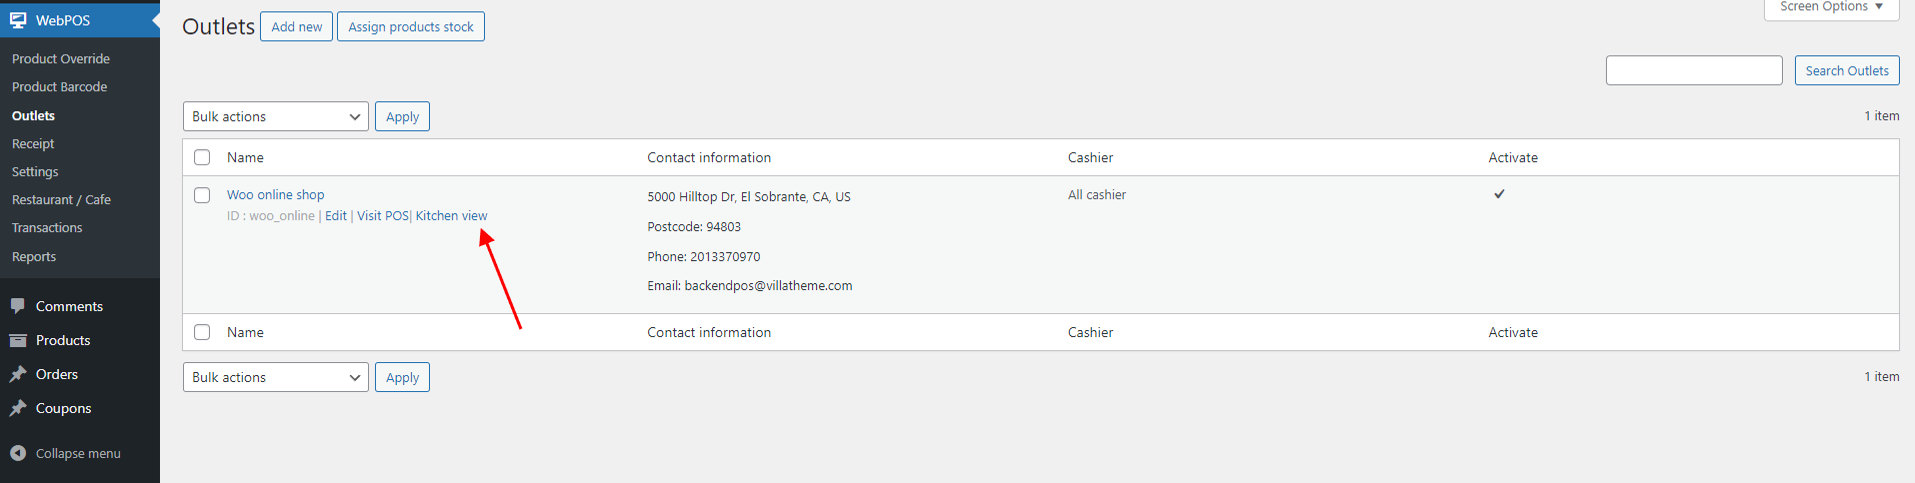
- Managing Outlets in Backend
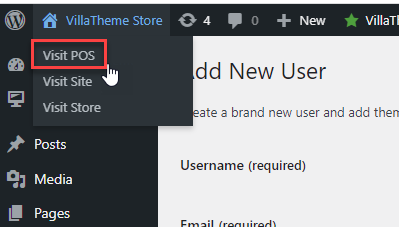
- Point Of Sale on the Woocommerce POS Page
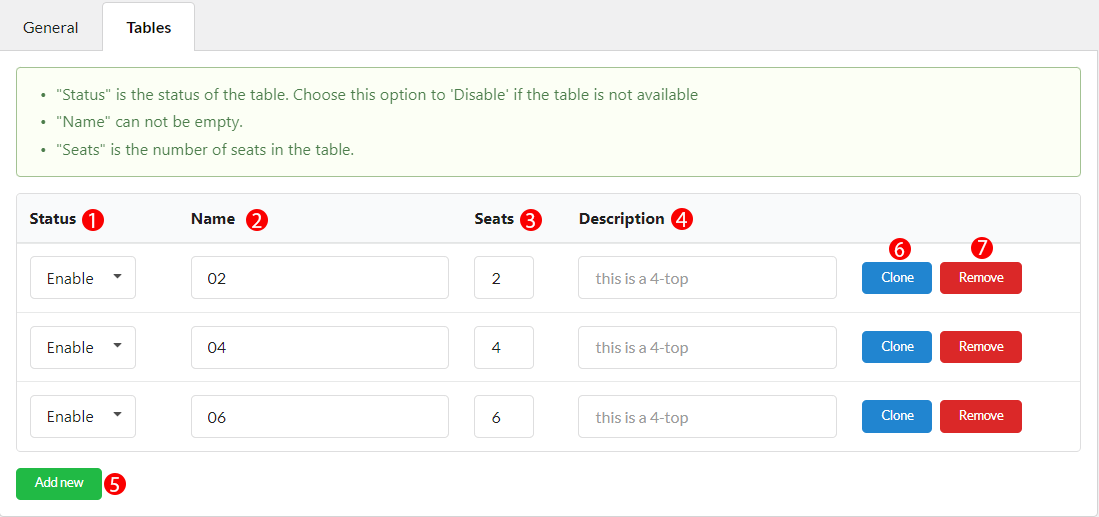
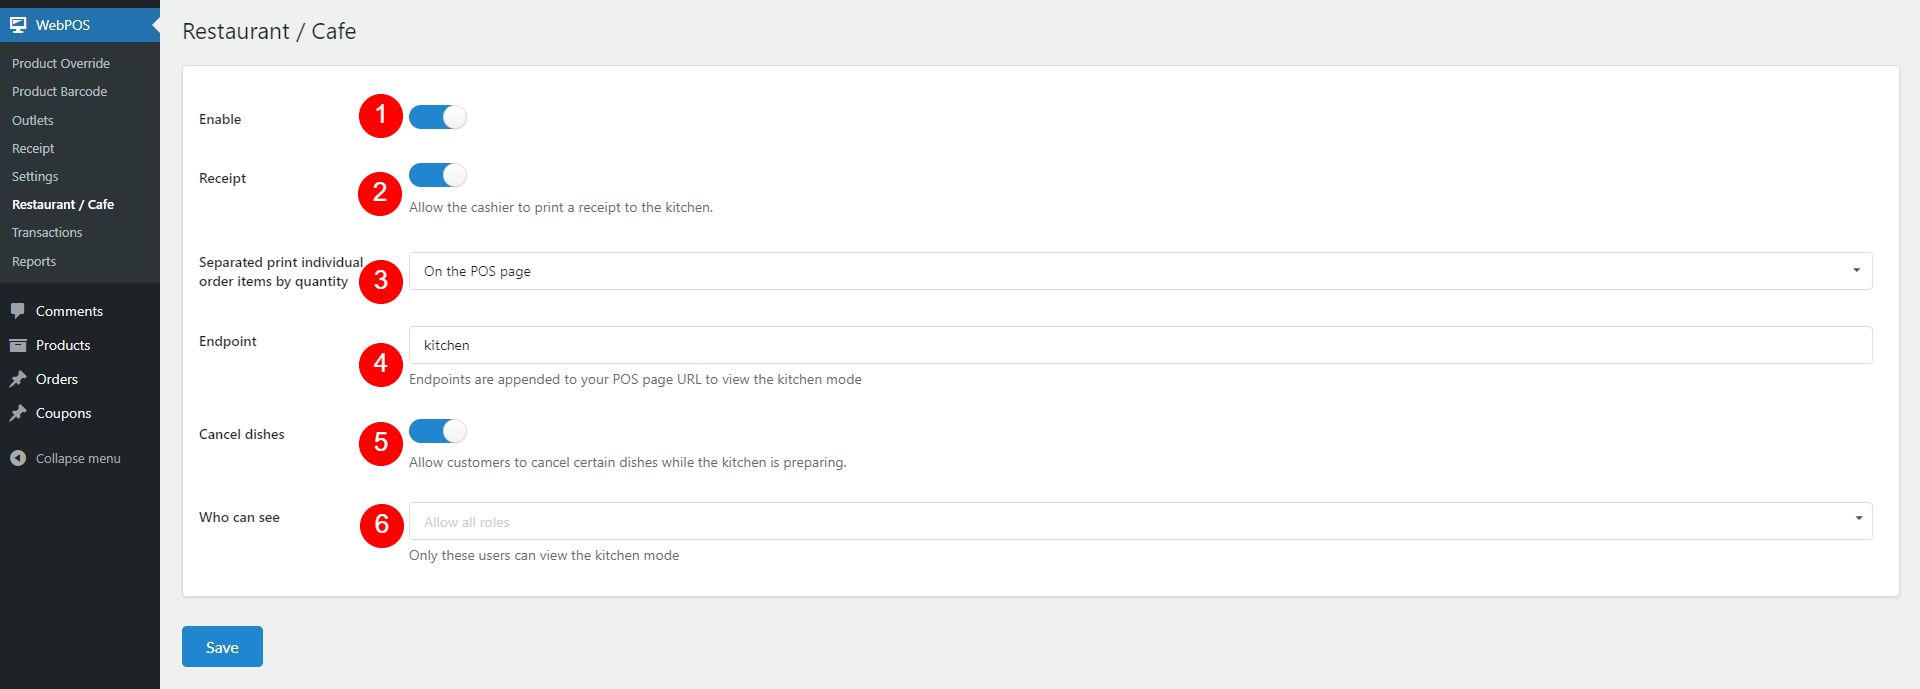
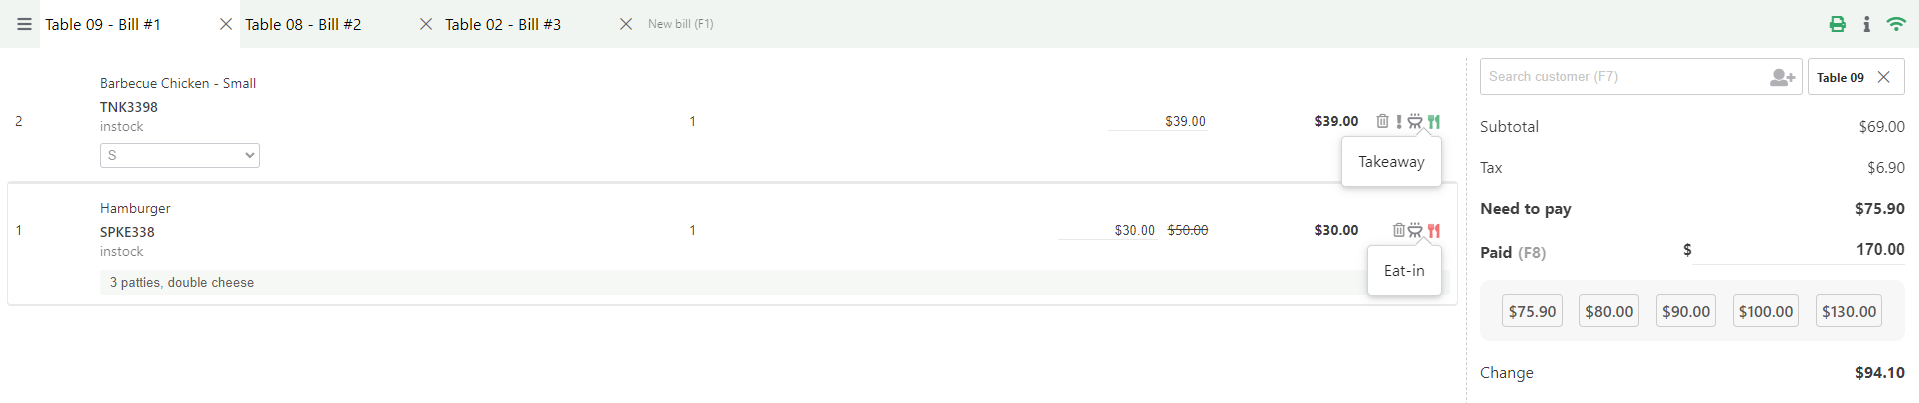
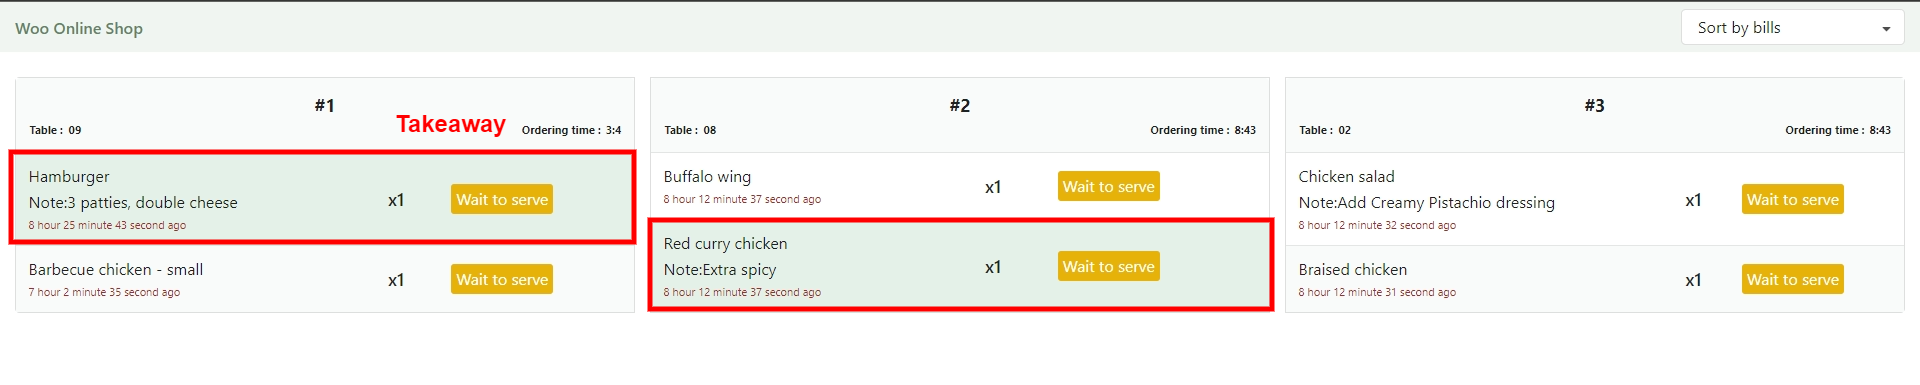
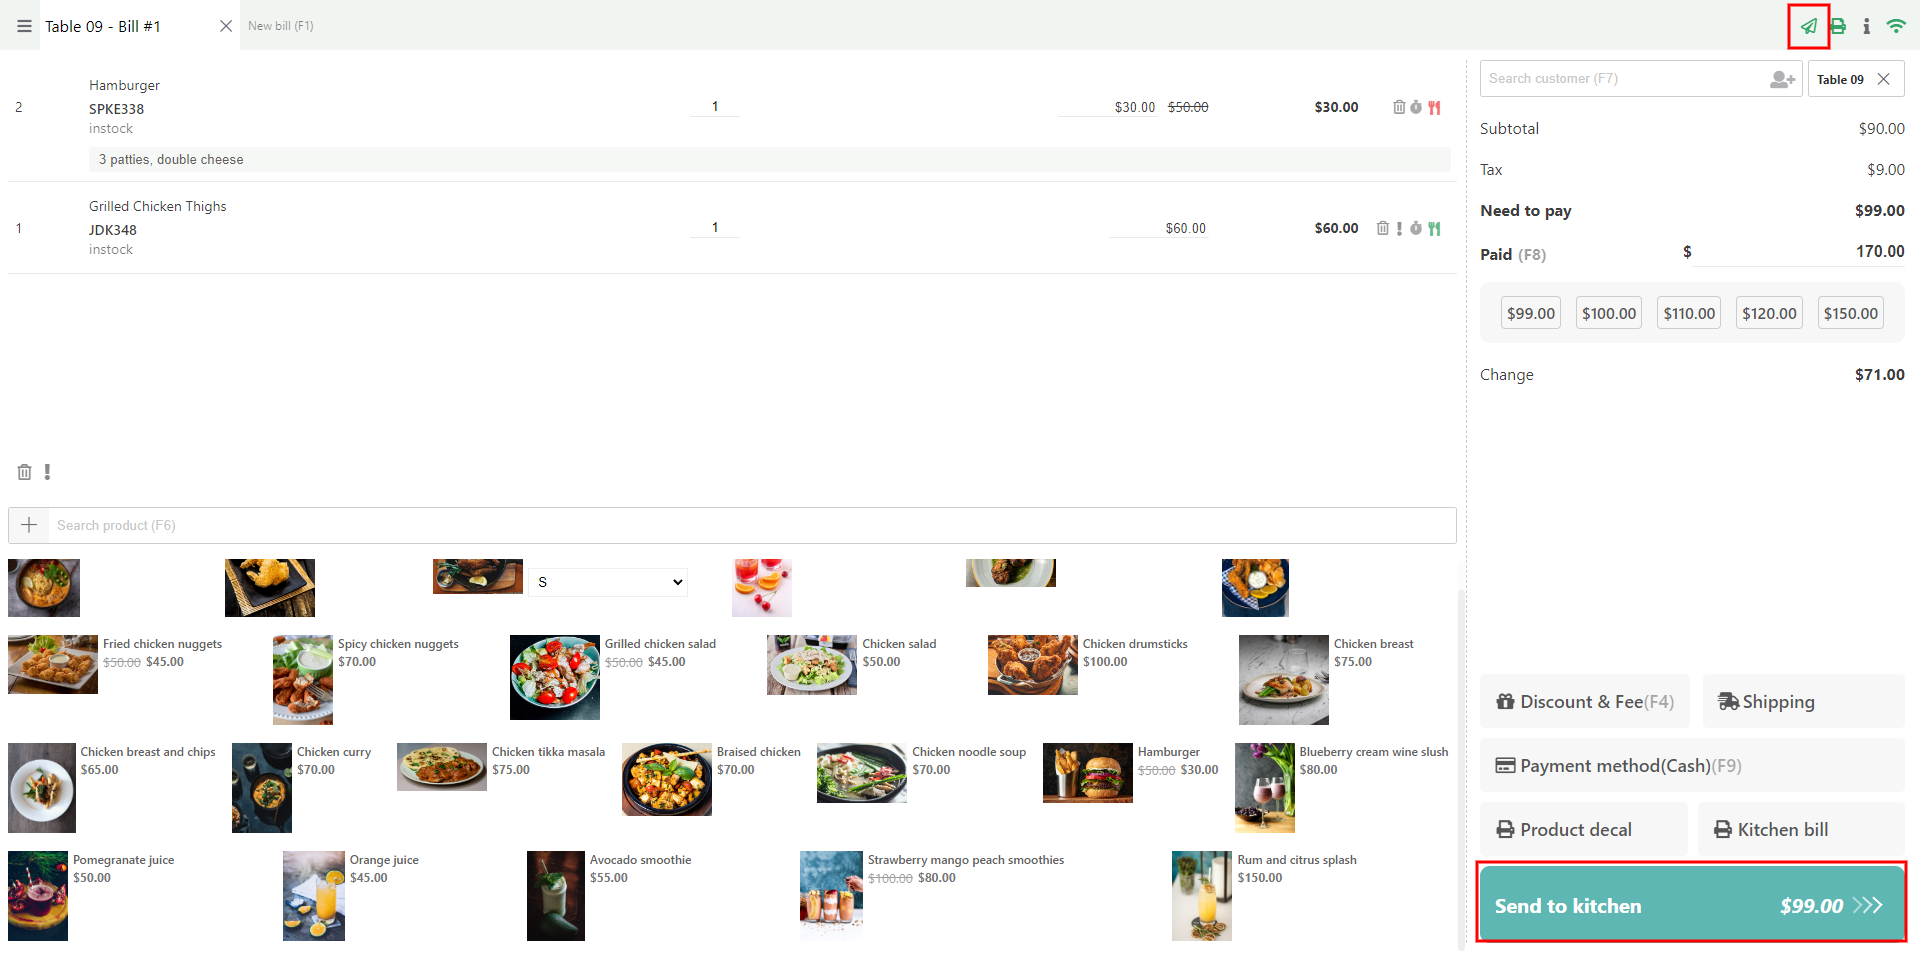
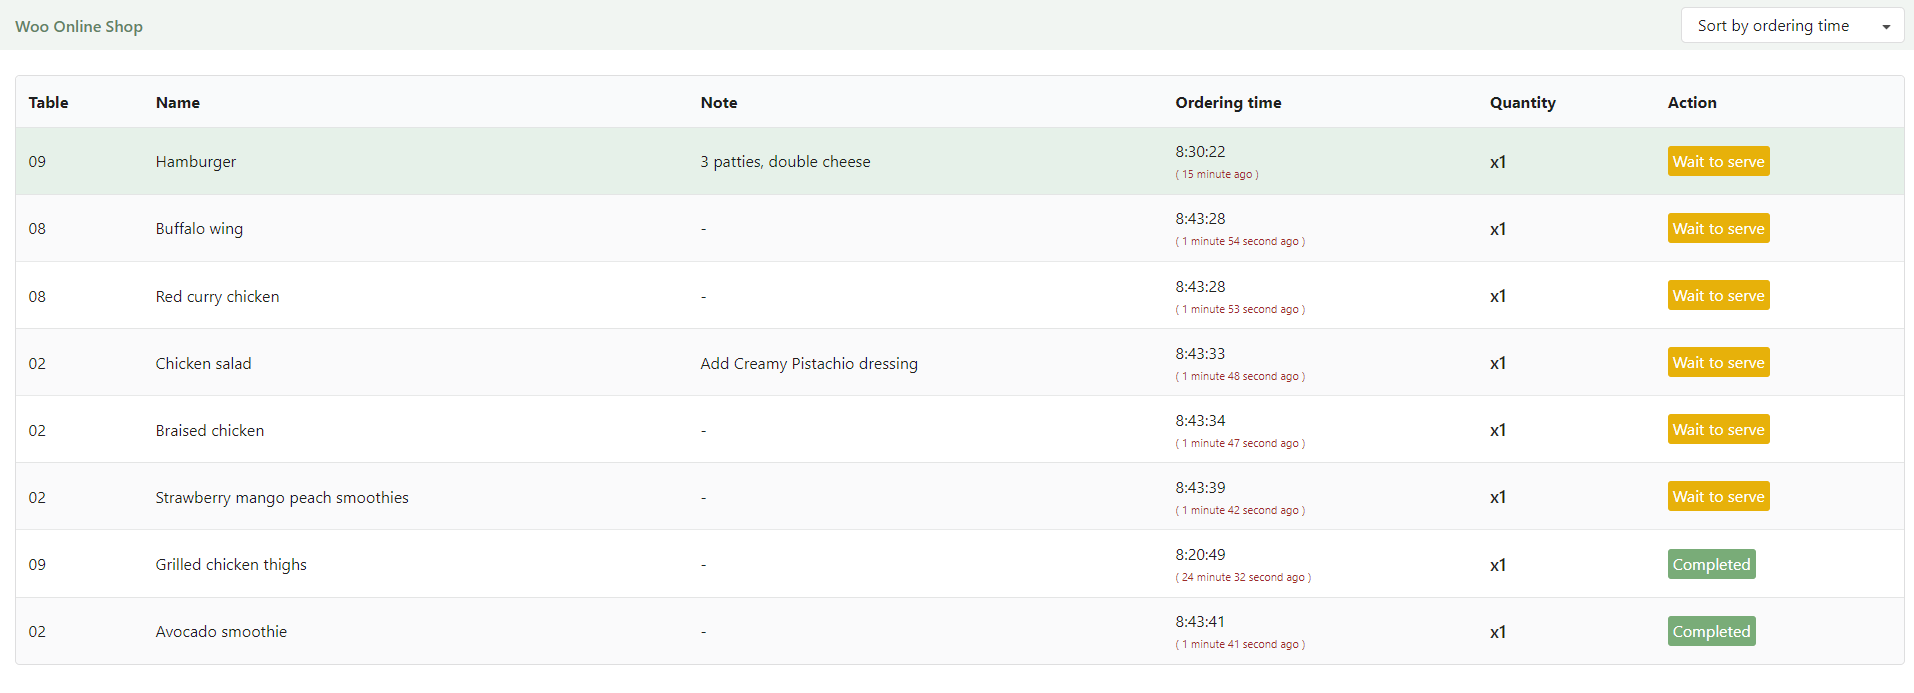
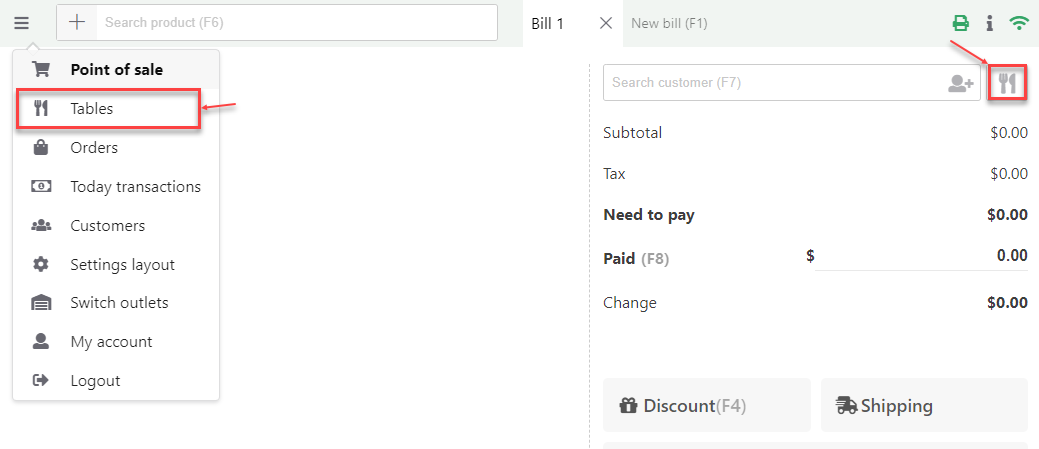
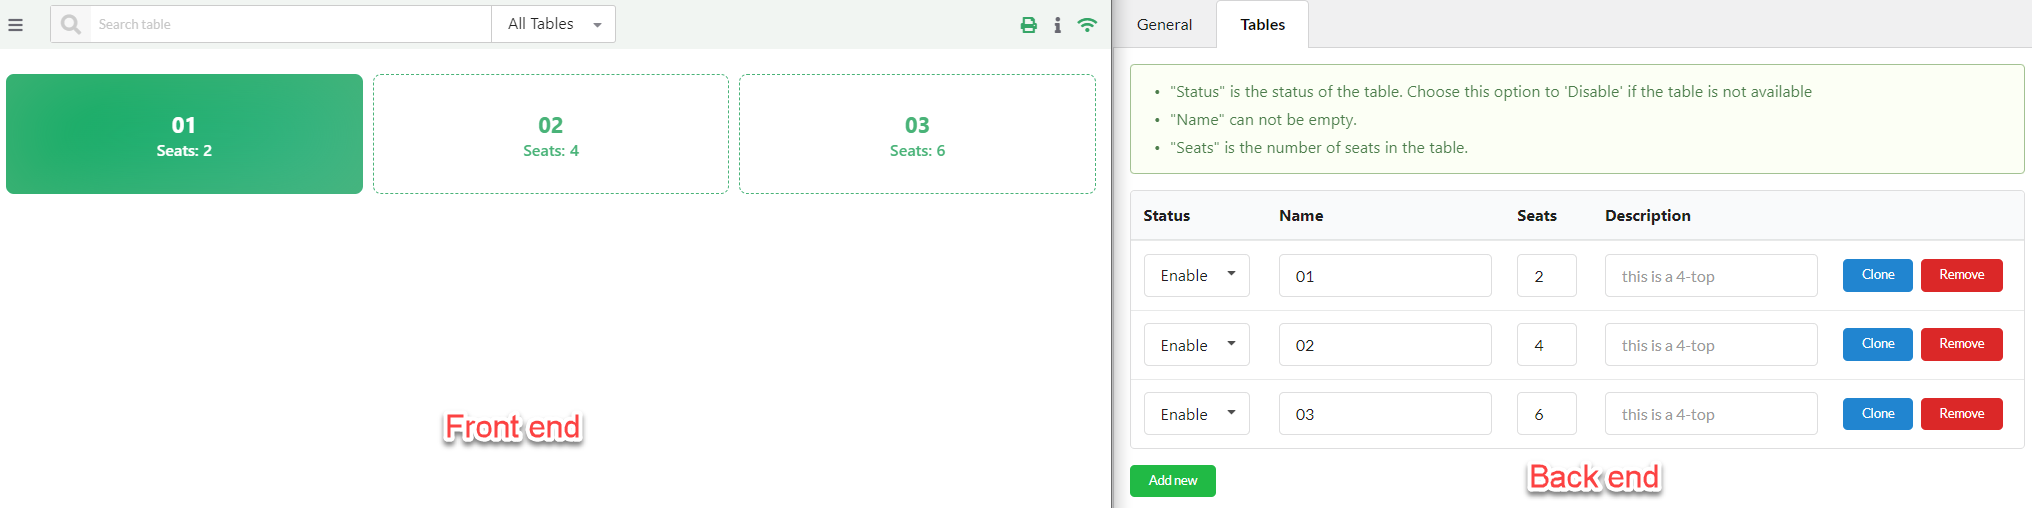
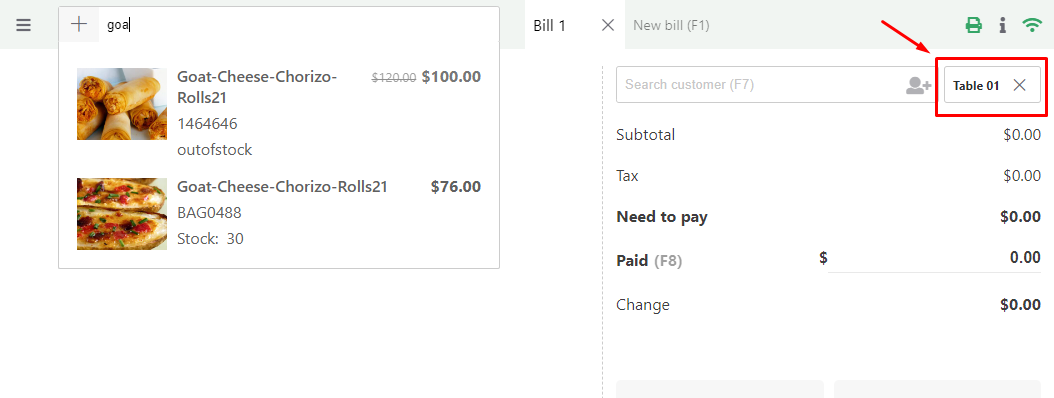
- POS for Restaurant/Cafe
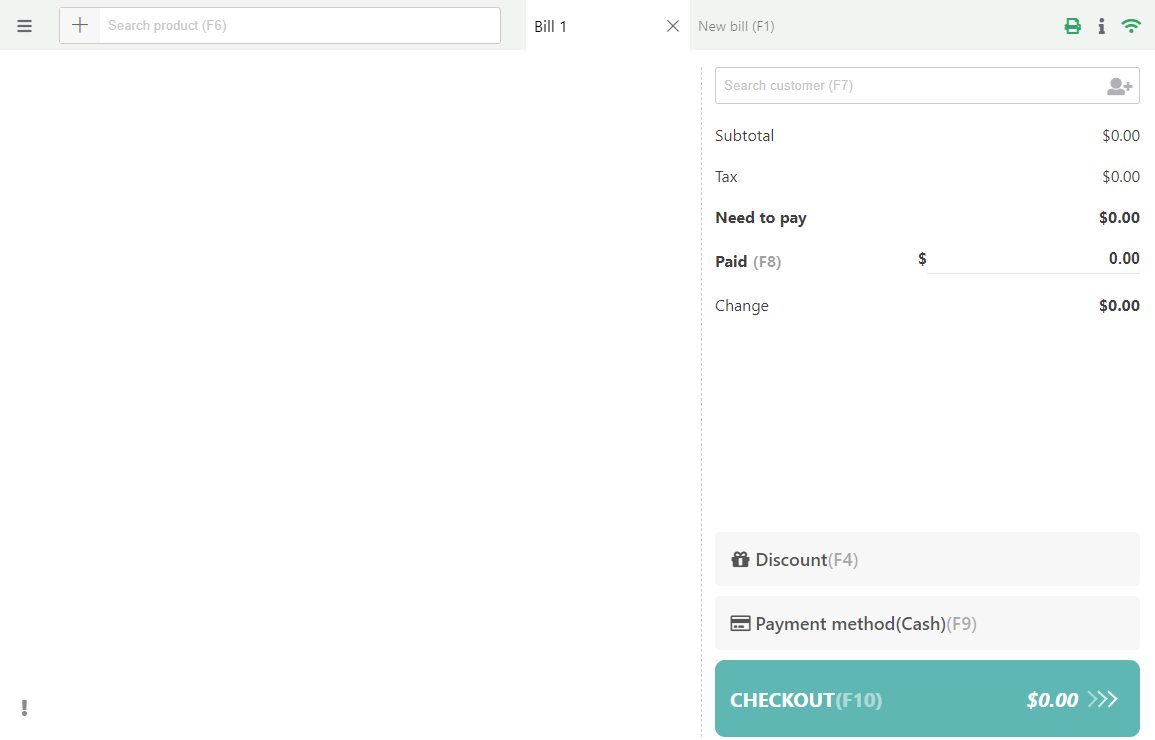
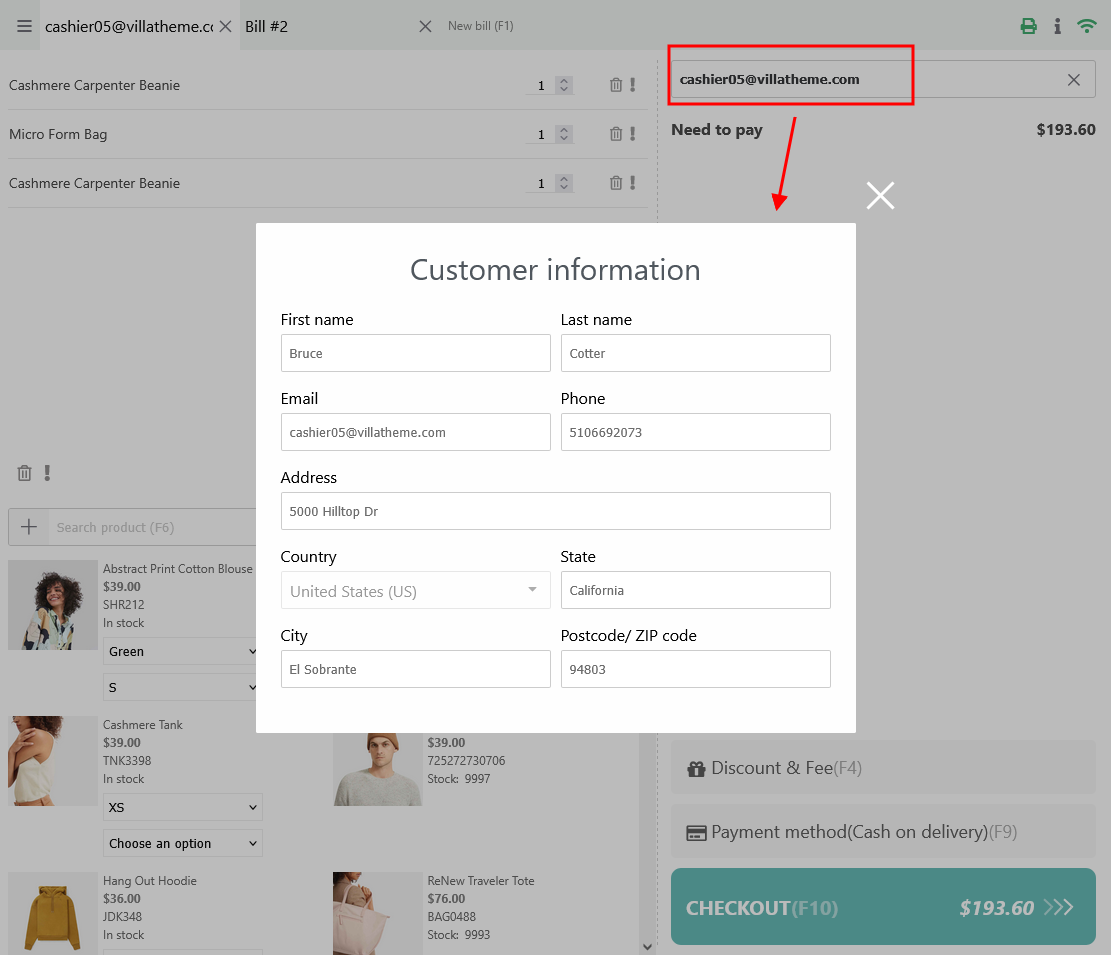
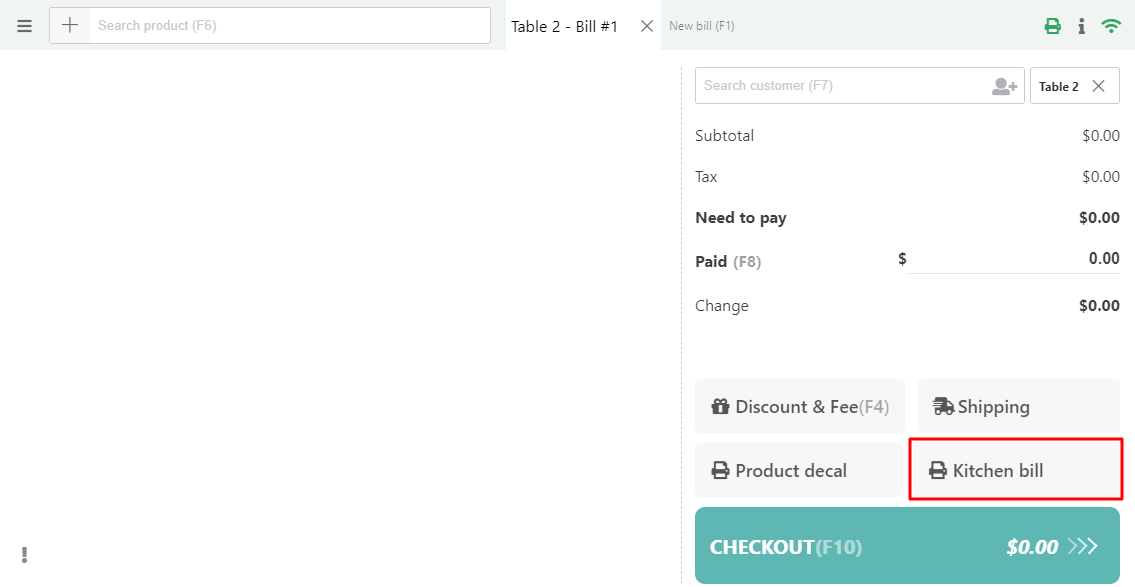
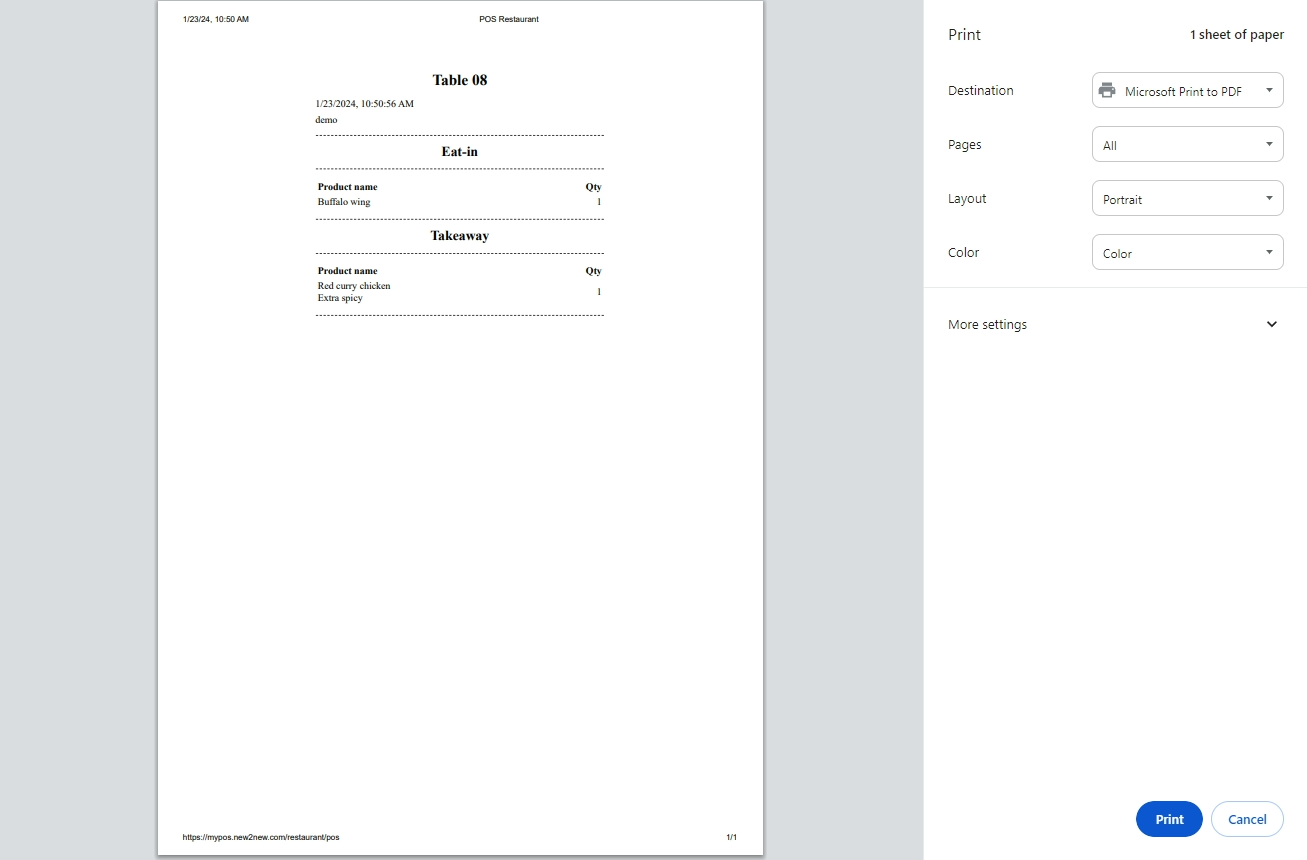
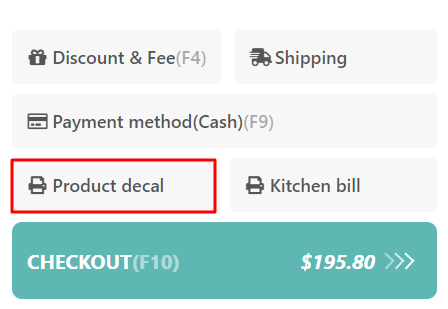
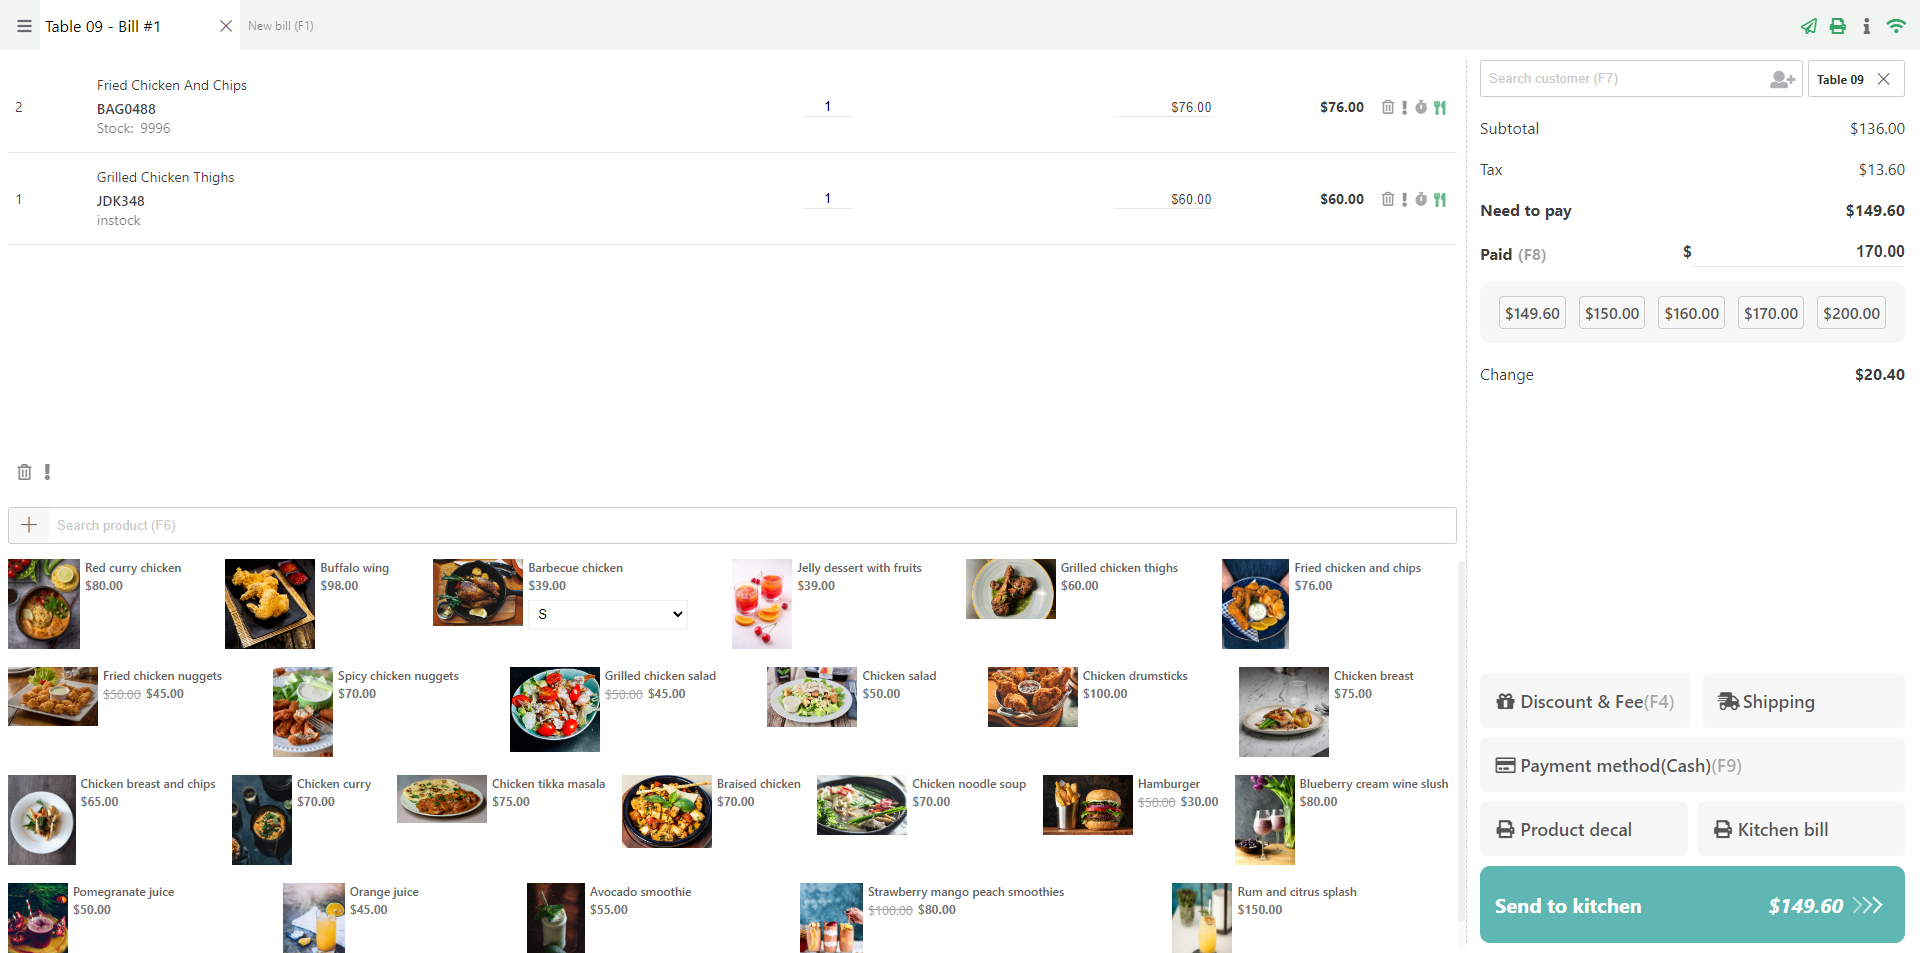
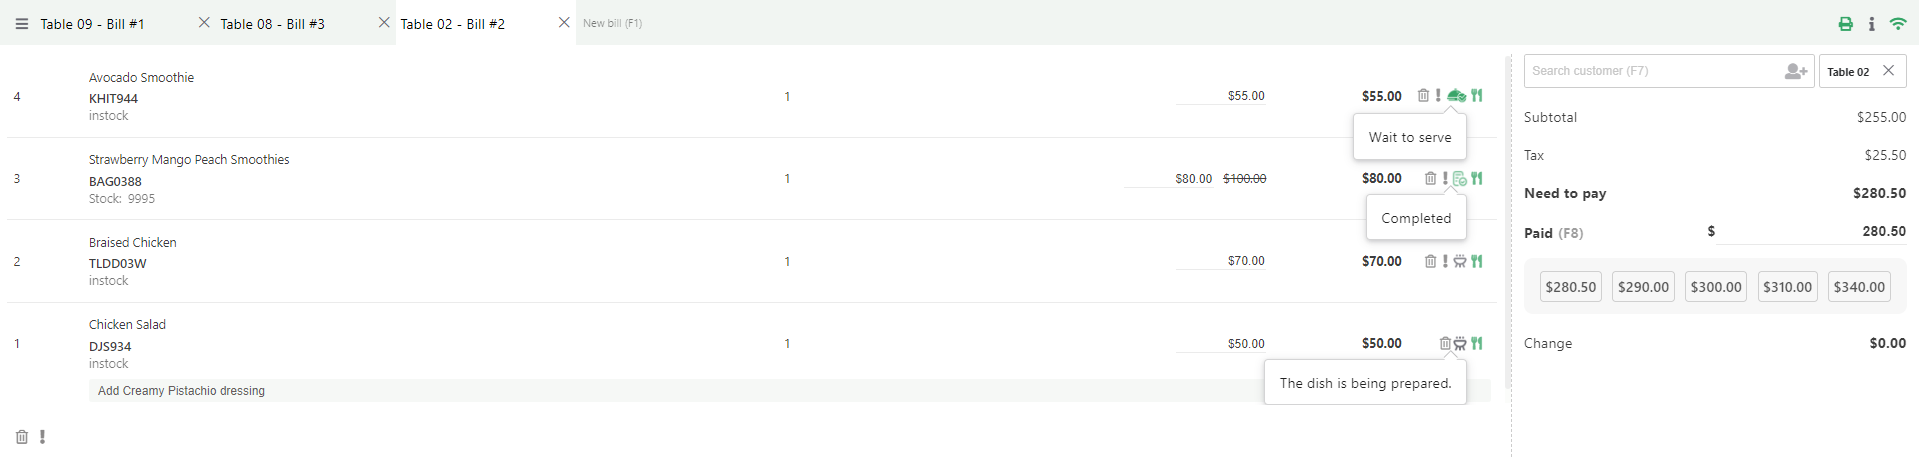
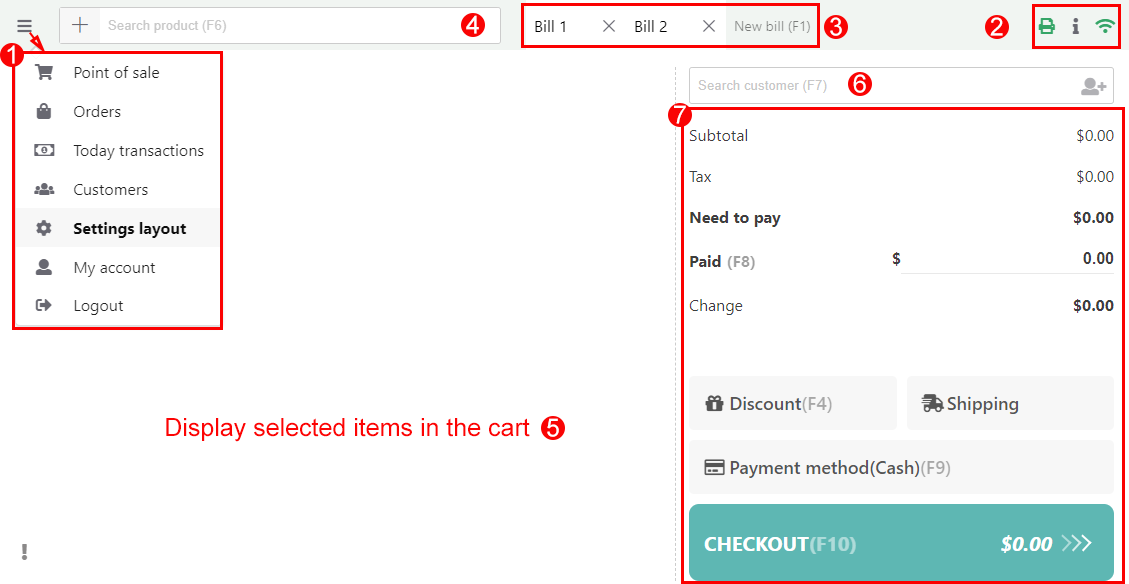
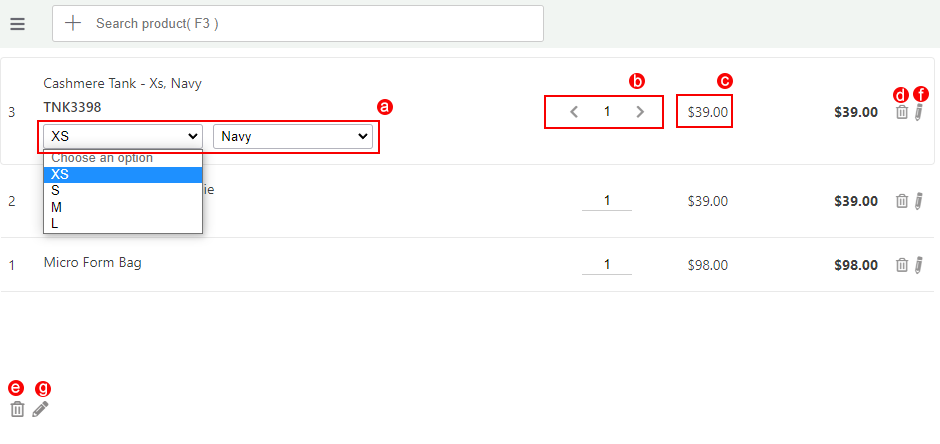
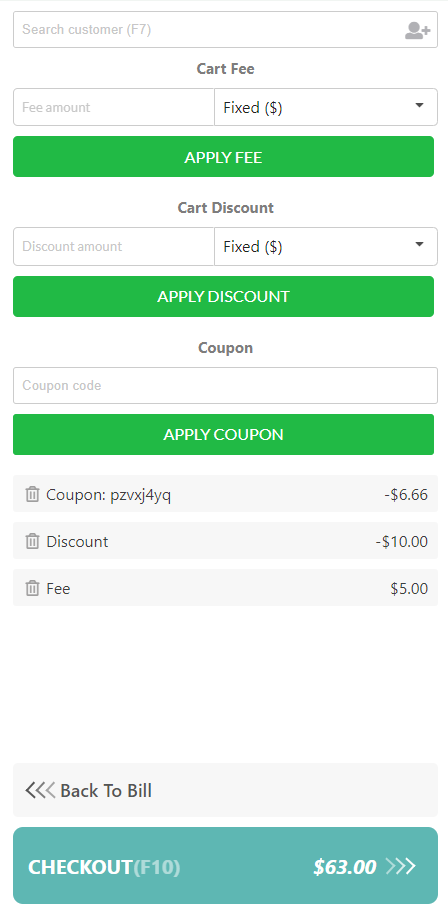
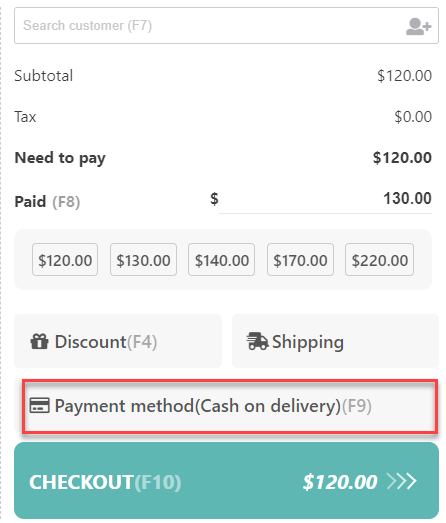
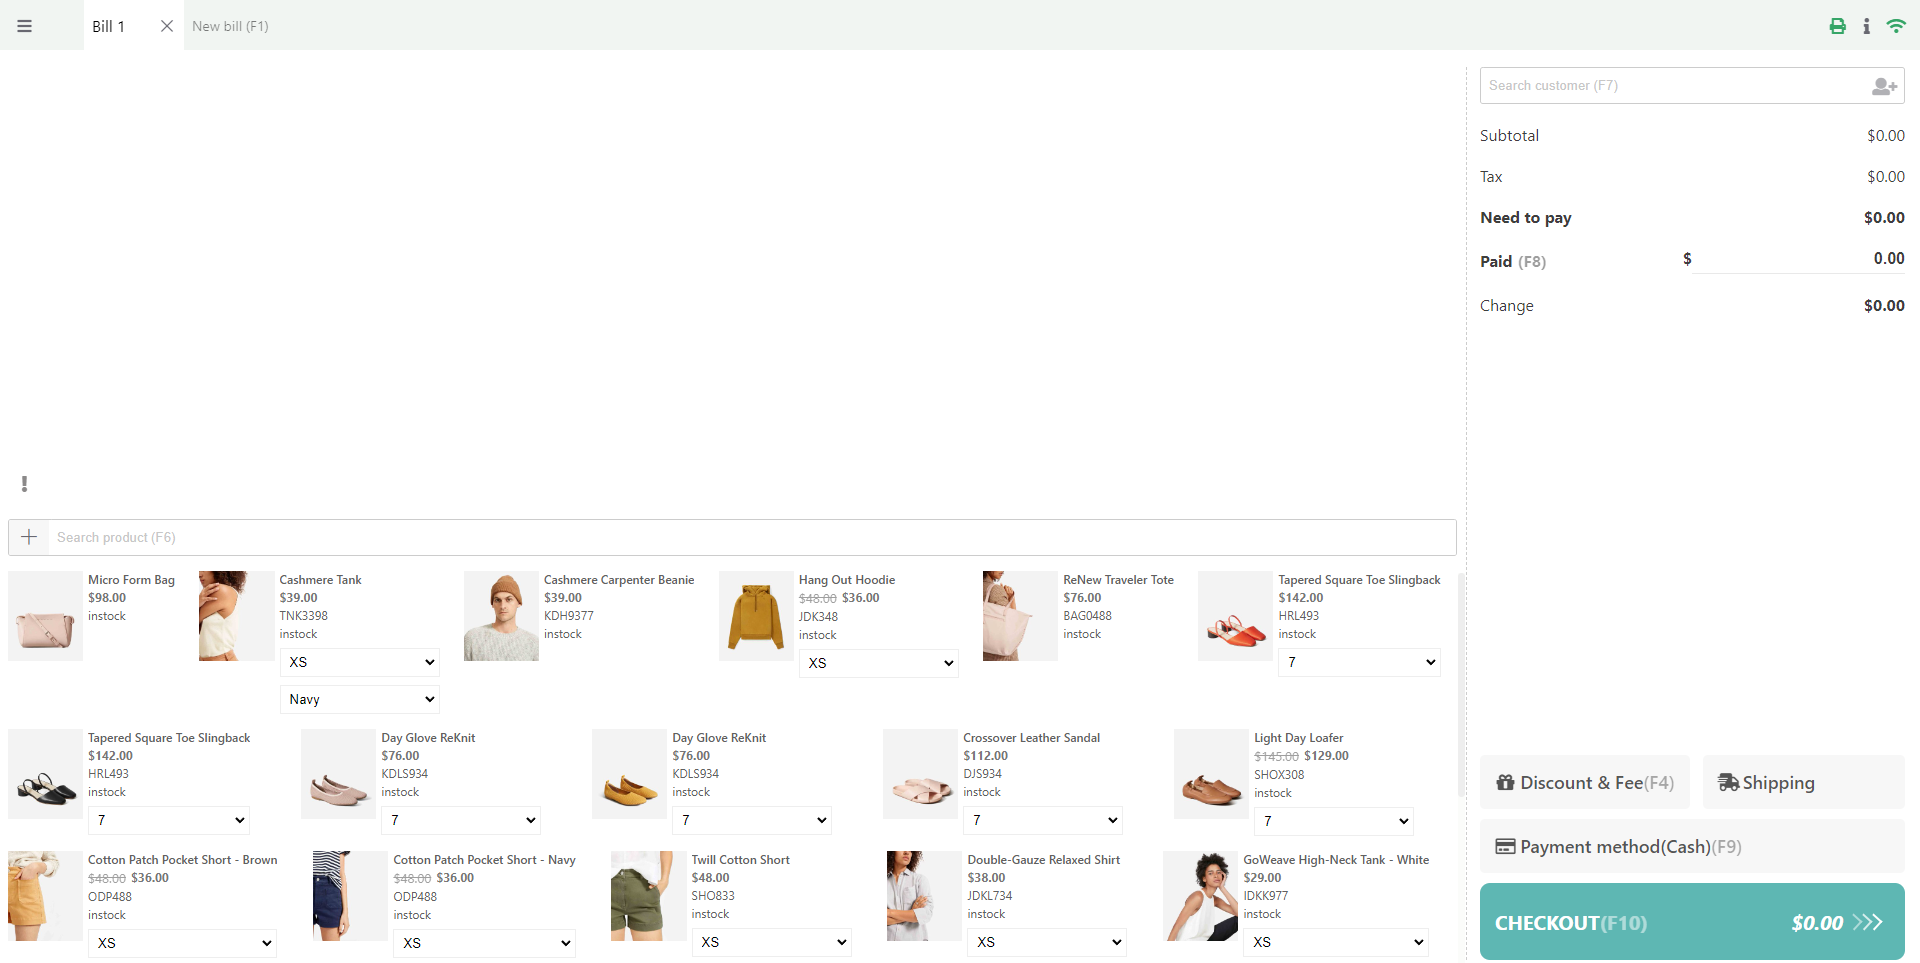
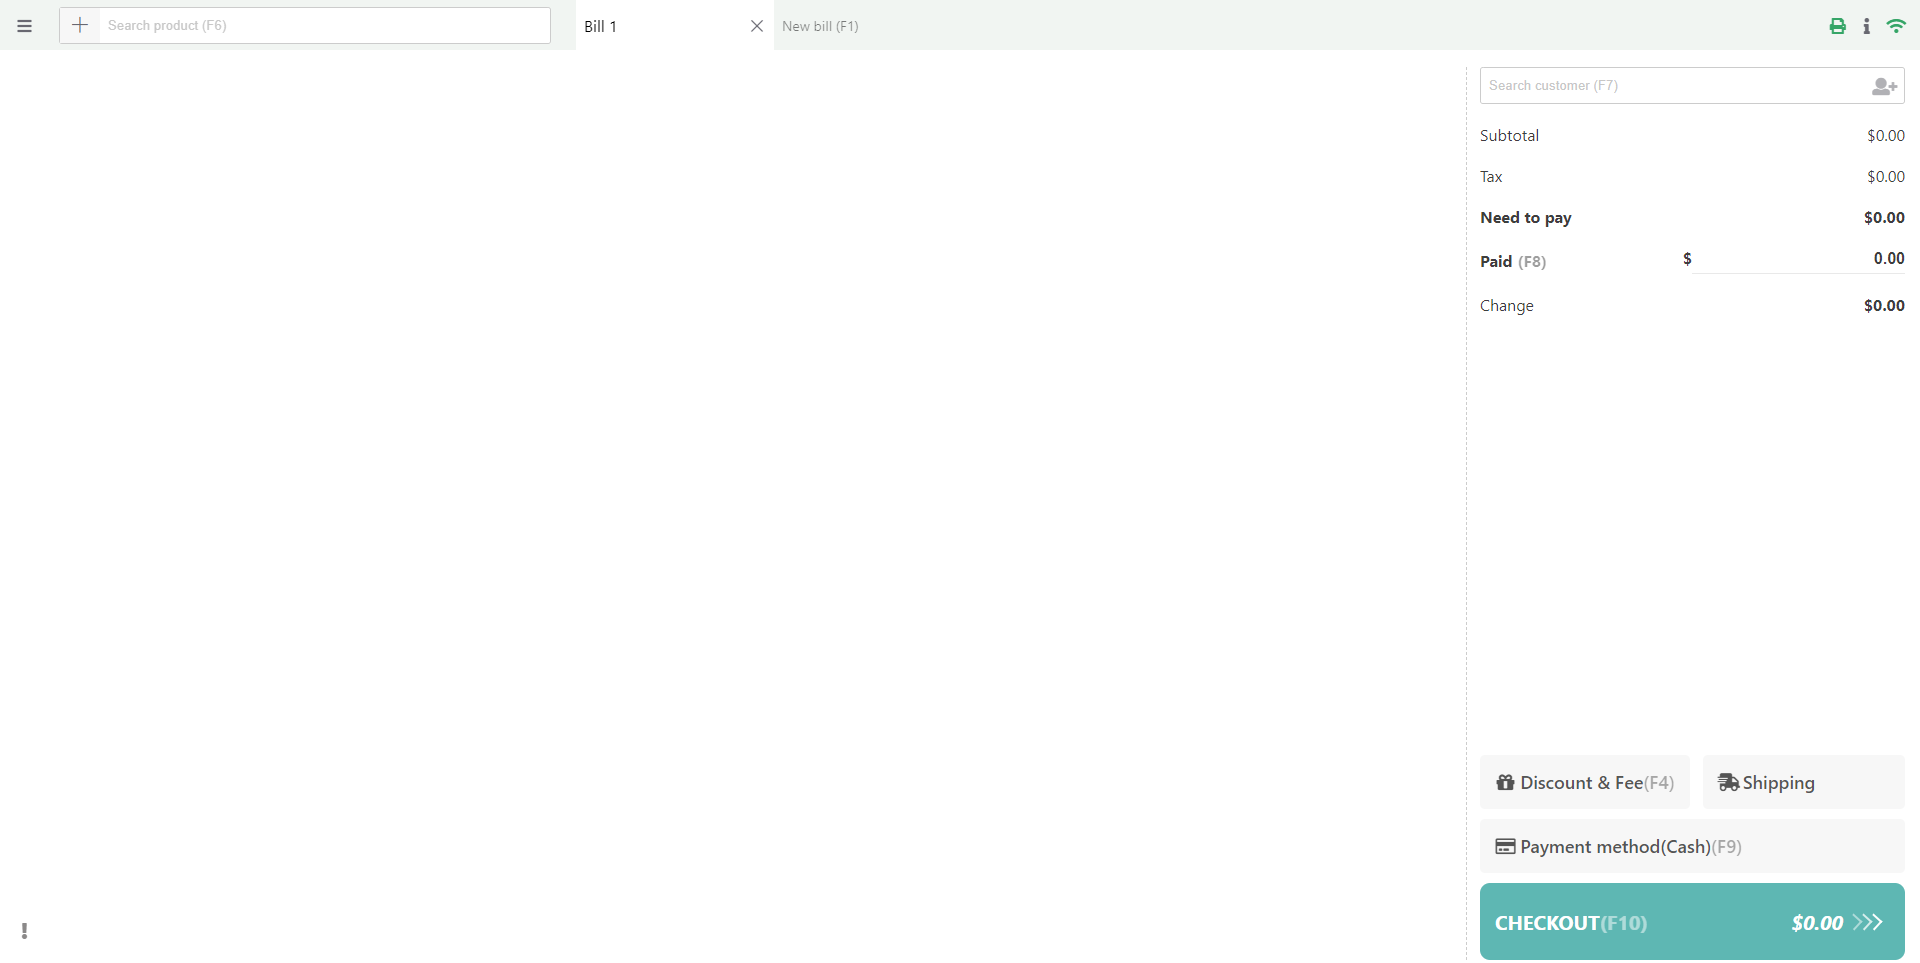
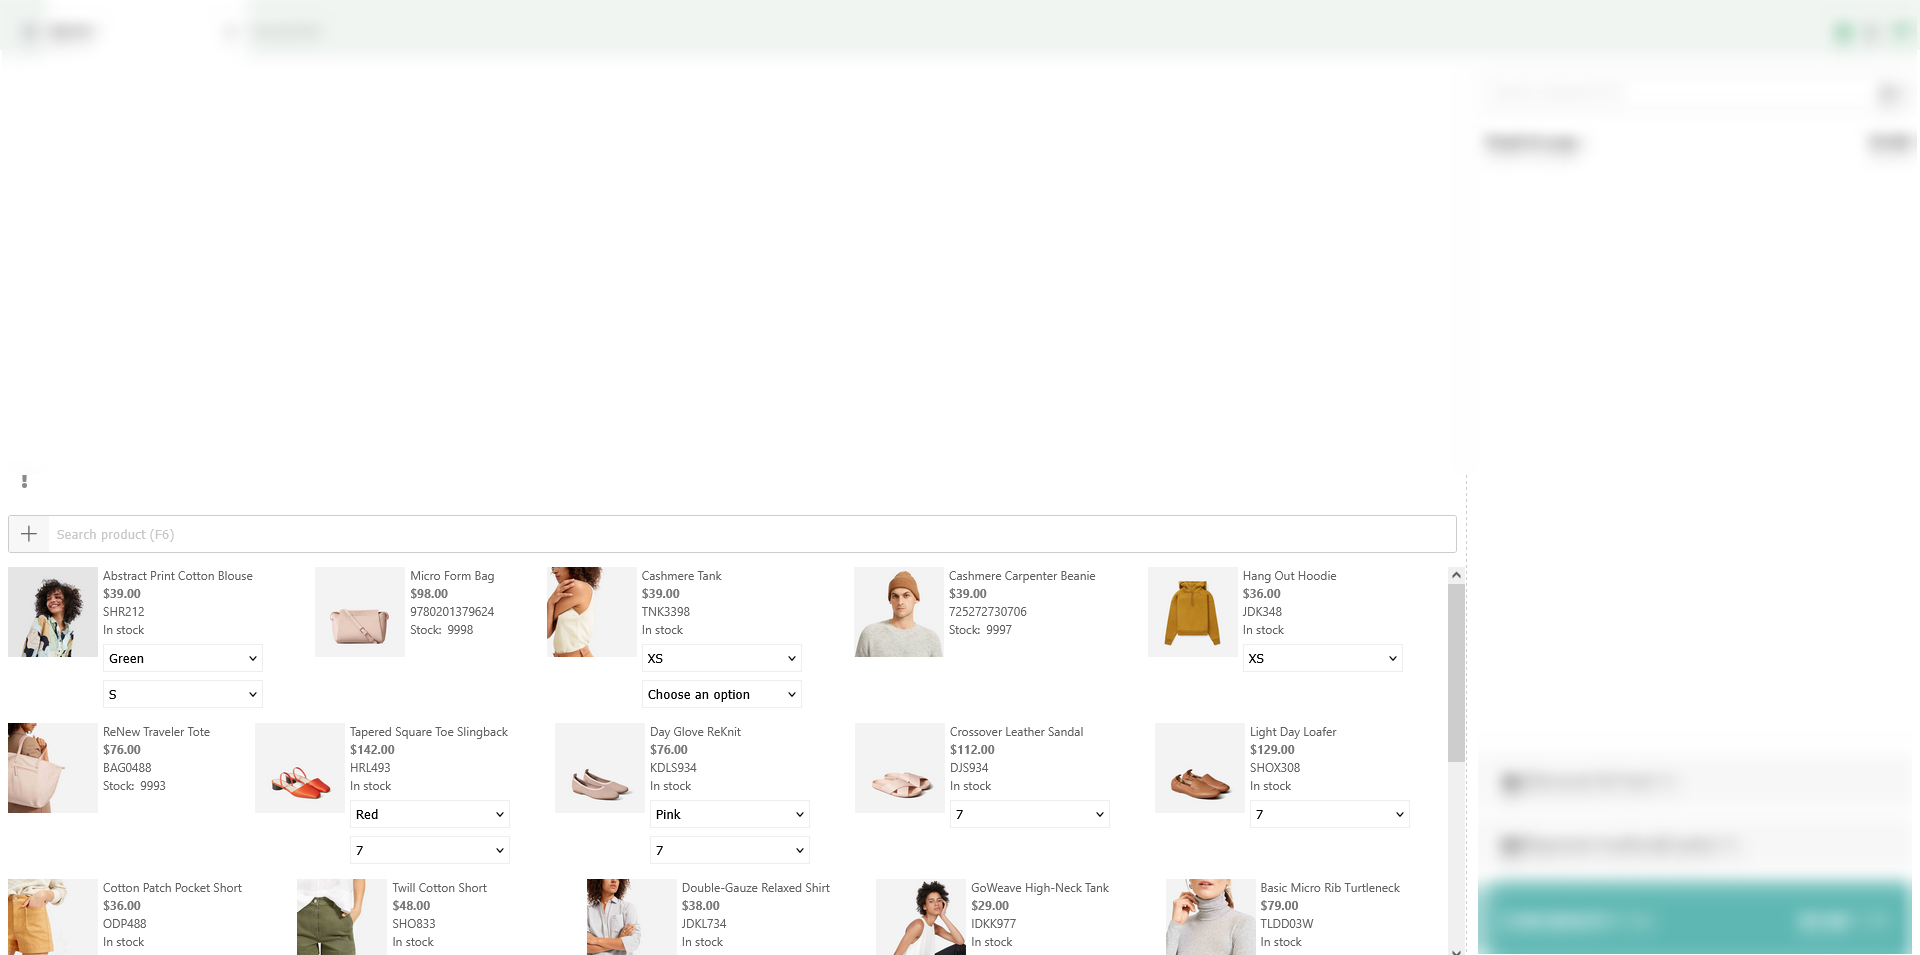
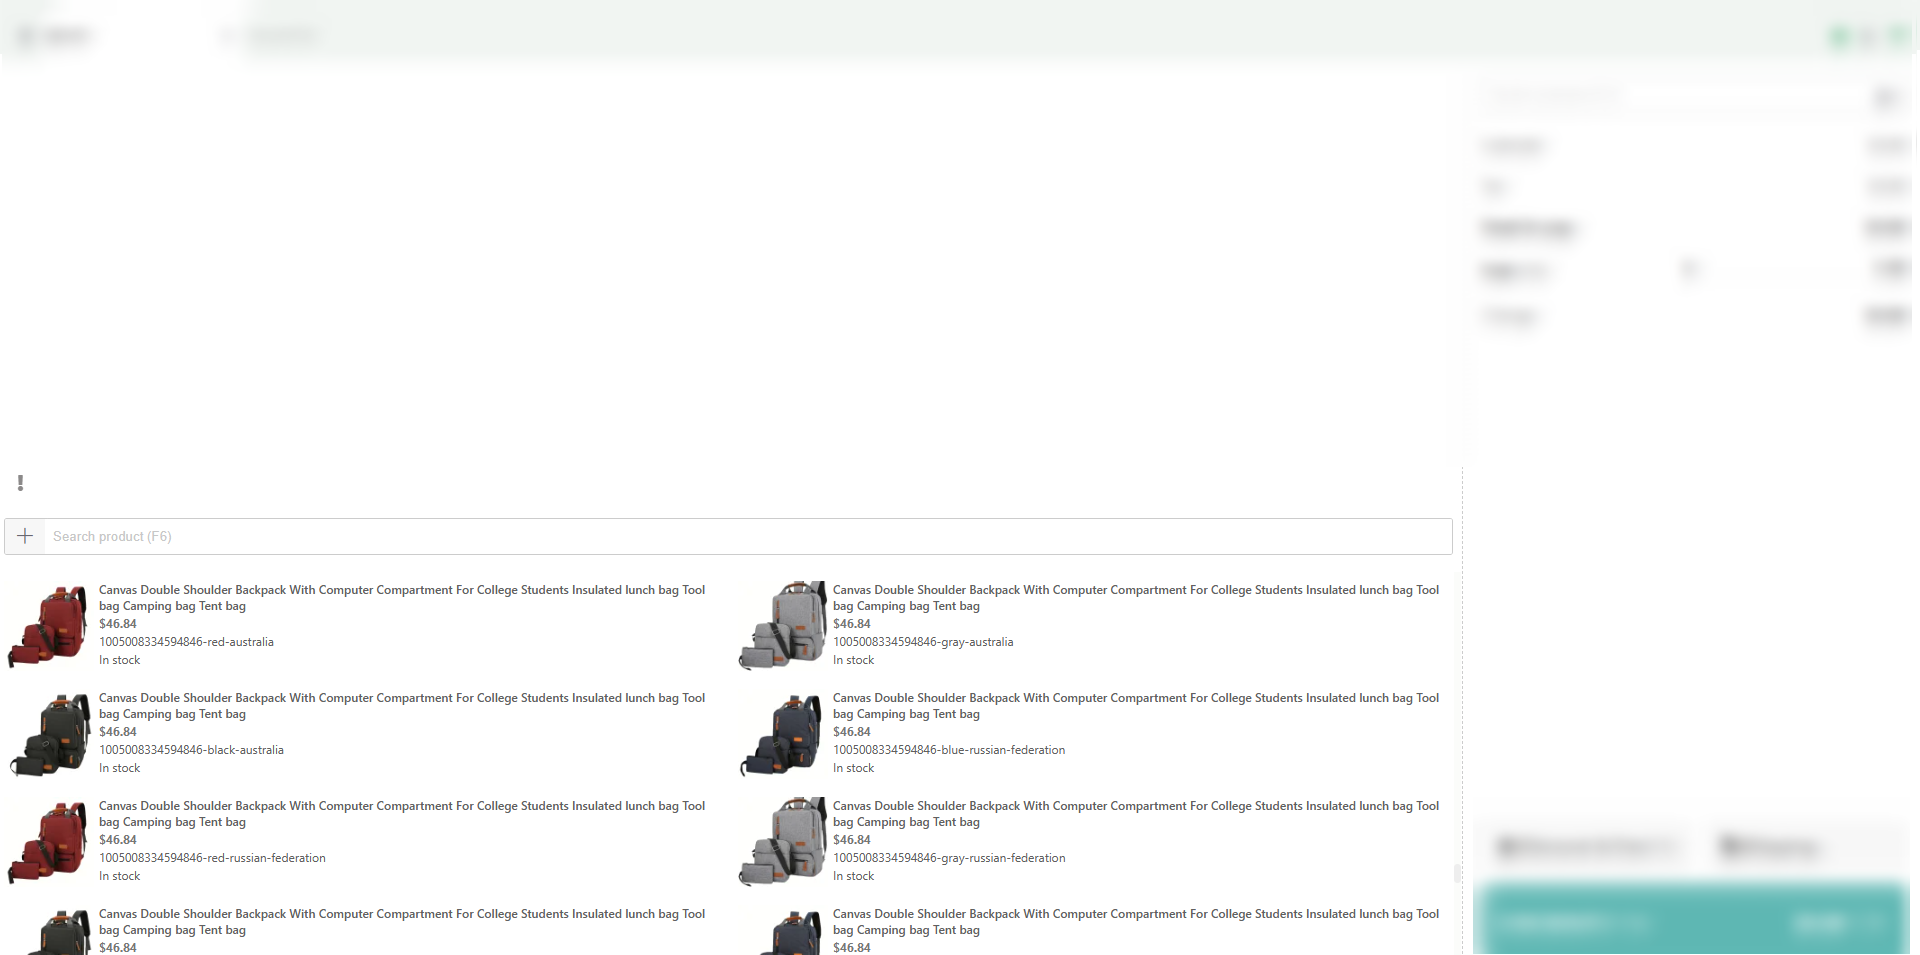
- A. POS Page Interface
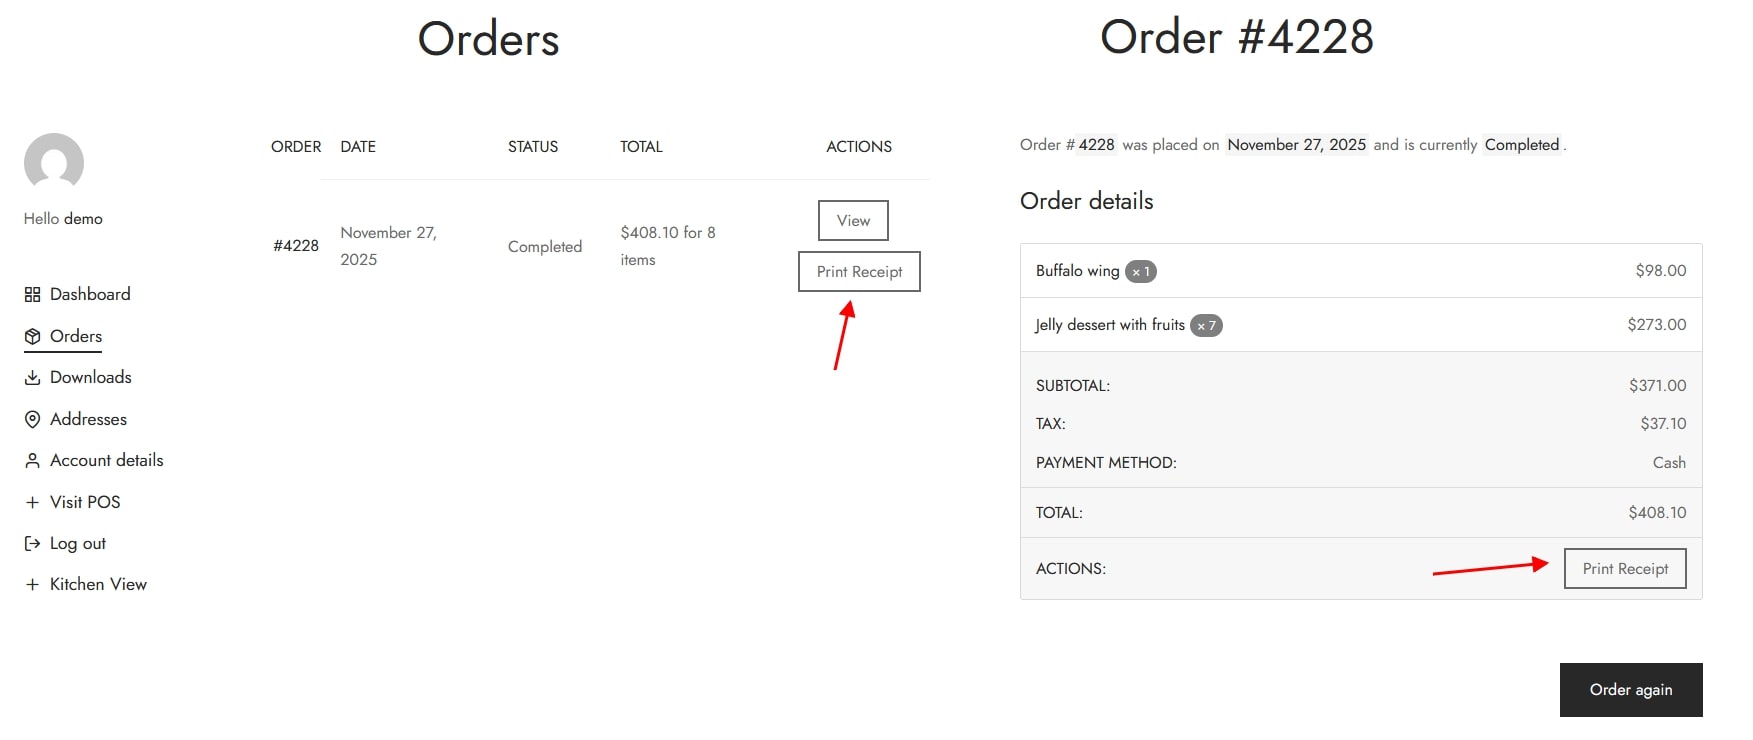
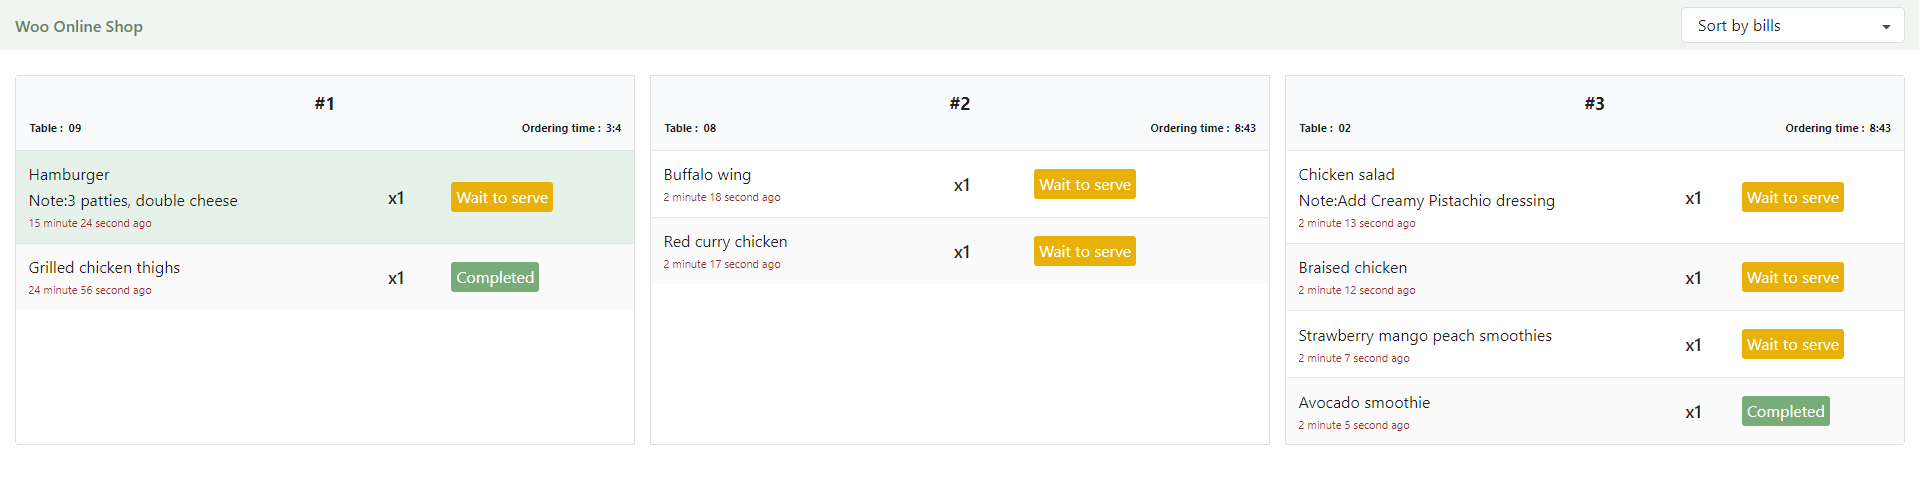
- B. Order Management on POS Page
- C. Today’s Transaction Visibility
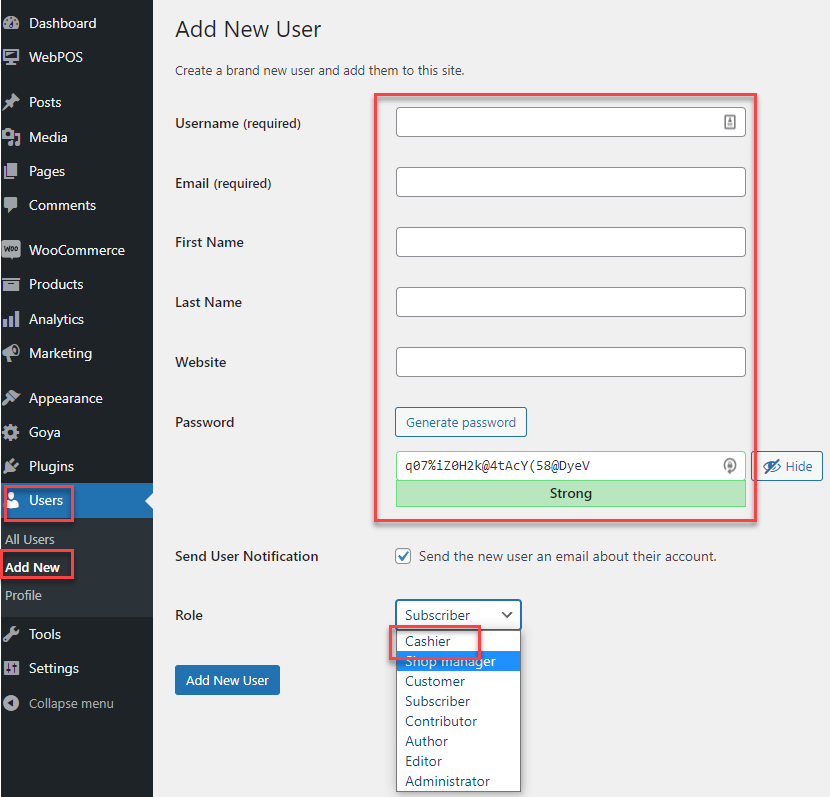
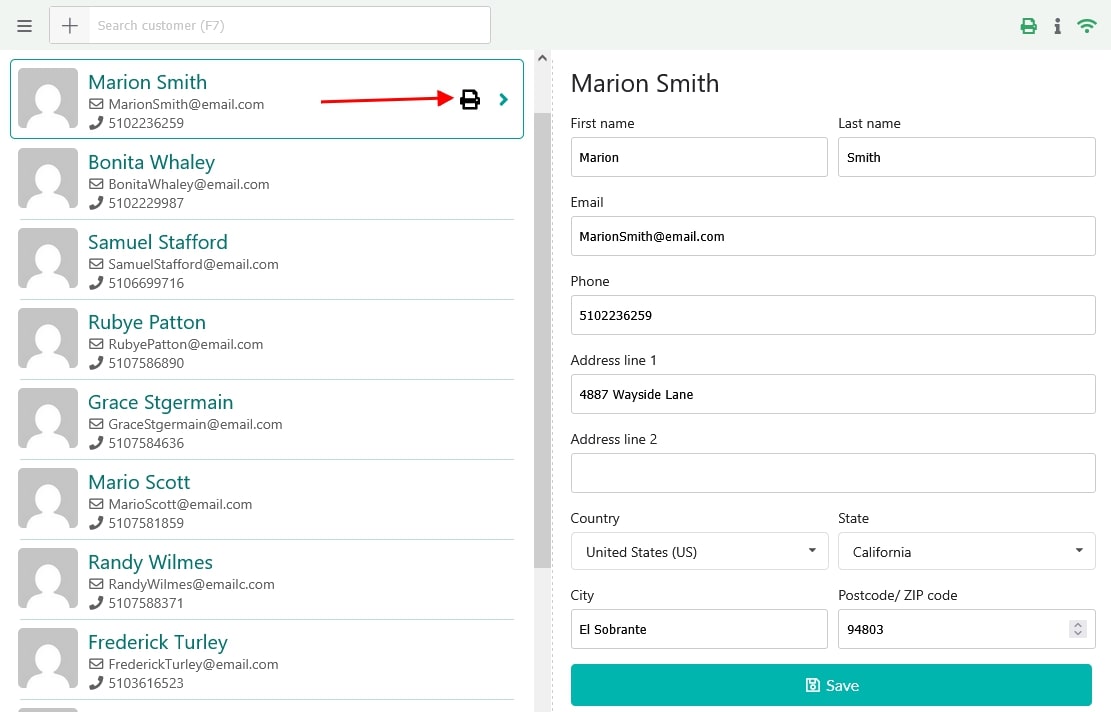
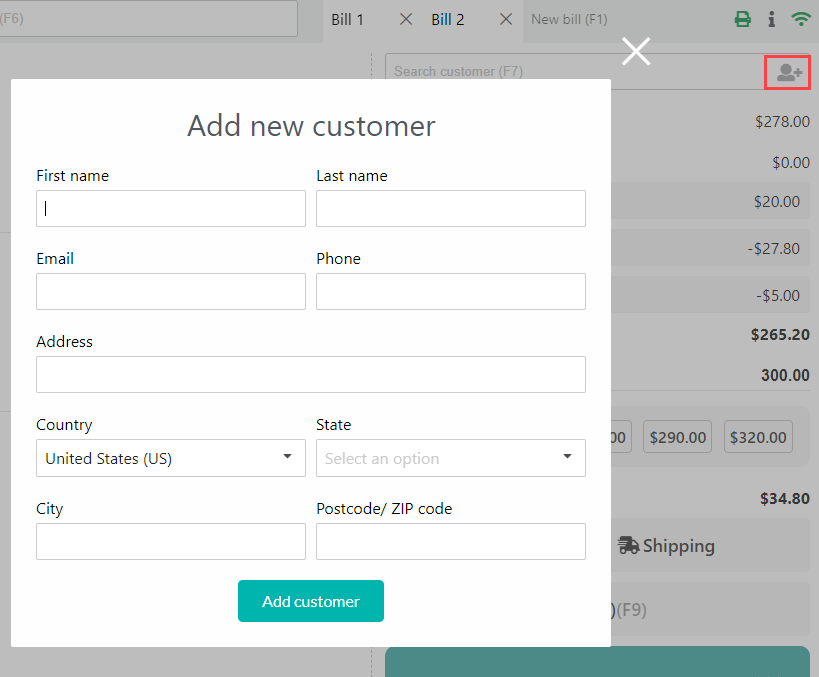
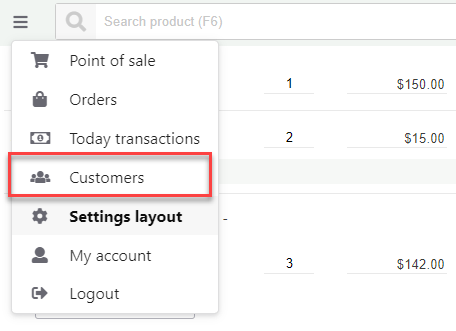
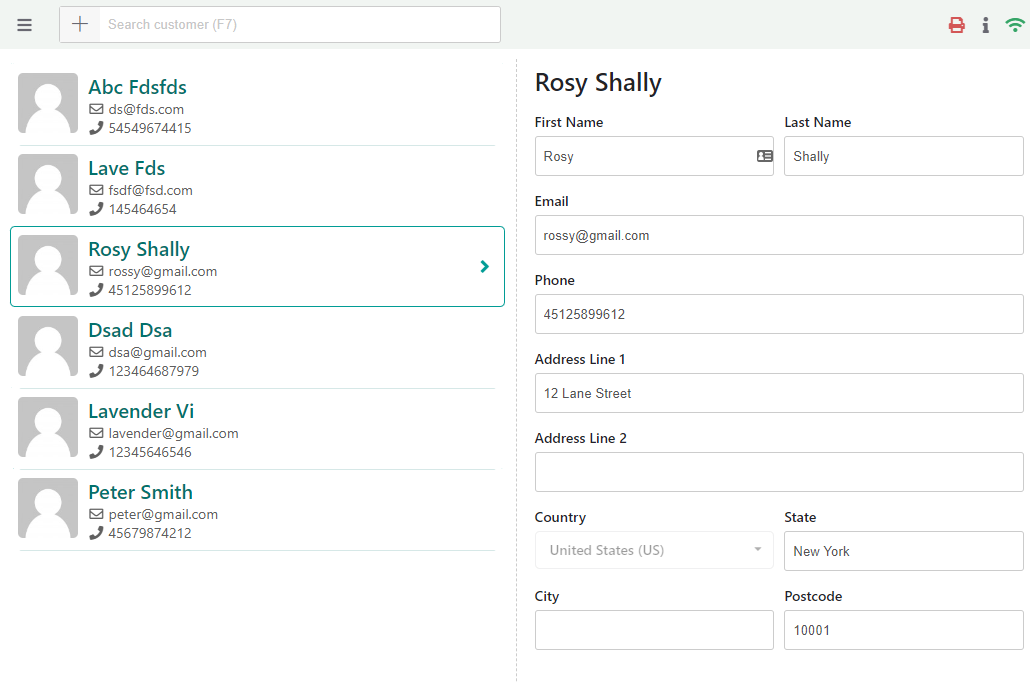
- D. Managing Customers/Users on POS Page
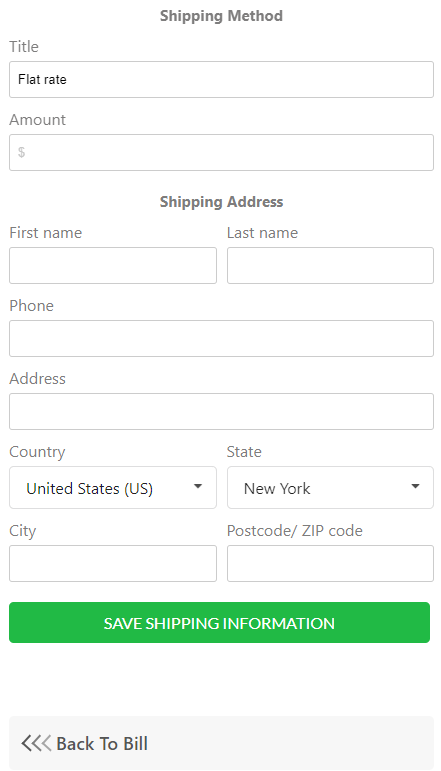
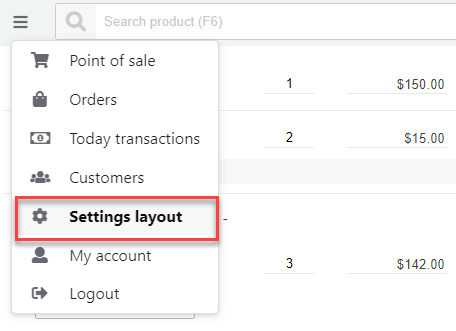
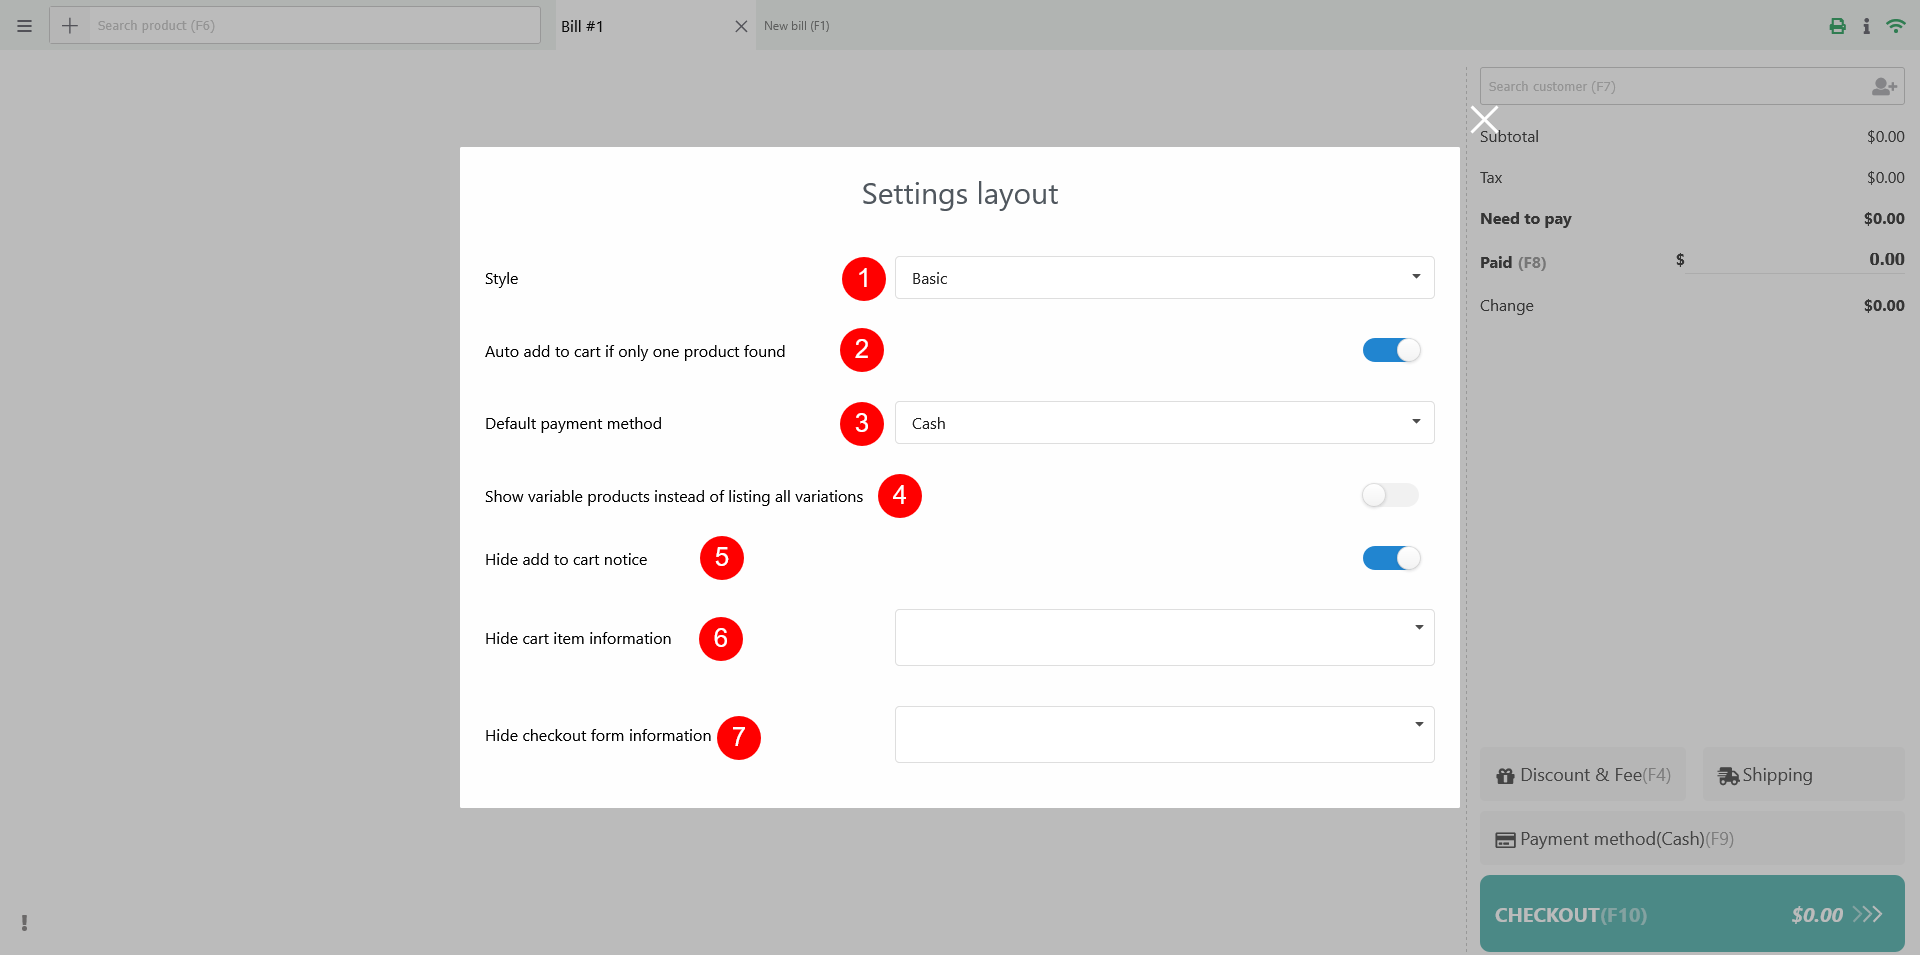
- E. Setting layout
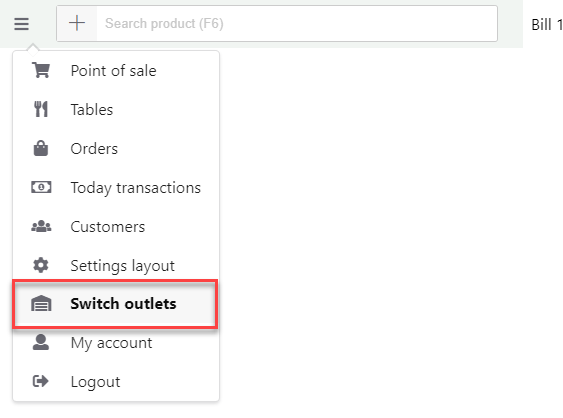
- F. Outlets on Frontend
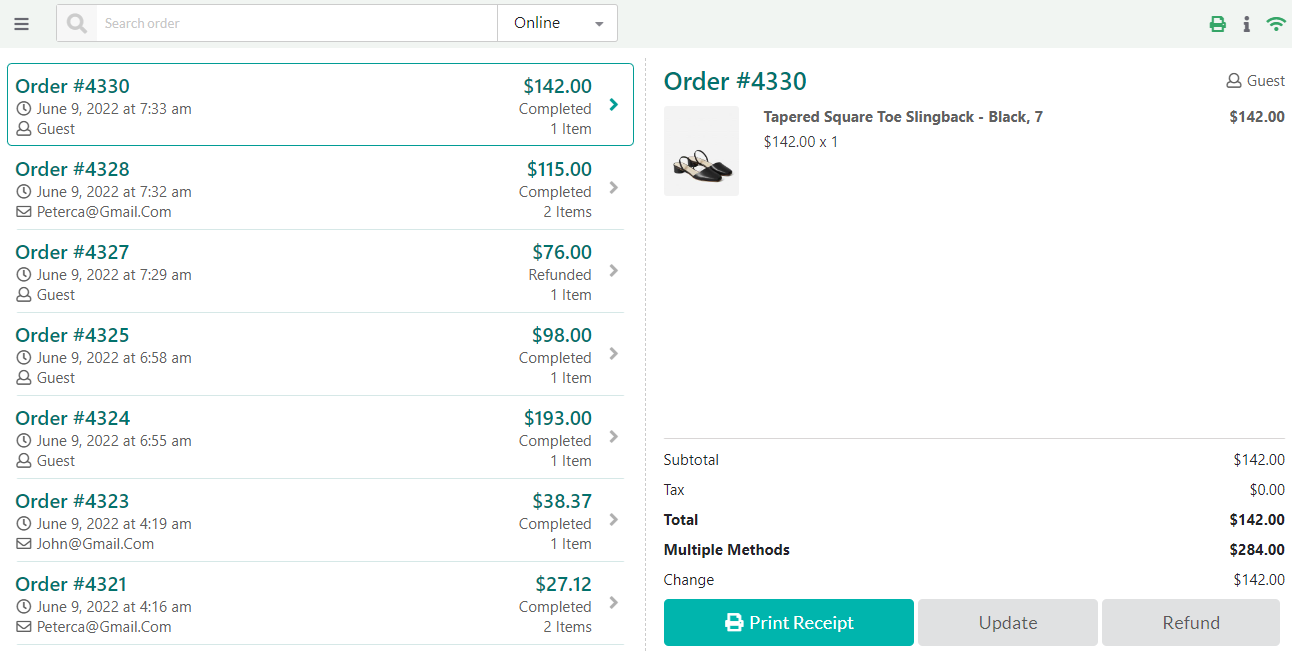
- POS Transactions Management in Backend
- Compatibility
- Extra Information
Copyright Villatheme 2015-2026