WooCommerce Photo Reviews is available 4 widgets in Elementor:
- Photo Reviews: To display a list of reviews on your website.
- Review form: To display the review form for customers to post their reviews.
- Rating: To display the product rating.
- Overal rating: To display the last average rating of the product.
* Note: This feature is only available in the WooCommerce Photo Reviews plugin premium version.
A. Photo Reviews widget
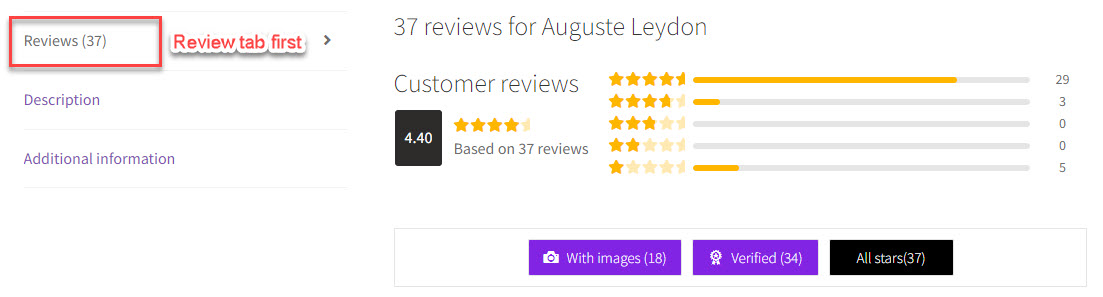
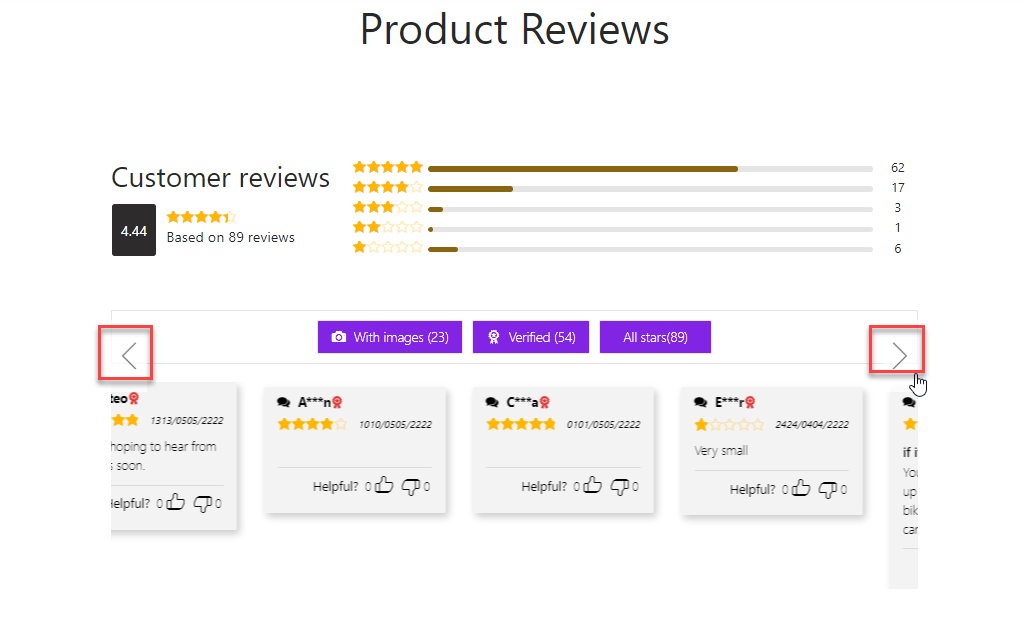
You can use the Photo reviews widget to display a review list of all products or specific products on your website. Create a review page or edit a page with Elementor.

- Choose the WooCommerce Tab in Elementor left side bar.
- Drag and drop the Photo reviews widget to the supported and desired position on the page.
- Design the Reviews page with Elementor, customize Photo Reviews on the left bar to design the Reviews page.
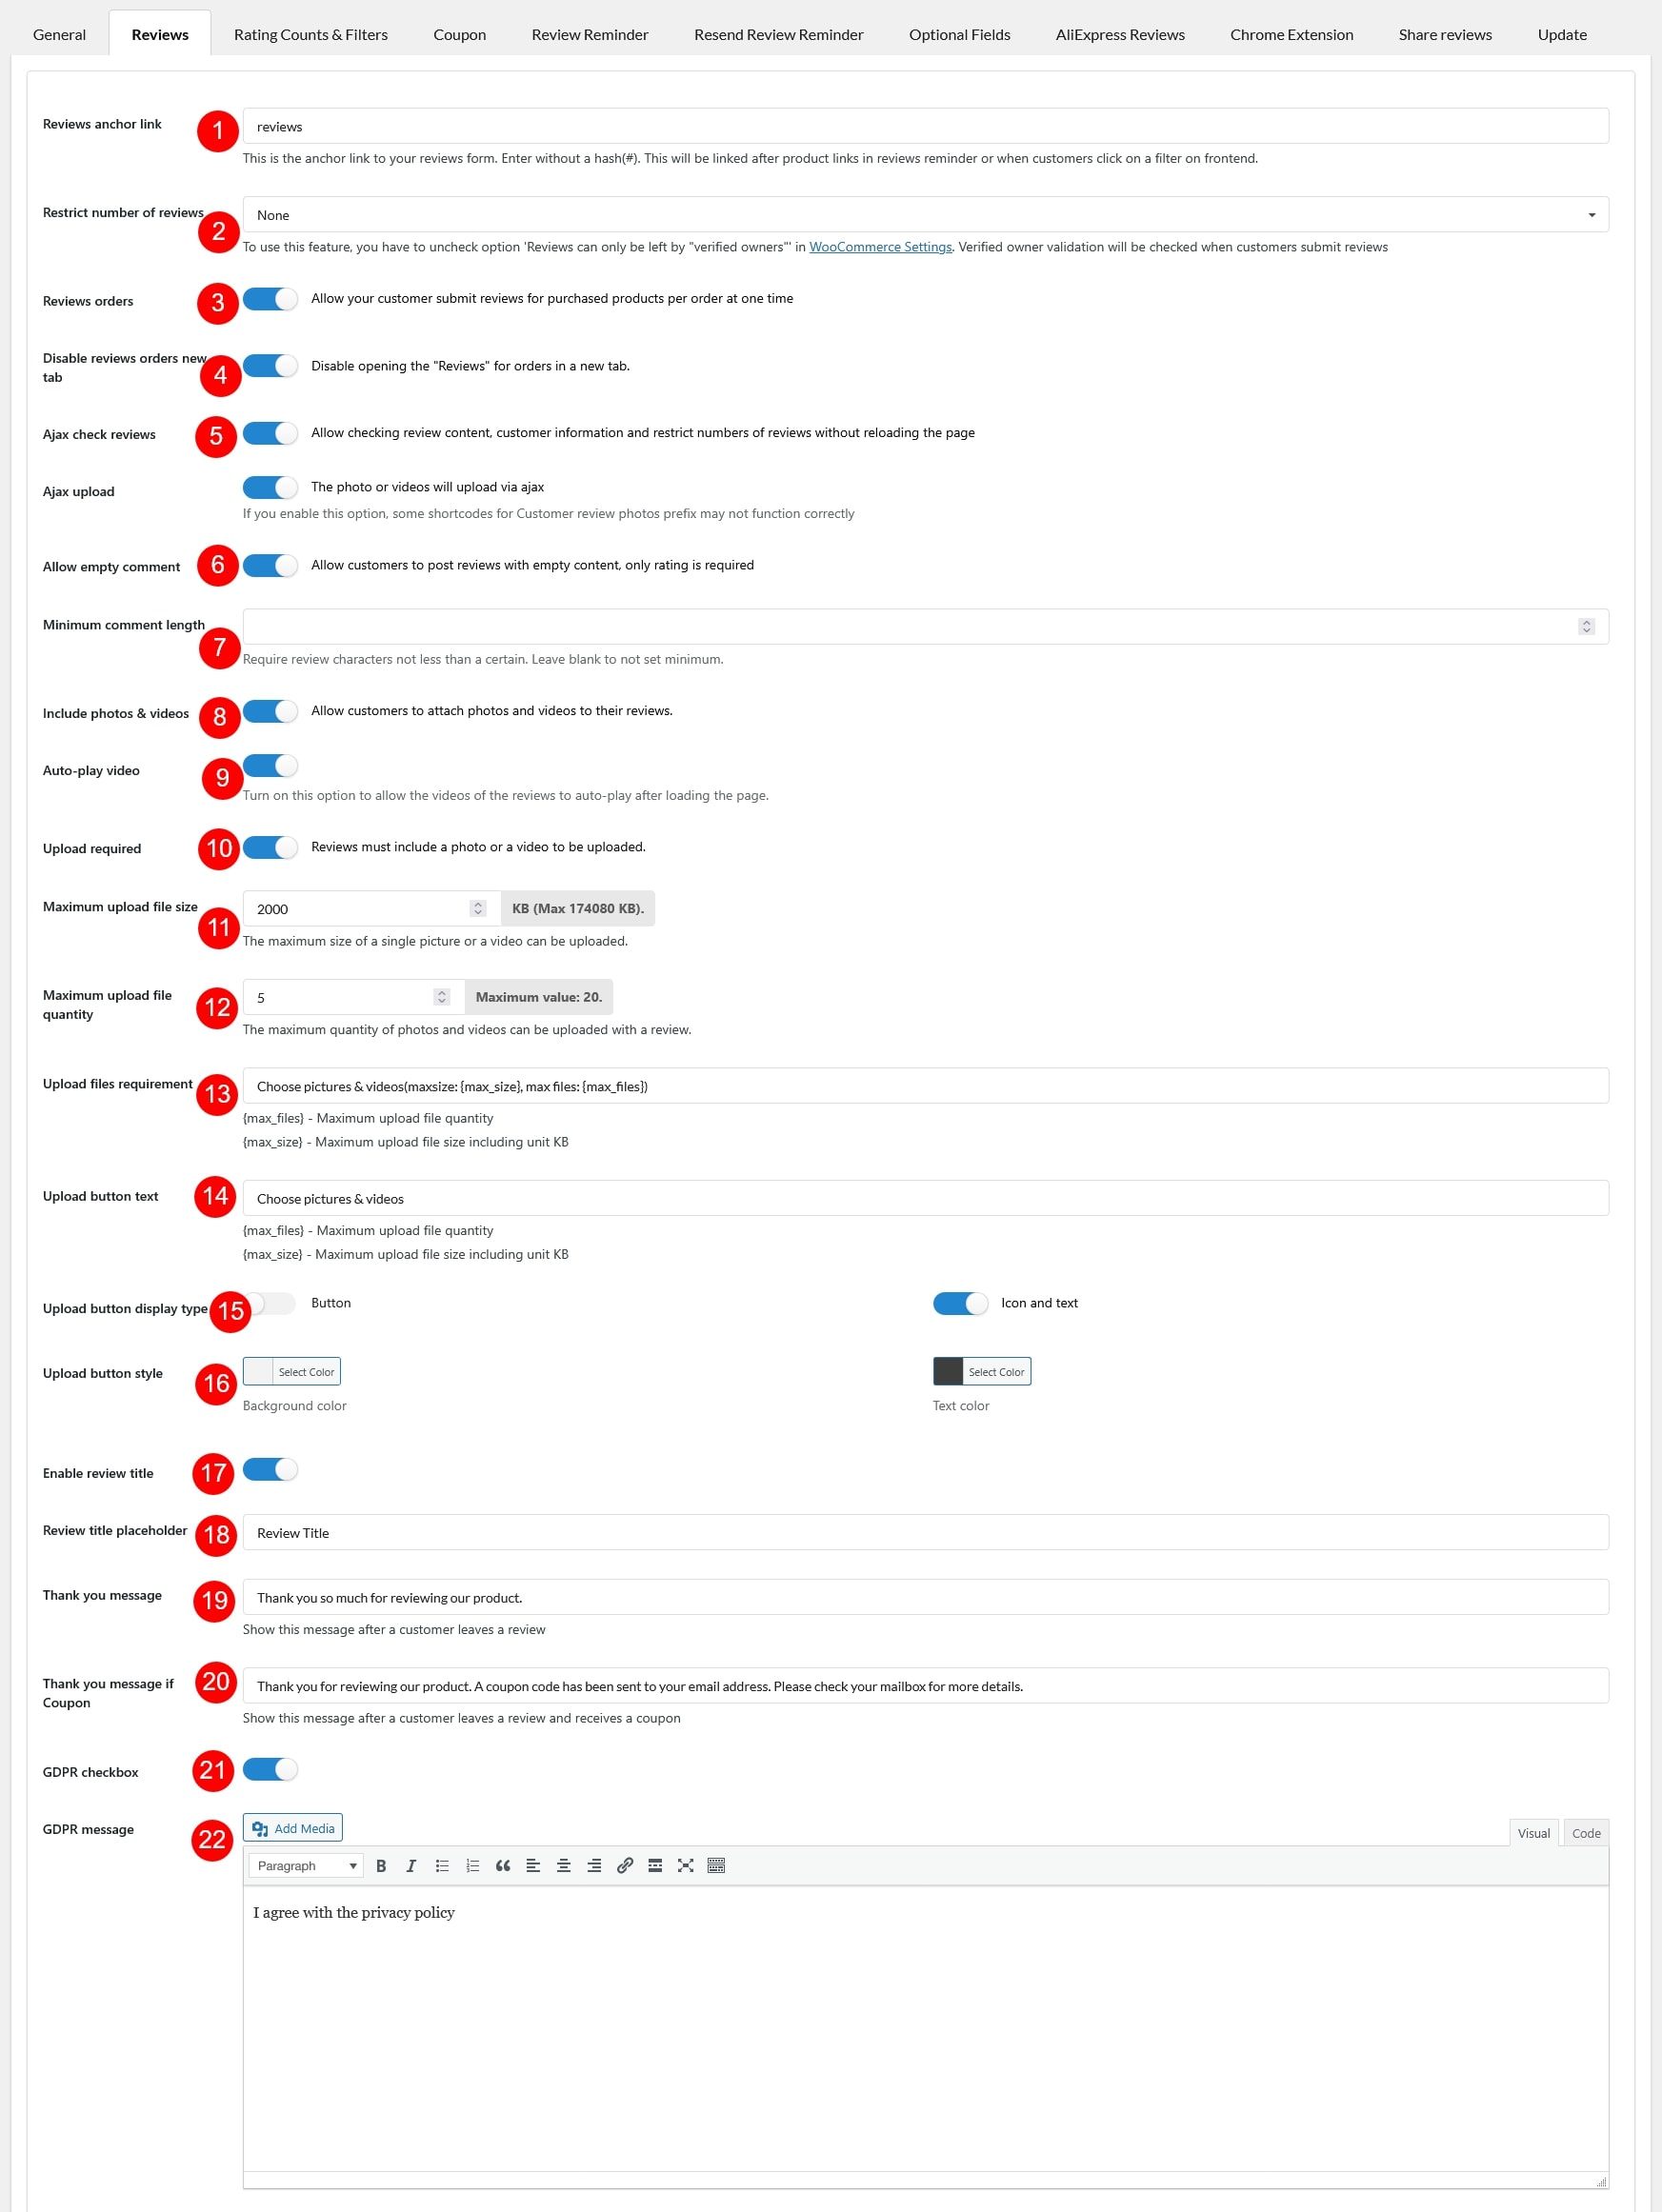
a. General tab
Go to General tab on the left side bar.
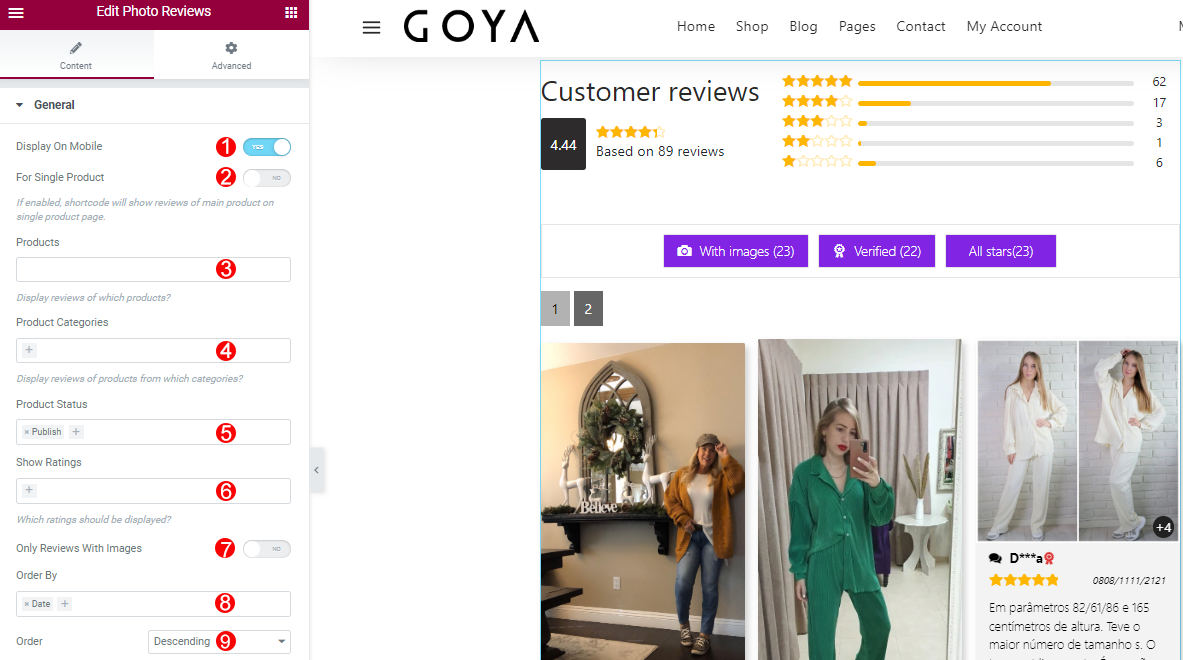
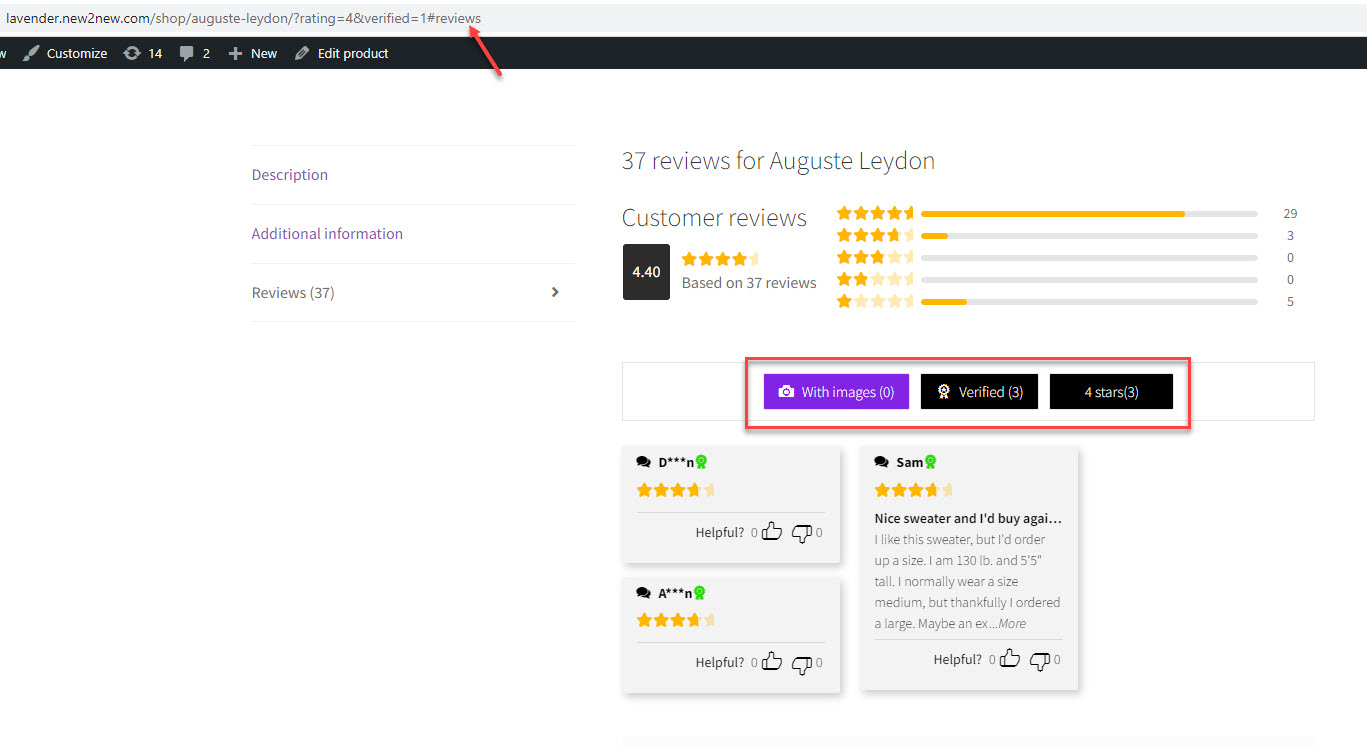
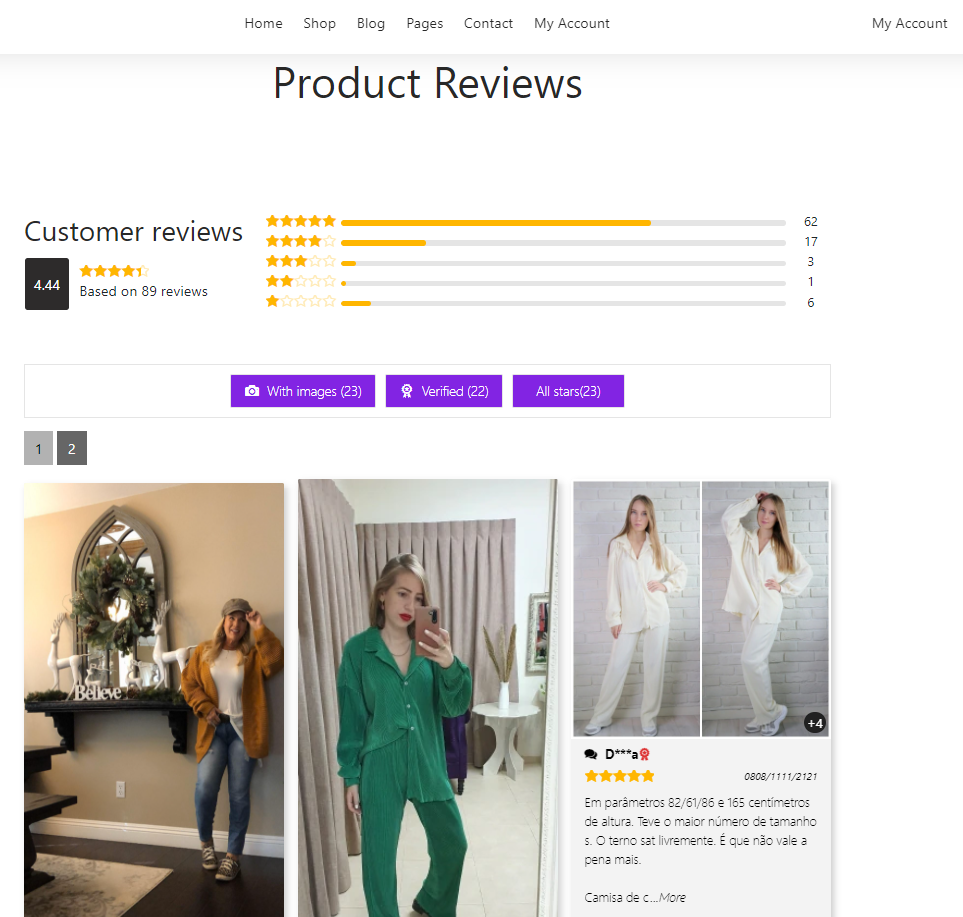
- Product Categories: Choose the categories that you want to display on review page.
- Product Status: Only display the reviews of the products which have these statuses.
- Show Ratings: Choose the ratings which will be displayed.
- Only Reviews With Images: YES/NO, select to display reviews with photo.
- Order by: Order the reviews by choosen fields.
- Order: Sort the review follow ASC or DSC ratings.
b. Pagination Tab
Go to Pagination tab on the left side bar.
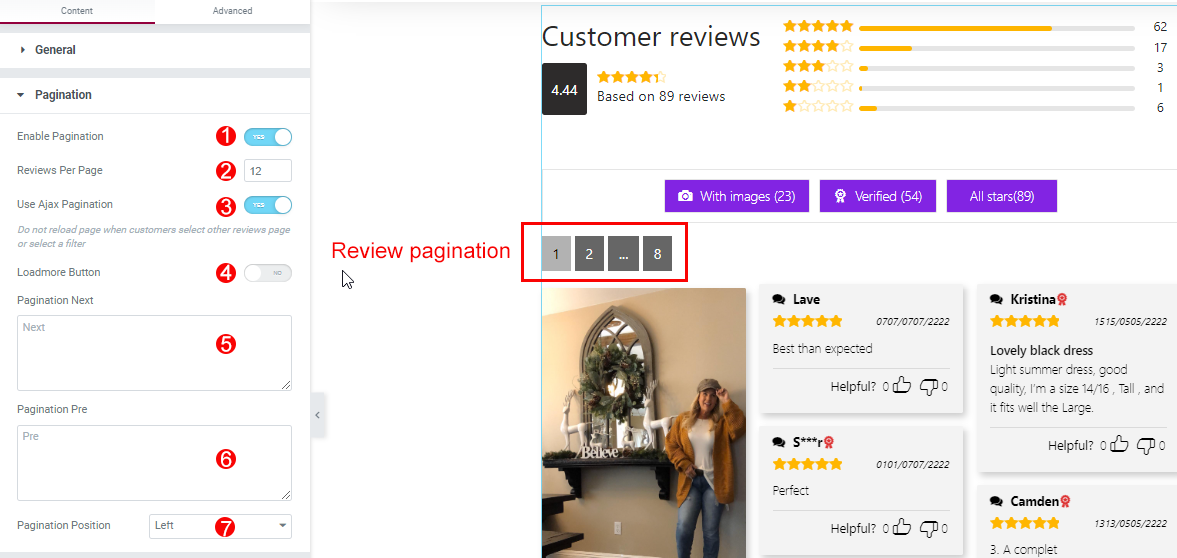
- Enable pagination: YES/NO, paginate reviews.
- Reviews per page: Enter the number of reviews displayed per page.
- Use Ajax Pagination: YES/NO, select to not reload page when customers select other reviews page or select a filter.
- Loadmore button: Click on the load more button to display more reviews, enable this feature, the review pagination will be overridden.
- Pagination next: The text if clicking to will see the next reviews.
- Pagination Pre: The text if clicking to will see the previous reviews.
- Pagination Position: Choose the position of pagination: Left; Right; or Center.
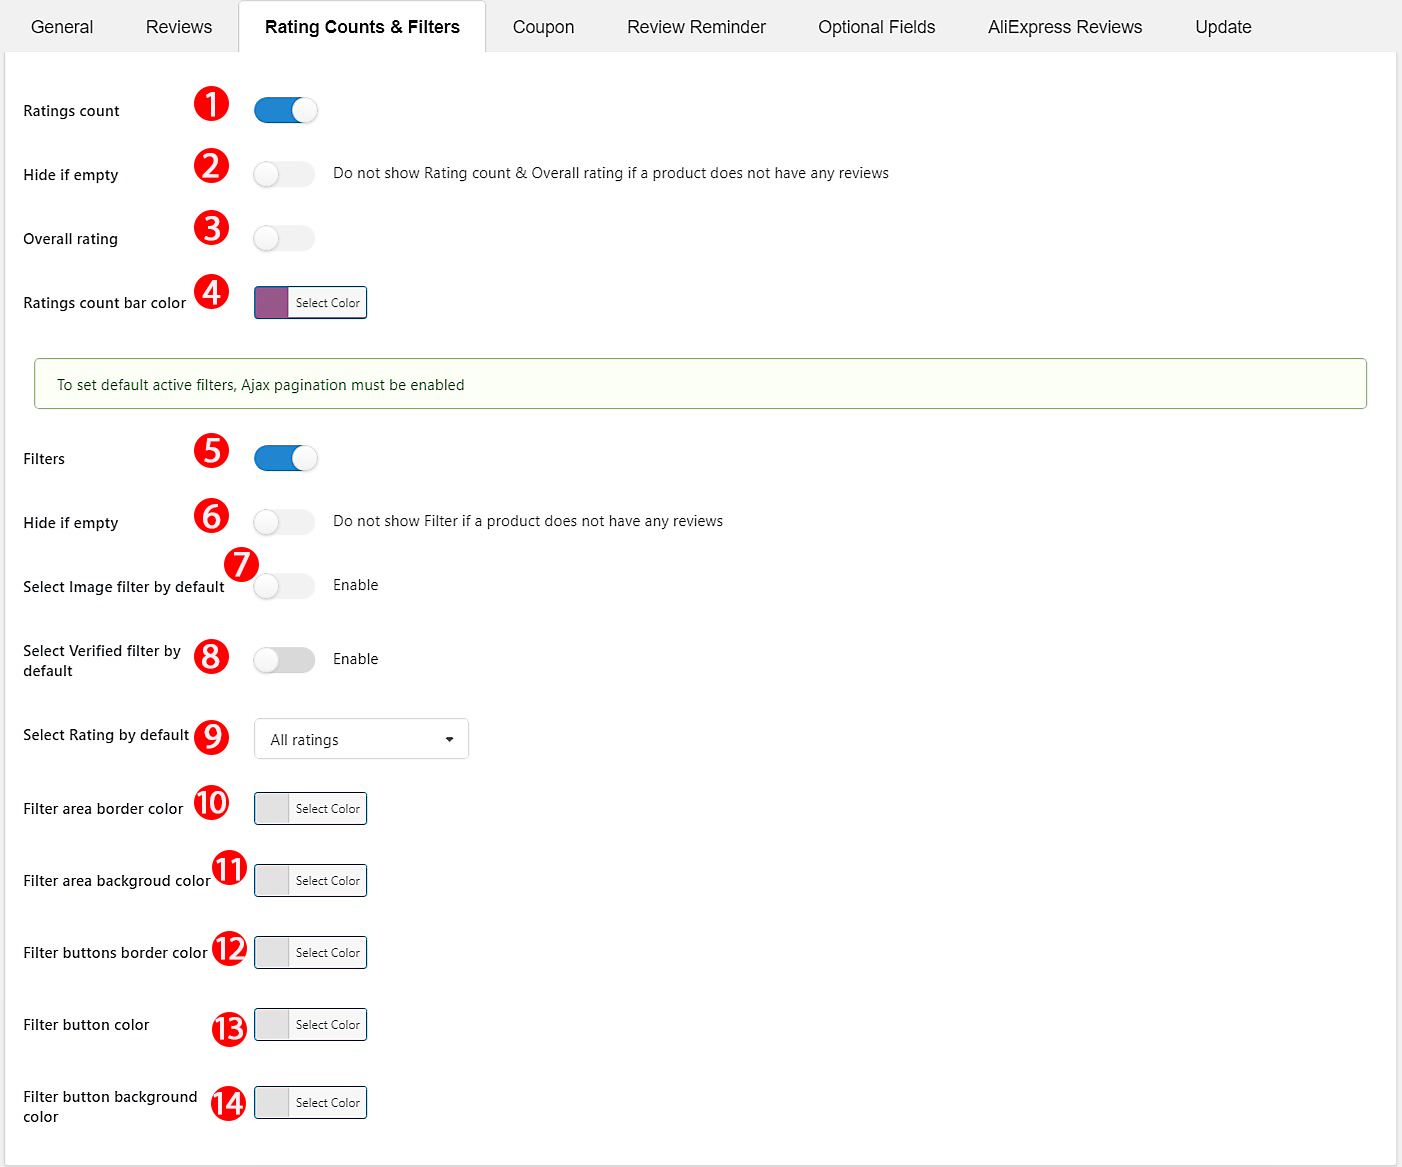
c. Filter Tab
Go to Filter tab on the left side bar.
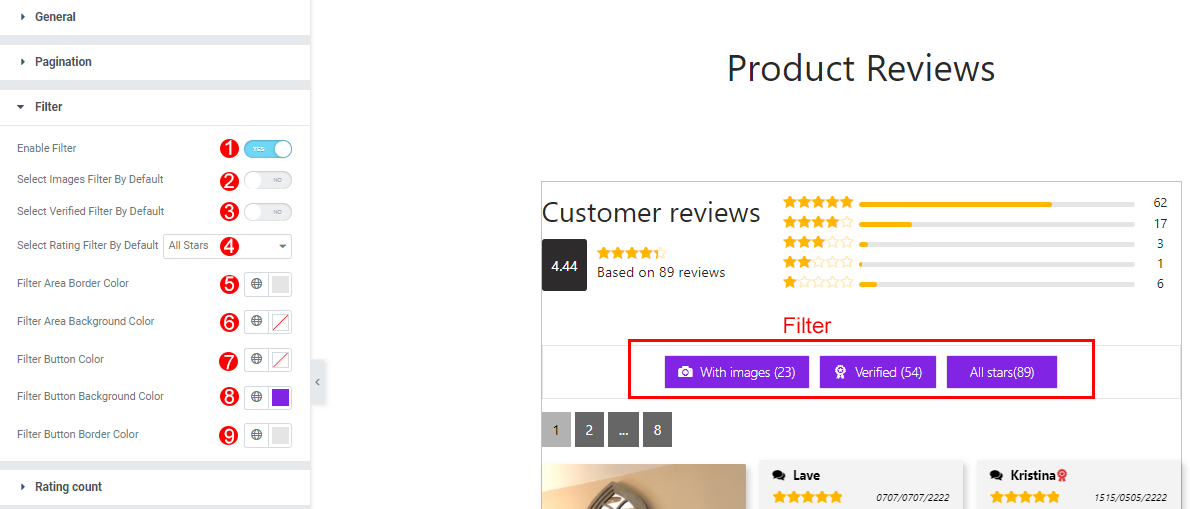
- Enable Filter: YES/NO, select to enable filter.
- Select images Filter By Default: YES/NO, select to set images Filter by default.
- Select Verified Filter By Default: YES/NO, select to set Verified Filter by default.
- Select Rating Filter By Default: Select to set Rating Filter by default.
- Filter Area Border Color: Choose the color for area border.
- Filter Area Background Color: Choose the color for filter area background.
- Filter Button Color: Choose the color for filter button.
- Filter Button Background Color: Choose the color for filter button background.
- Filter Button Border Color: Choose the color for filter button border.
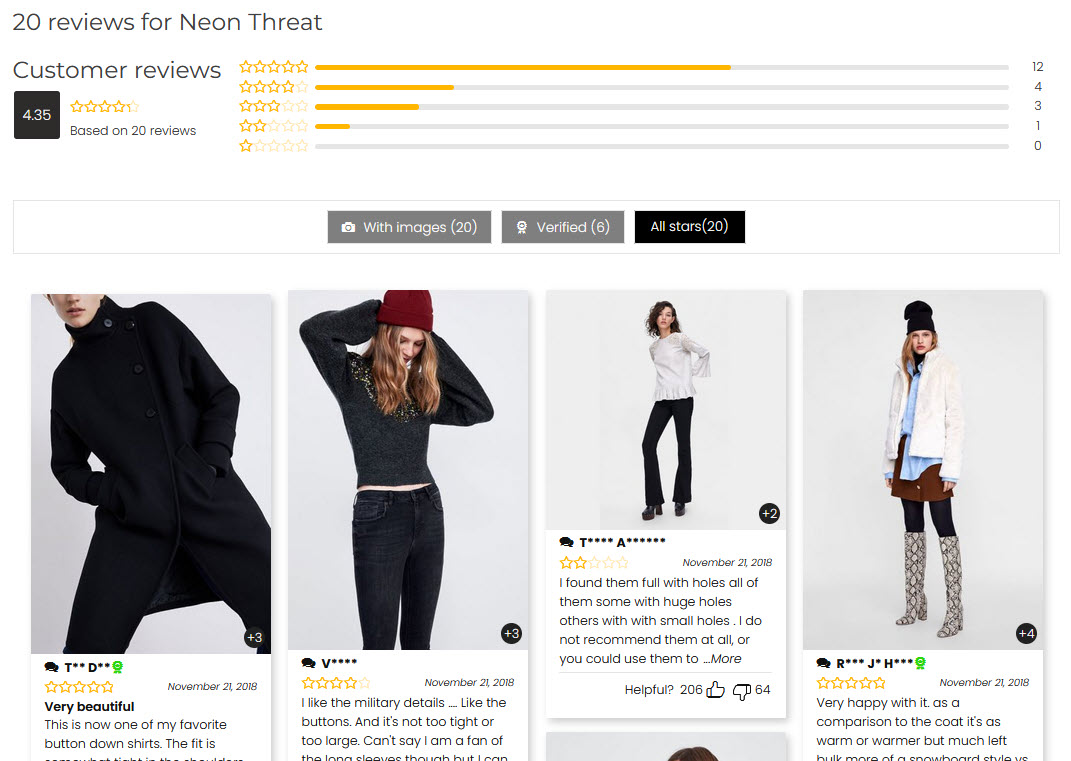
d. Rating Count Tab
Go to Rating Count tab on the left side bar.

- Enable Rating Count: YES/NO, select to enable rating count on review page.
- Enable overall Rating: YES/NO, select to enable overal rating on review page.
- Rating Count Bar Color: Choose the color for rating count bar.
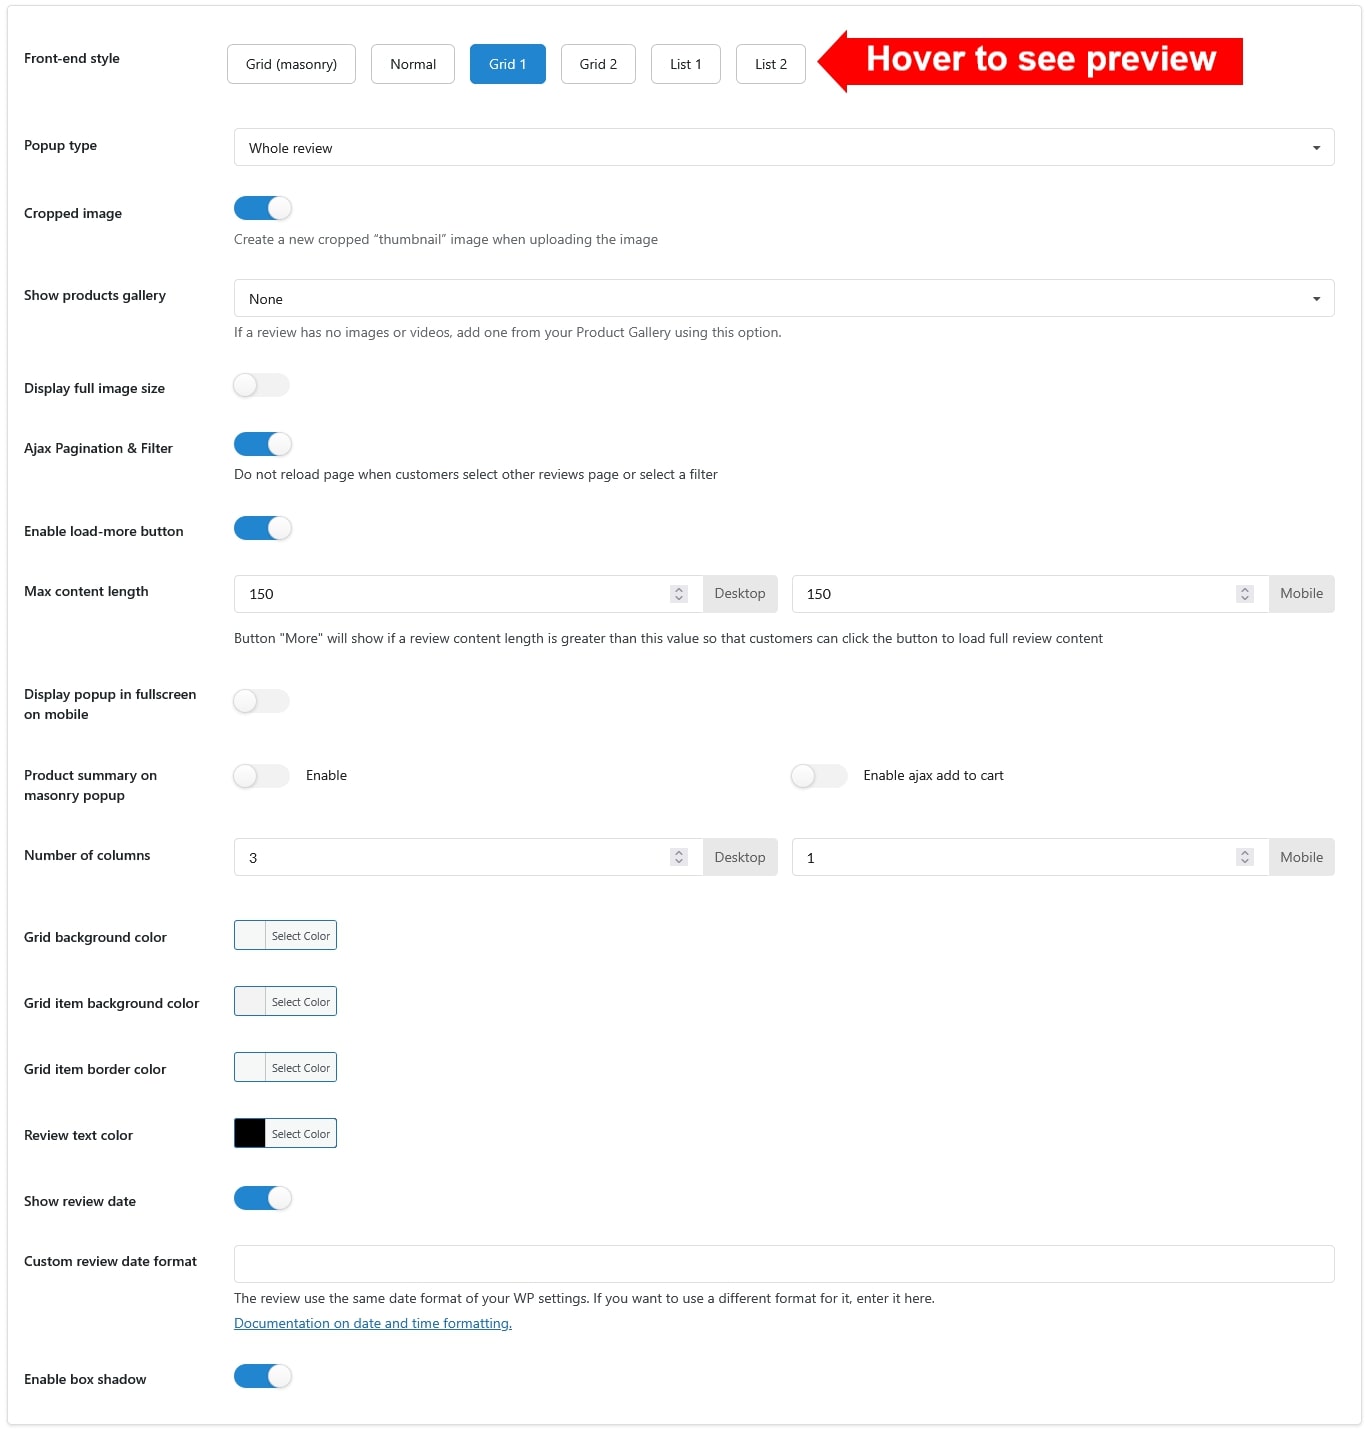
e. Design Tab
Go to Design Tab on the left side bar.
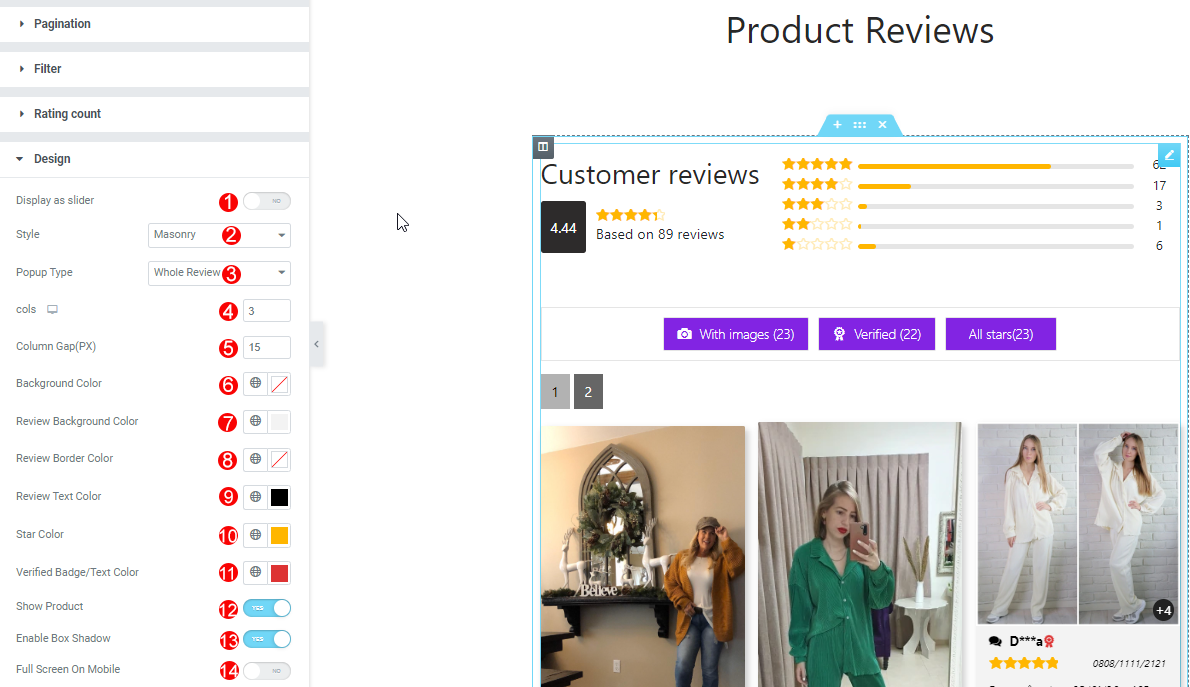
- Display as slider: Display reviews under a slider.
- Style: Choose style of photo reviews displayed on the review page: Masonry or normal.
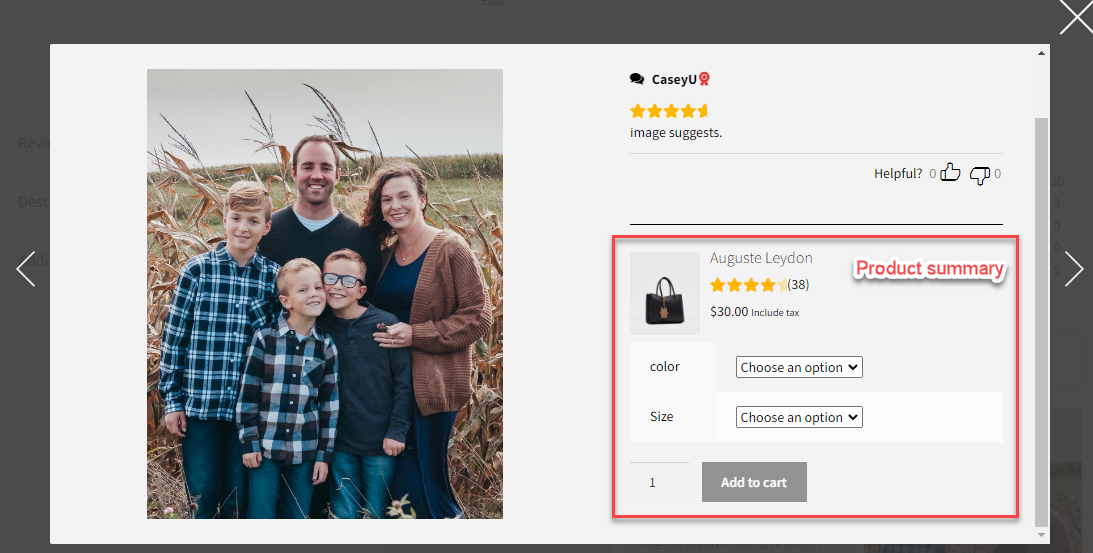
- Popup Type: There are three styles you can select to let the images appear when the customer clicks on the review images:
- Whole review: Display full review content when clicking on this review image.
- Only image: Zoom out just this review image.
- Off: Not zoom the review image.
- Col: Enter the number of review columns displyed on review page.
- Column Gap (PX): Enter the gap between columns.
- Background Color: Choose the color for background.
- Review Background Color: Choose the color for review background.
- Review Border Color: Choose the color for review border.
- Review Text Color: Choose the color for review text.
- Star Color: Choose the color for stars.
- Verified Badge/ Text Color: Choose the color for Verified badge/text.
- Show Product: YES/NO, select to show product on popup.
- Enable Box Shadow: YES/NO, select to enable box shadow.
- Full Screen on Mobile: Display reviews full size on mobile.
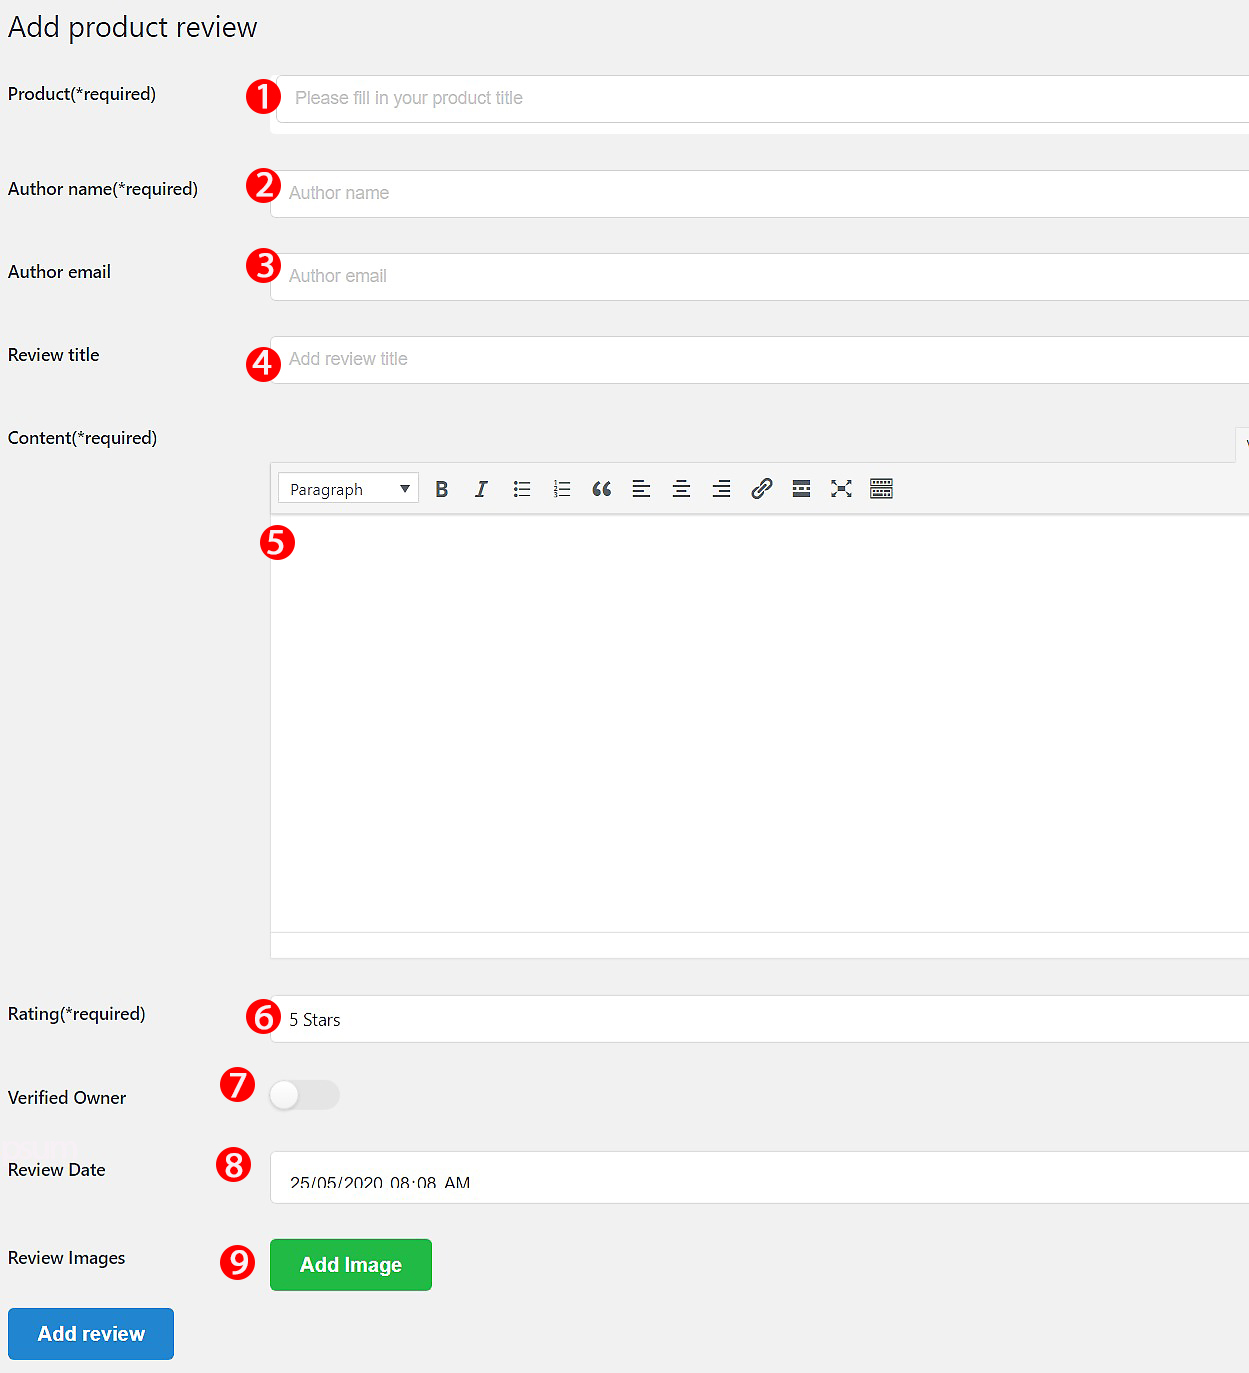
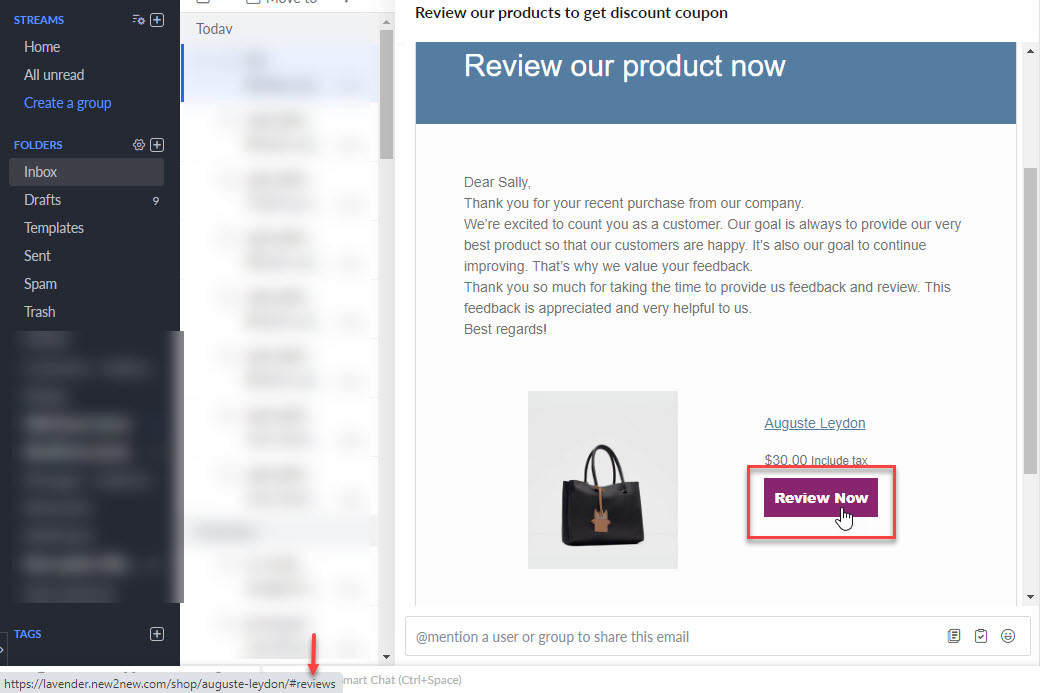
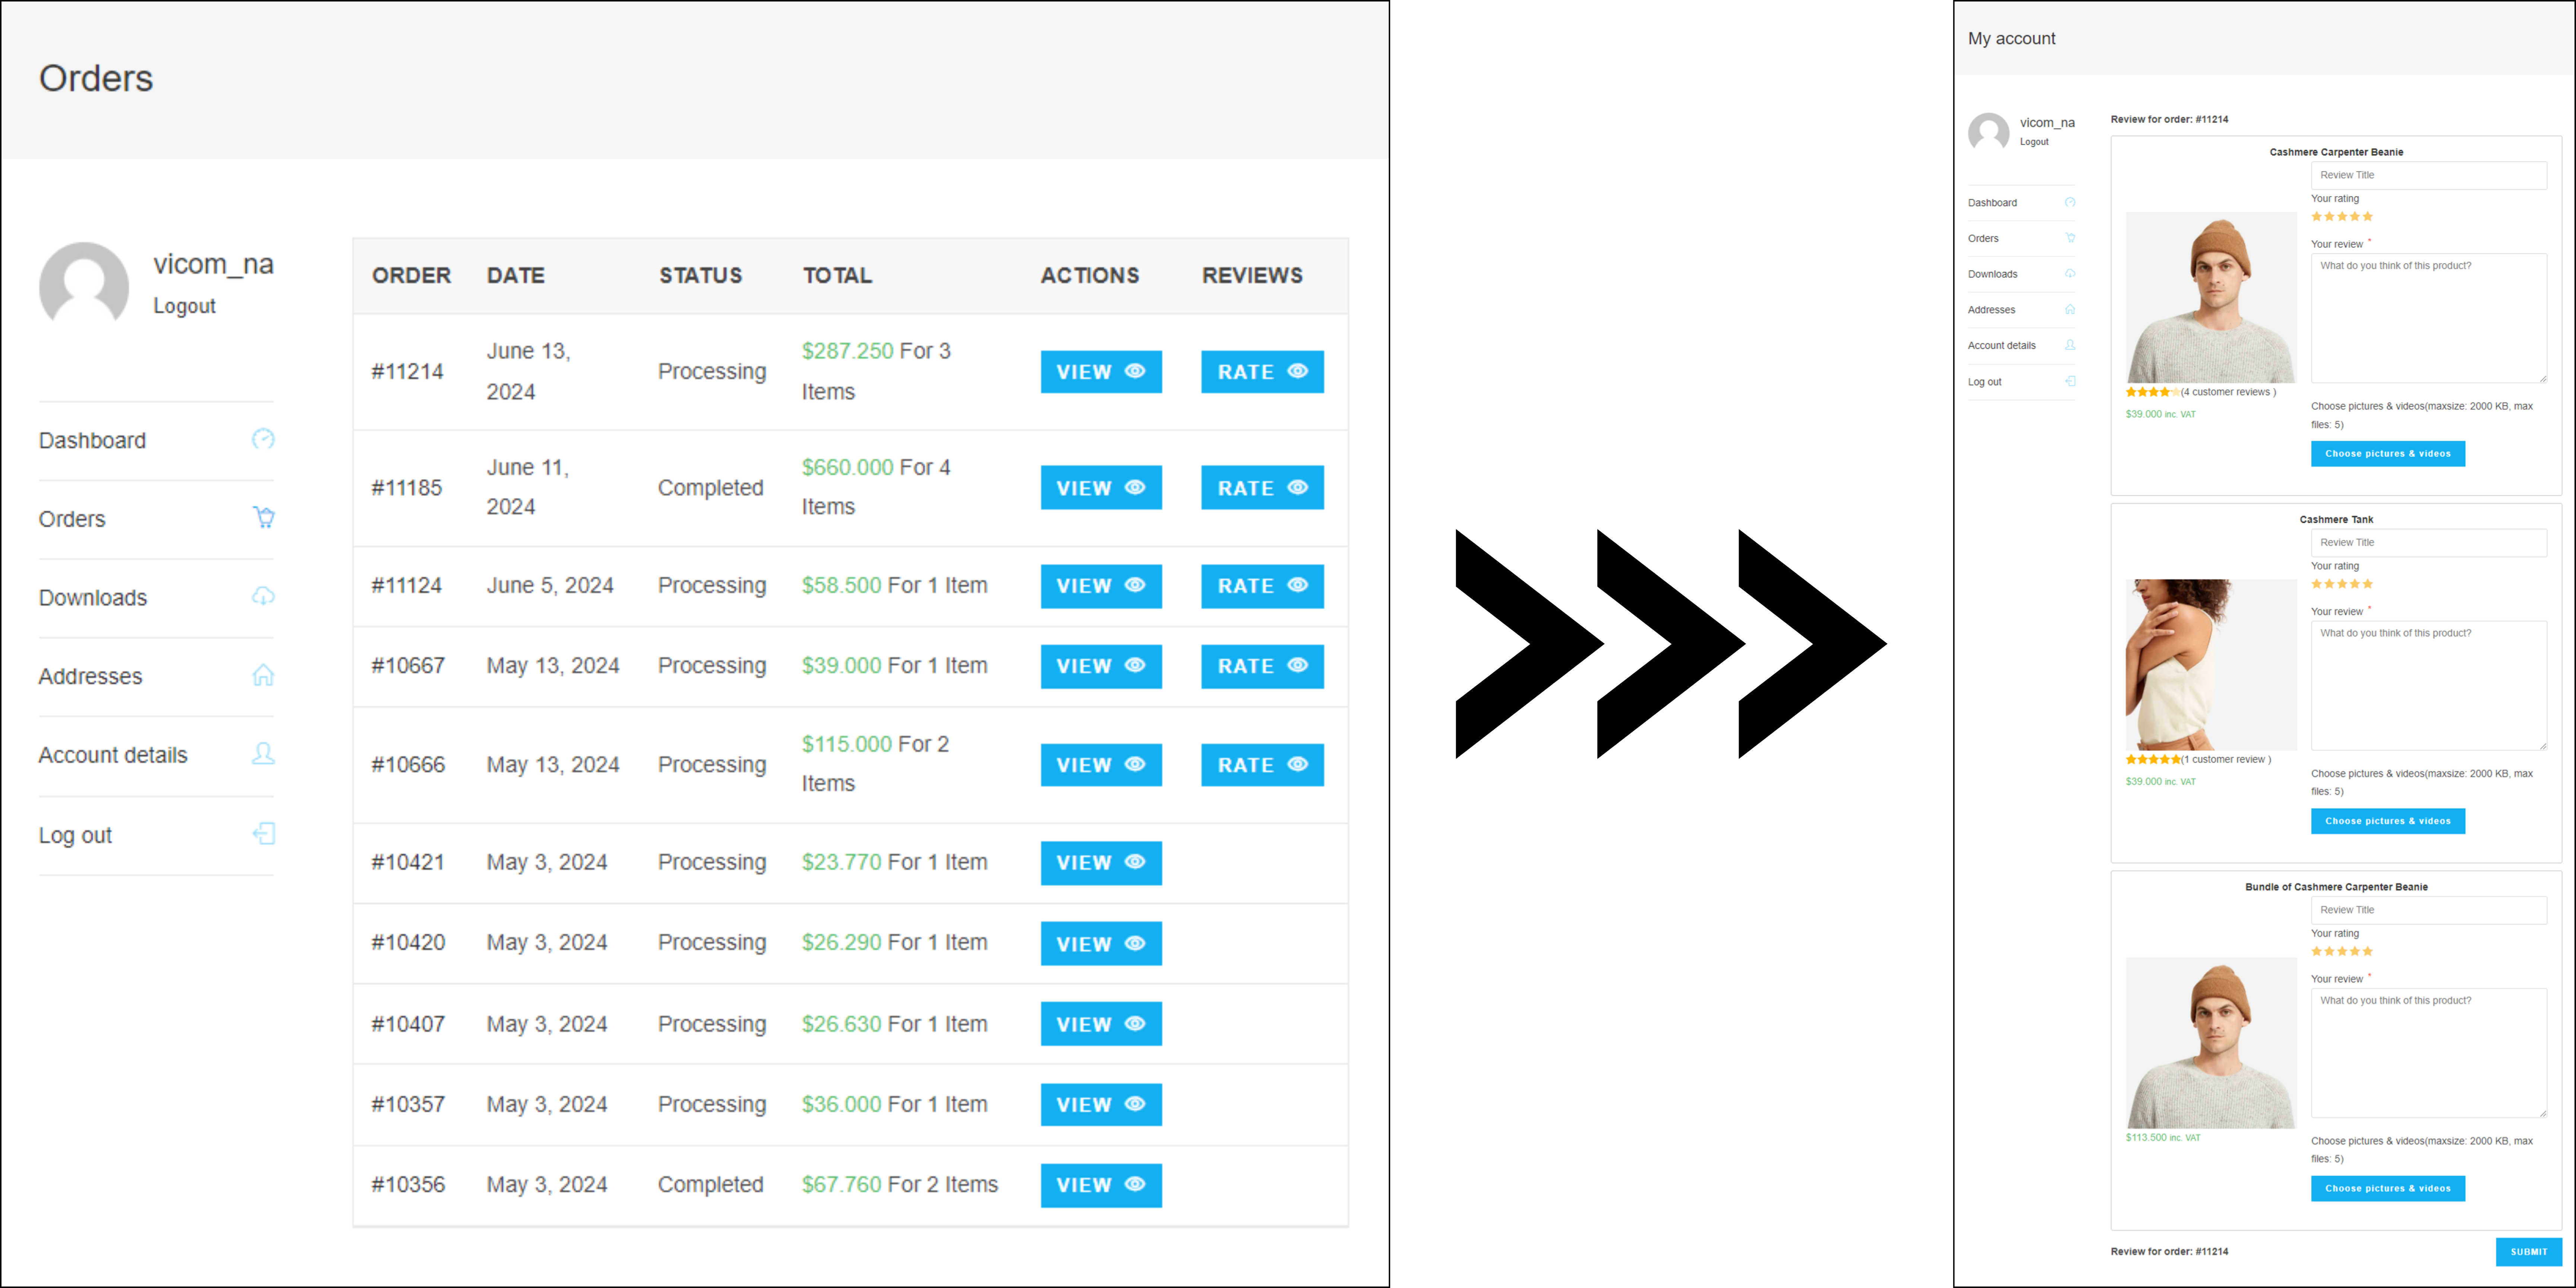
B. Review form widget
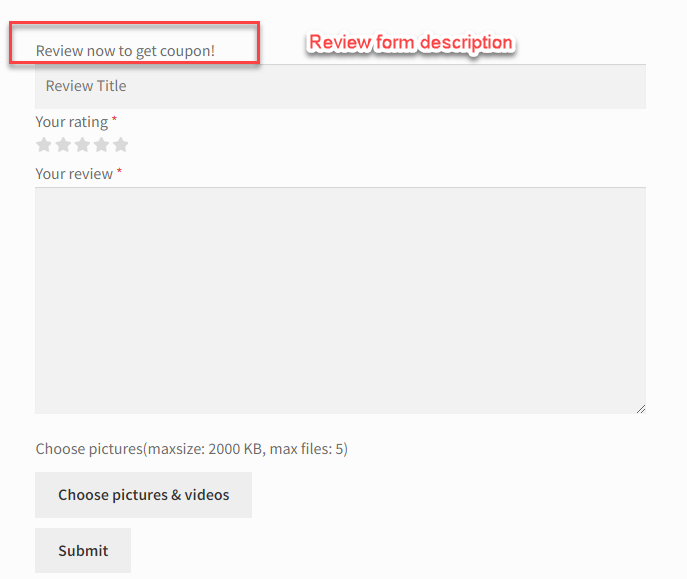
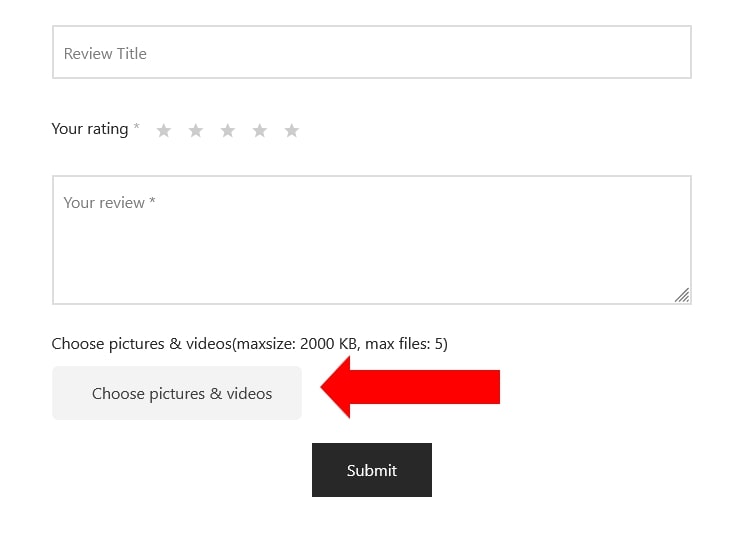
You can use the review form widget to display the review form for customers to post their reviews.
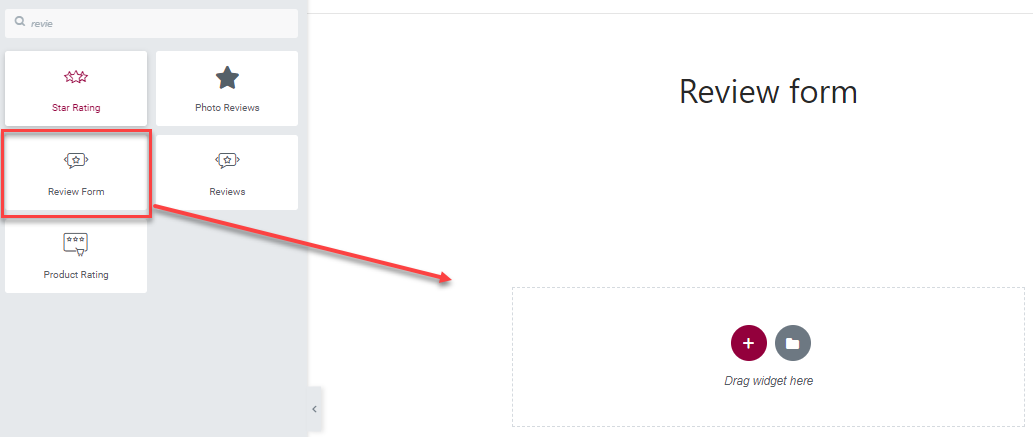
- Choose the WooCommerce Tab in Elementor left side bar.
- Drag and drop the Review form widget to the supported and desired position on the page.
- Design the Review form with Elementor.
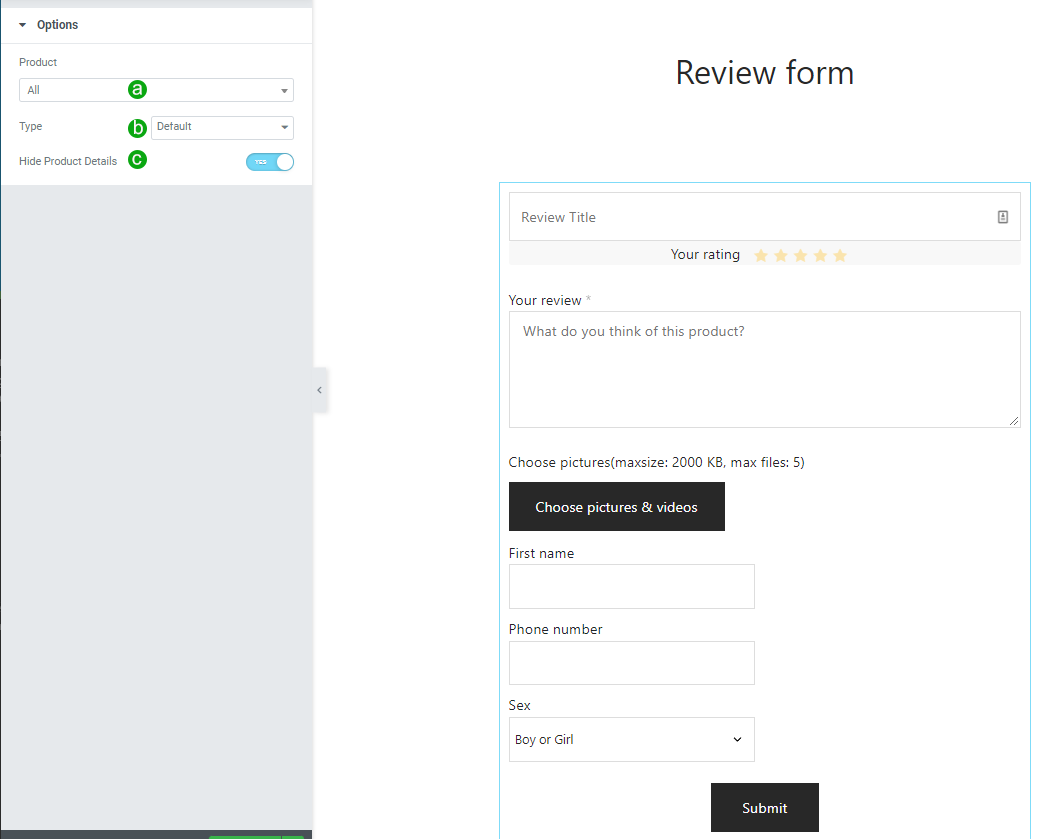
a. Product:
b. Type: Display the review form in the default type or in the popup type (click on the Write Your review button to display the review form under a popup).
* Note: If choosing the popup type, you will be asked to localate the review form button on the Left; Right or Center.
c. Hide product details: Use this option to hide or show the main product details.
C. Rating widget
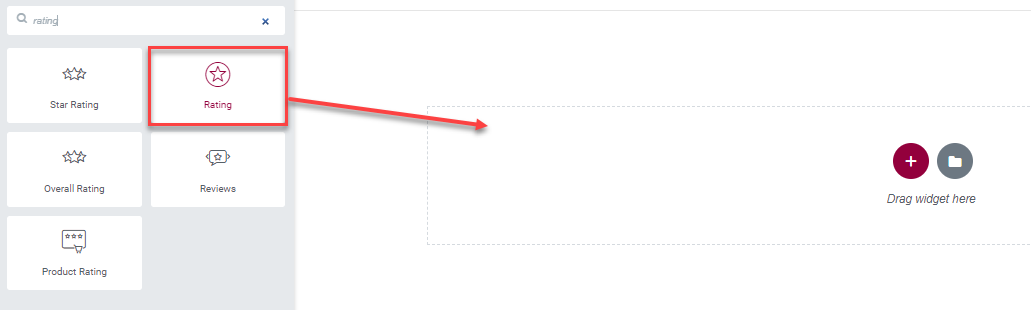
- Choose the WooCommerce Tab in Elementor left side bar.
- Drag and drop the Rating widget to the supported and desired position on the page.
- Design the rating with Elementor.

a. Product:
b. Product review count: Enable to display the rating count.
c. Rating: Display a specific rating in the rank from 1 -5 star.
D. Overall rating widget
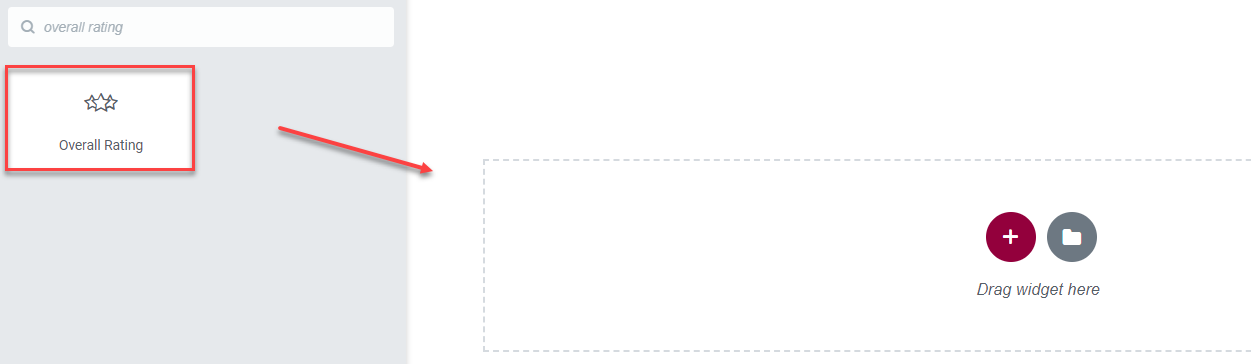
- Choose the WooCommerce Tab in Elementor left side bar.
- Drag and drop the Overall Rating widget to the supported and desired position on the page.
- Design the overall rating with Elementor.
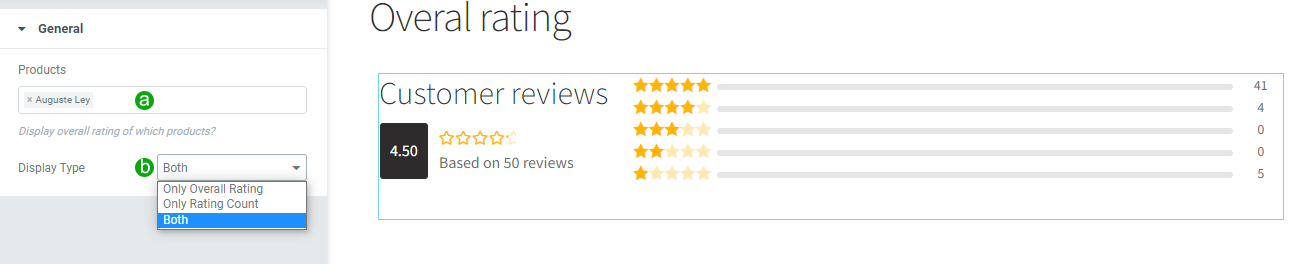
a. Product:
b. Display type: There are 3 options for you
- Both: Display both overall rating and rating count
- Only Overall rating: Only display overall rating
- Only Rating count: Only display rating count