- Start
- FILE INCLUDES
- DOWNLOAD AND INSTALLATION
- INTRODUCTION
- How to use EXMAGE
- How does this work
- DEVELOPER
- COMPATIBILITY
- Extra Information
Copyright Villatheme 2015-2026
Created: 12/2021
Latest updated: 04/2026 – Updated version: 1.0.2
By: VillaTheme
Thank you for purchasing our plugin. If you have any questions that are beyond the scope of this documentation, please feel free to request support at our Support Forum. Thanks so much!
Get the plugin installation package from your account download page and save it to your desktop.
Go to Plugins/ Add New/ Upload Plugin/ Choose file/ Select exmage-wordpress-image-links.zip / click “Install Now“/ click “Active plugin”.

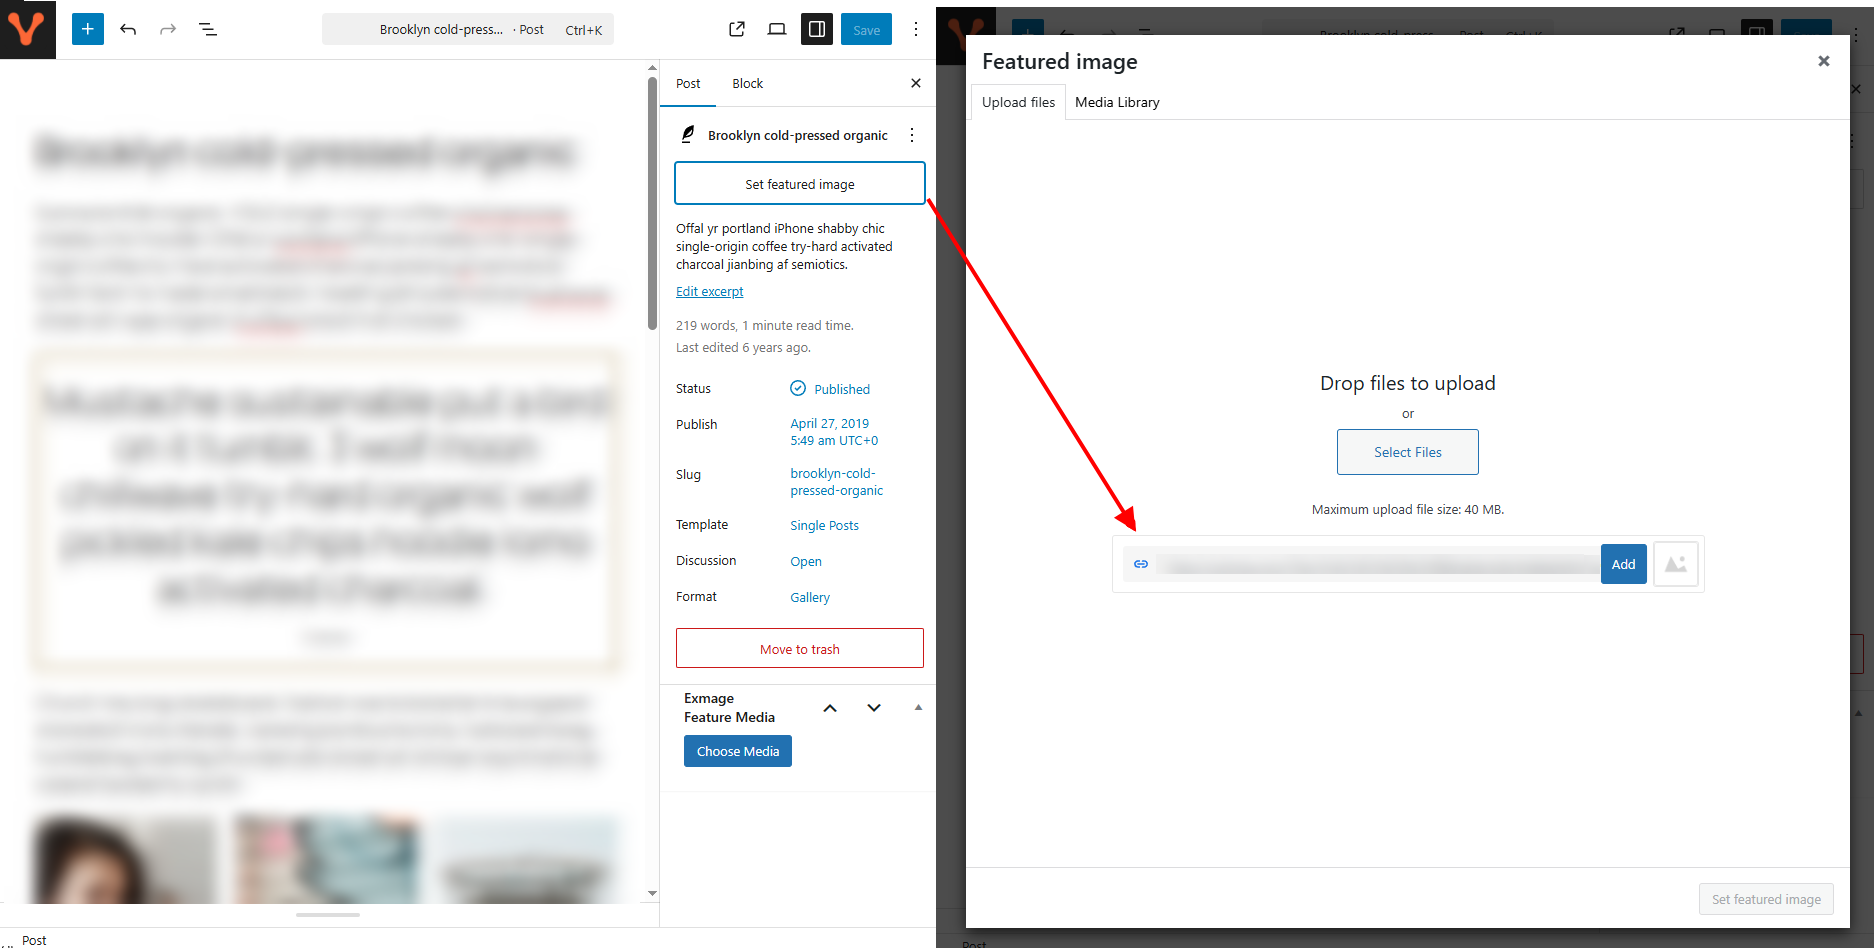
Add an image URL from Media library such as Post/Product featured image.
For example:
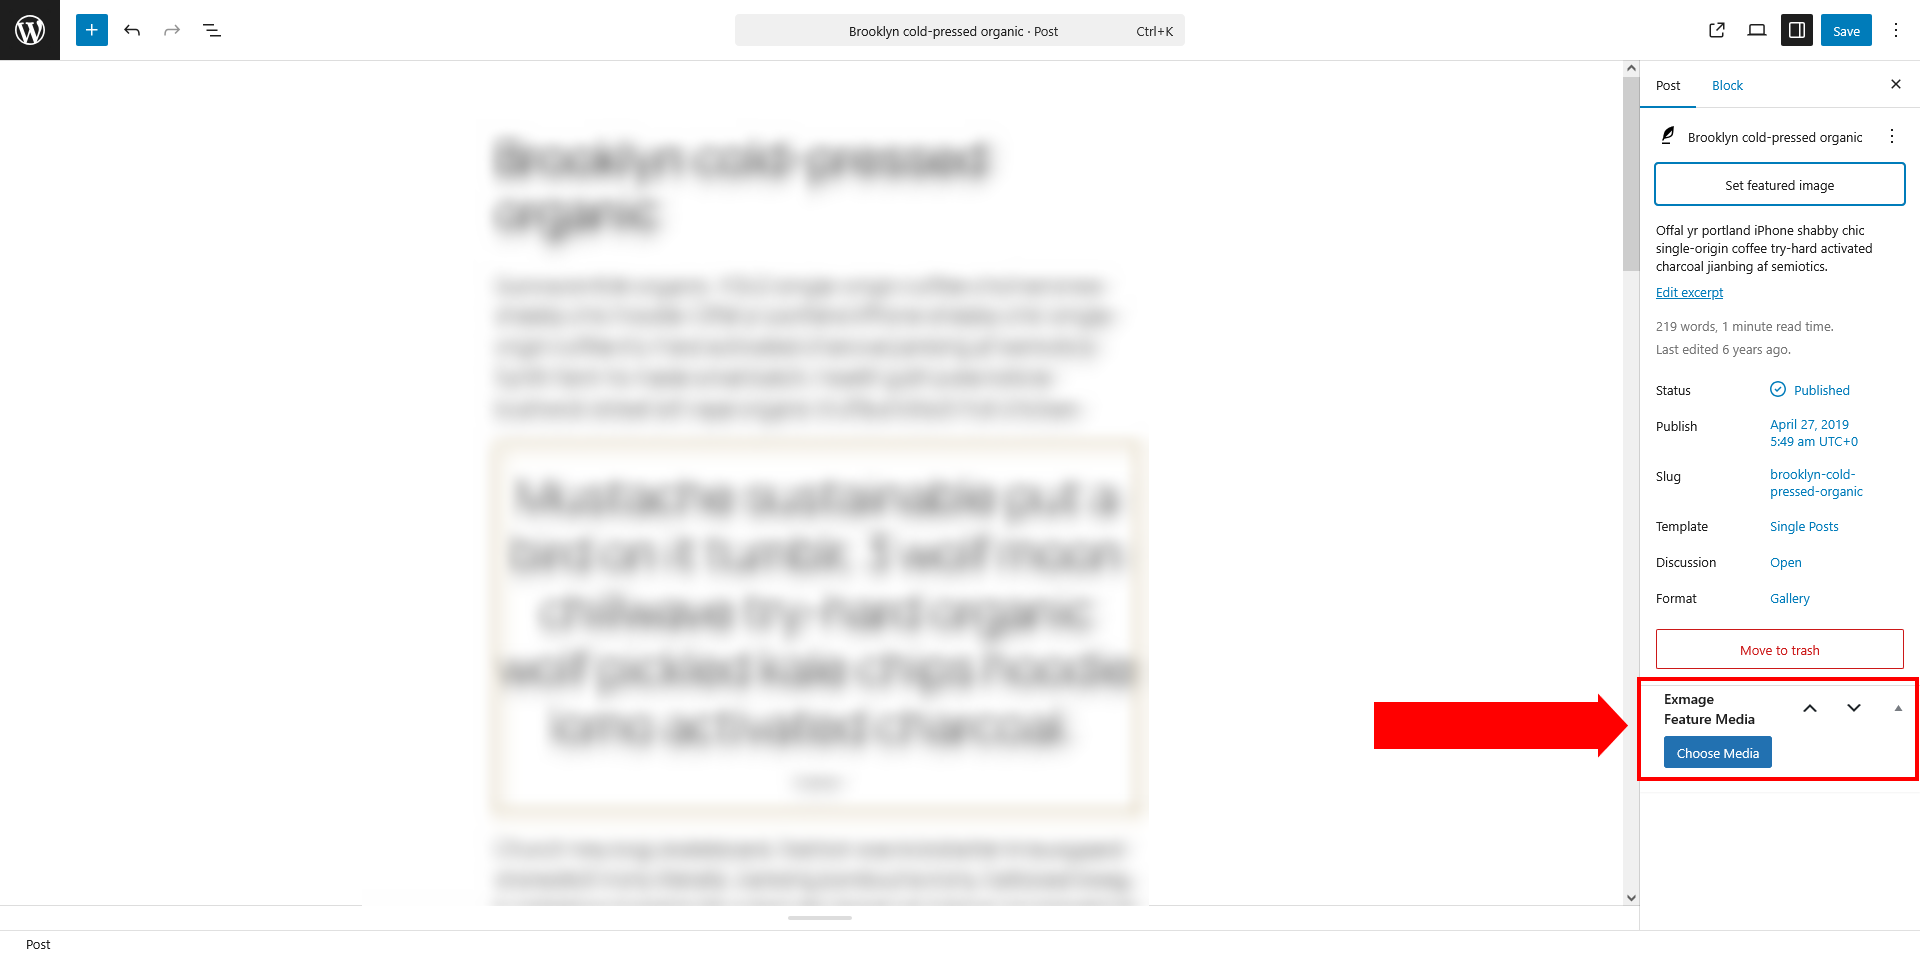
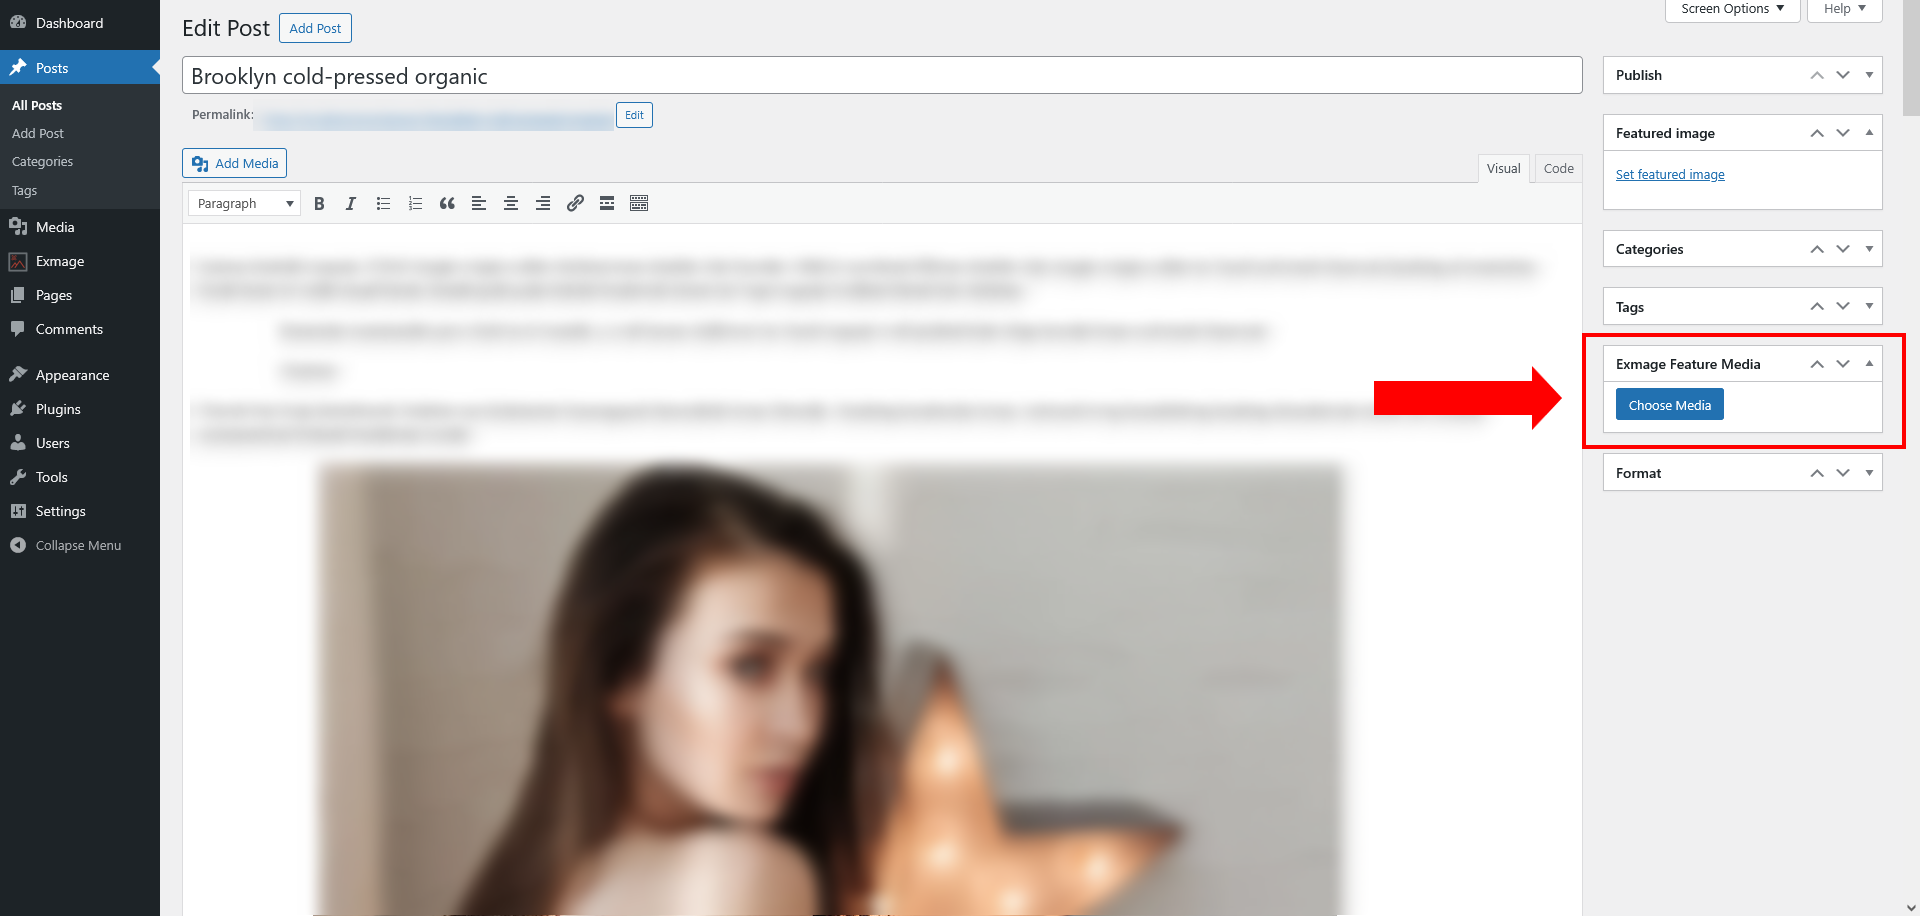
Post featured image
On Classic Editor:

If you enable Set thumbnail video option under Video settings, you can add an external video as a post’s featured video
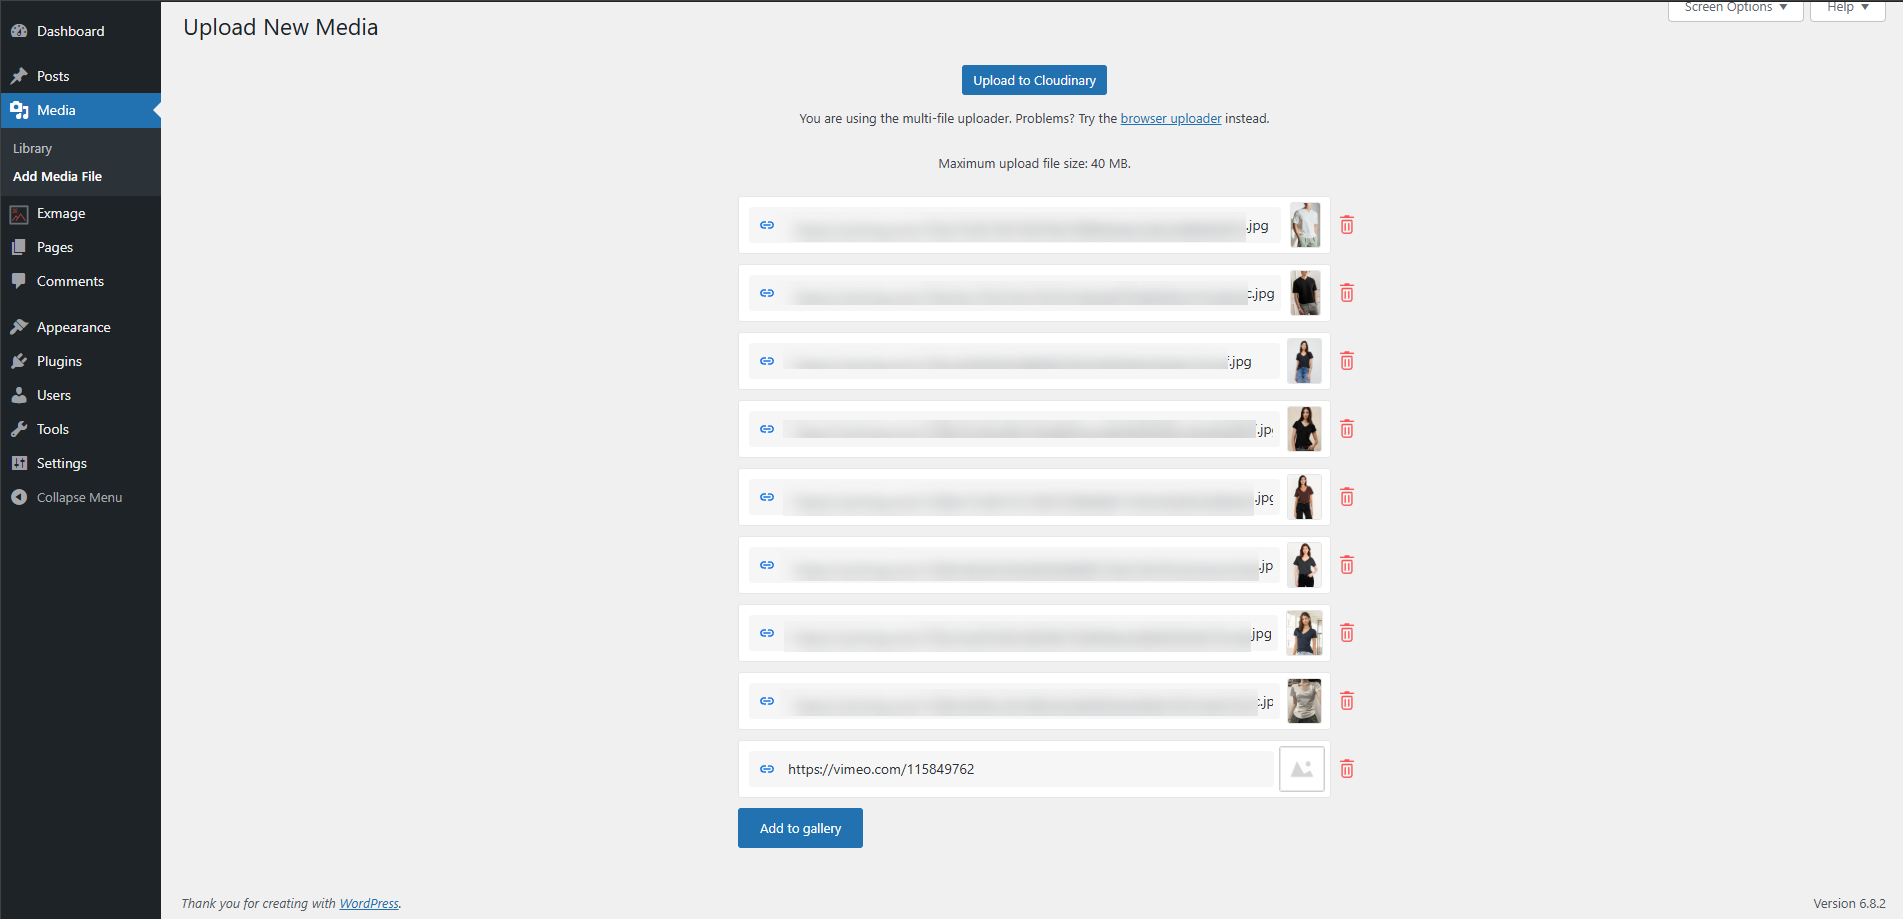
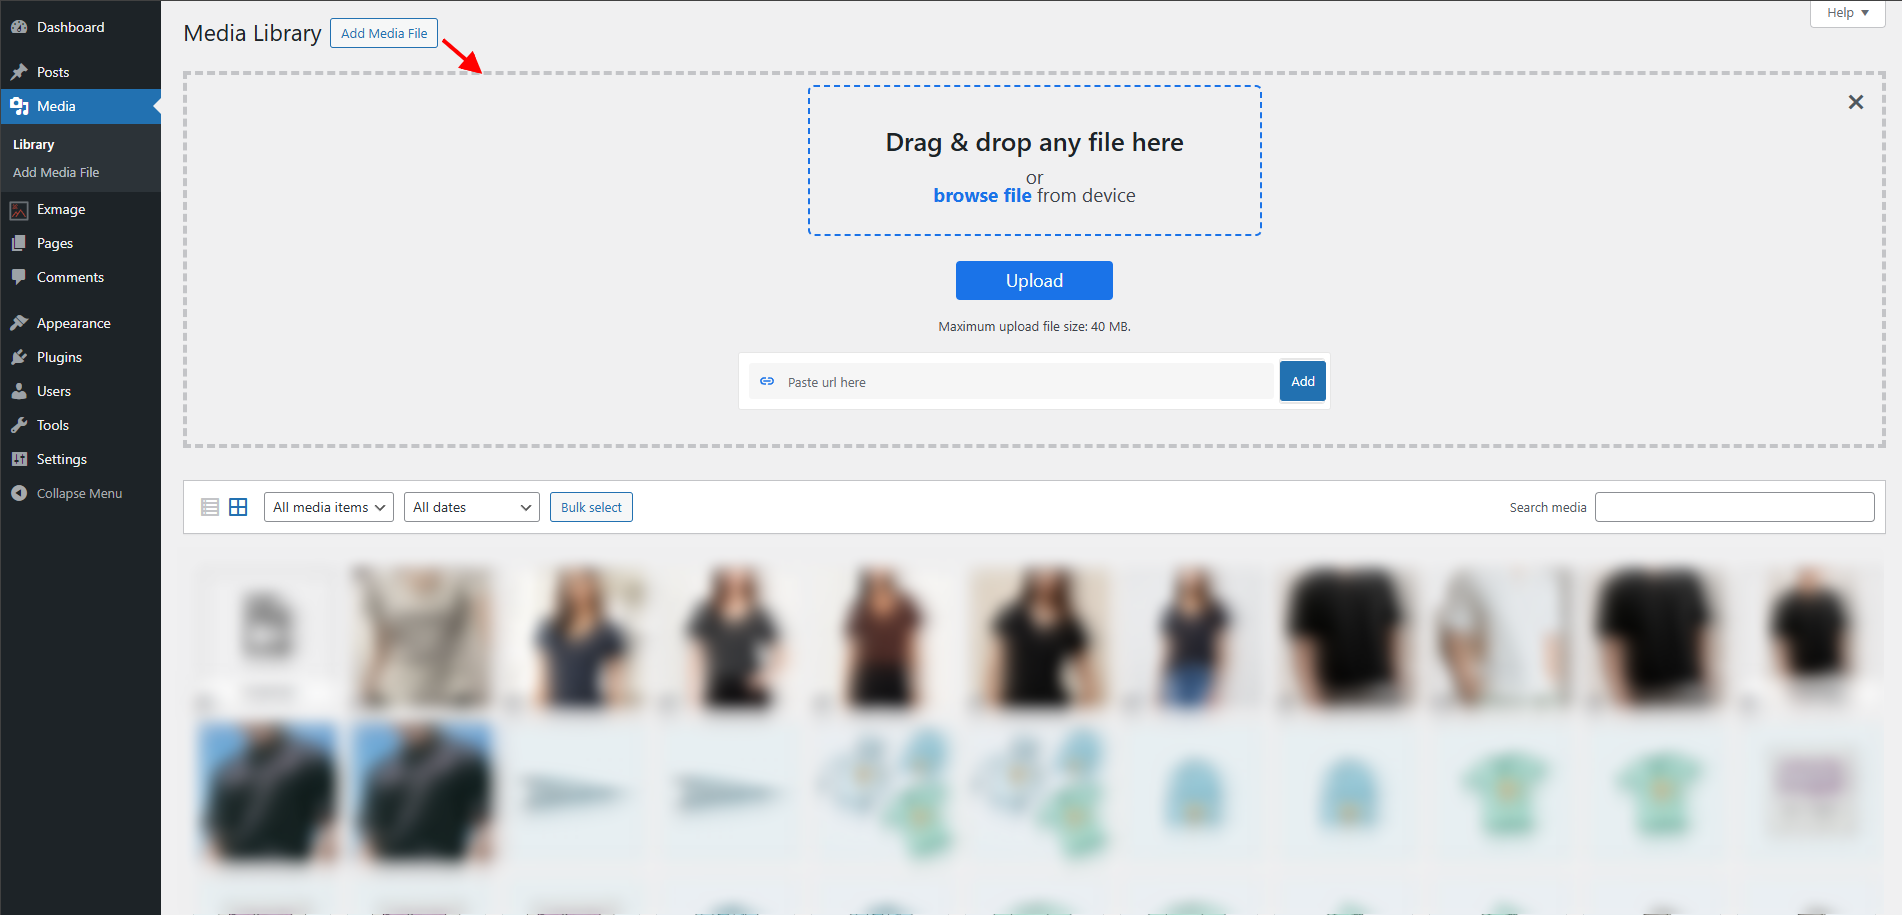
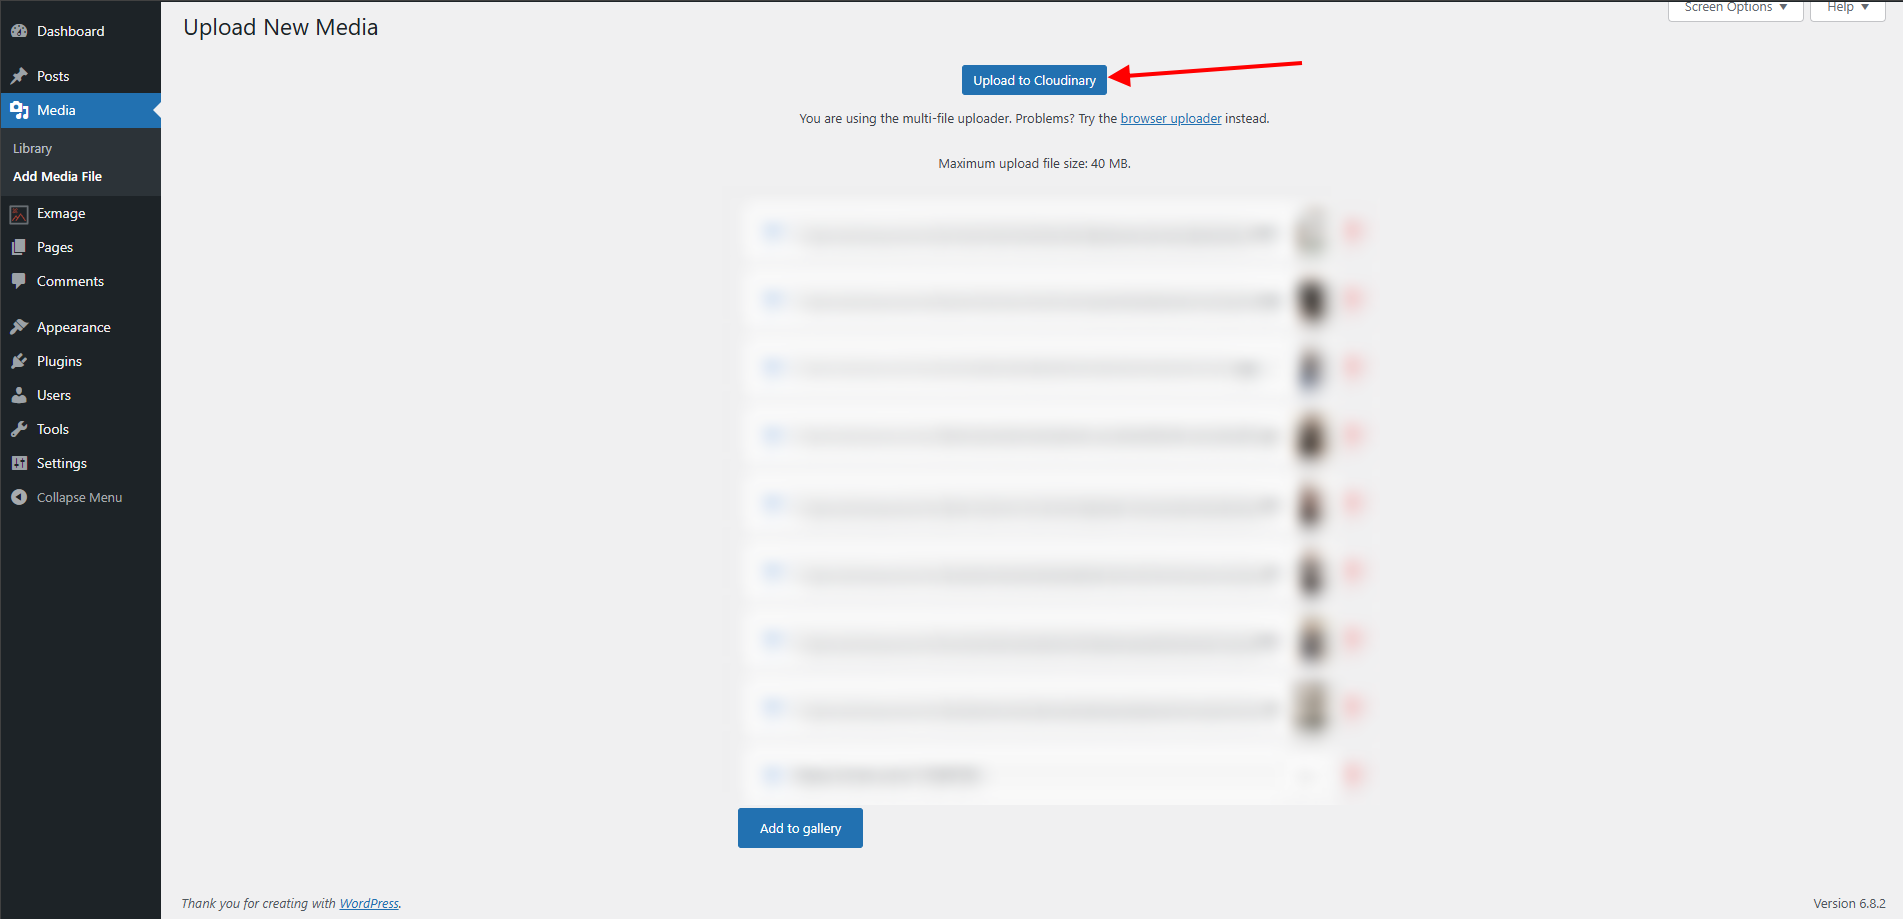
Add URLs on the Media Library: You can add multiple image/video URLs at once on below the File upload on Upload New Media page
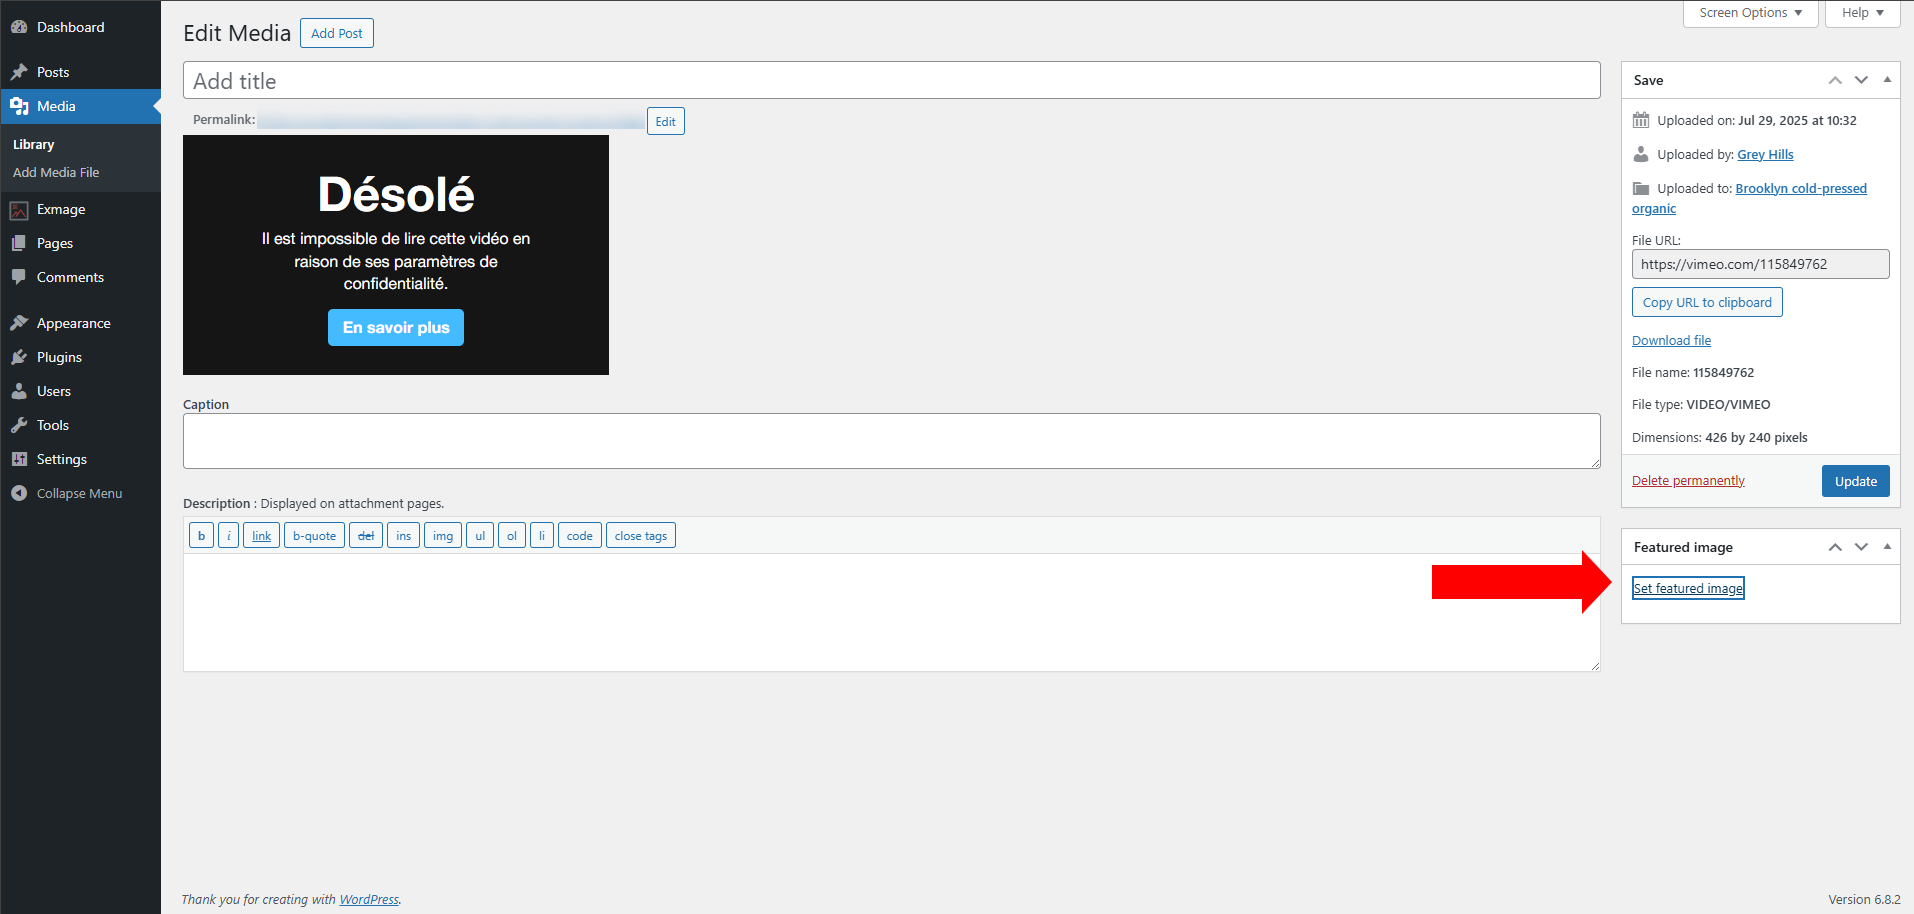
For videos, add featured images if you need in the media editing page:
After adding external files, they will be available under Media dashboard. You can:
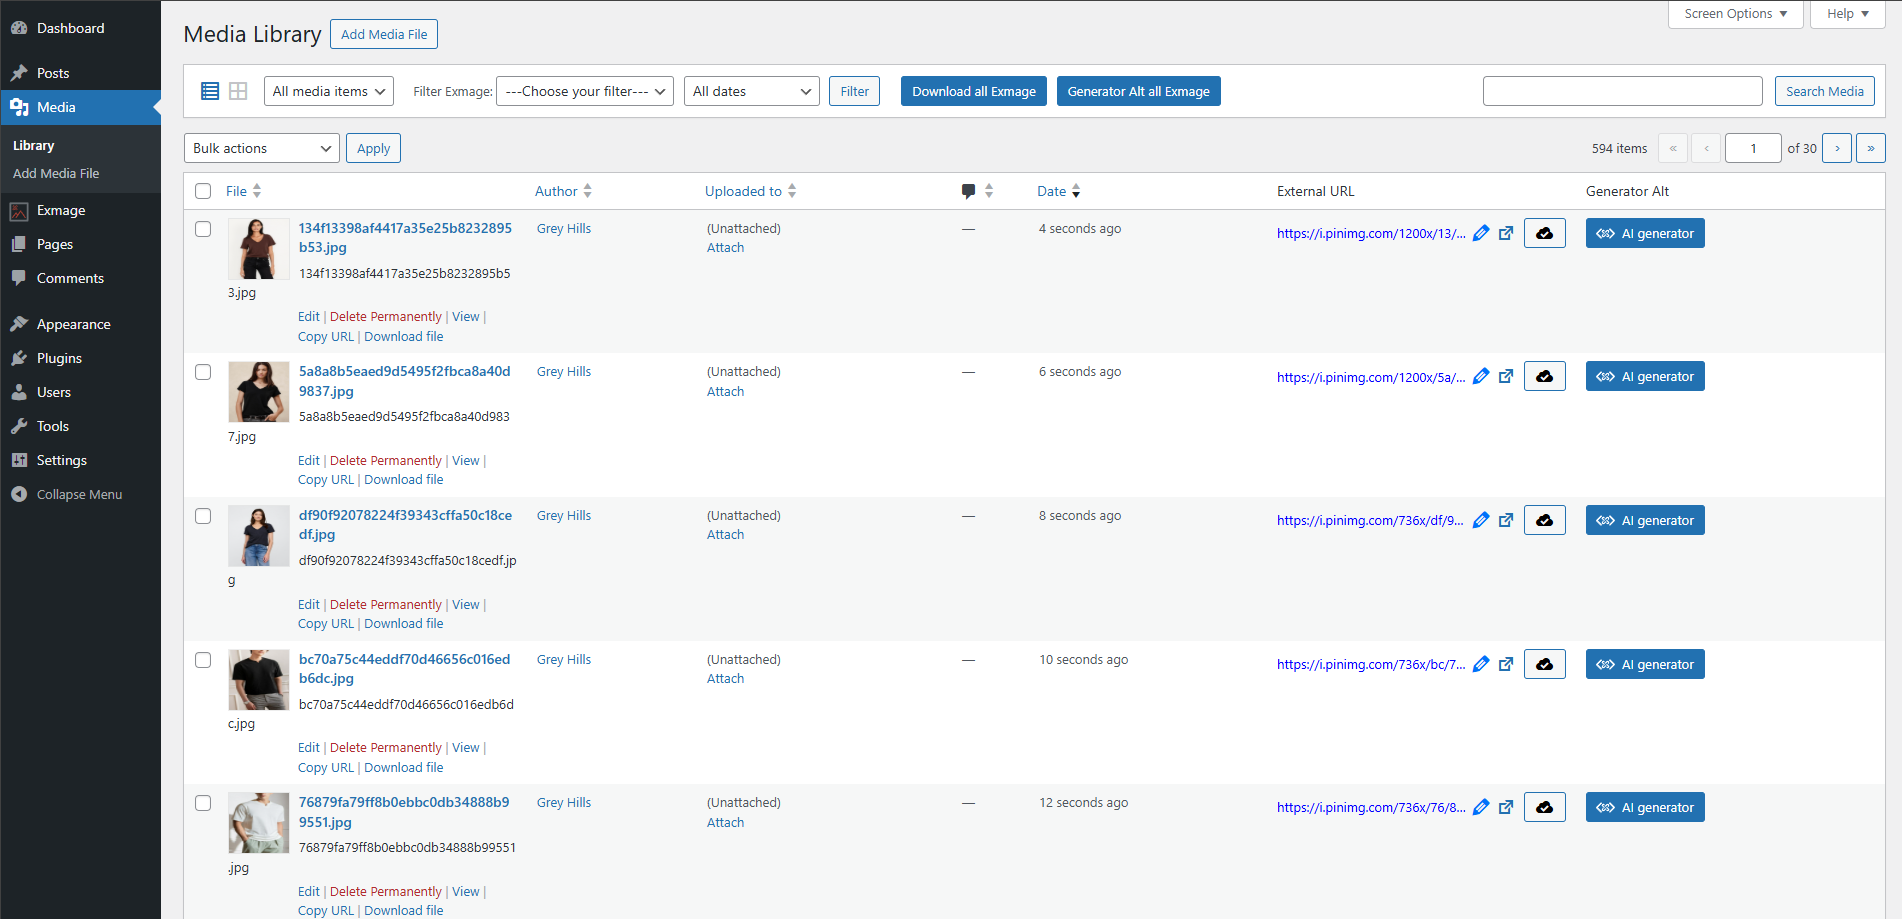
On the Media dashboard, you can:
Easily identify and manage images that are hosted externally:
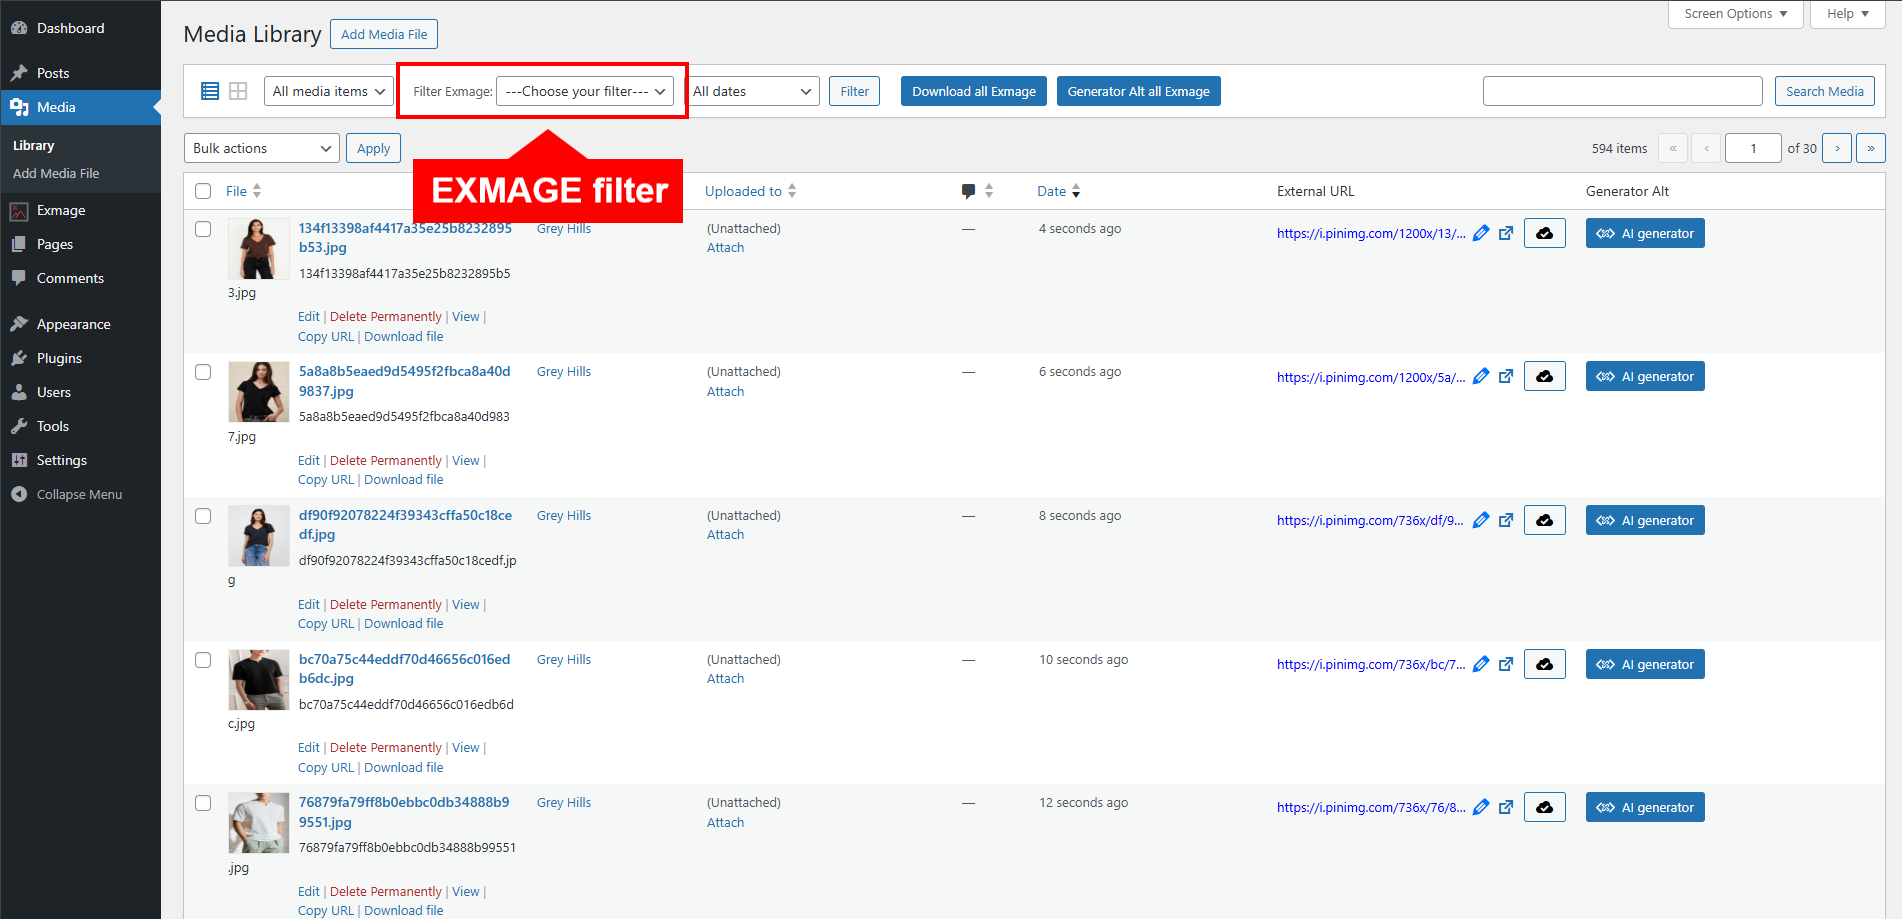
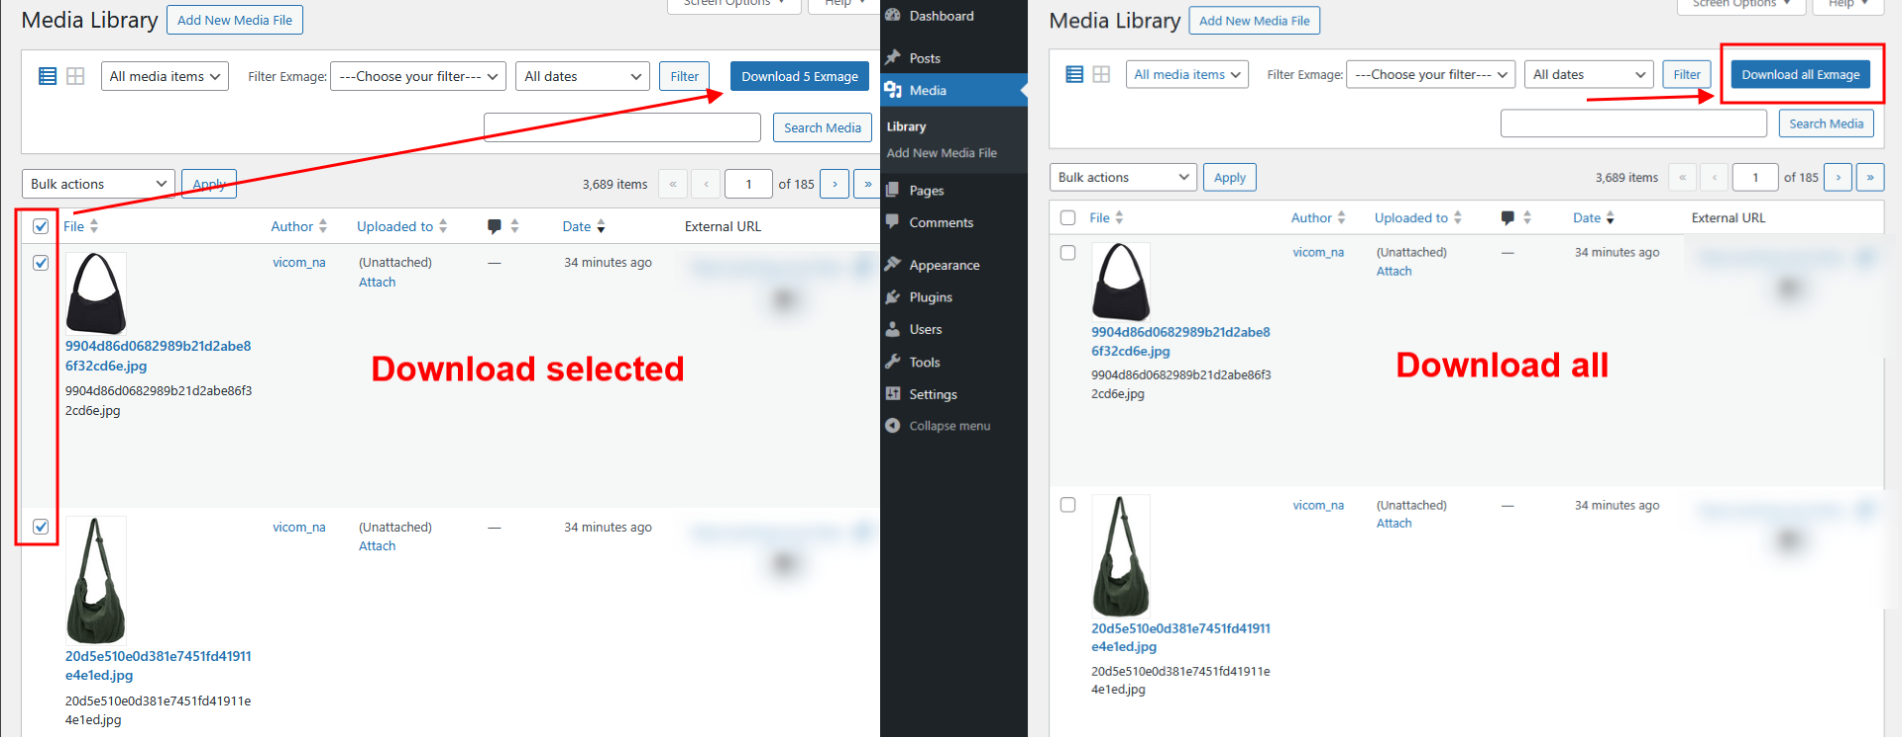
You can use this feature after filtering images. It saves time by downloading multiple external images at once:
In the Media Dashboard, select multiple external images or use the Select All option.
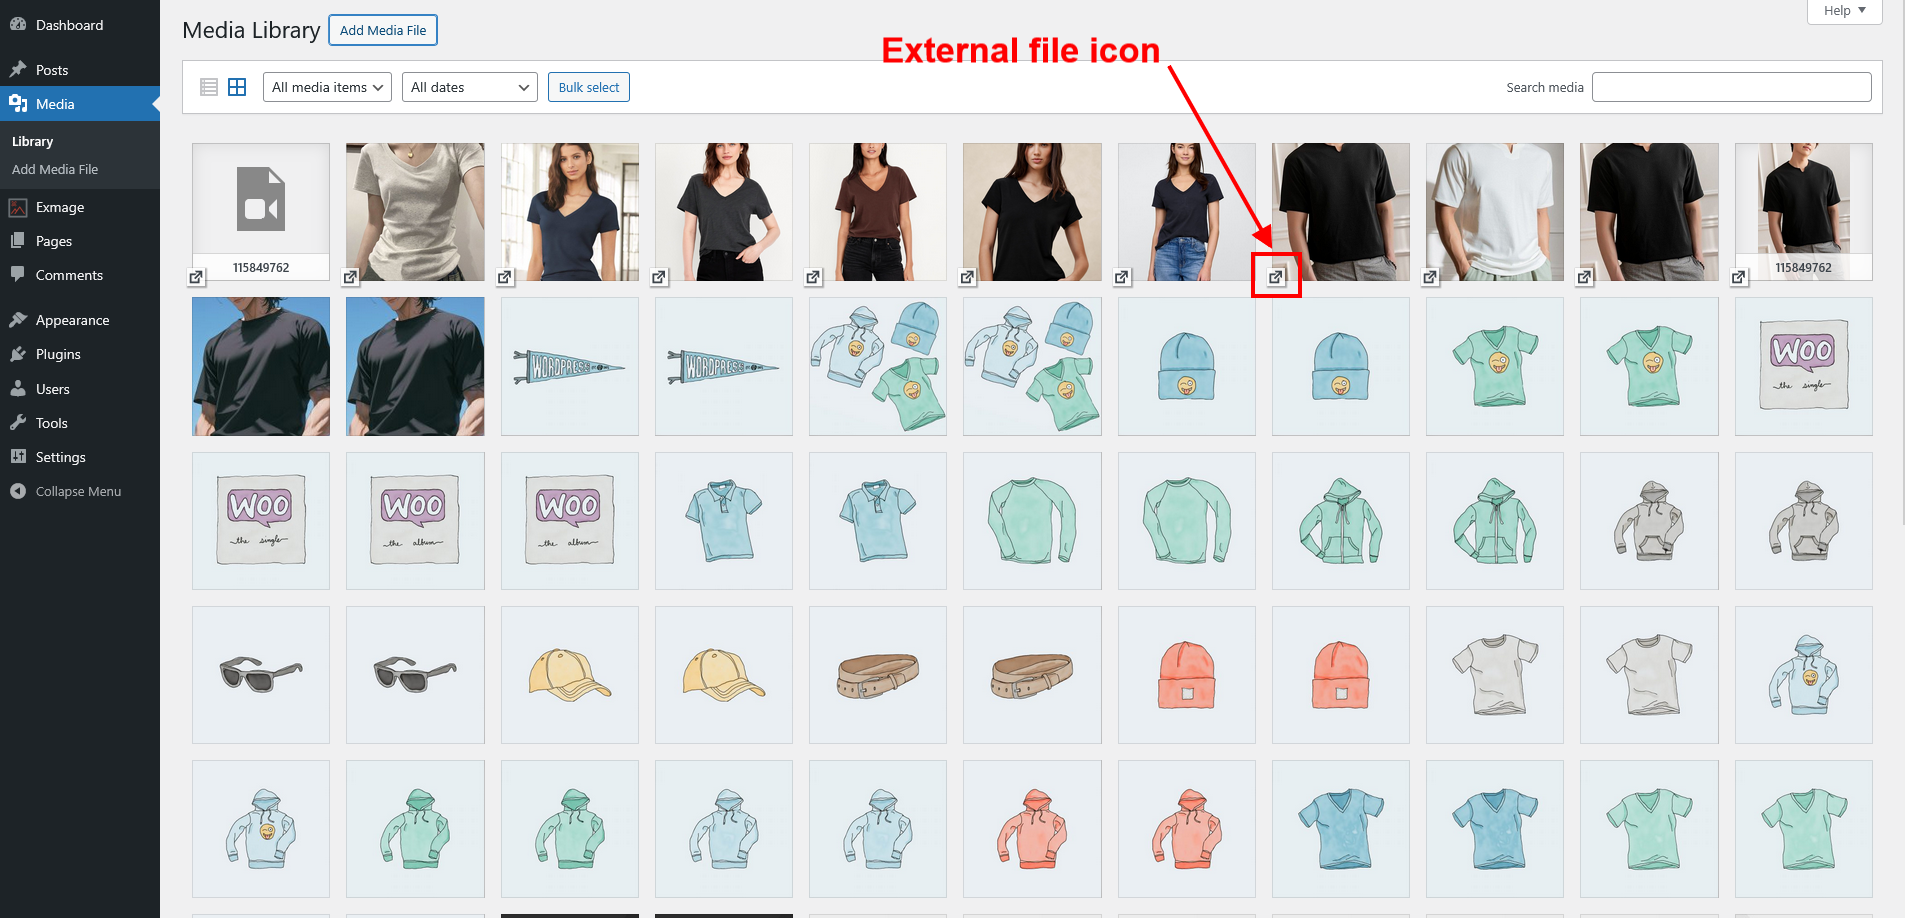
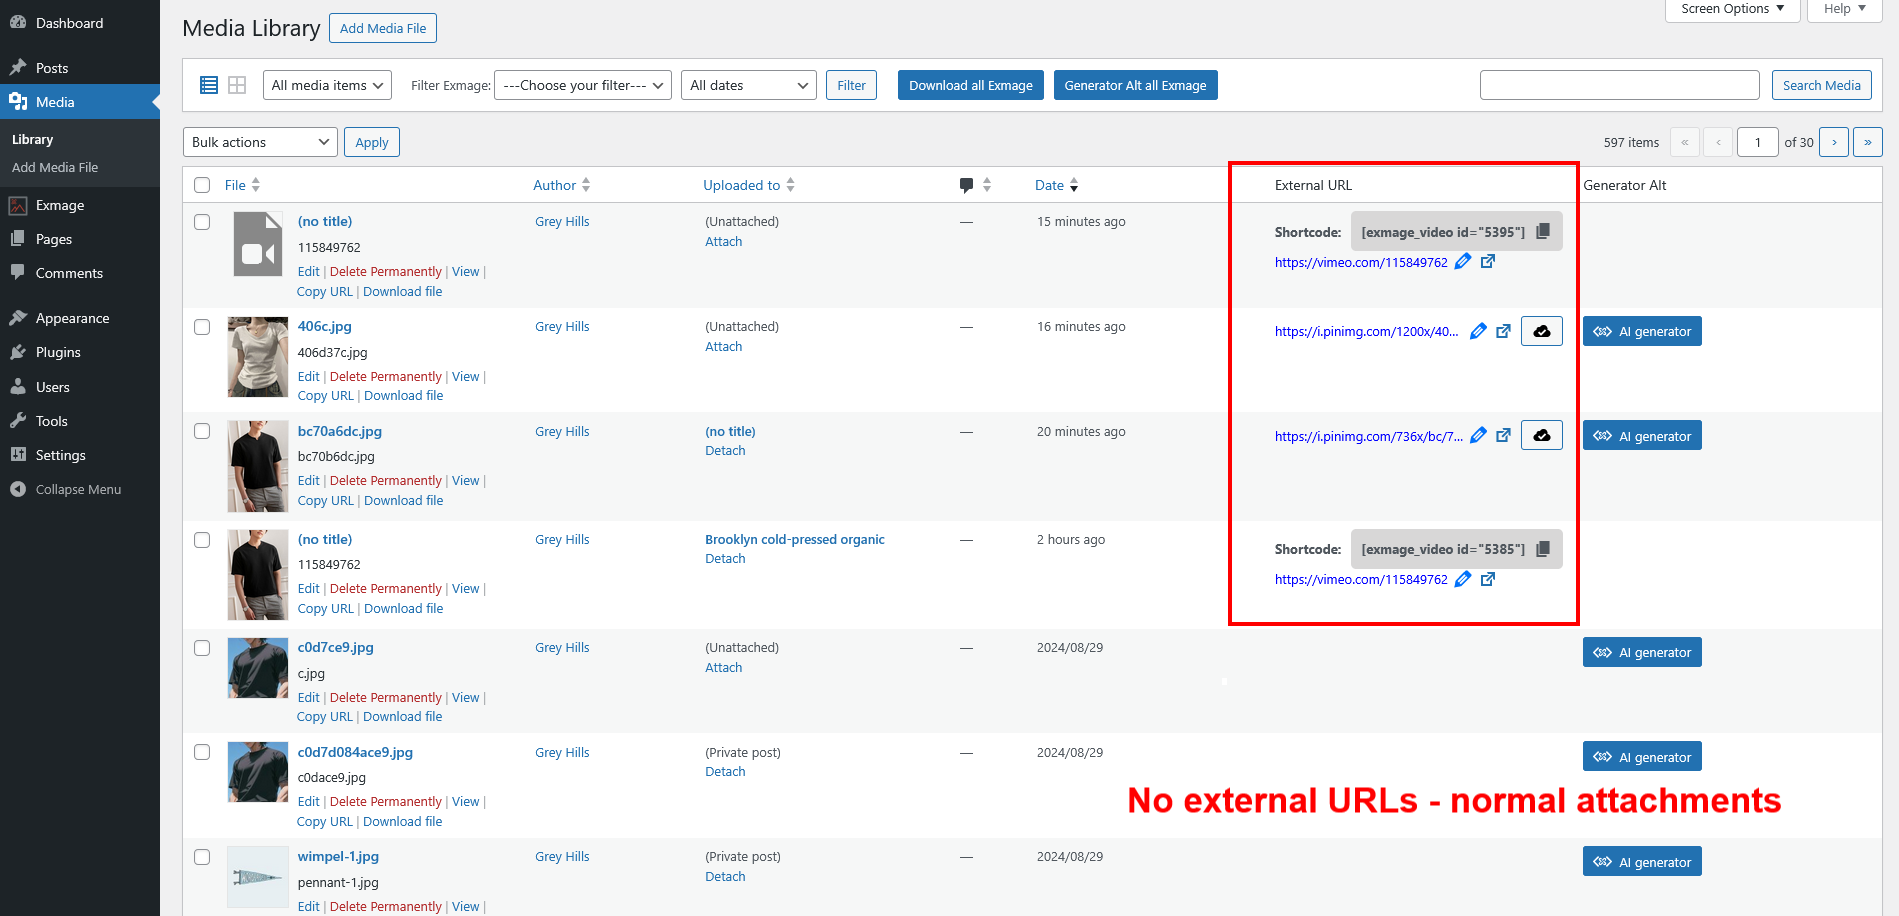
You can distinguish between external images and normal attachments by the icon.
In Grid view
In list view
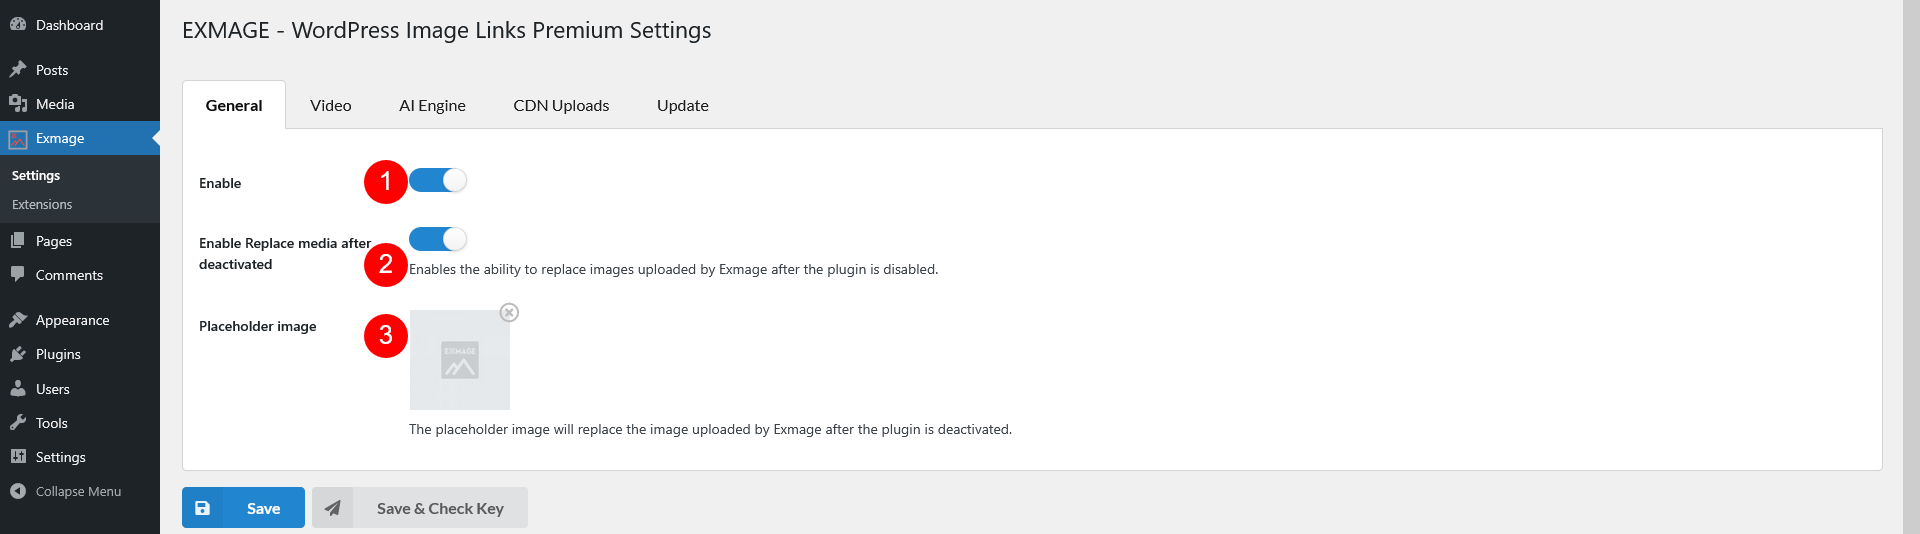
These settings control the core behavior of Exmage, especially how it handles media when the plugin is no longer active.
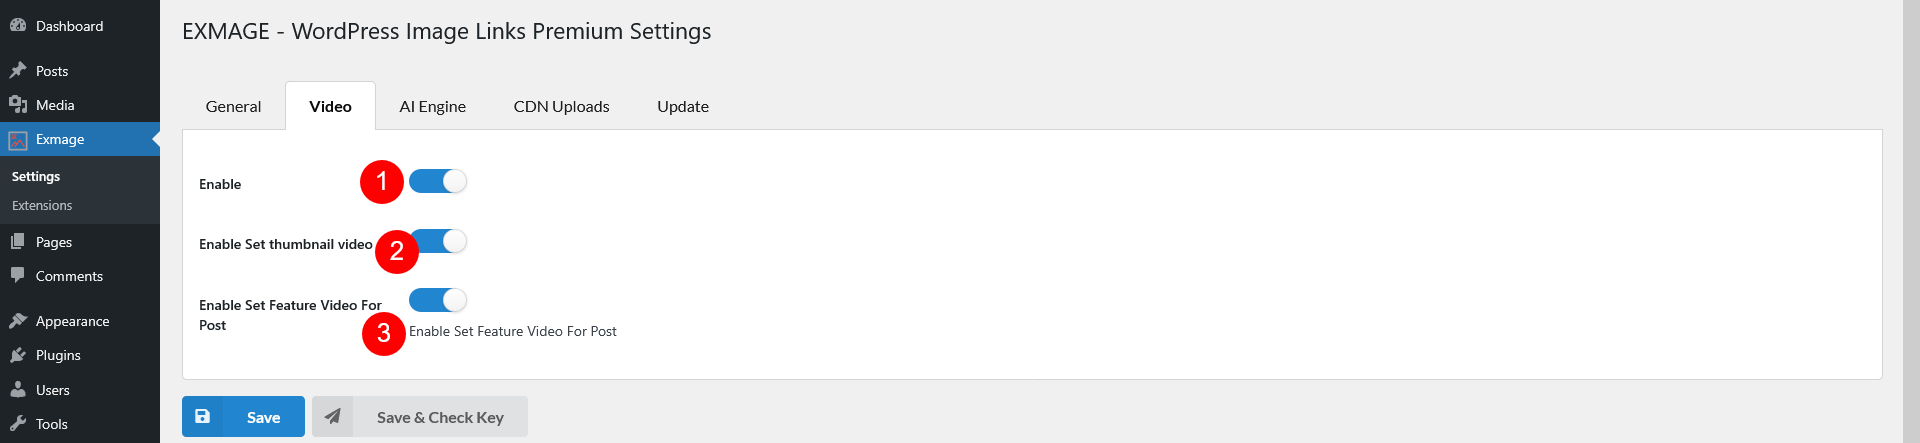
EXMAGE allows you to work with external videos by enhancing your media handling capabilities. These settings give you more control over how videos are displayed on your site.
This feature allows Exmage to automatically generate ALT text for images using AI models like ChatGPT (via OpenAI API) or Gemini (via Google AI API). It helps improve SEO, accessibility, and image context by creating meaningful ALT descriptions based on the image content and your custom settings.
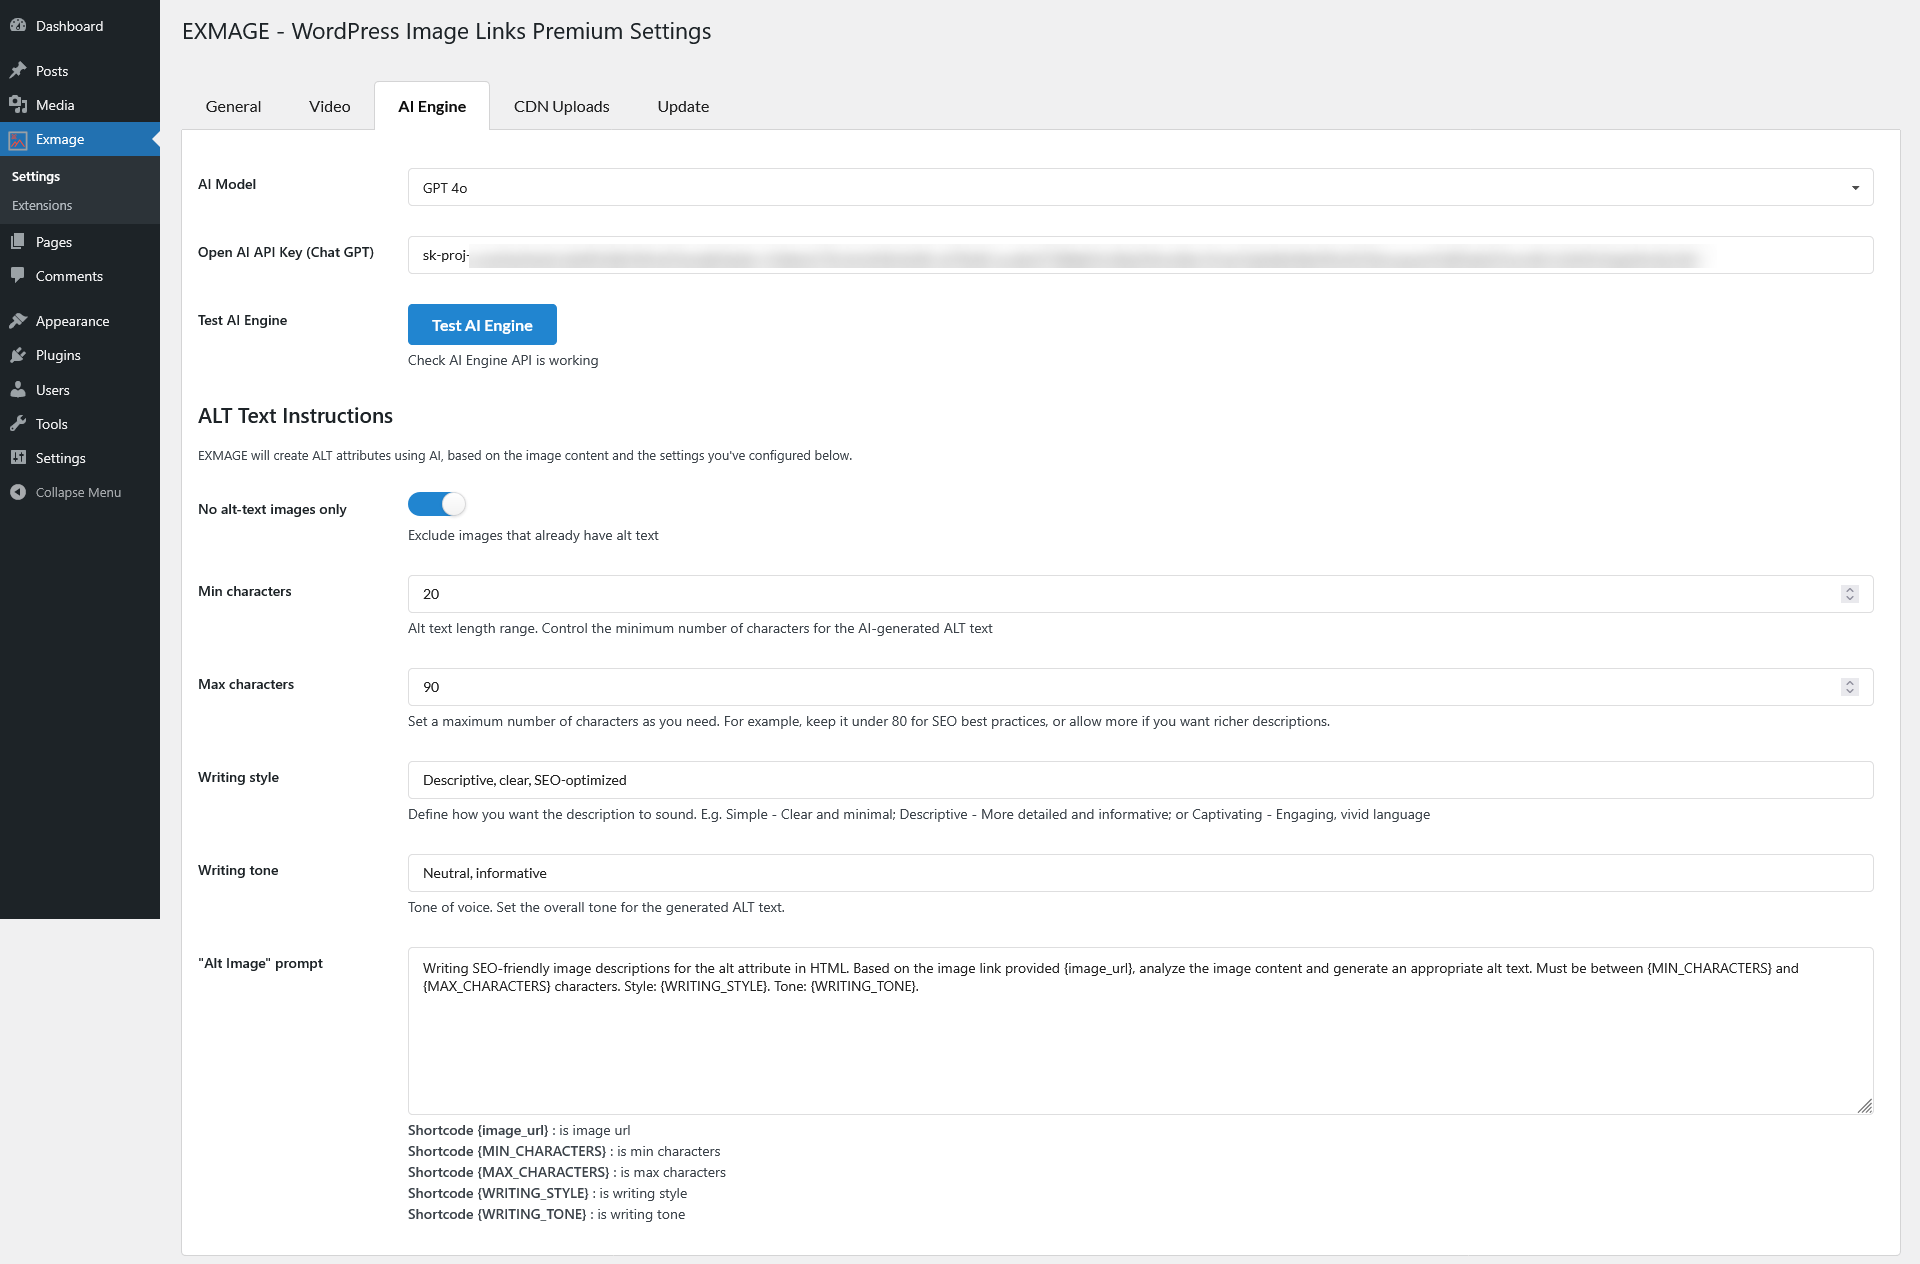
ALT Text Instructions
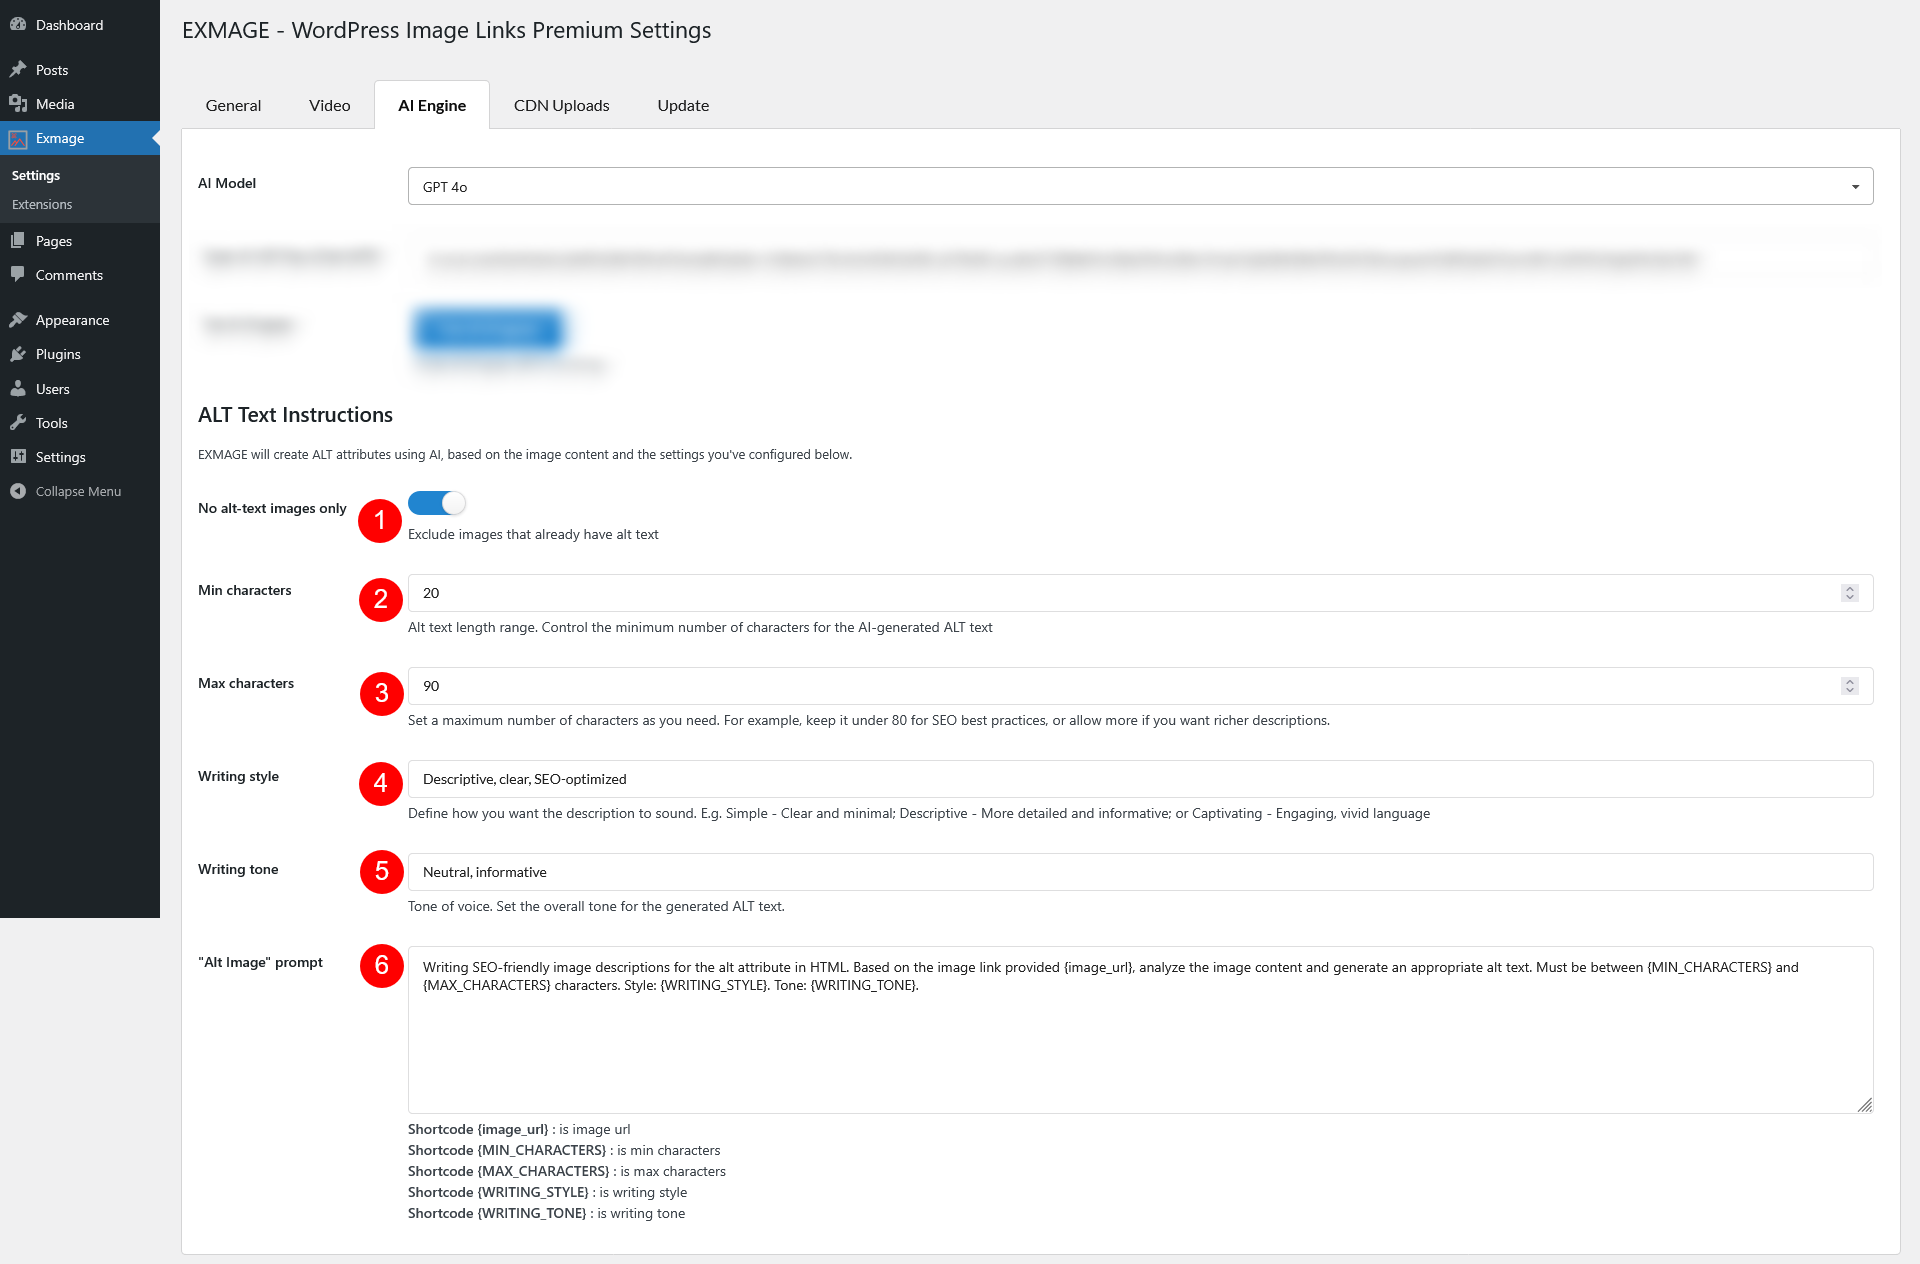
EXMAGE will create ALT attributes using AI, based on the image content and the settings you’ve configured below. These settings let you fine-tune the output of the AI-generated ALT text:
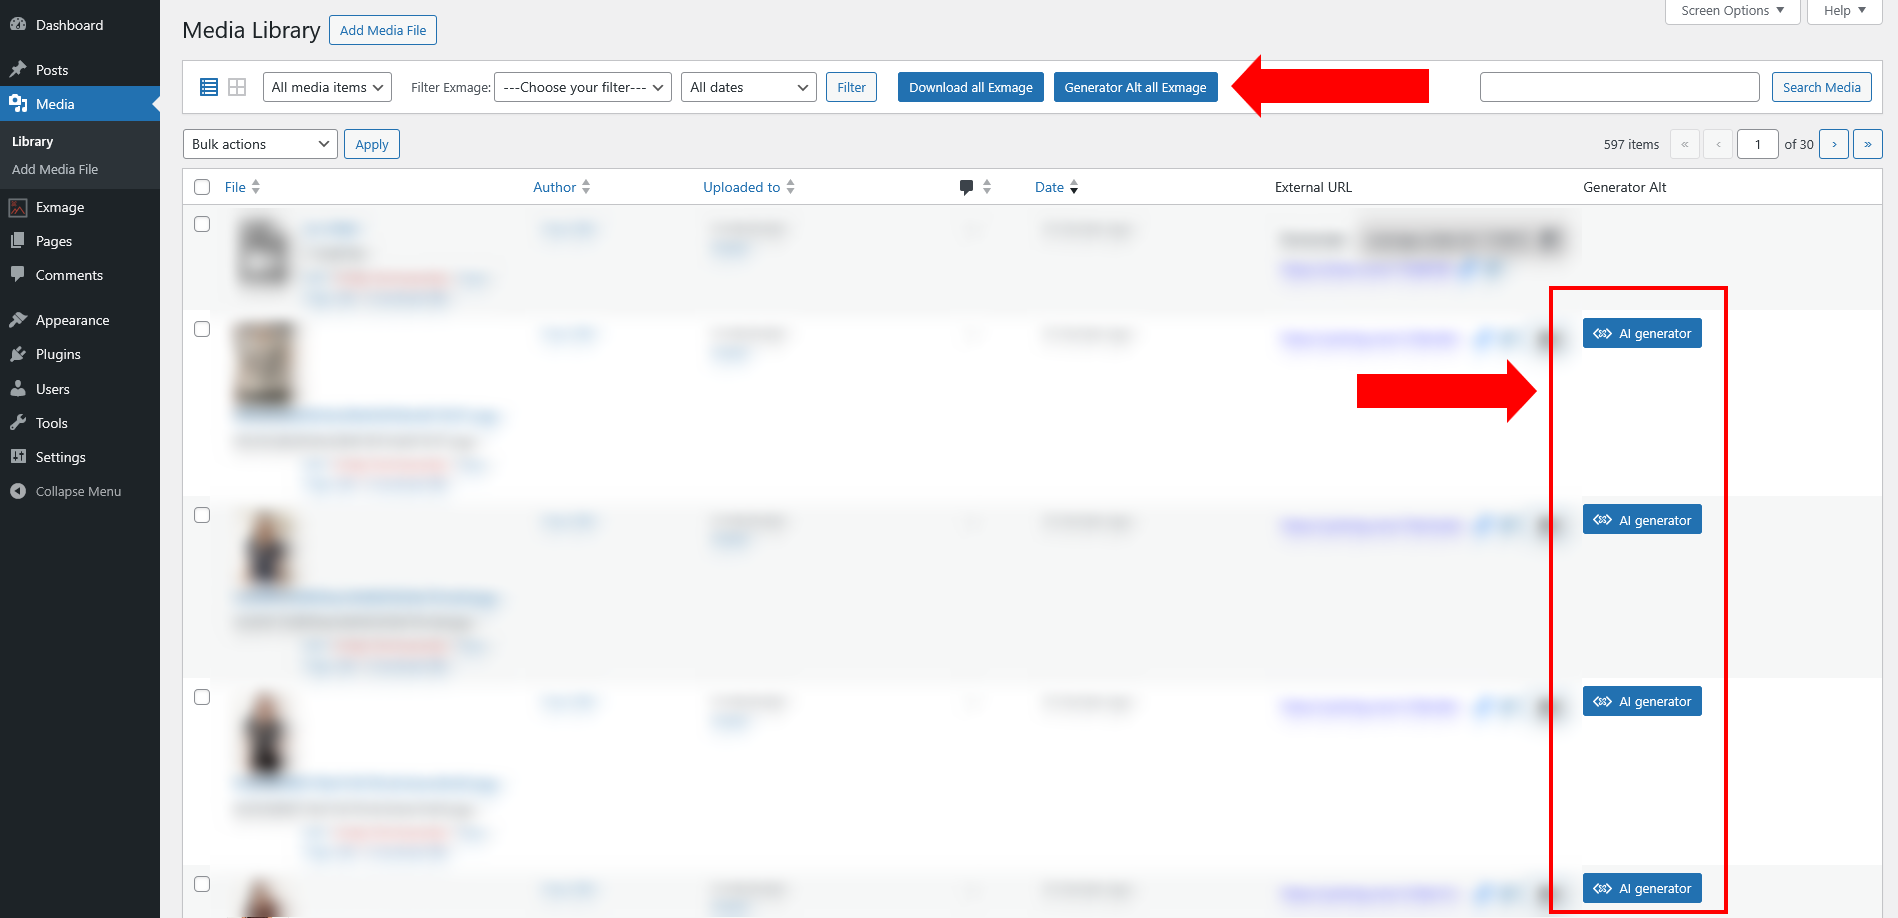
After configuring, you can start generating alt text for your media files as needed. Note that, to use the “Generator Alt all Exmage”, you have to select at least one media file.
This feature replaces WordPress’s default upload behavior. Instead of uploading your media files to your server, EXMAGE will automatically upload them to a selected third-party CDN. This reduces your server’s storage and workload, speeds up delivery, and improves global performance by serving images from CDN endpoints.
You can choose from 3 supported CDNs:
1. Cloudinary: Cloudinary is a popular image CDN with built-in optimization and transformation features.
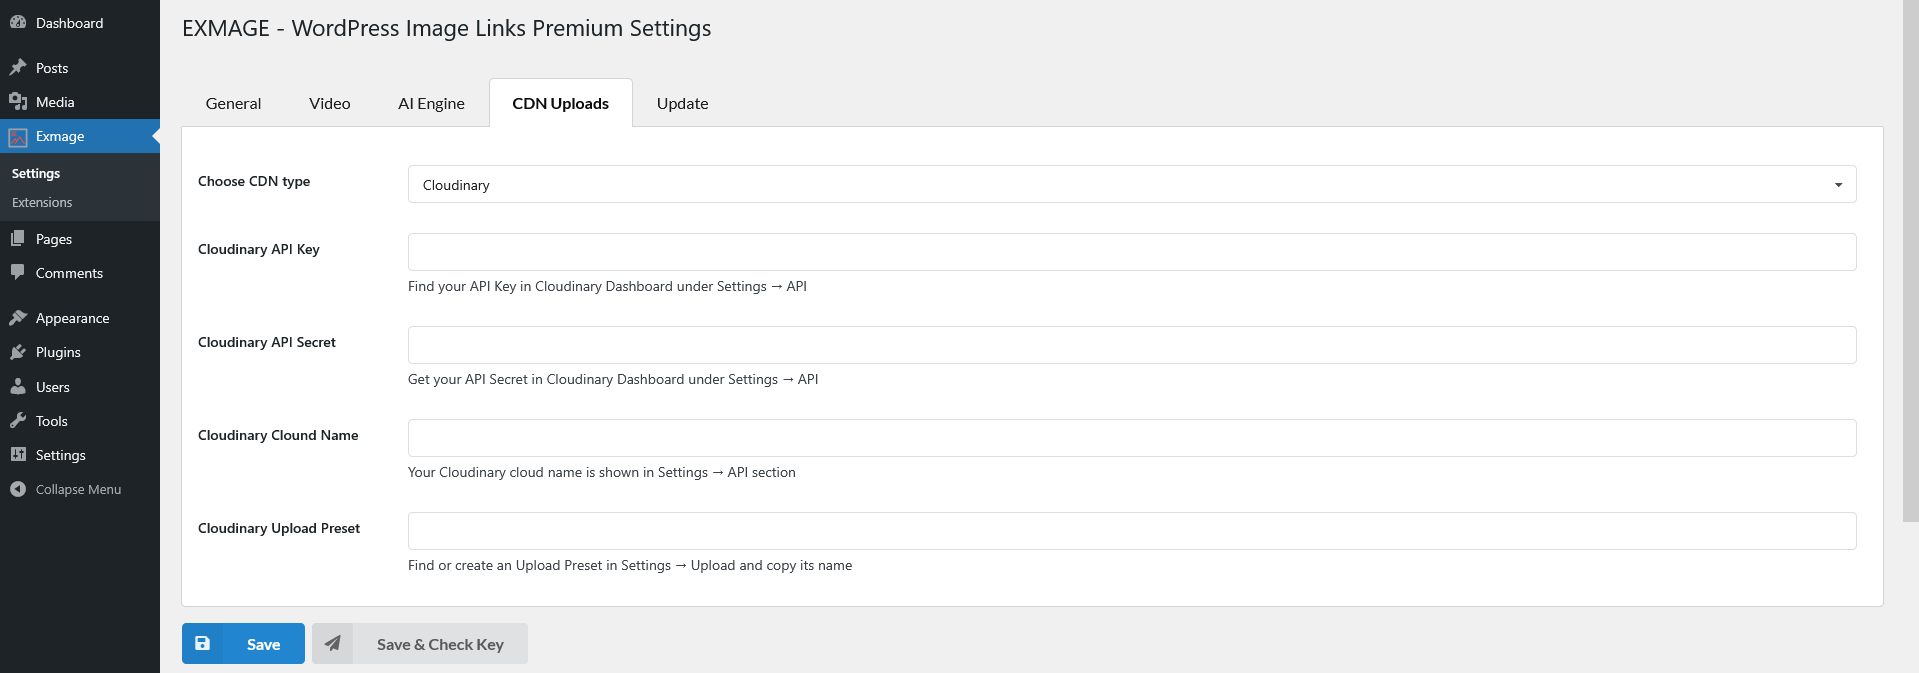
Required Credentials:
How to Get These:
2. Cloudflare: This option uses Cloudflare R2 with direct image delivery via Cloudflare’s CDN.
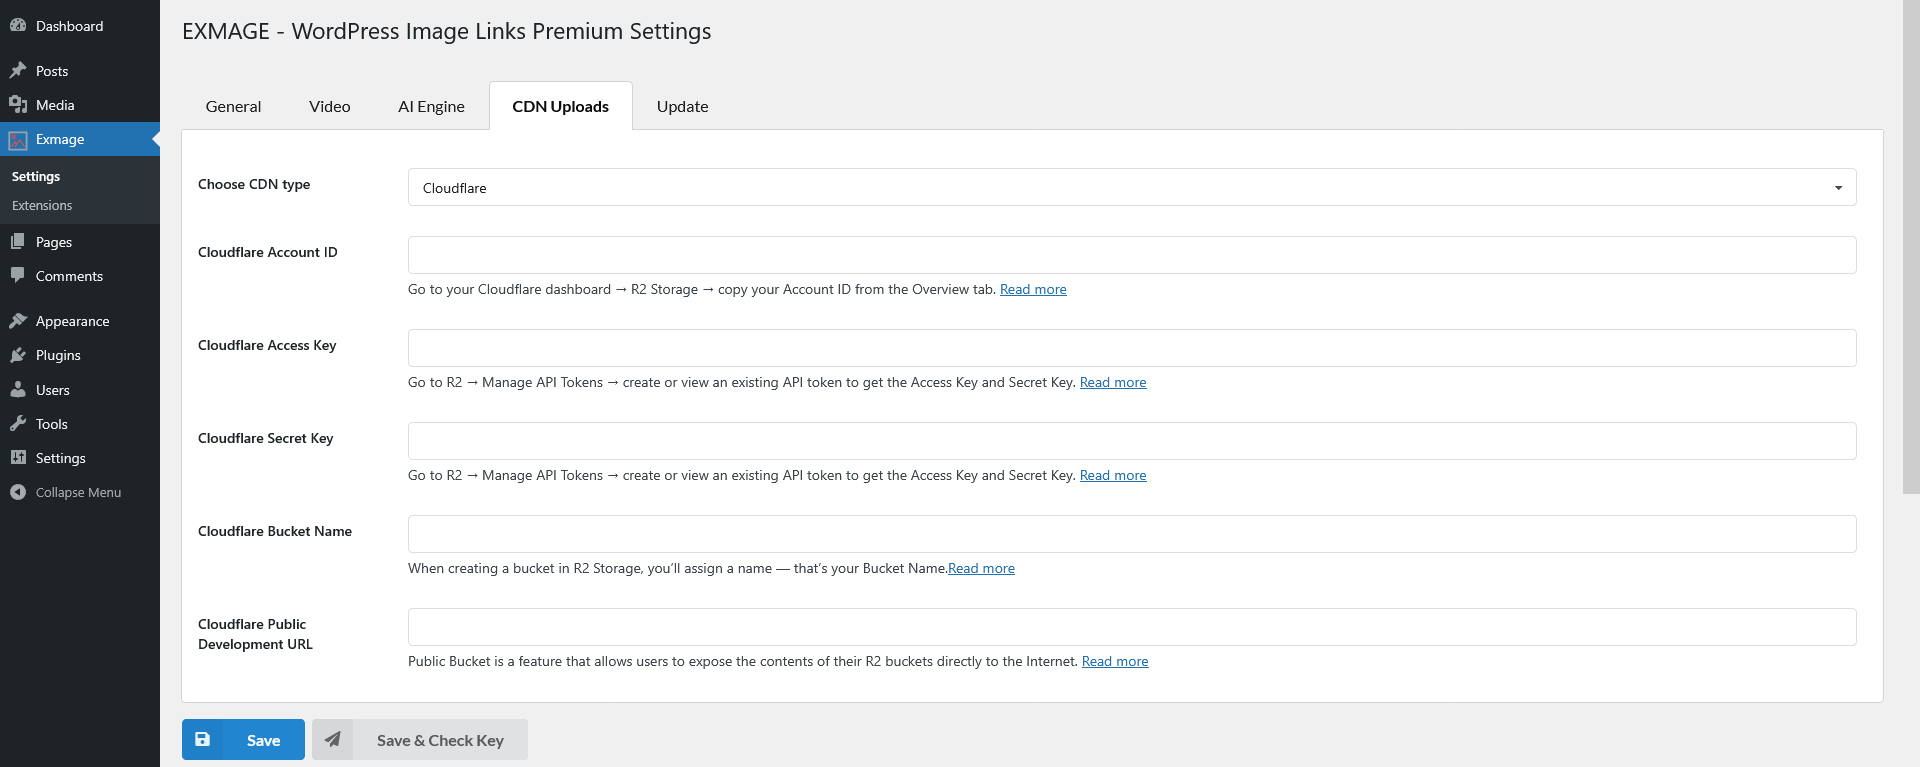
Required Credentials:
How to Get These:
3. AWS Amazon: Amazon S3 is a powerful and scalable storage service, and EXMAGE can upload directly to your S3 bucket.
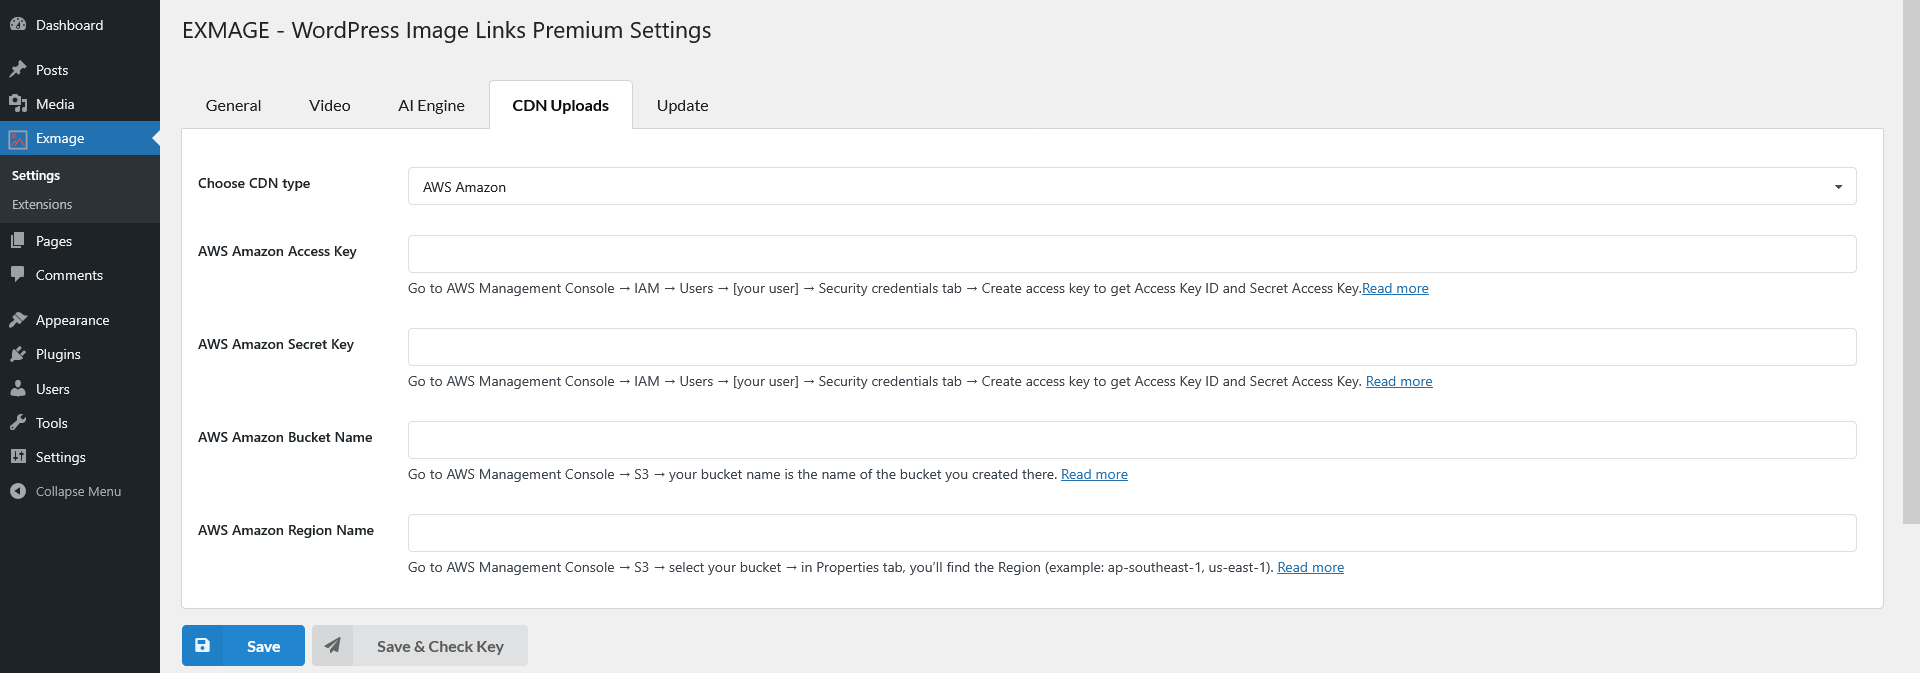
Required Credentials:
How to Get These:
After configuring all the required creds, you can upload media to the selected CDN
This plugin is tested compatibility some plugins:
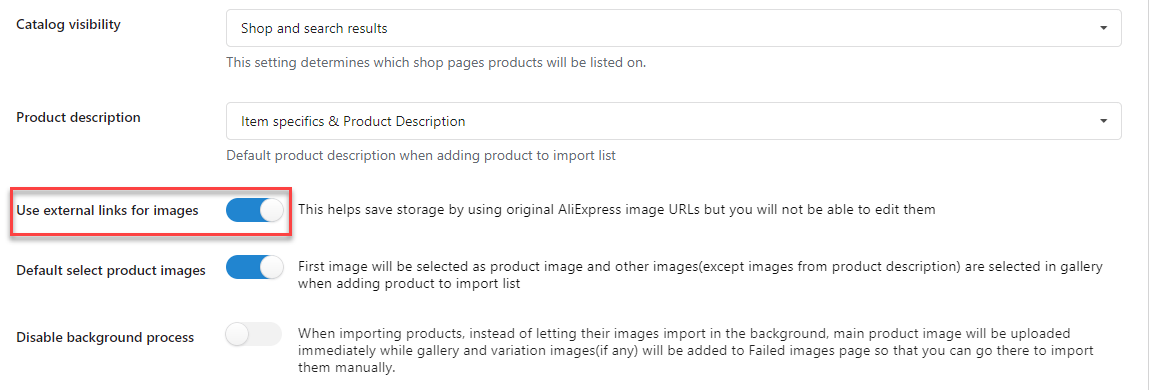
ALD – Aliexpress Dropshipping and Fulfillment for WooCommerce By VillaTheme.
When activating both plugins, the option “Use external links for image” will appear in the Product tab of the ALD plugin to let you choose. If you enable it, the original AliExpress image URL is saved on that external storage plugin, which helps to save your website storage space.