- Start
- FILE INCLUDES
- INSTRUCTION
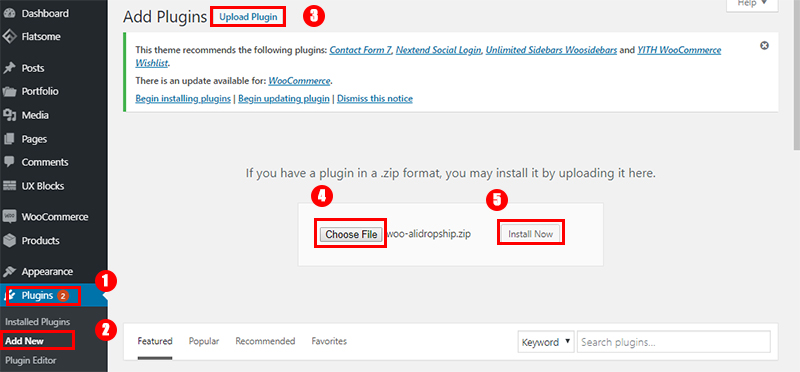
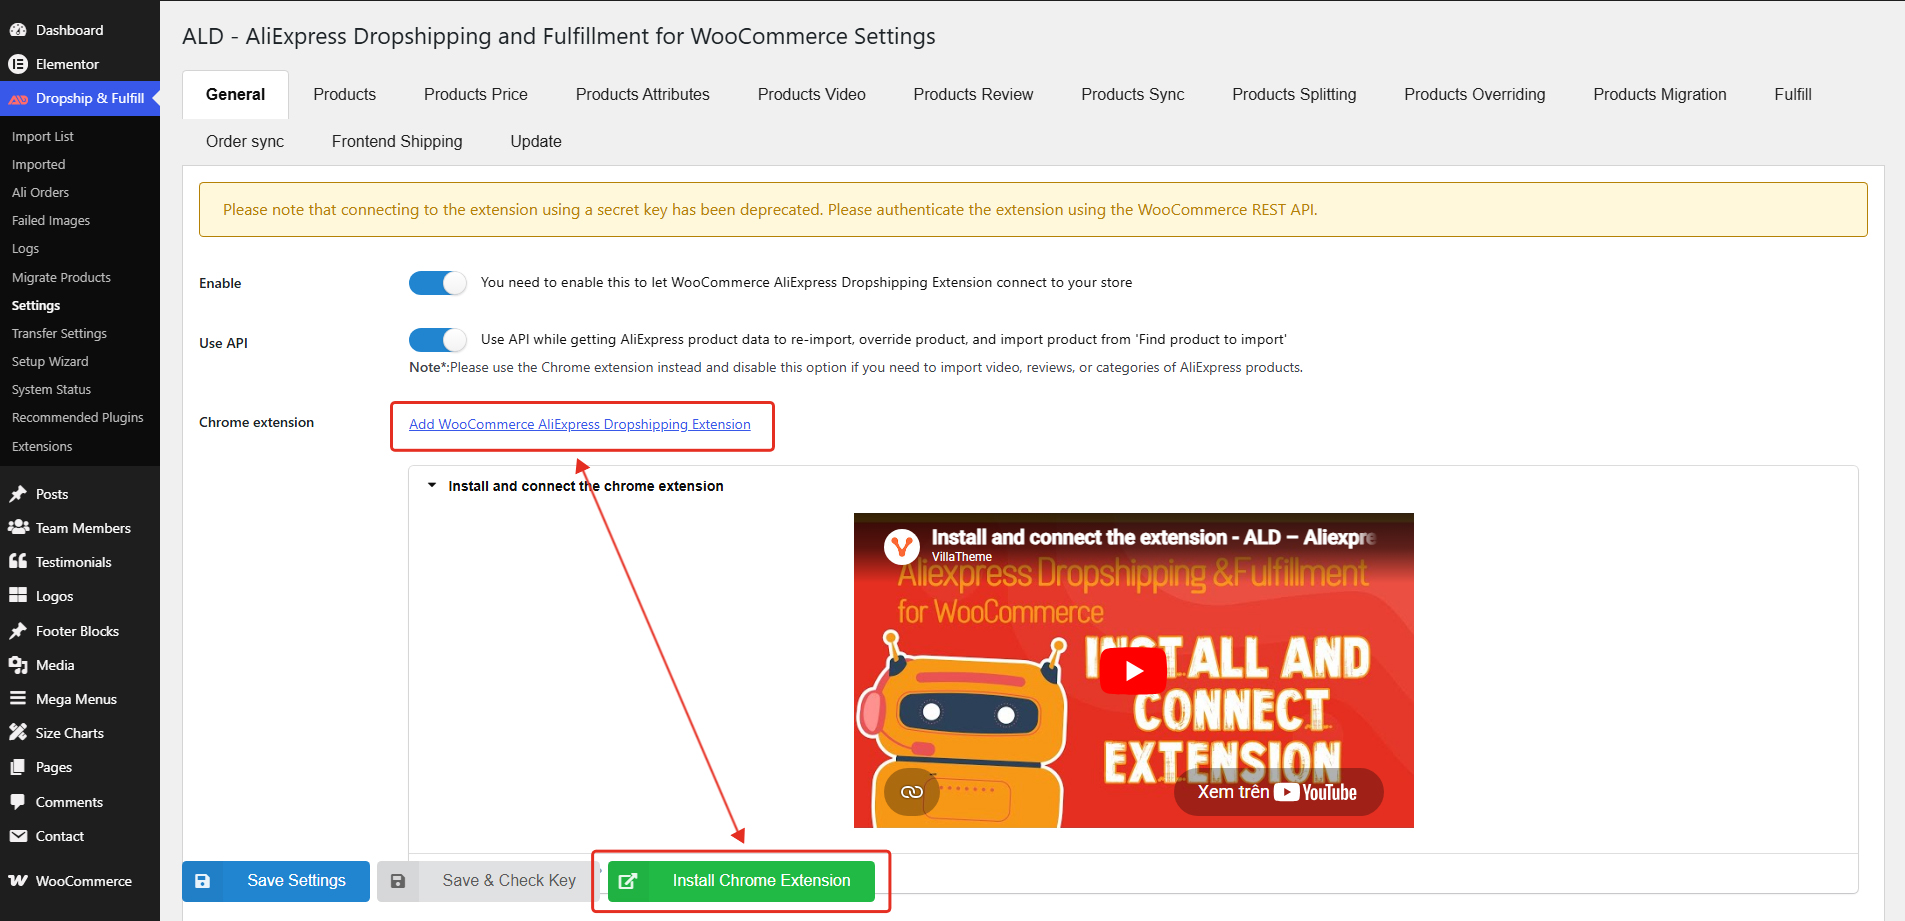
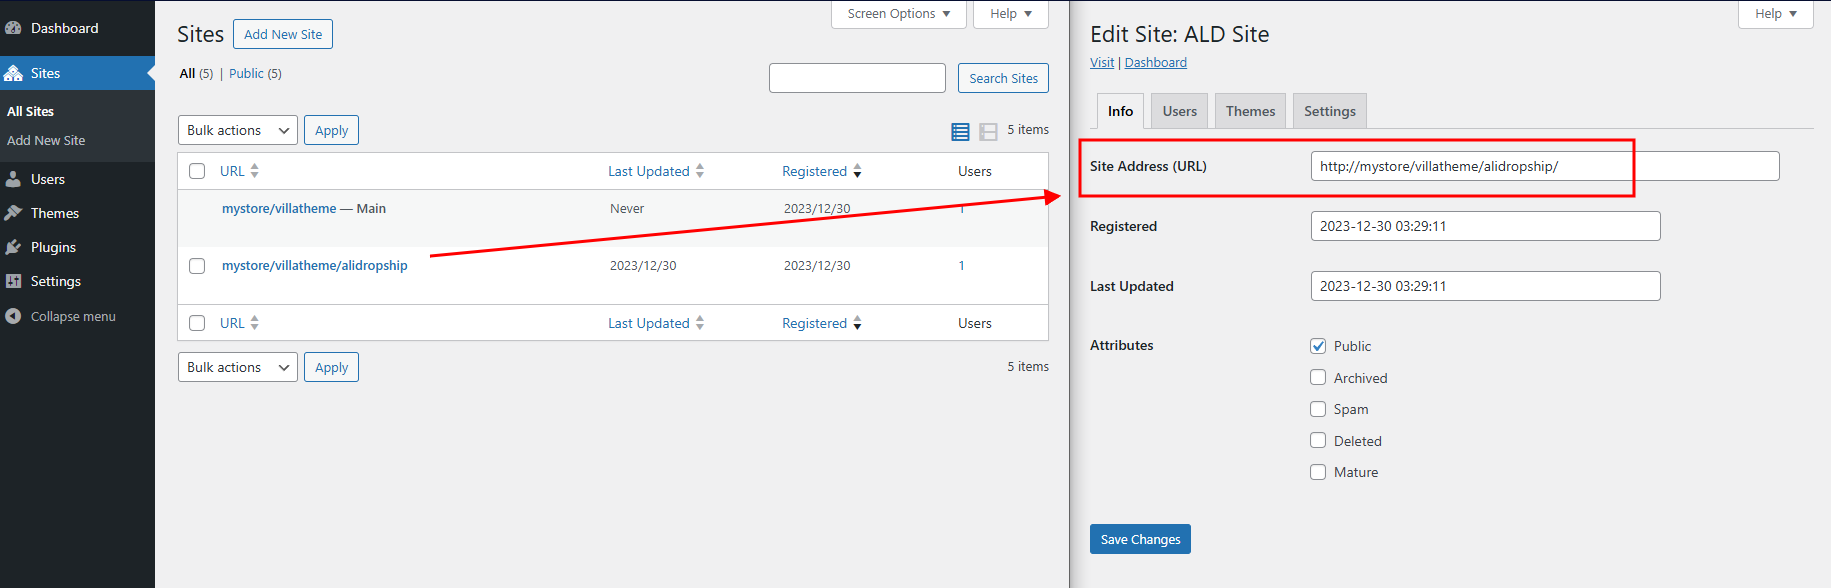
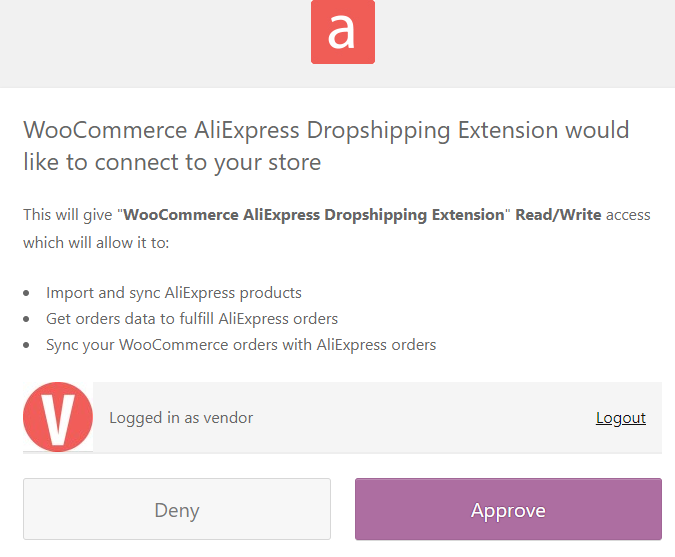
- INSTALLATION
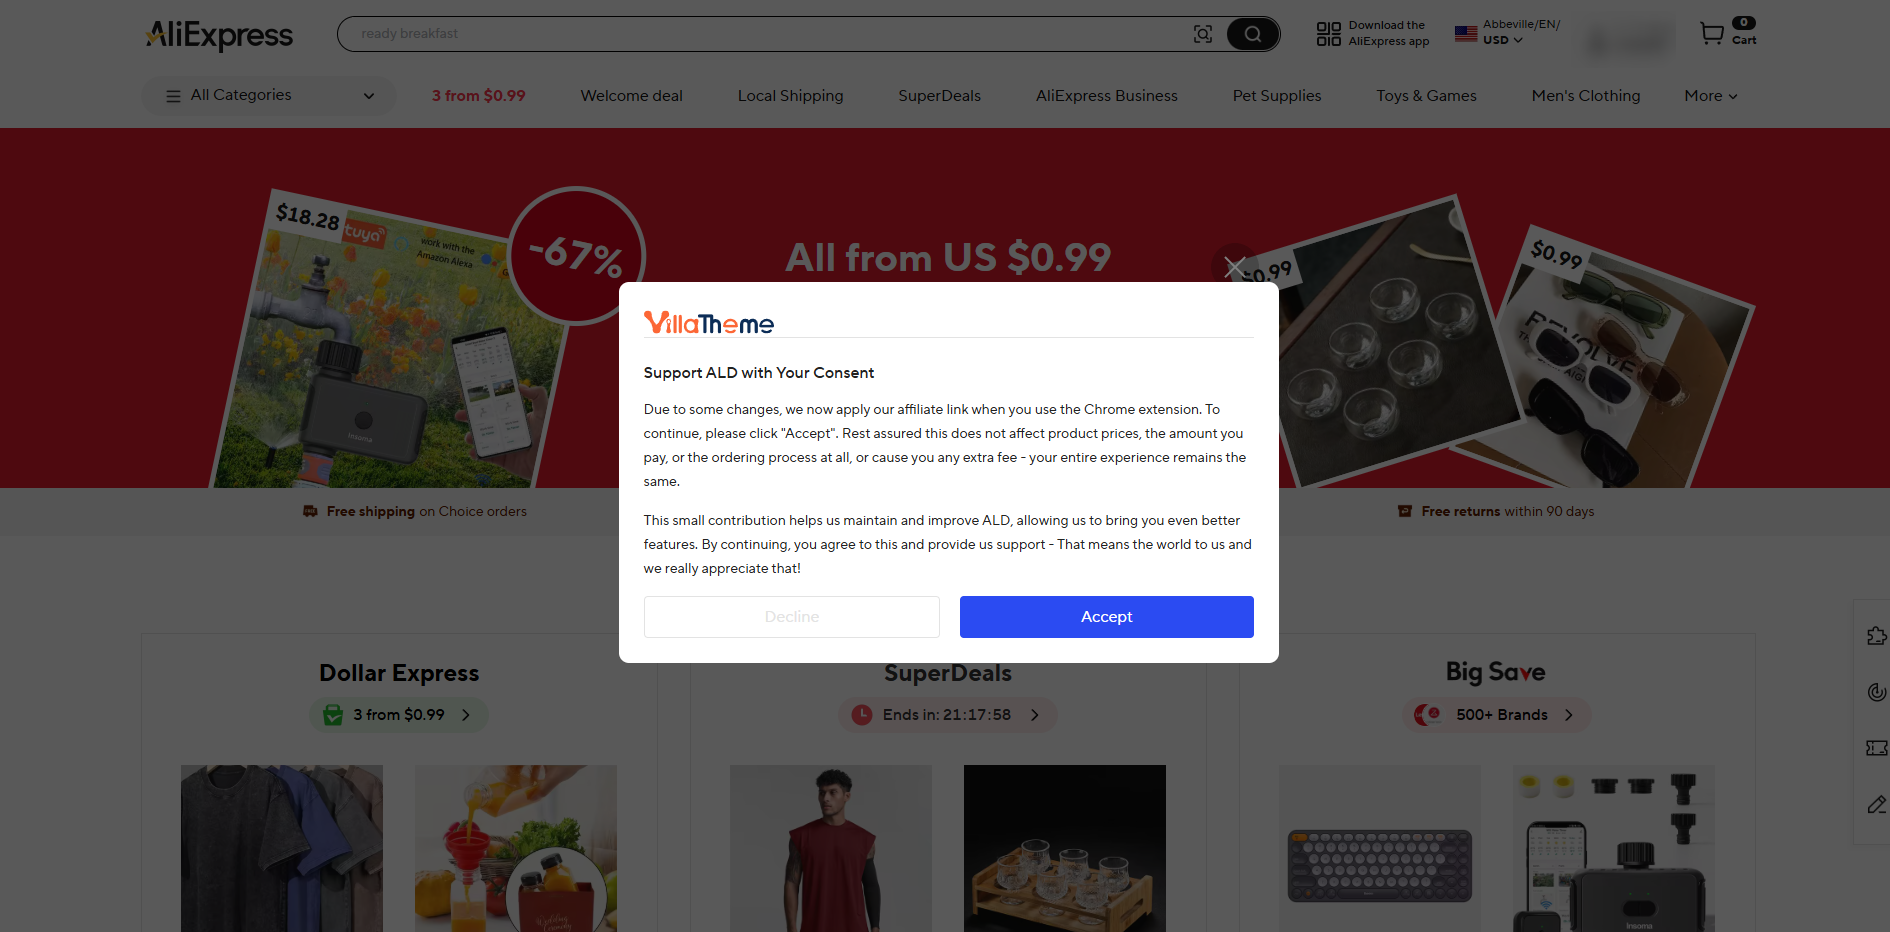
- HOW TO USE ALD
- IMPORTANT NOTE
- HOW DOES IT WORK
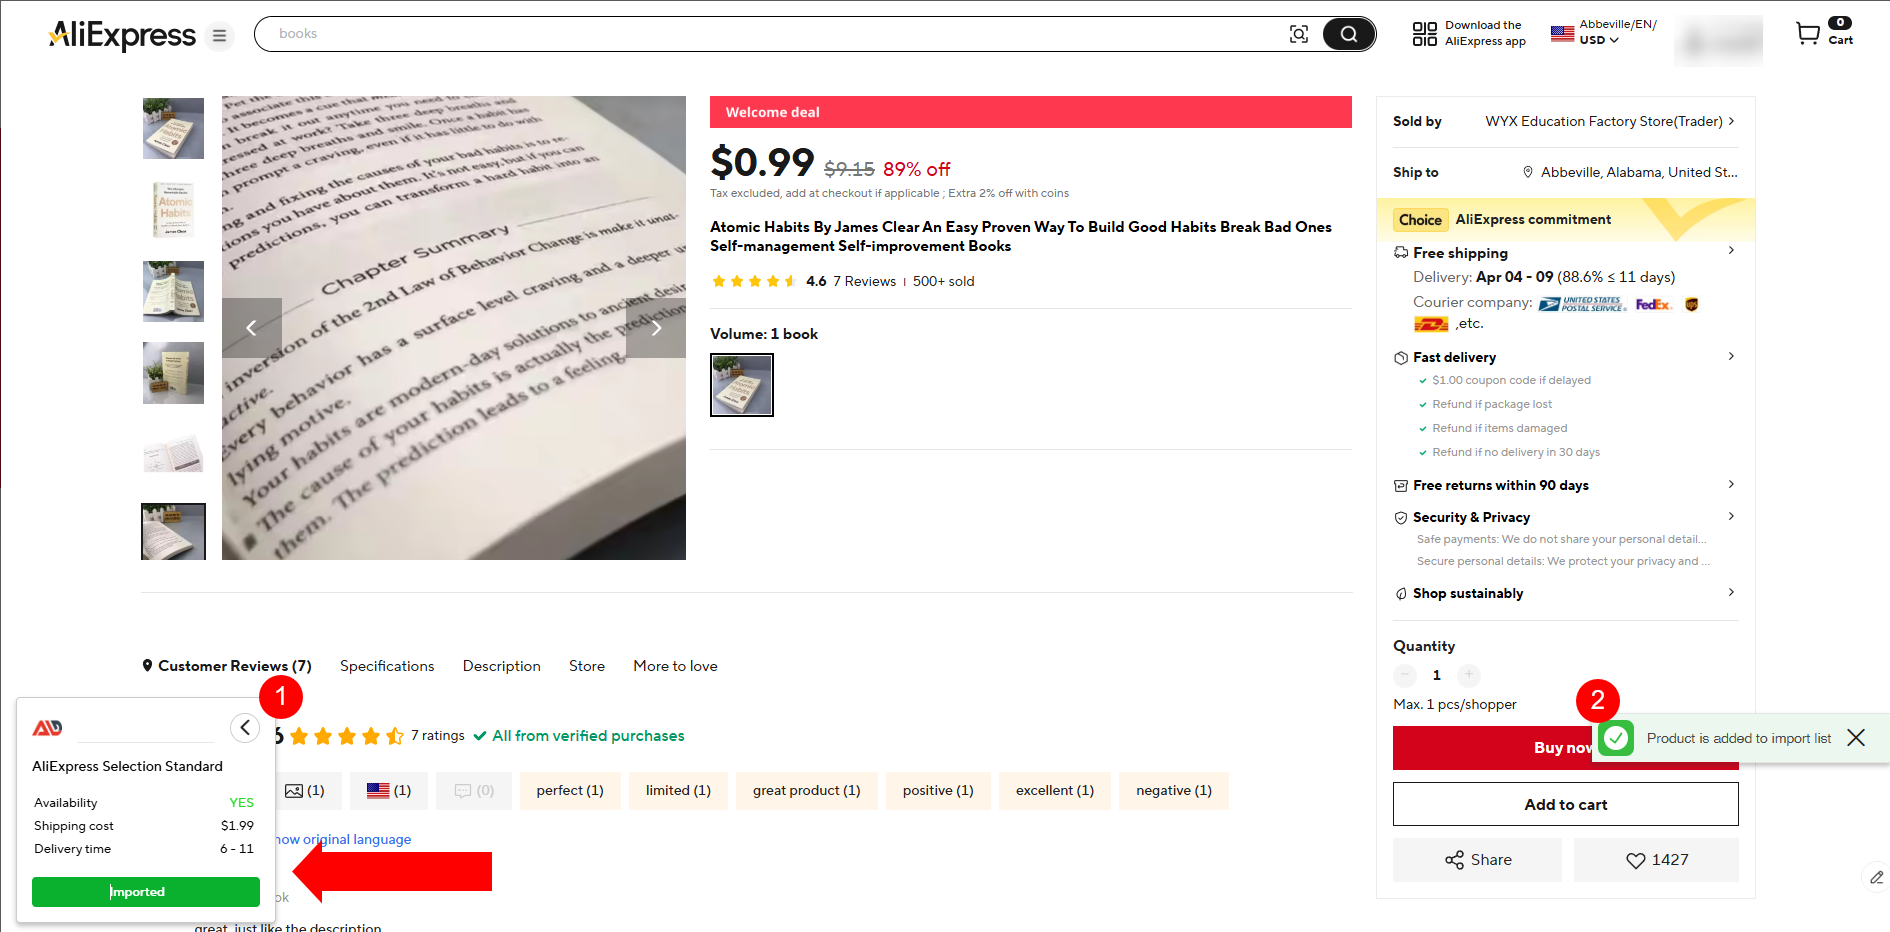
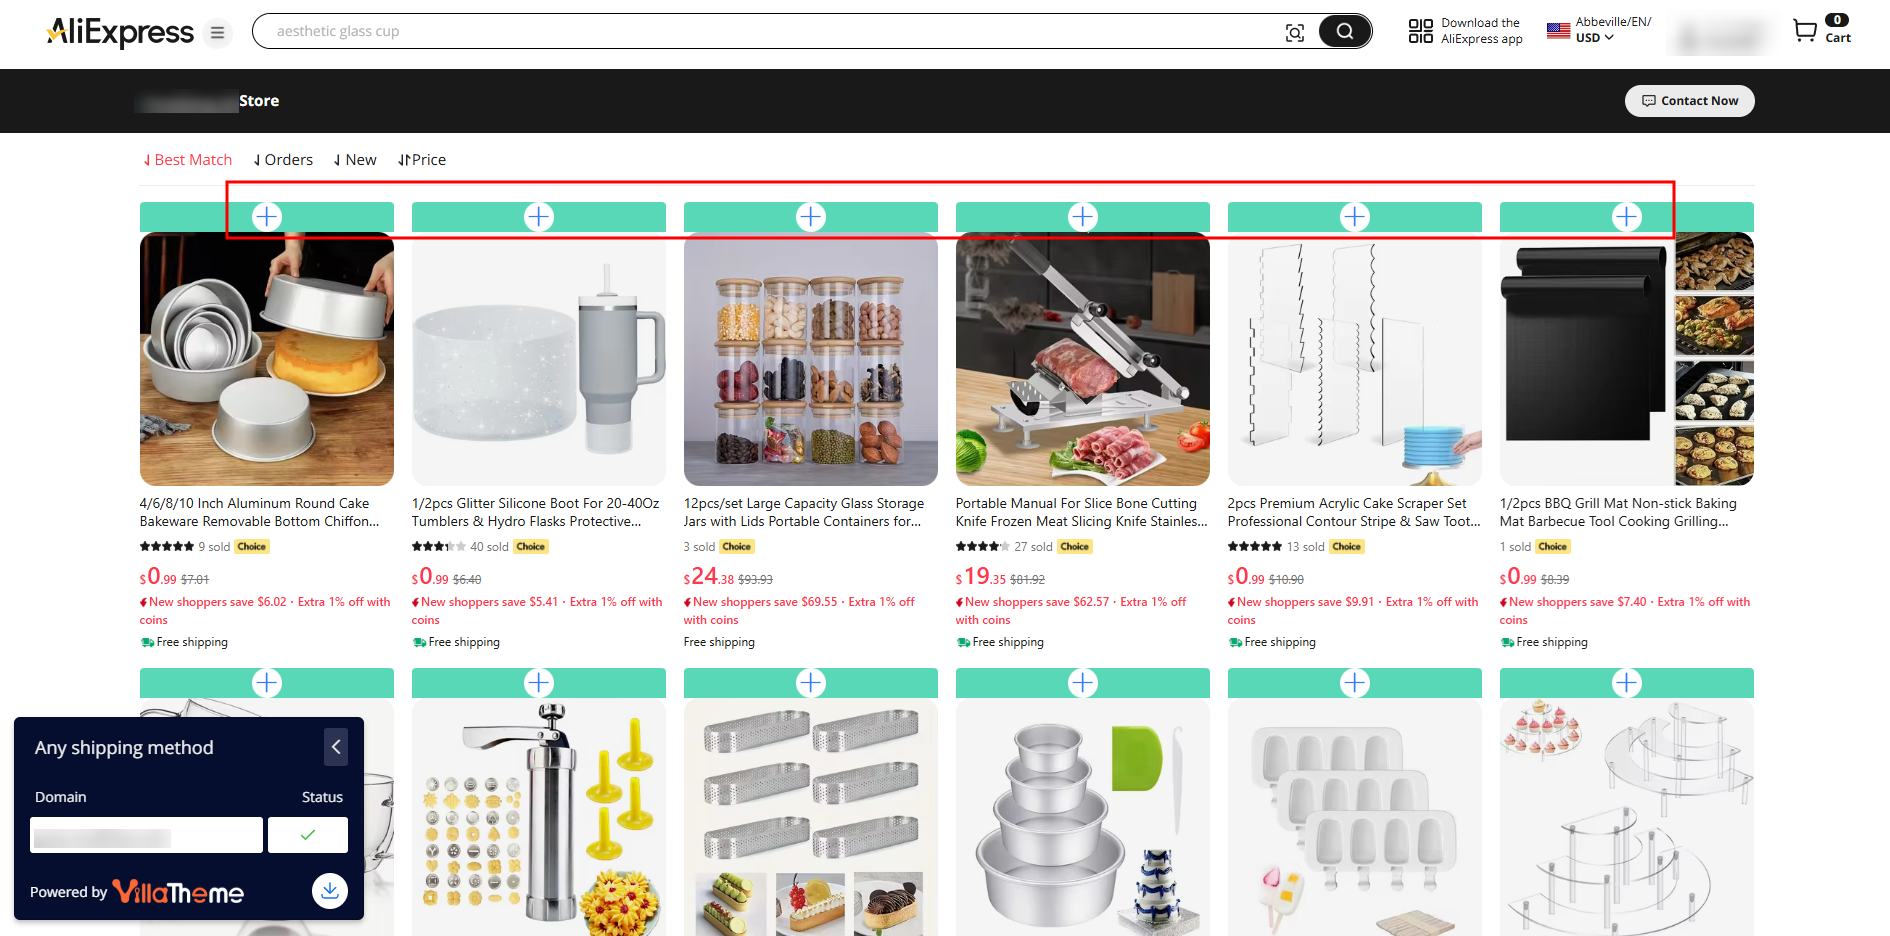
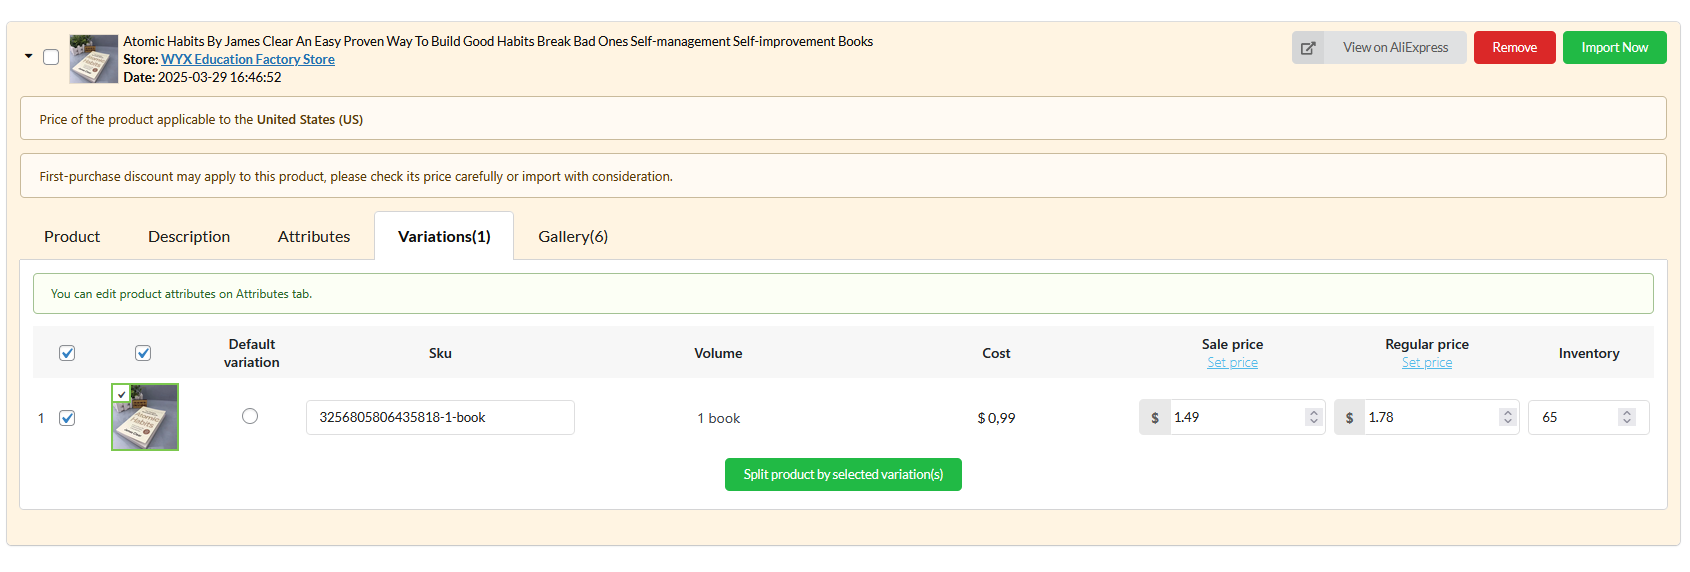
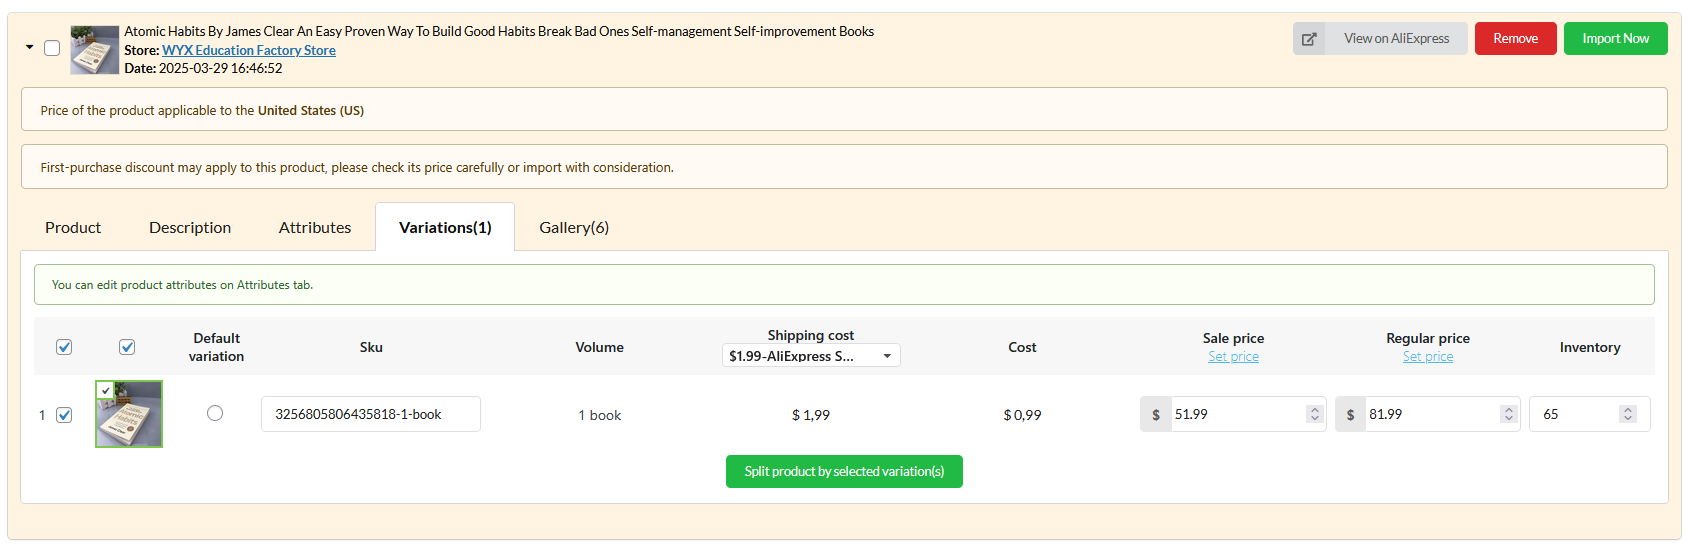
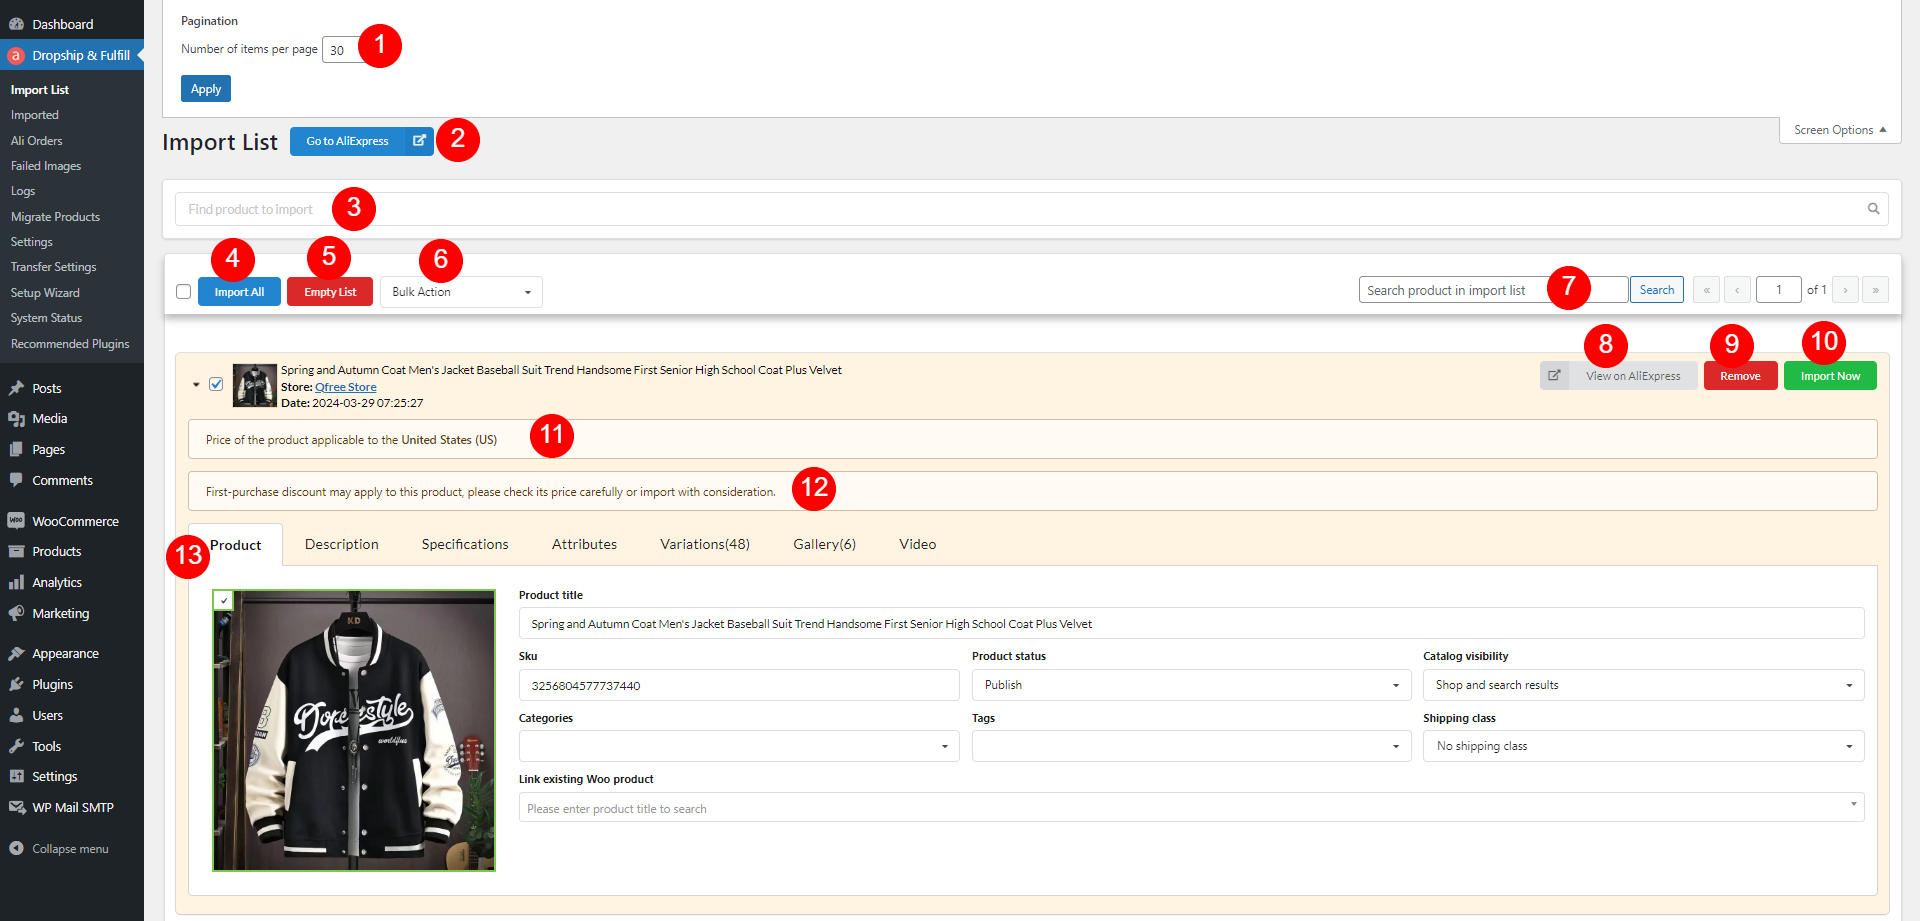
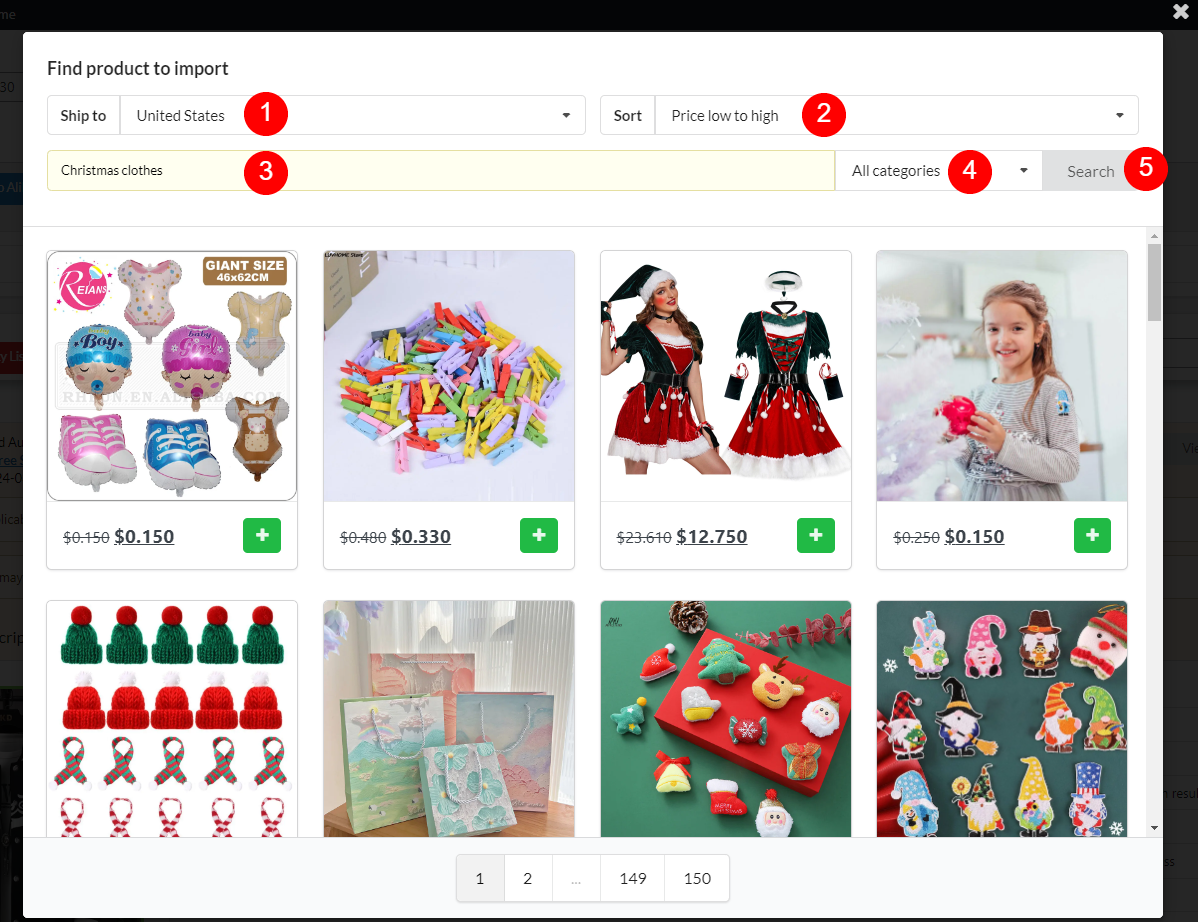
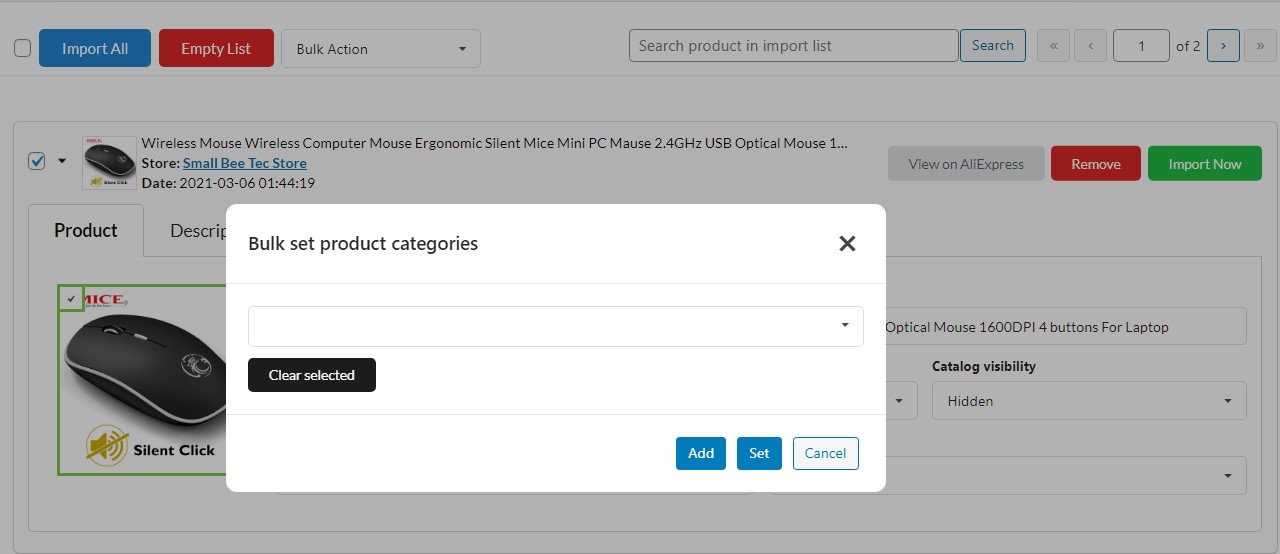
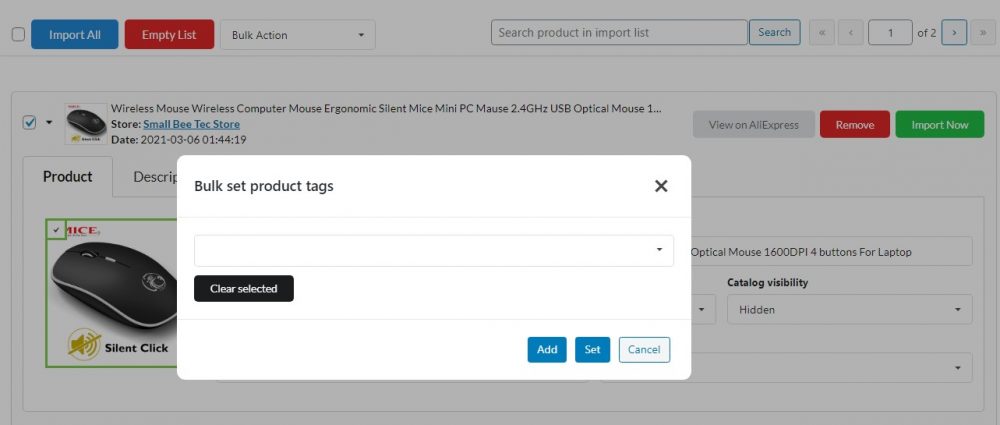
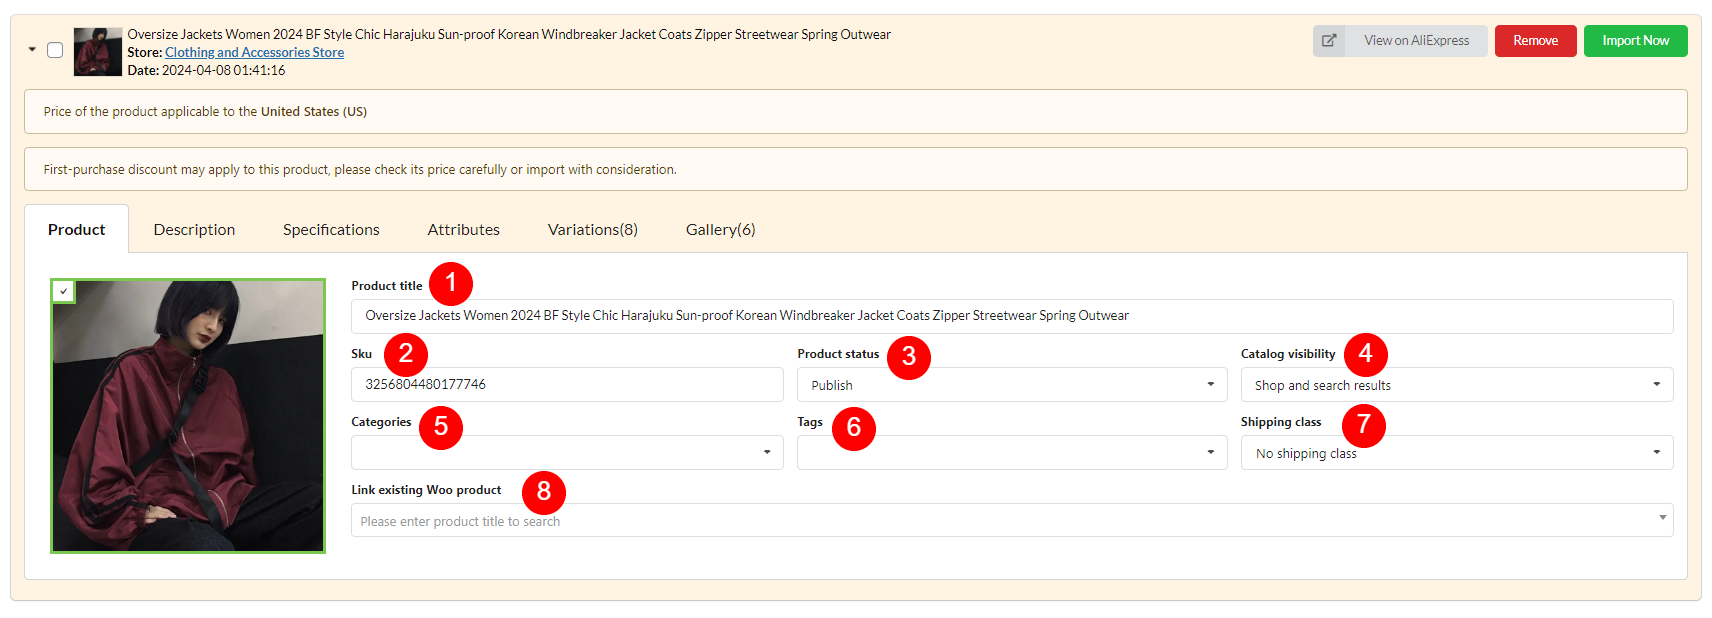
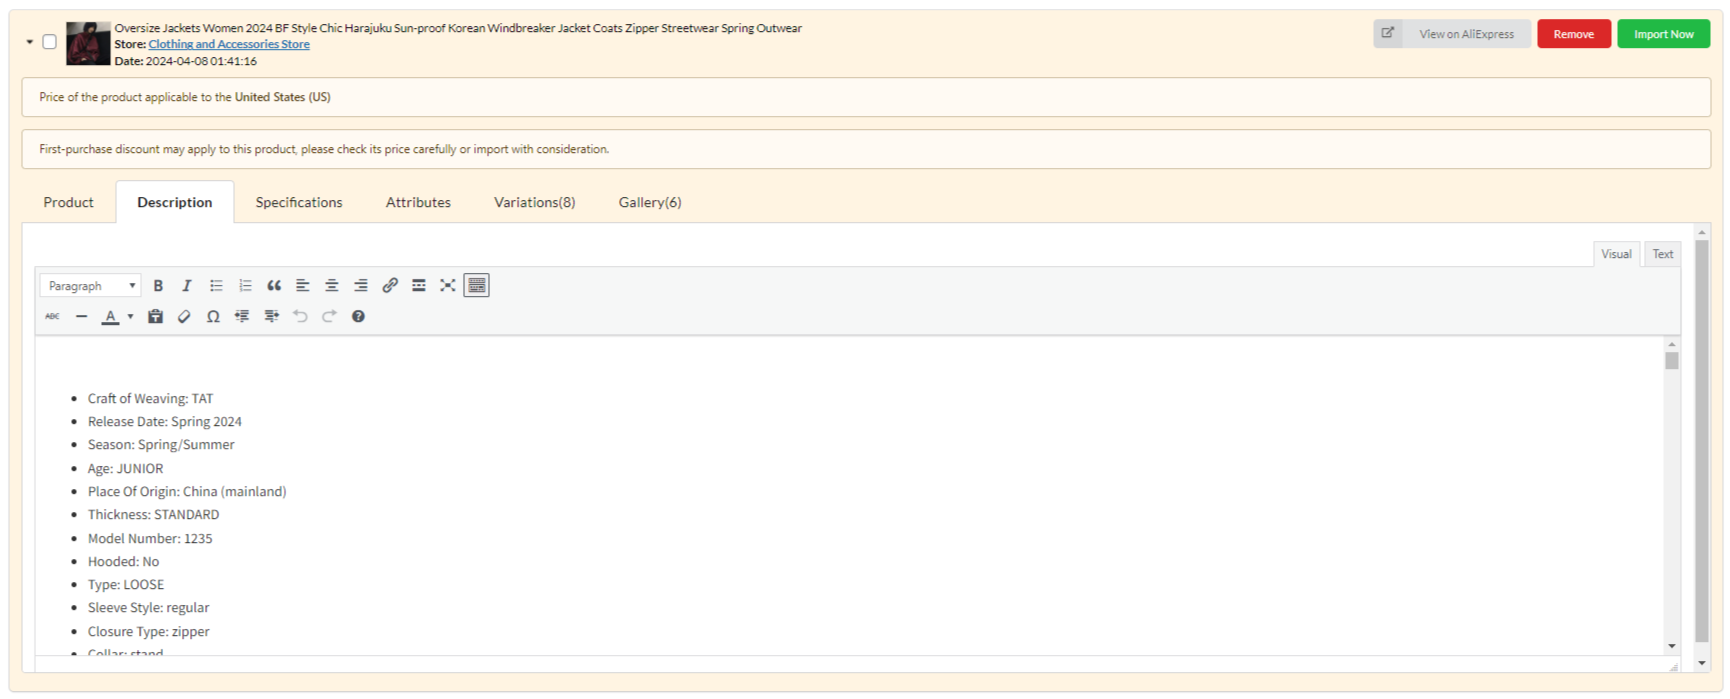
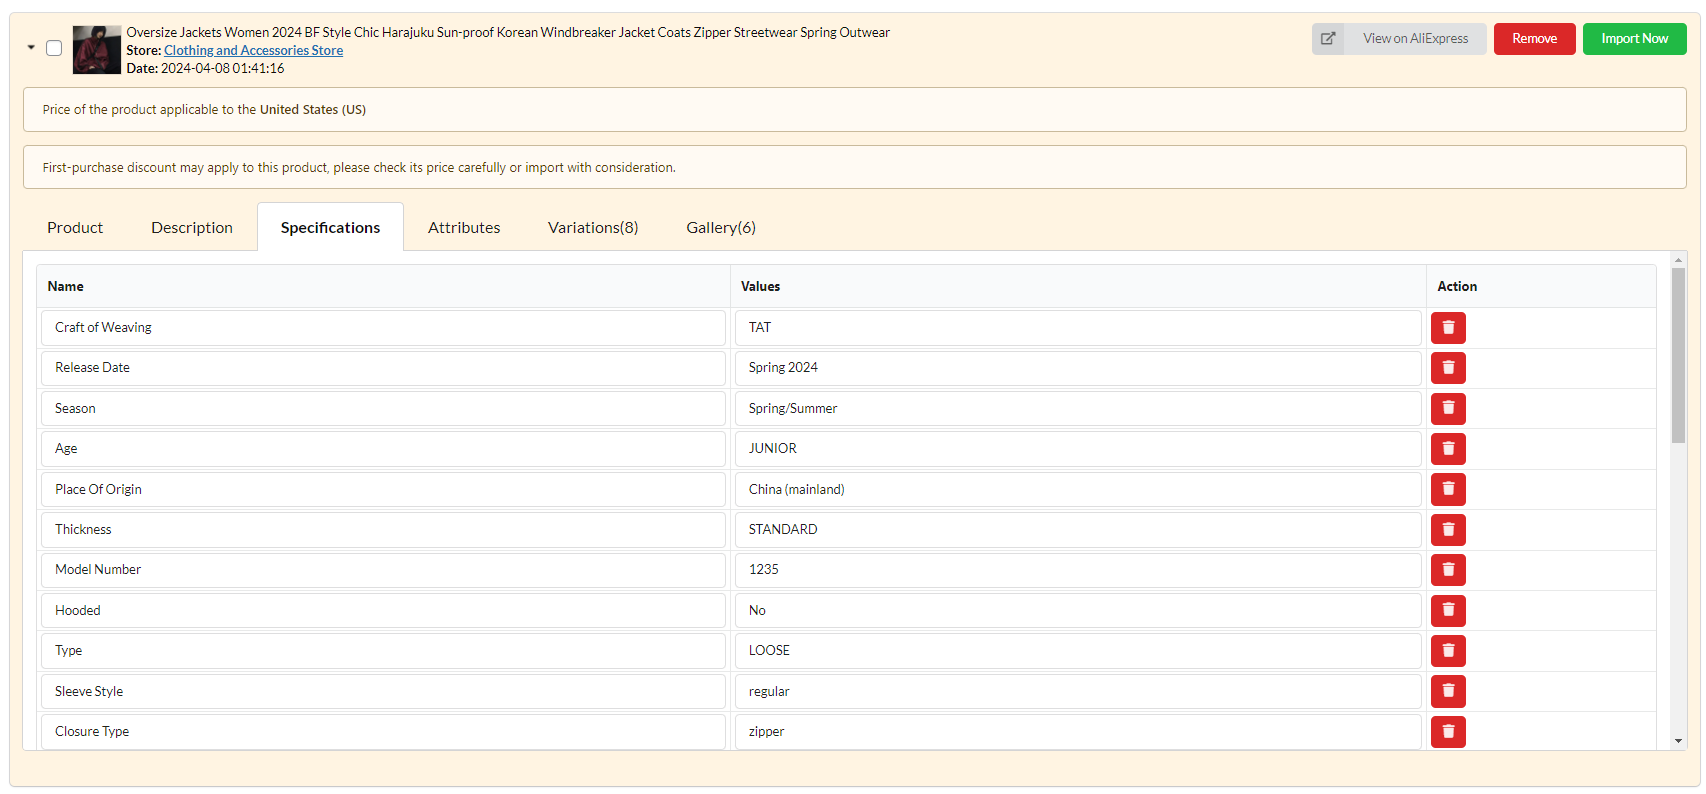
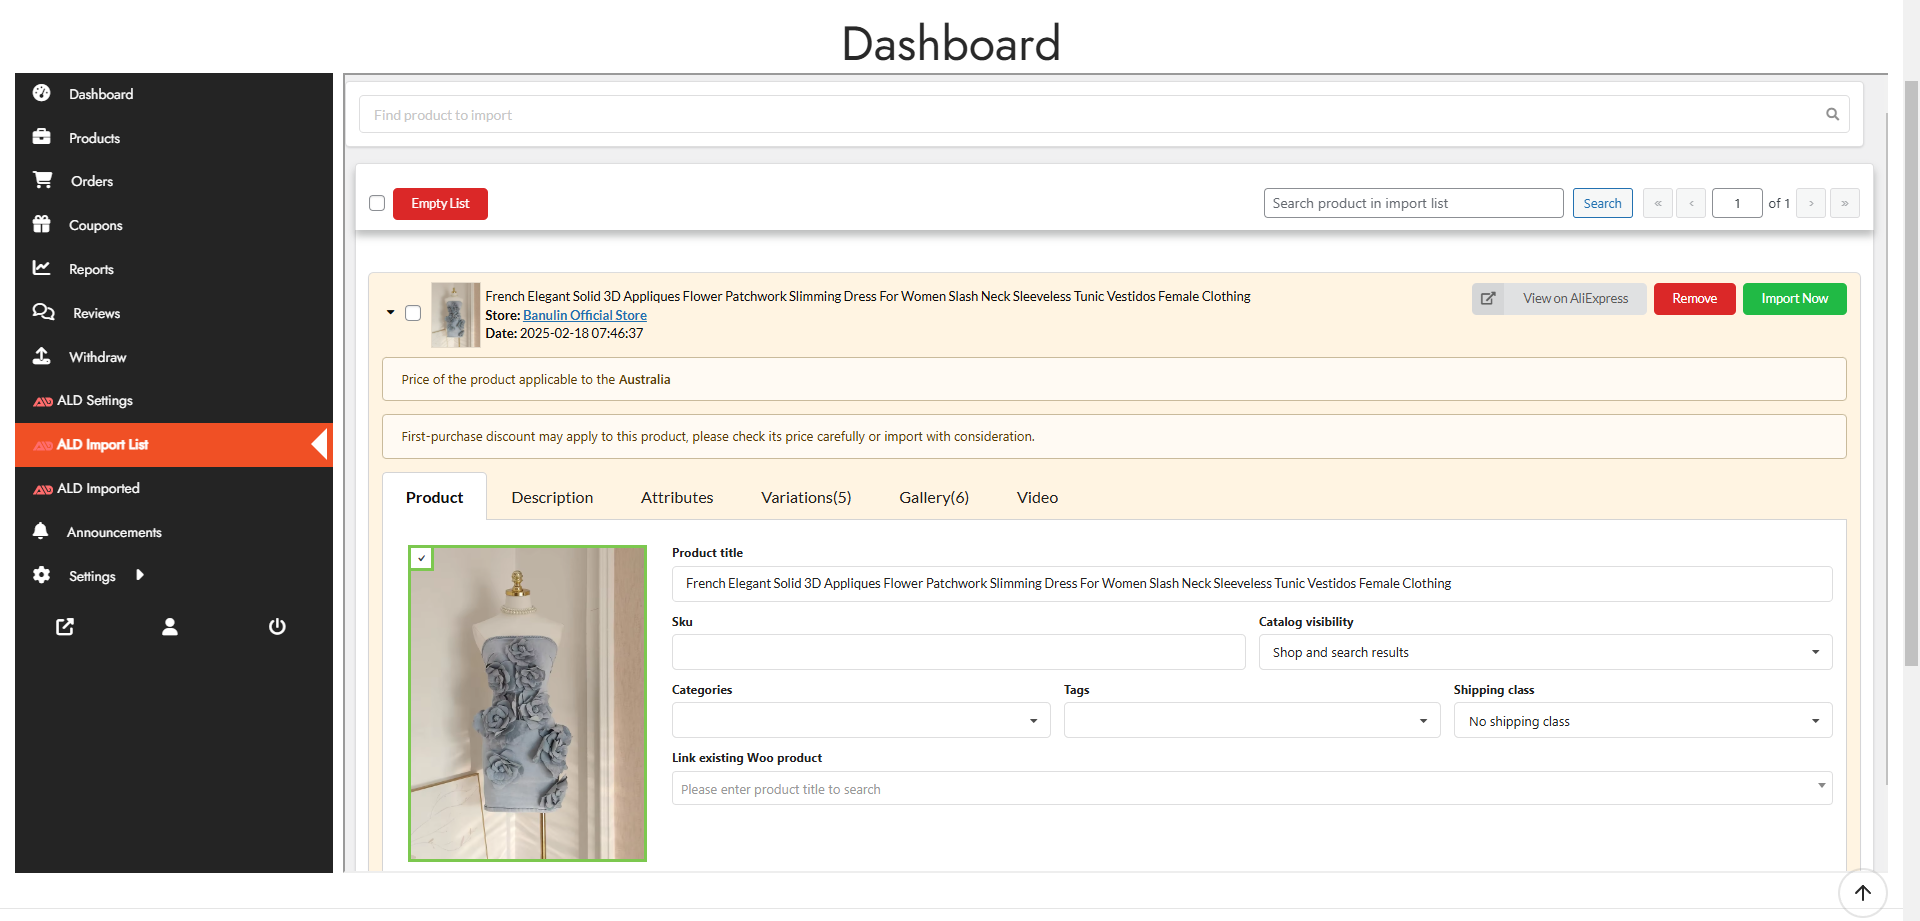
- Import List
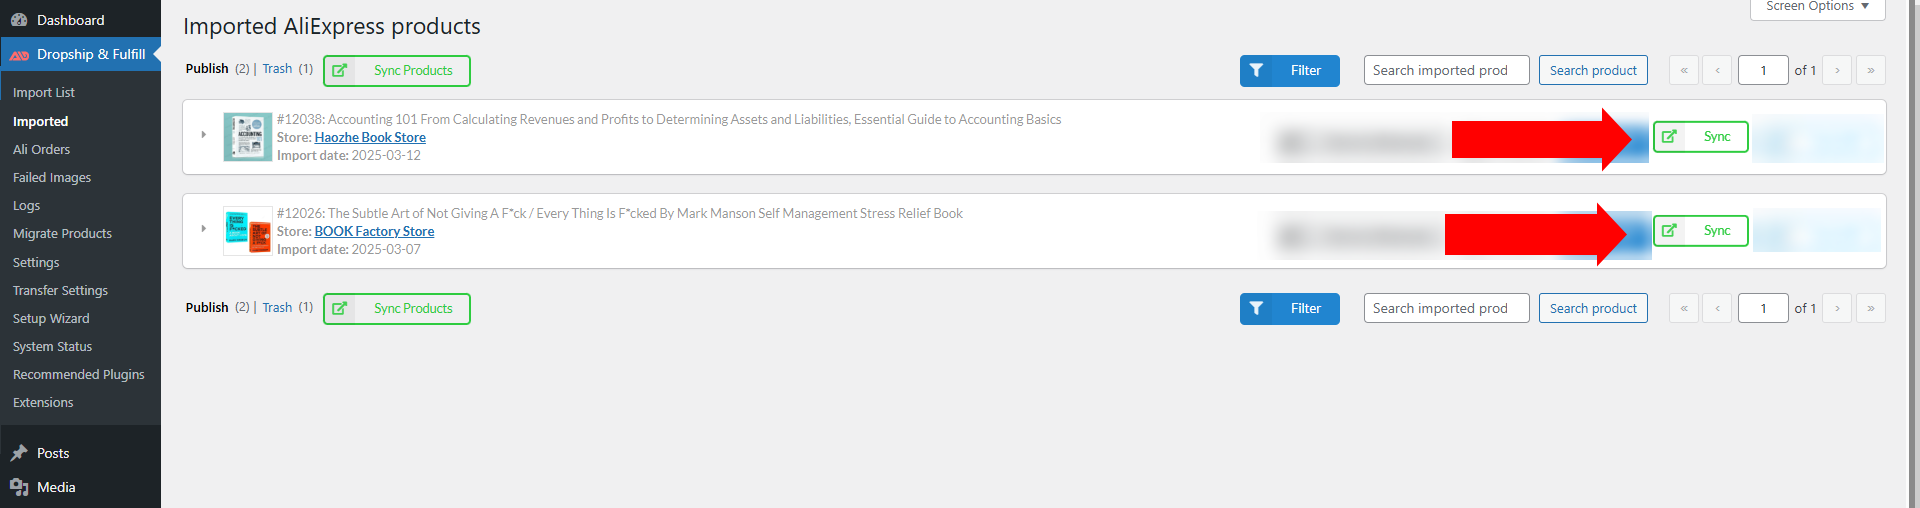
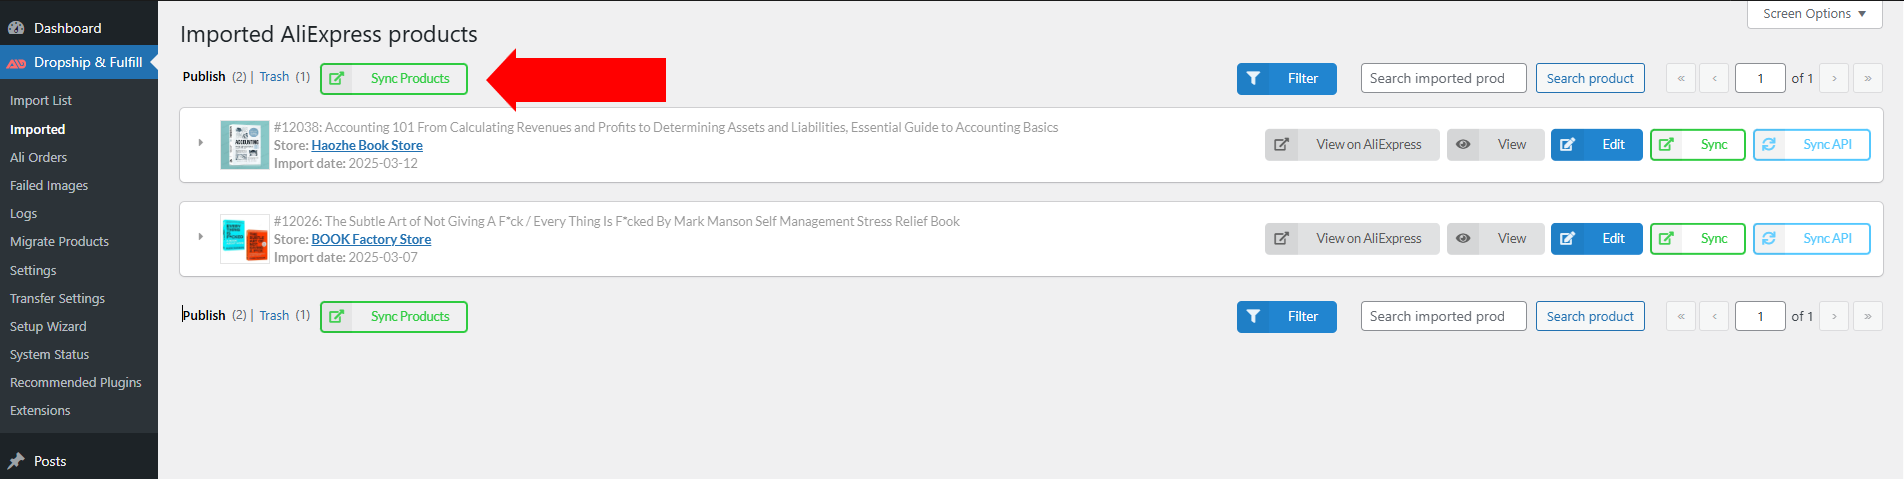
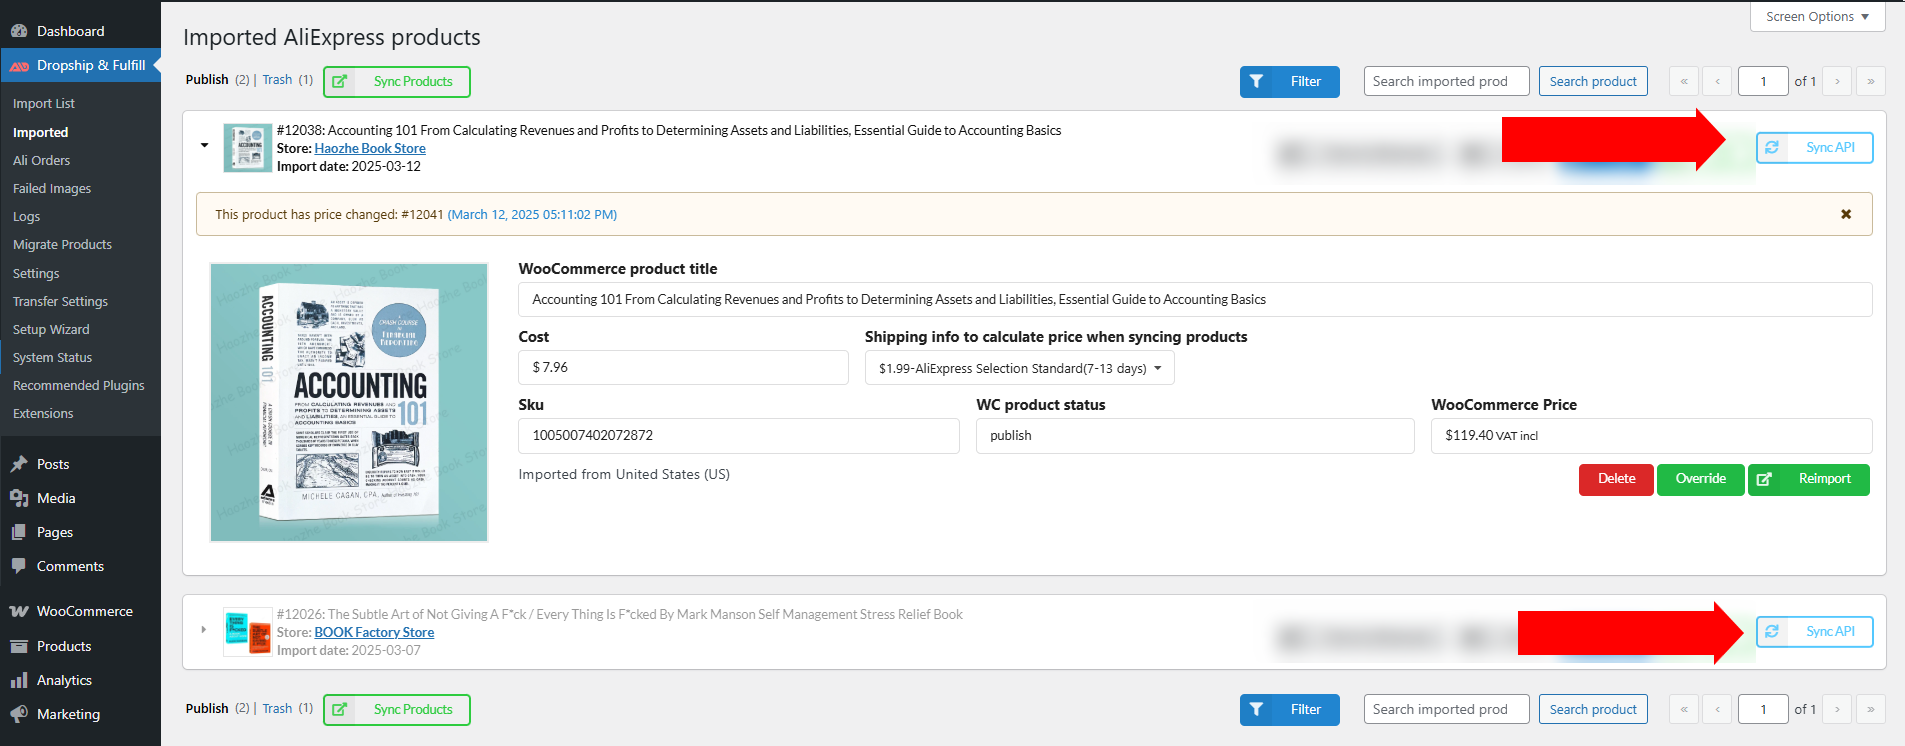
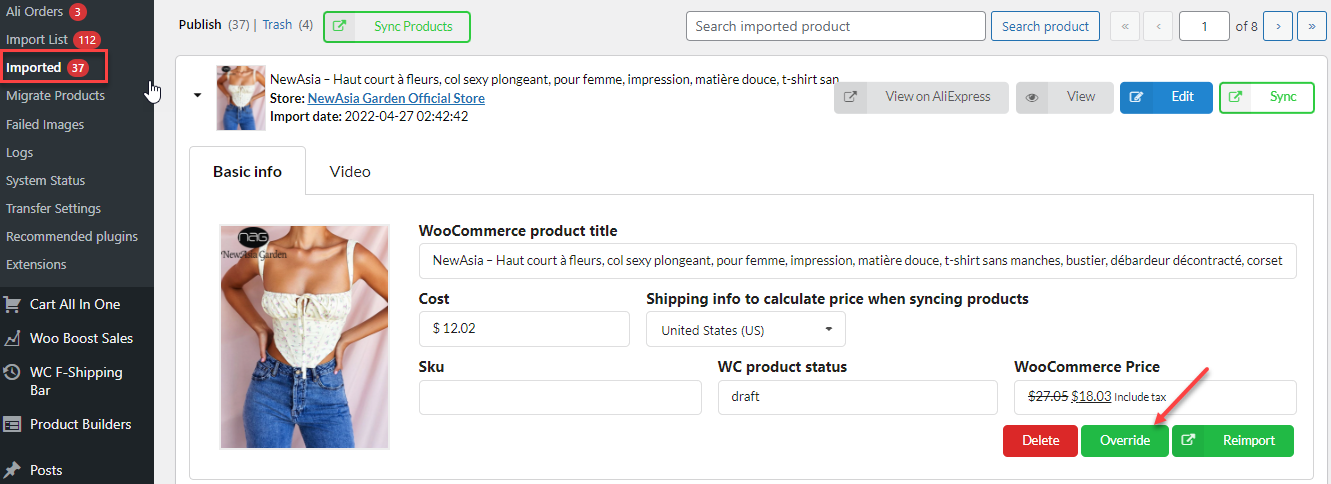
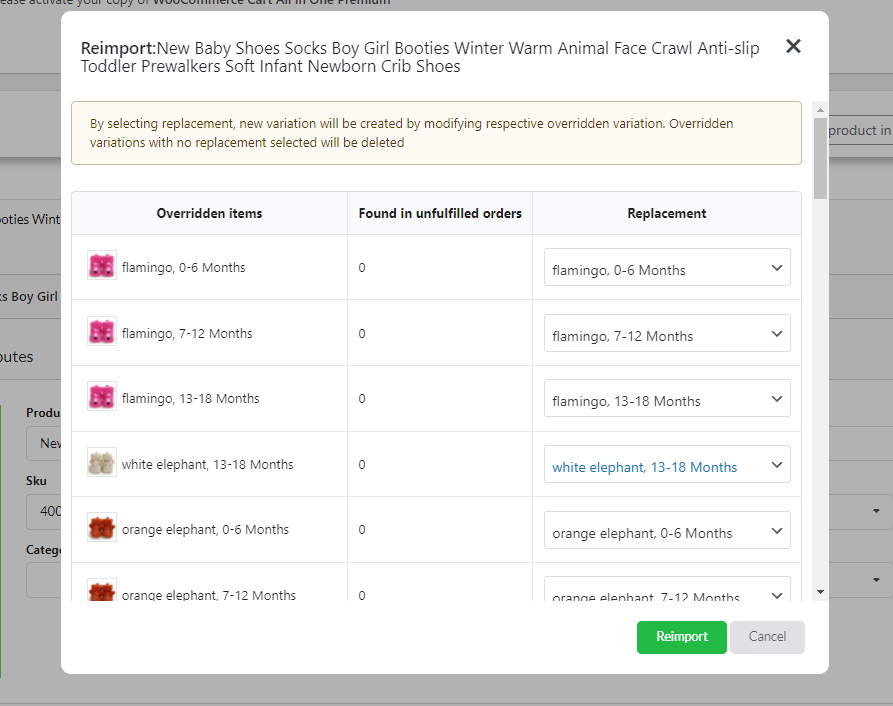
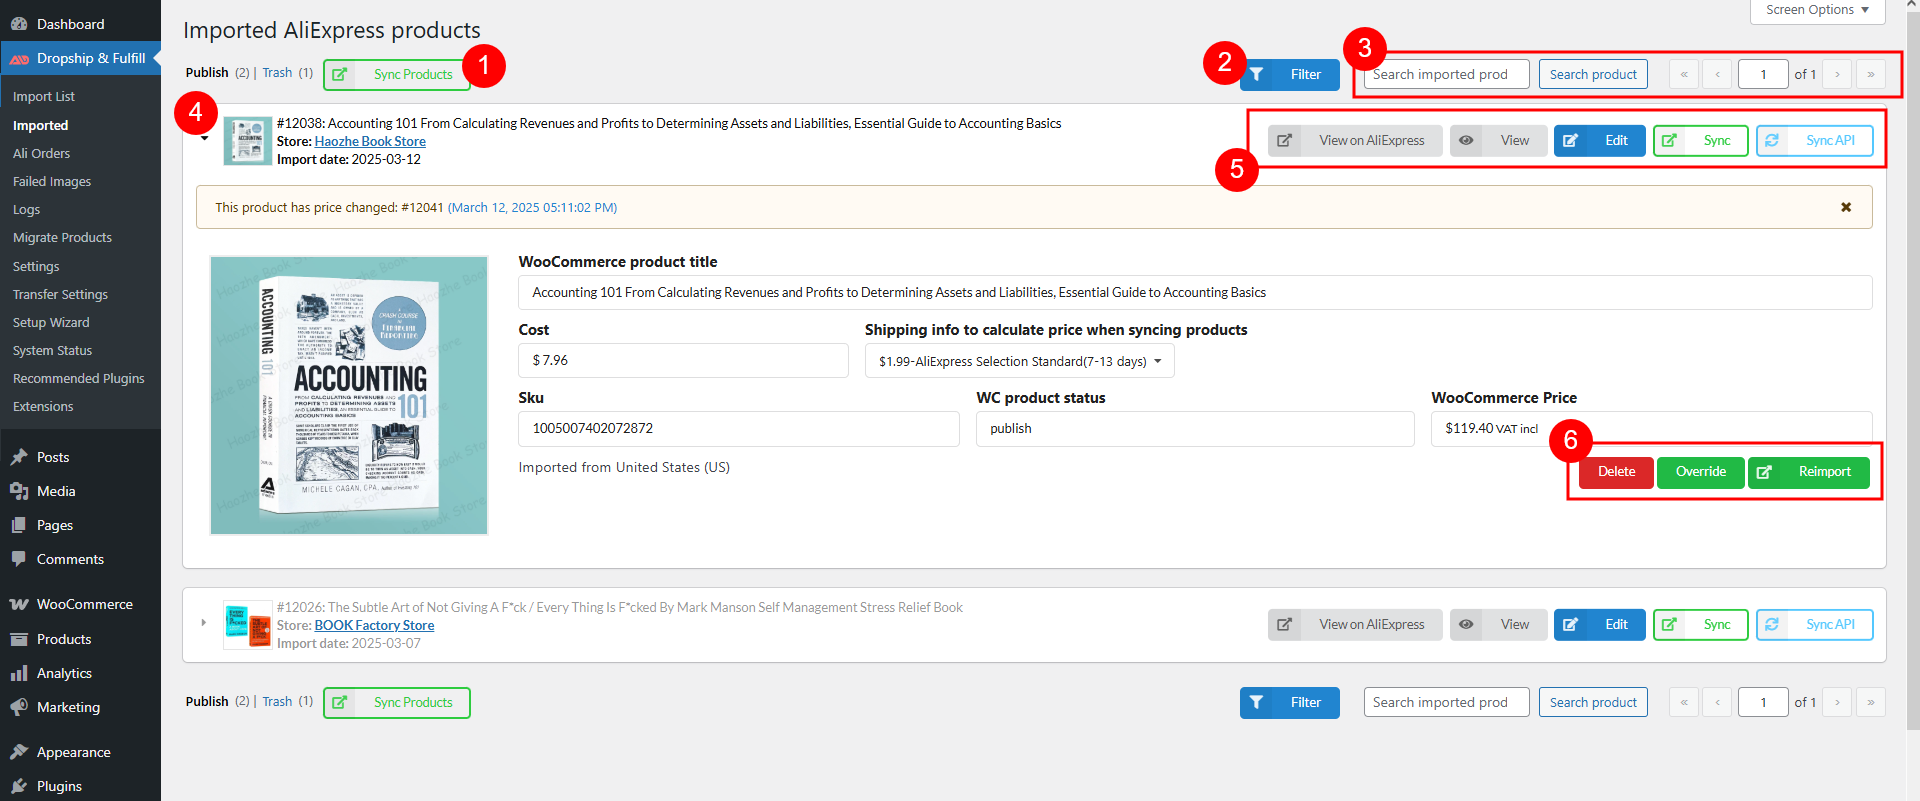
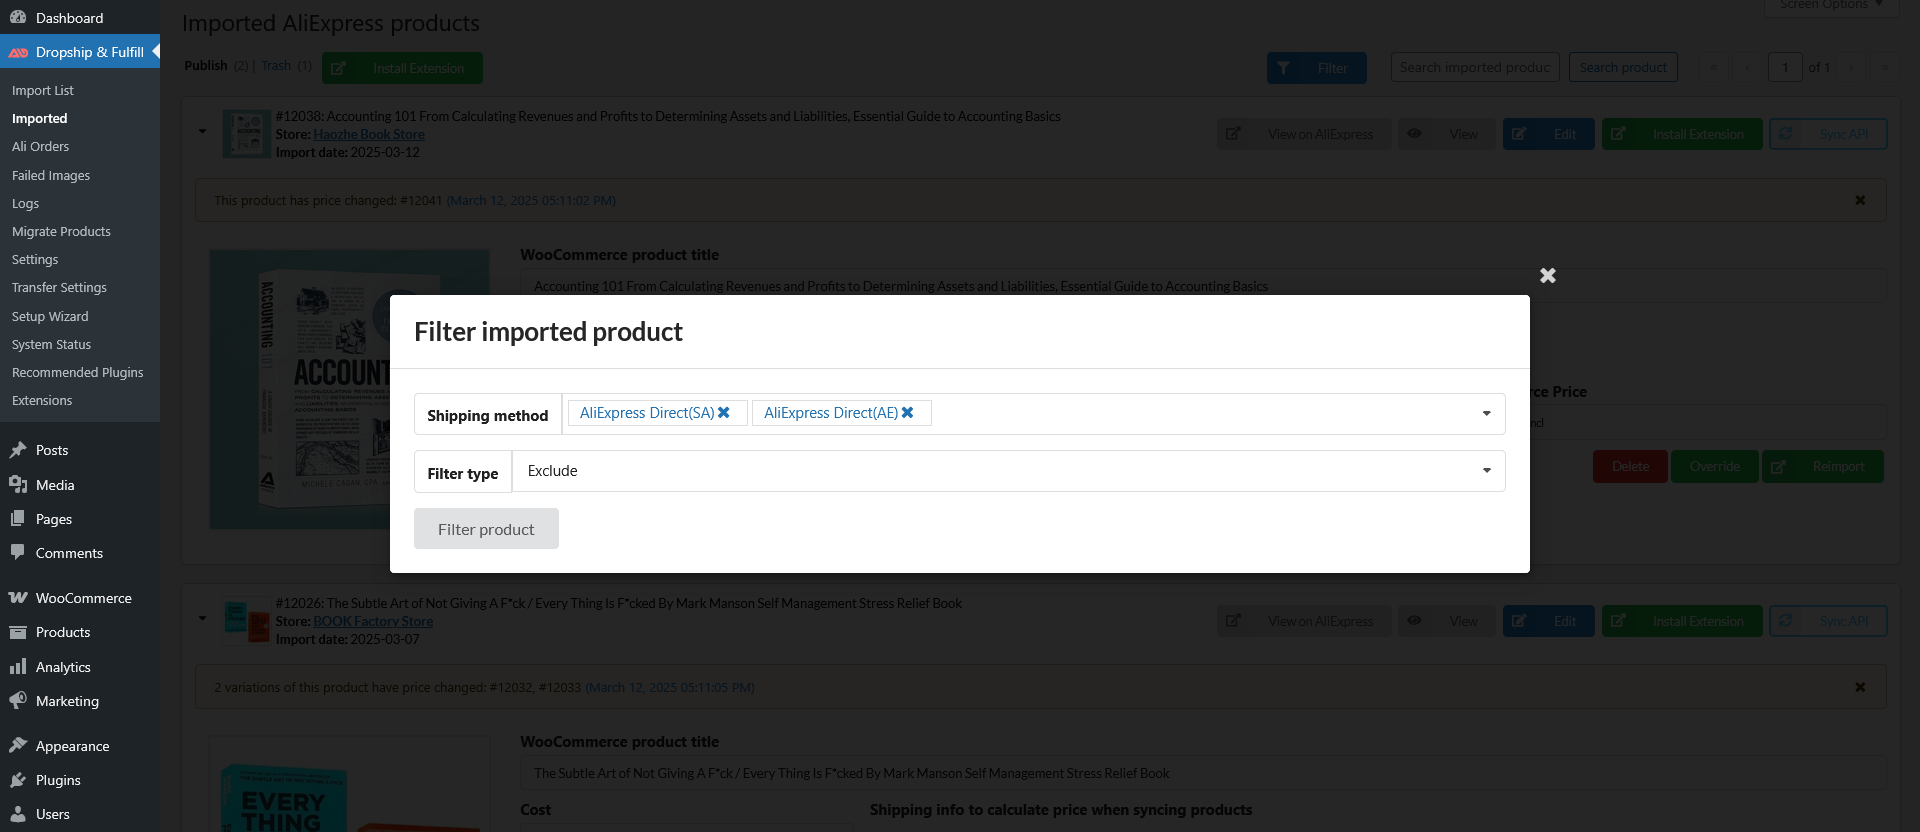
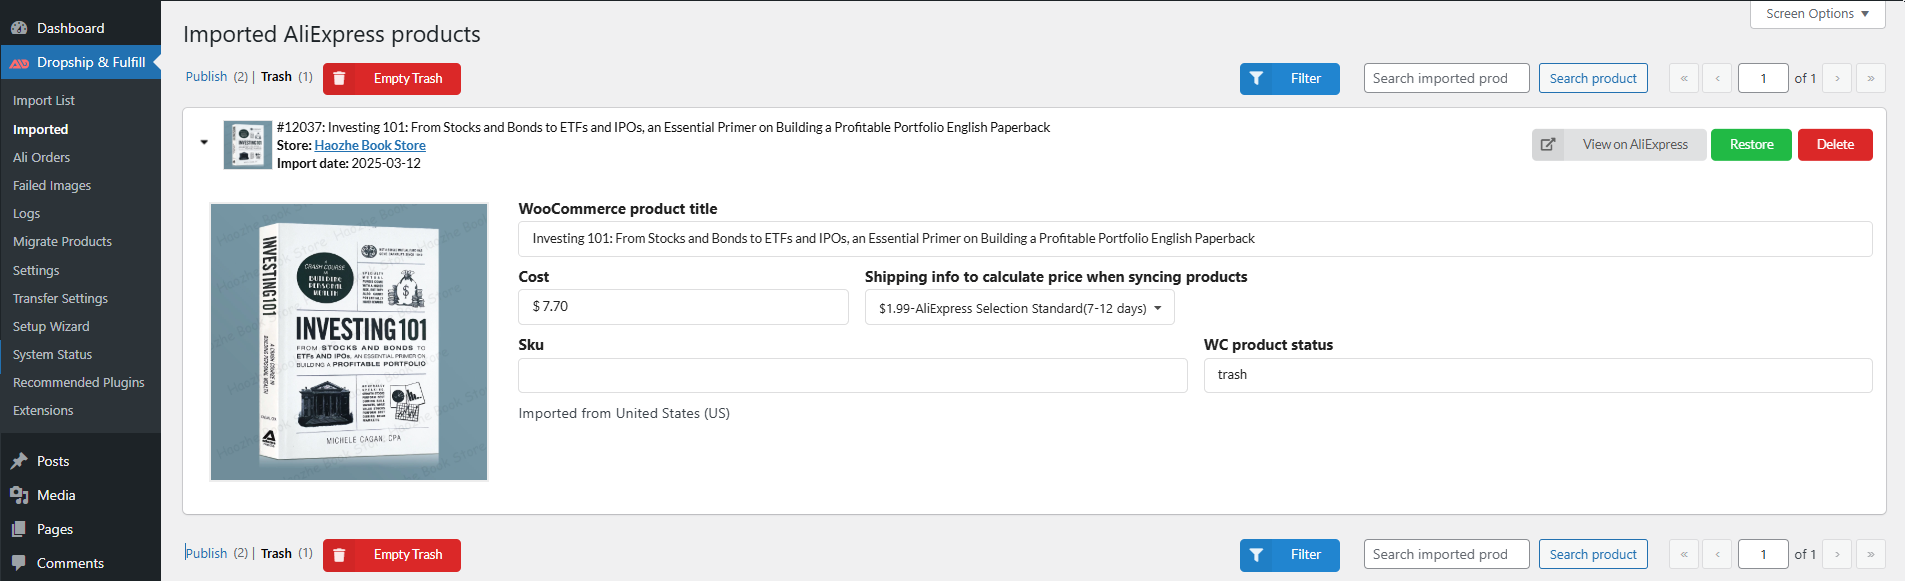
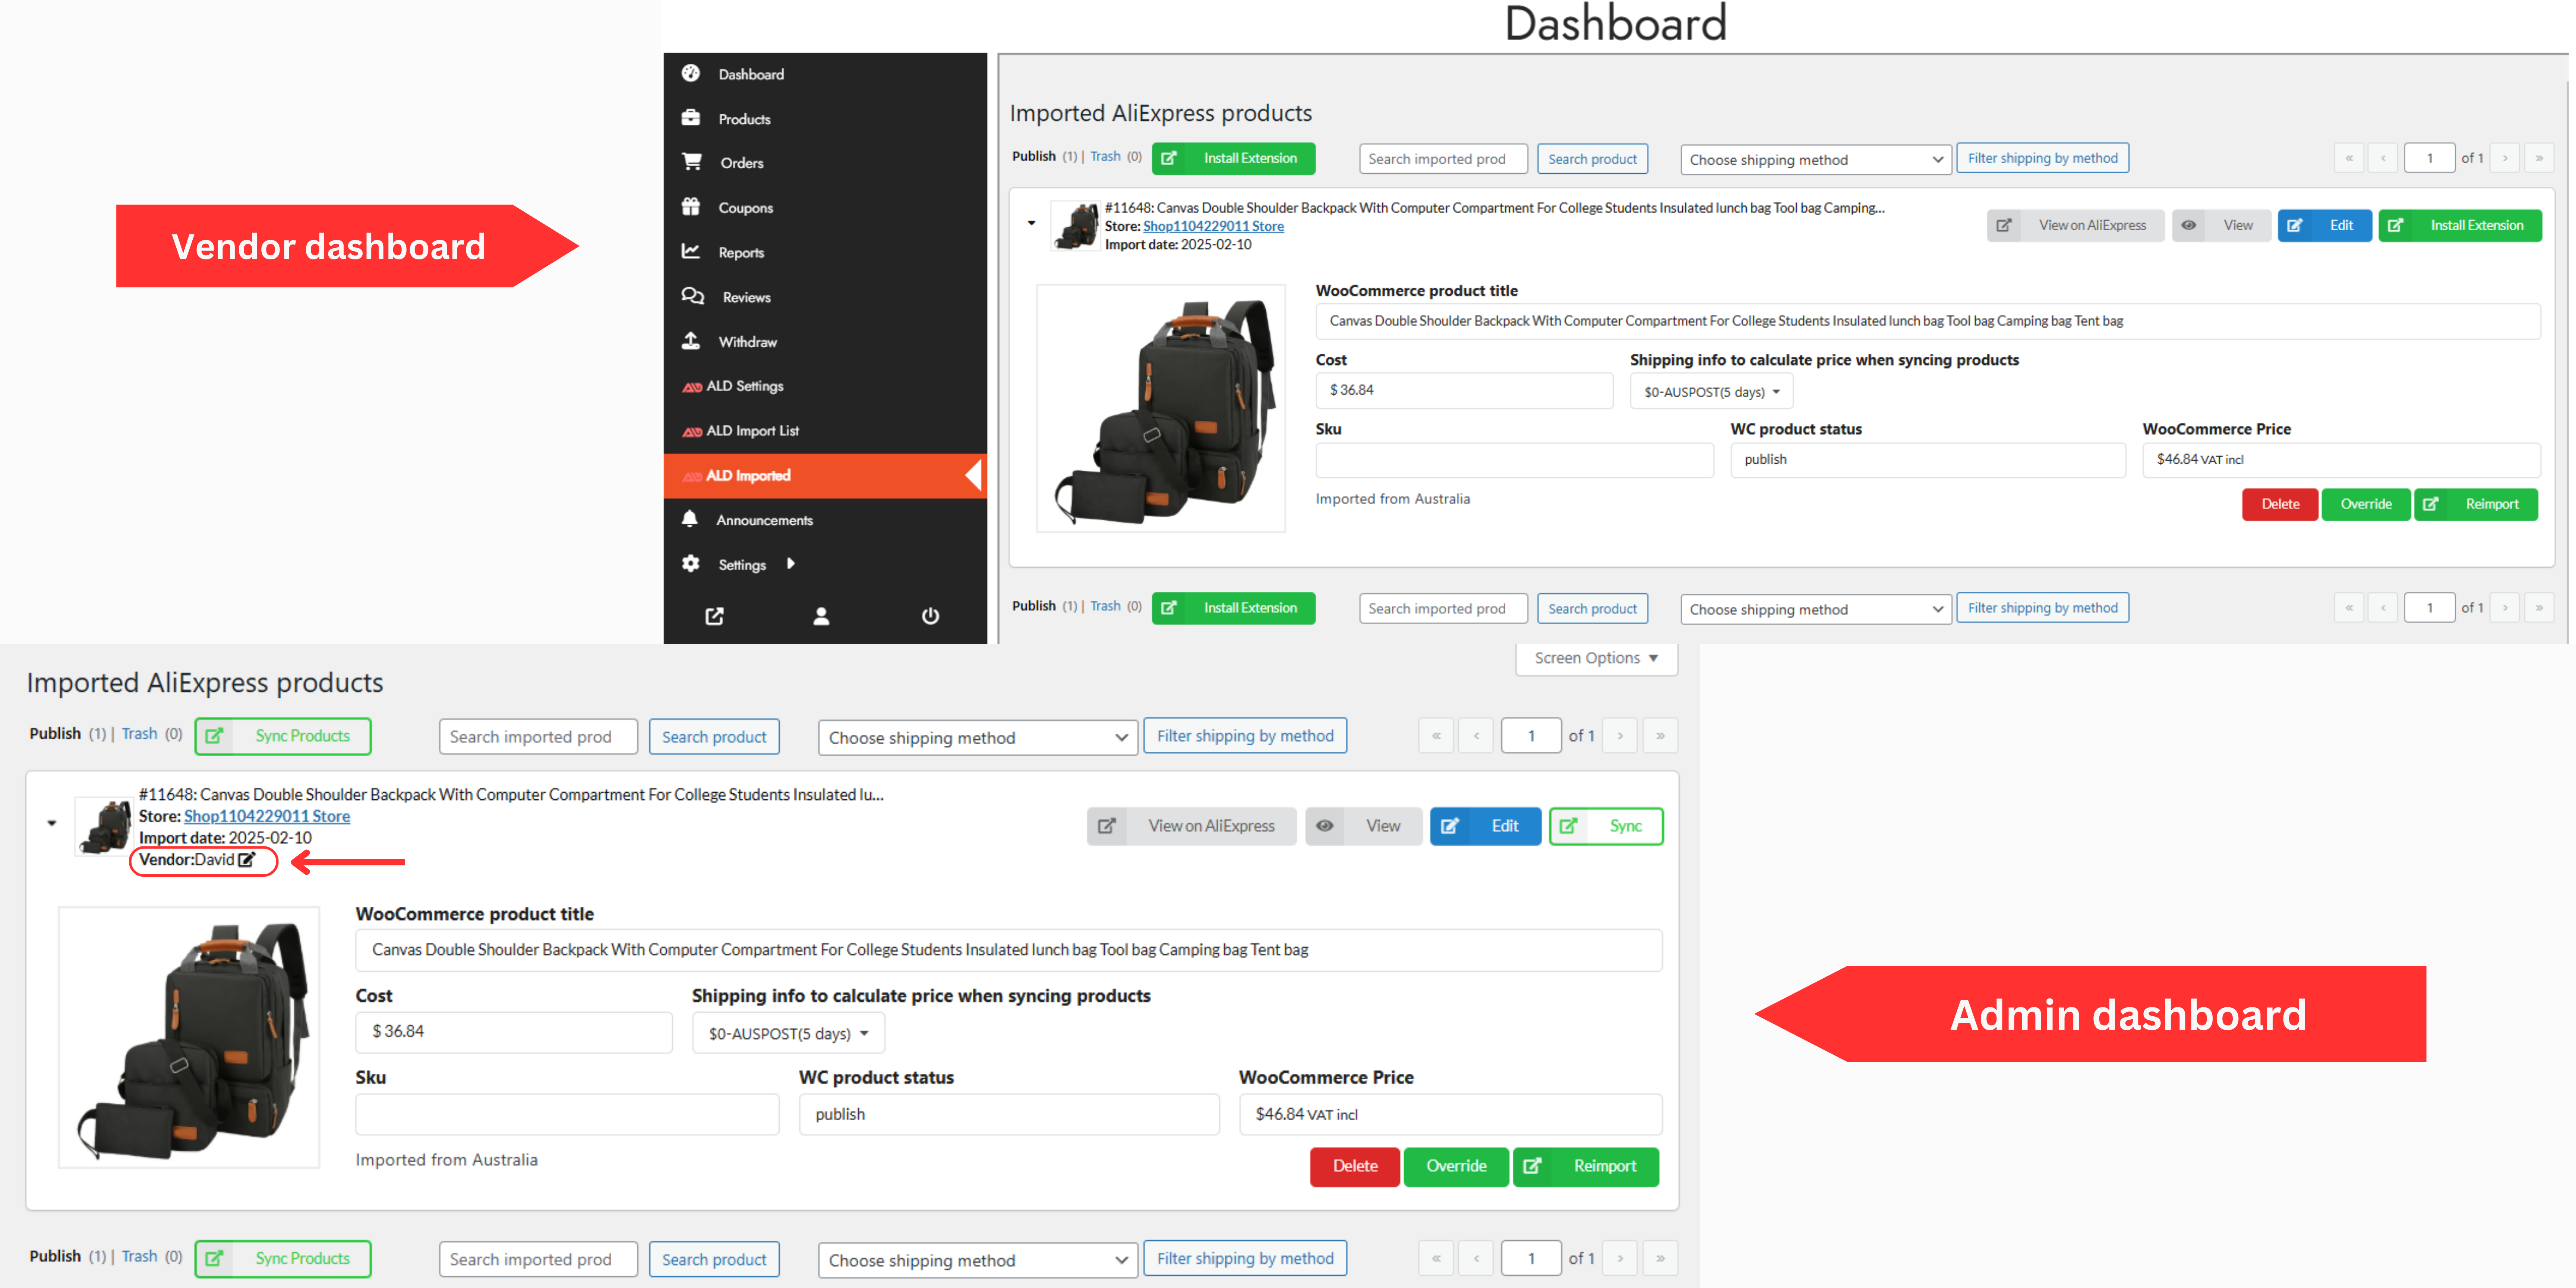
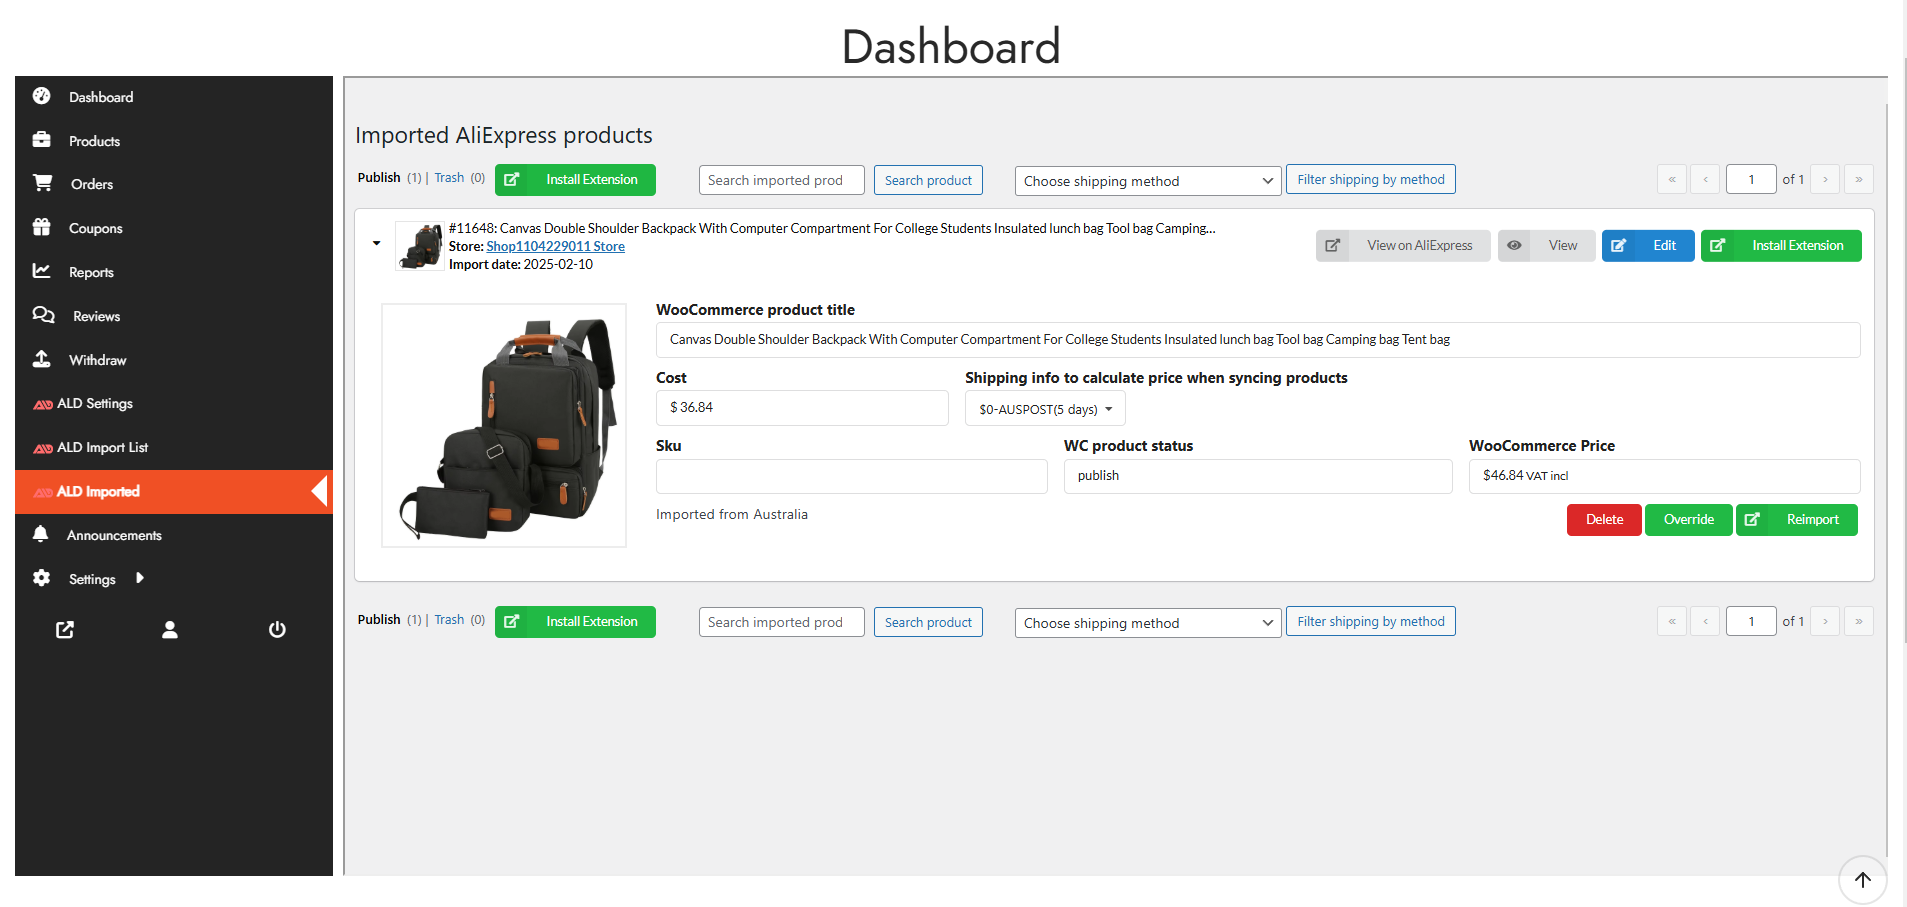
- Imported
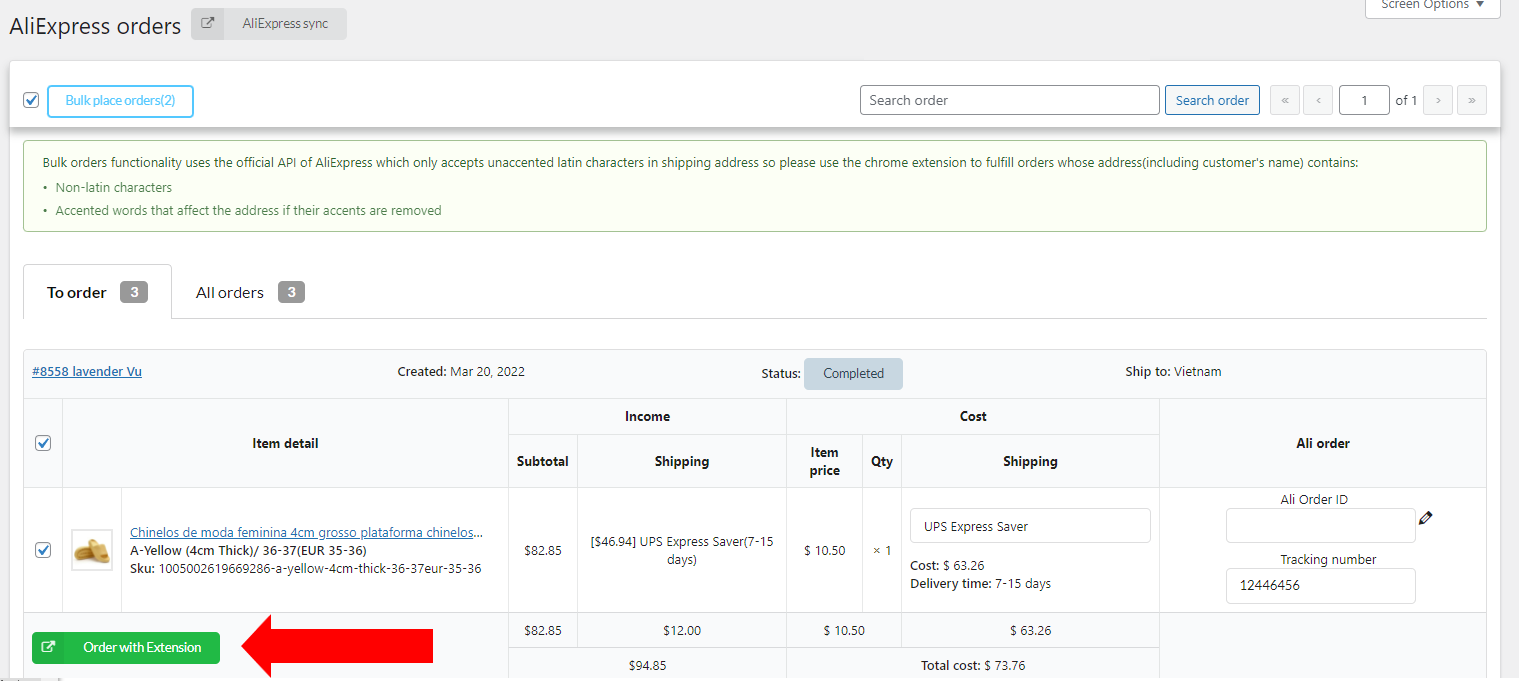
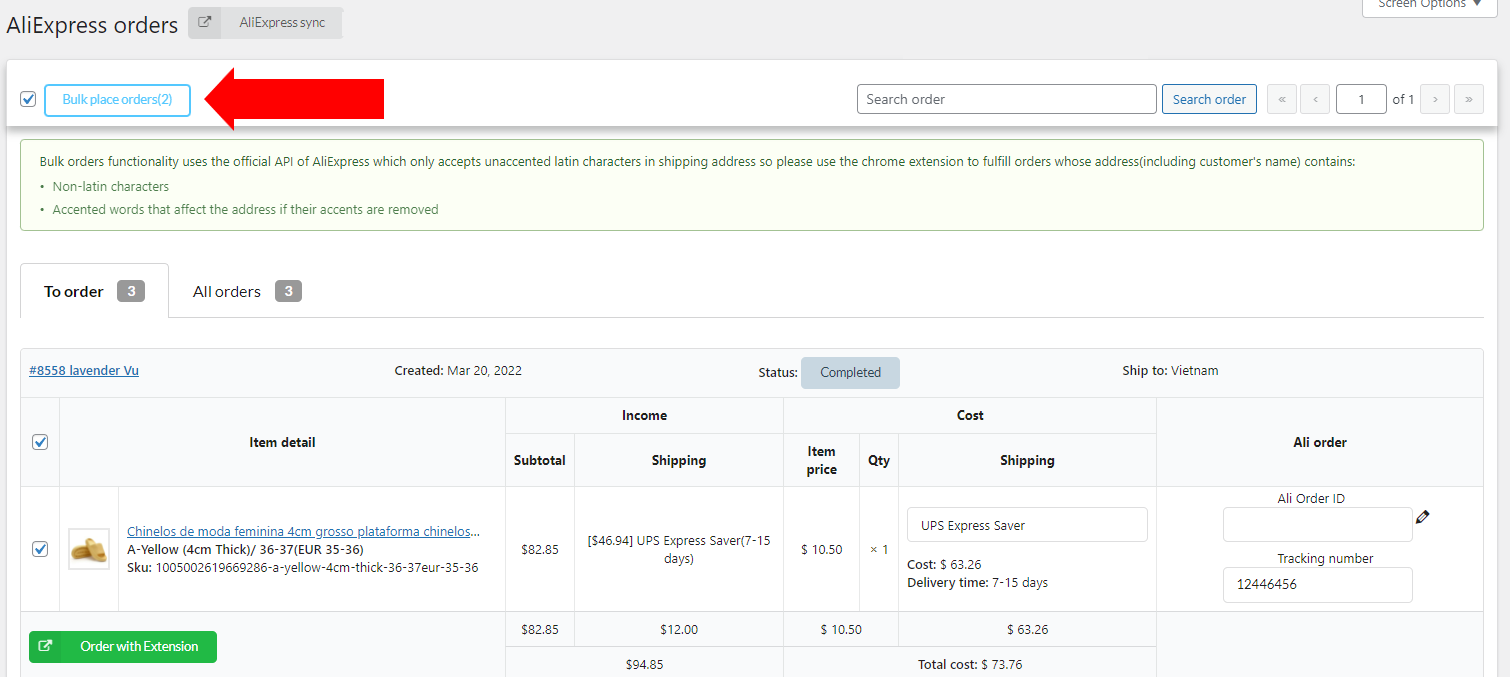
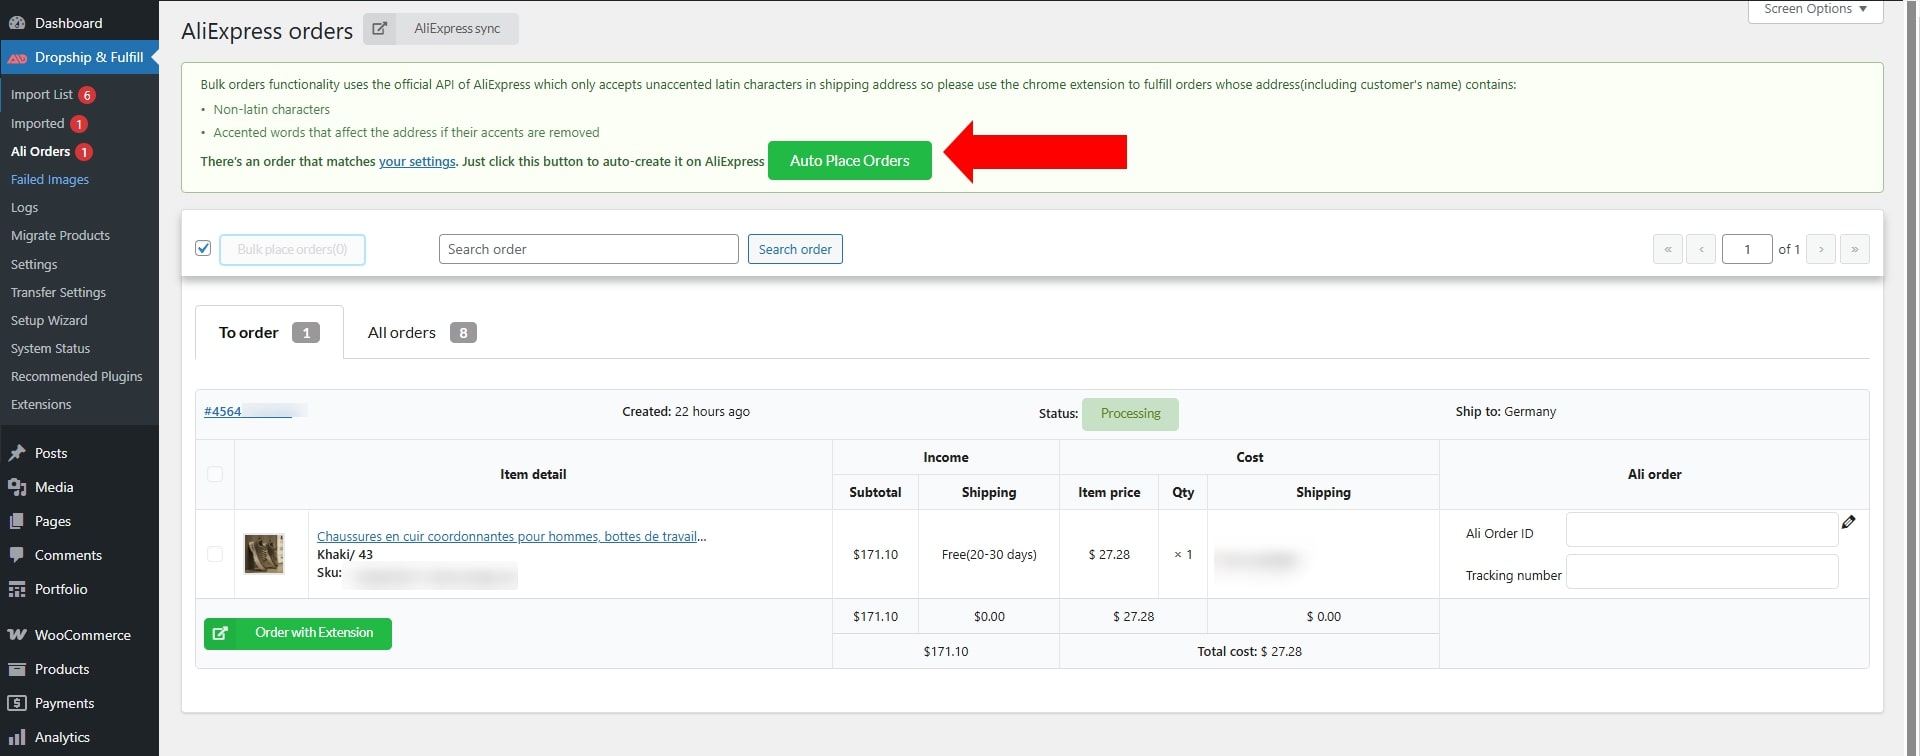
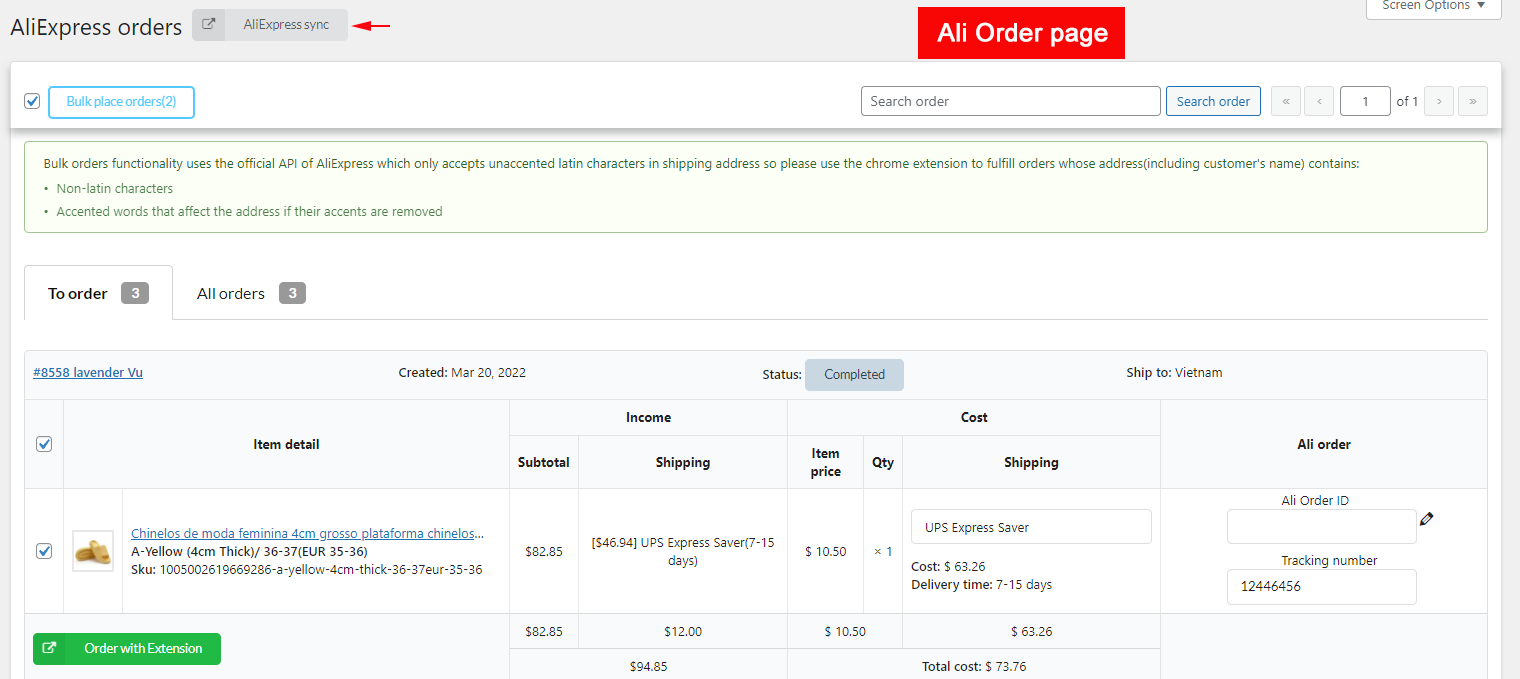
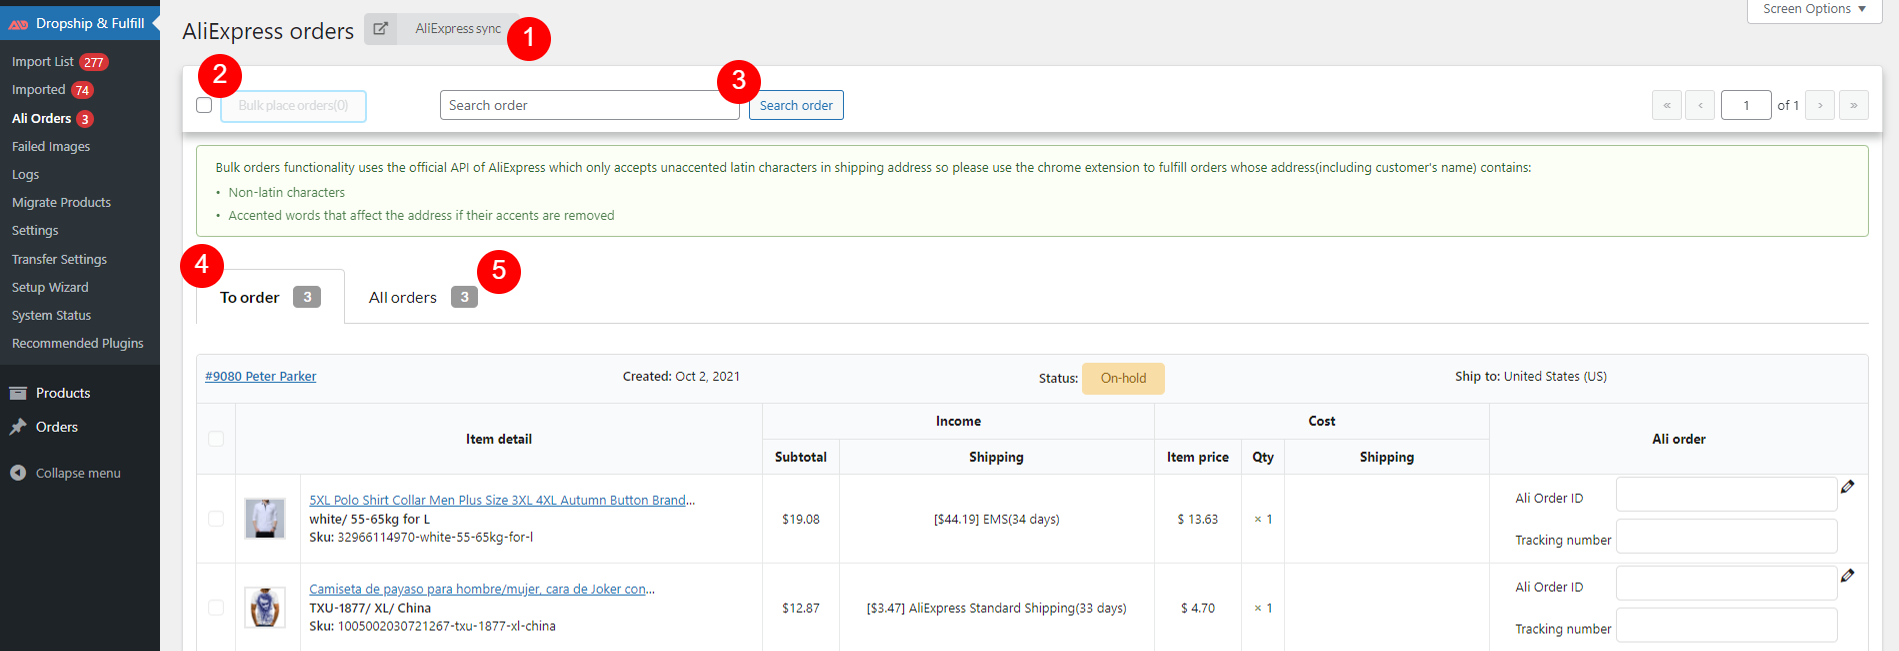
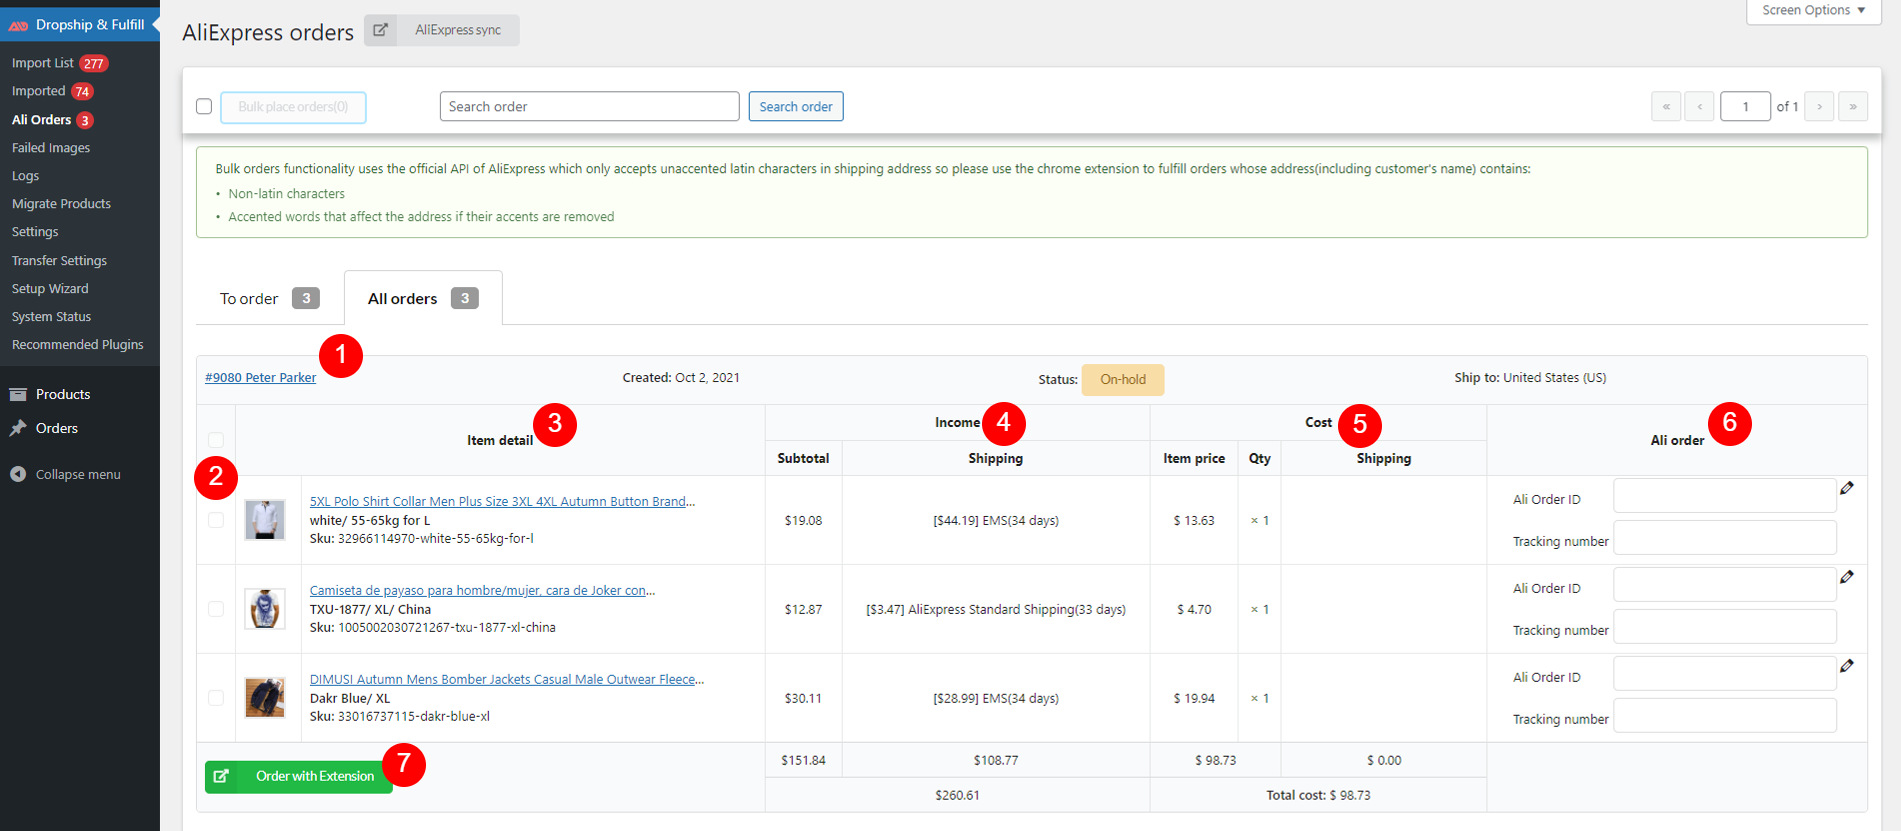
- Ali Orders
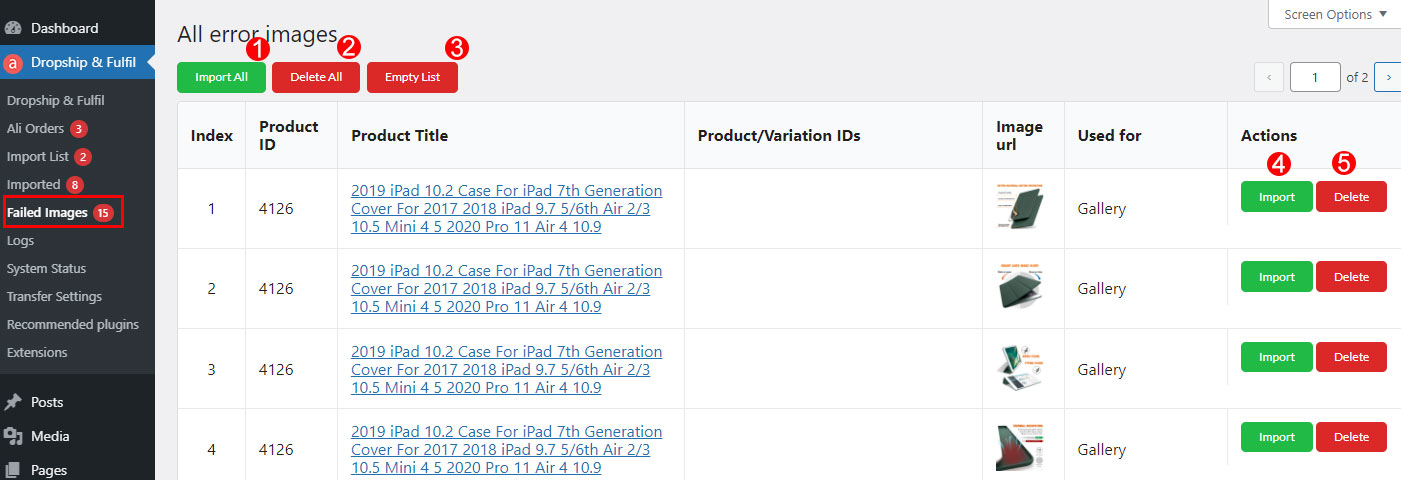
- Failed Images
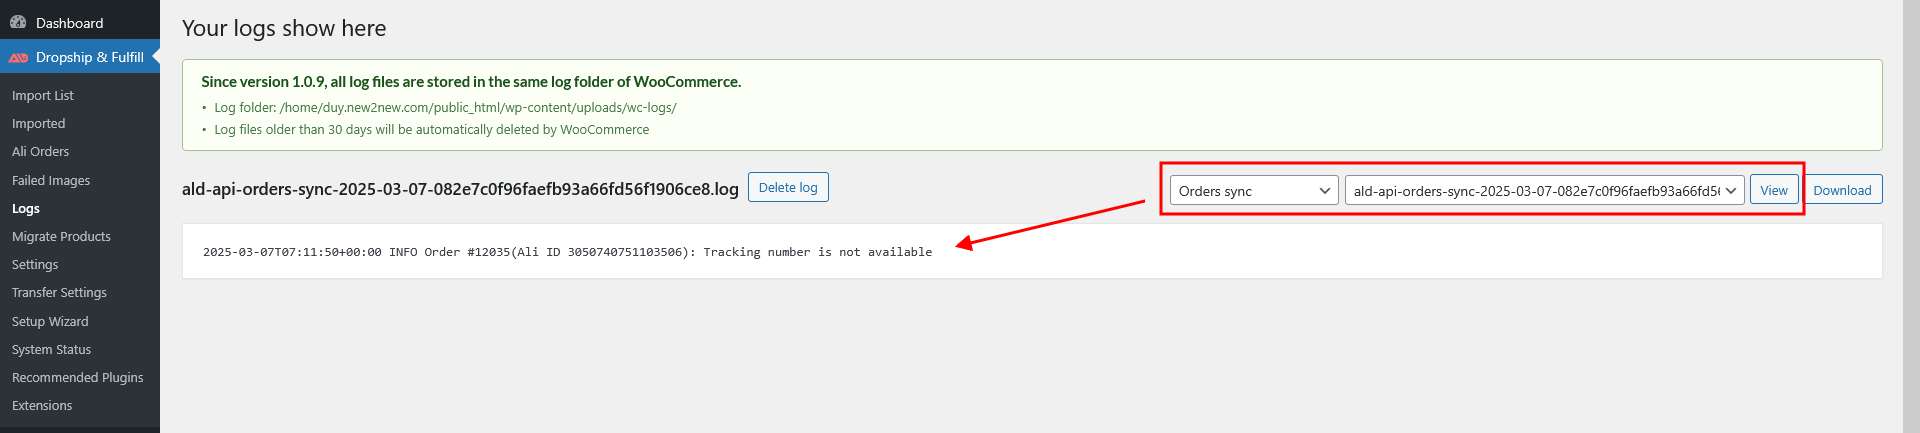
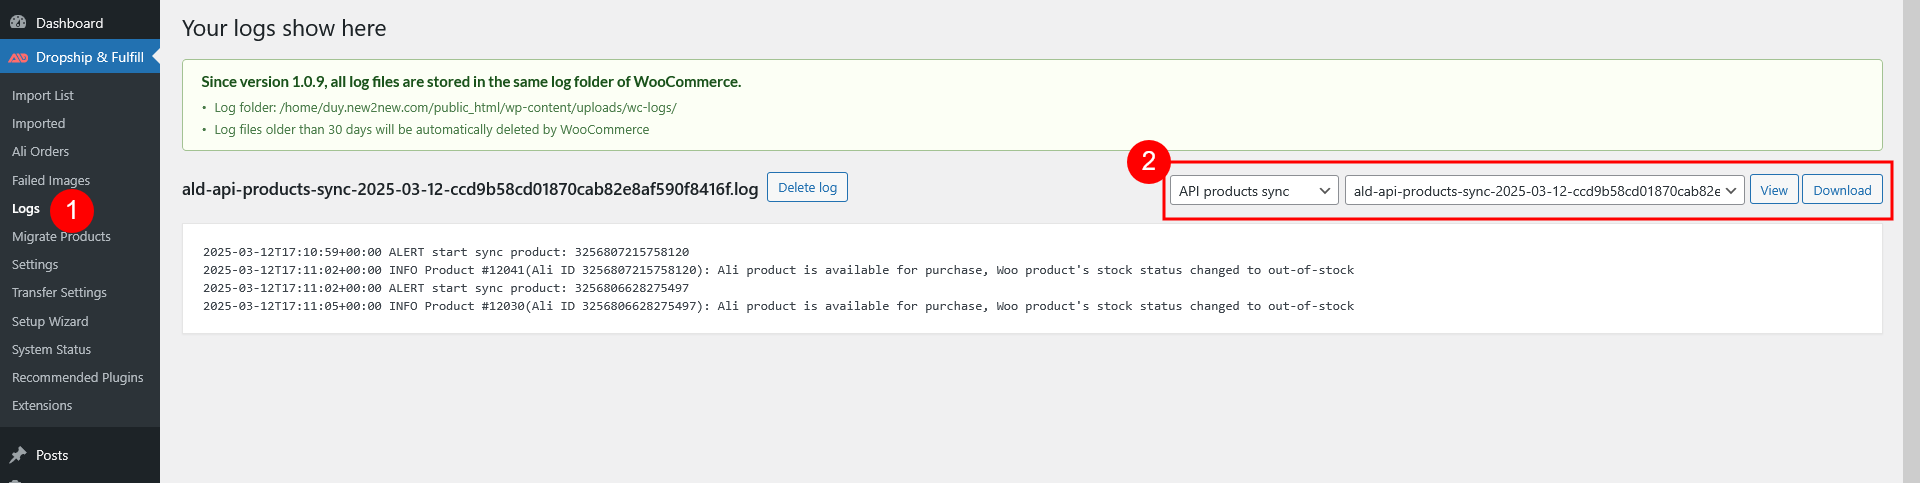
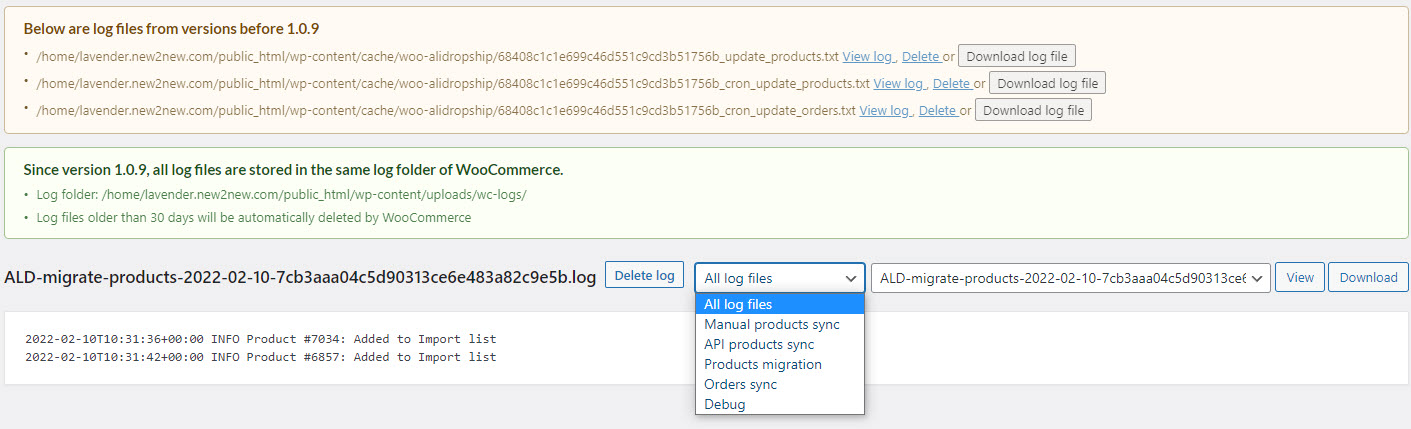
- Logs
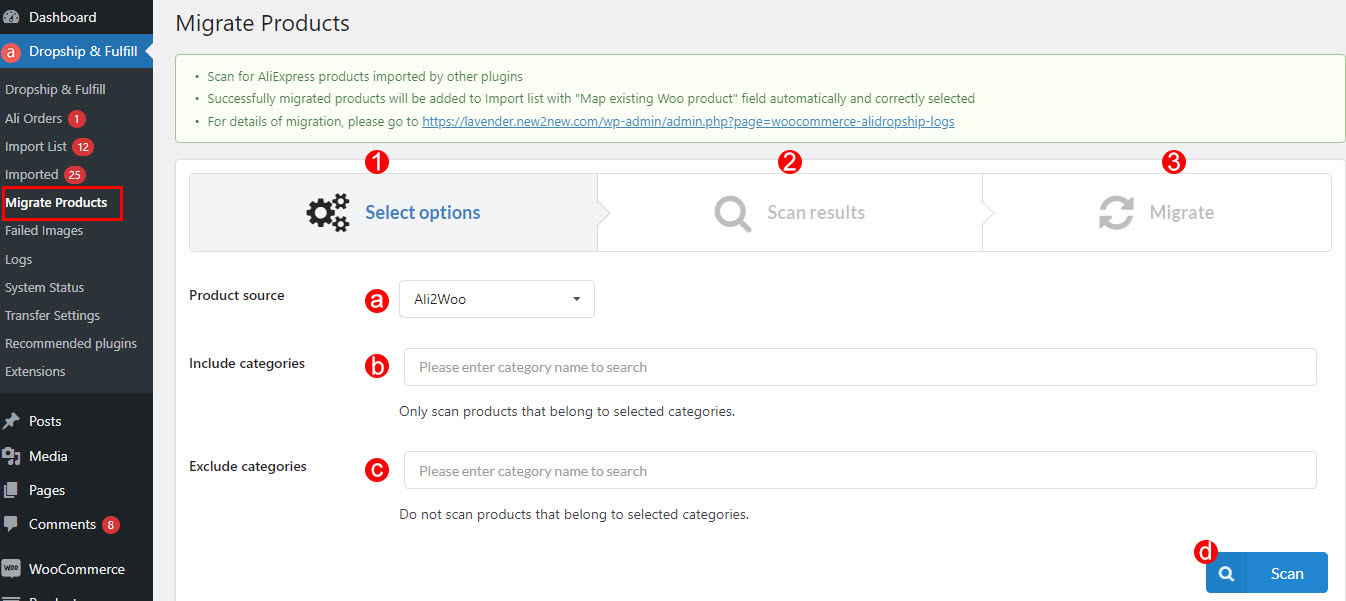
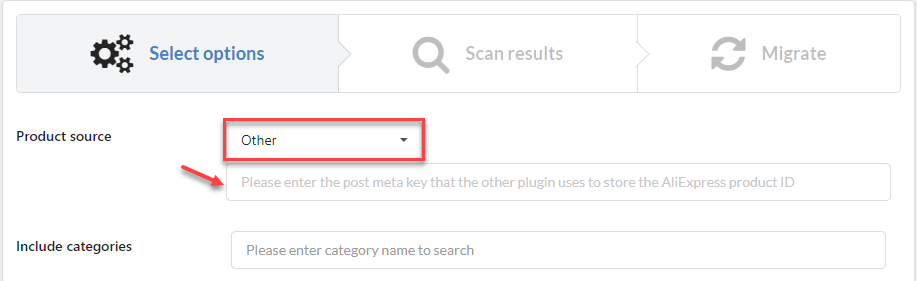
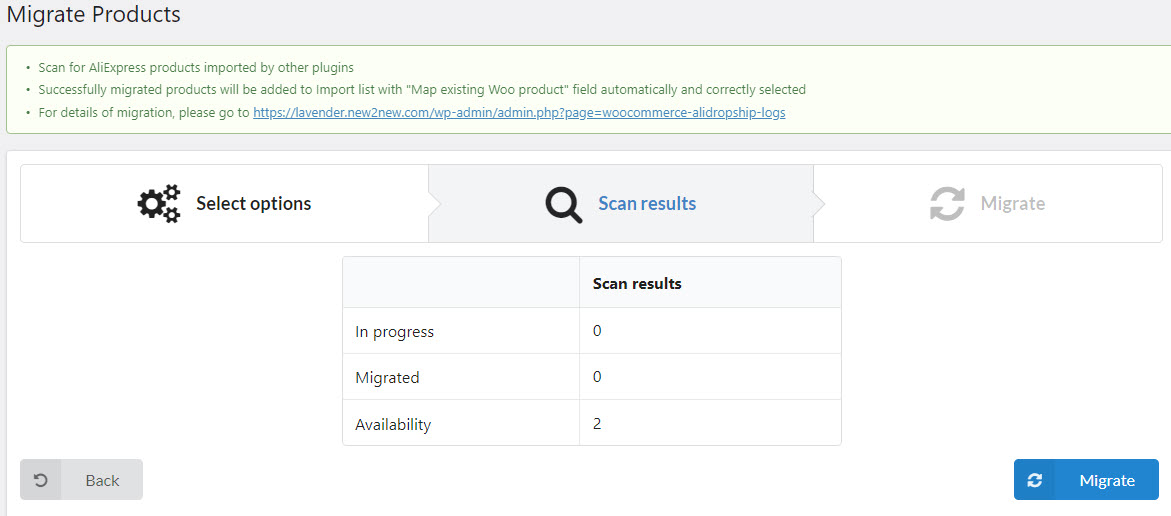
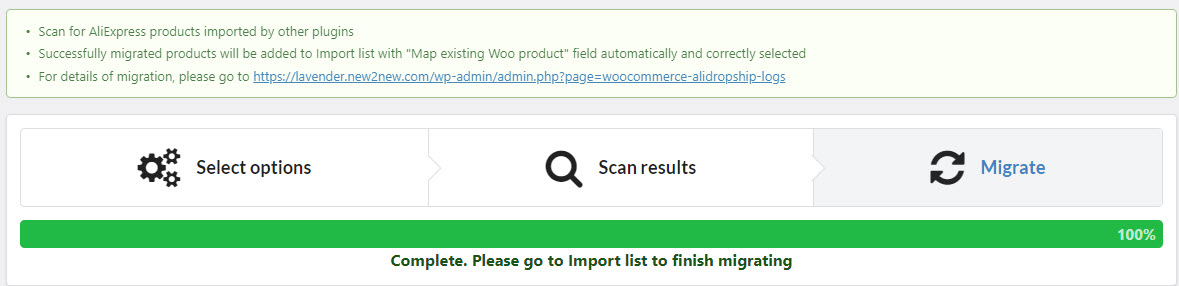
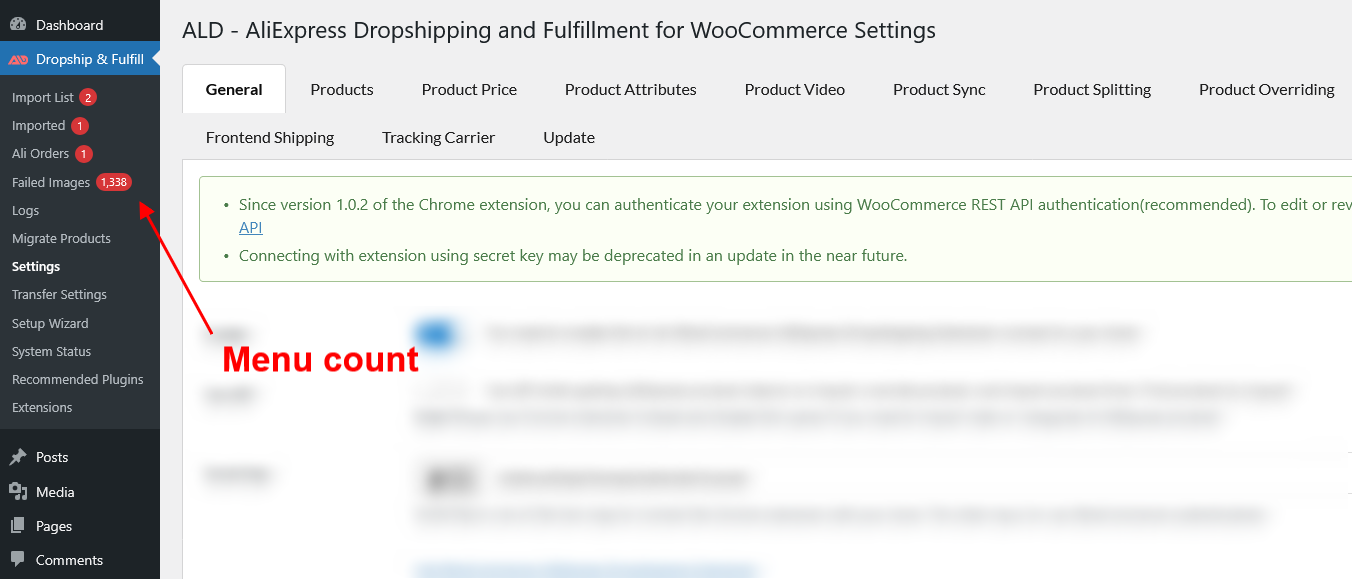
- Migrate Products
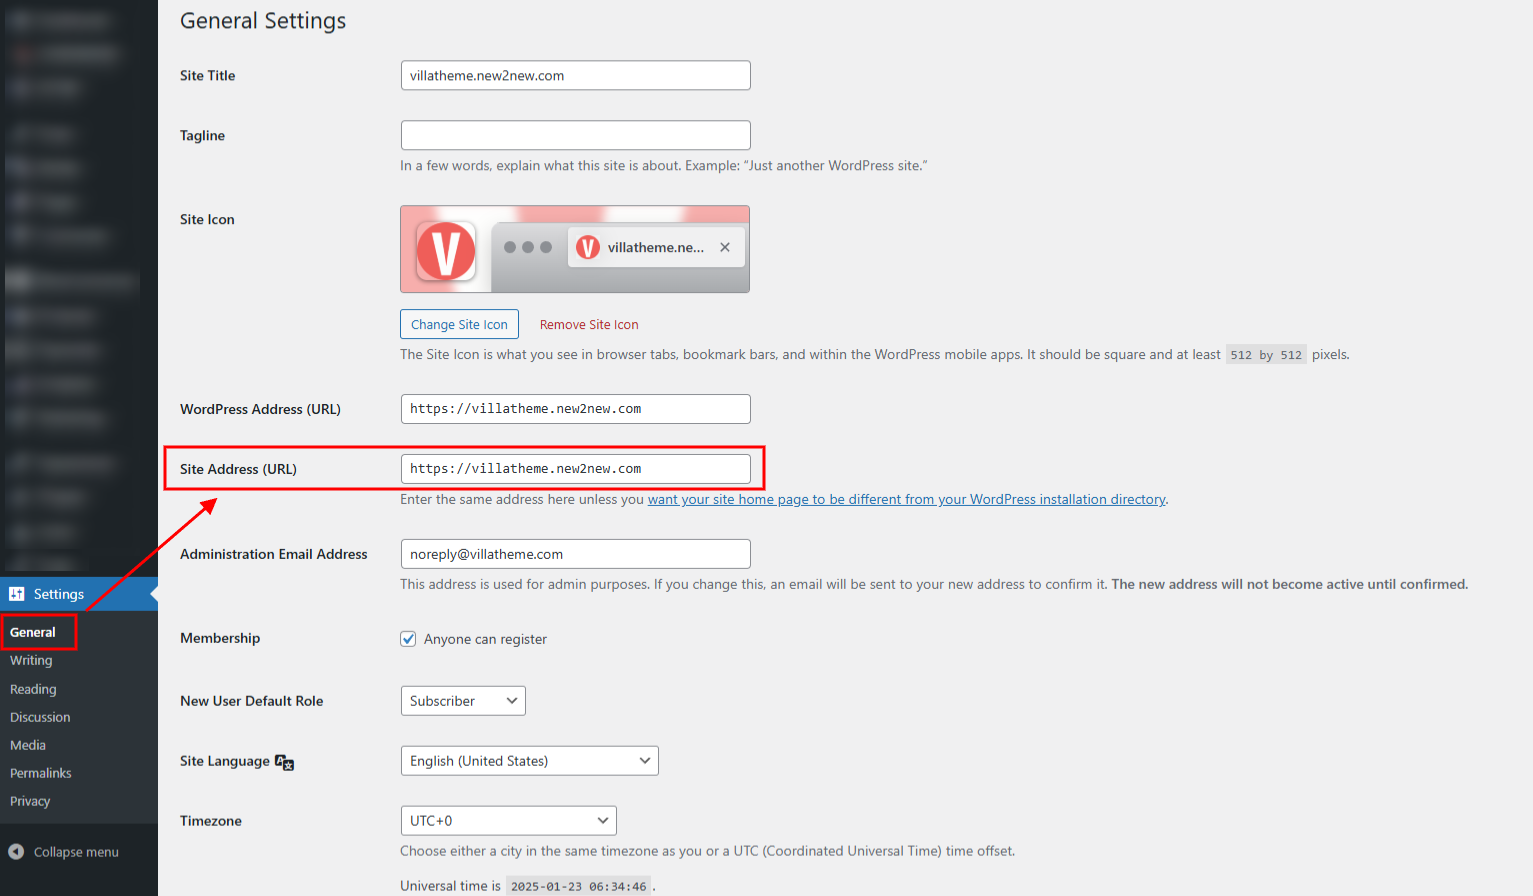
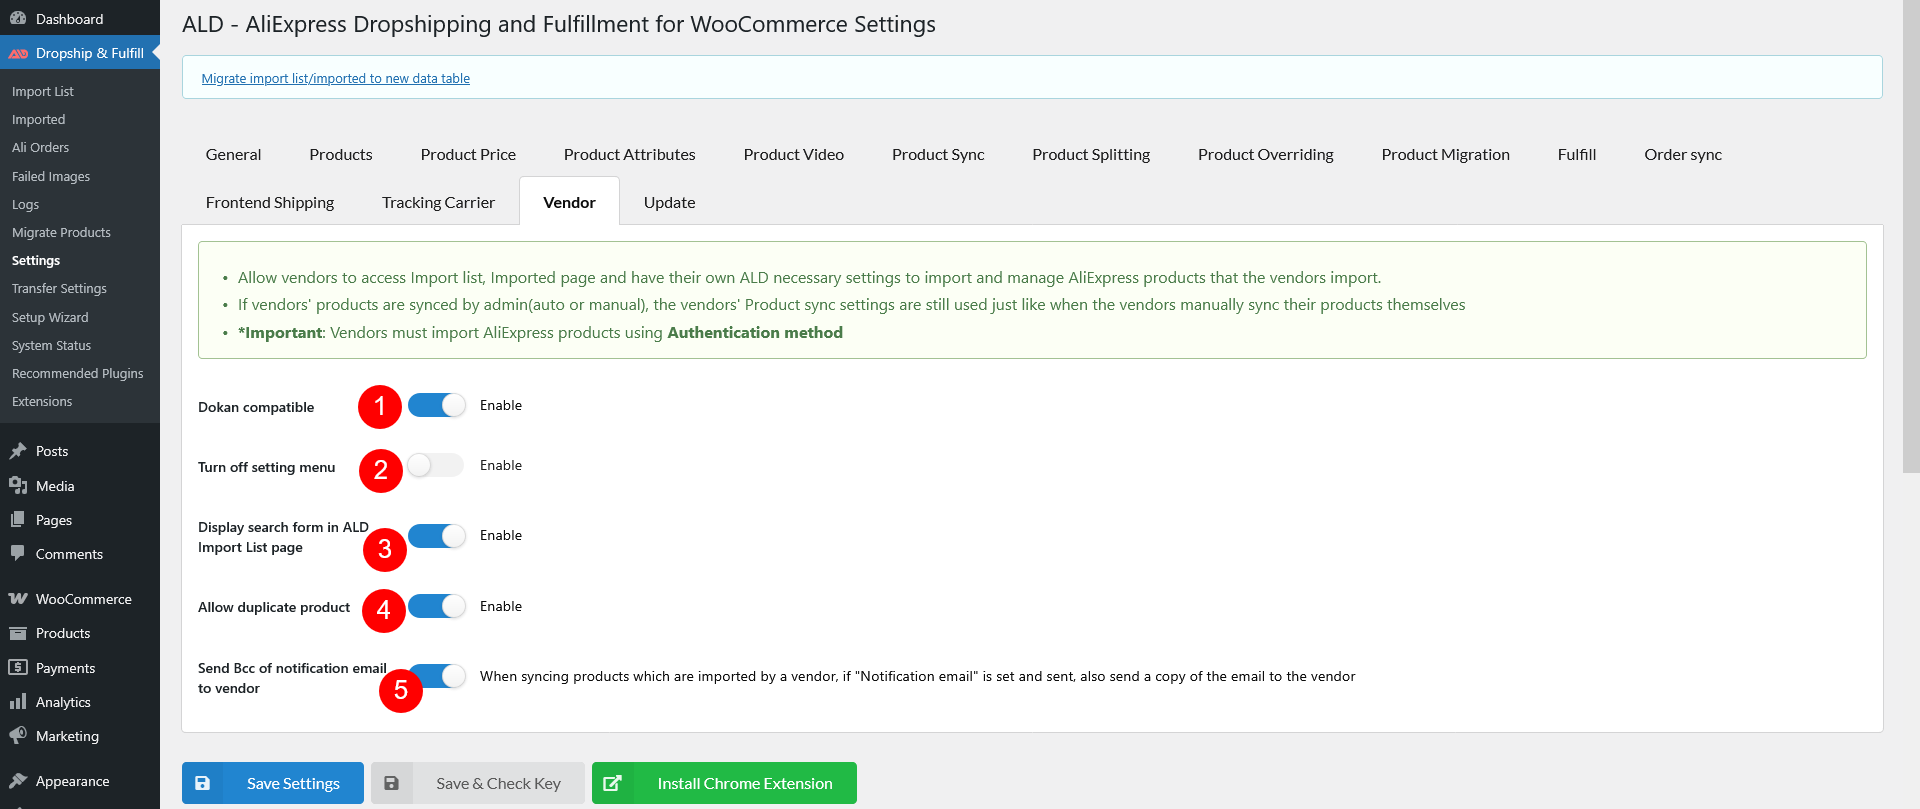
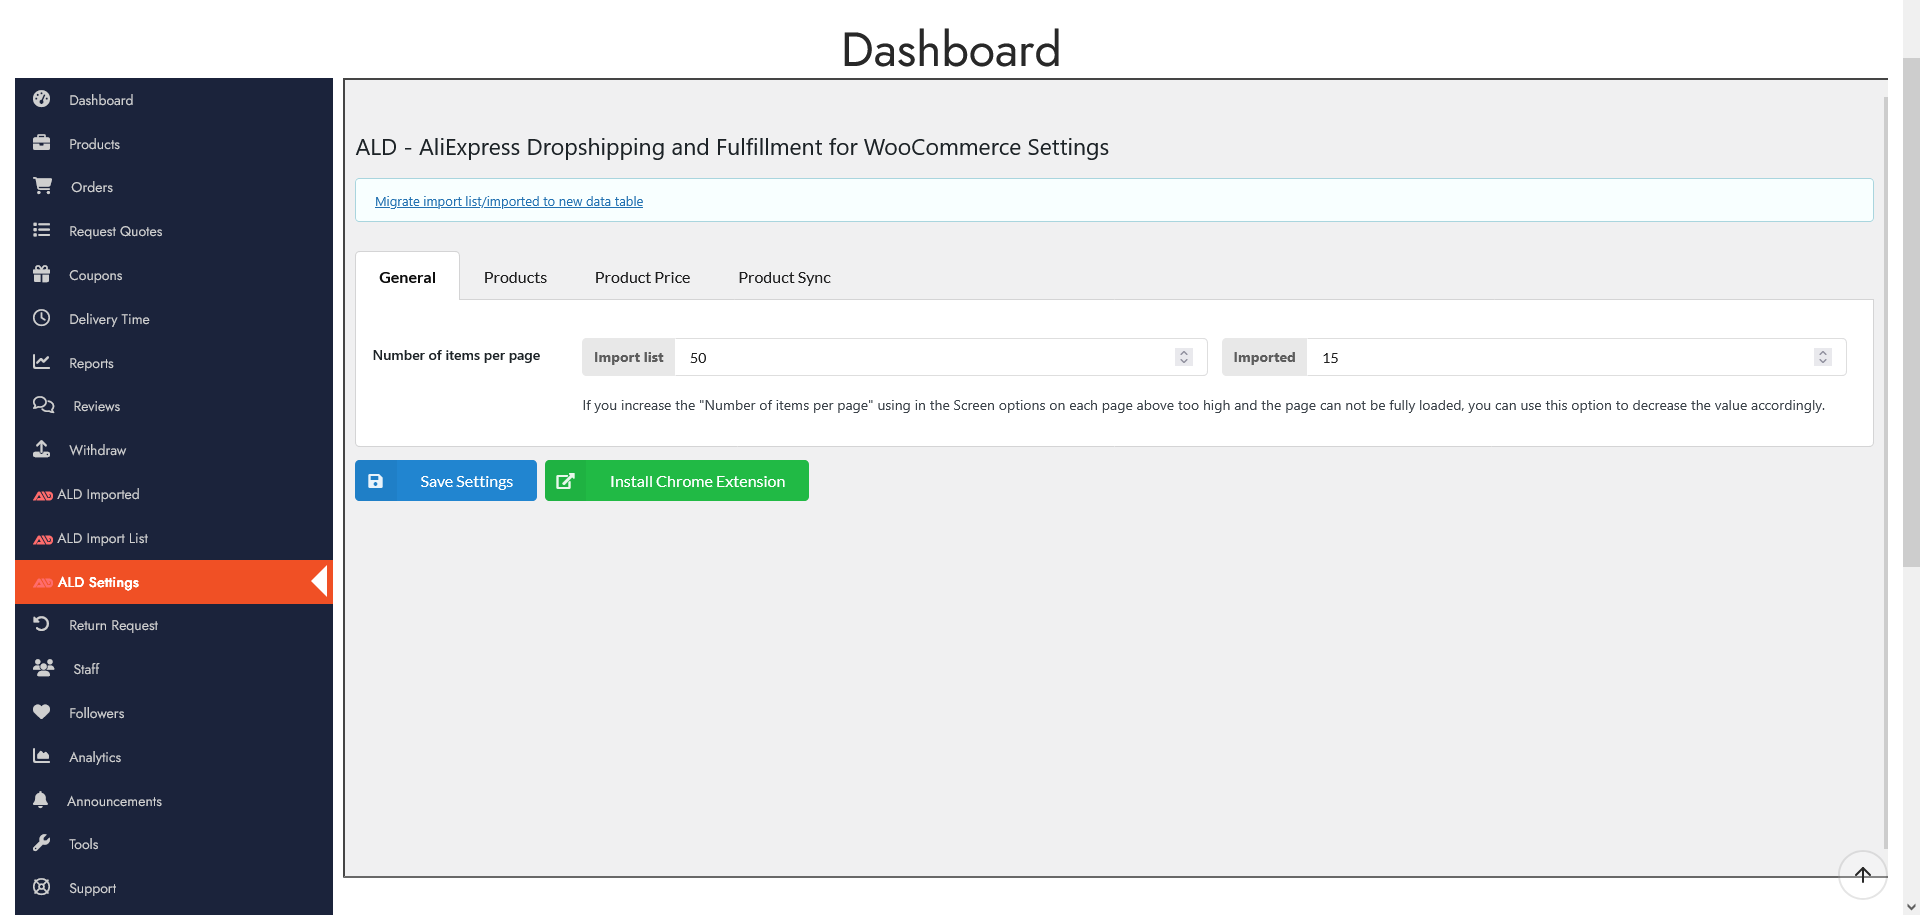
- Settings – General
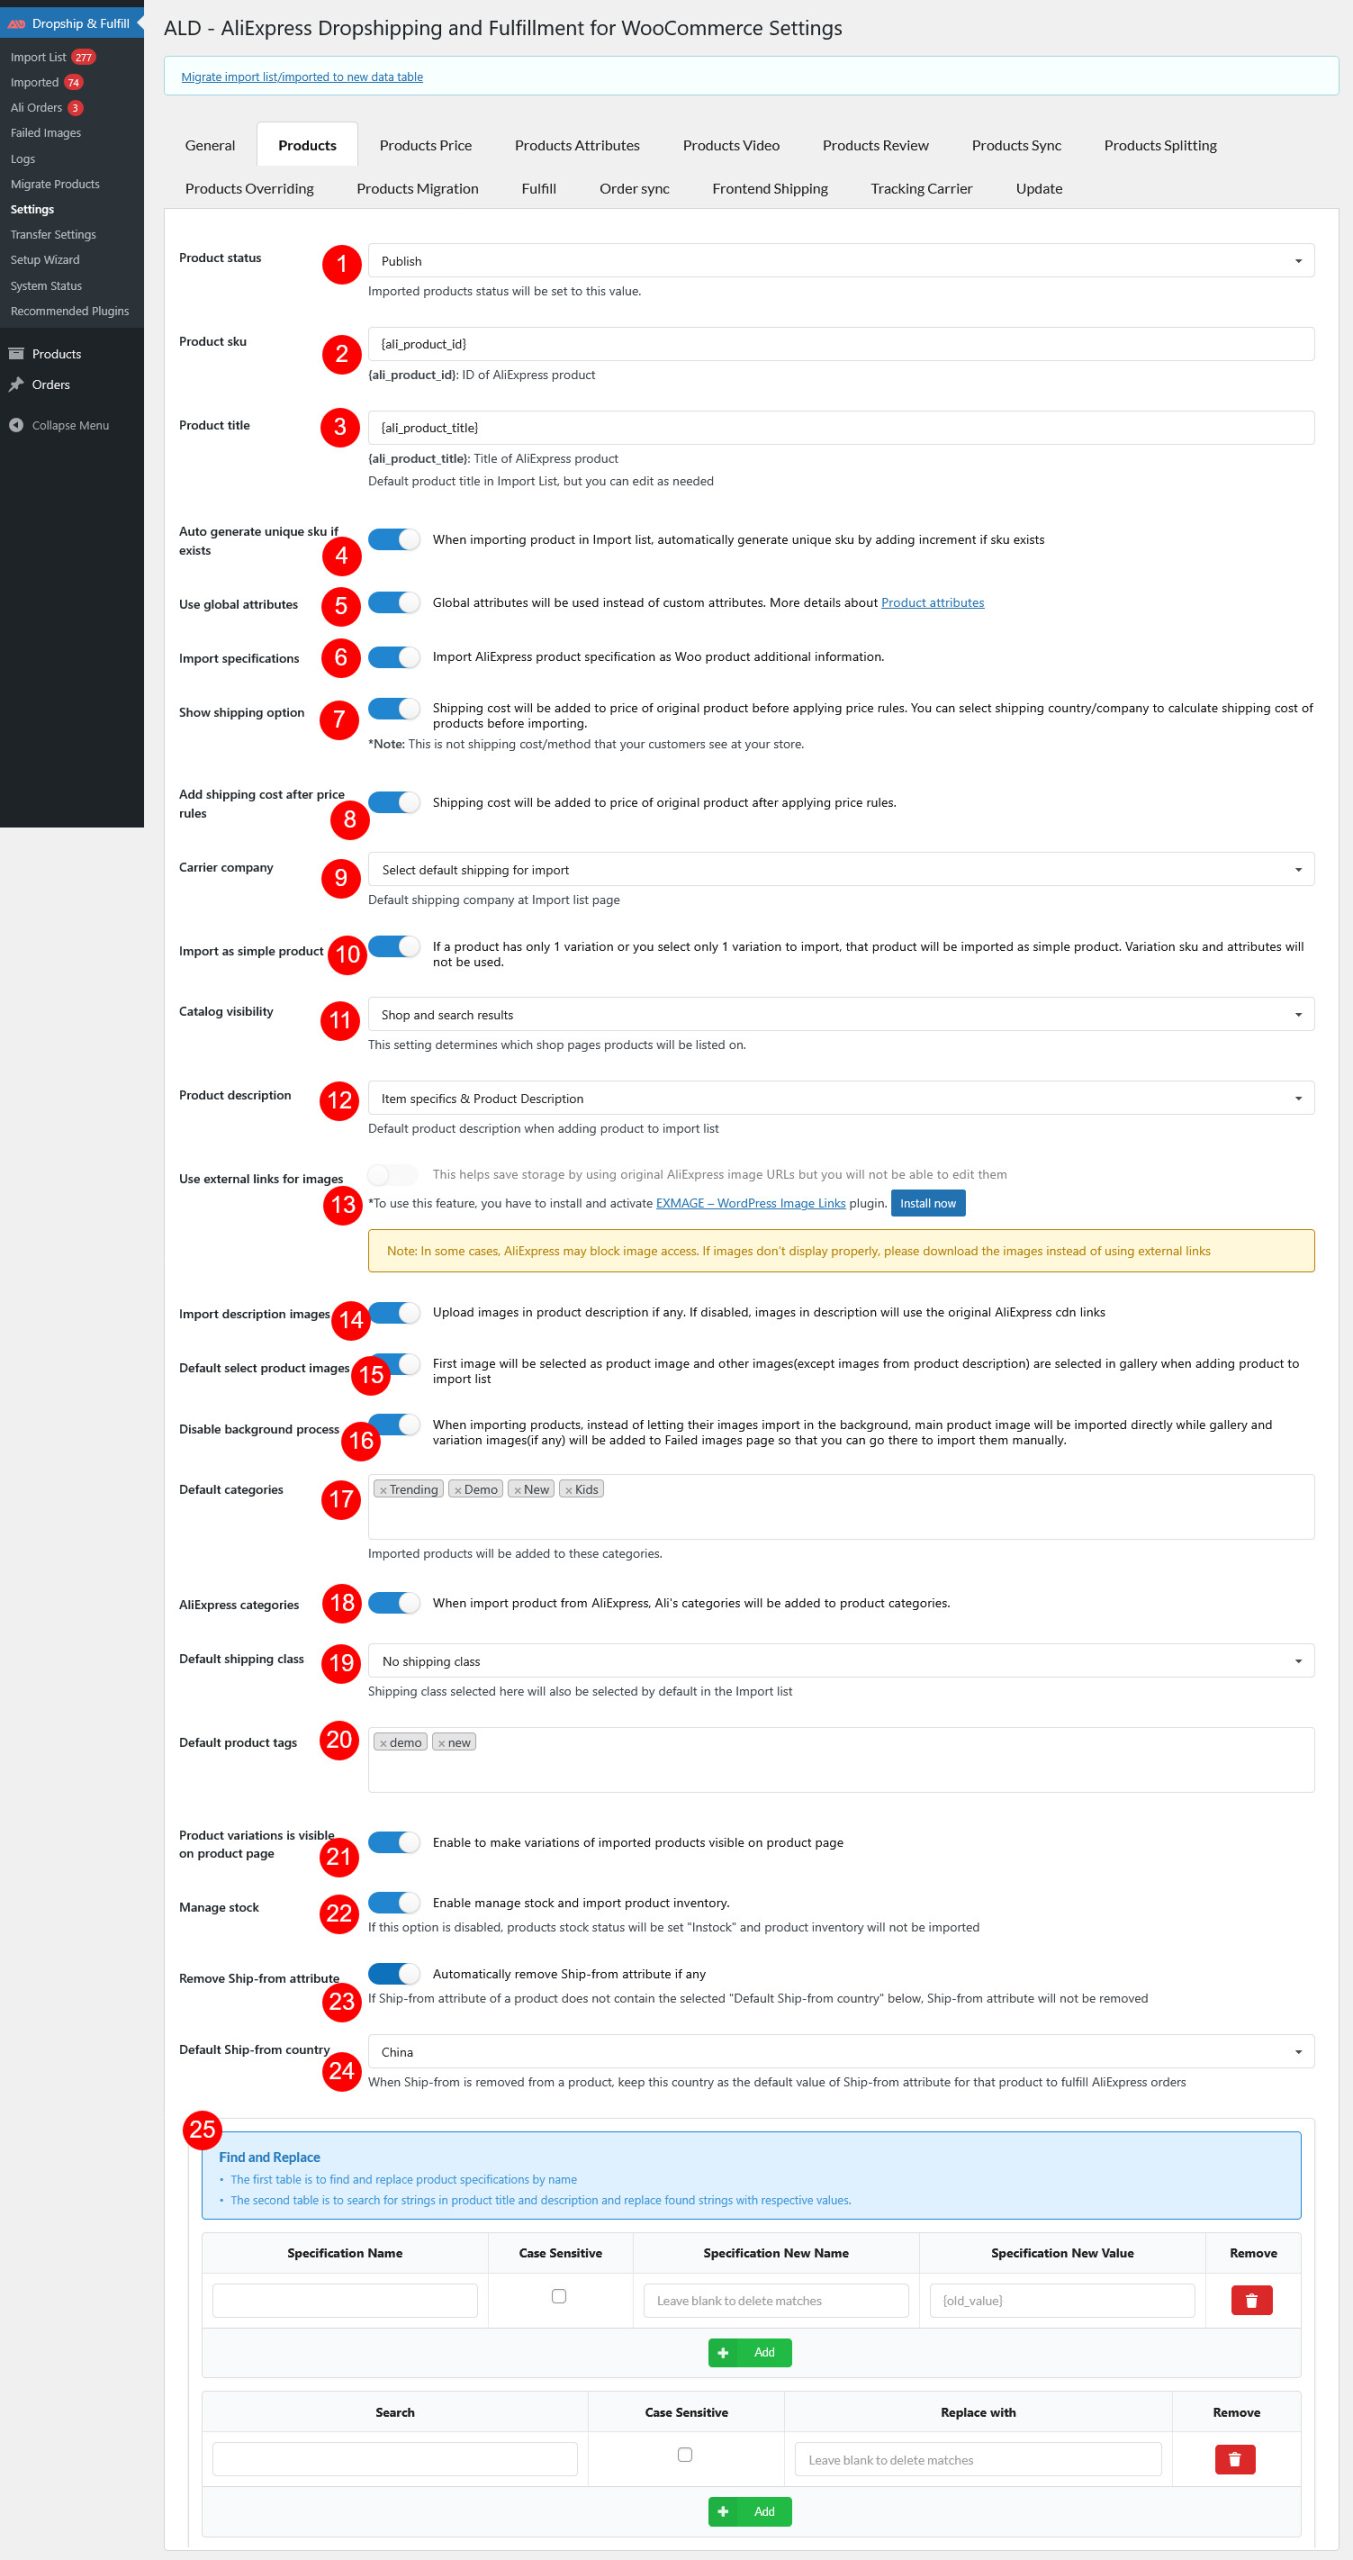
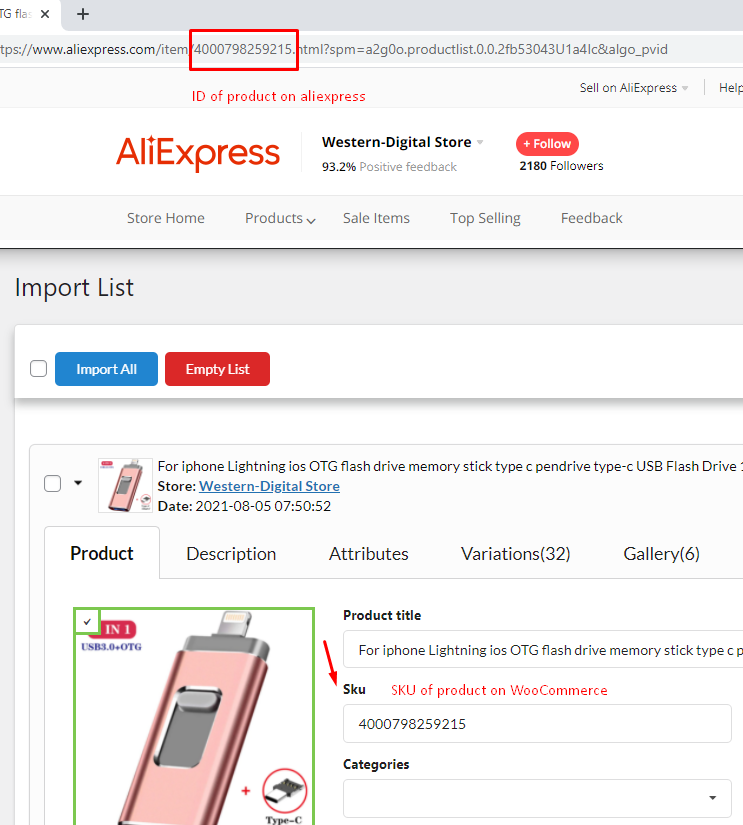
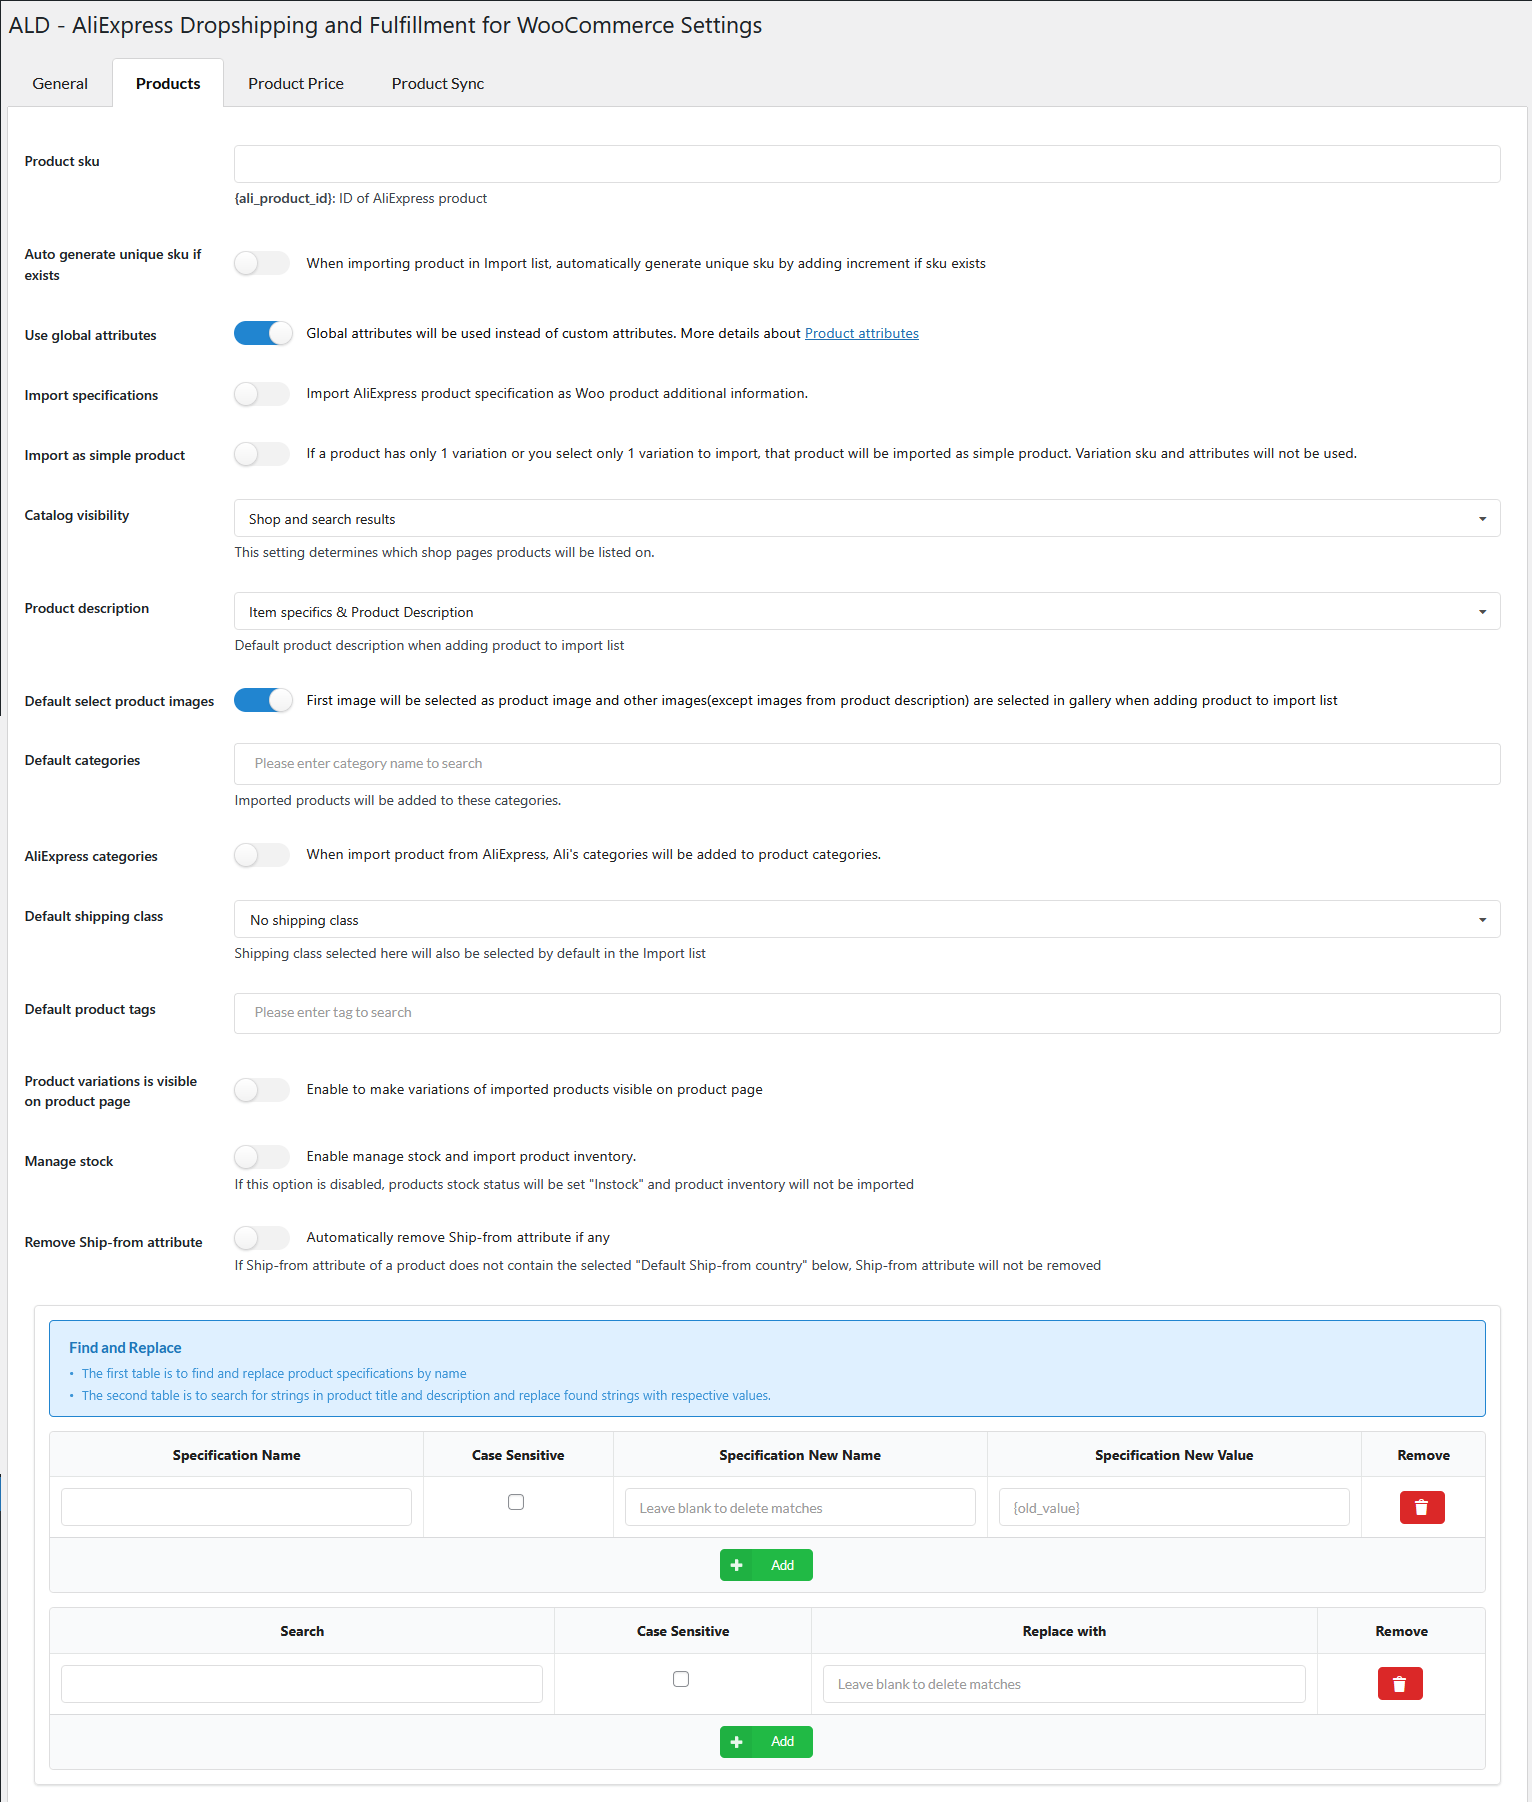
- Settings – Products
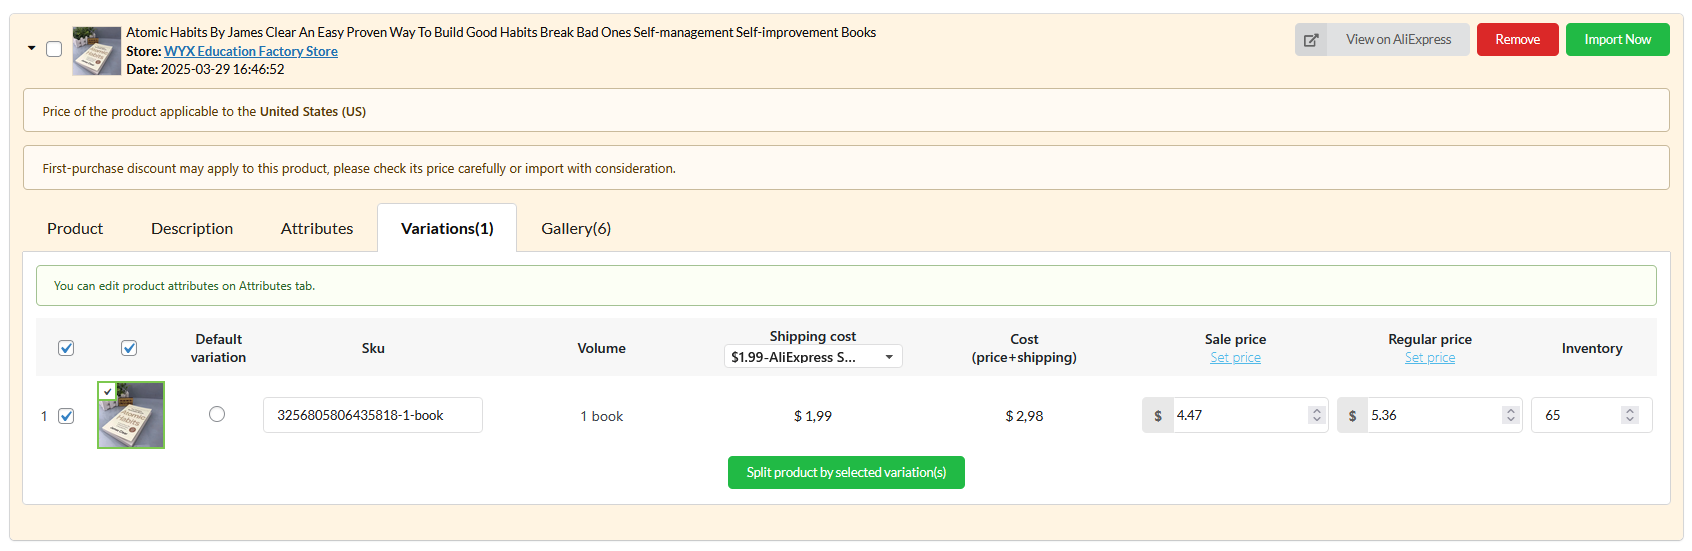
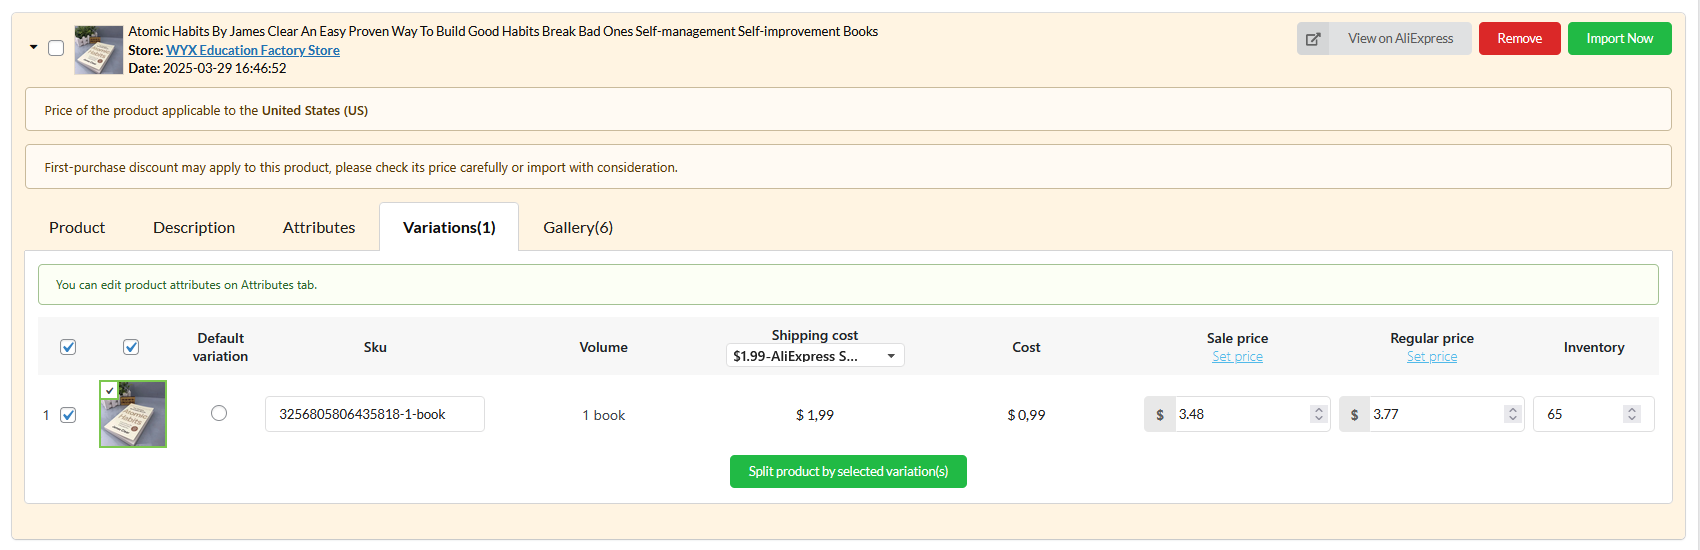
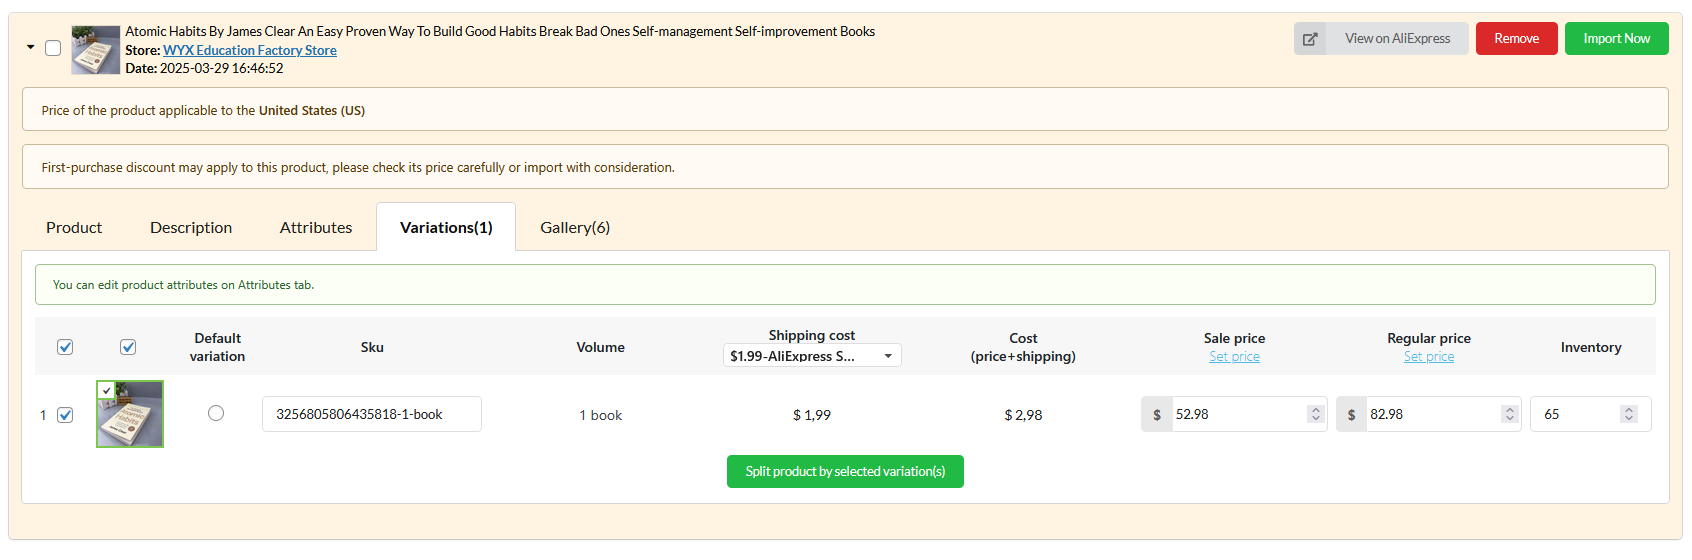
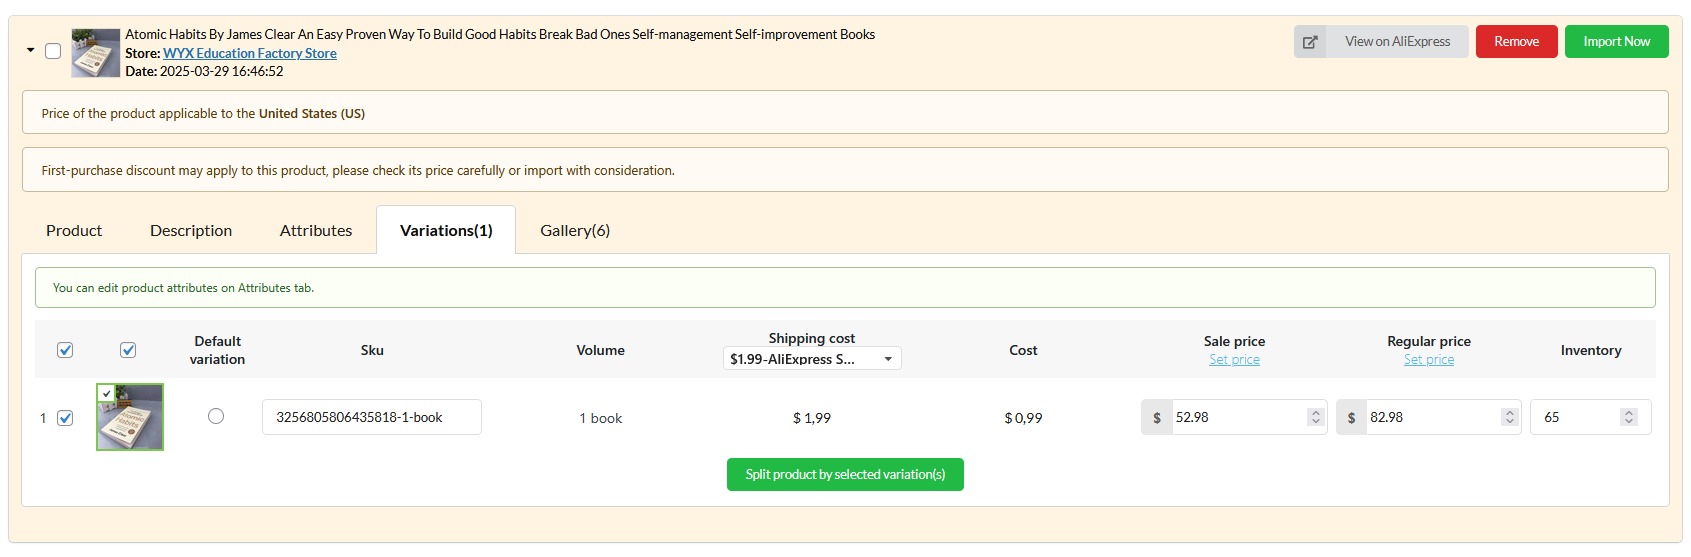
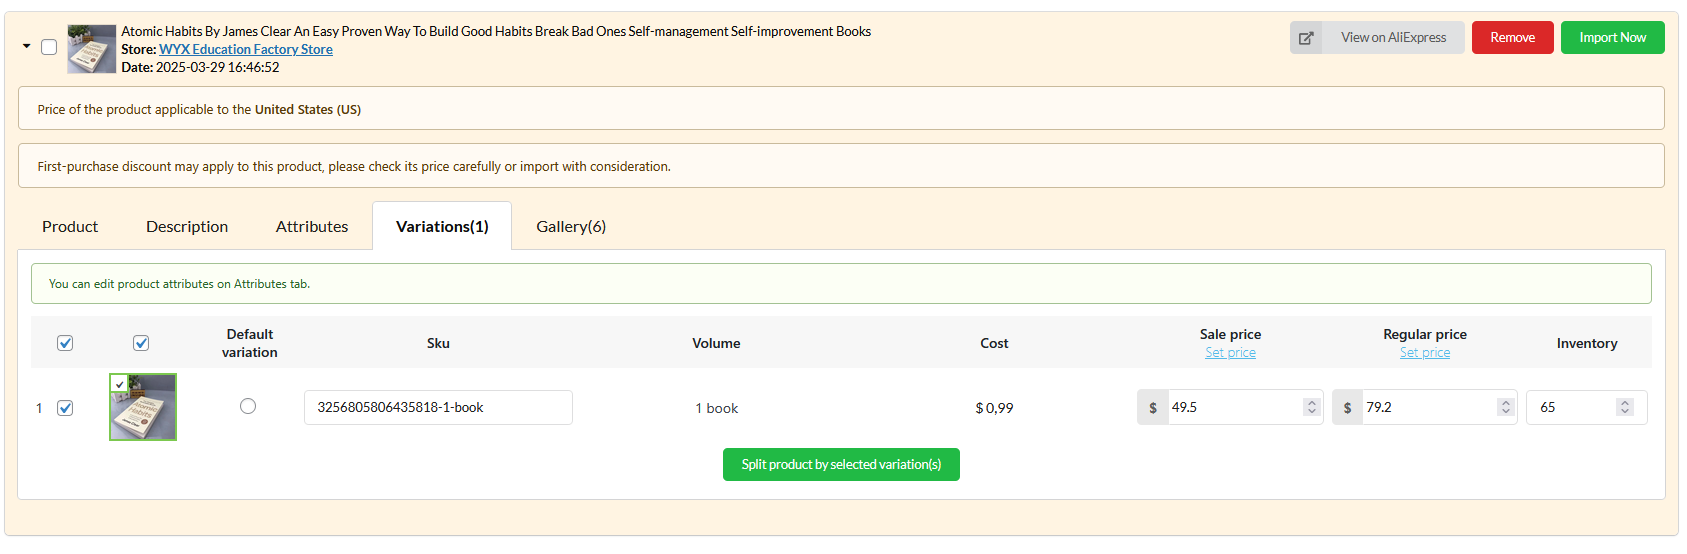
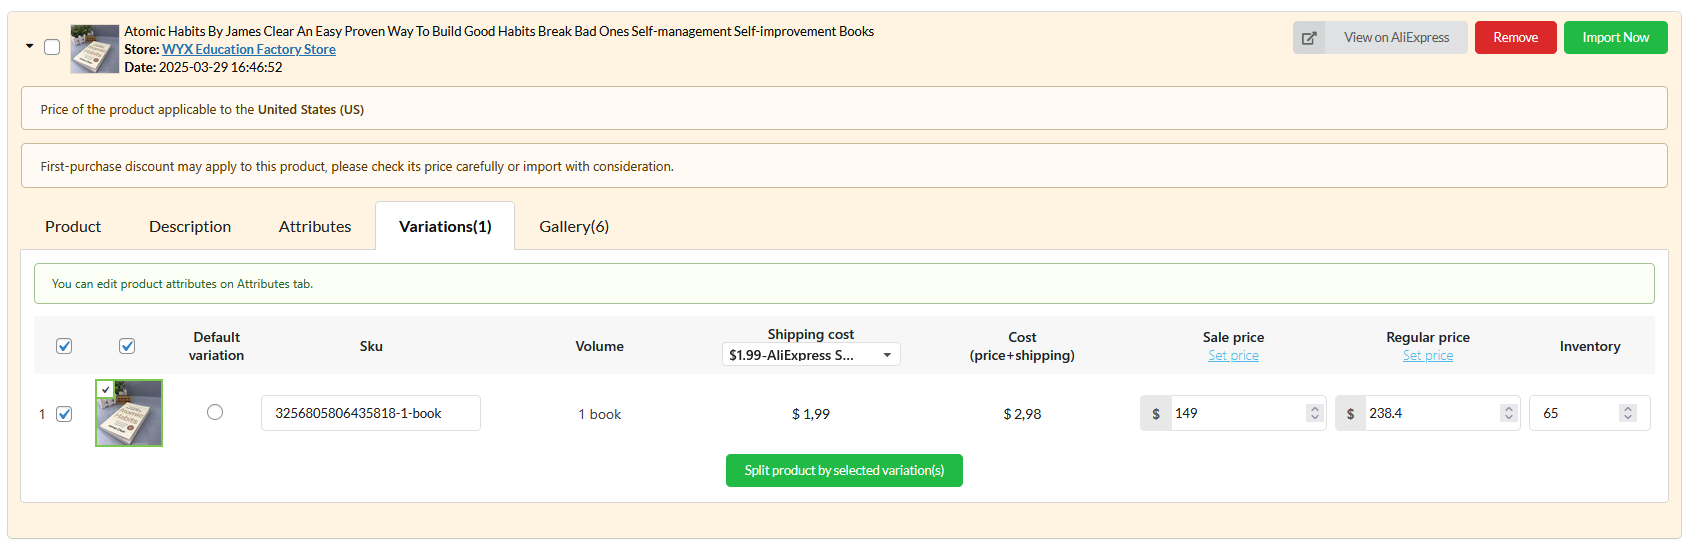
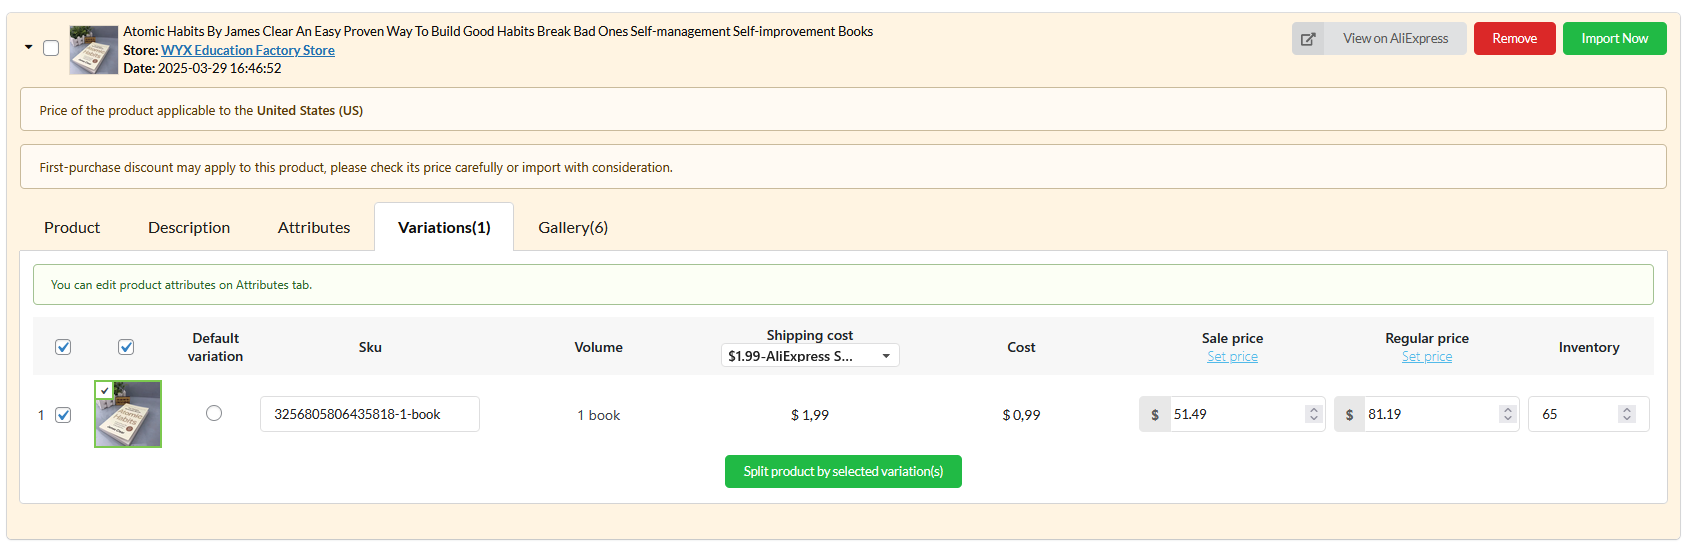
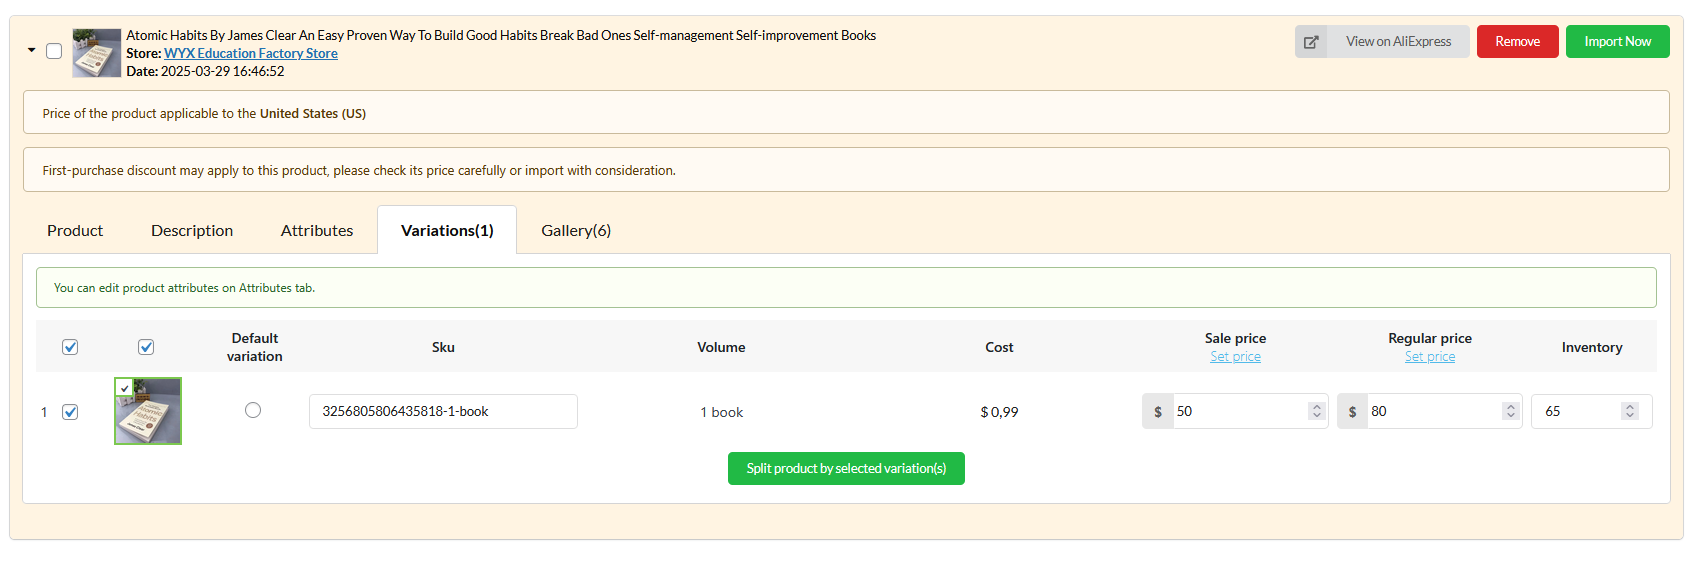
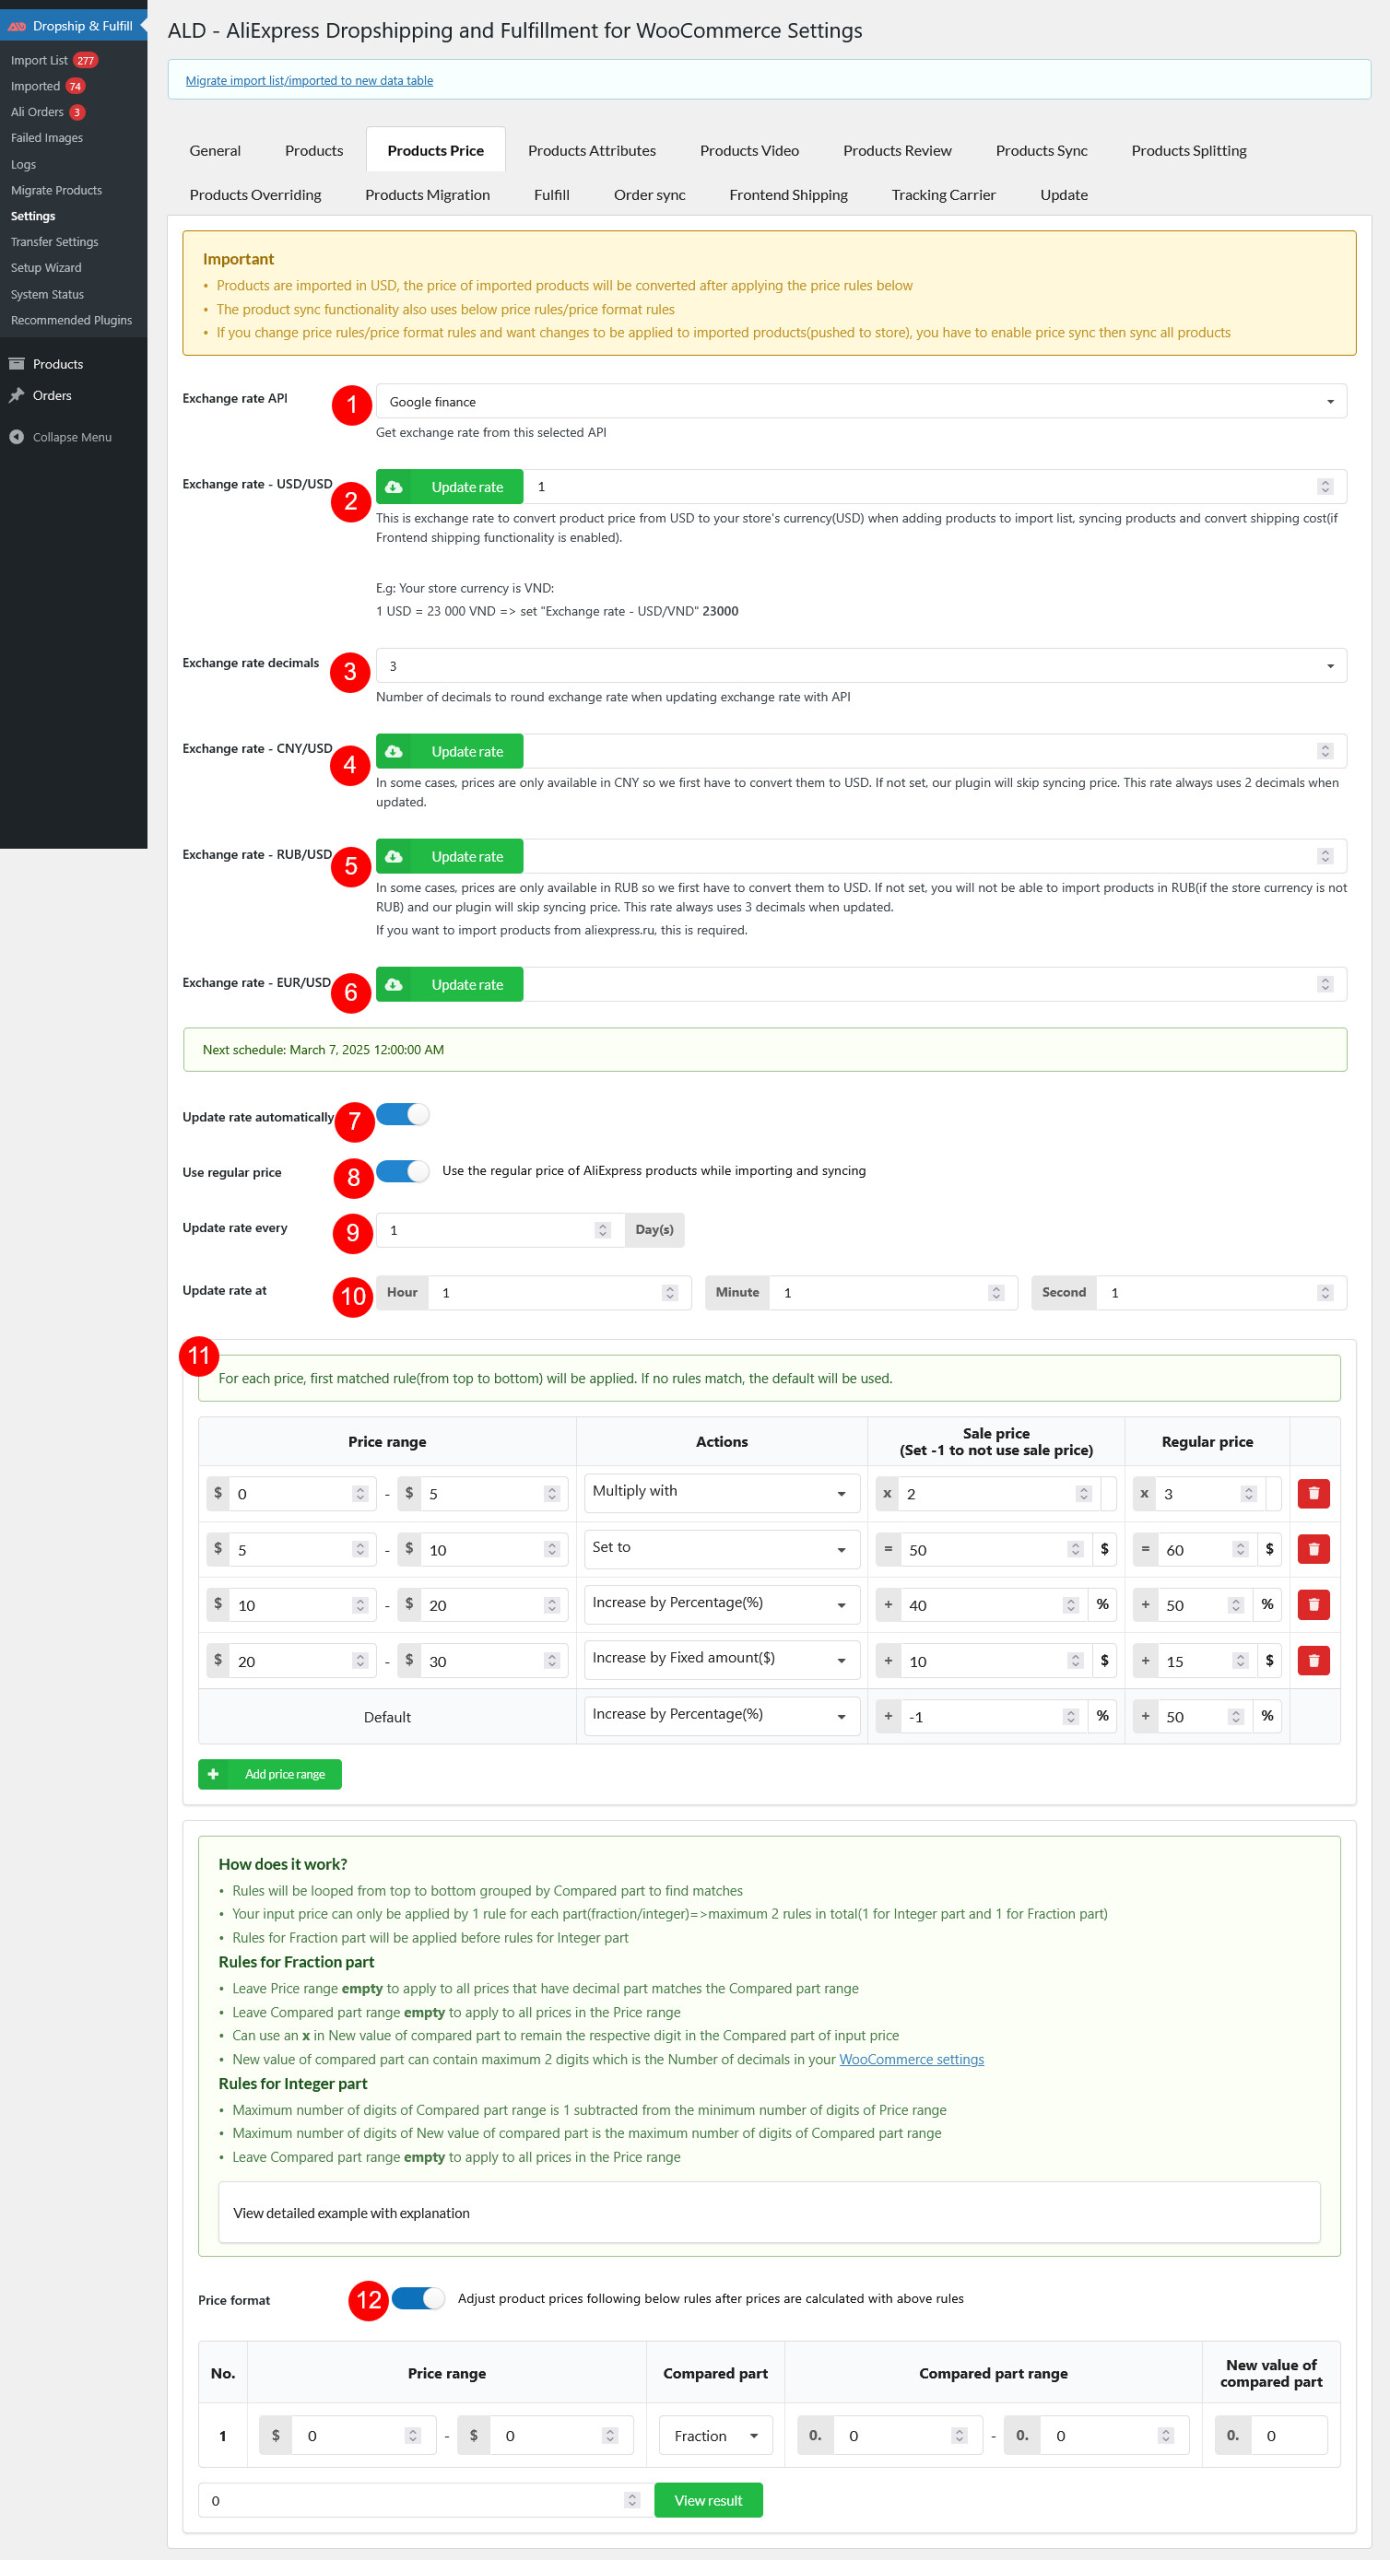
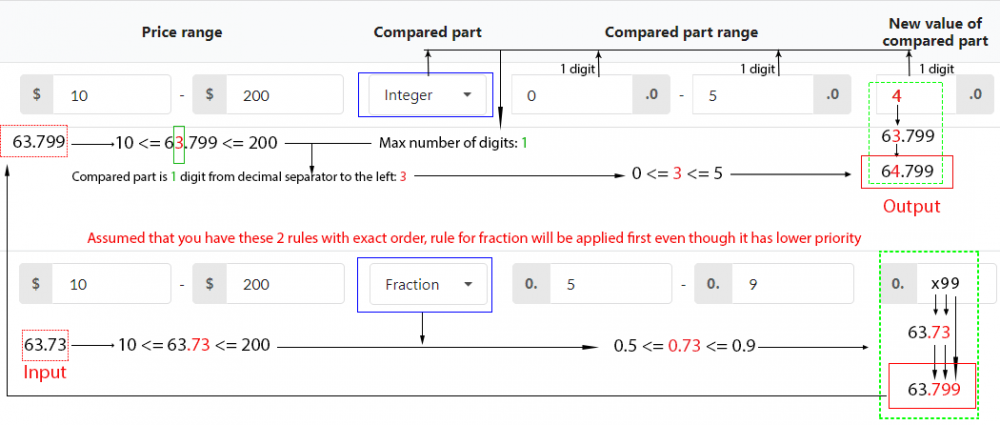
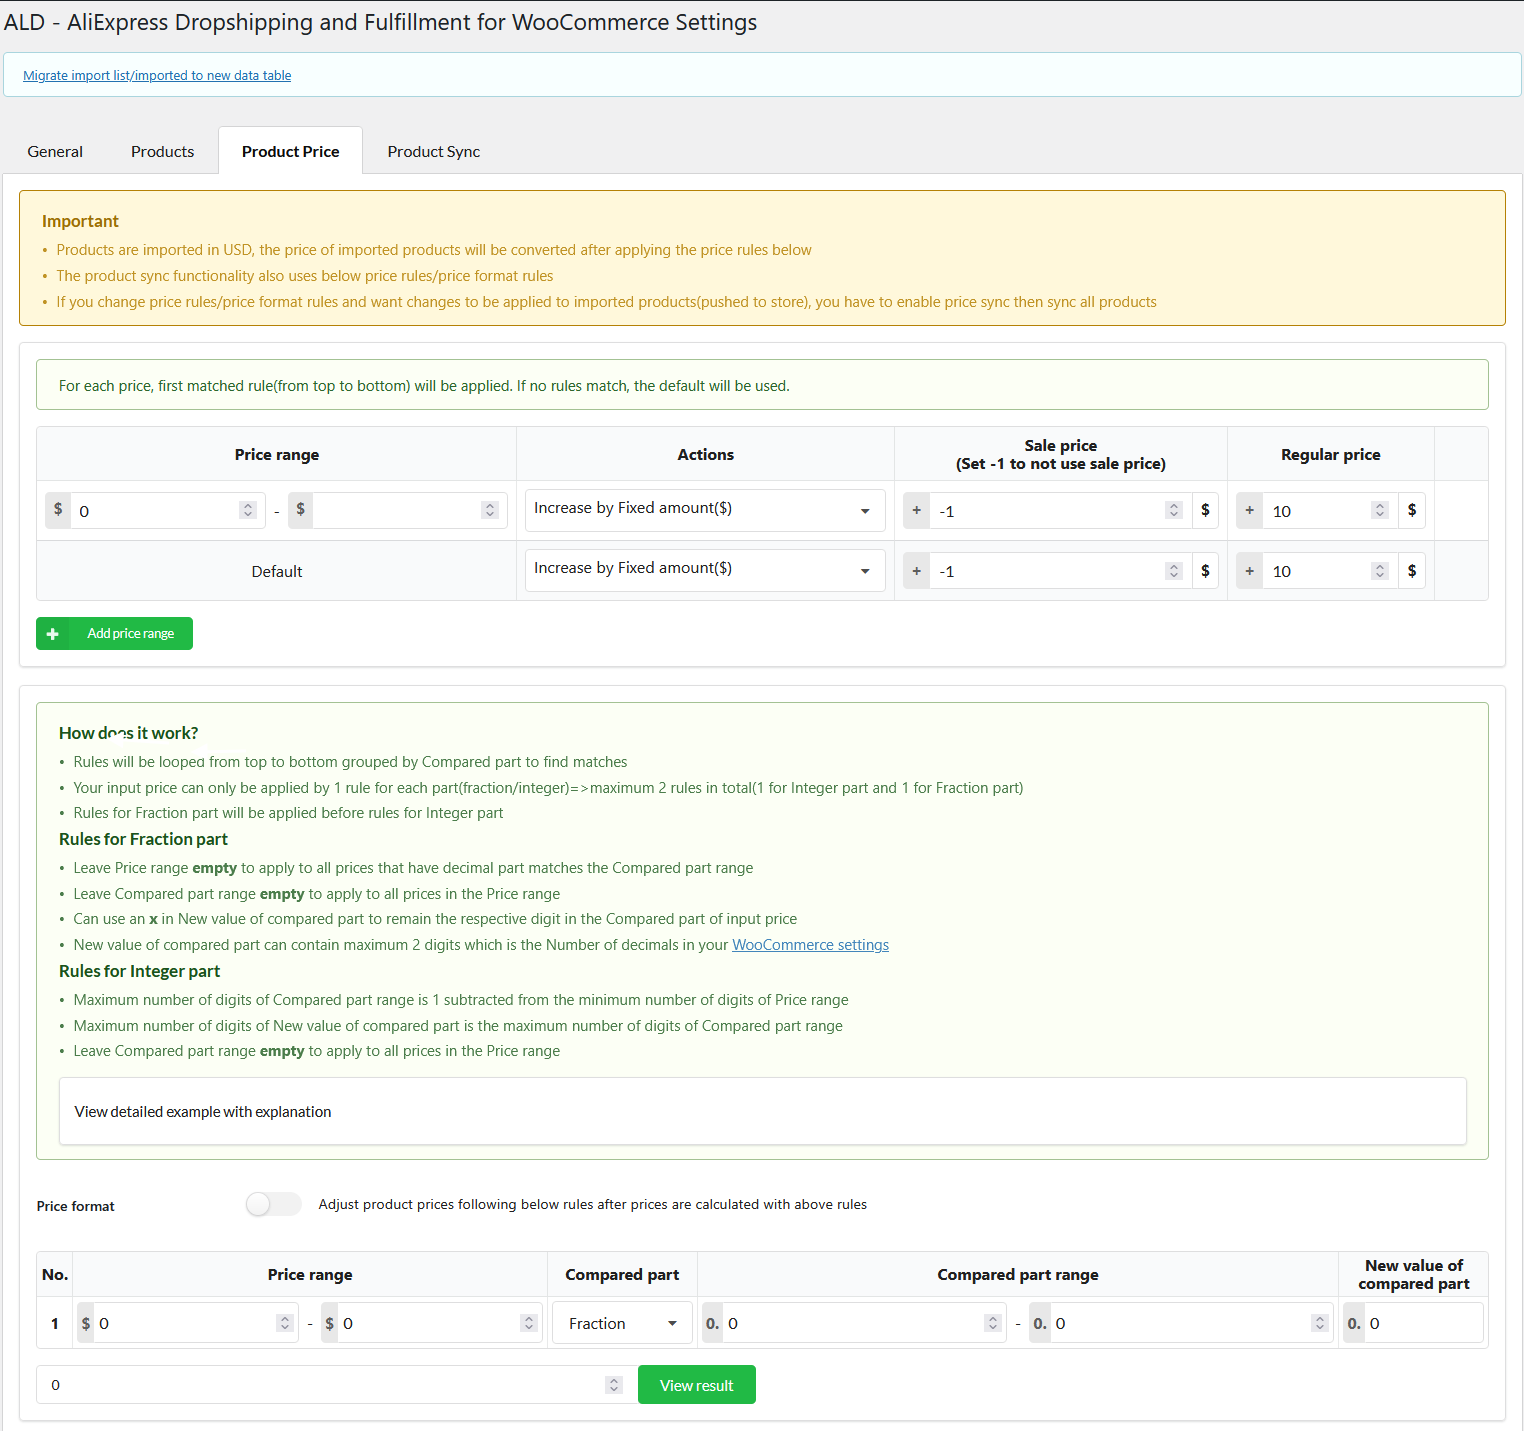
- Settings – Product Price
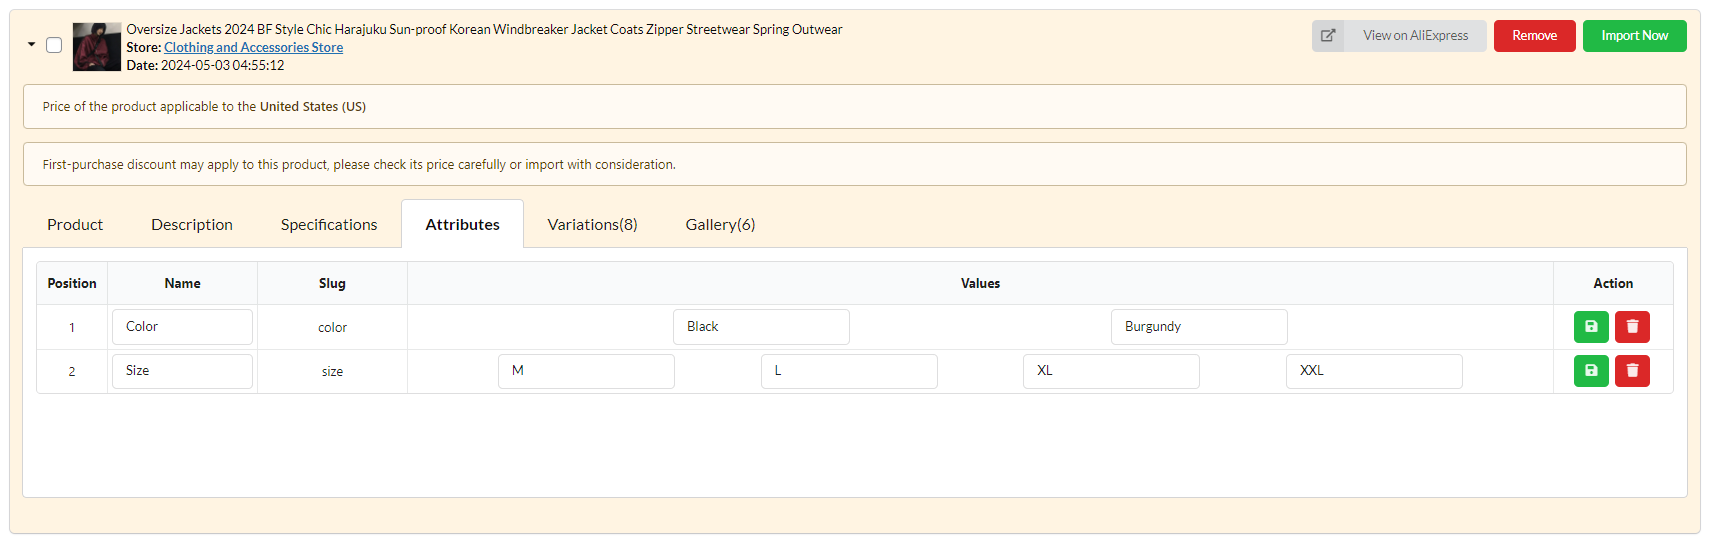
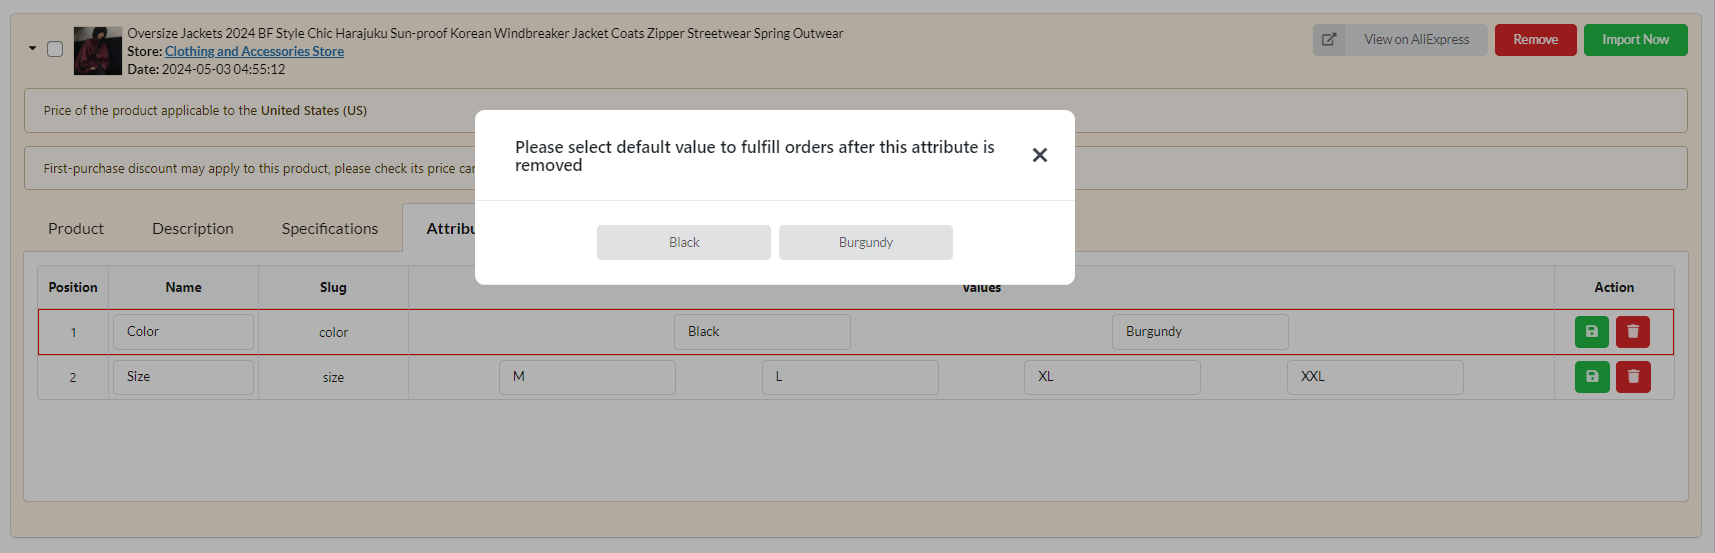
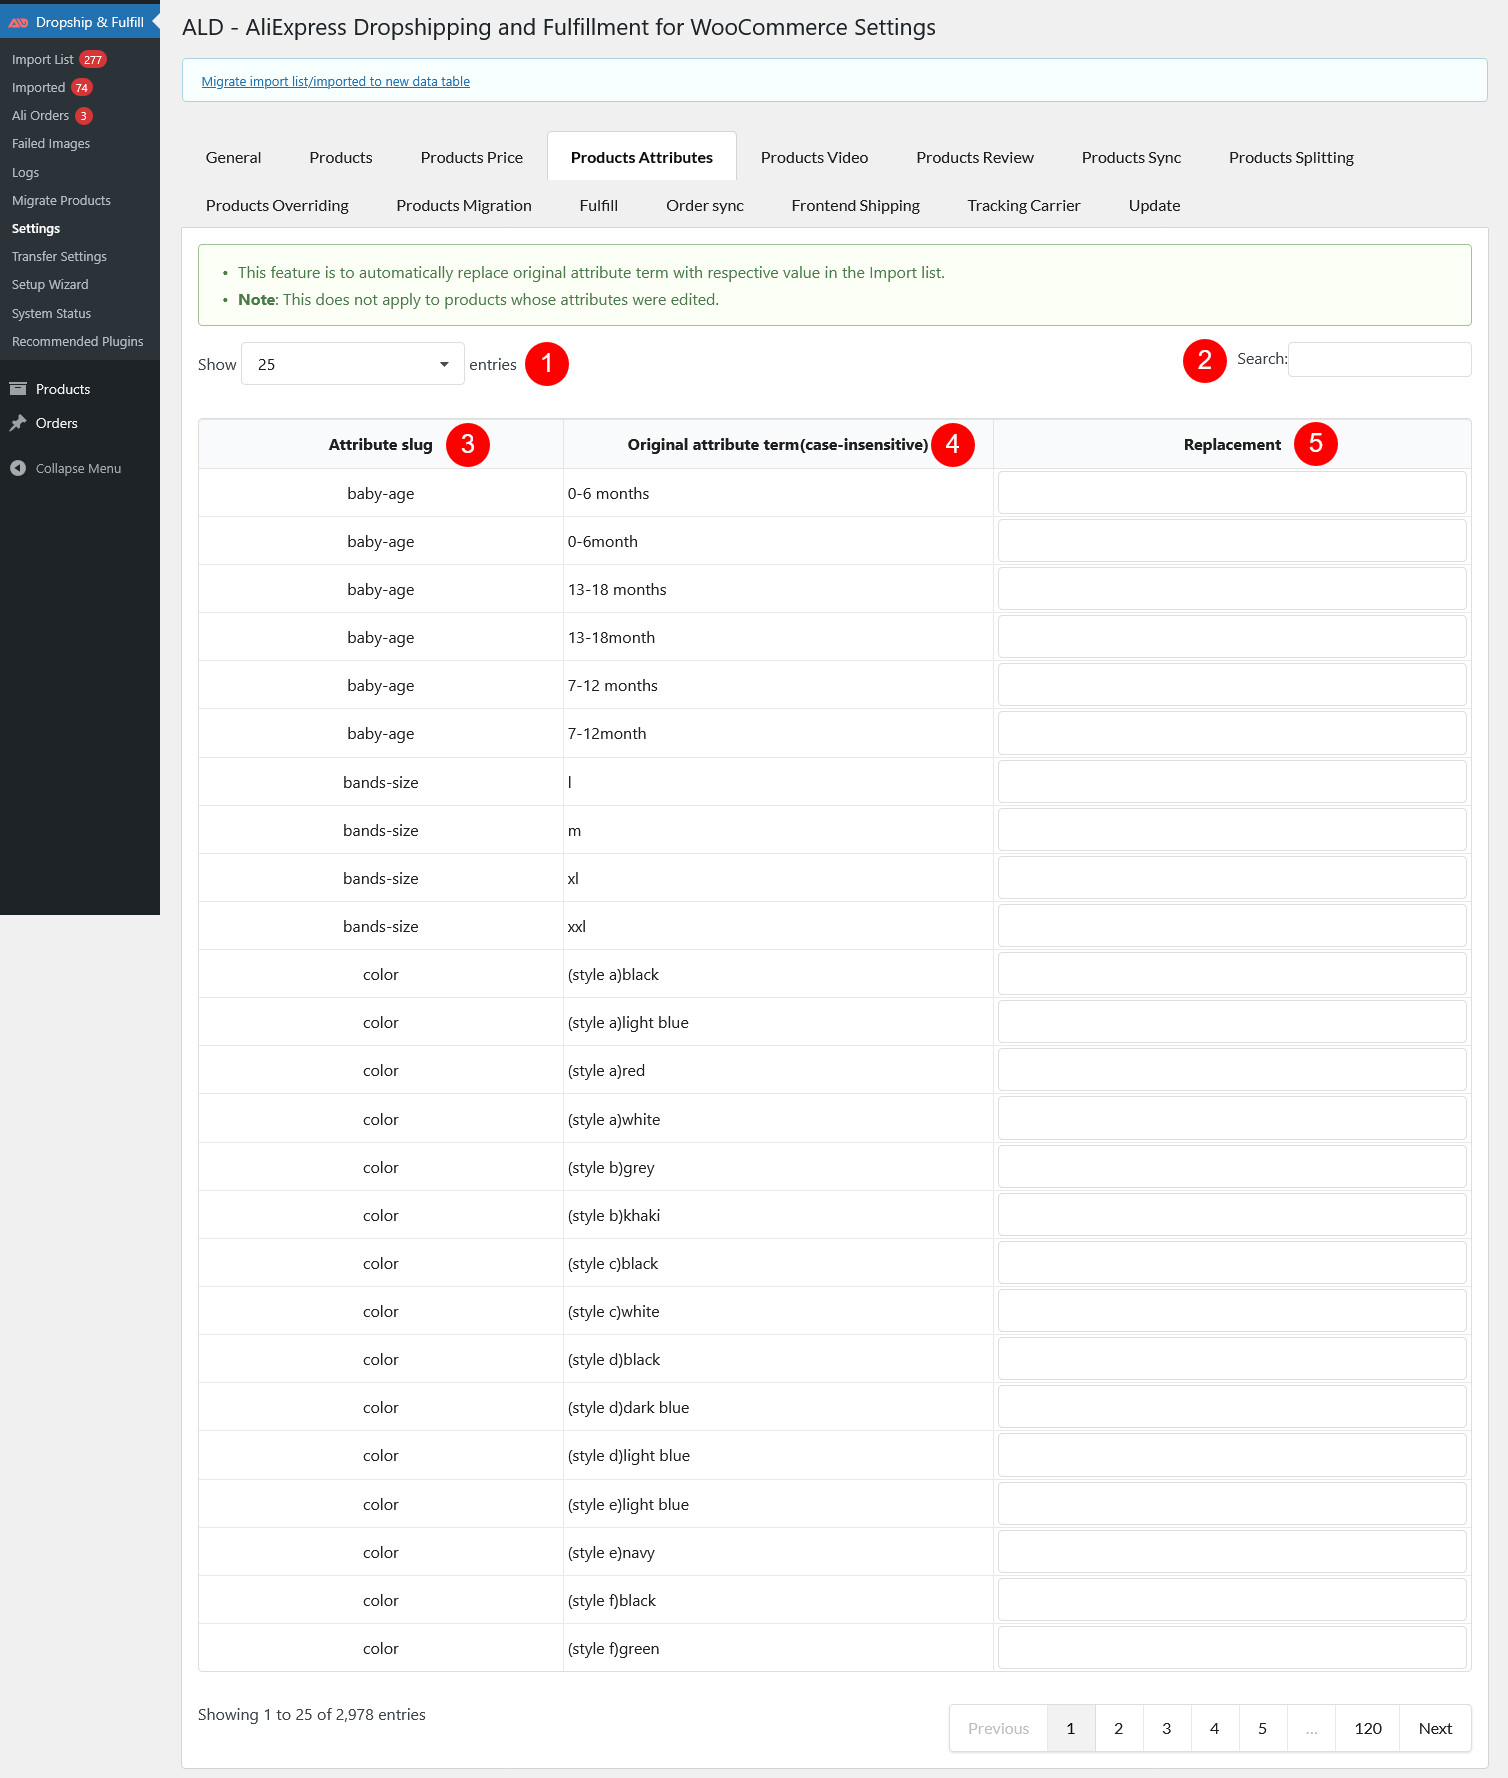
- Product Attributes
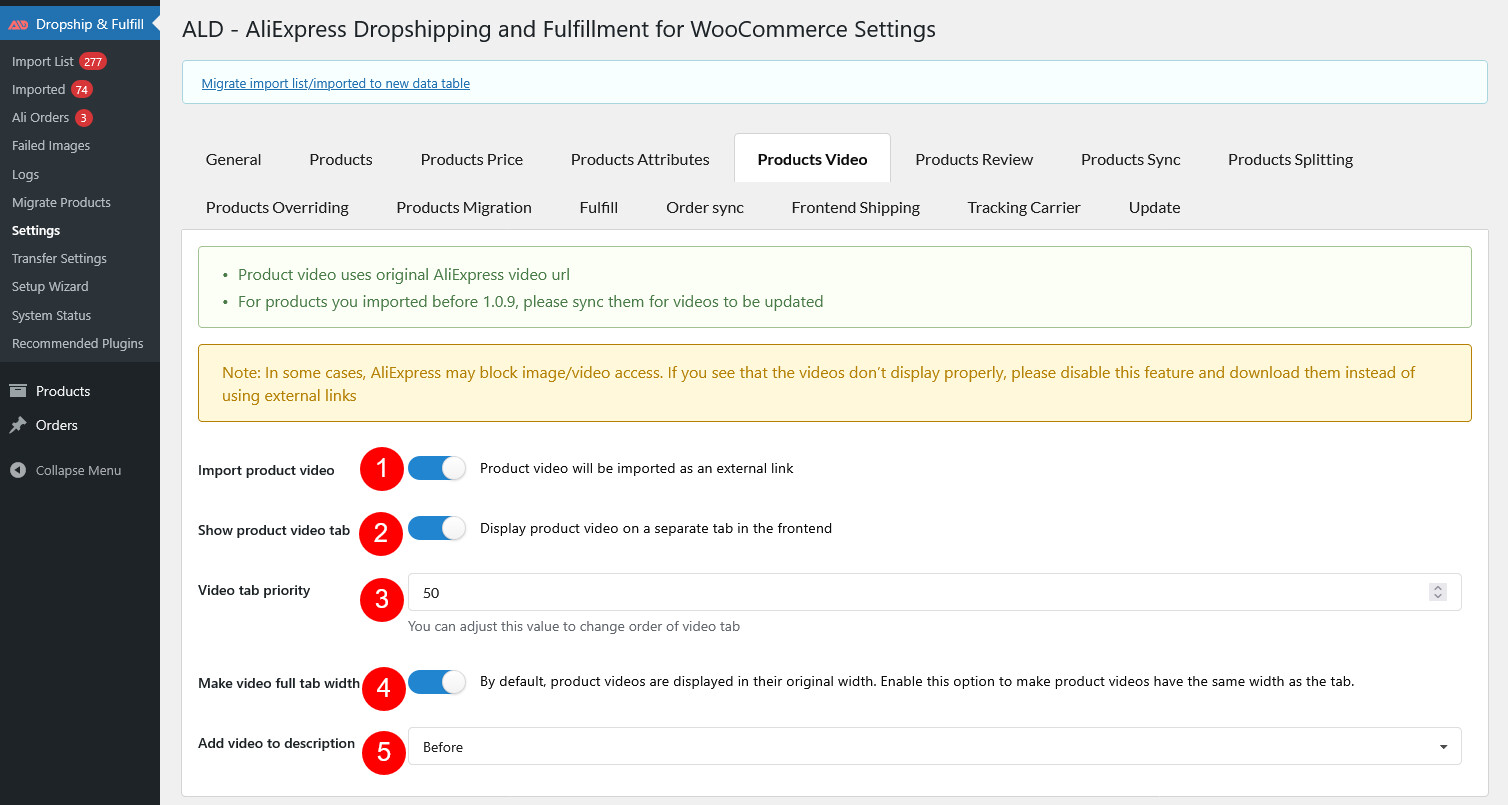
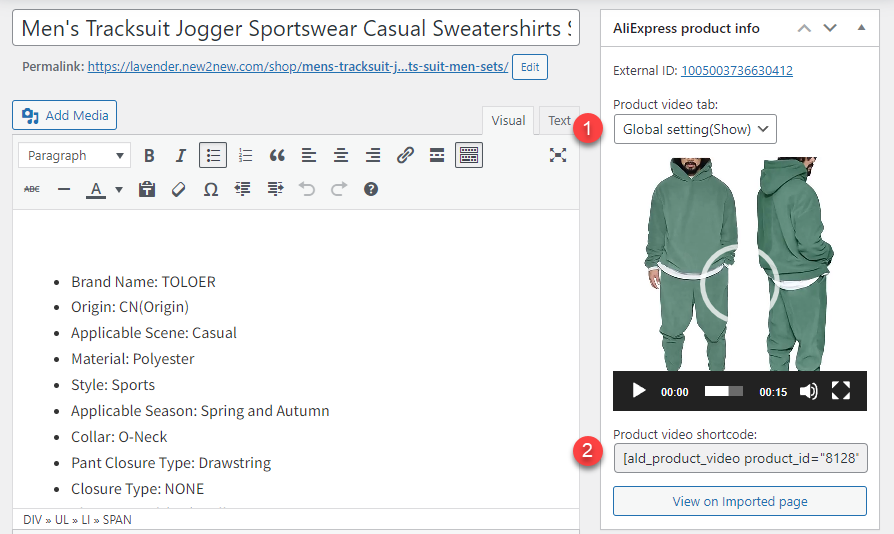
- Product Video
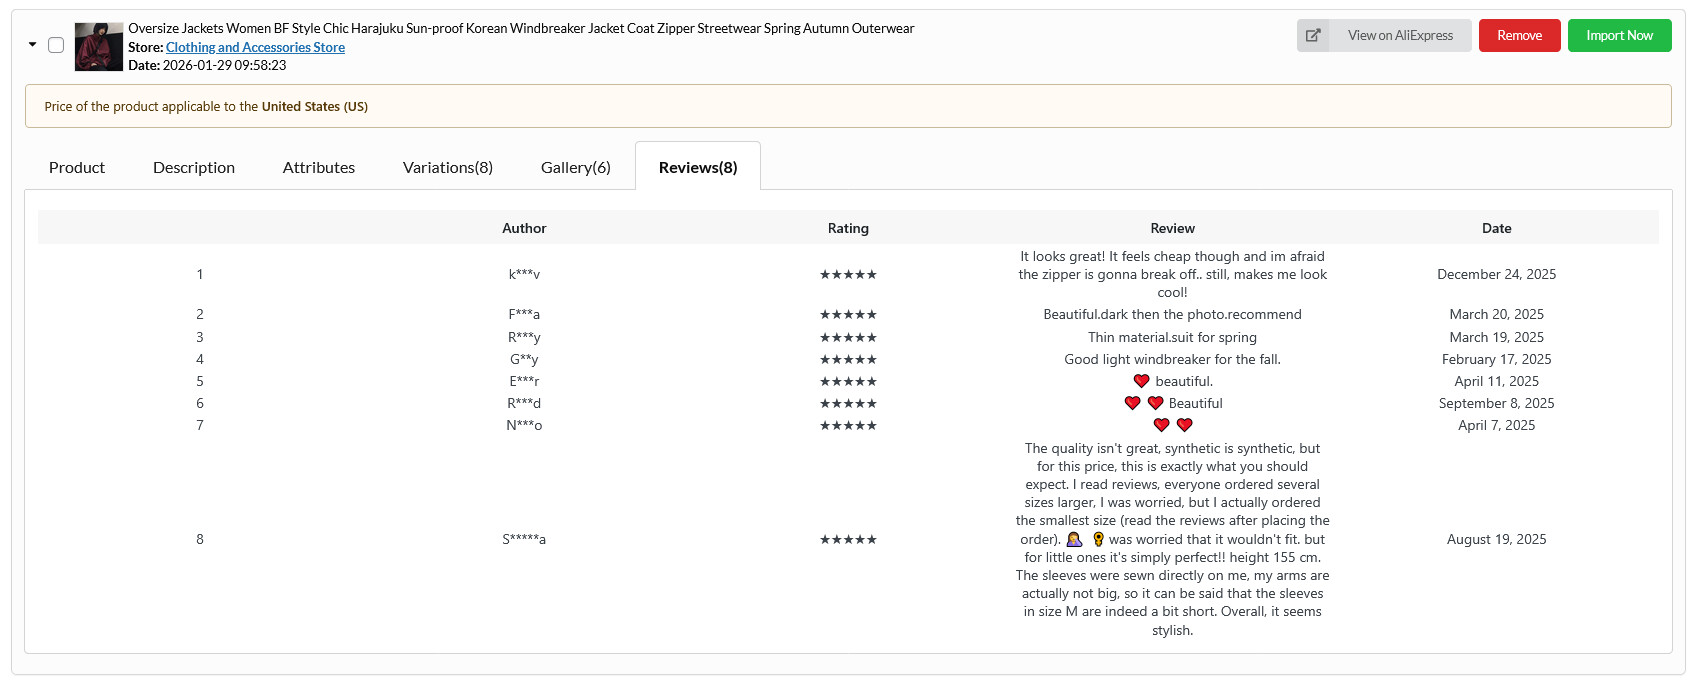
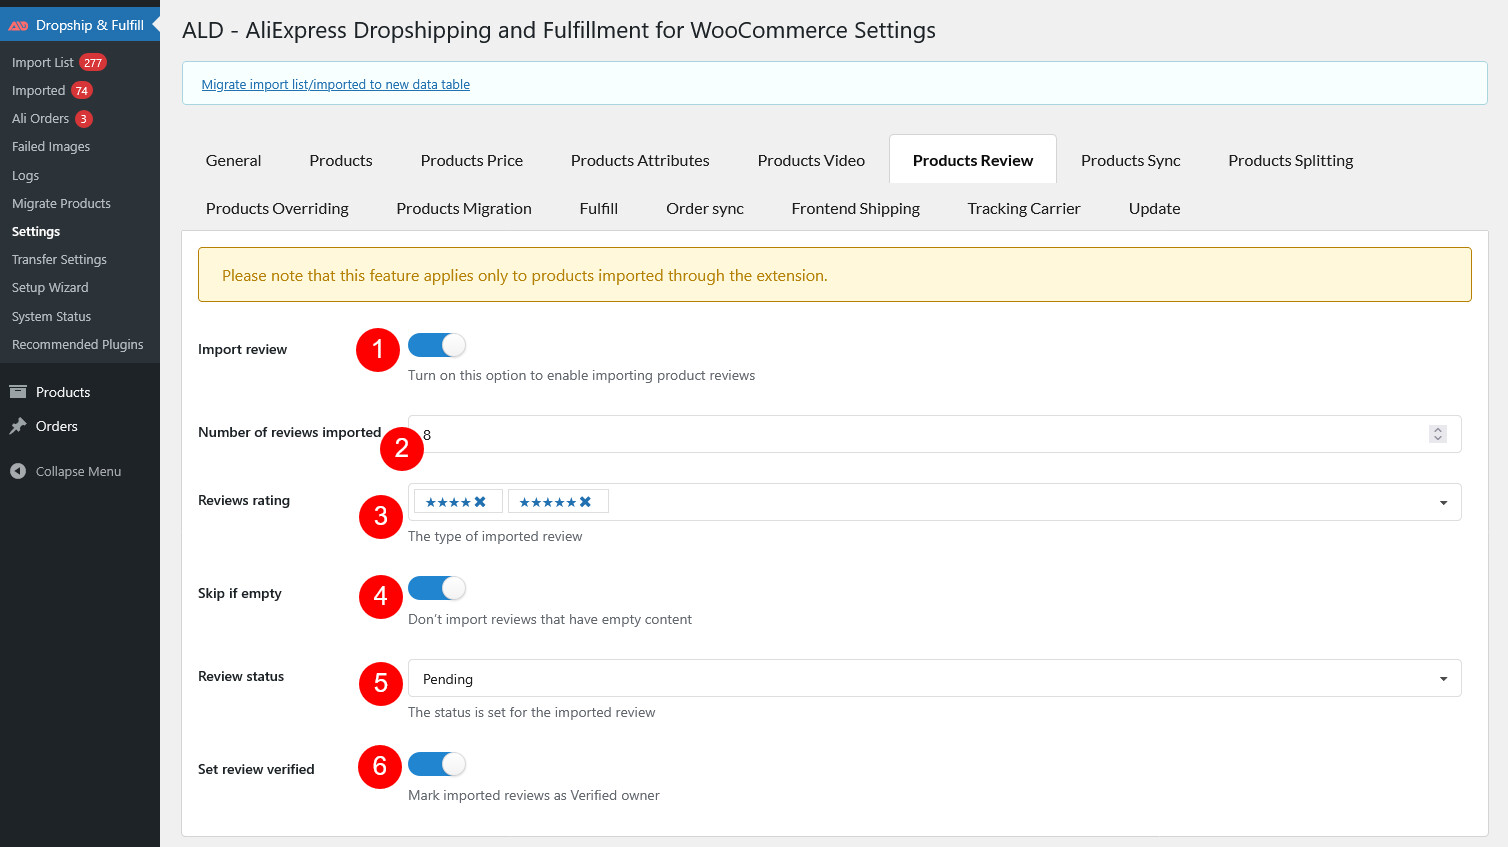
- Products Review
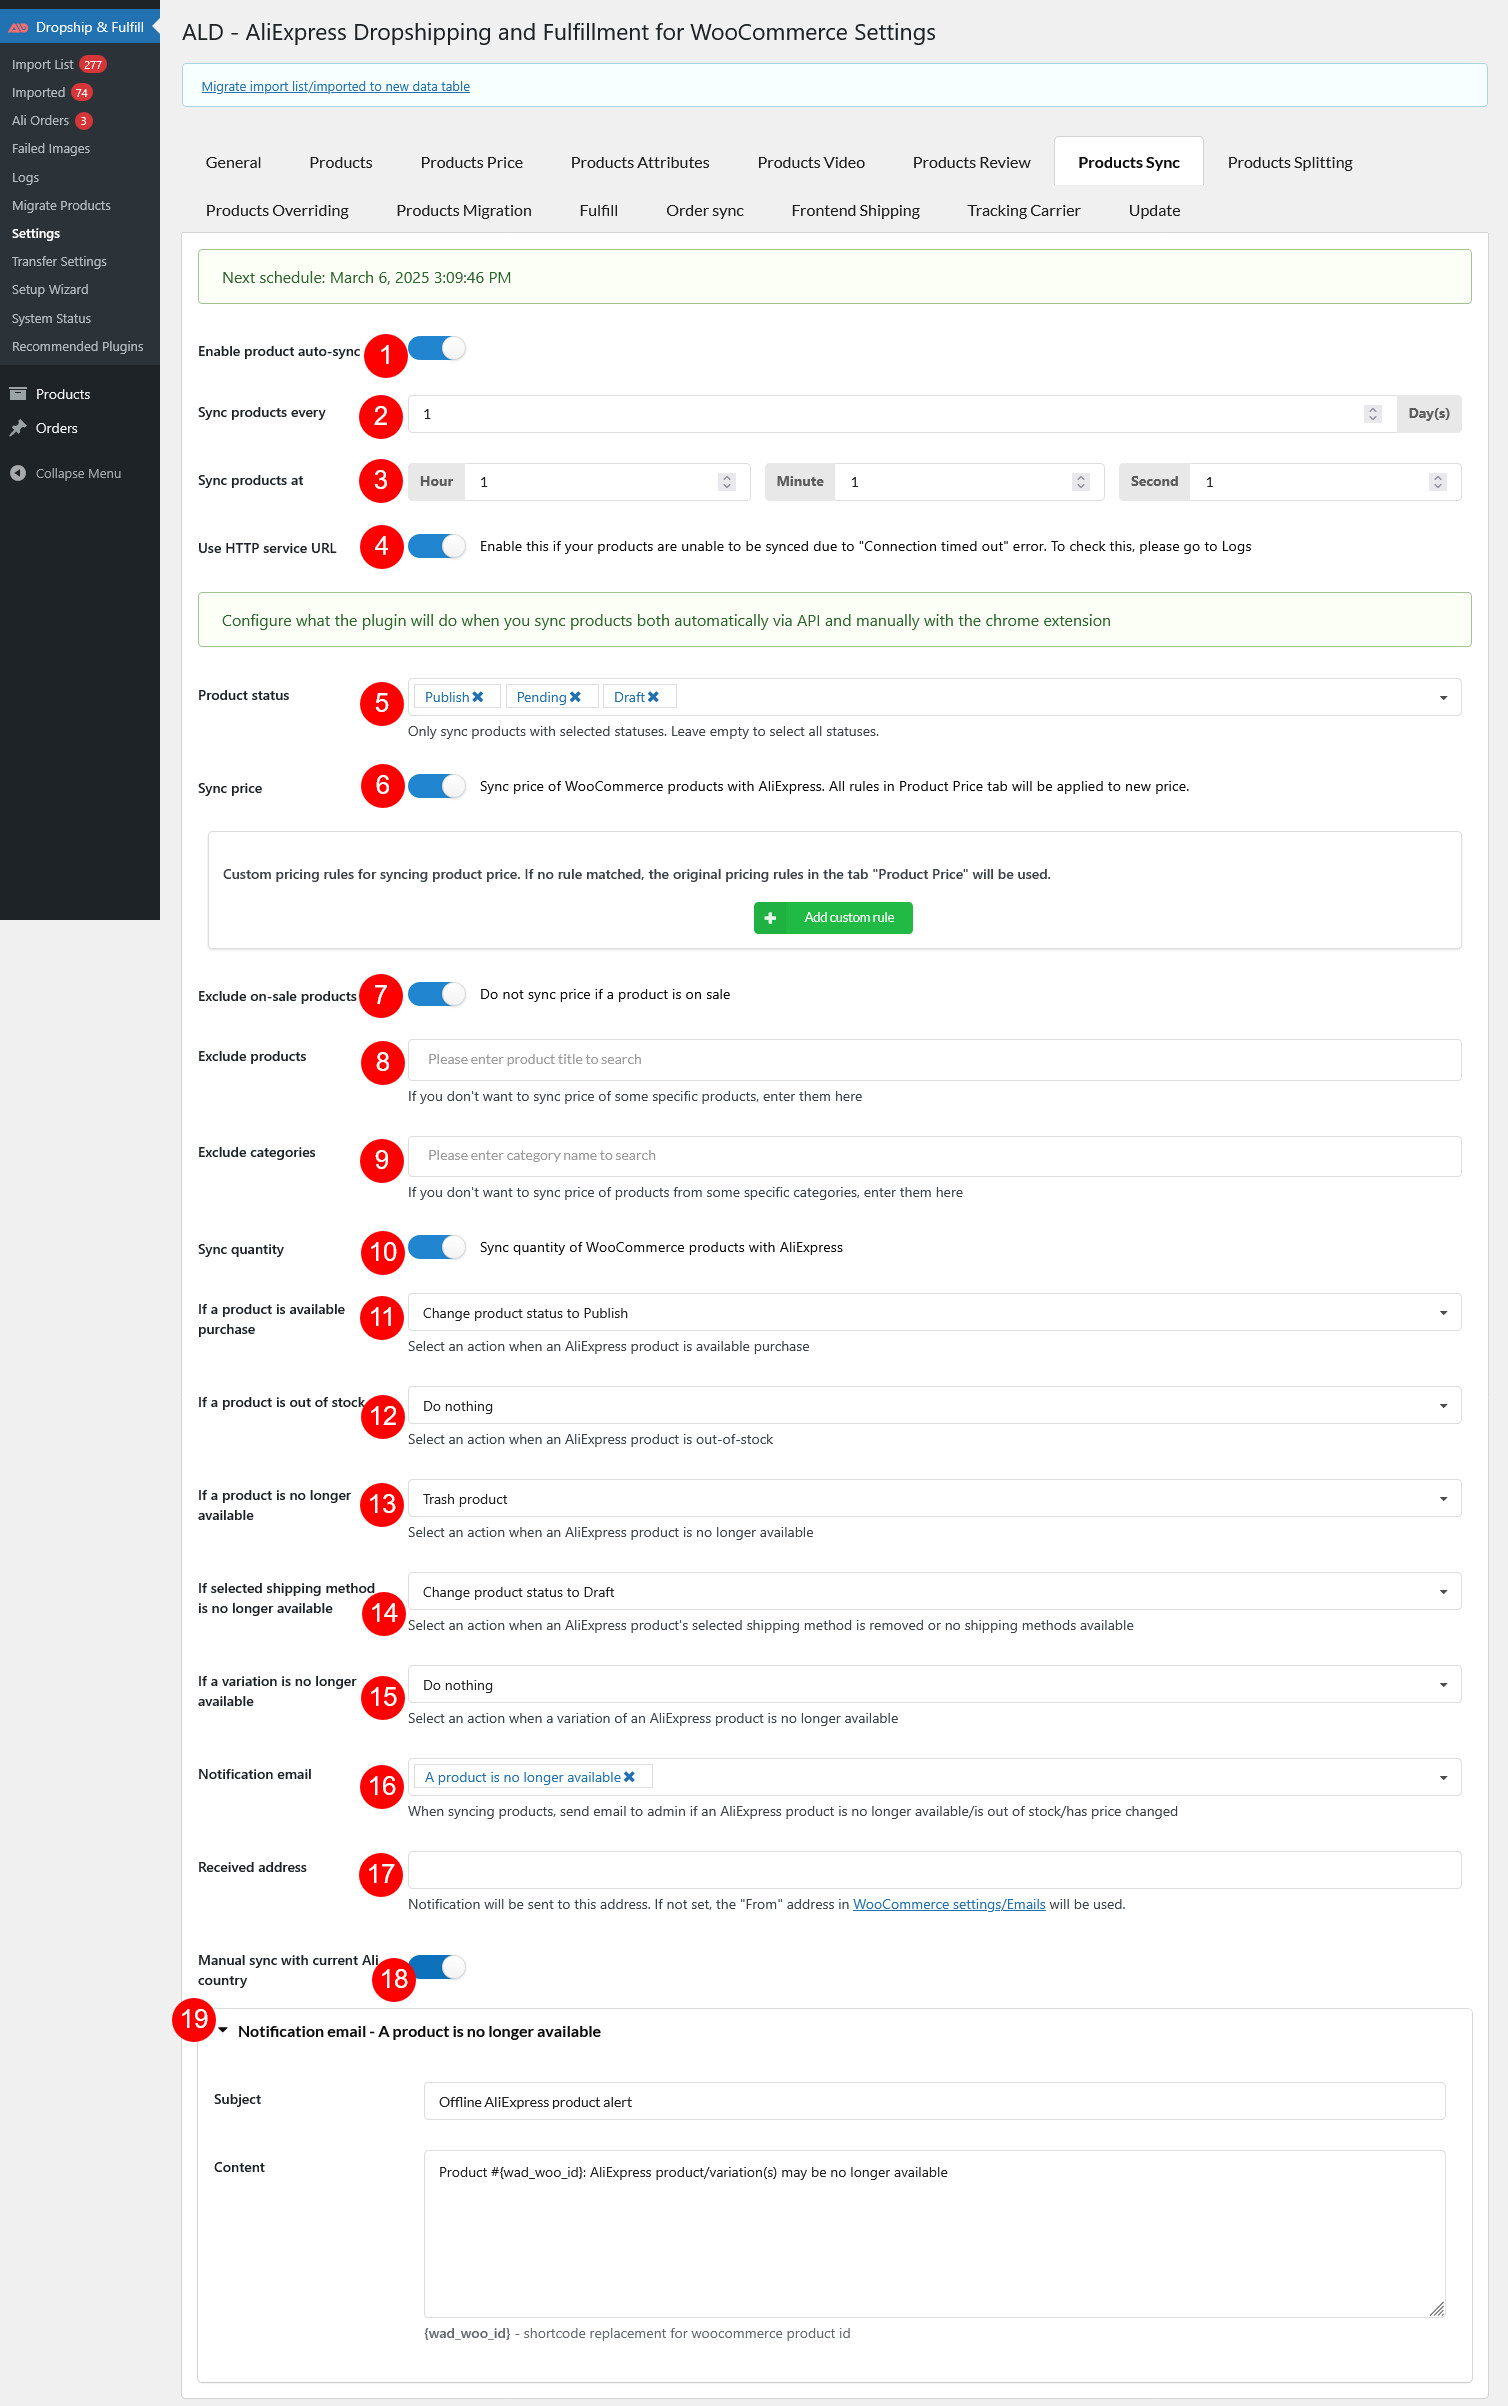
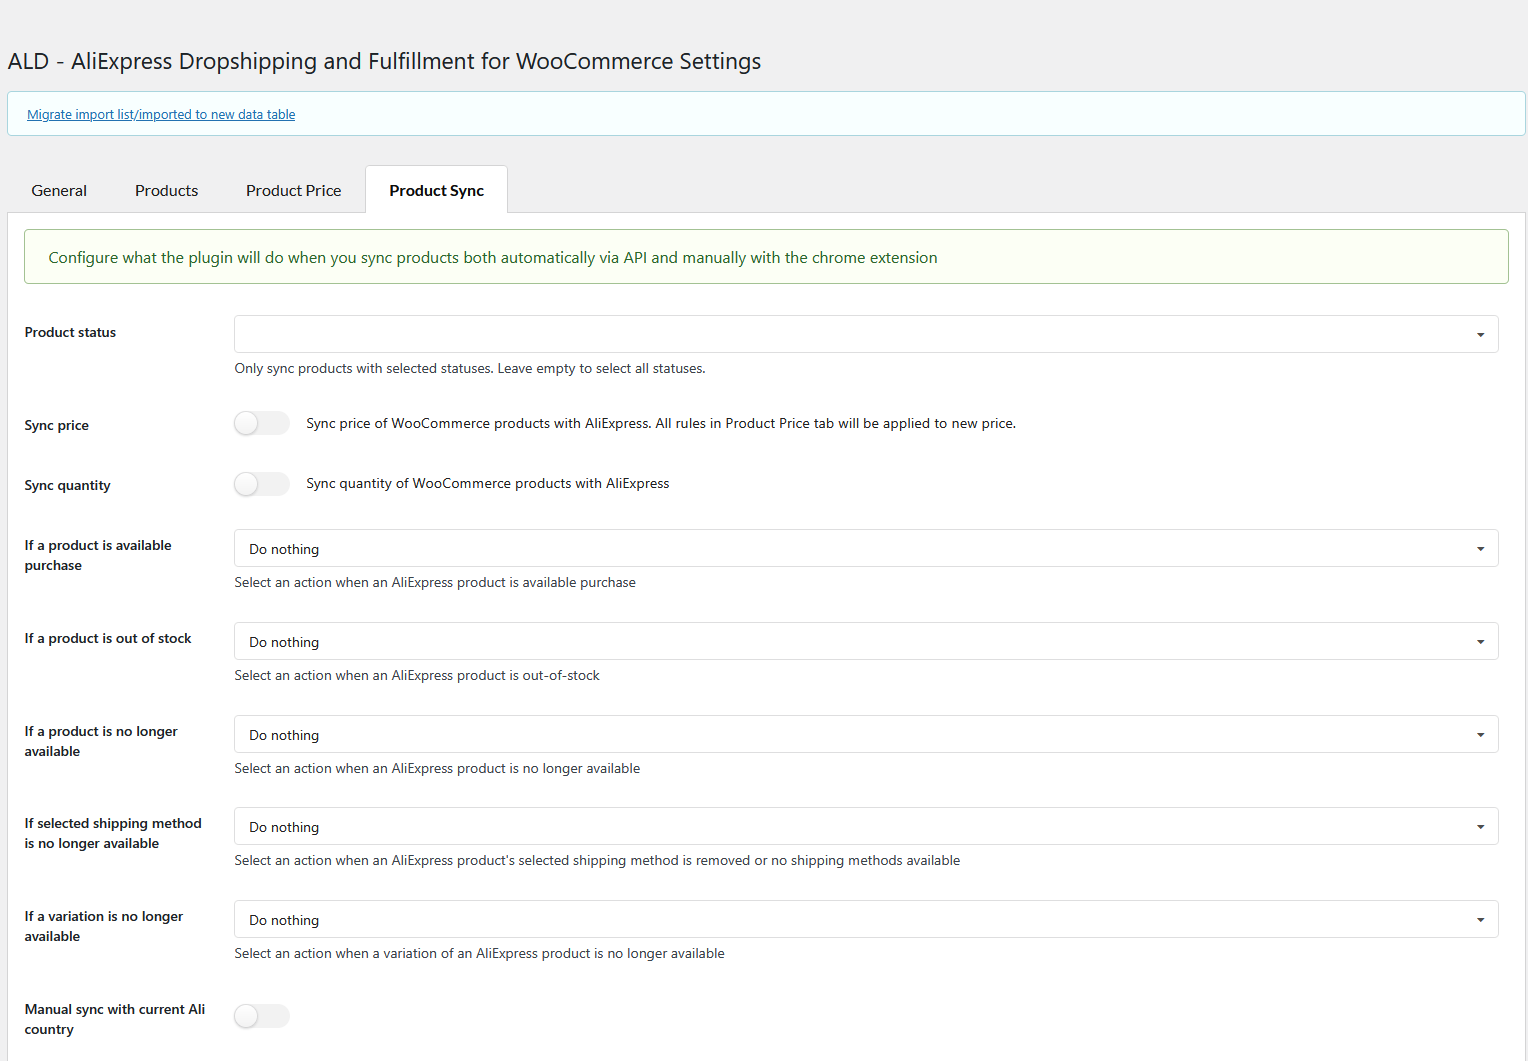
- Settings – Product Sync
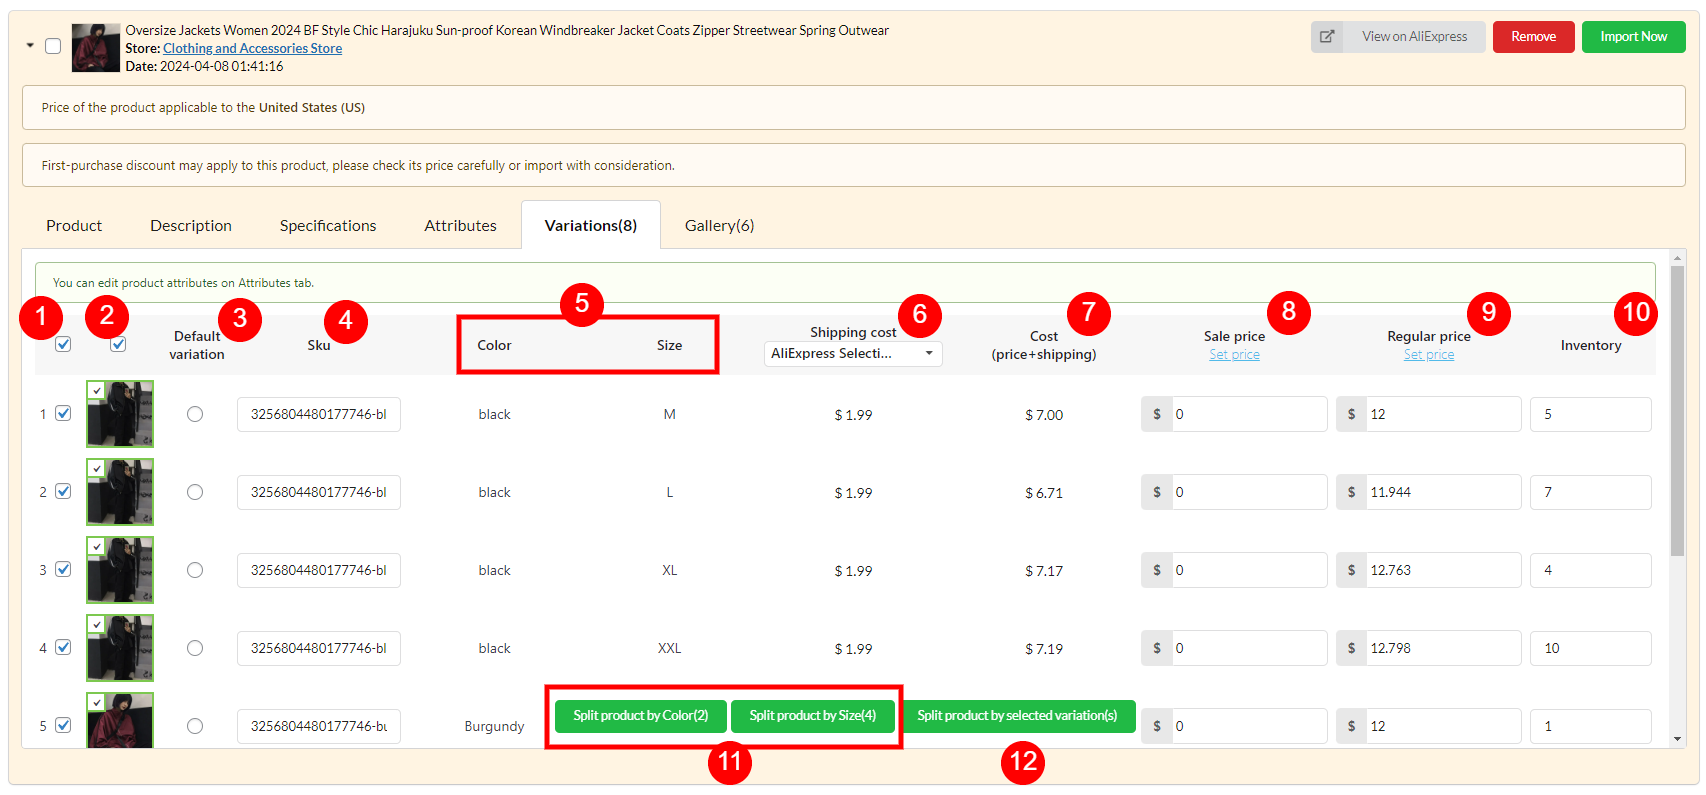
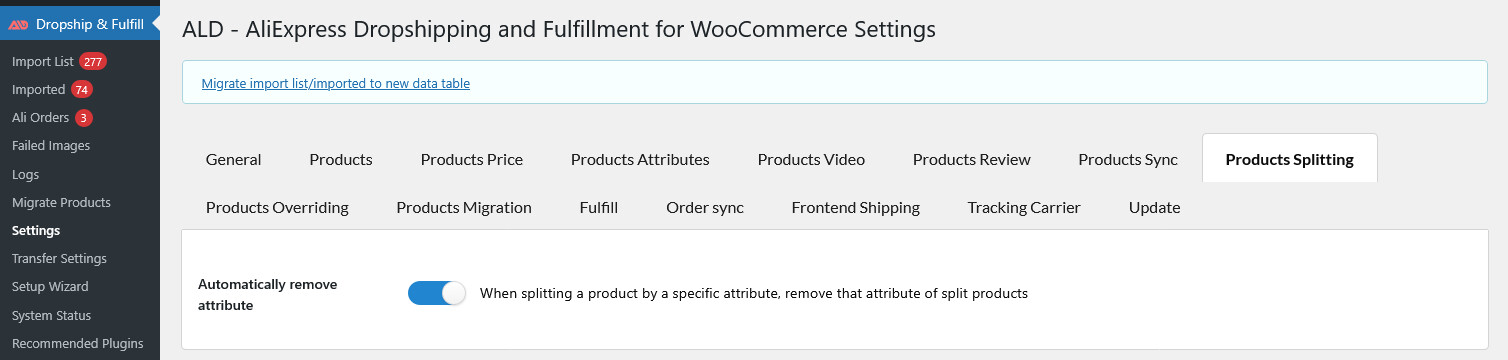
- Product Splitting
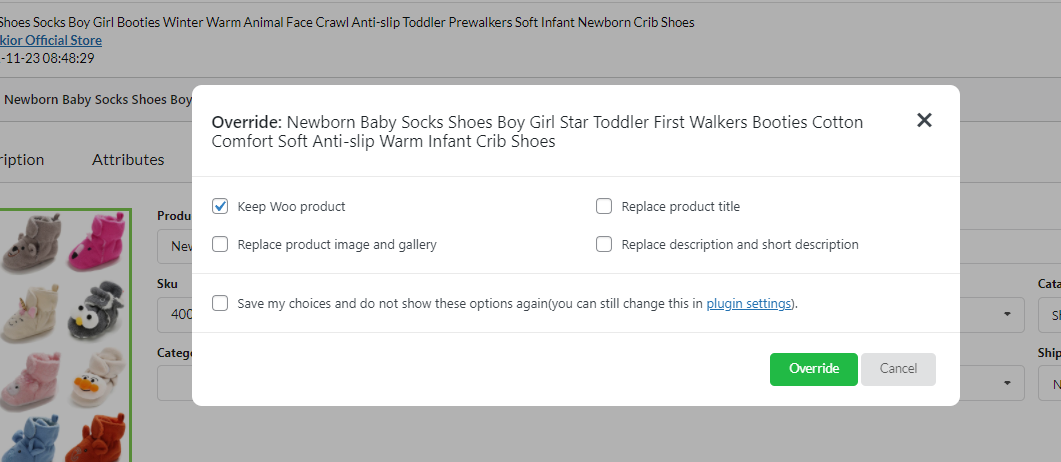
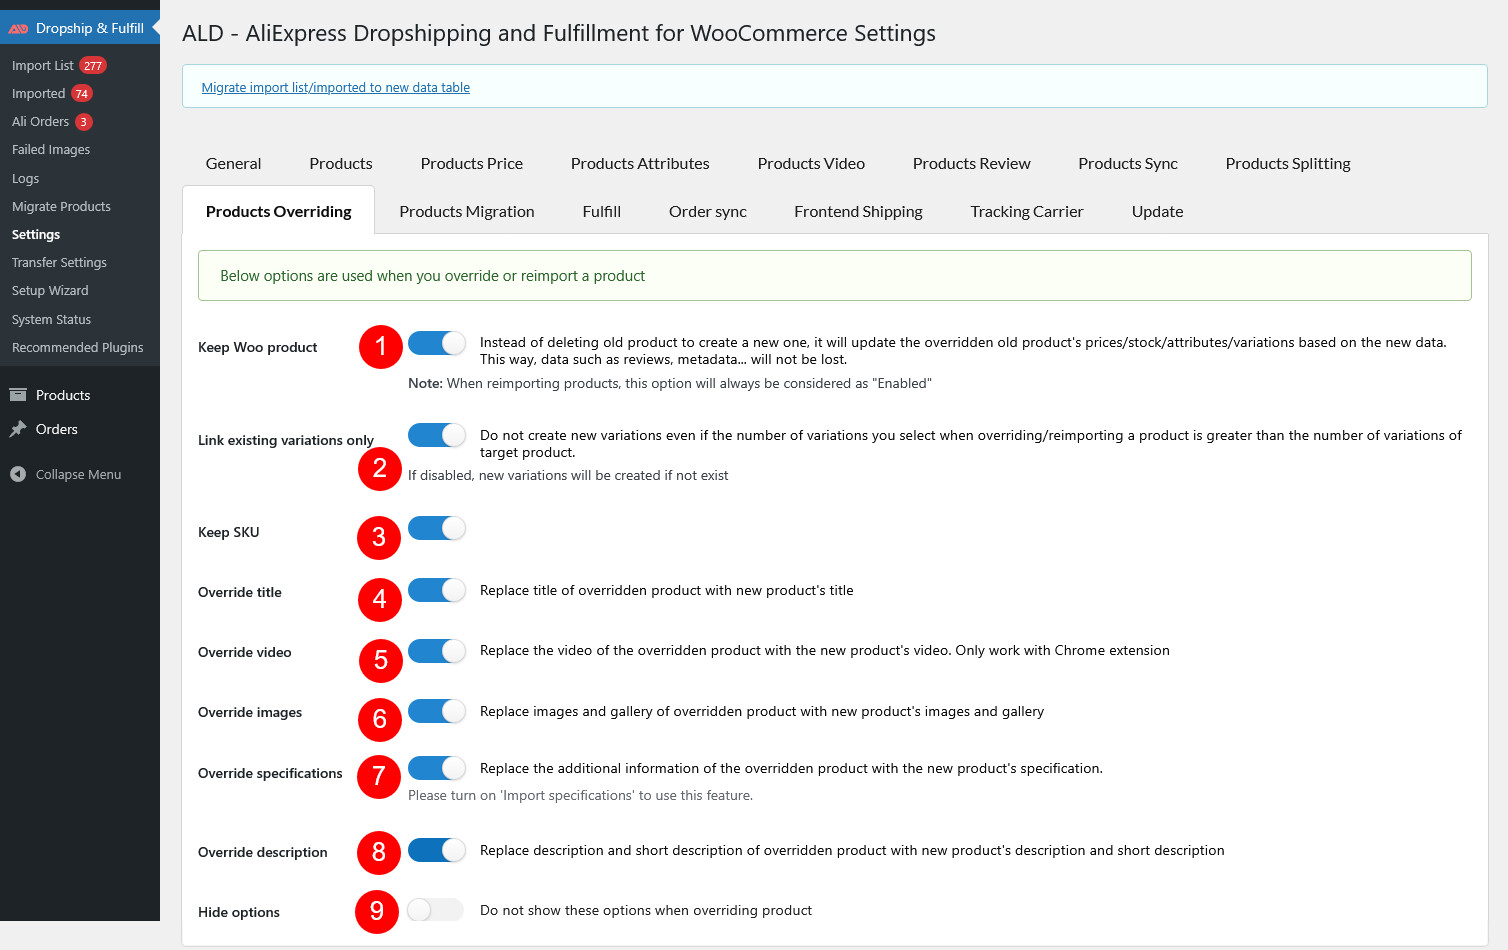
- Settings – Product Overriding
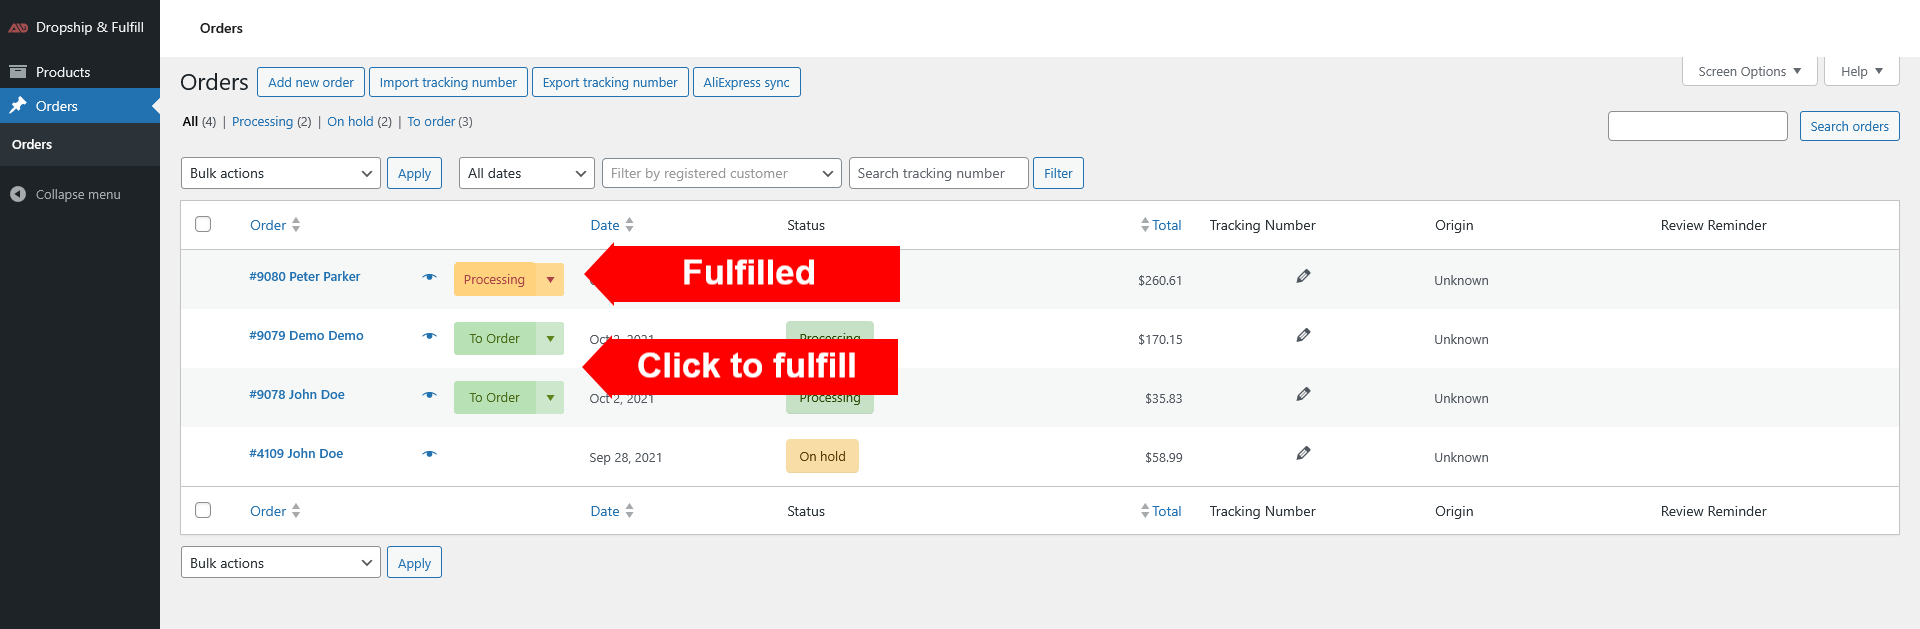
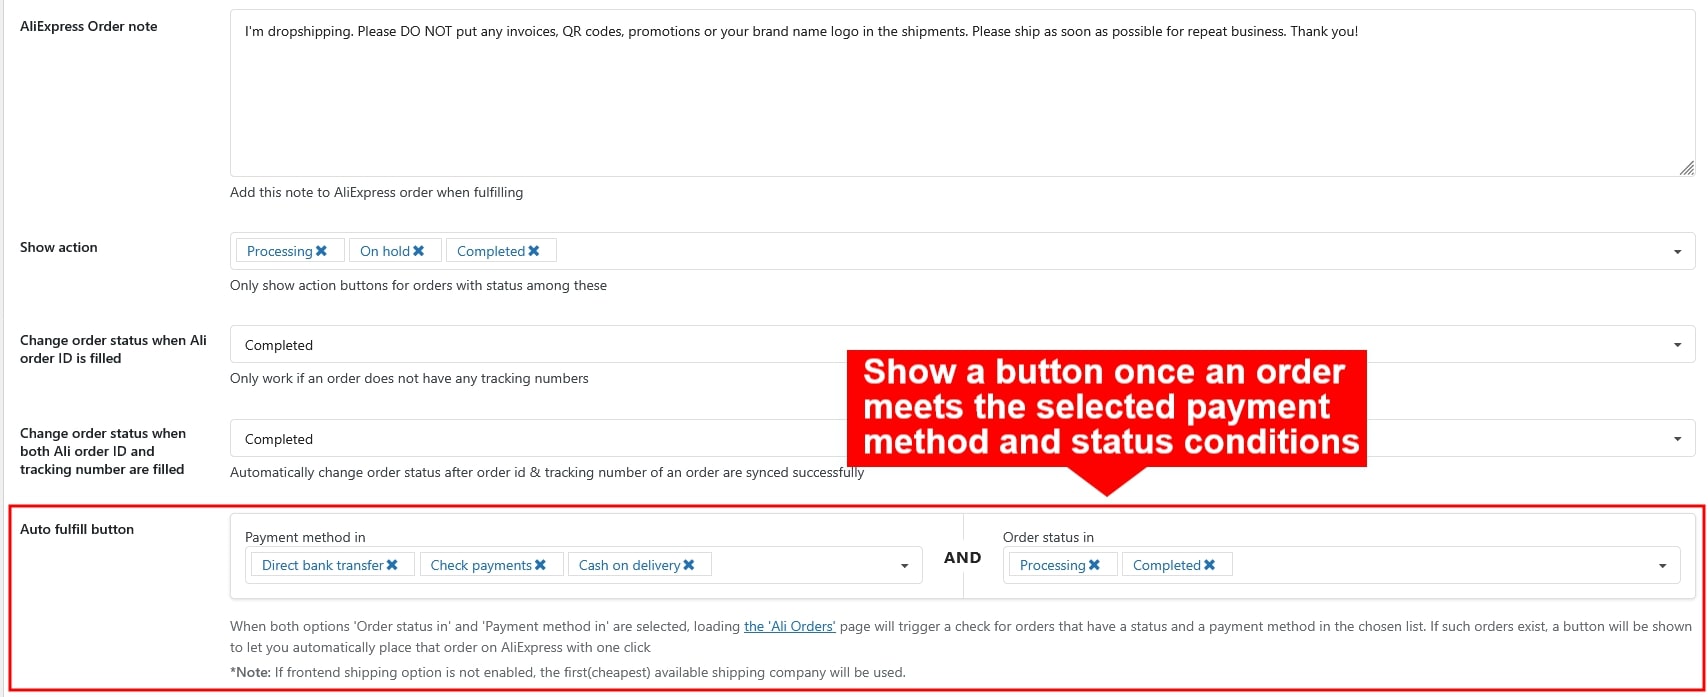
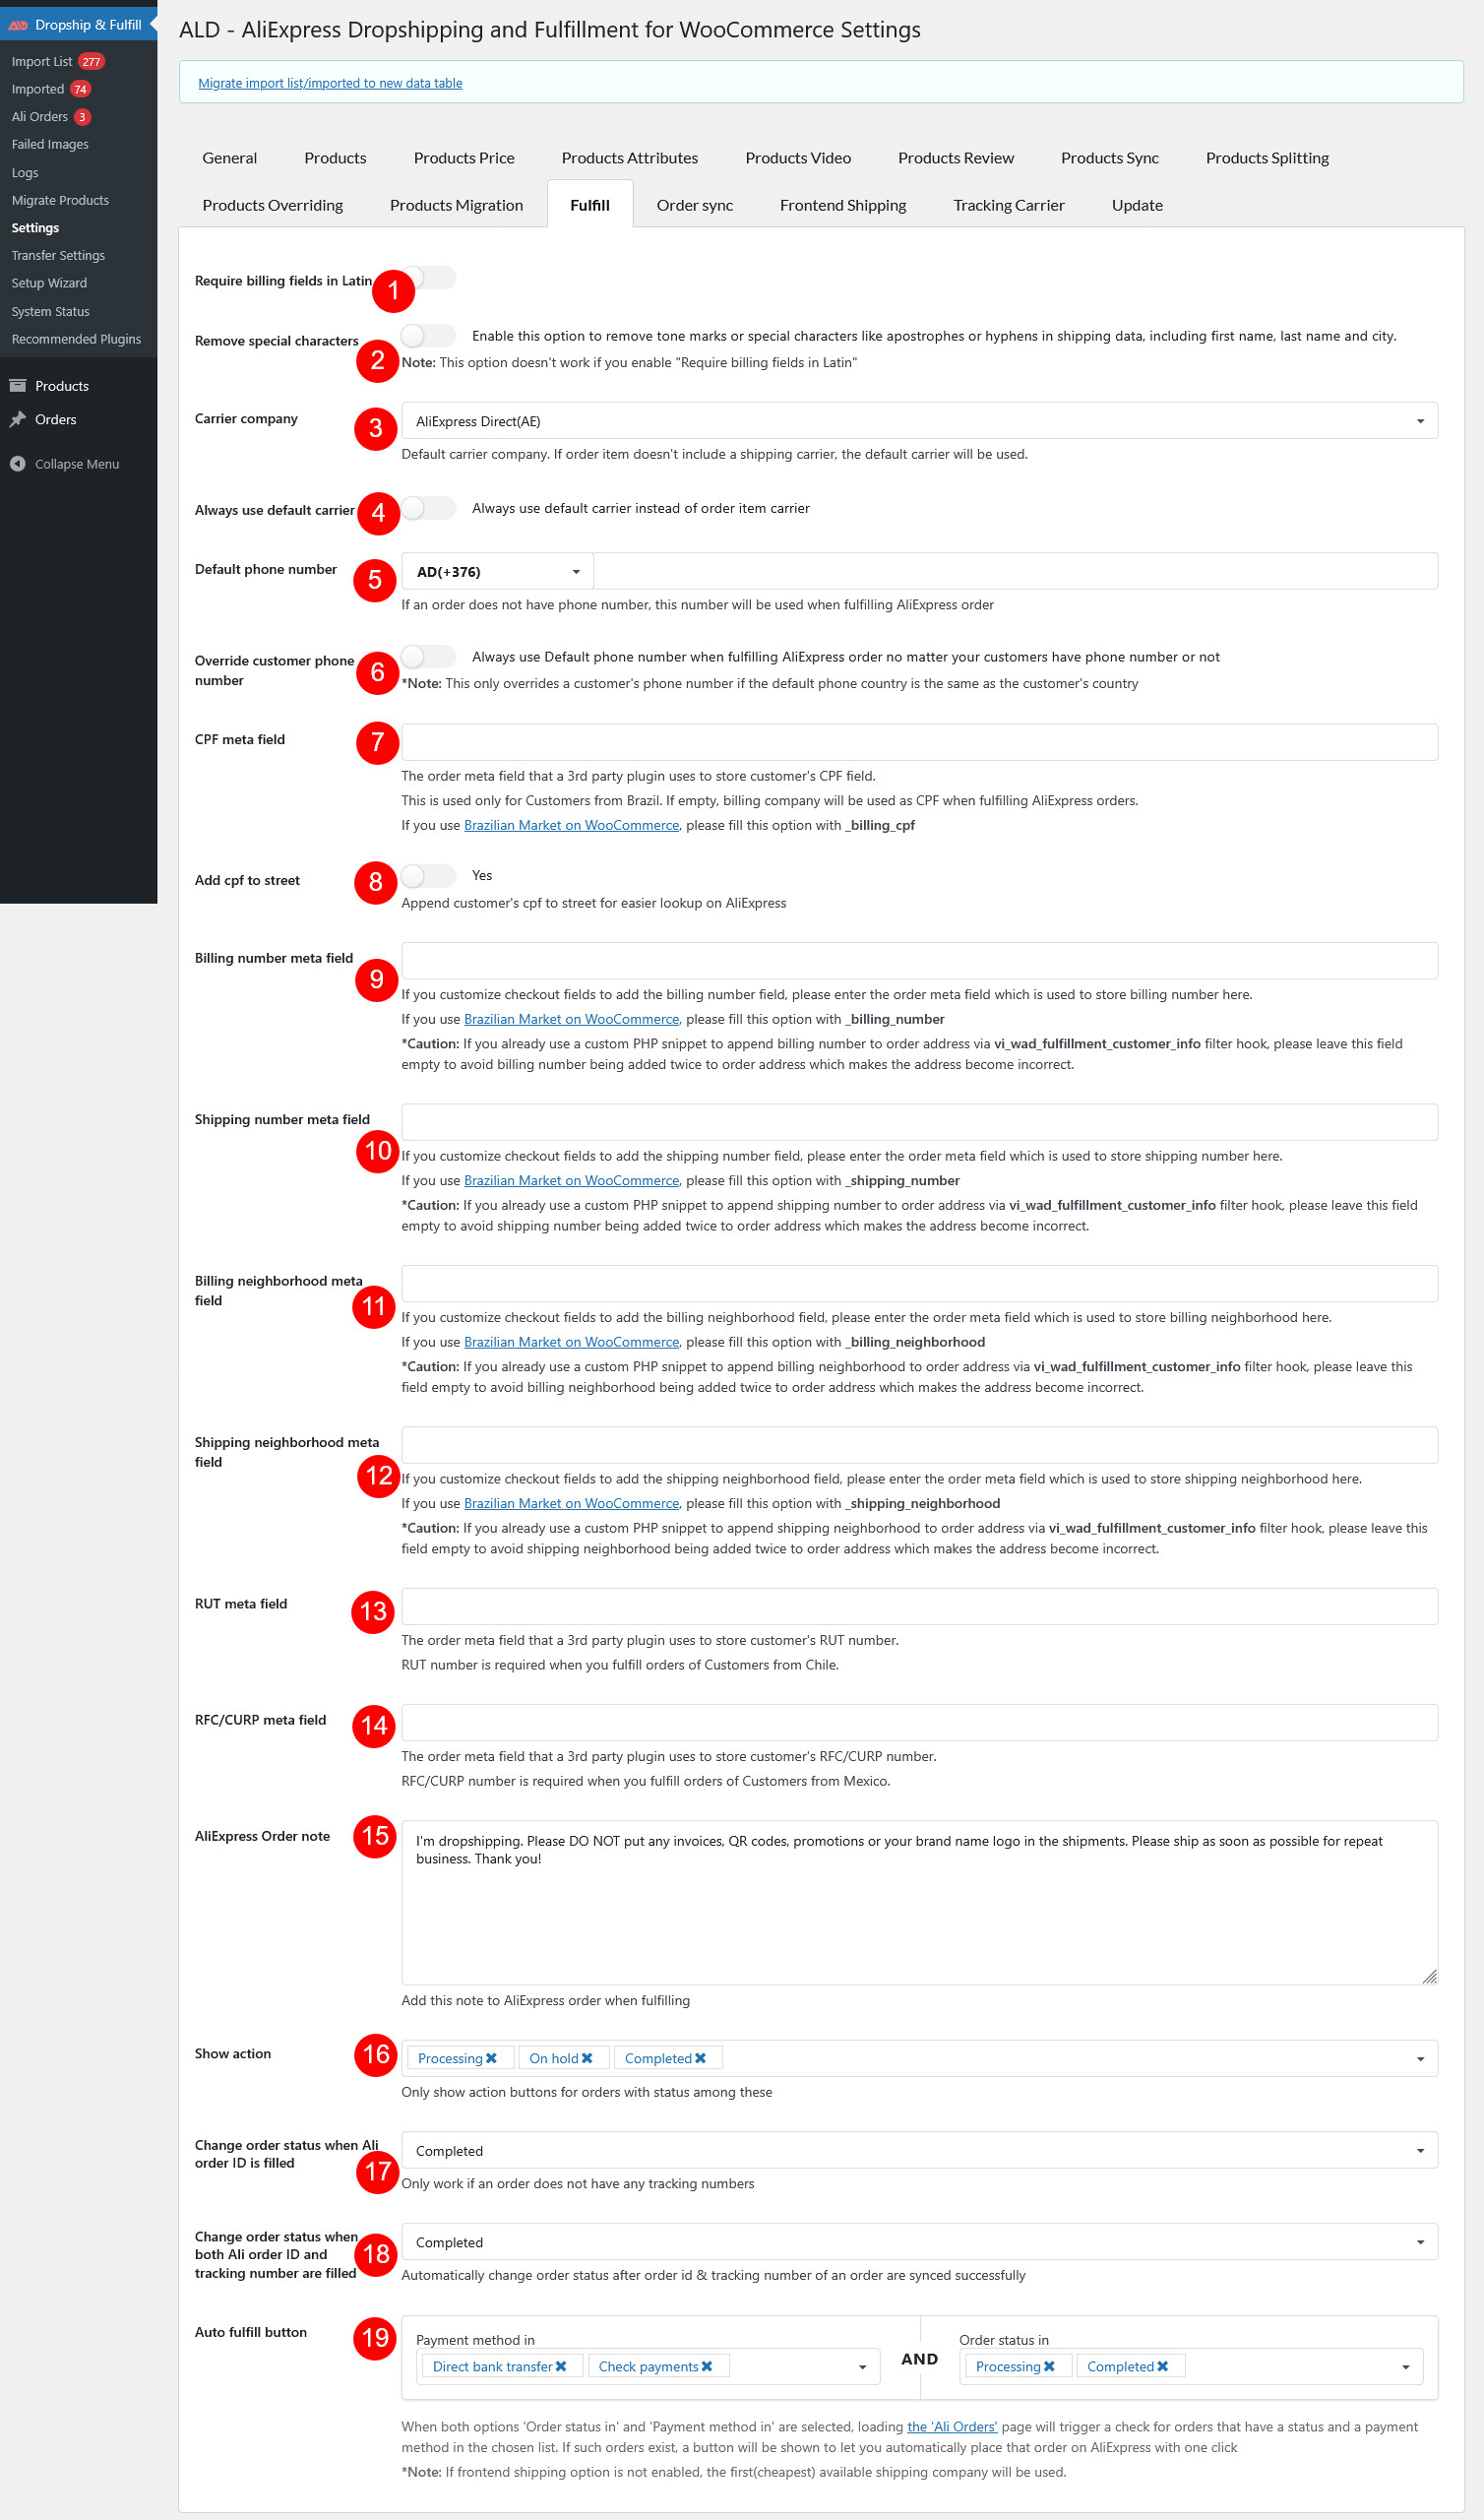
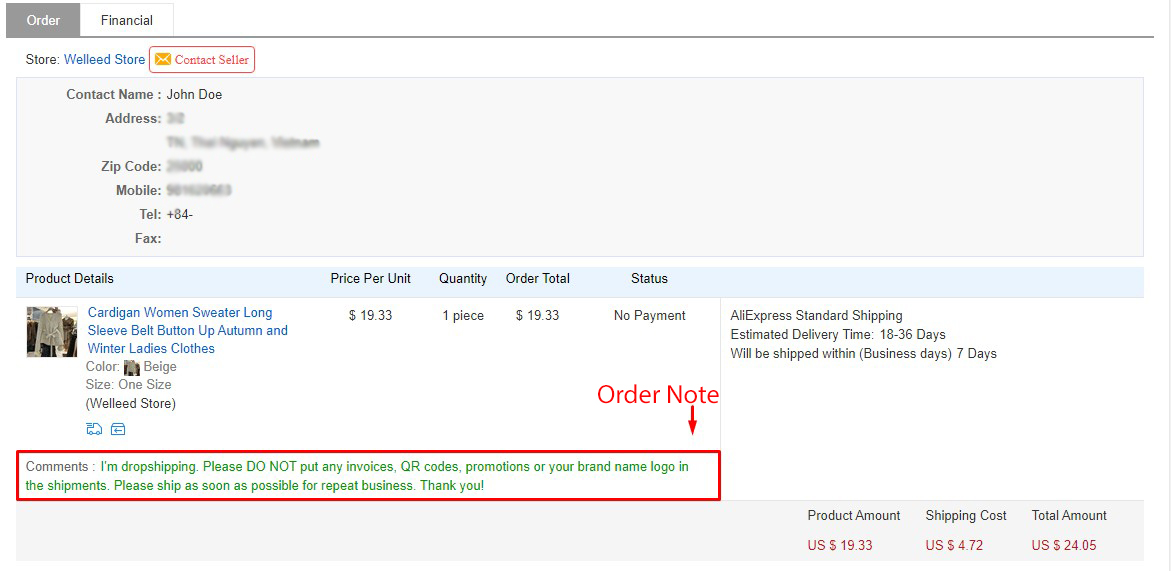
- Settings – Fulfill
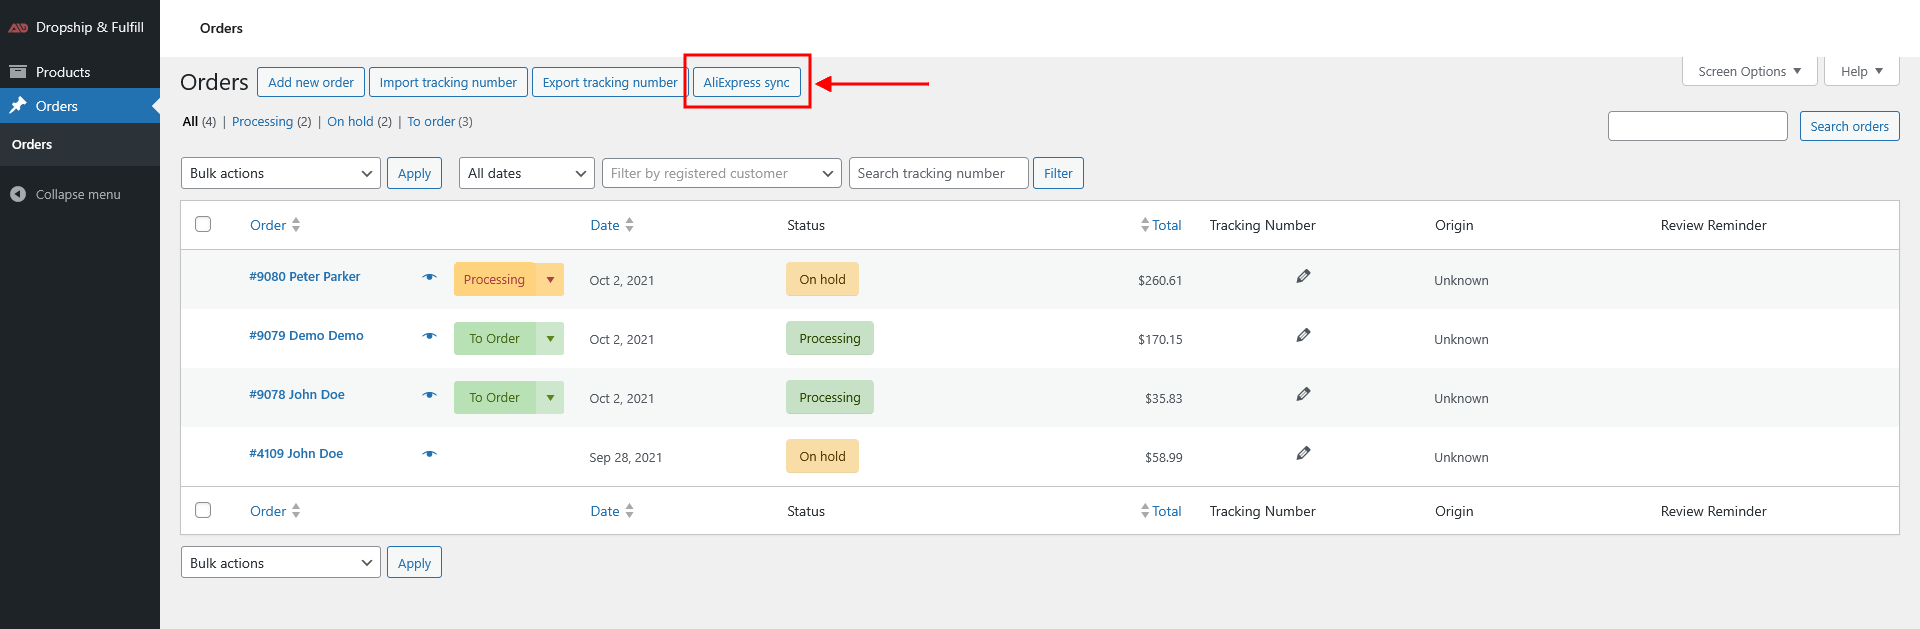
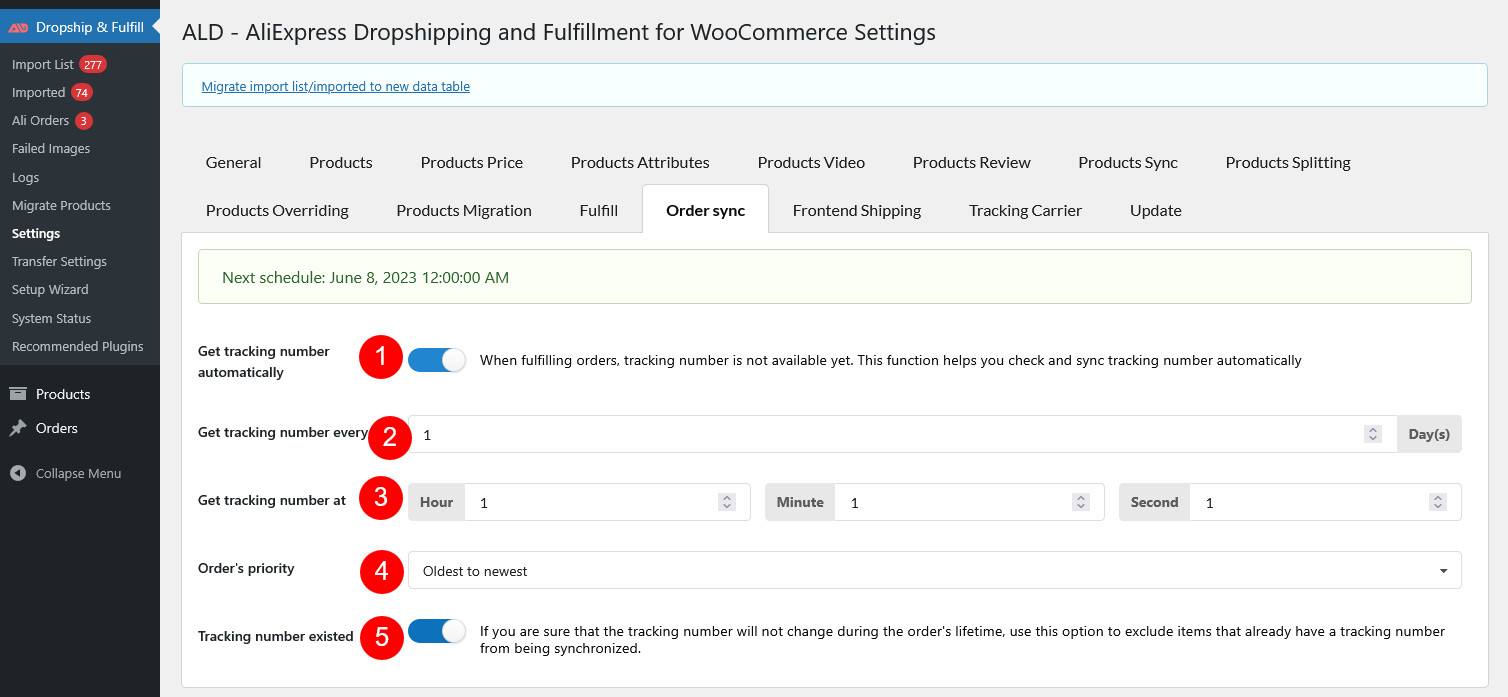
- Settings – Order sync
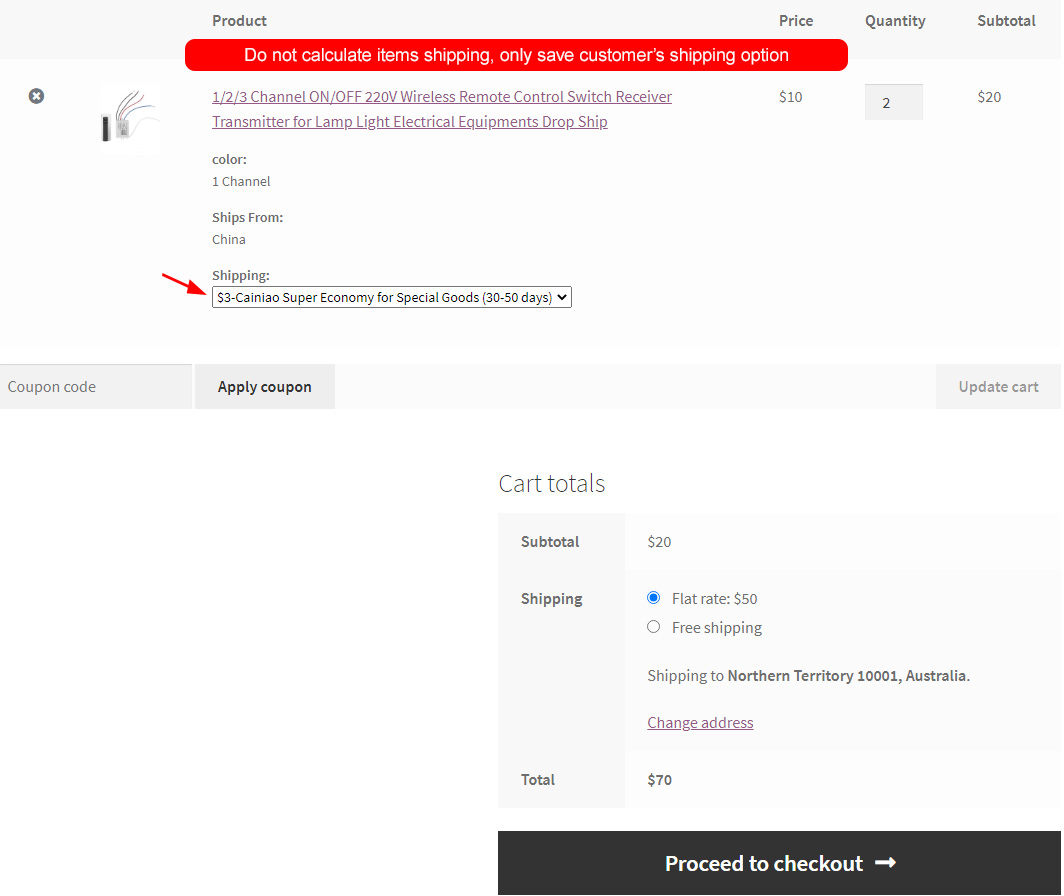
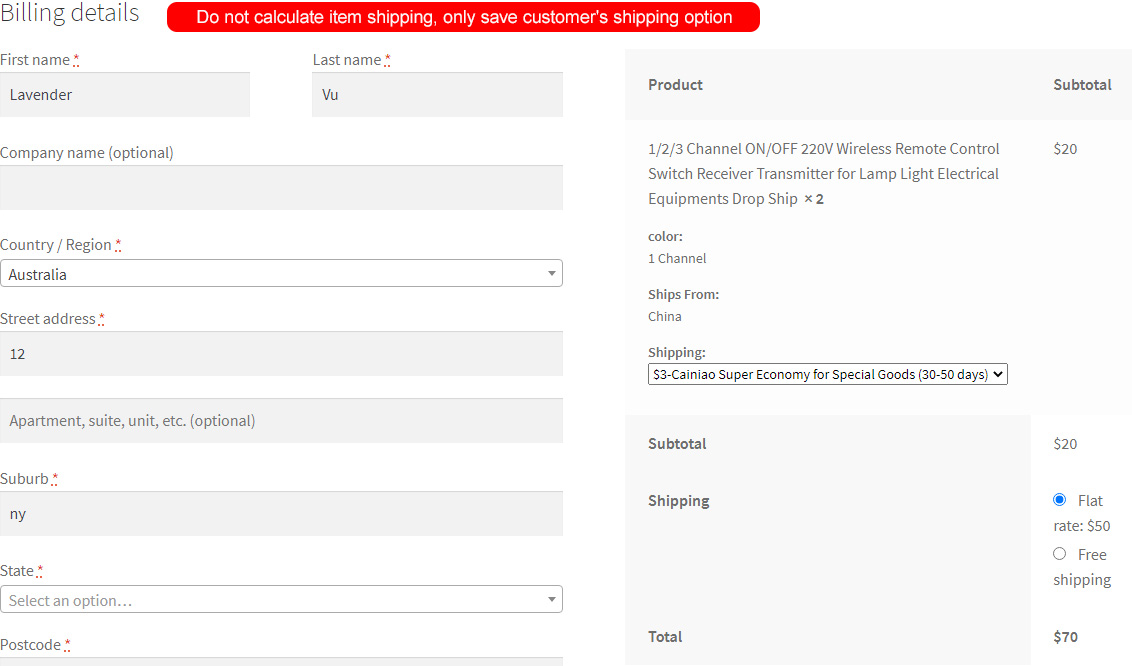
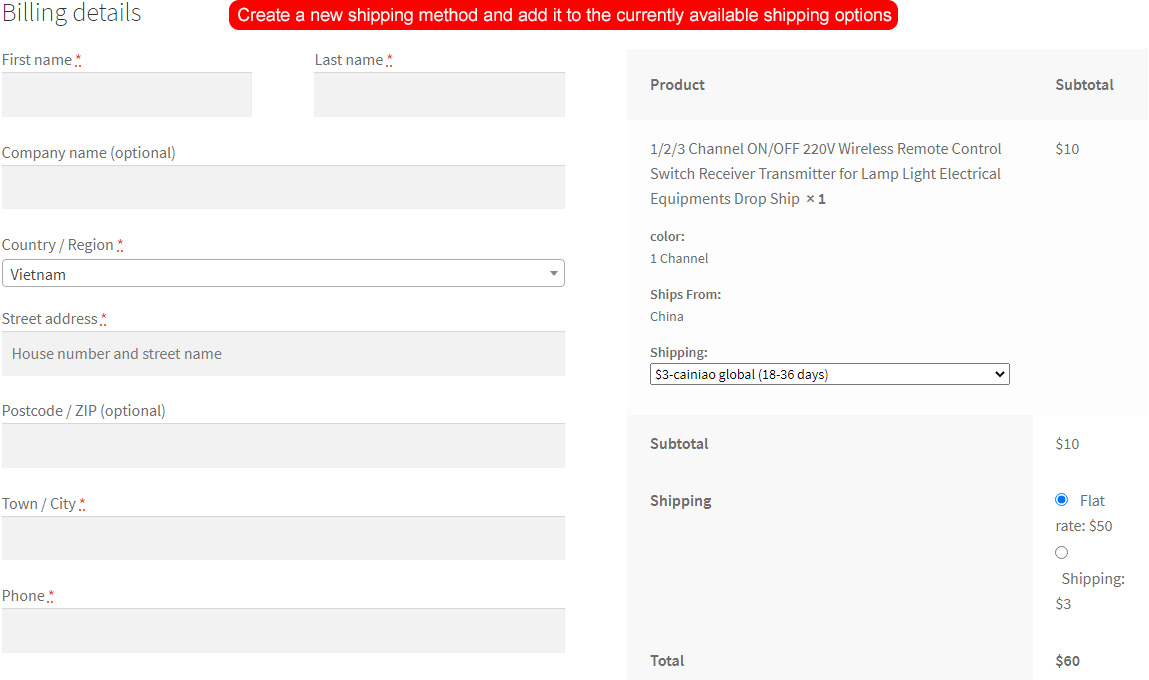
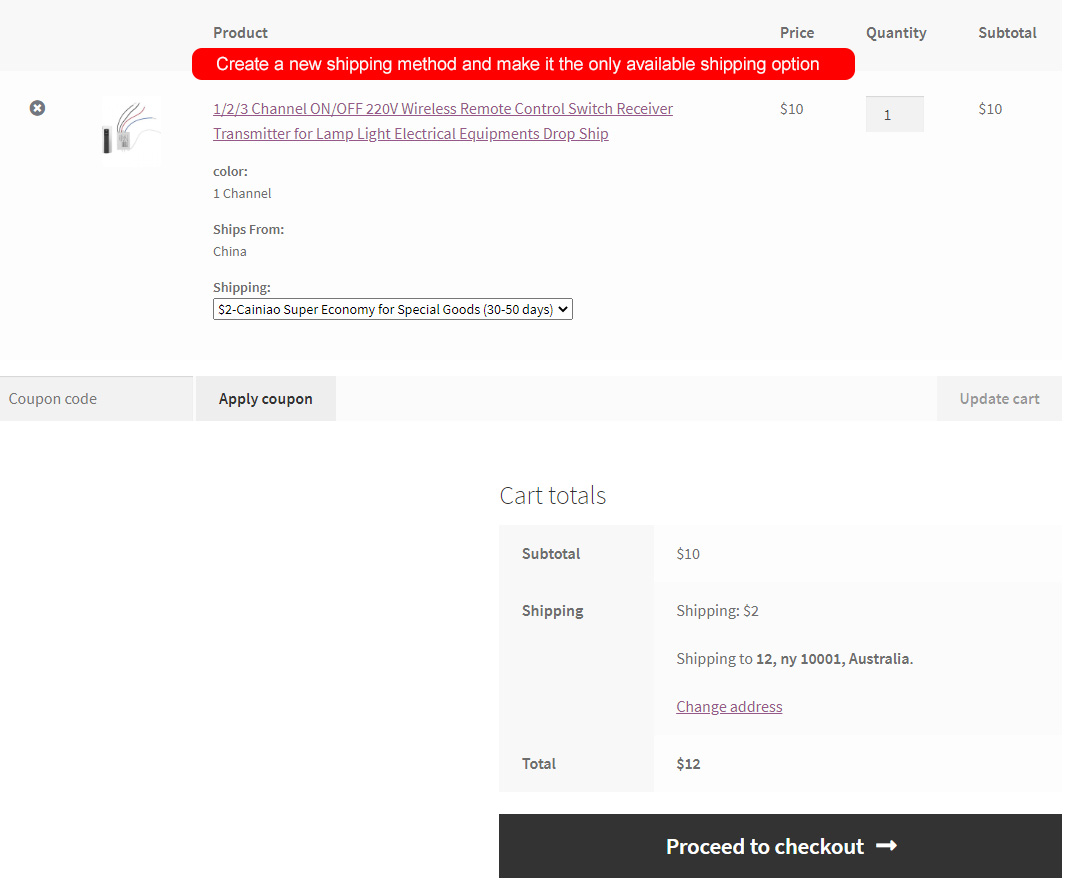
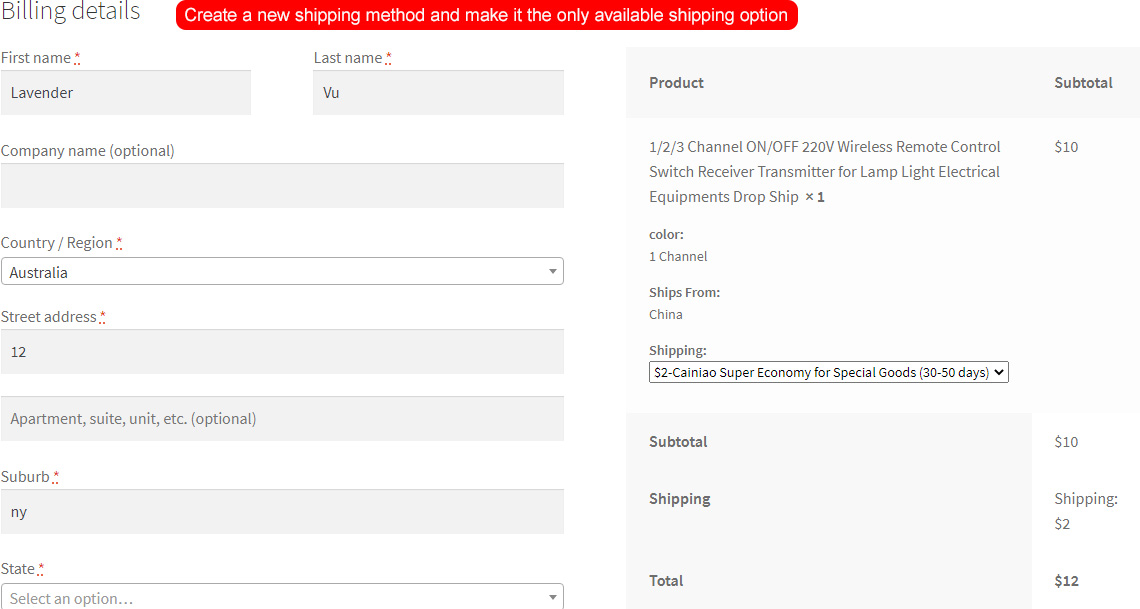
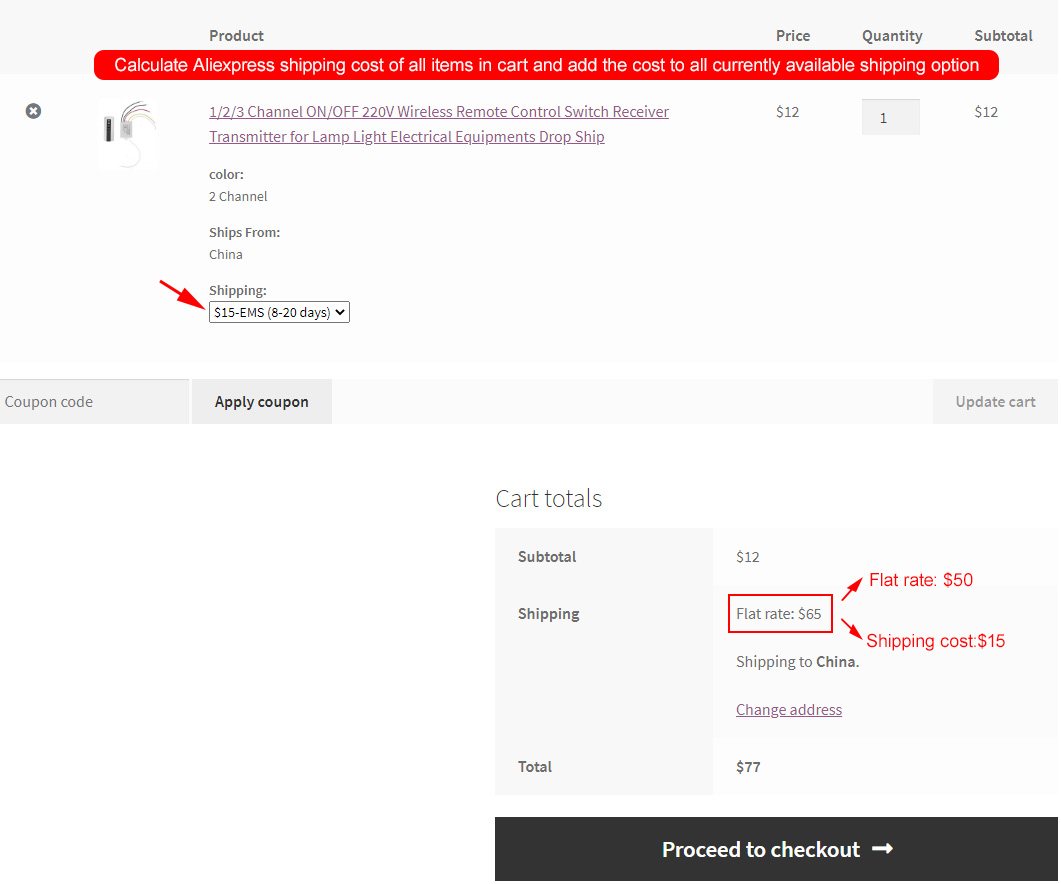
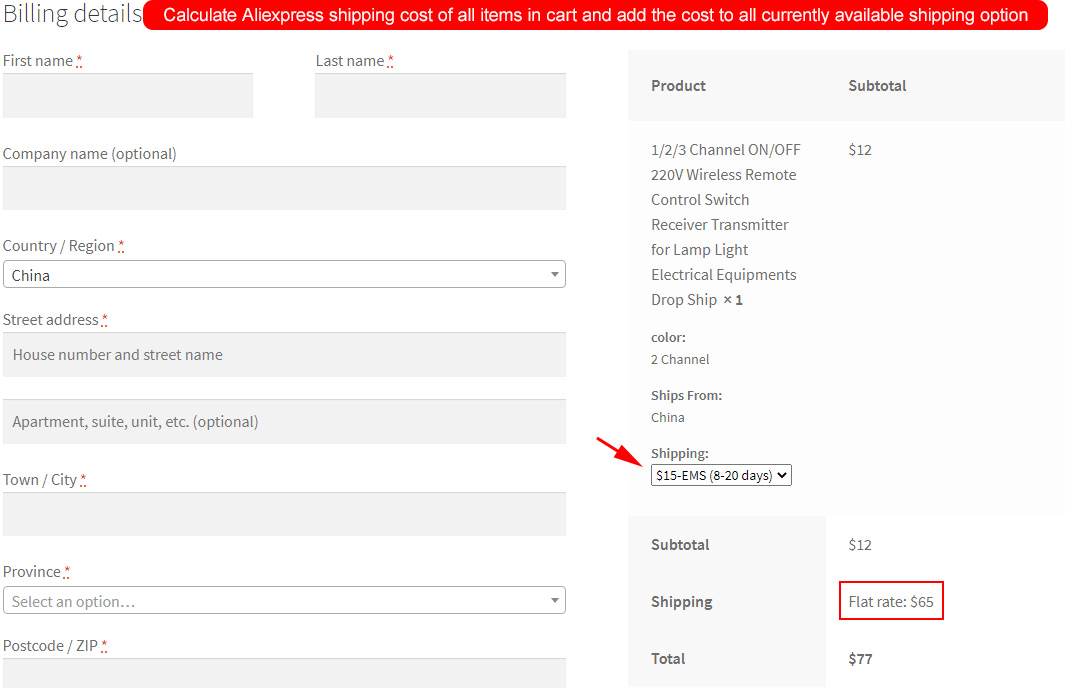
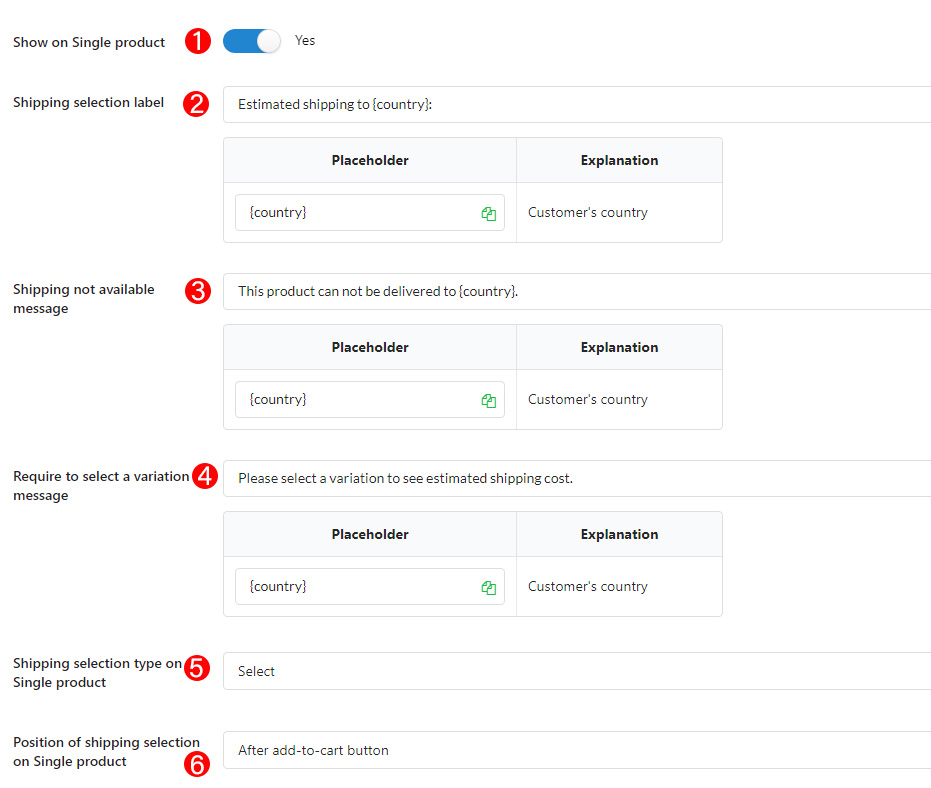
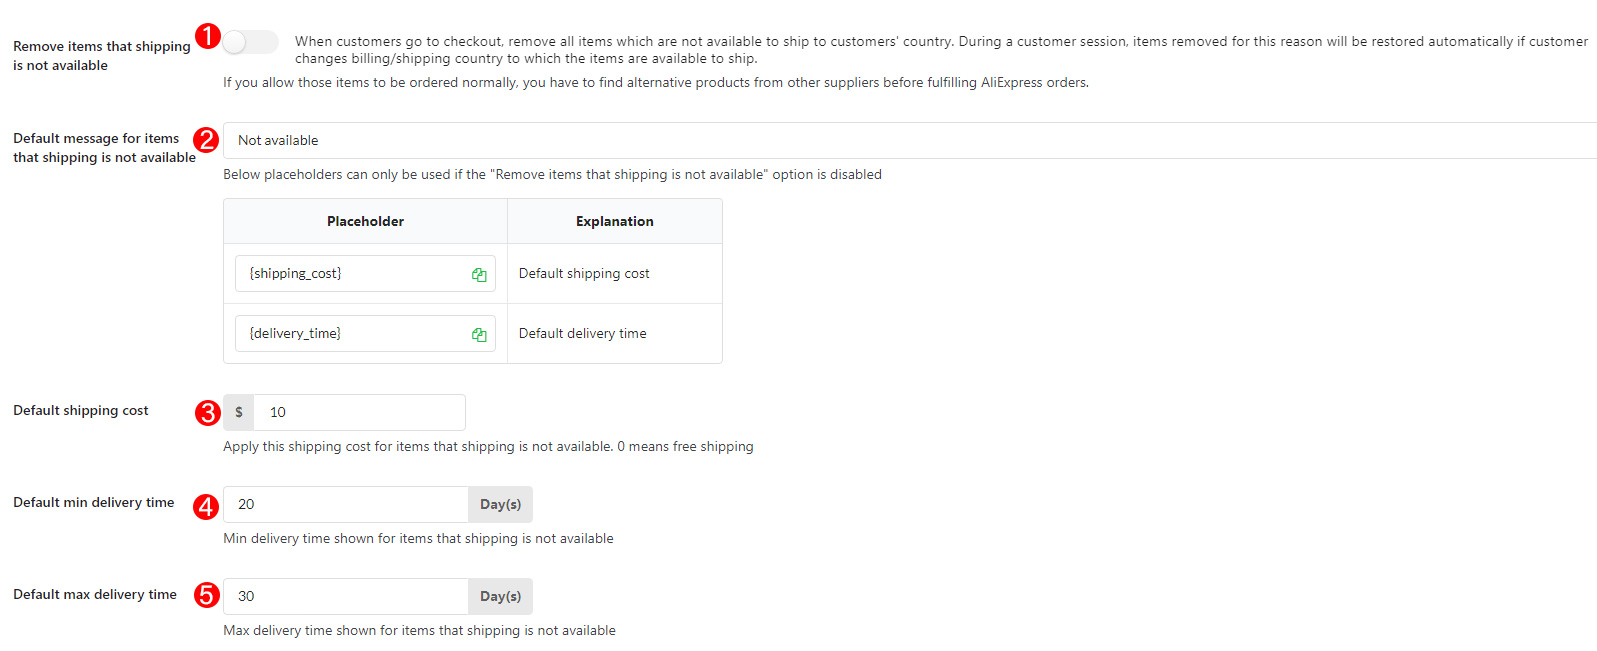
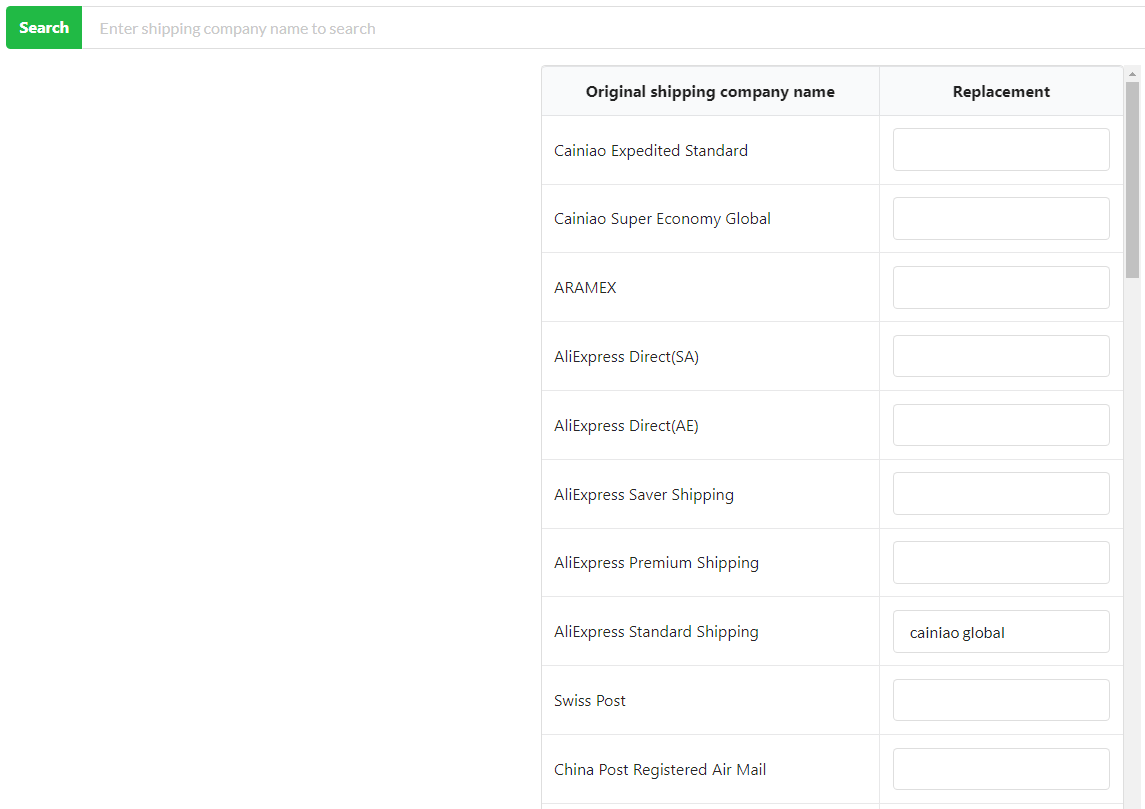
- Settings – Frontend Shipping
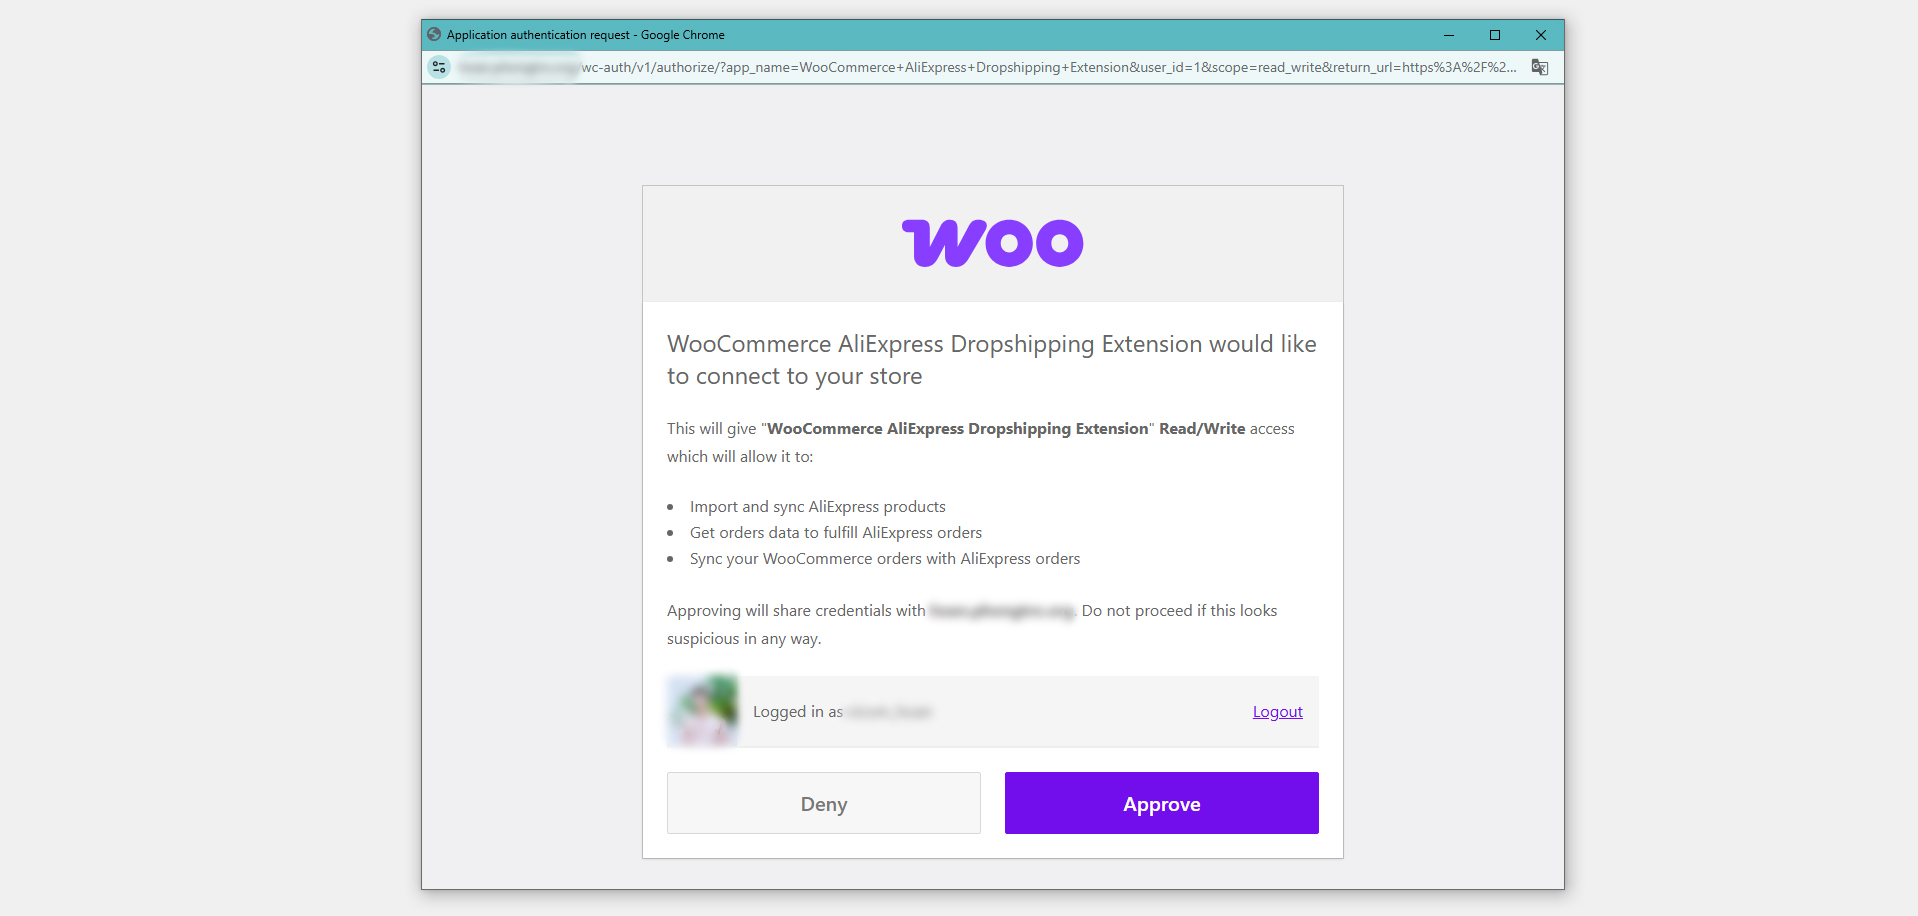
- Update API – Get Access token
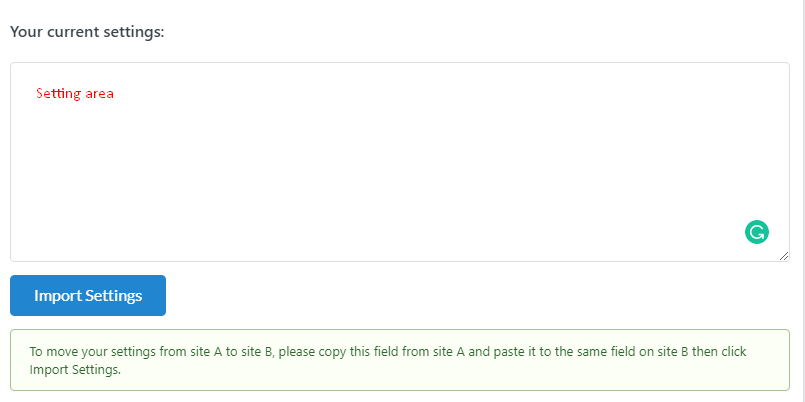
- Transfer Settings
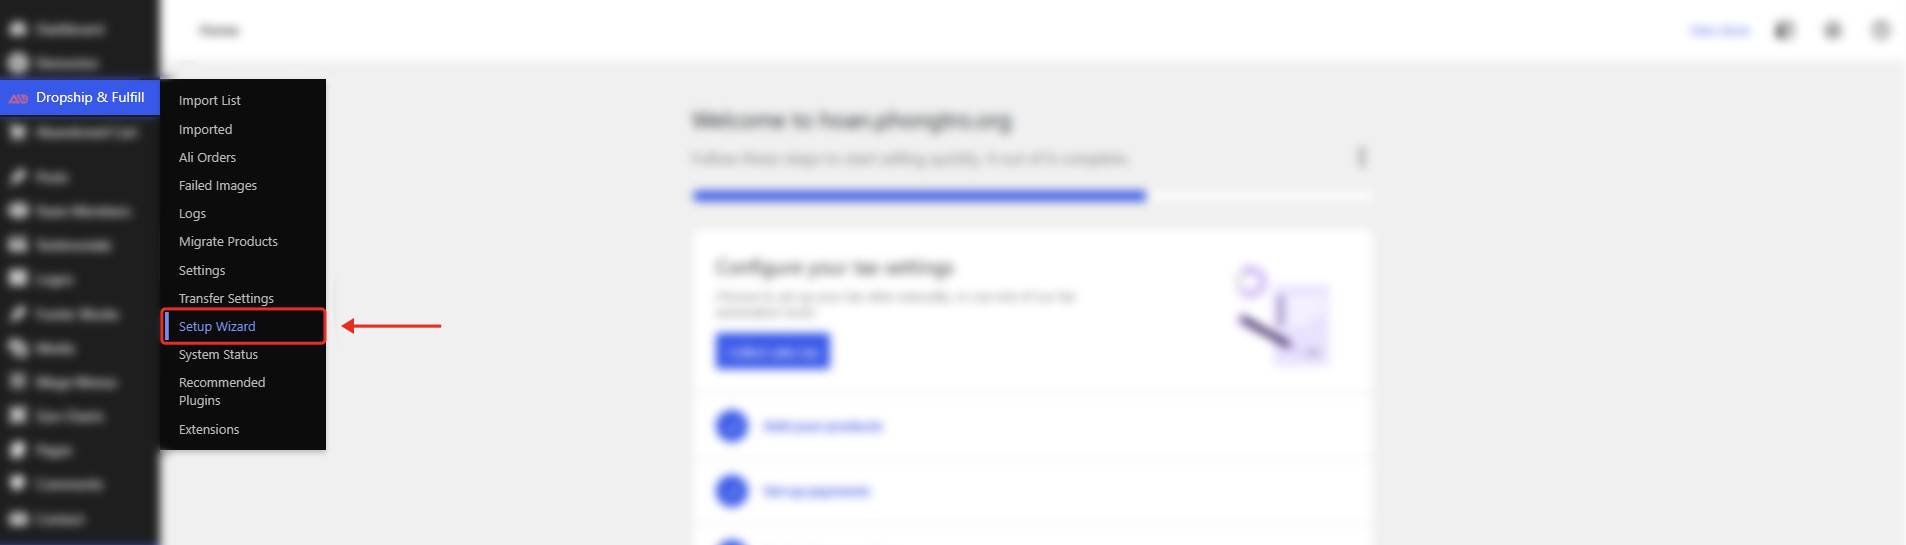
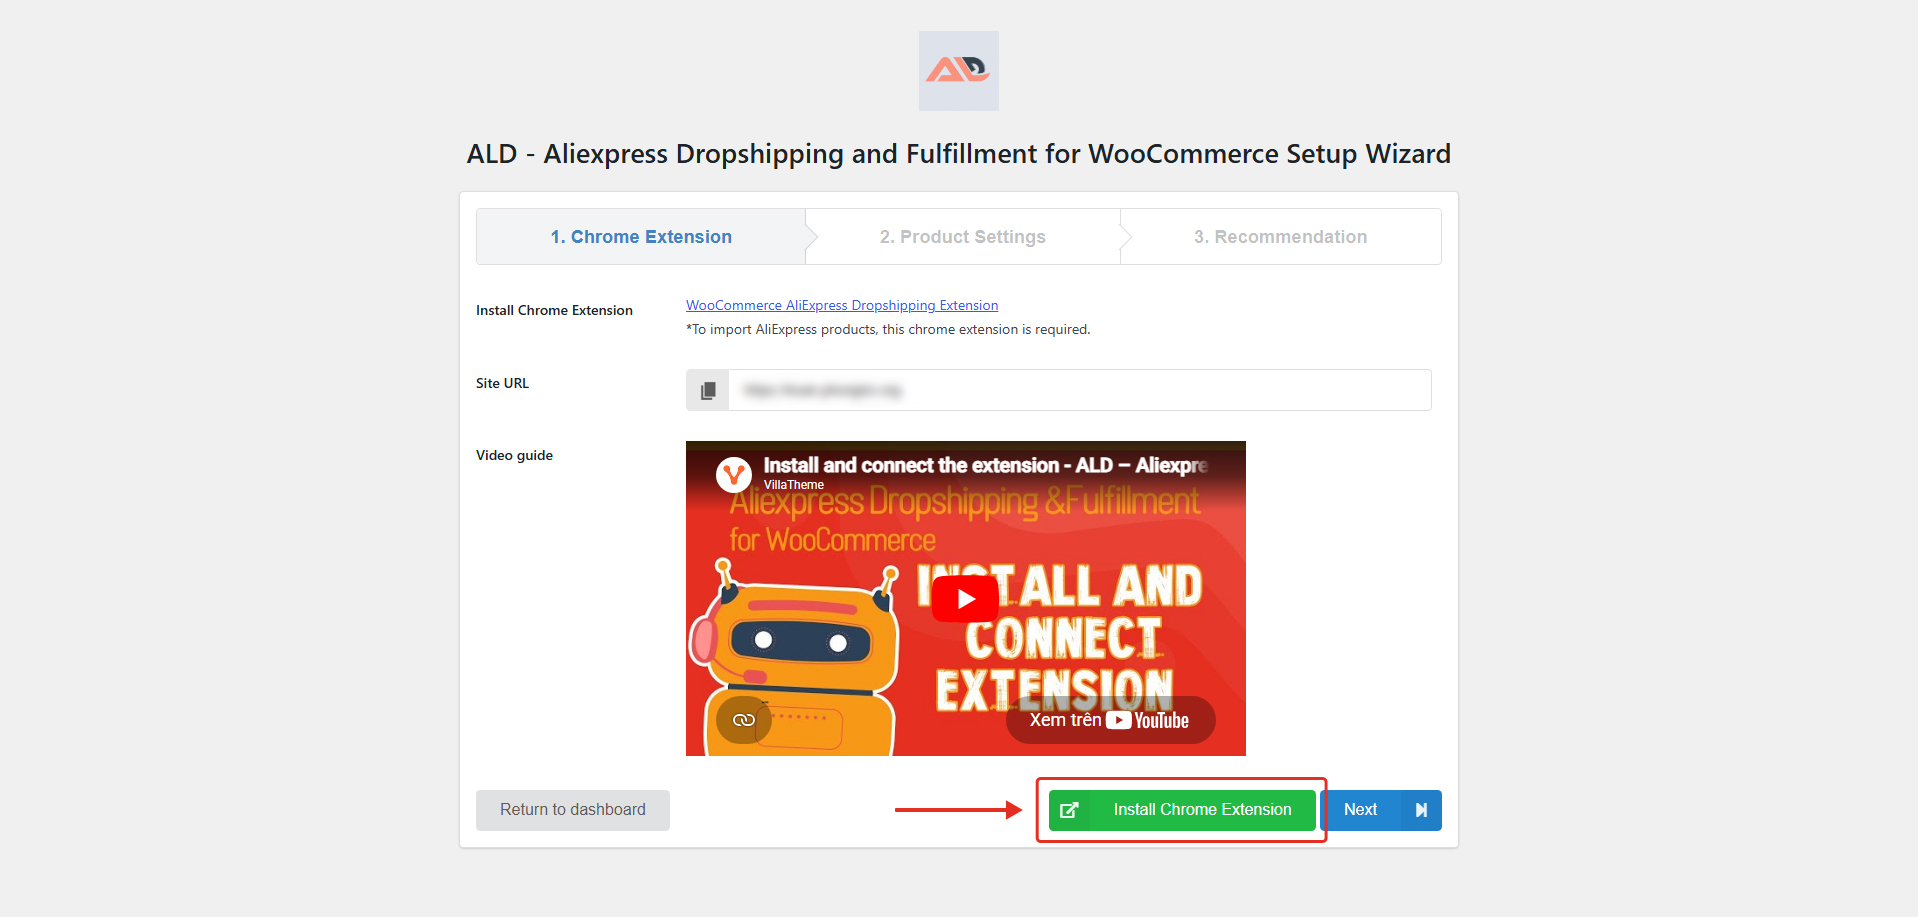
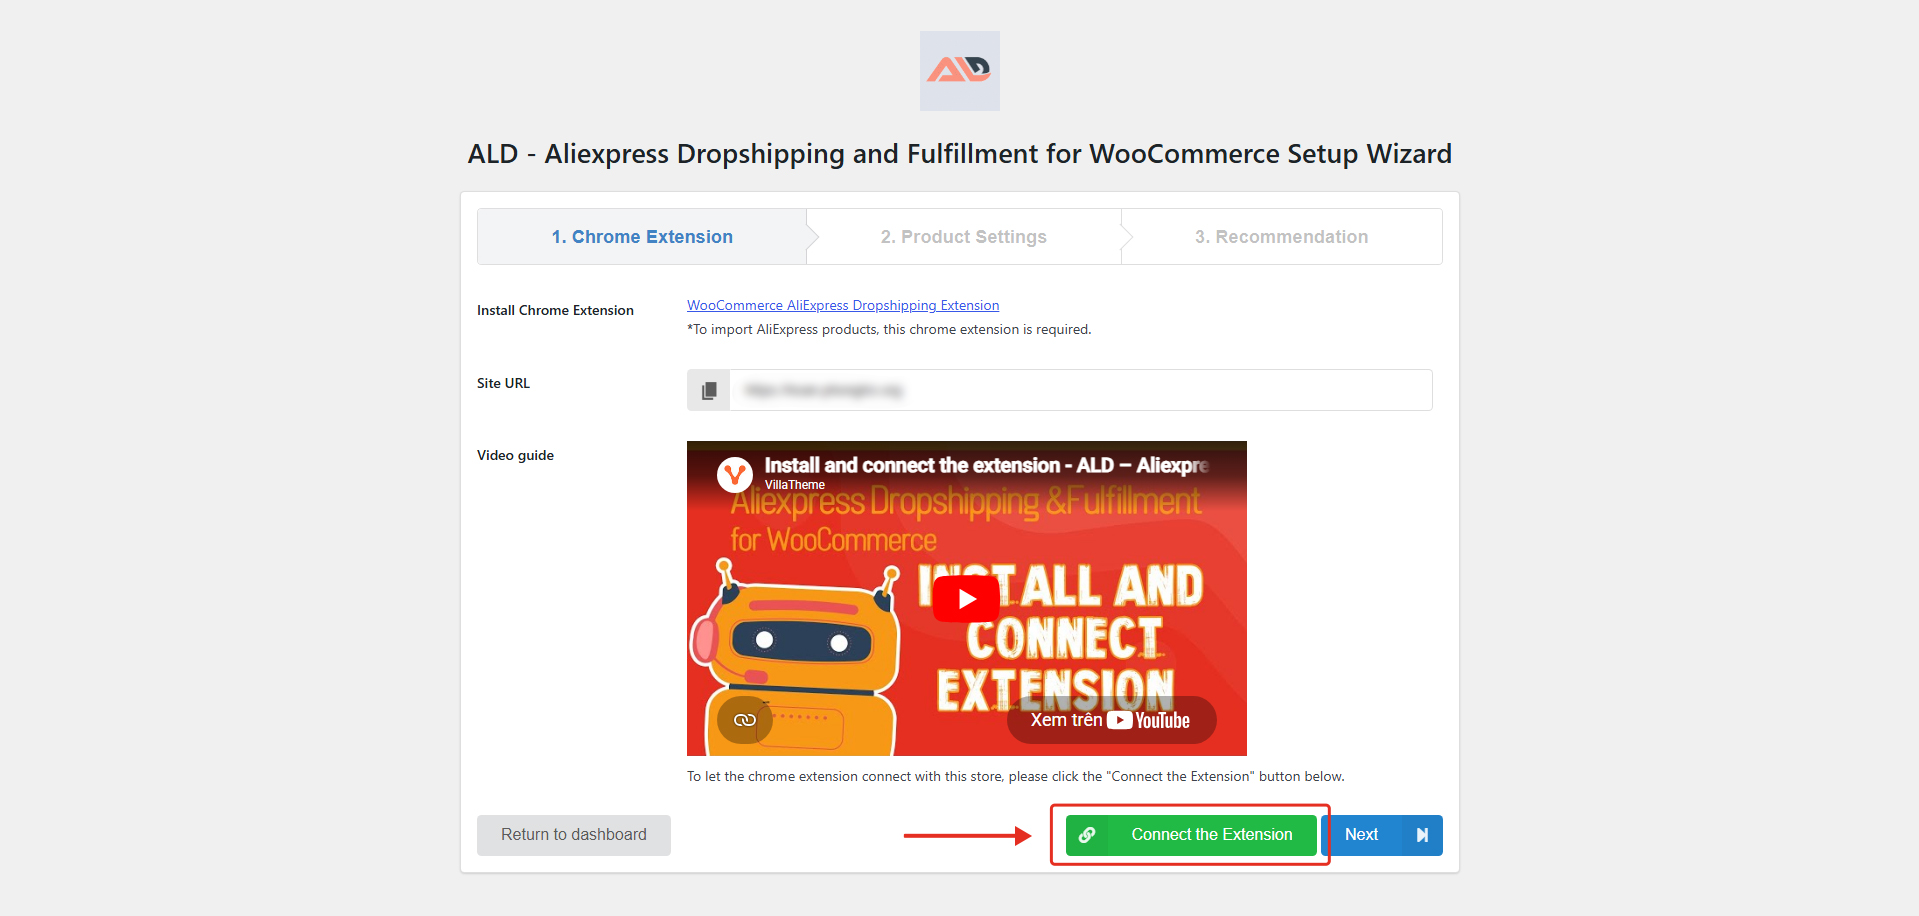
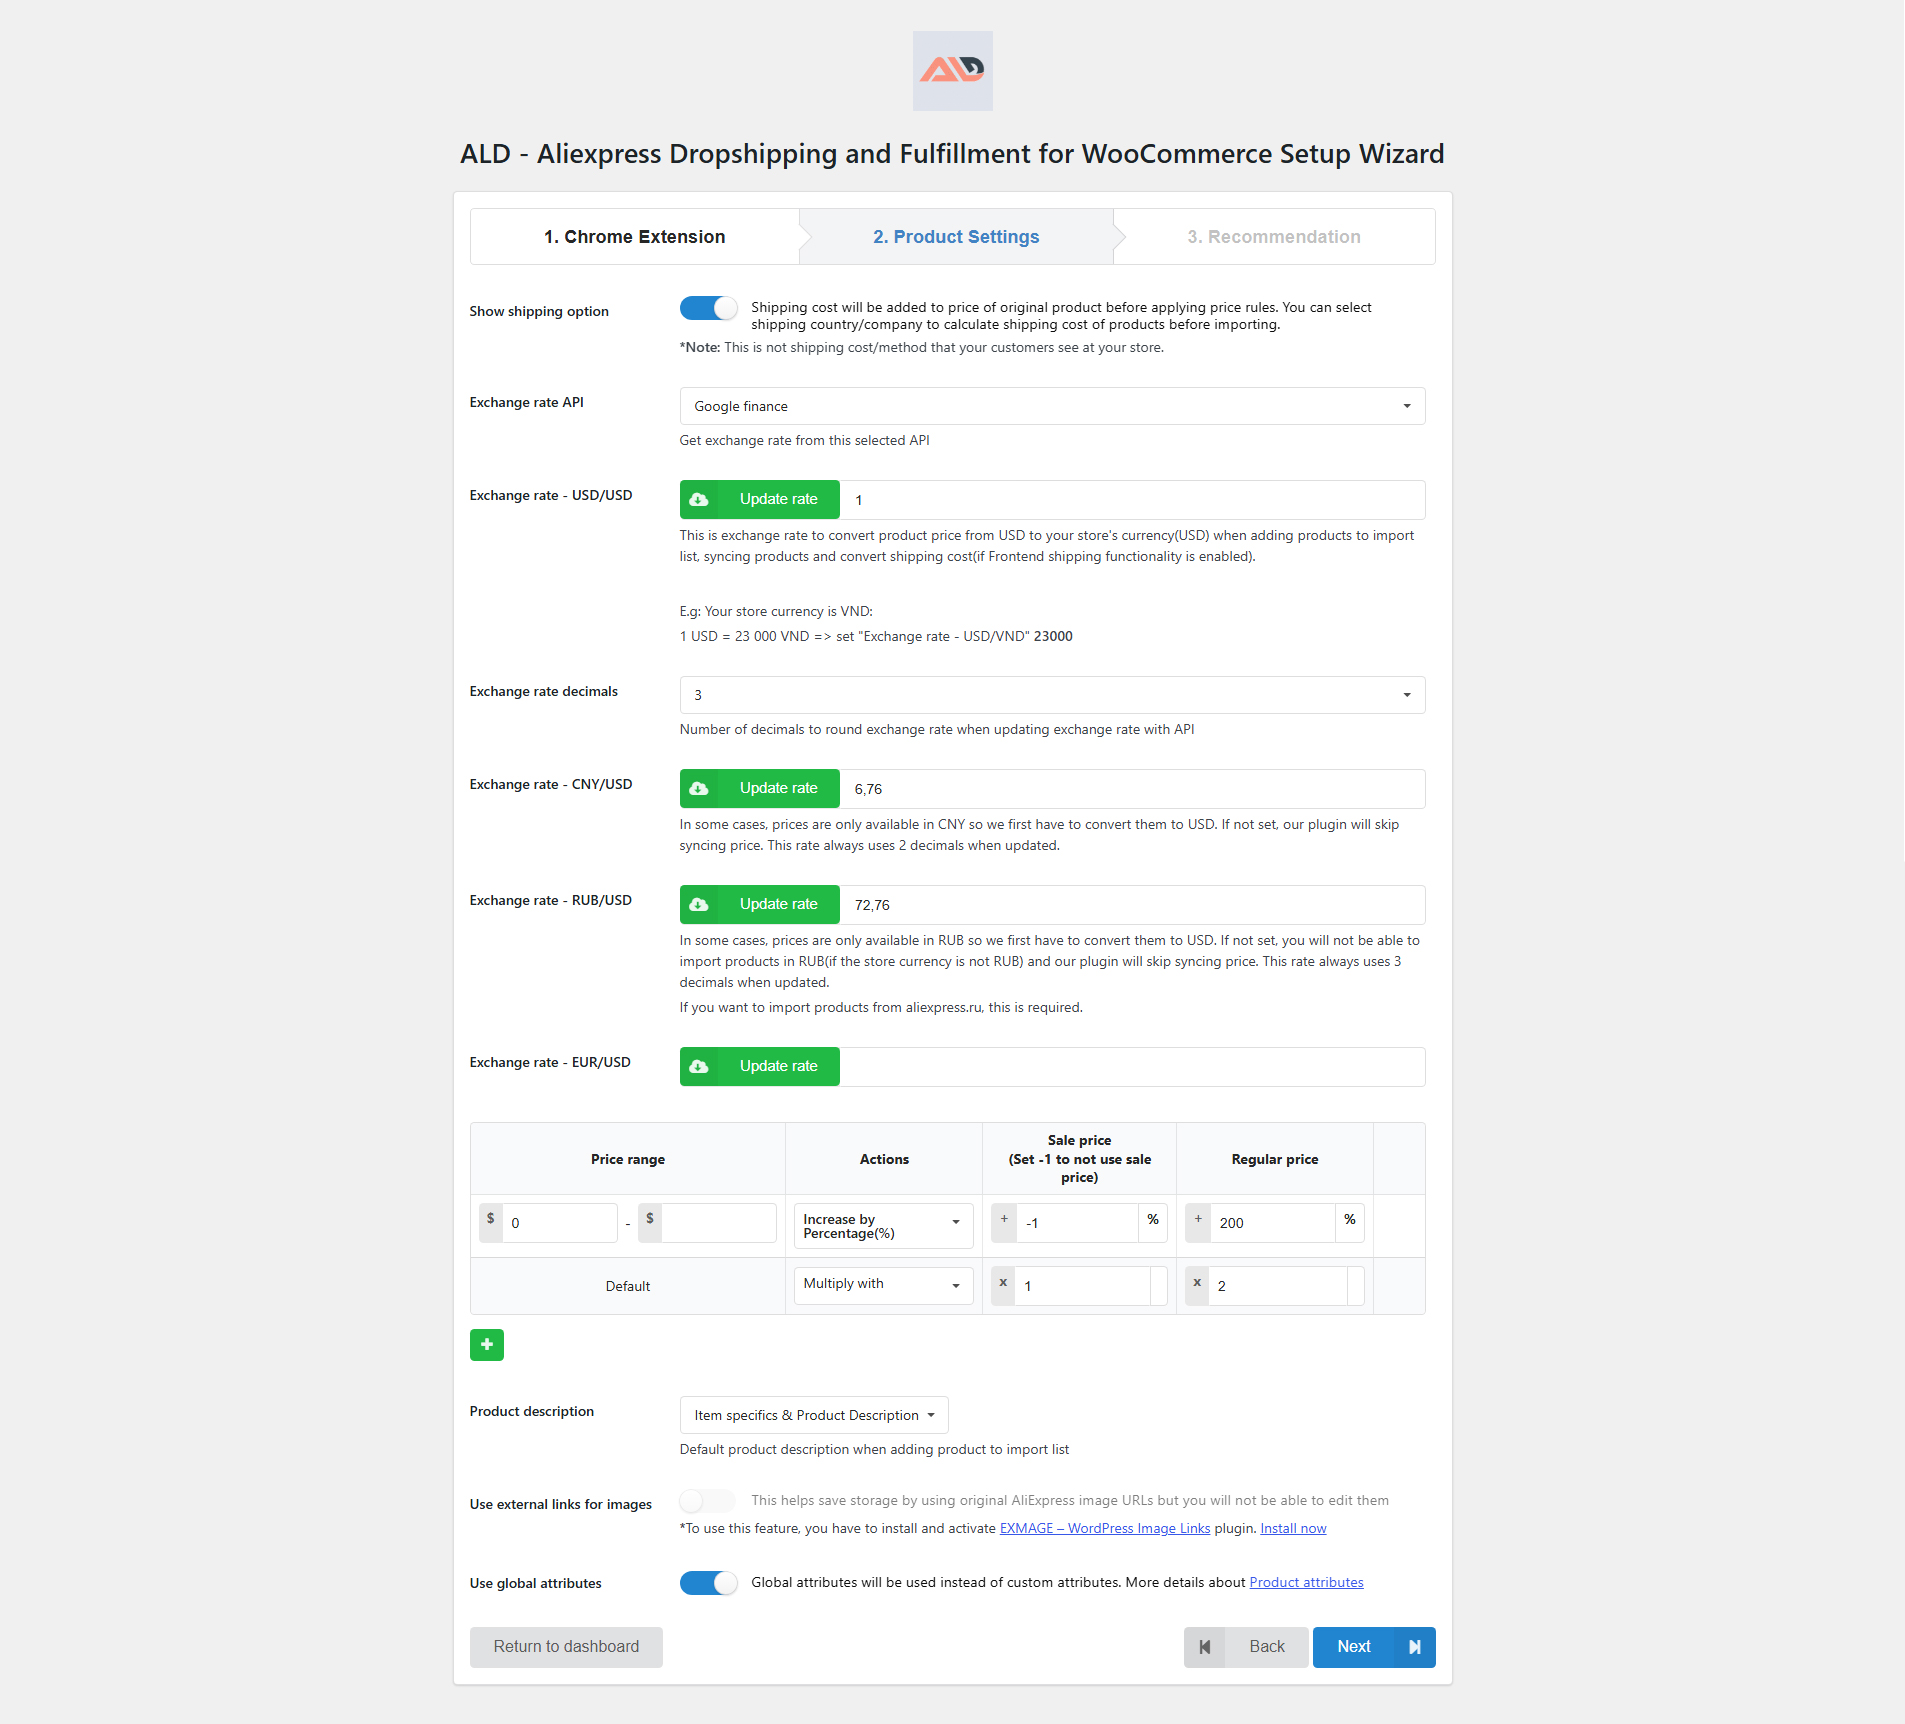
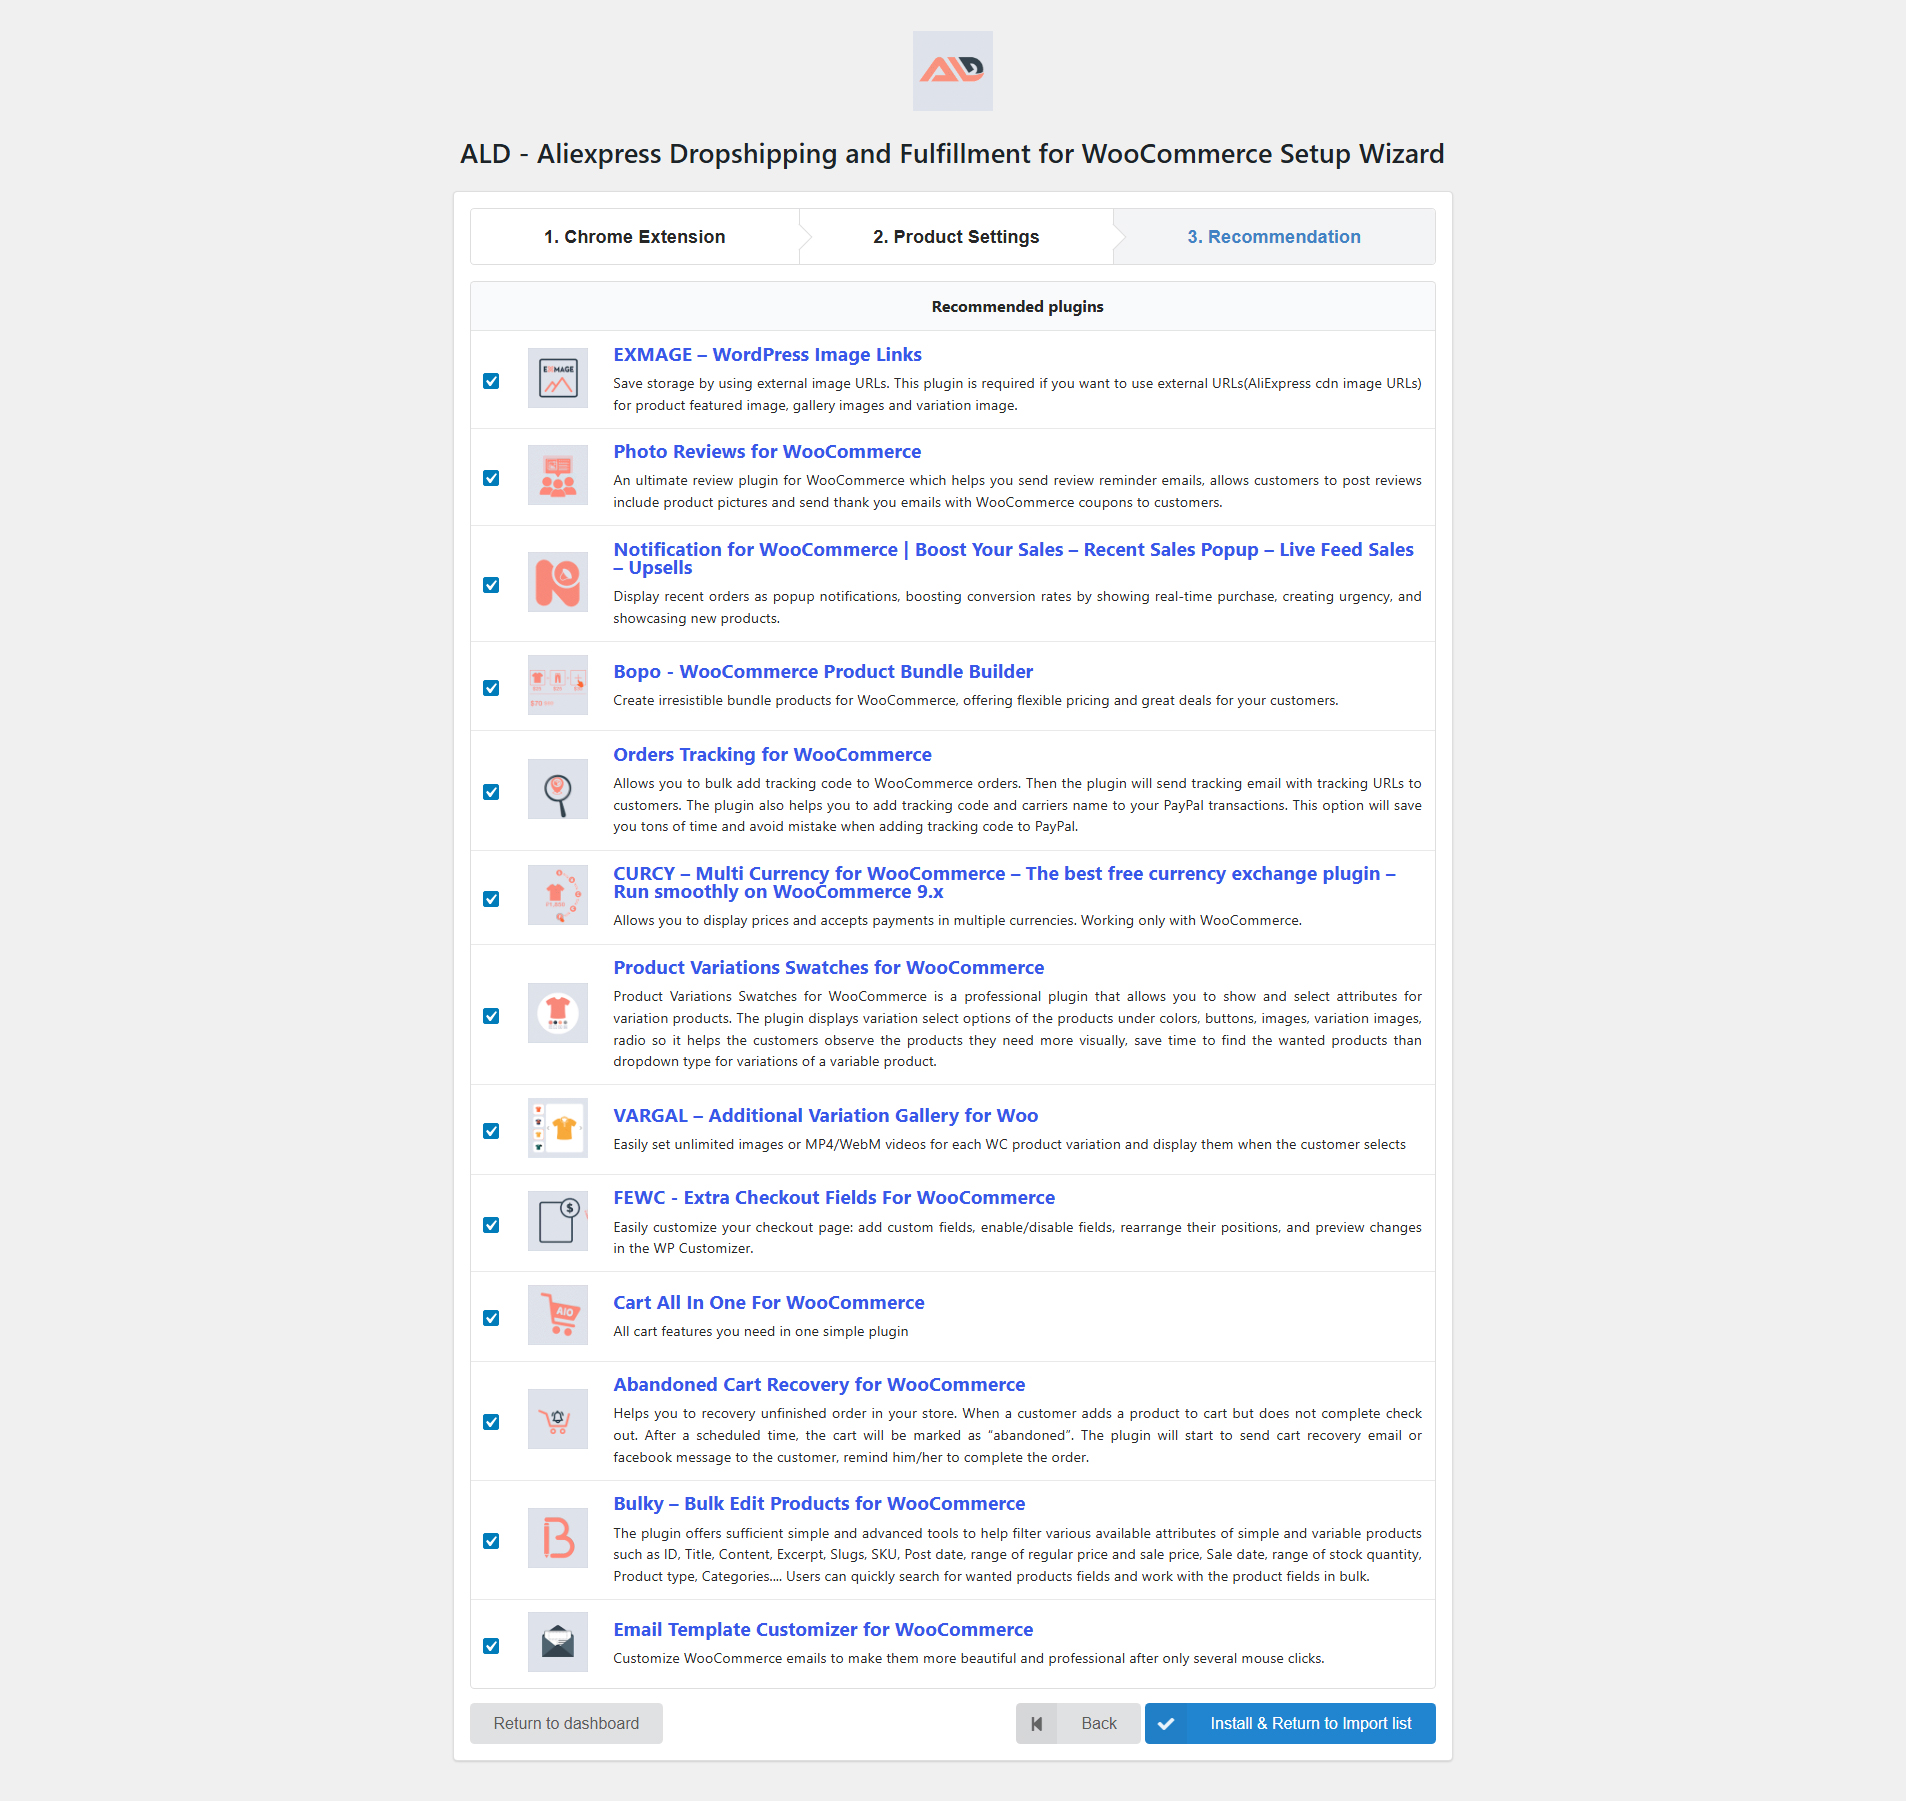
- Setup wizard
- COMPATIBILITY
- Extra Information
Copyright Villatheme 2015-2026