The admin can synchronize the imported product and order data manually.
A. Synchronize imported product data
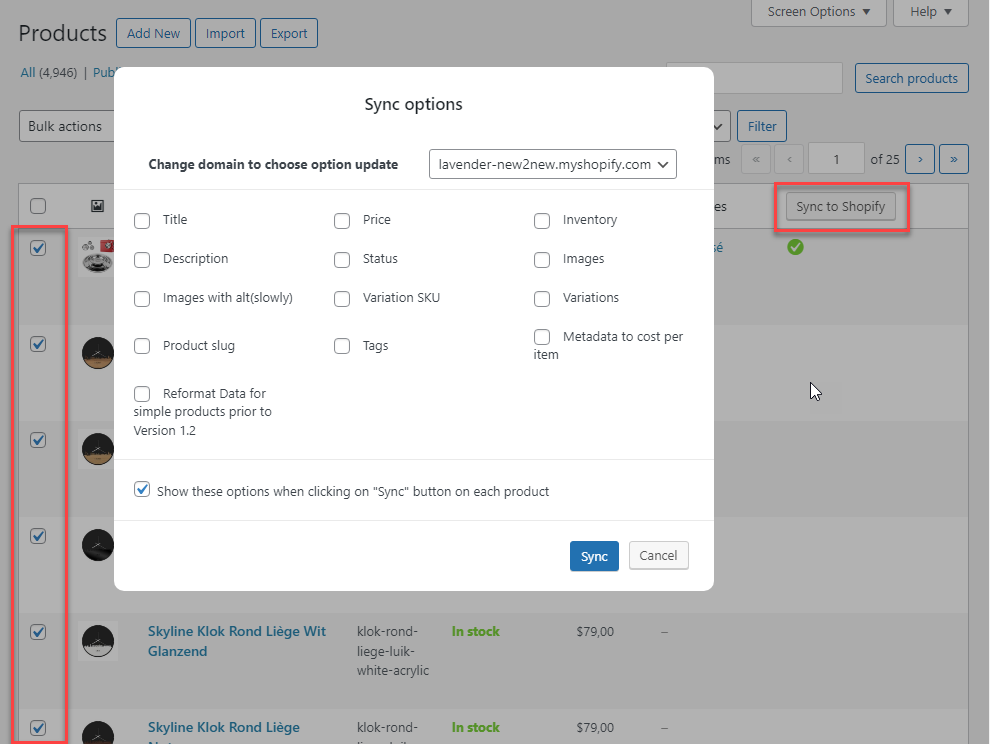
Step 1: In the WooCommerce Product list, select the products you want to synchronize, then click “Sync to Shopify”
Step 2: A popup will appear for you to select:
- Domain to update and synchronize the data: Choose one of the Shopify store domains to synchronize the product data
- Options to synchronize the data: Select which data you want to update. They can be Title, Price, Inventory, Description, Status, Image, Image with alt (this sync can be slow), Variation SKU, Variations, Product slug, Tags, Metadata to cost per item, Reformat data for simple product prior to Version 1.2
- Option to show the synchronizing options above next time you sync: If you disable this option >> The next time you click the “Sync” button (appears when you hover over the imported product), it’ll automatically sync without showing this popup again
Step 3: After selecting the domain and the options:
- Click “Save” to save the selection
- Click “Sync selected” to start syncing without saving the selection (if there are any changes)
- Click “Cancel” to cancel the action
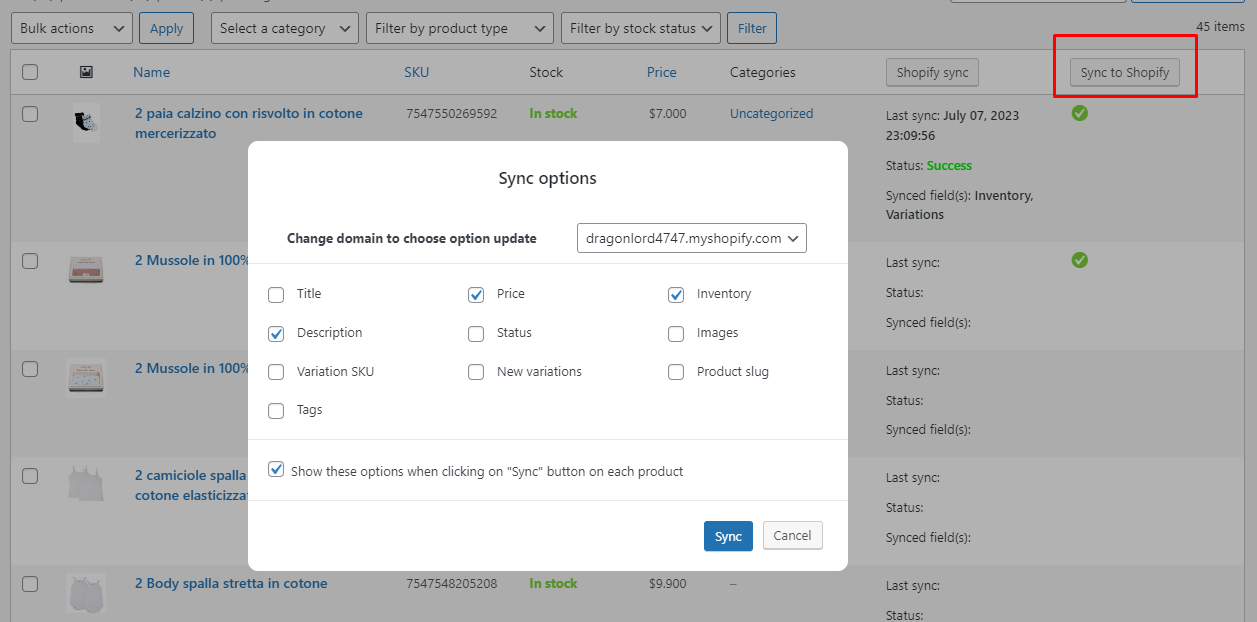
Note: You can only sync the imported product. In the image below, there are only 5 products that were imported, even if the other products are also selected, they will not be added to Shopify.
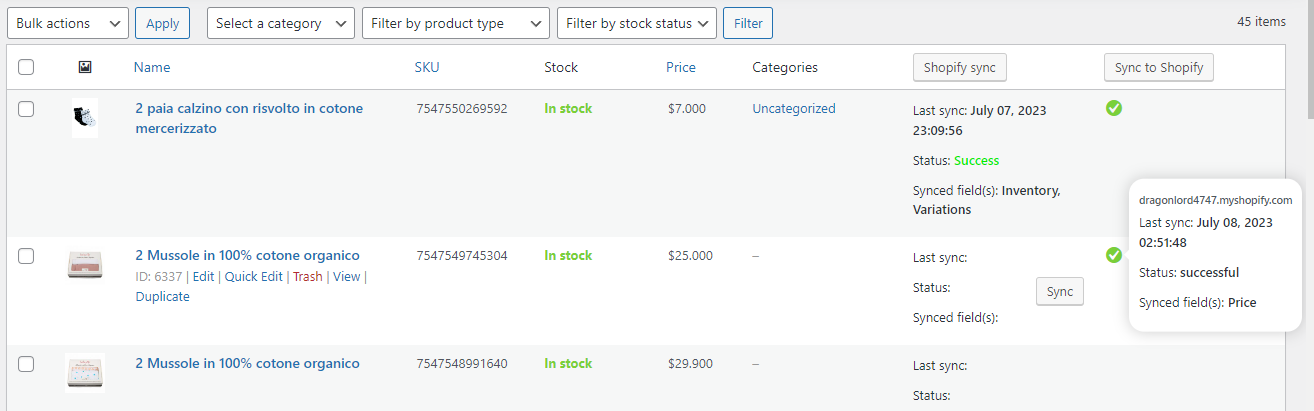
You can also sync each particular product by hovering over the product title, the “Sync” button will appear, and clicking it will lead you to a popup as above, but only sync that product data only.
When the process is finished, you can see the status to know if the data was synced successfully or not

The status will let you know:
-
- The Shopify store domain the data was synced.
- The date and time the data was synced
- Status of the synchronization
- Successful: The data was synchronized successfully. This status shows with a green tick symbol
- All other statuses: The data failed to be synced. All these statuses show with the red cross symbol
- Synced fields
B. Synchronize imported order data
In the WooCommerce Orders list, you can do the same as in the WooCommerce Product list above.
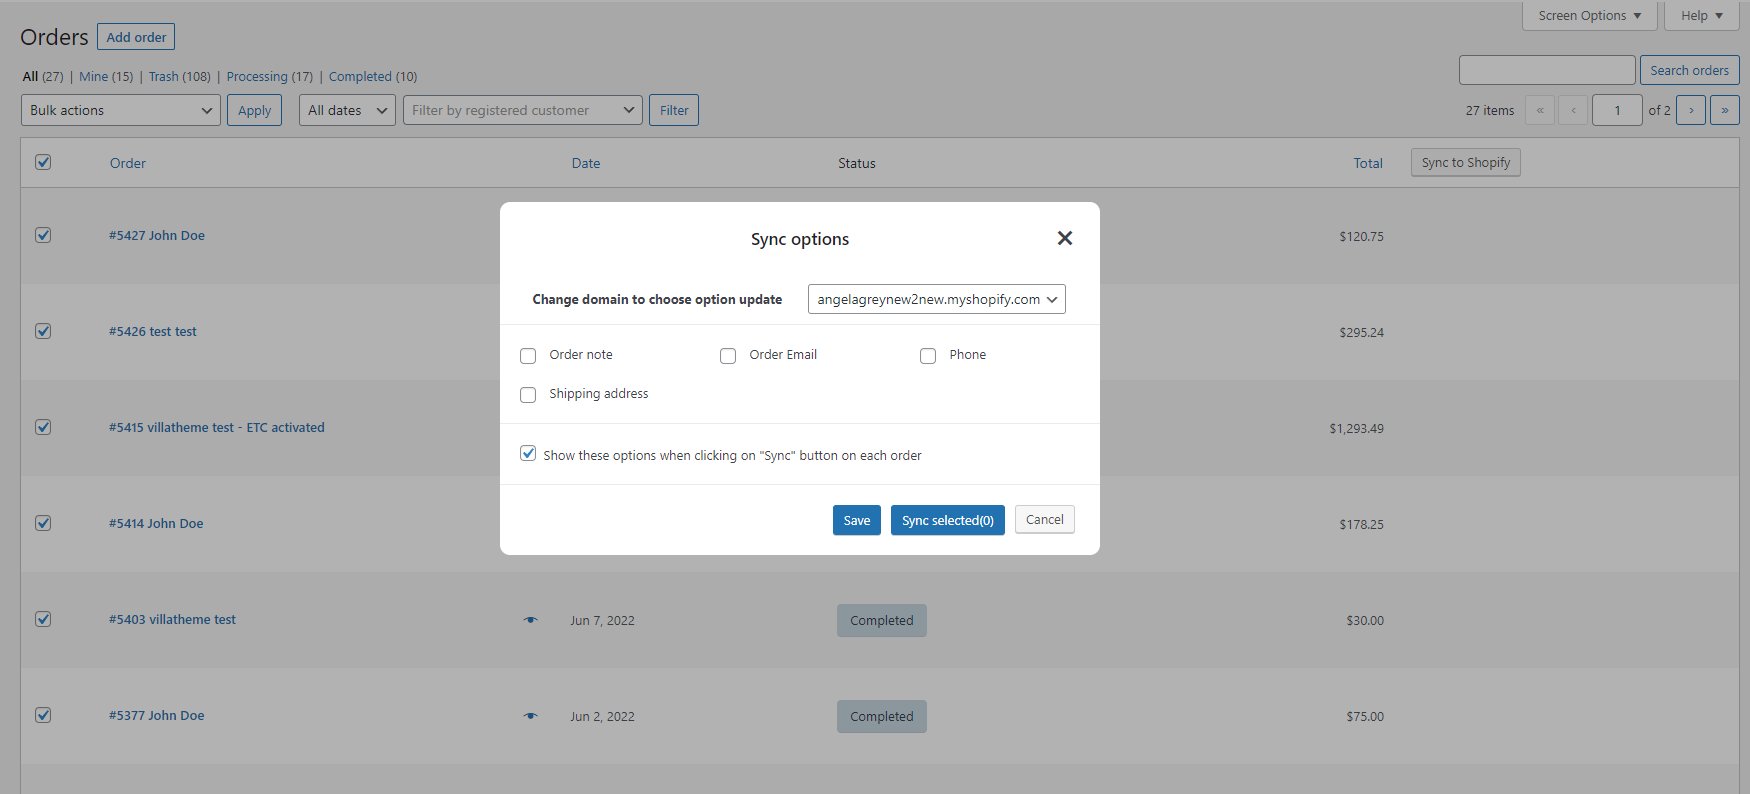
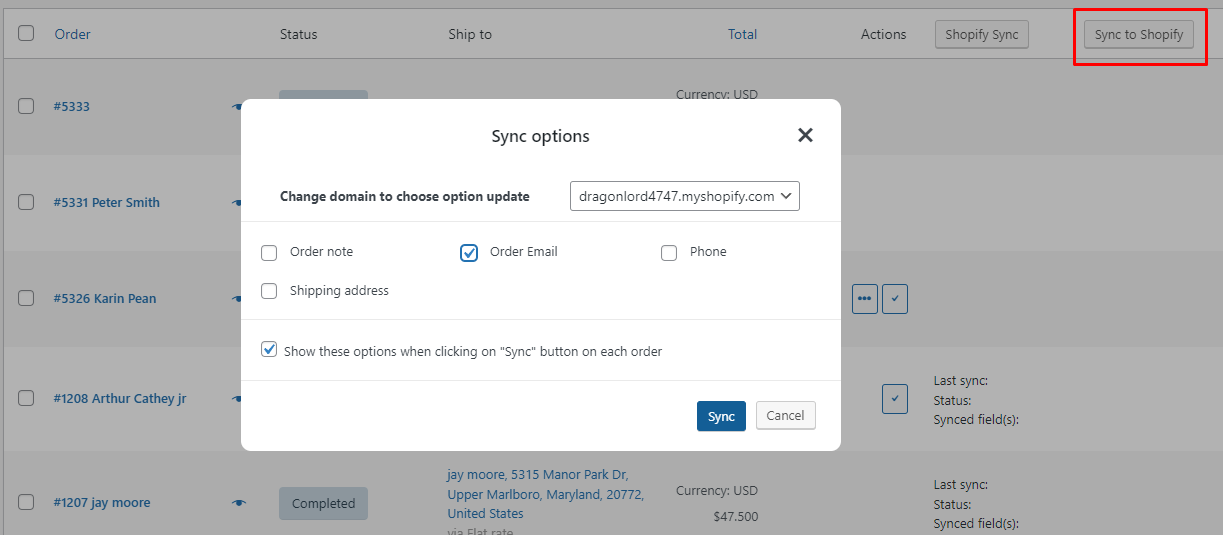
Step 1: In the WooCommerce Order list, select the orders you want to synchronize, then click “Sync to Shopify”
Step 2: A popup will appear for you to select:
- Domain to update and synchronize the data: Choose one of the Shopify store domains to synchronize the product data
- Options to synchronize the data: Select which data you want to update
- Option to show the synchronizing options above next time you sync: If you disable this option >> The next time you click the “Sync” button (appears when you hover over the imported product), it’ll automatically sync without showing this popup again
Step 3: After selecting the domain and the options:
- Click “Save” to save the selection
- Click “Sync selected” to start syncing without saving the selection (if there are any changes)
- Click “Cancel” to cancel the action
Note: You can only sync the imported orders.
You can also sync each particular product by hovering over the product title, the “Sync” button will appear, and clicking it will lead you to a popup as above, but only sync that product data only.
When the process is finished, you can see the status to know if the data was synced successfully or not.
The status will let you know:
- The Shopify store domain the data was synced.
- The date and time the data was synced
- Status of the synchronization
- Synced fields
C. Syncing order/product Data between Shopify and WooCommerce (Compatibility between Shopify to WooCommerce and WooCommerce to Shopify)
Starting from version 1.2, our plugin allows you to sync product and order data between Shopify and WooCommerce. This feature enables you to keep your data up to date across both platforms. In order to initiate the syncing process, please follow the steps below:
Step 1: Connect Shopify Store.
In the W2S plugin settings, navigate to the “General settings” section and connect Shopify API. You can see this guide in the General settings.
Step 2: Sync products/Orders
To ensure that you sync order data to the desired Shopify store, you need to select a shopify store.
- Go to Products > All products > Select products and click on “Sync to Shopify” then choose the desired synchronization options, such as syncing all or specific data.
To sync product data reversely from Shopify to WooCommerce, from version 1.2, please follow this guide link.
- Go to WooCommerce > Orders, select orders to sync then click on the “Sync to Shopify“
To sync order data reversely from Shopify to WooCommerce, from version 1.2, please follow this guide link.