- Start
- FILE INCLUDES
- INTRODUCTION
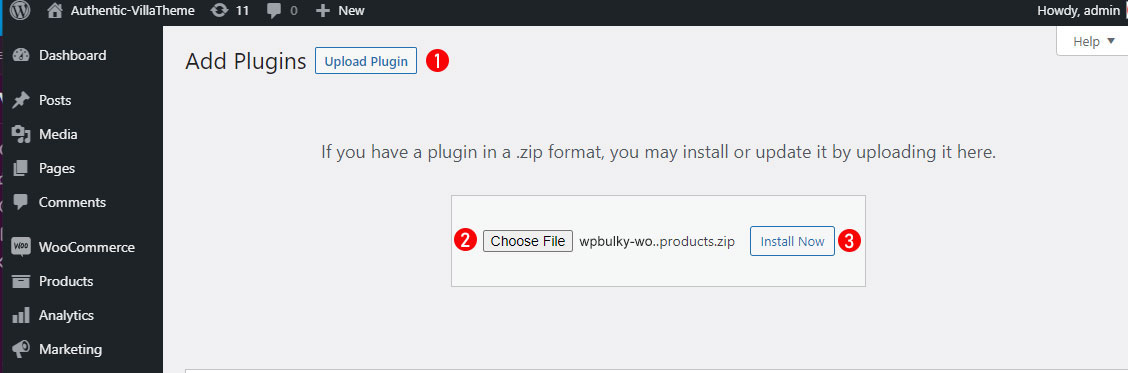
- DOWNLOAD AND INSTALLATION
- HOW TO USE
- HOW DOES IT WORK wpbulky
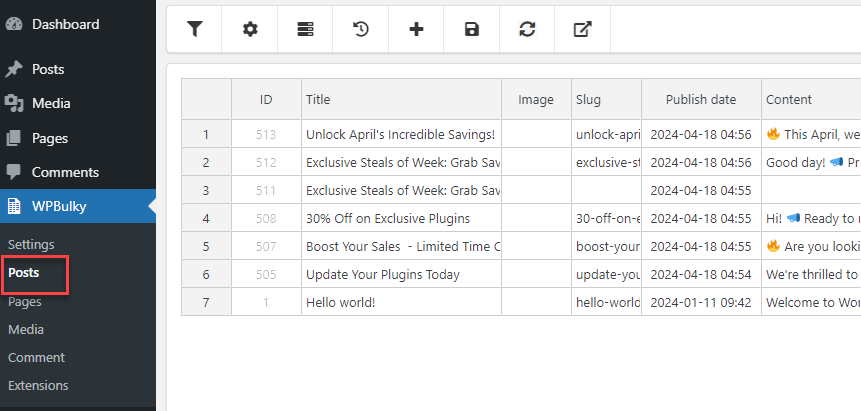
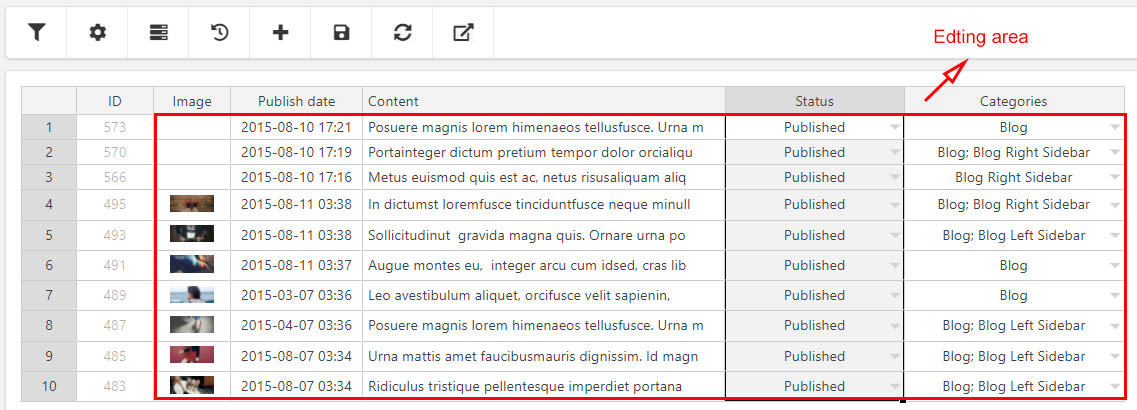
- HOW TO BULK EDIT POSTS
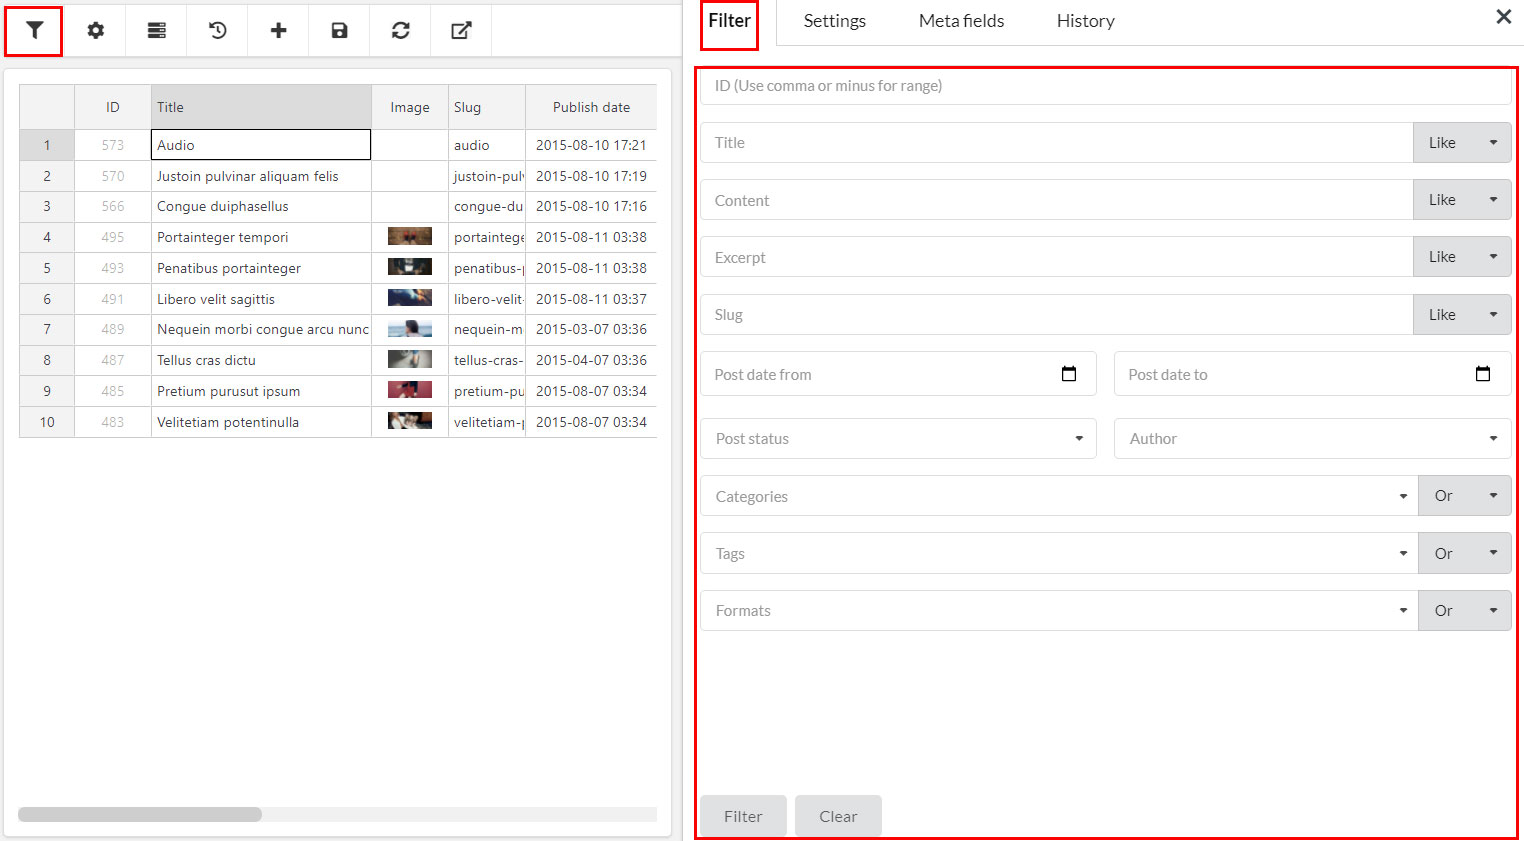
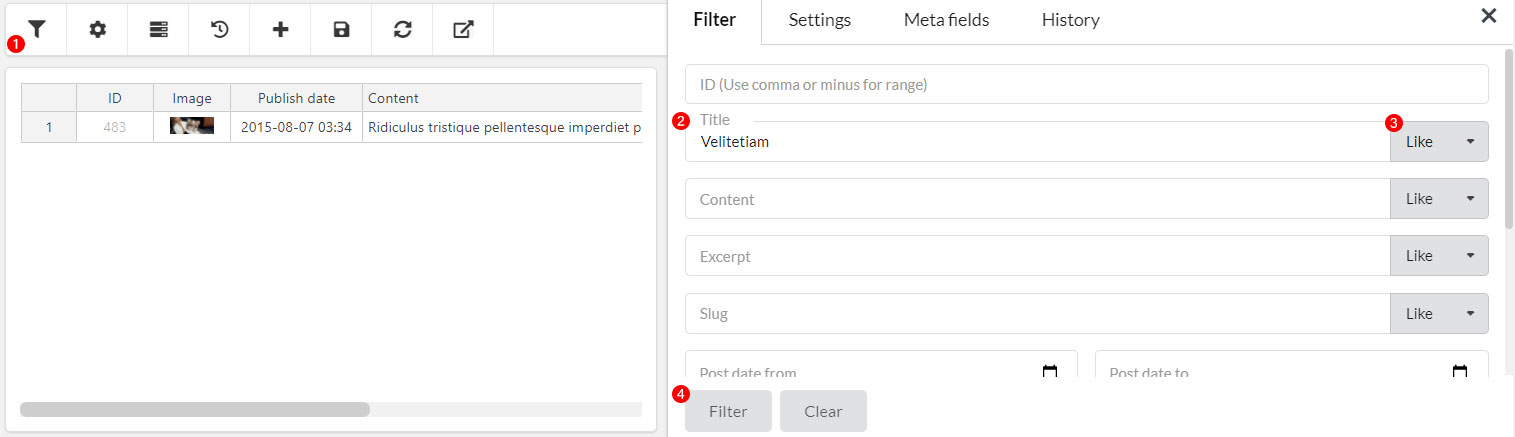
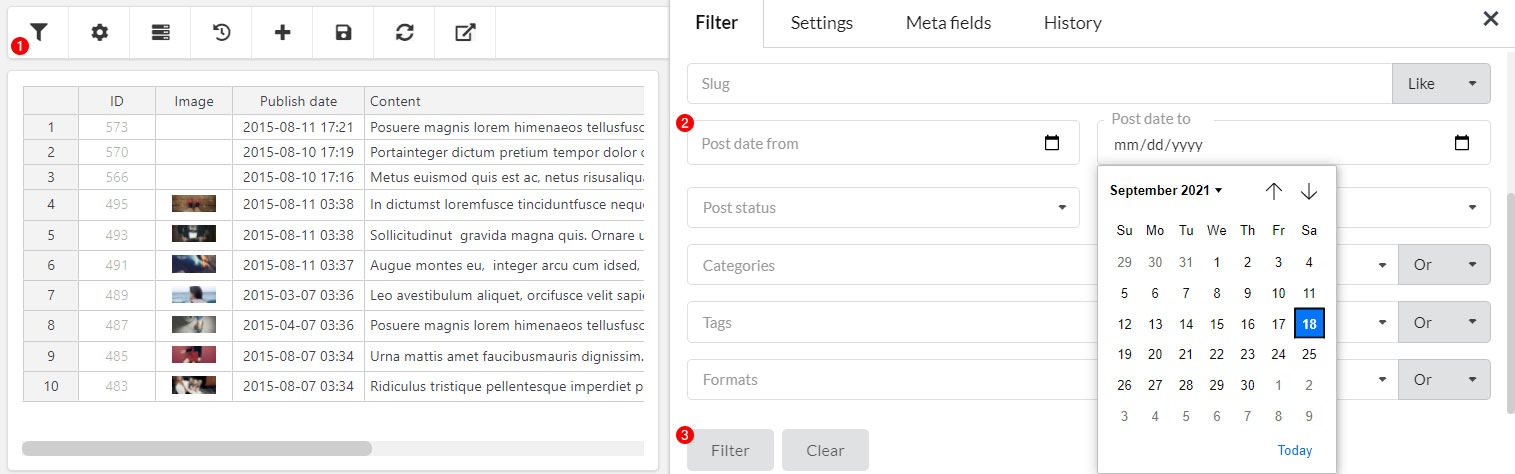
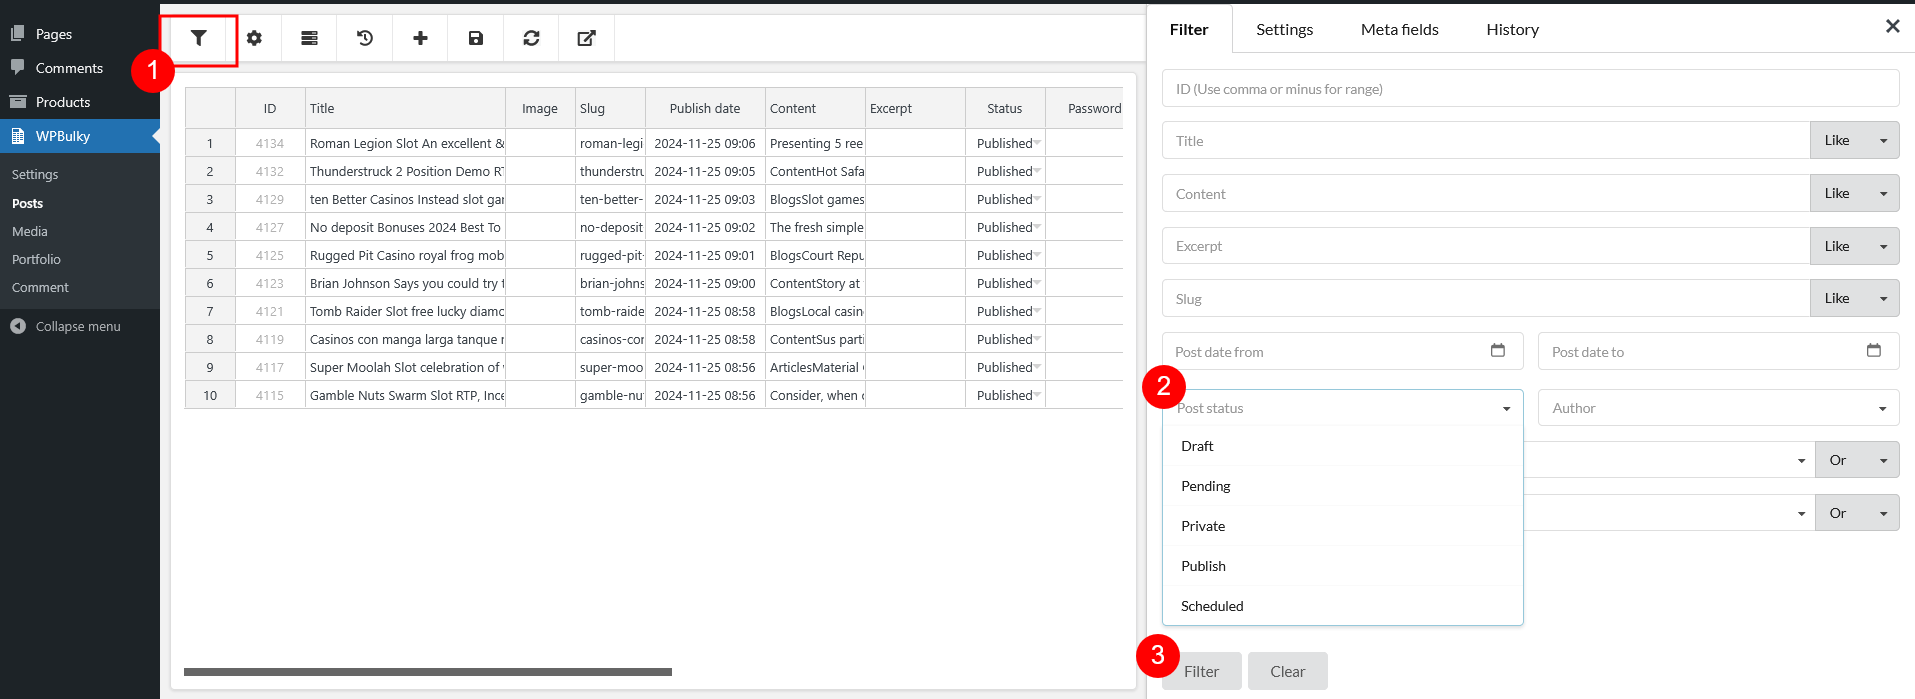
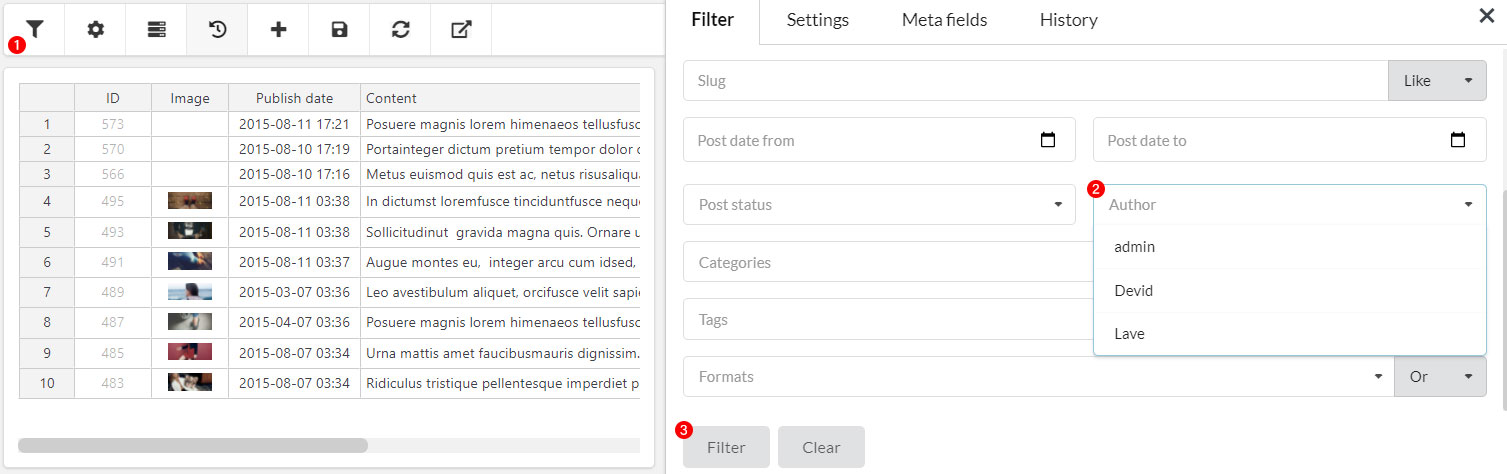
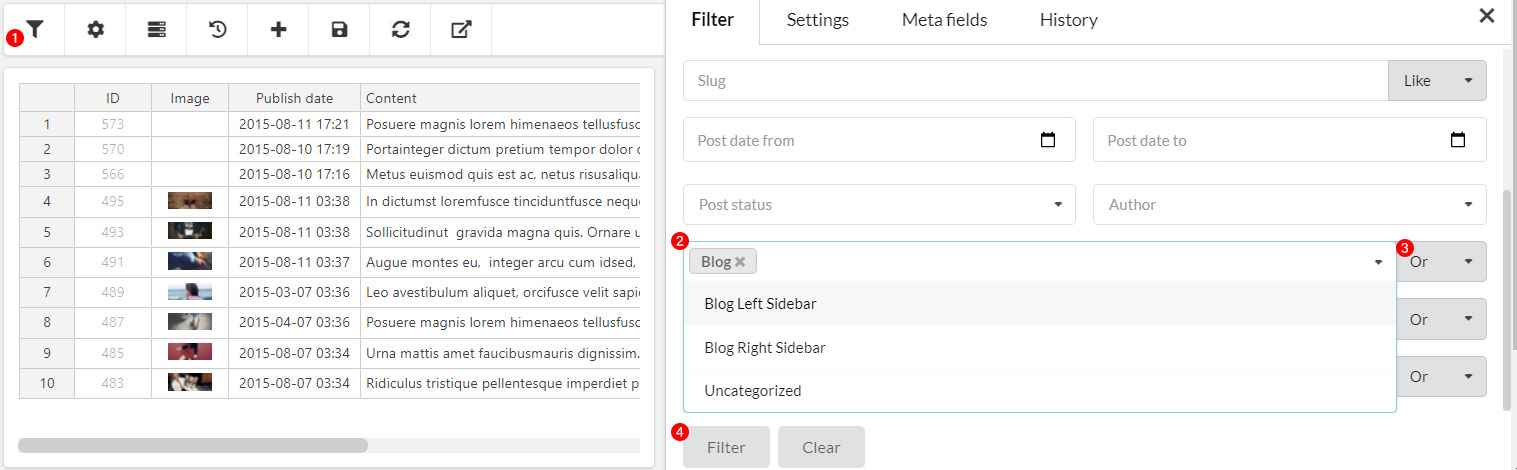
- Filter Based on Properties of Post Types
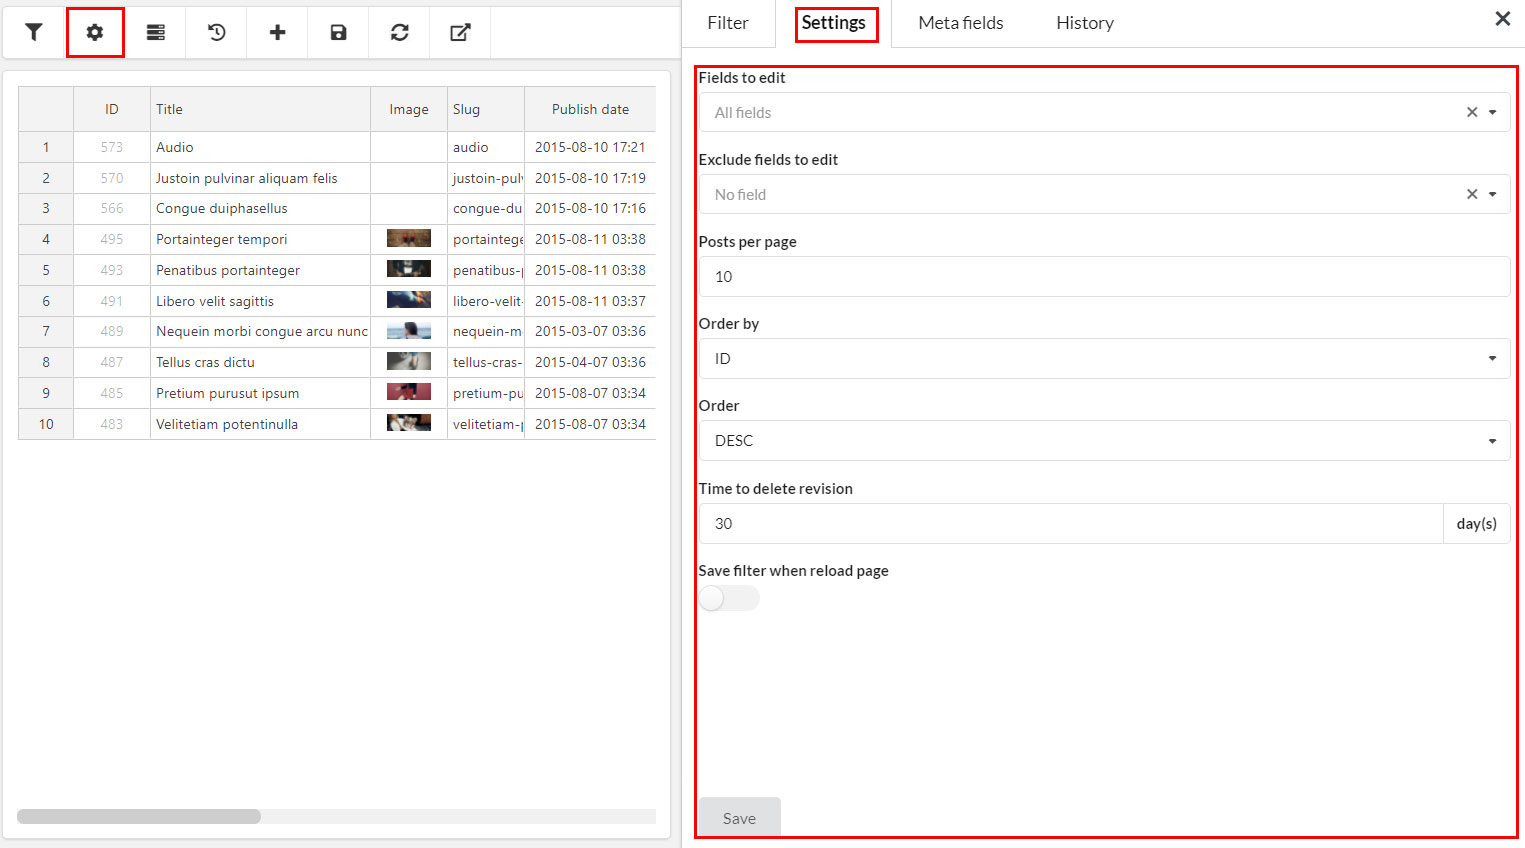
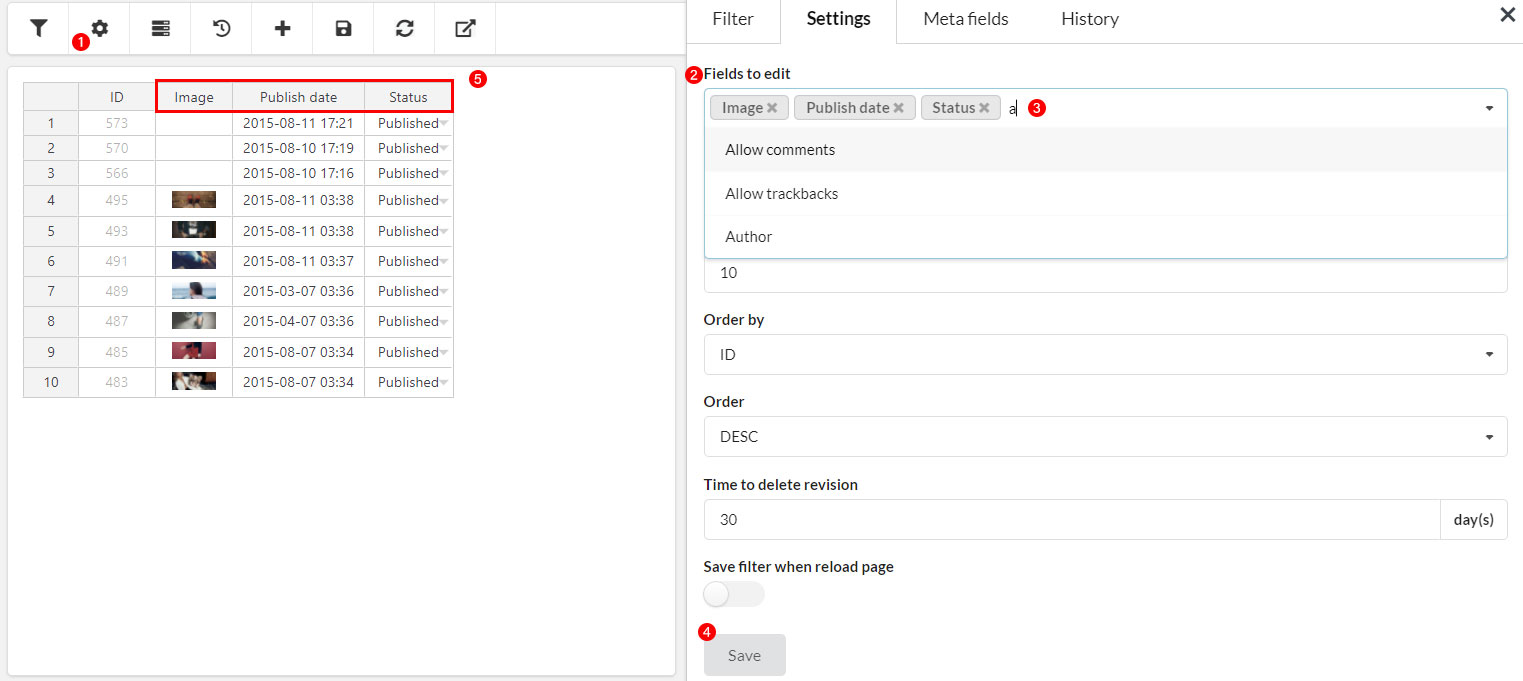
- Settings
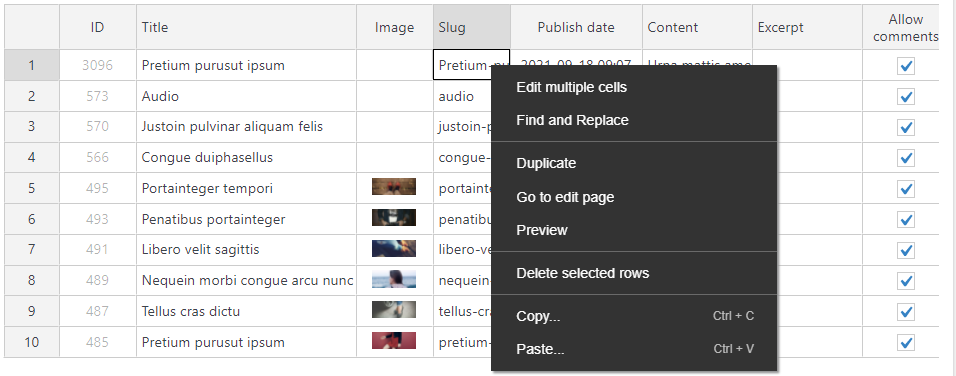
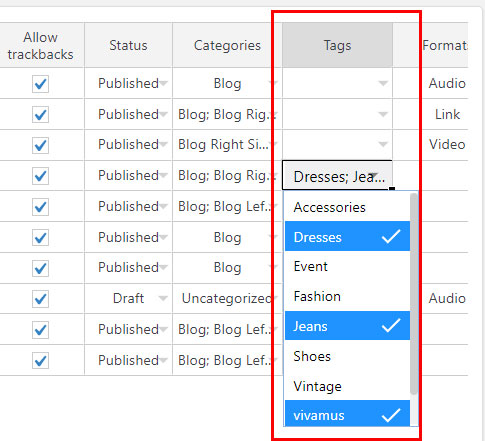
- Edit Post types in Bulk
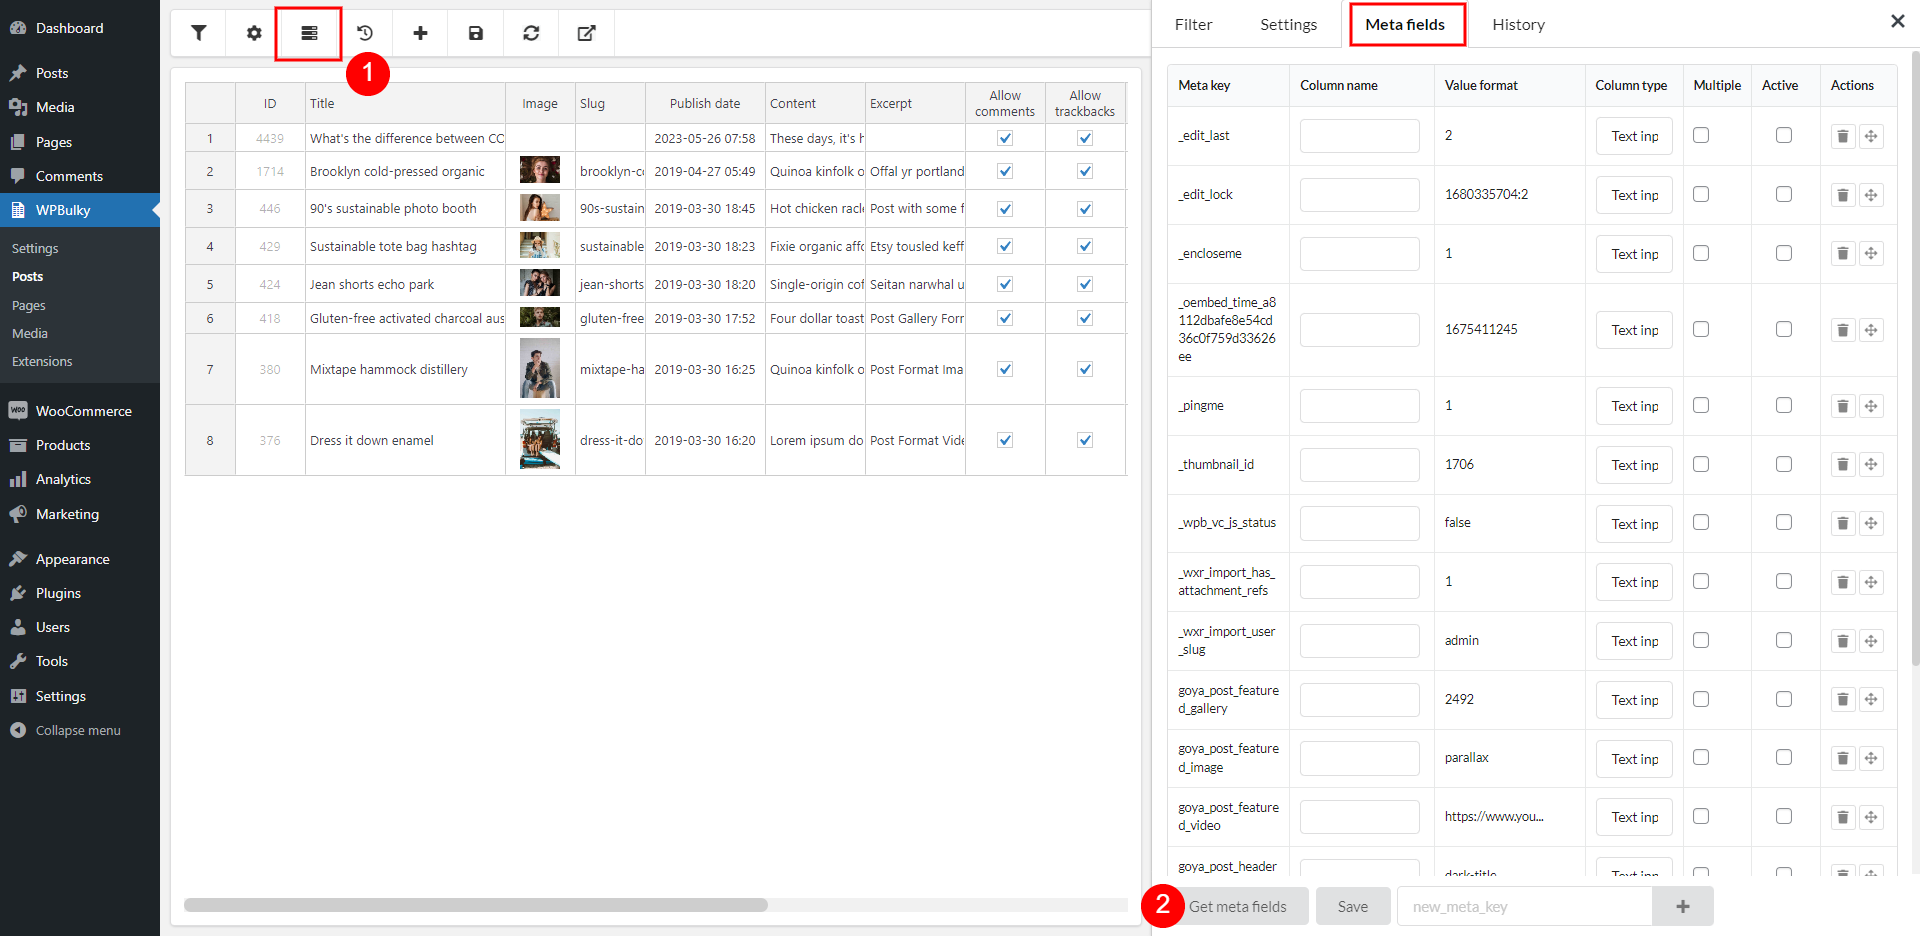
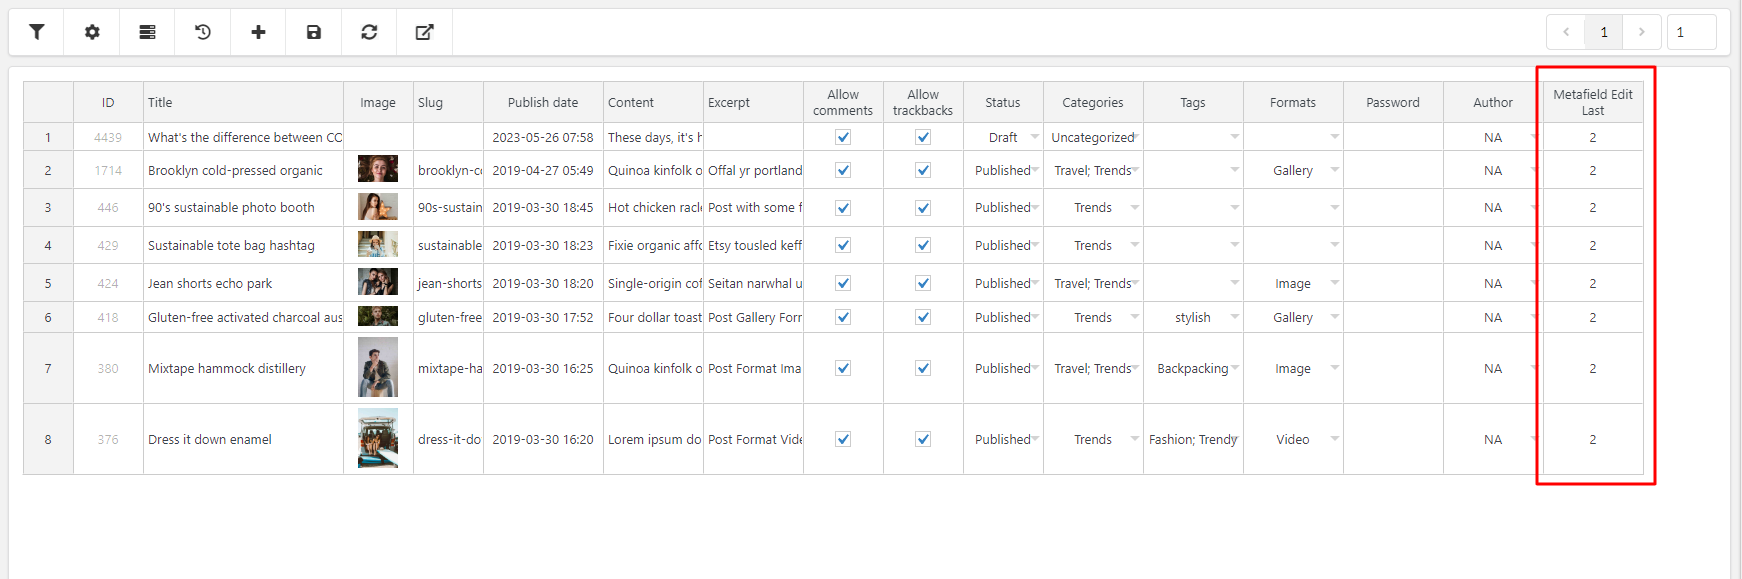
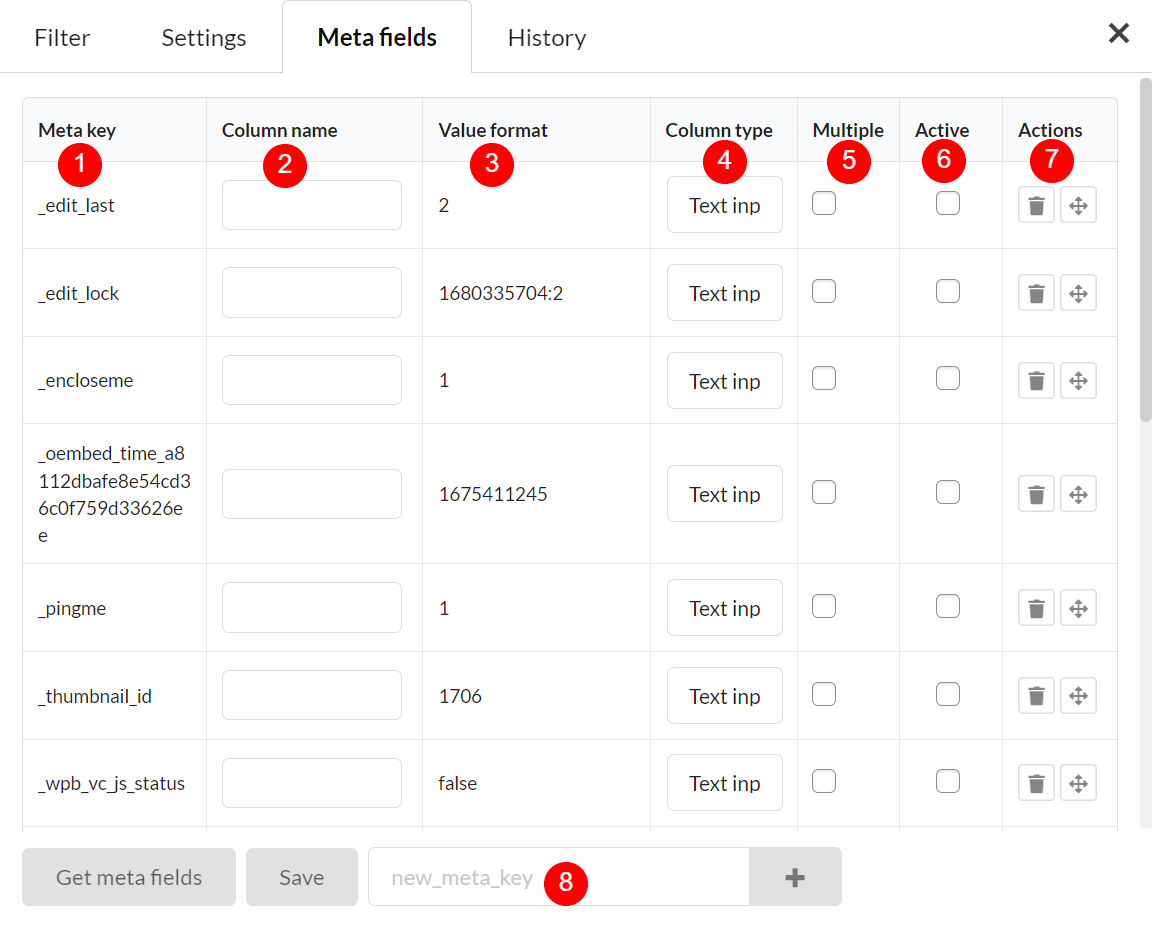
- Meta Fields
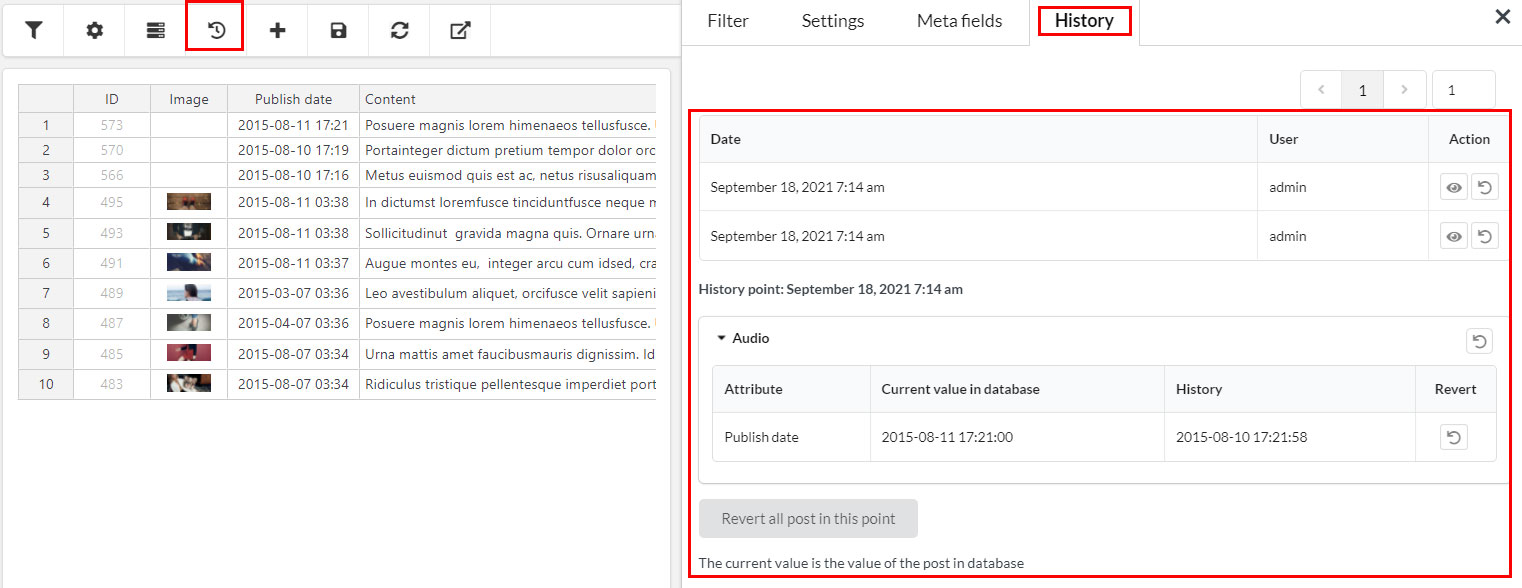
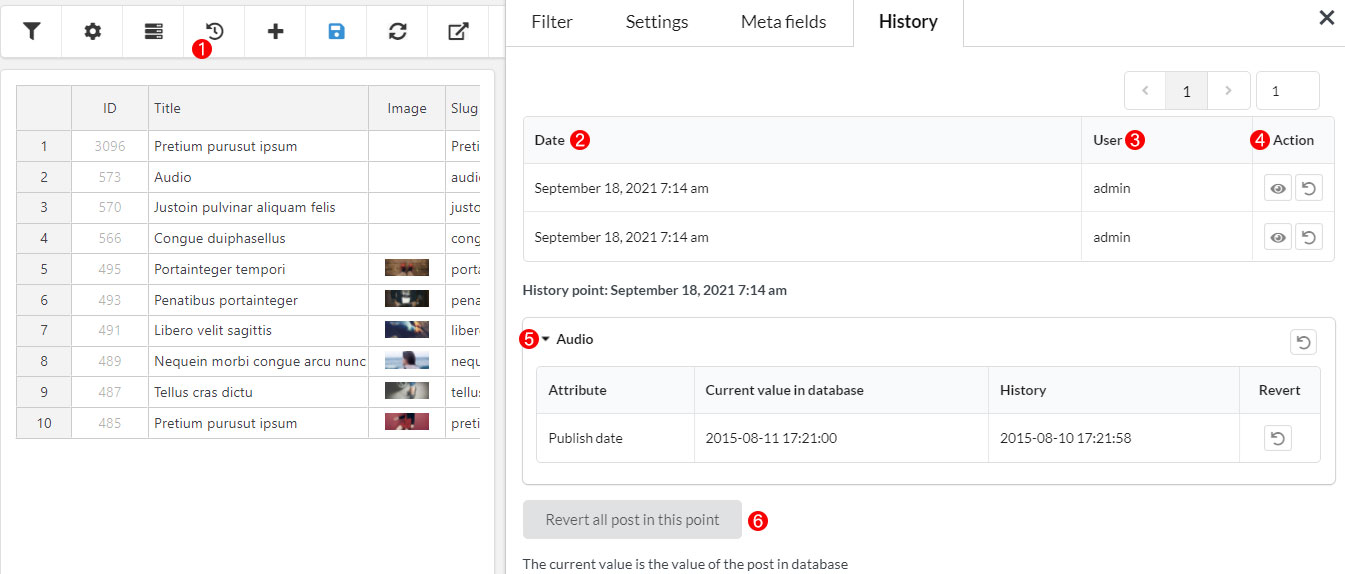
- History
- HOW TO BULK EDIT COMMENT
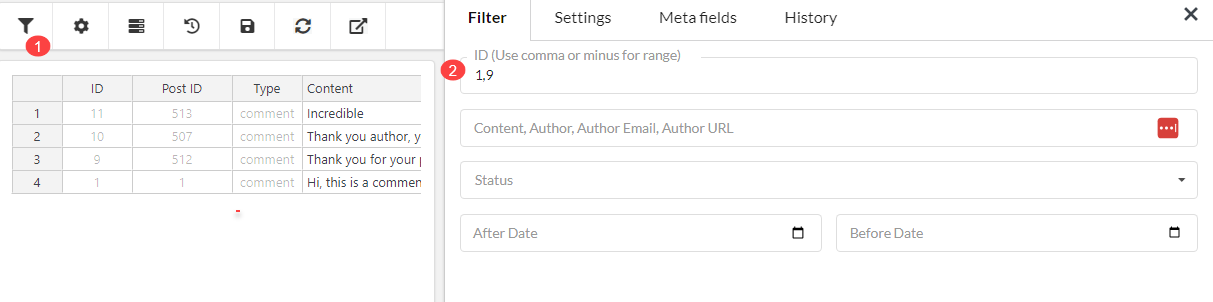
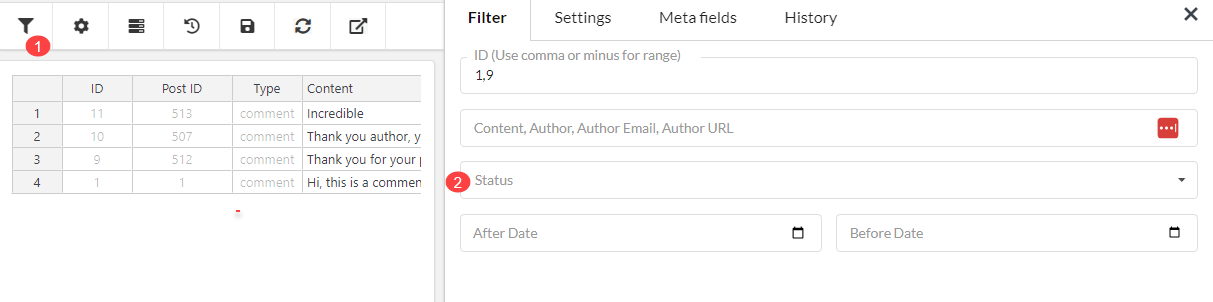
- Filter Based on Properties of Comment
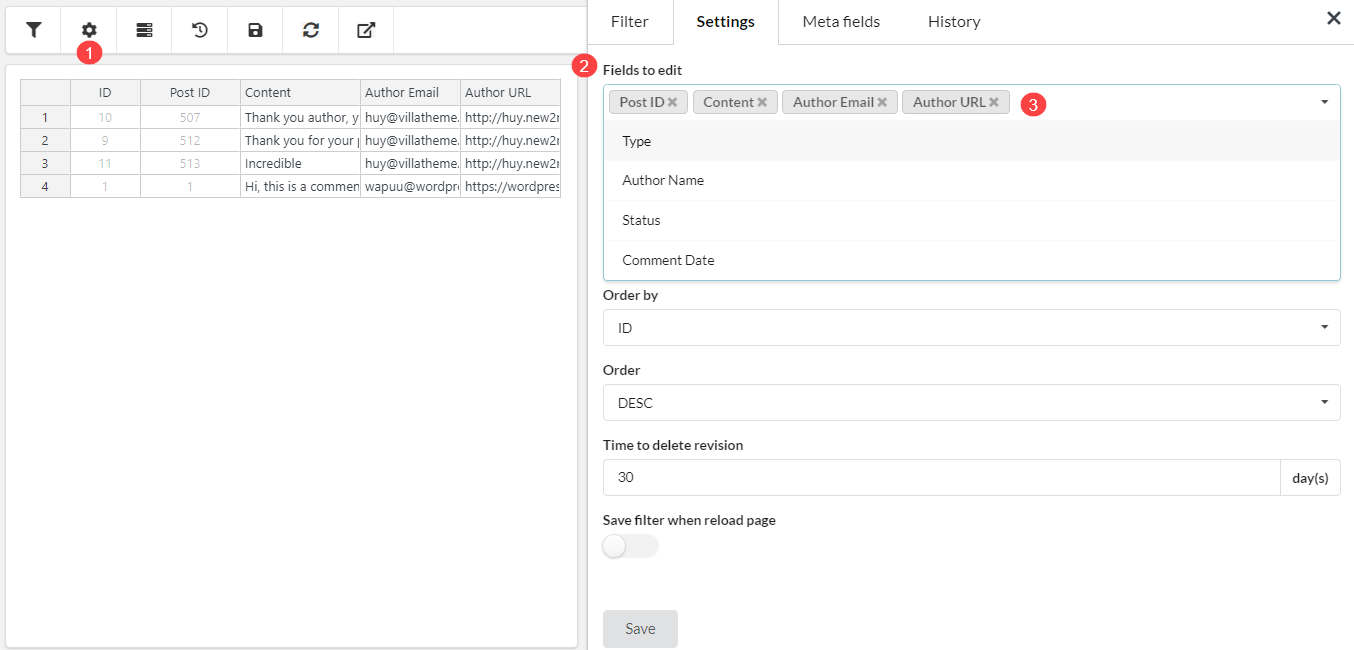
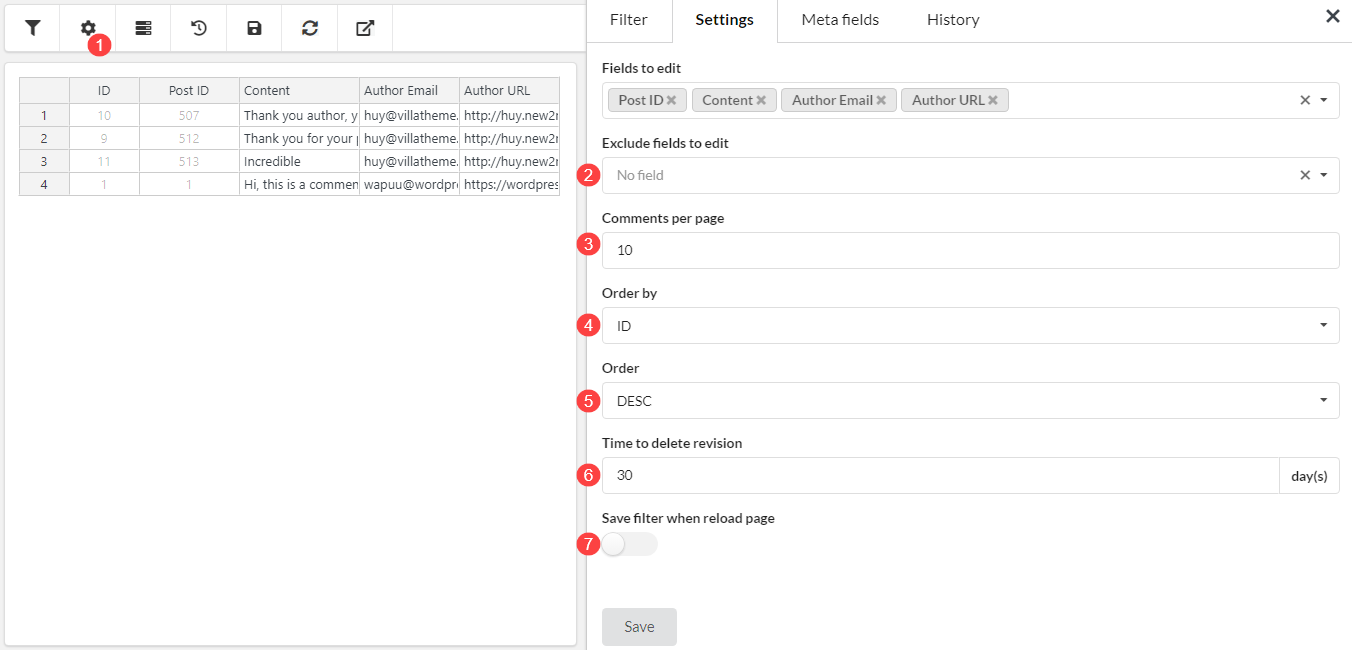
- Settings for Comment
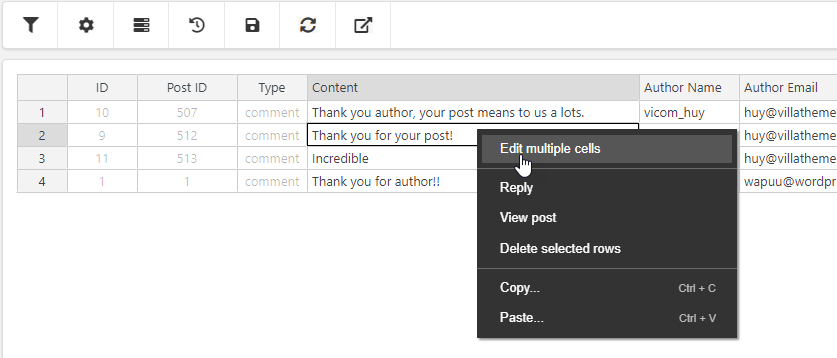
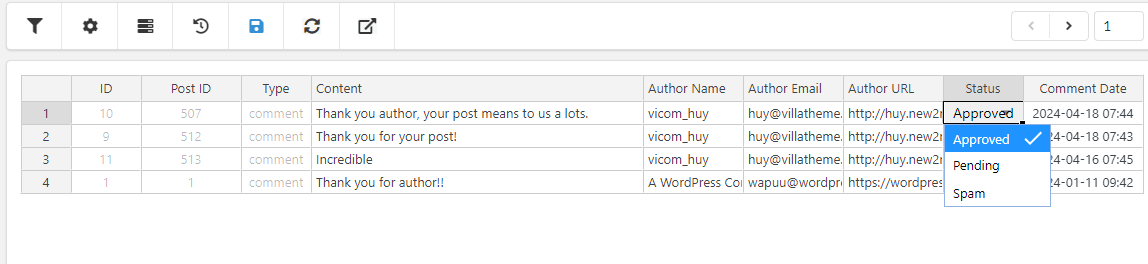
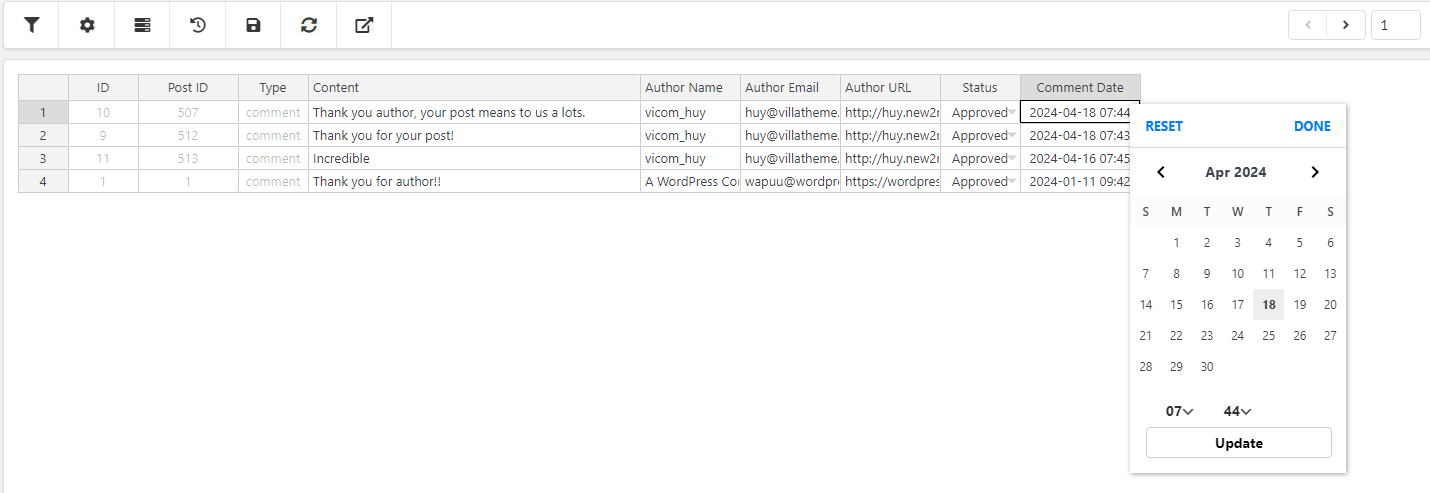
- Edit Comment in Bulk
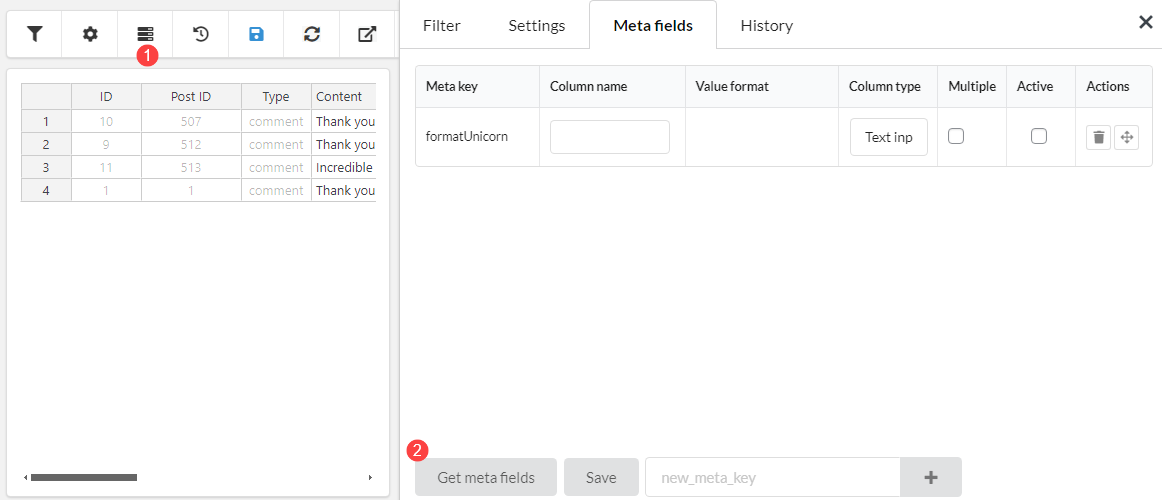
- Meta Fields
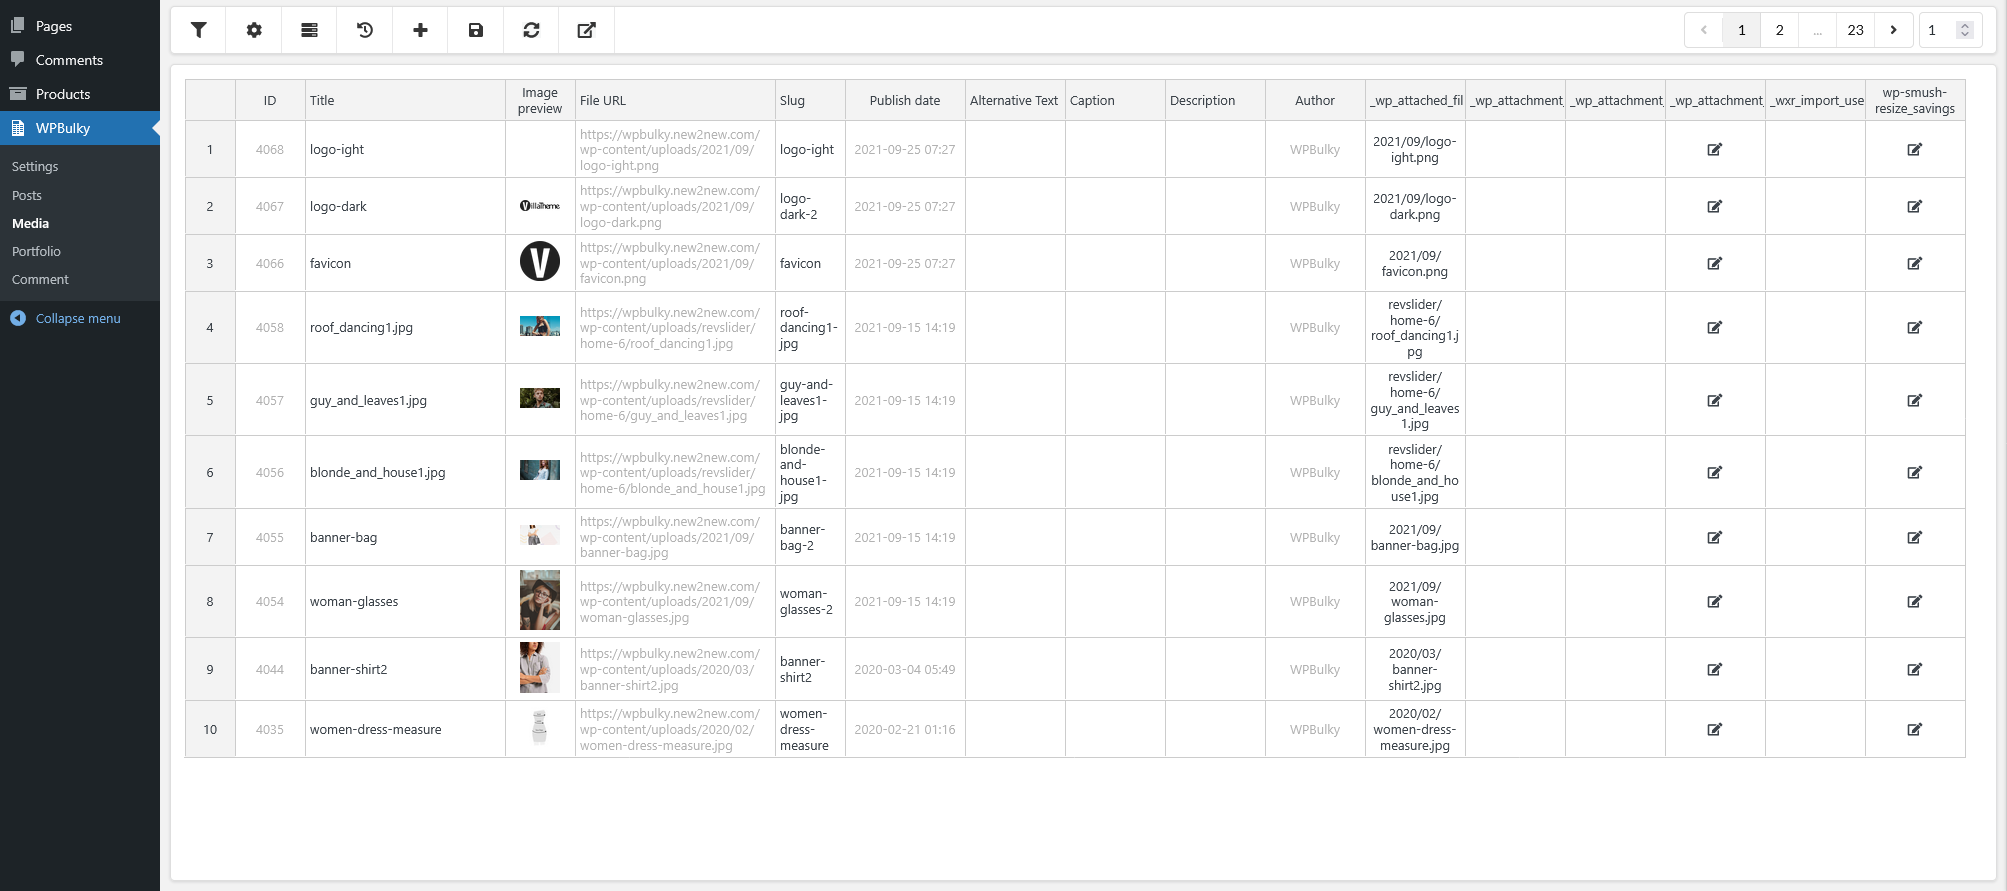
- BULK EDIT MEDIA
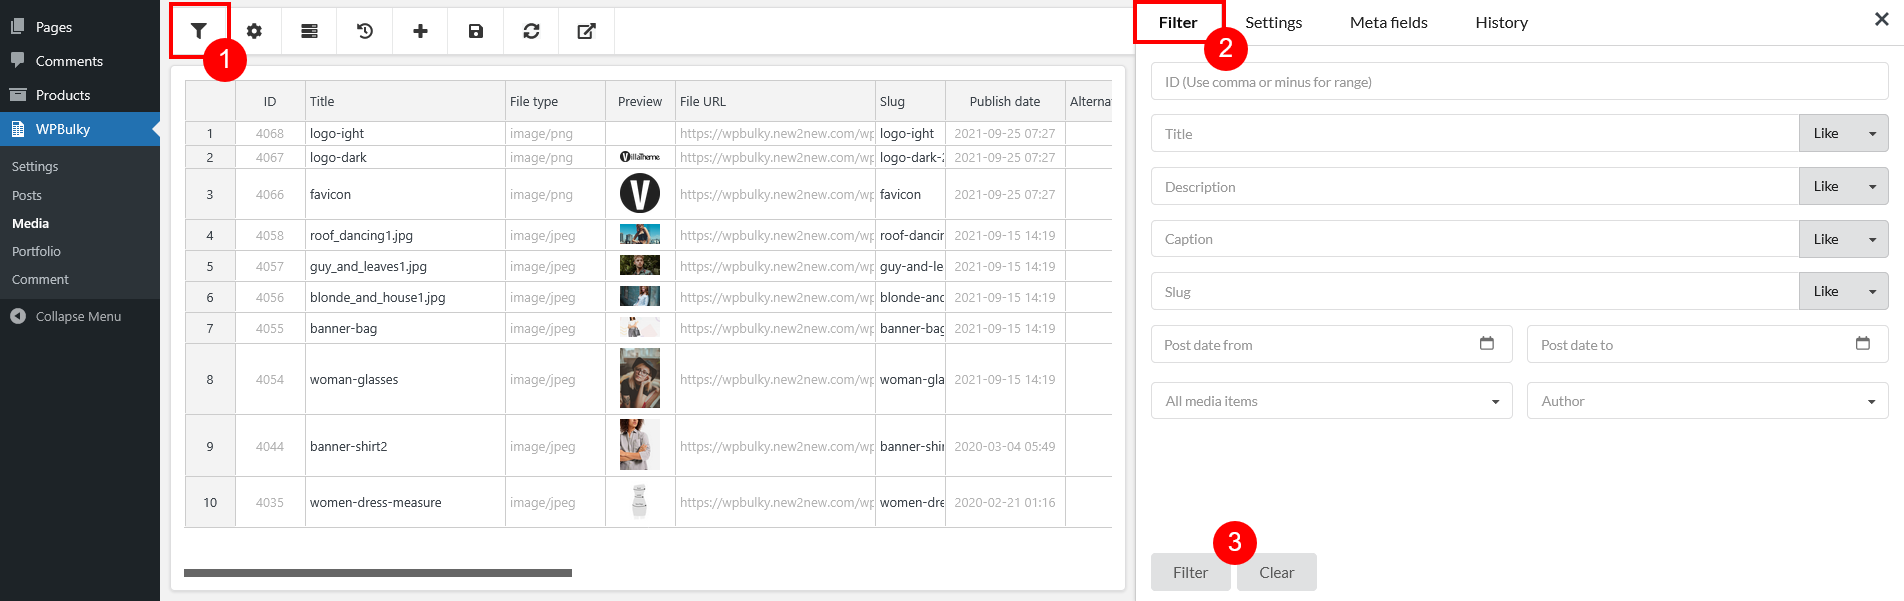
- Filter Media
- Media Settings
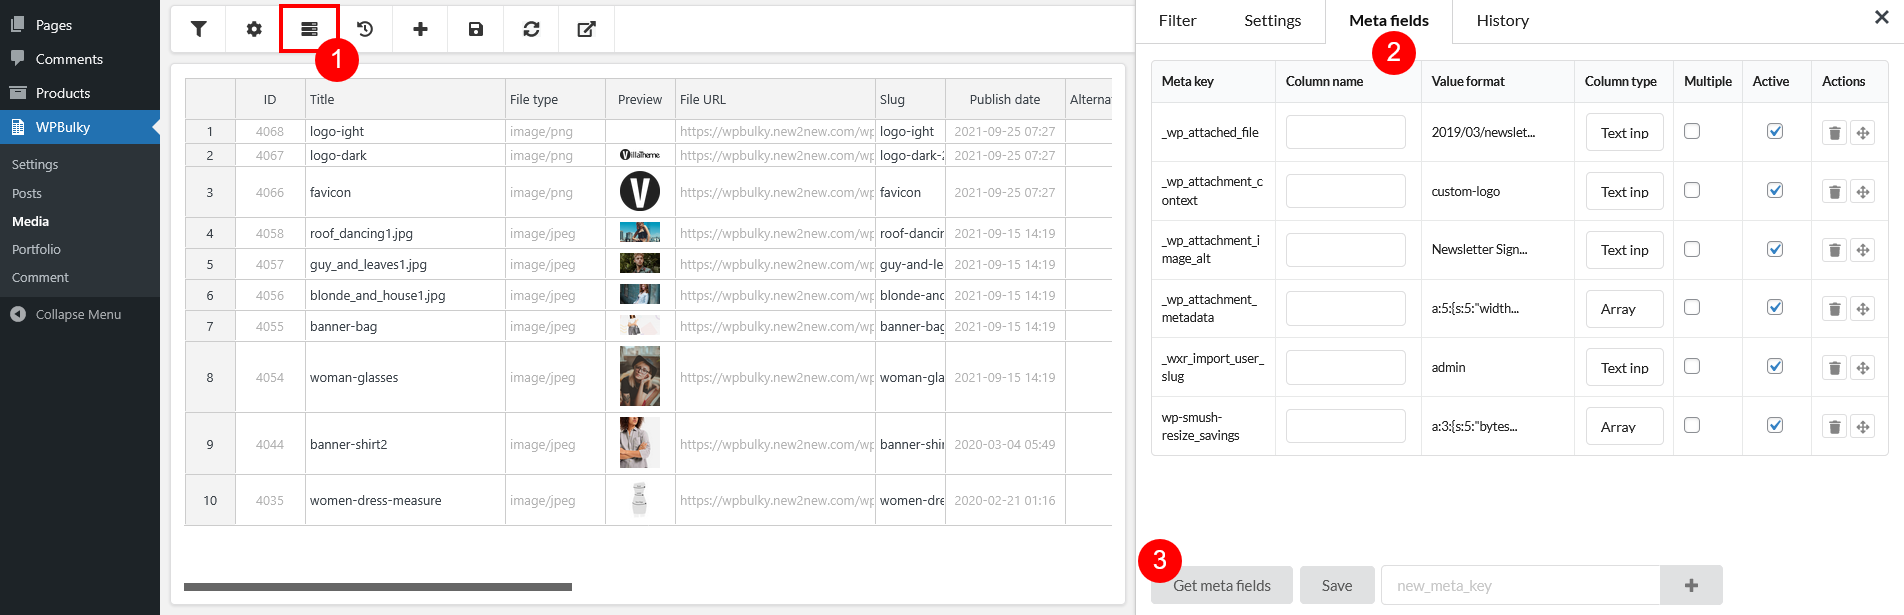
- Meta Fields
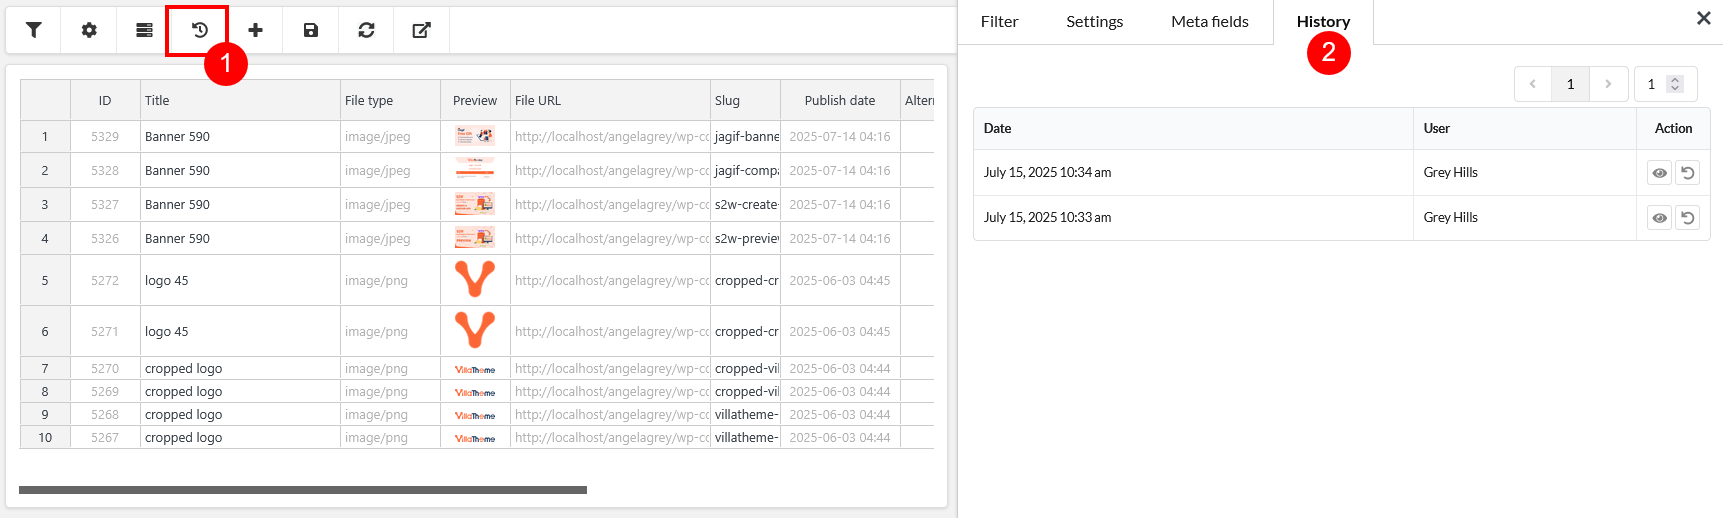
- Media History
- Bulk edit media
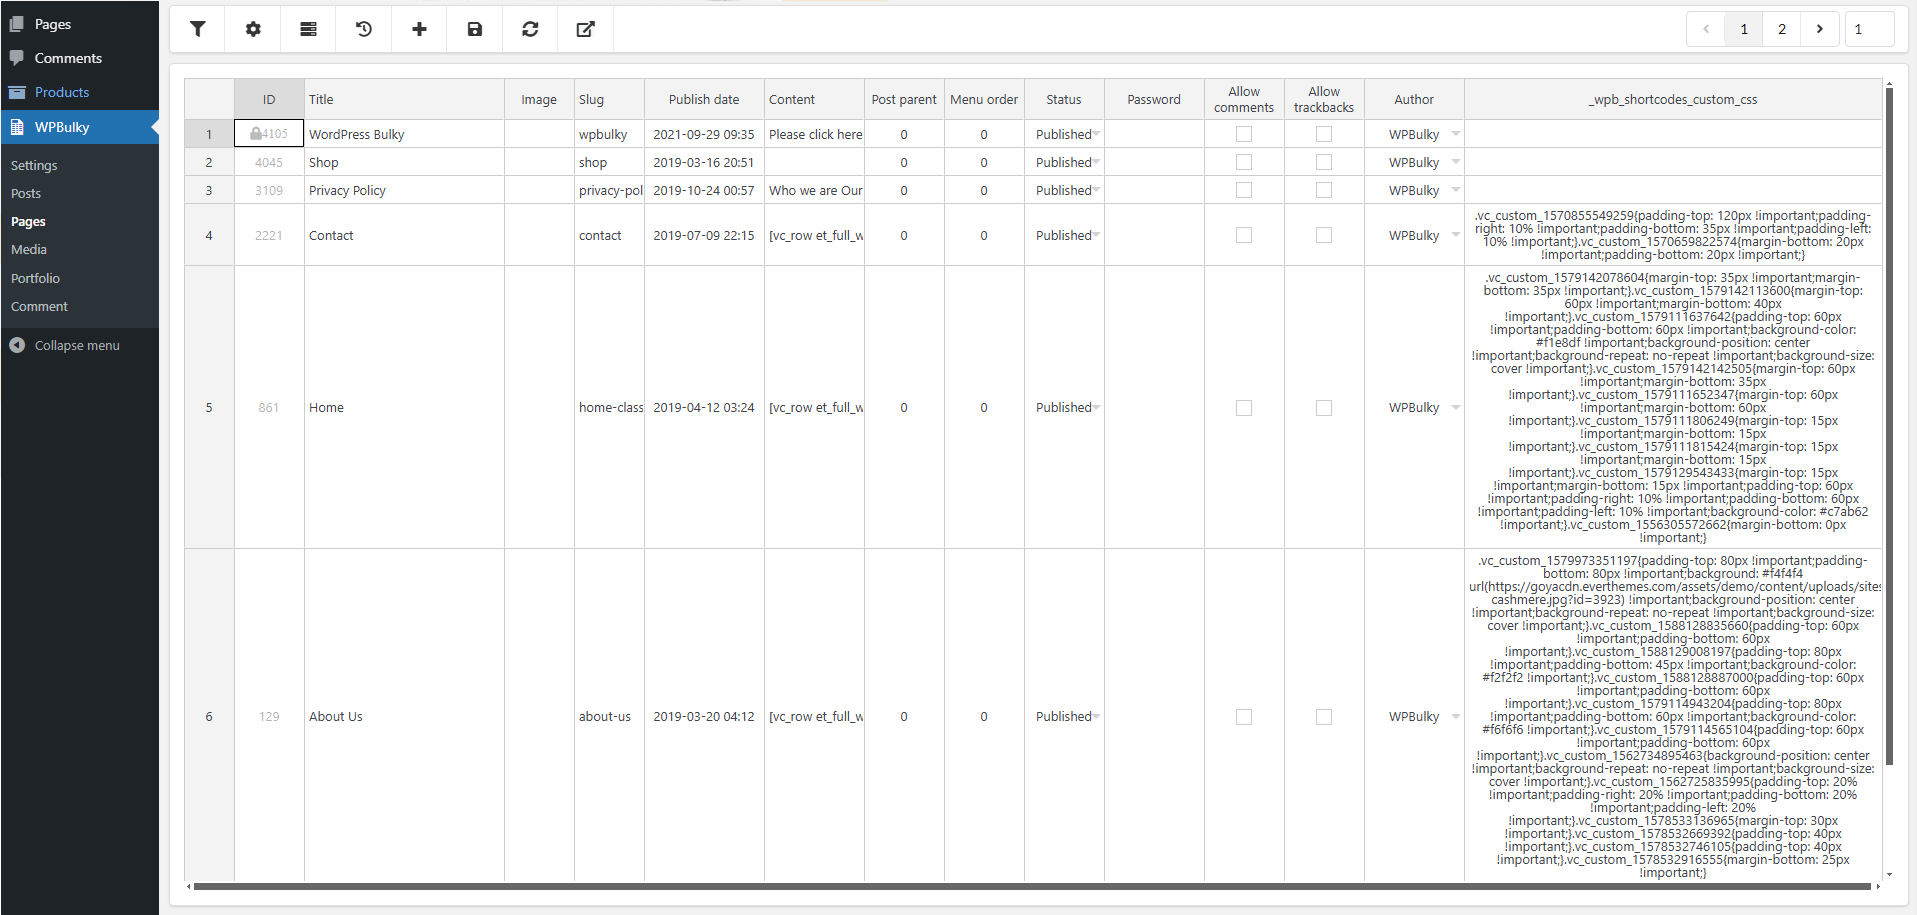
- BULK EDIT PAGES
- EXTRA INFORMATION
Copyright Villatheme 2015-2026