- Start
- FILE INCLUDES
- Instruction
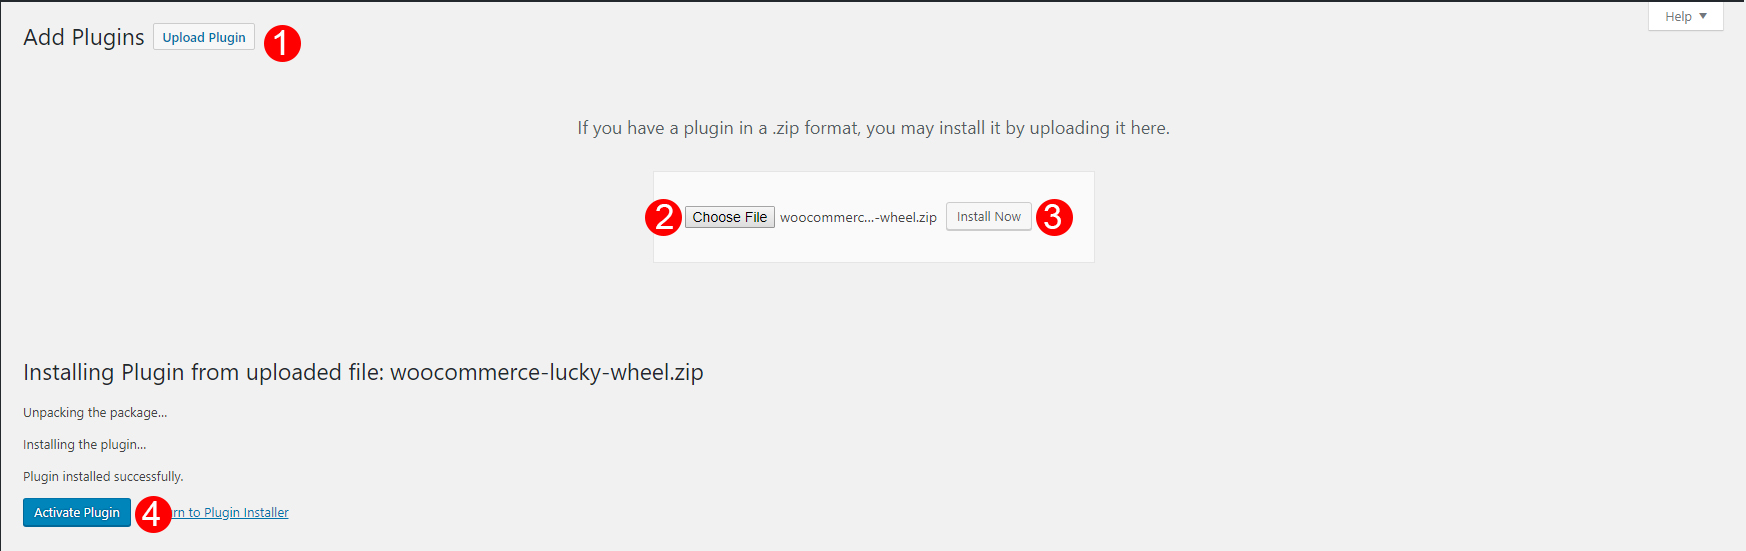
- Installation
- How to use
- How does it work
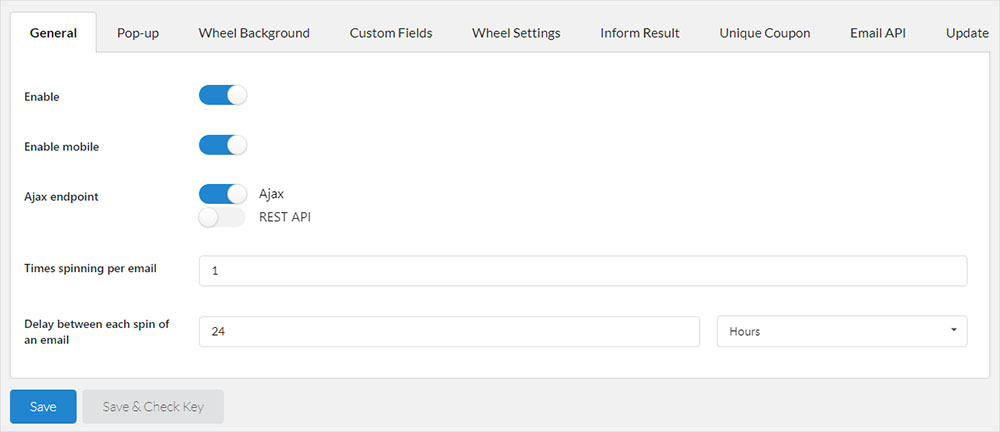
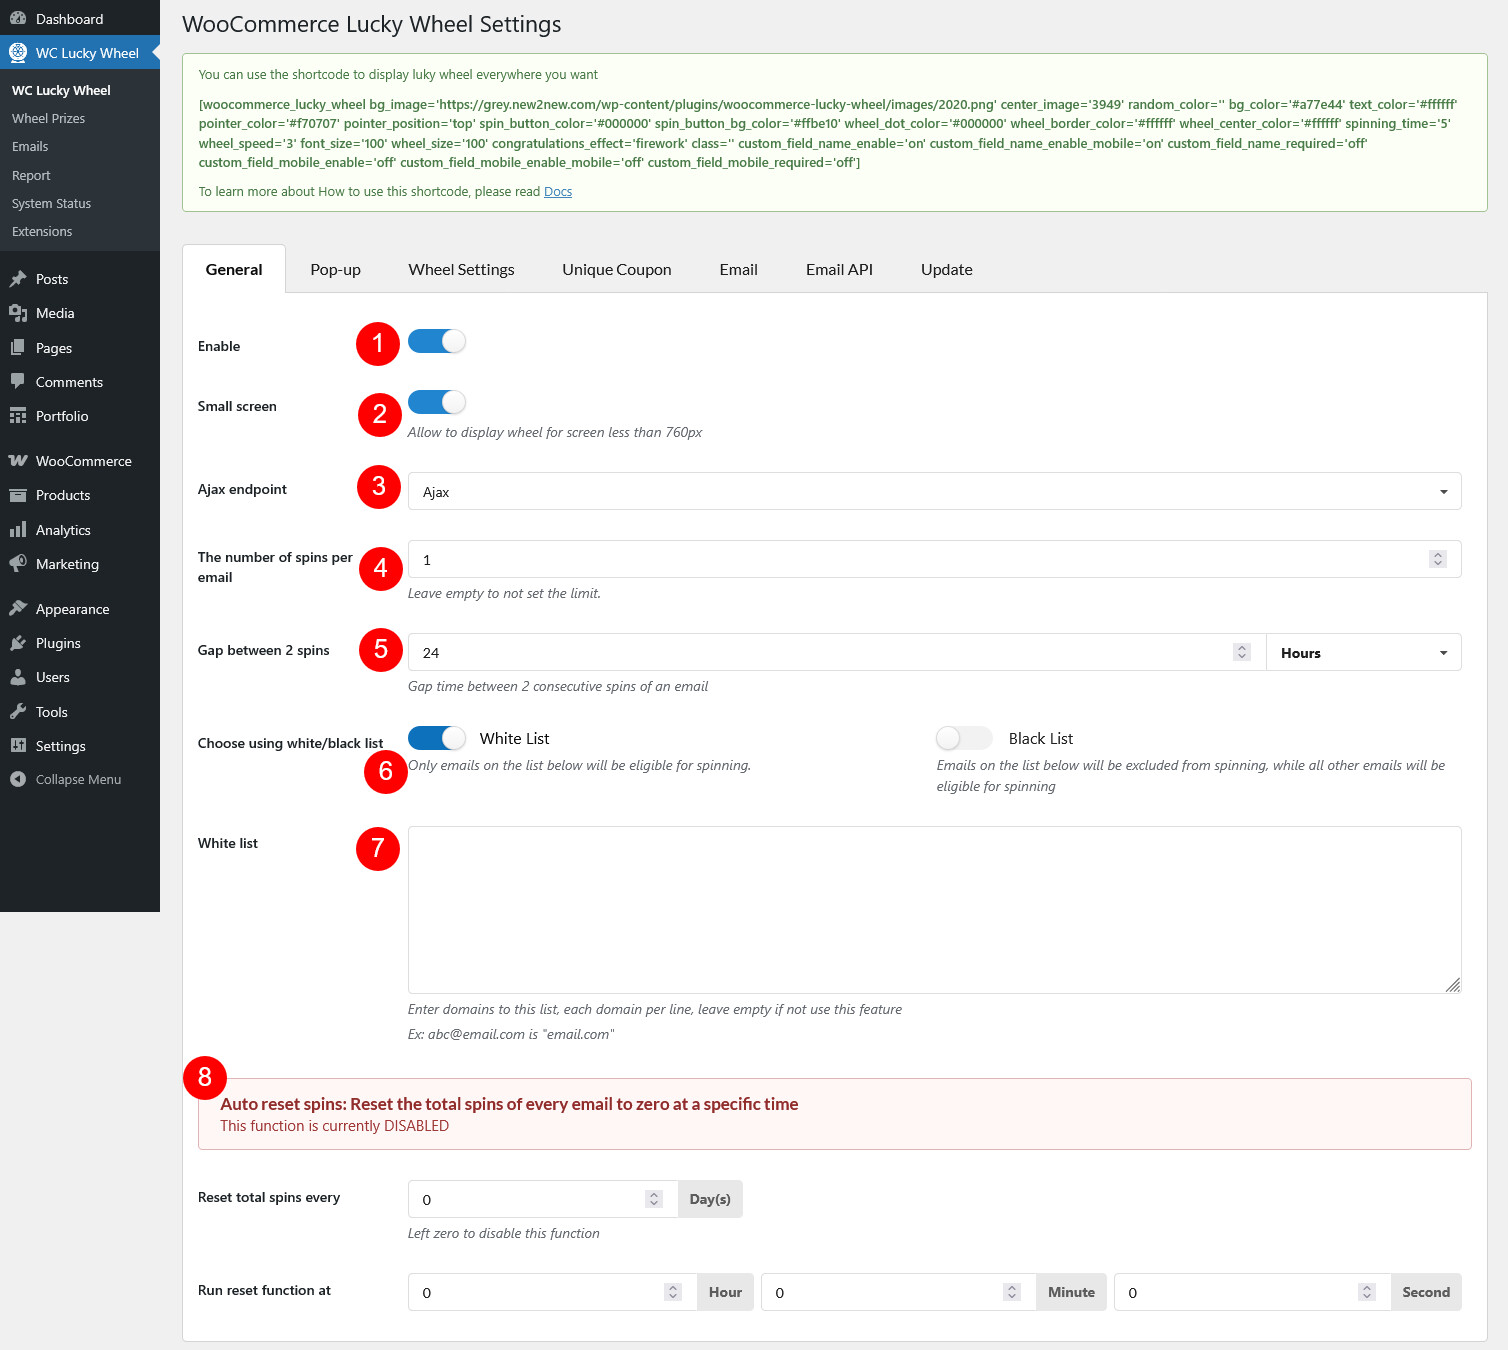
- General
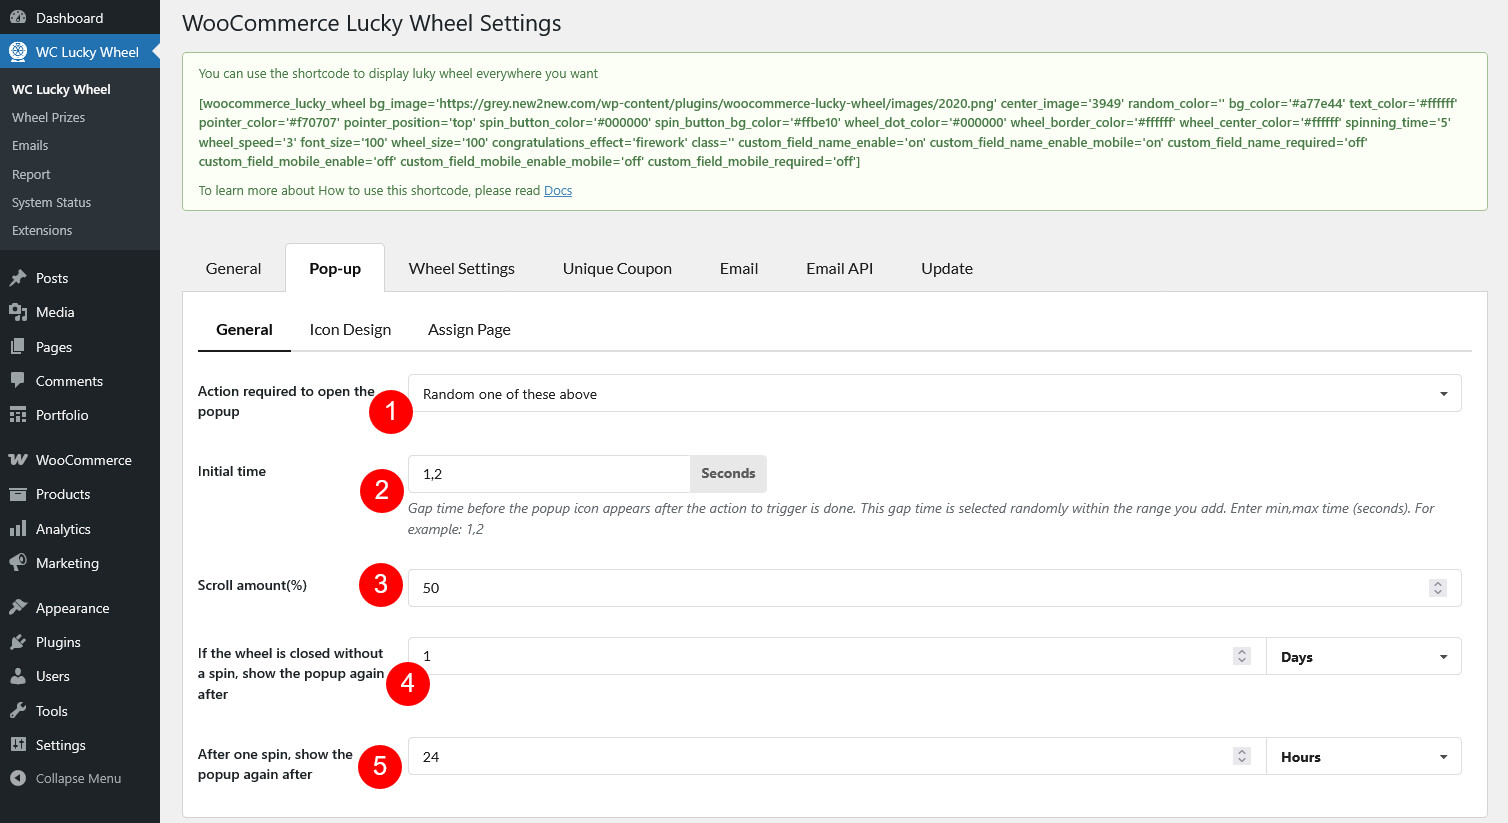
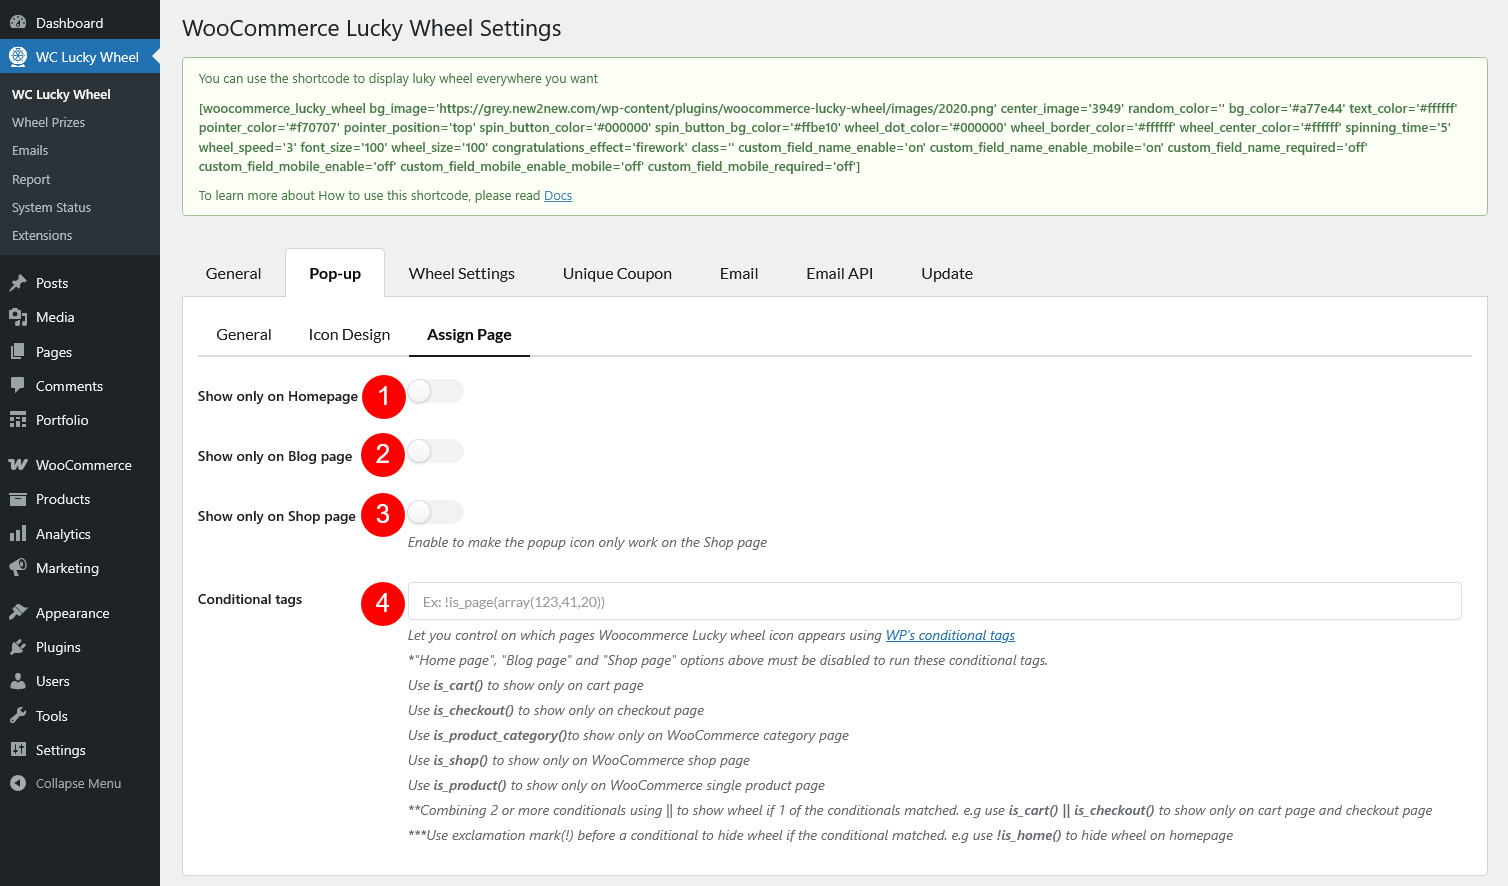
- Pop-up
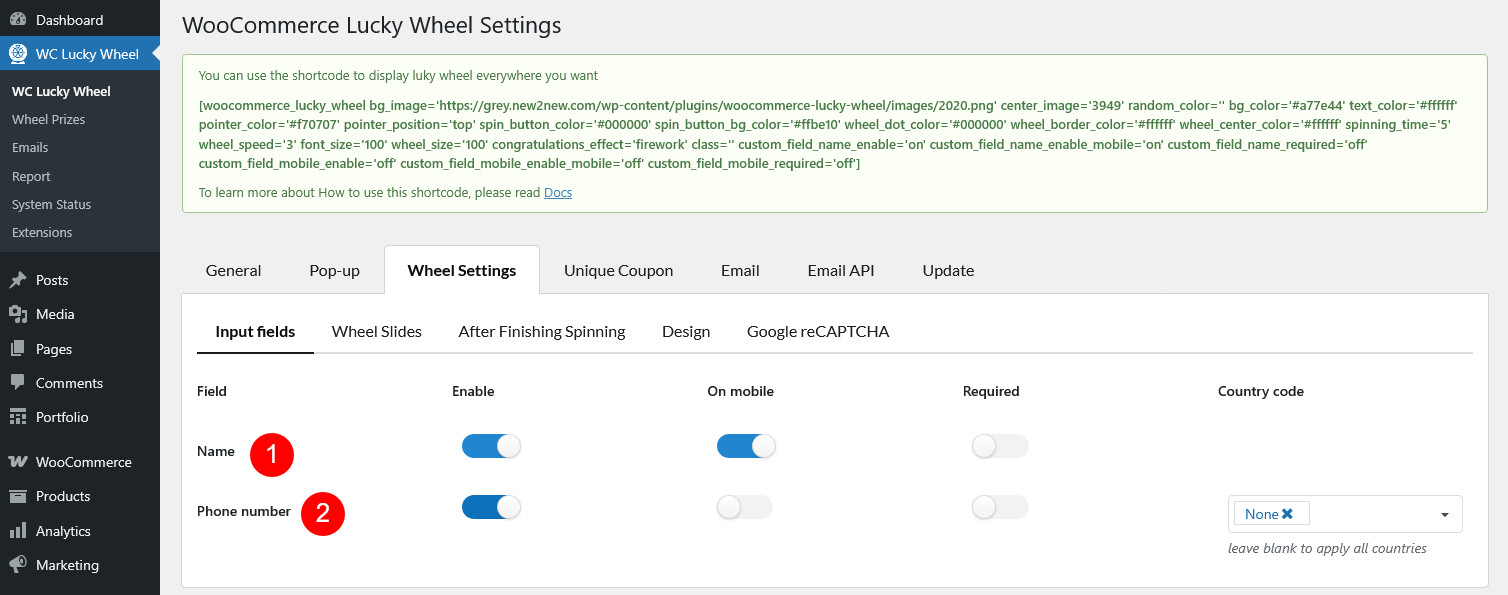
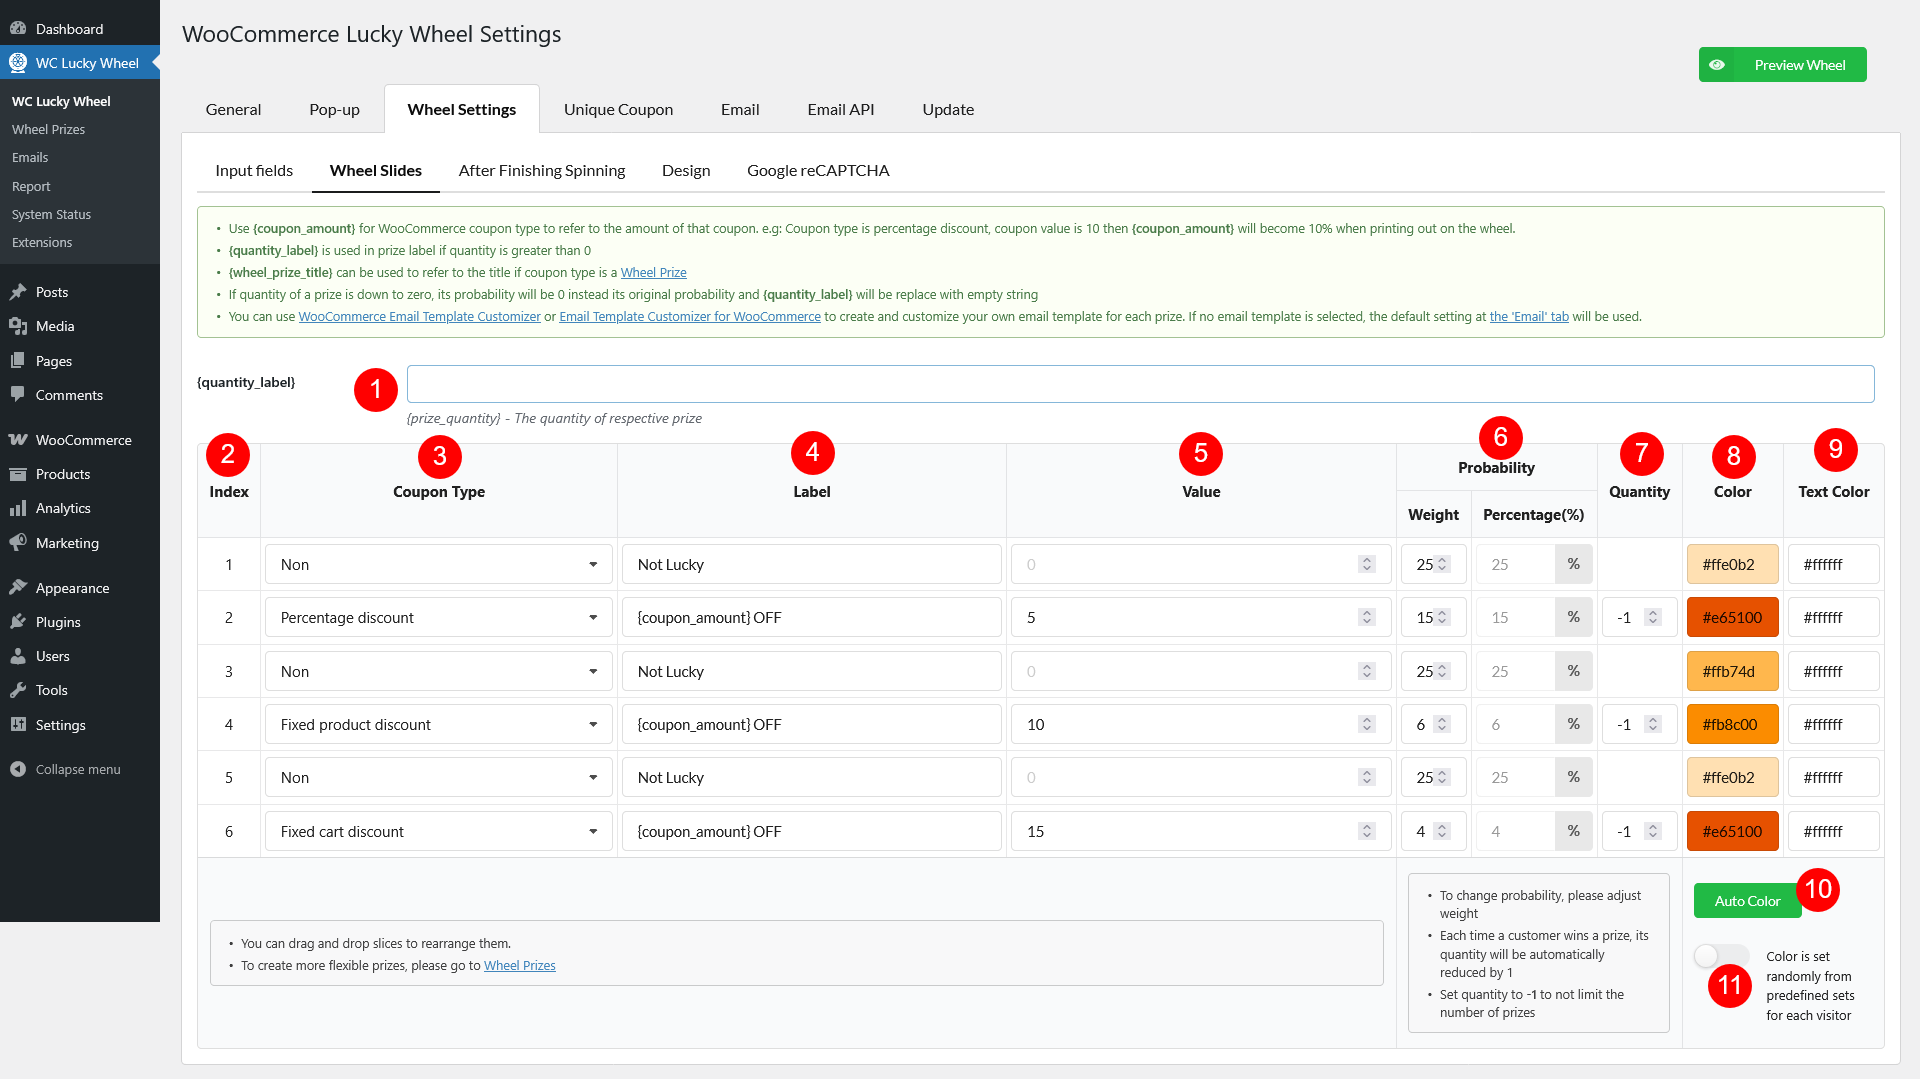
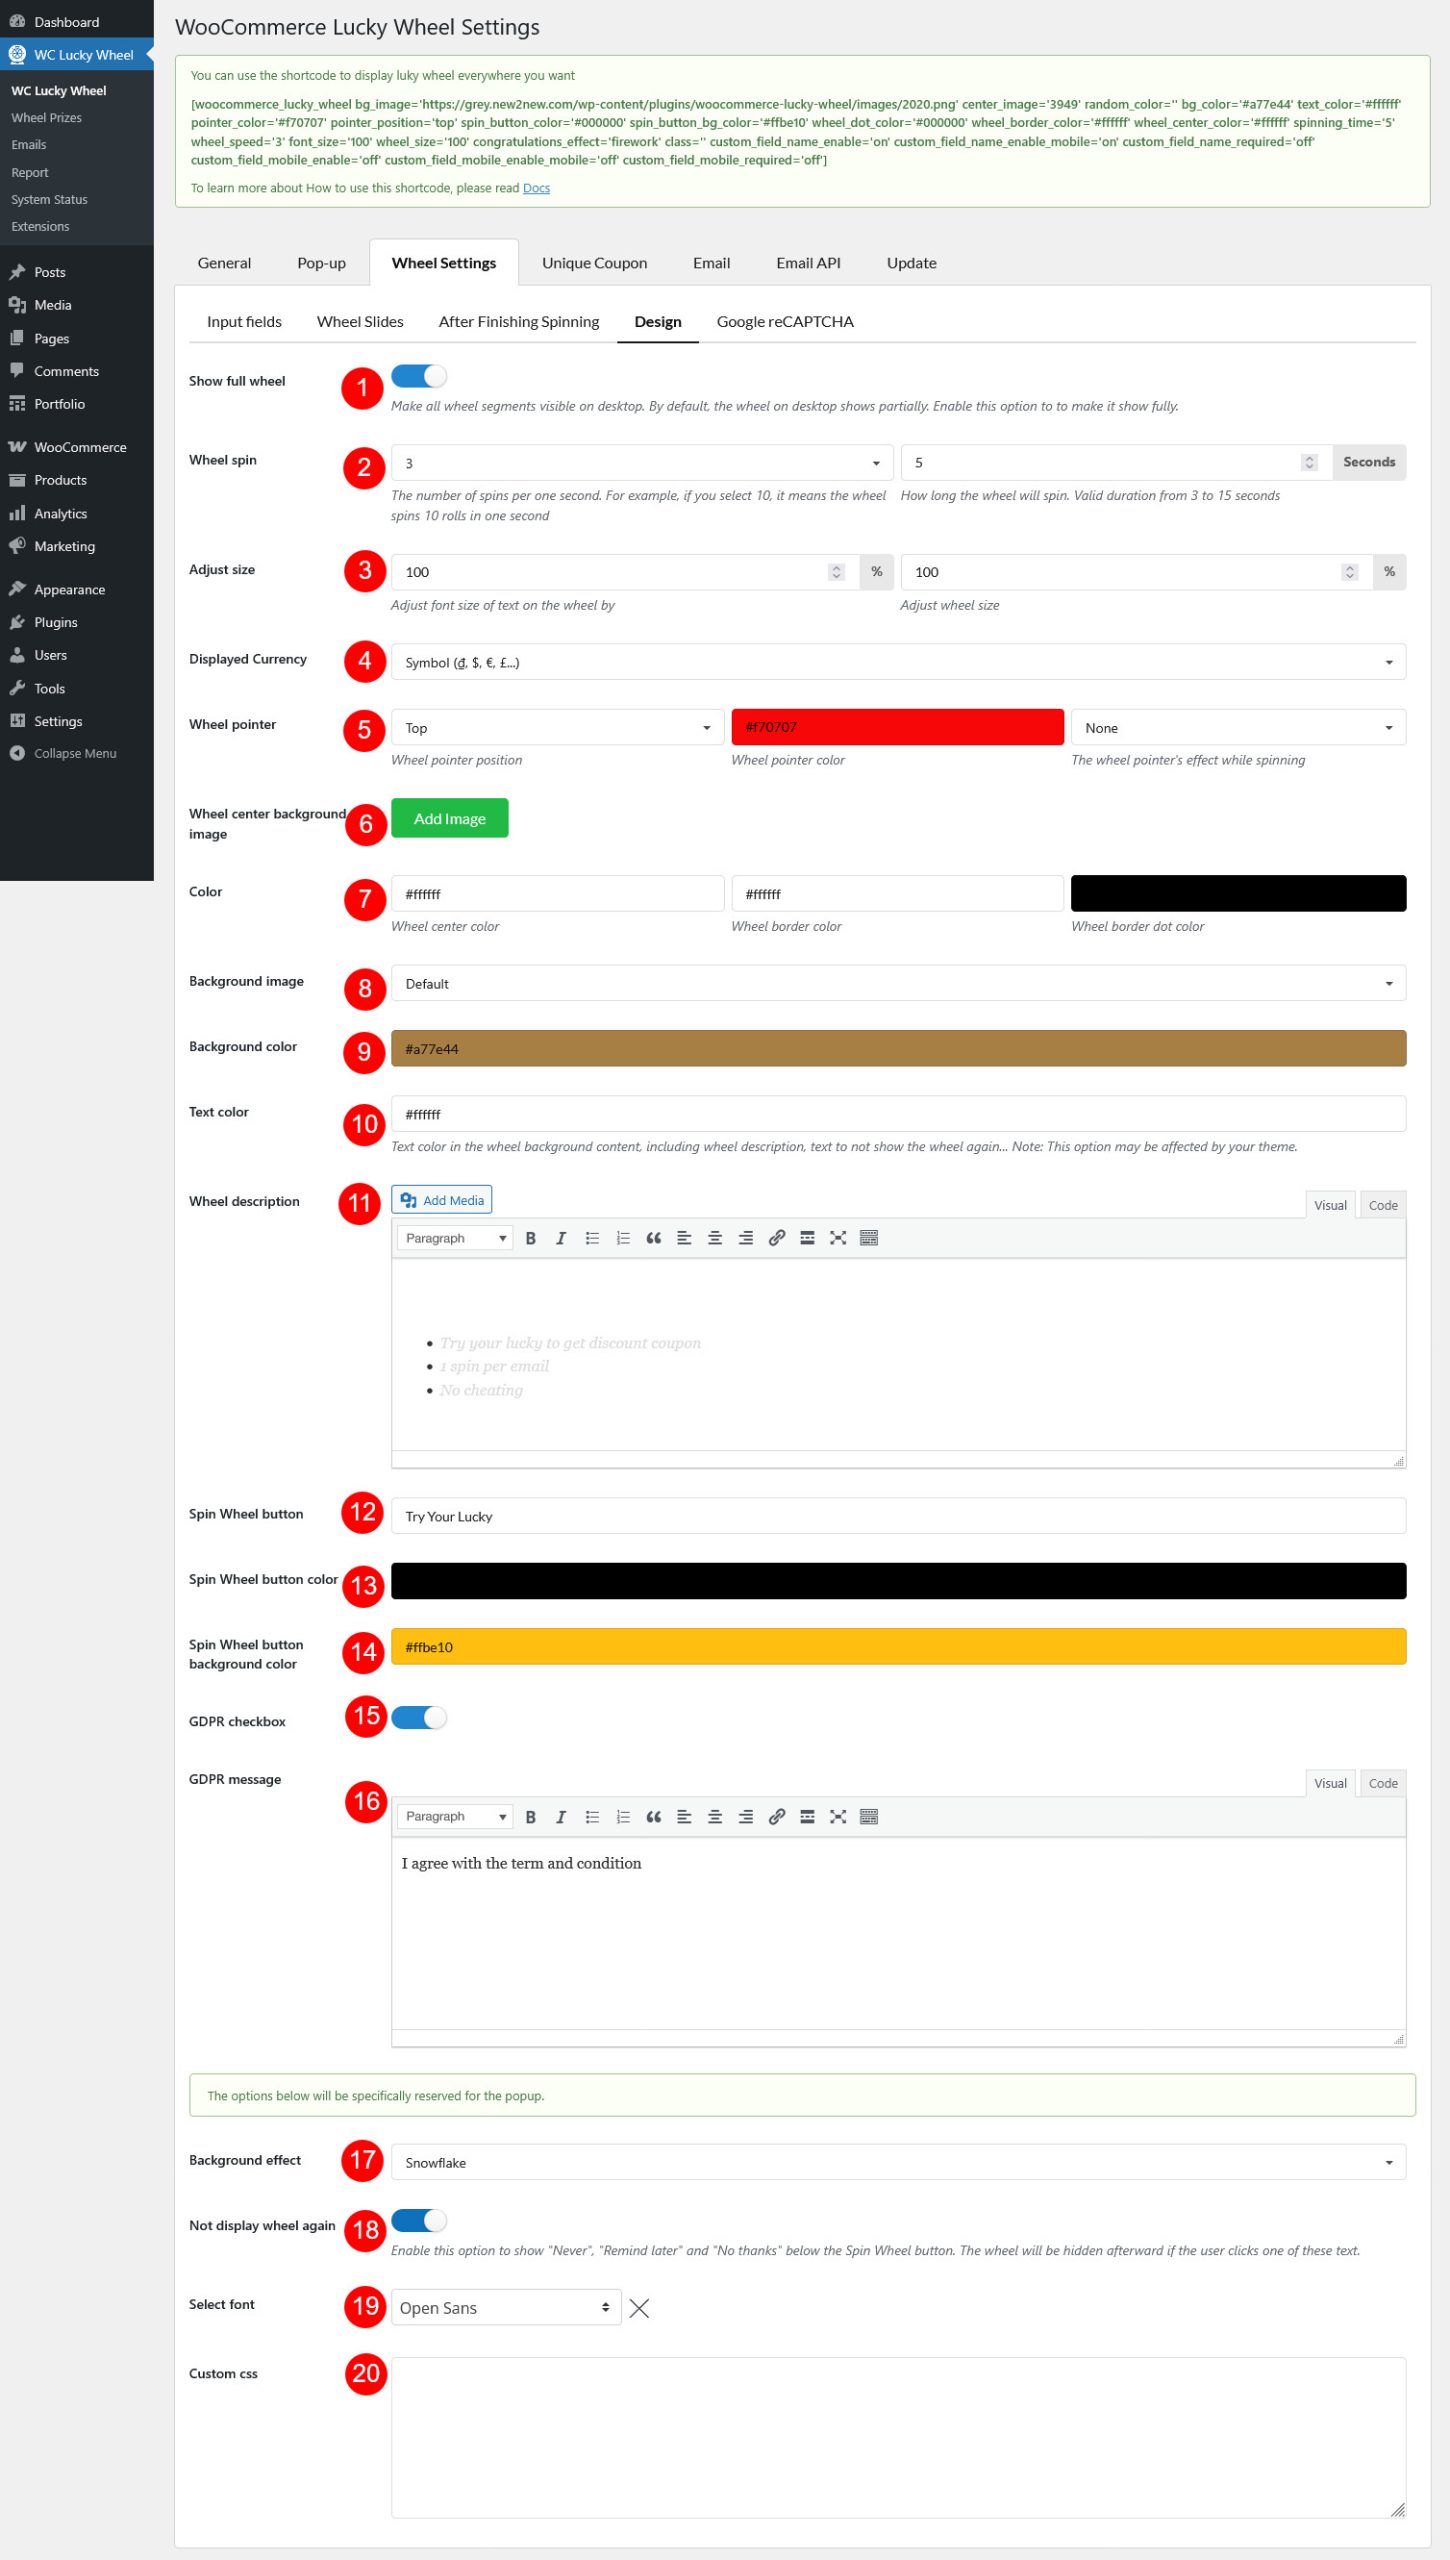
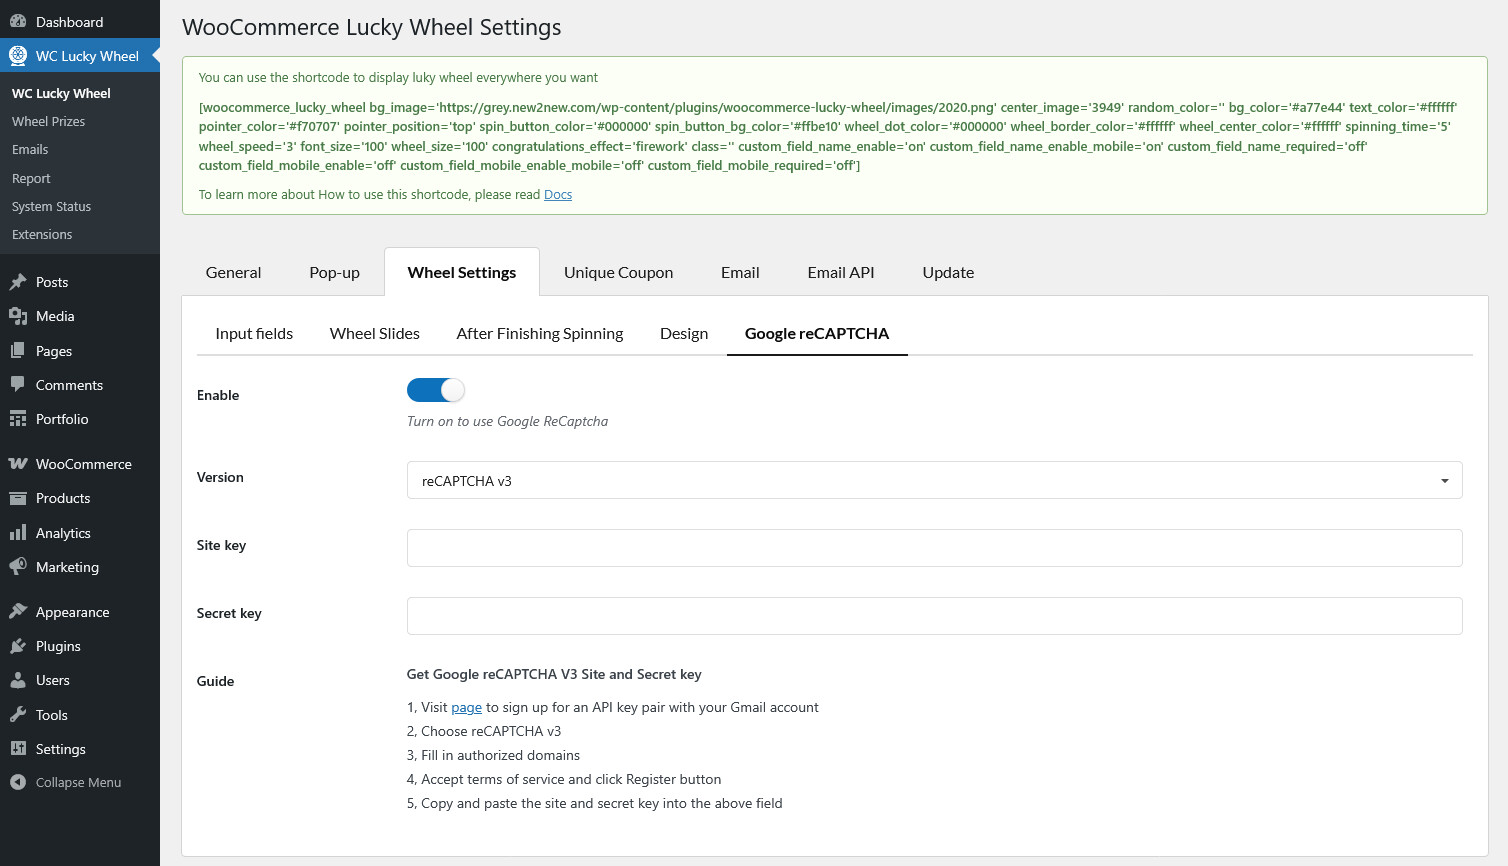
- Wheel Settings
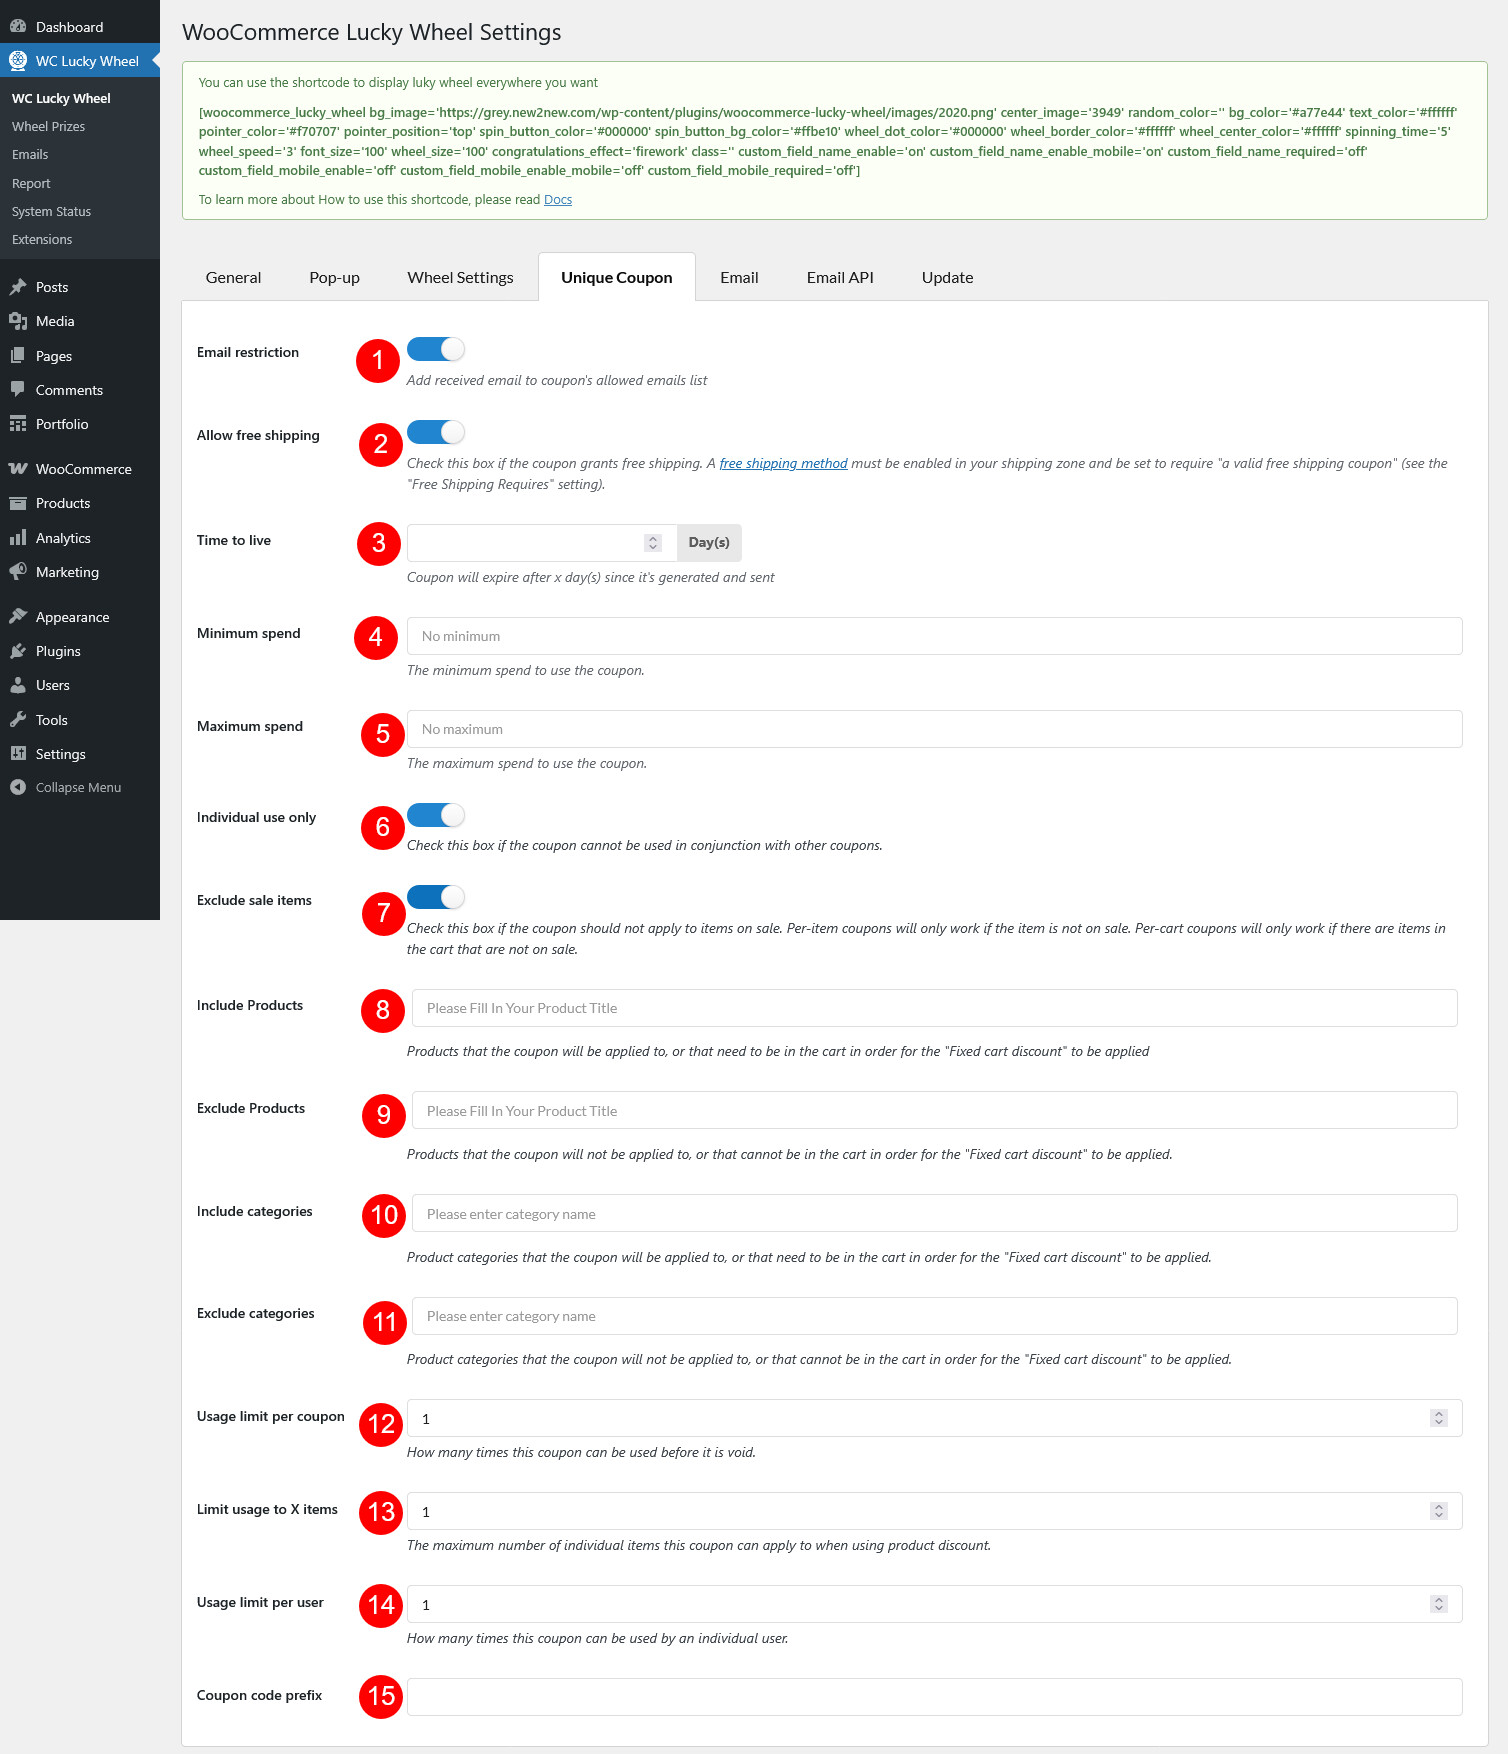
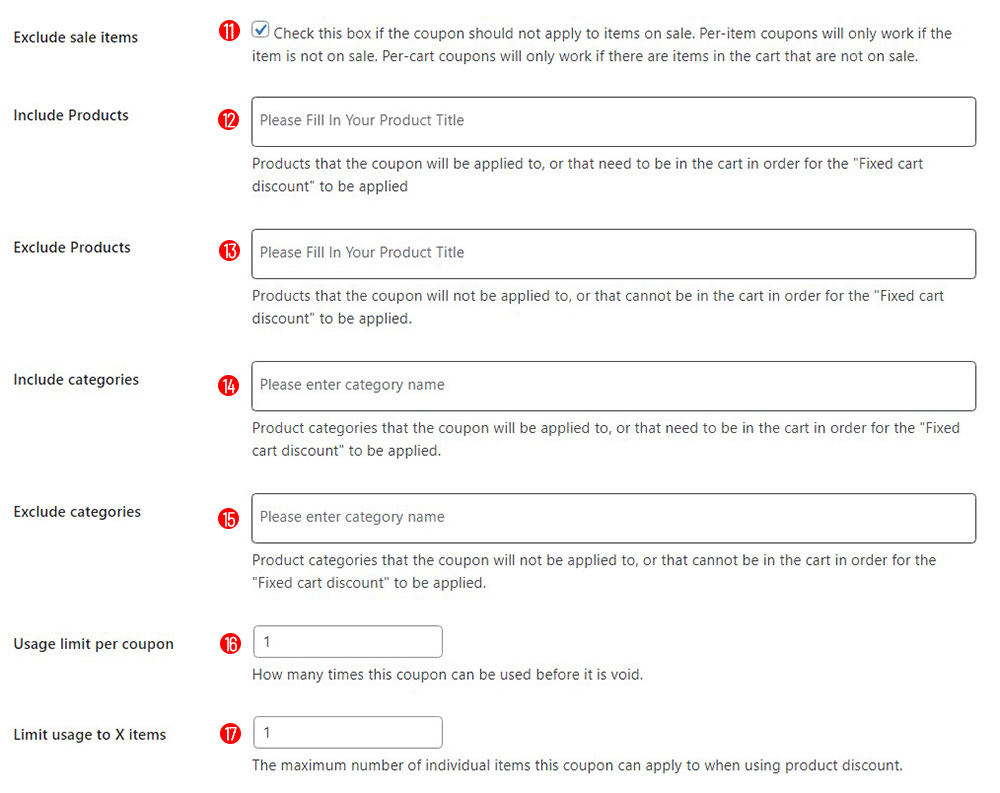
- Unique Coupon
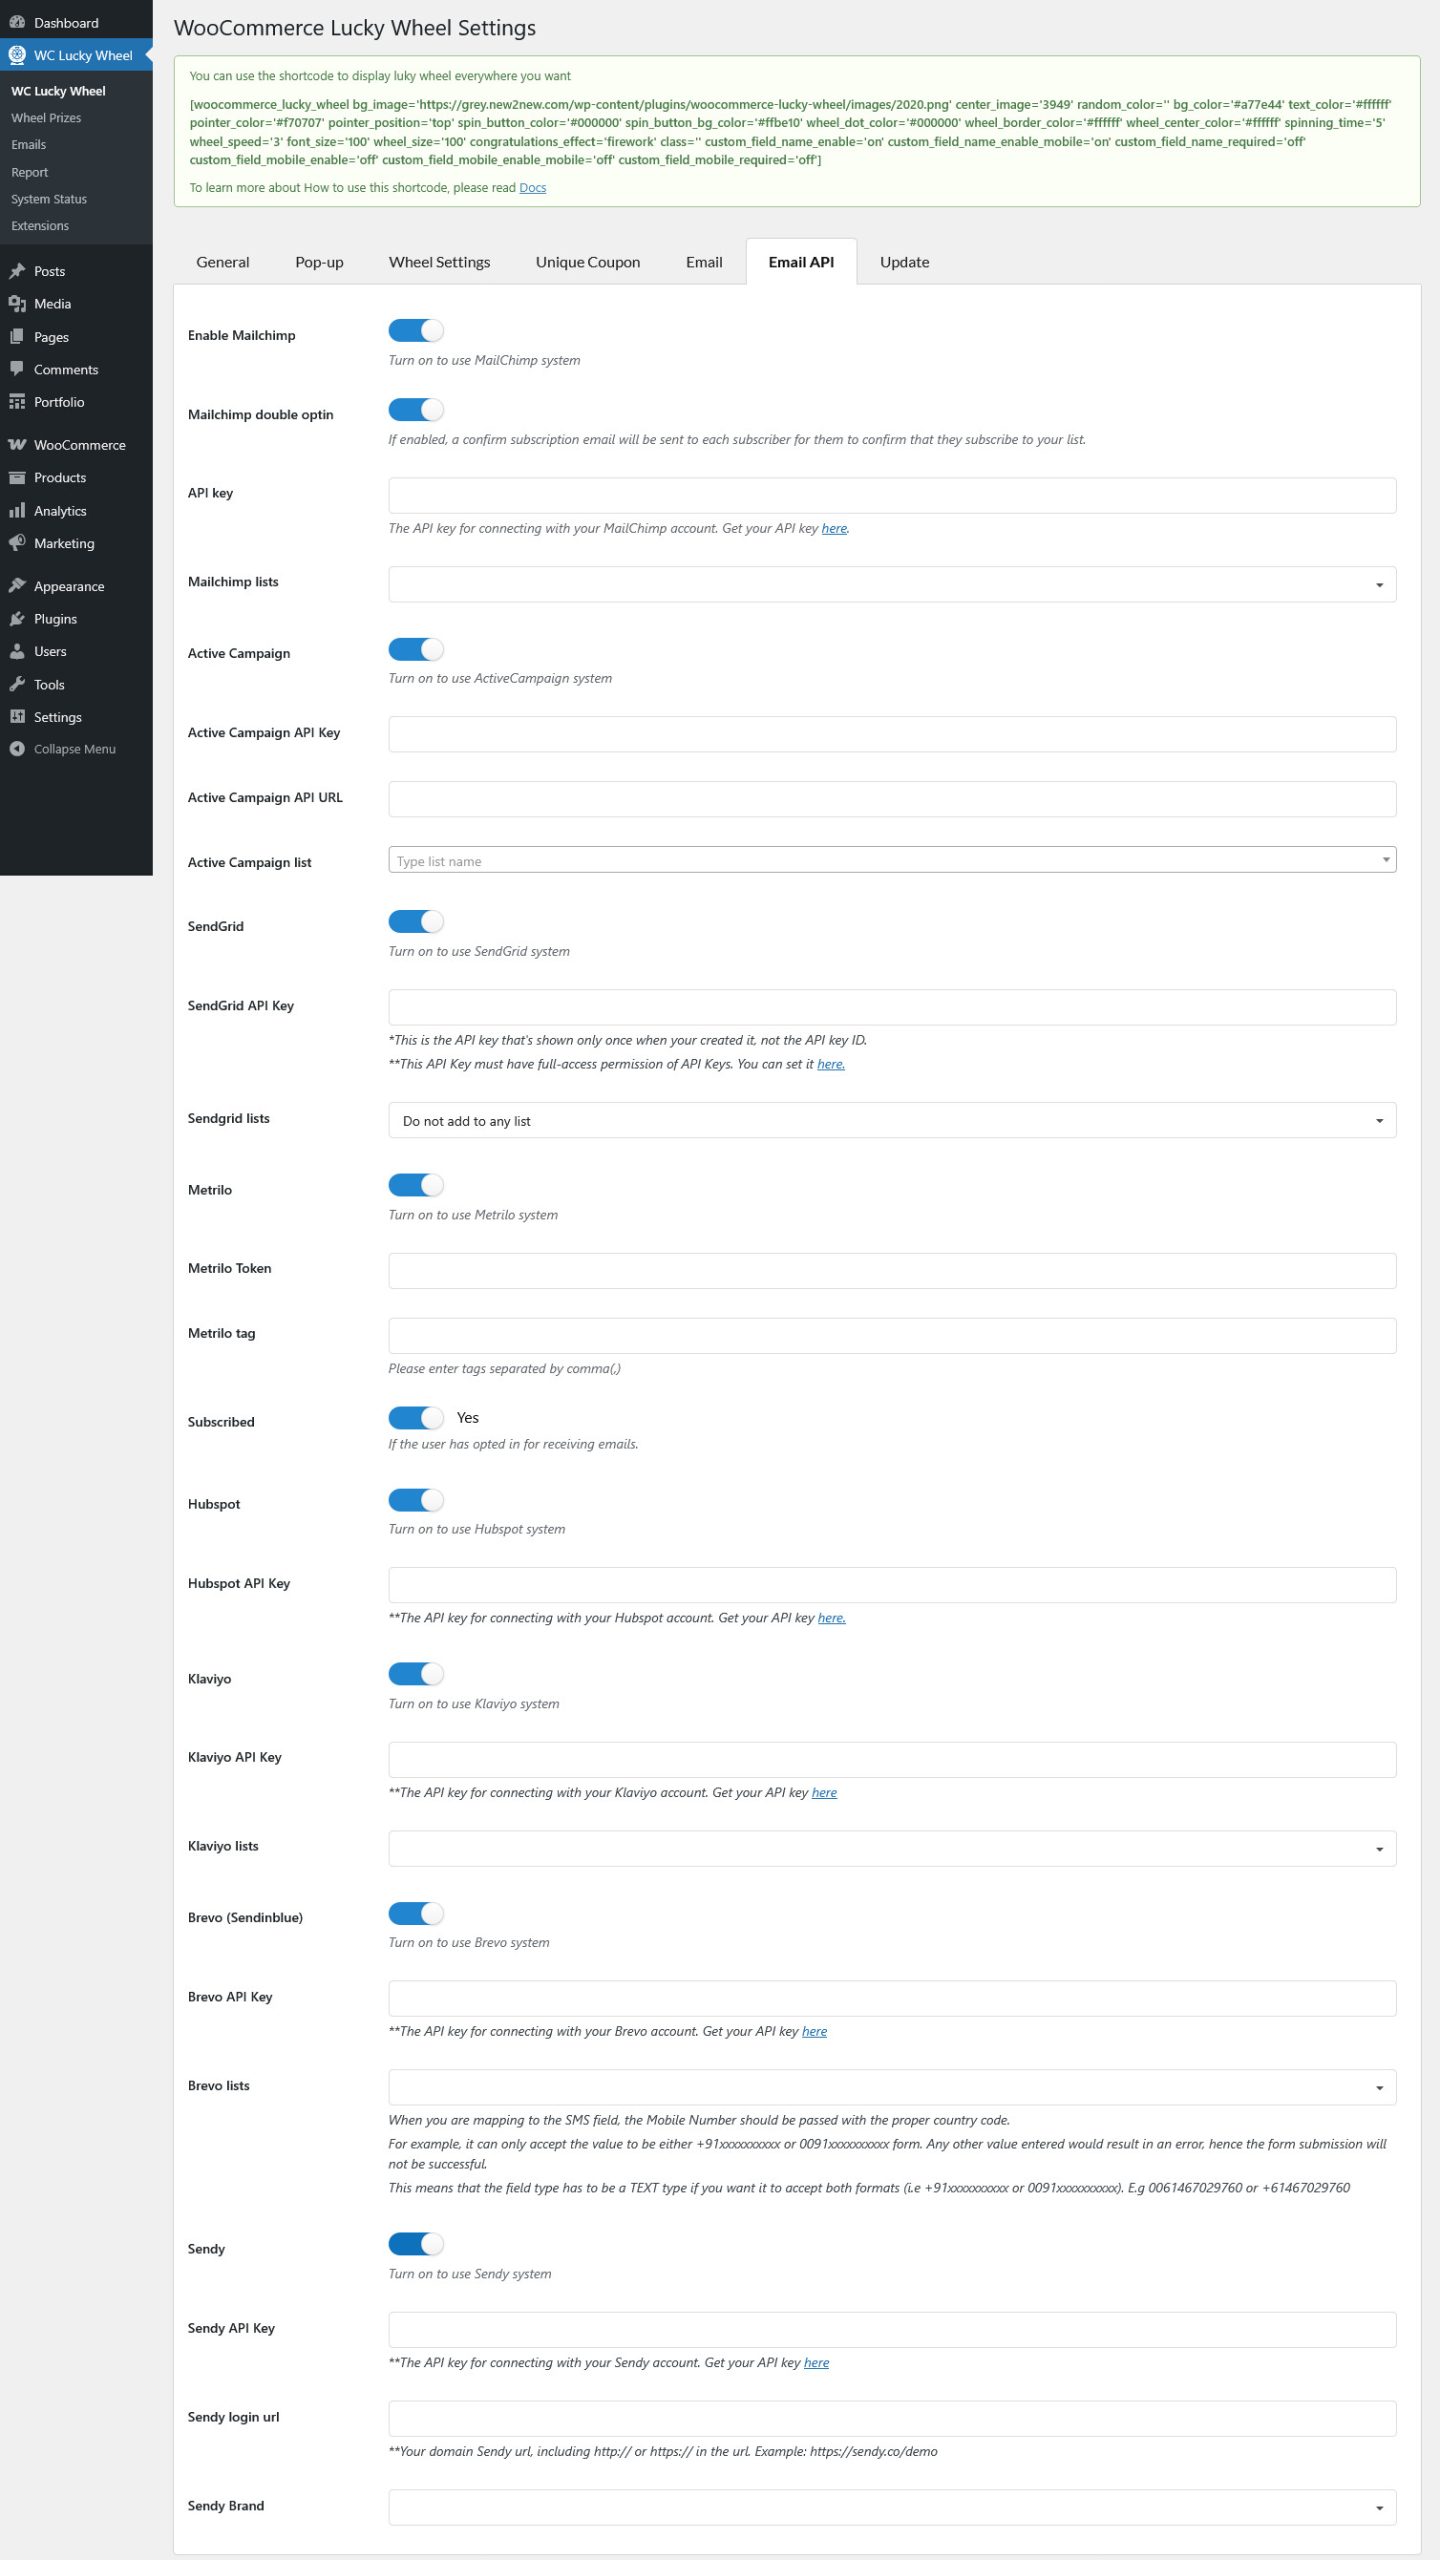
- Email API
- A. Email API configuration for Mailchimp
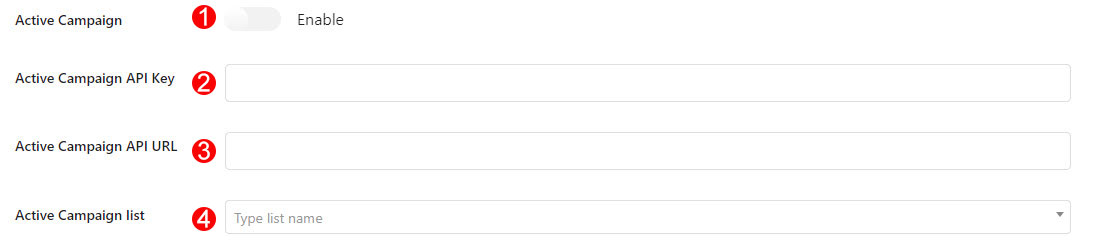
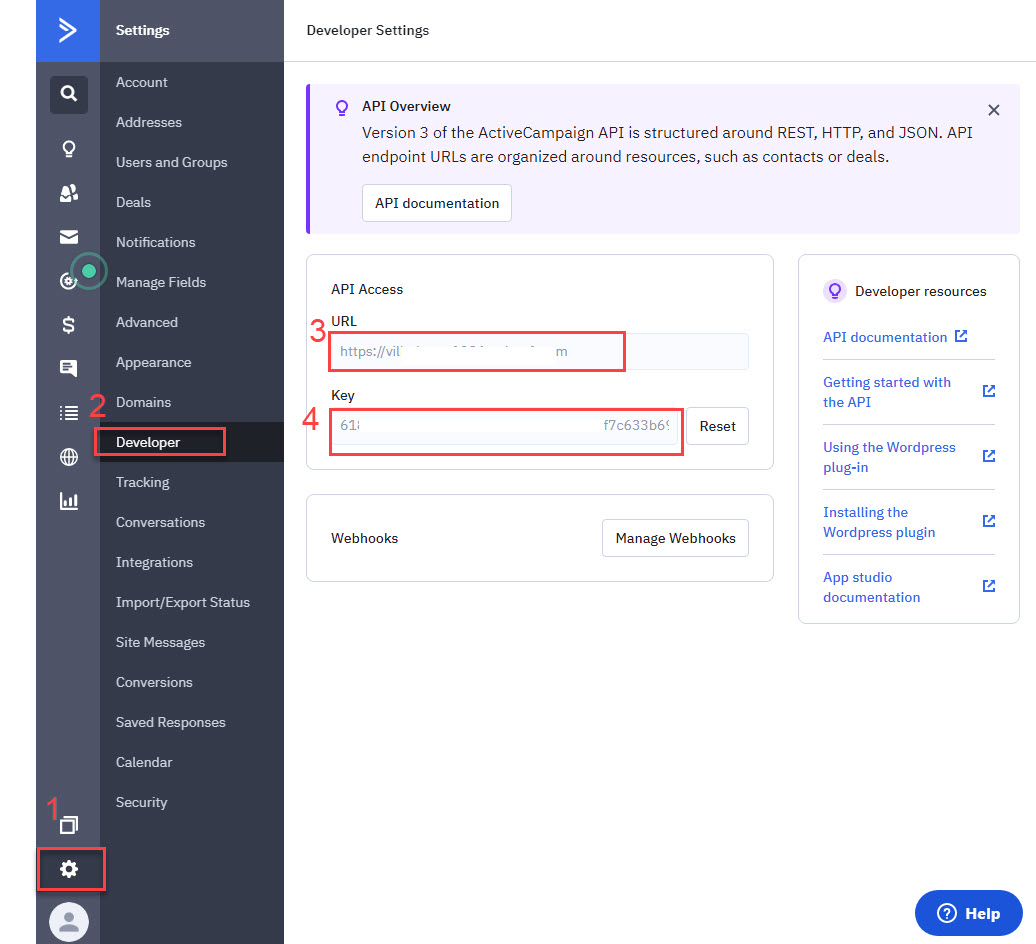
- B. Email API configuration for Active Campaign
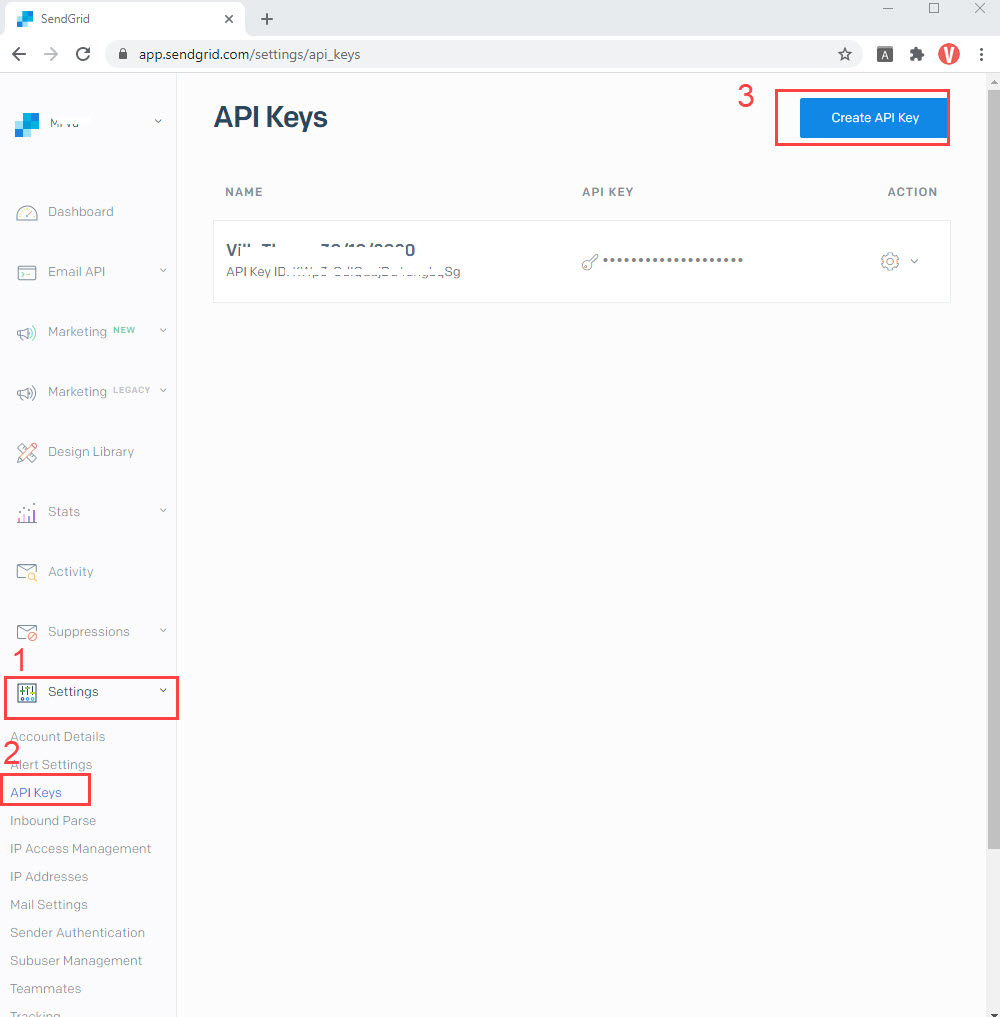
- C. Email API configuration for Sendgrid
- D. Email API configuration for Hubspot
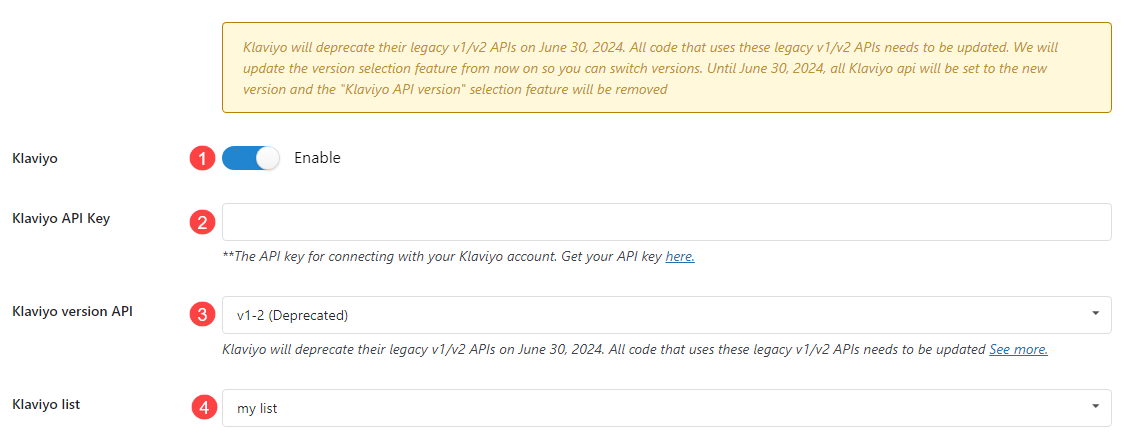
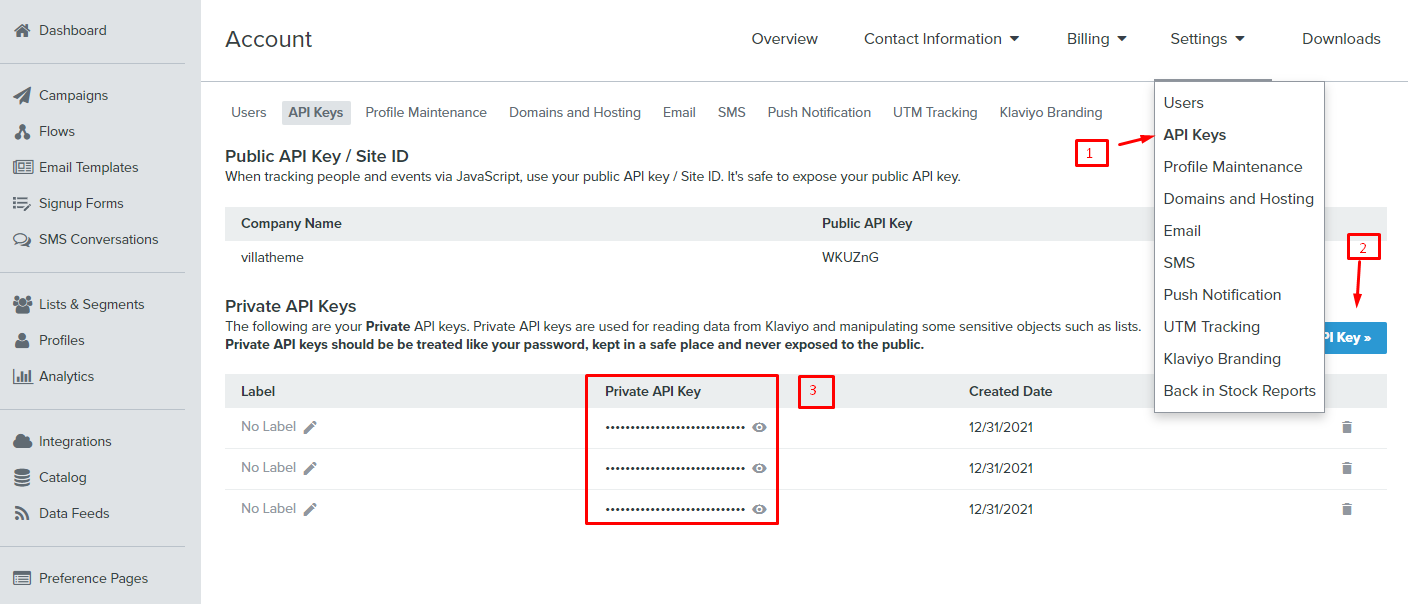
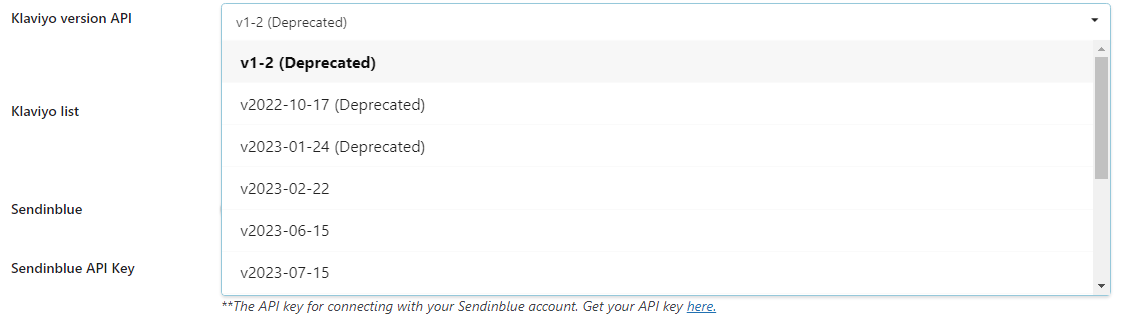
- E. Email API configuration for Klaviyo
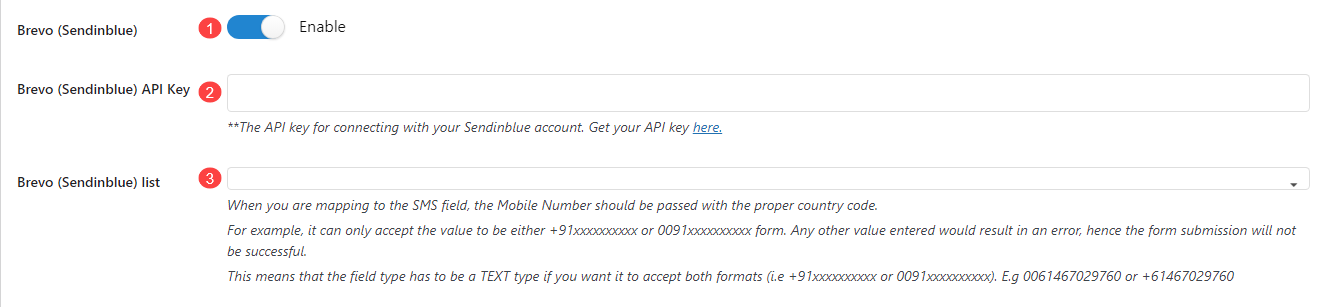
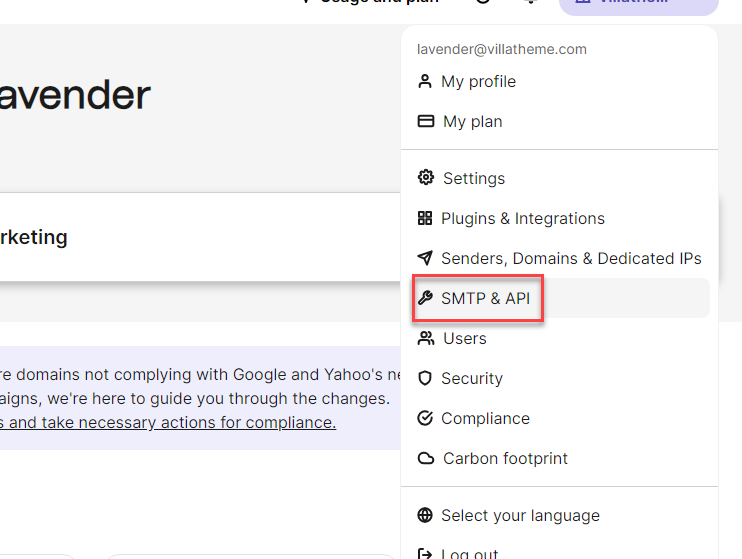
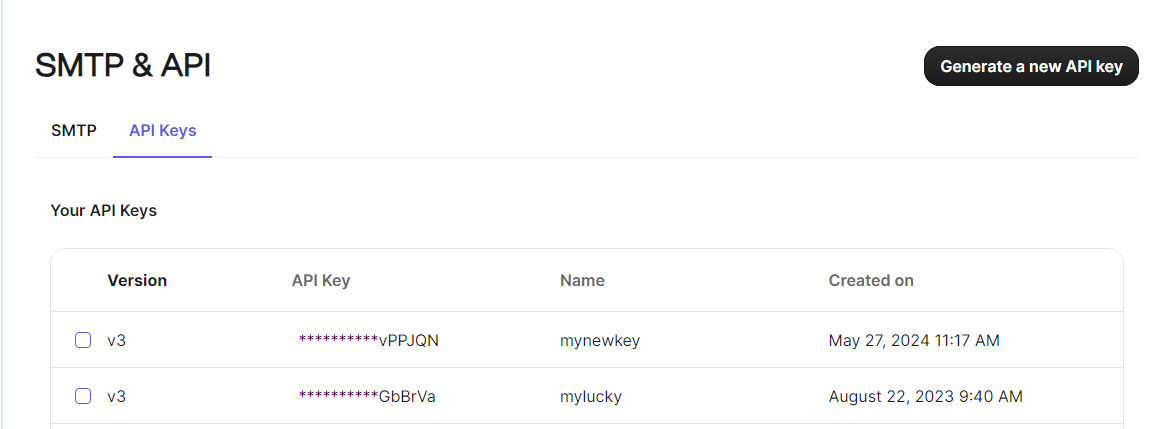
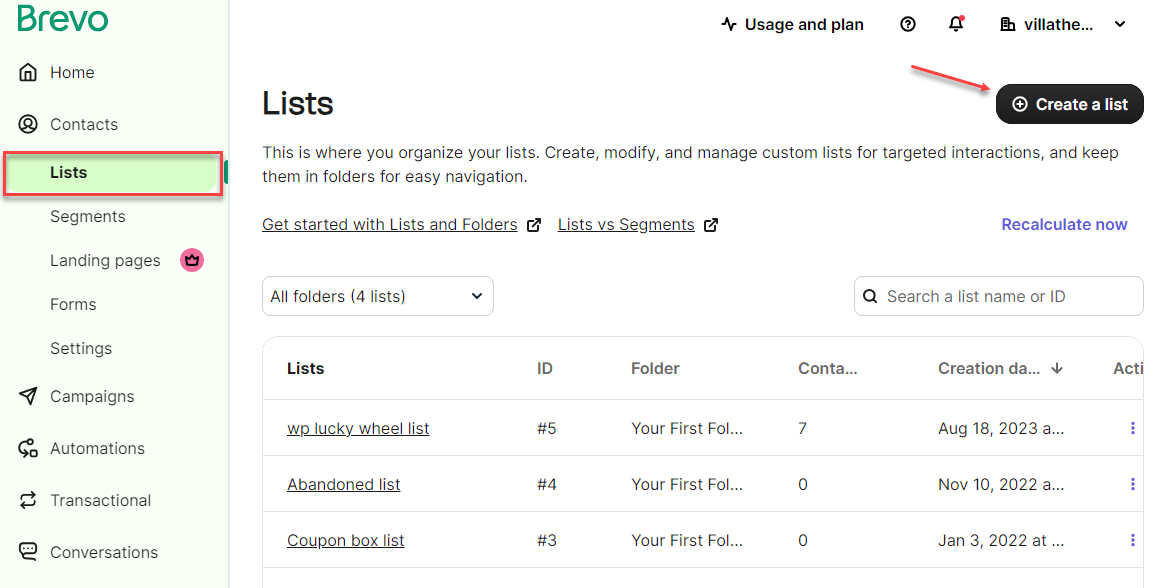
- F. Email API configuration for Brevo (Sendinblue)
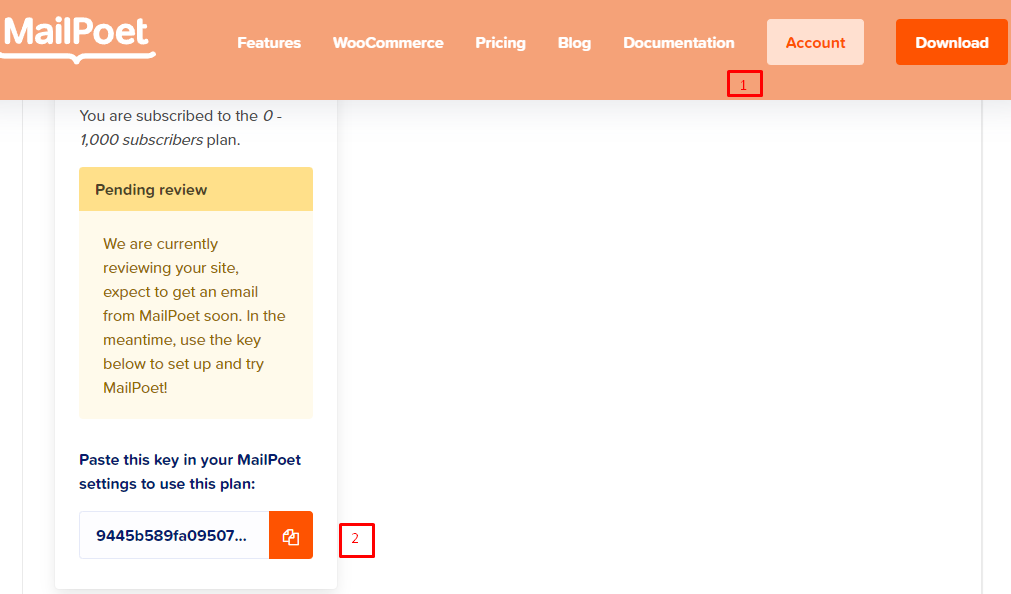
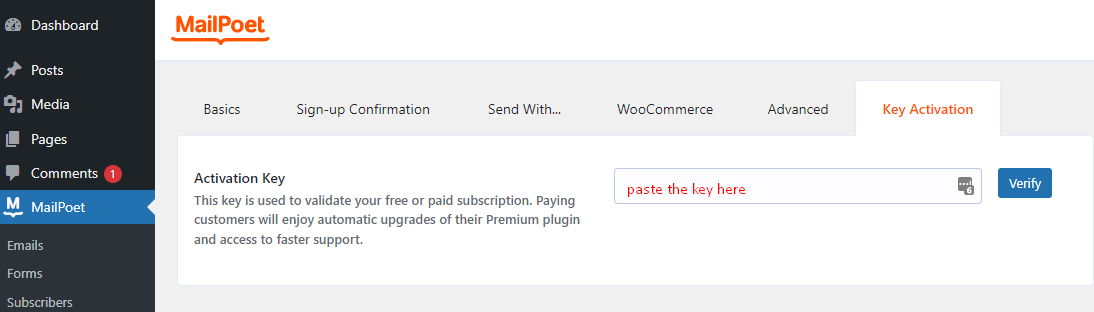
- G. Email API configuration for MailPoet
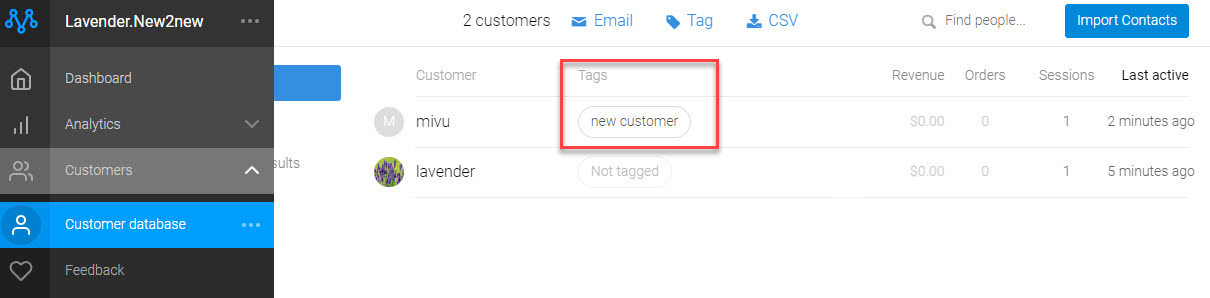
- H. Email API configuration for Metrilo
- I. Email API Configuration for Mailster
- J. Email API configuration for Sendy
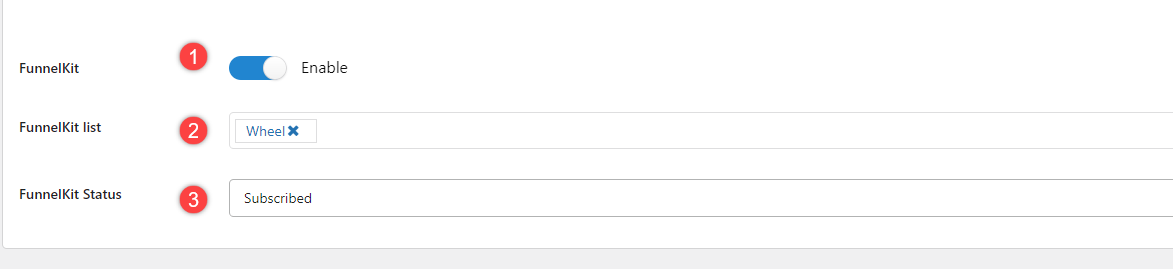
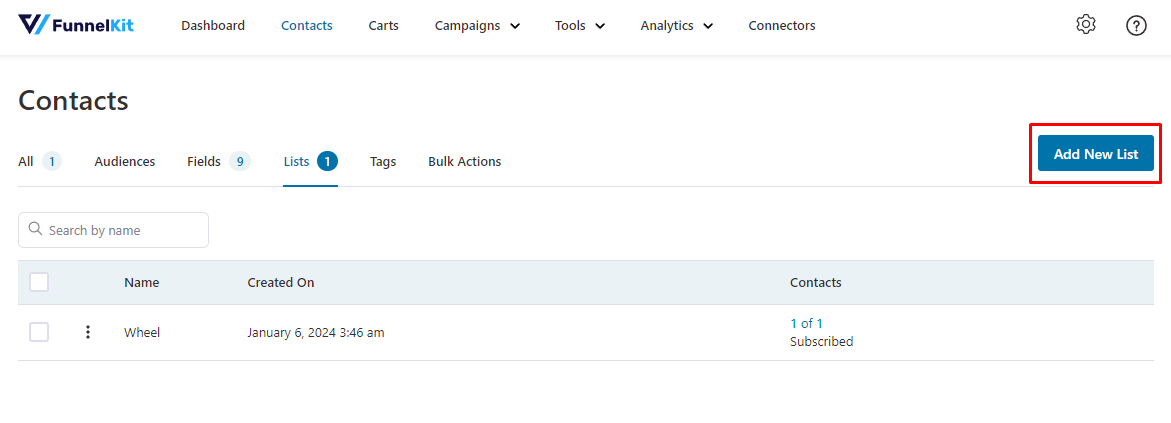
- K. Email API configuration for FunnelKit
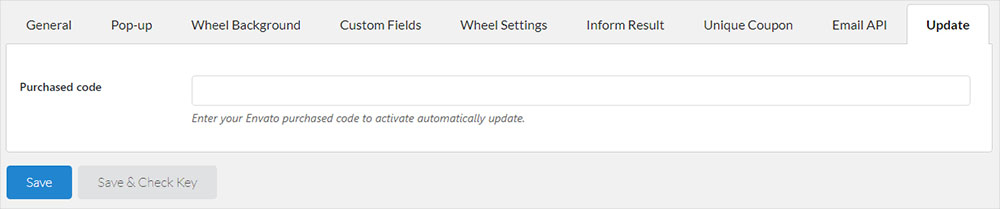
- Update
- Shortcode
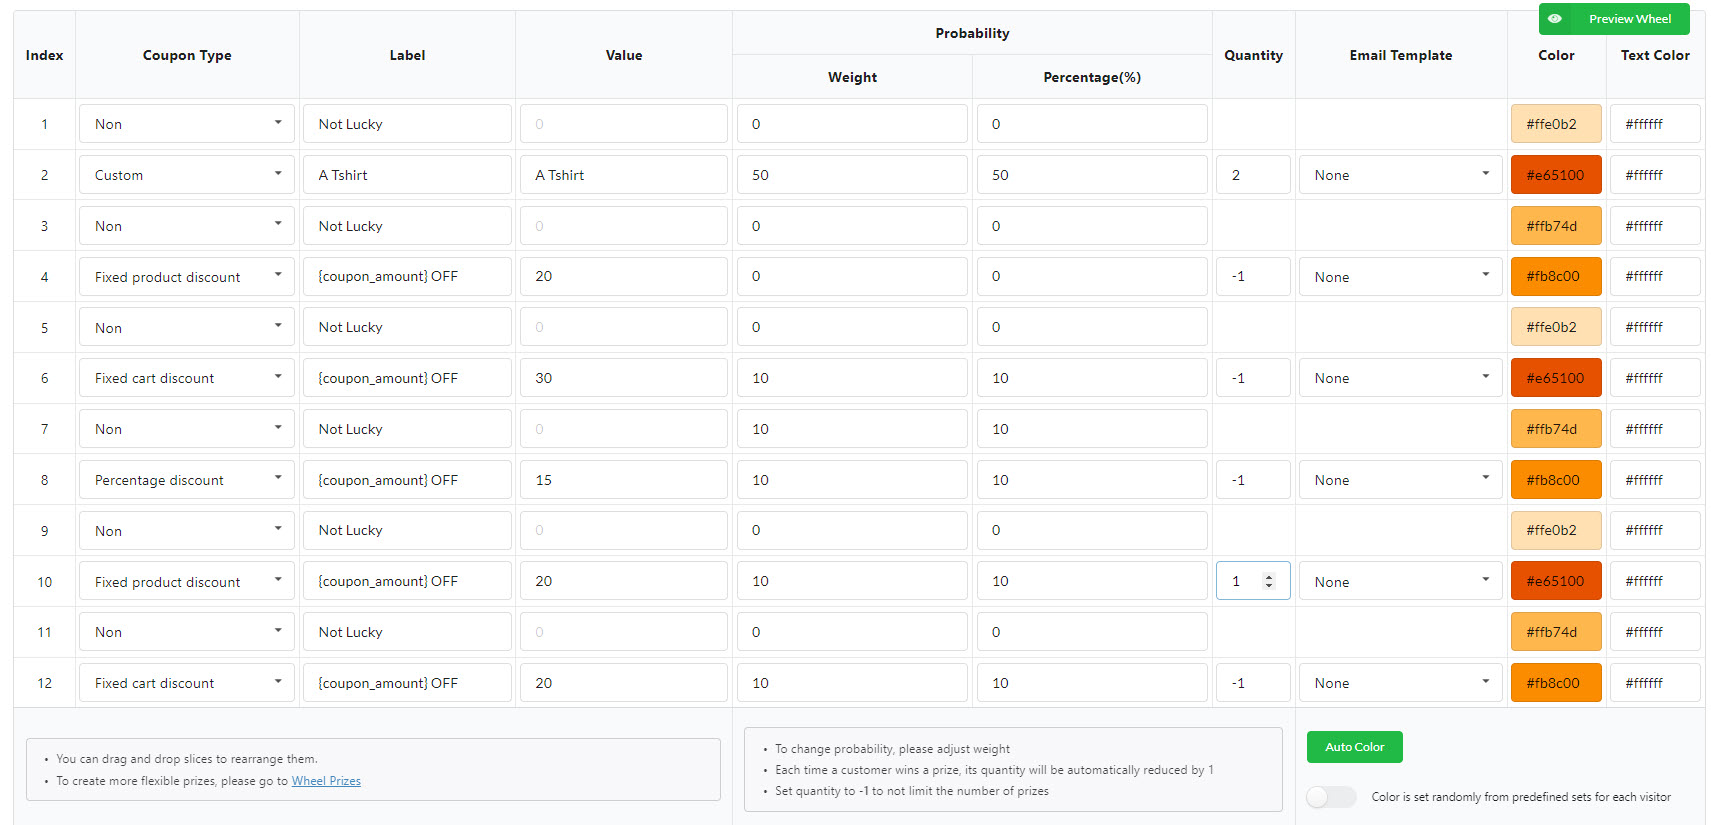
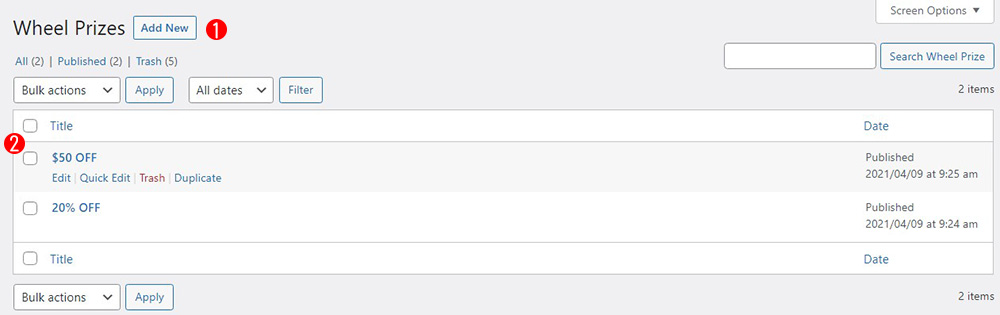
- Wheel prizes
- Report
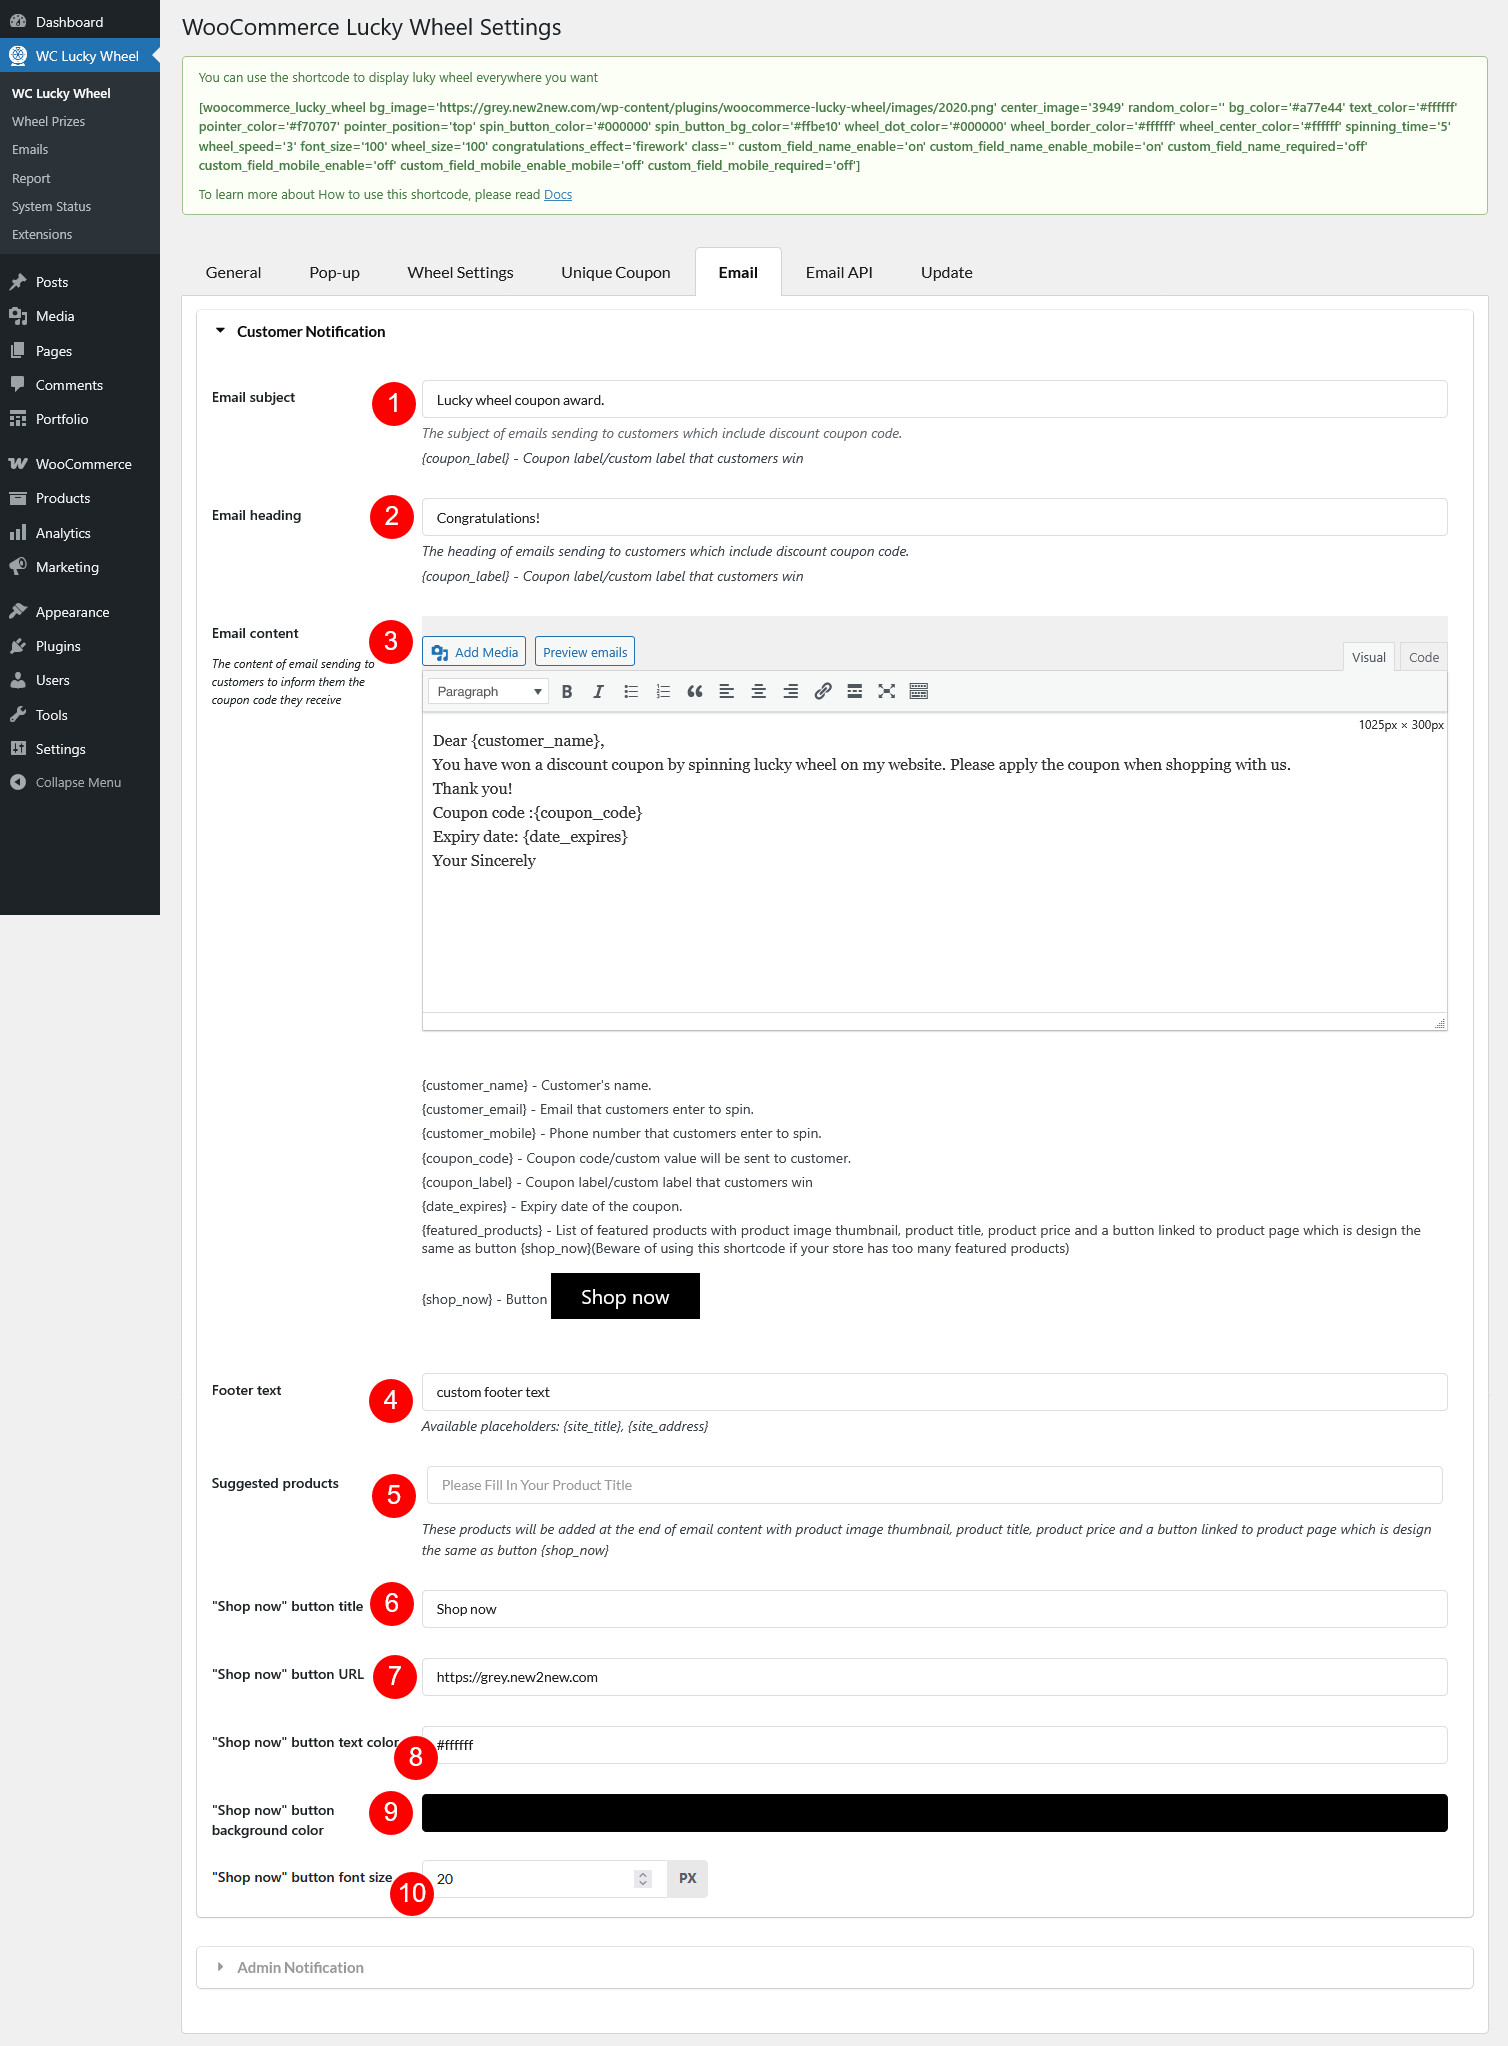
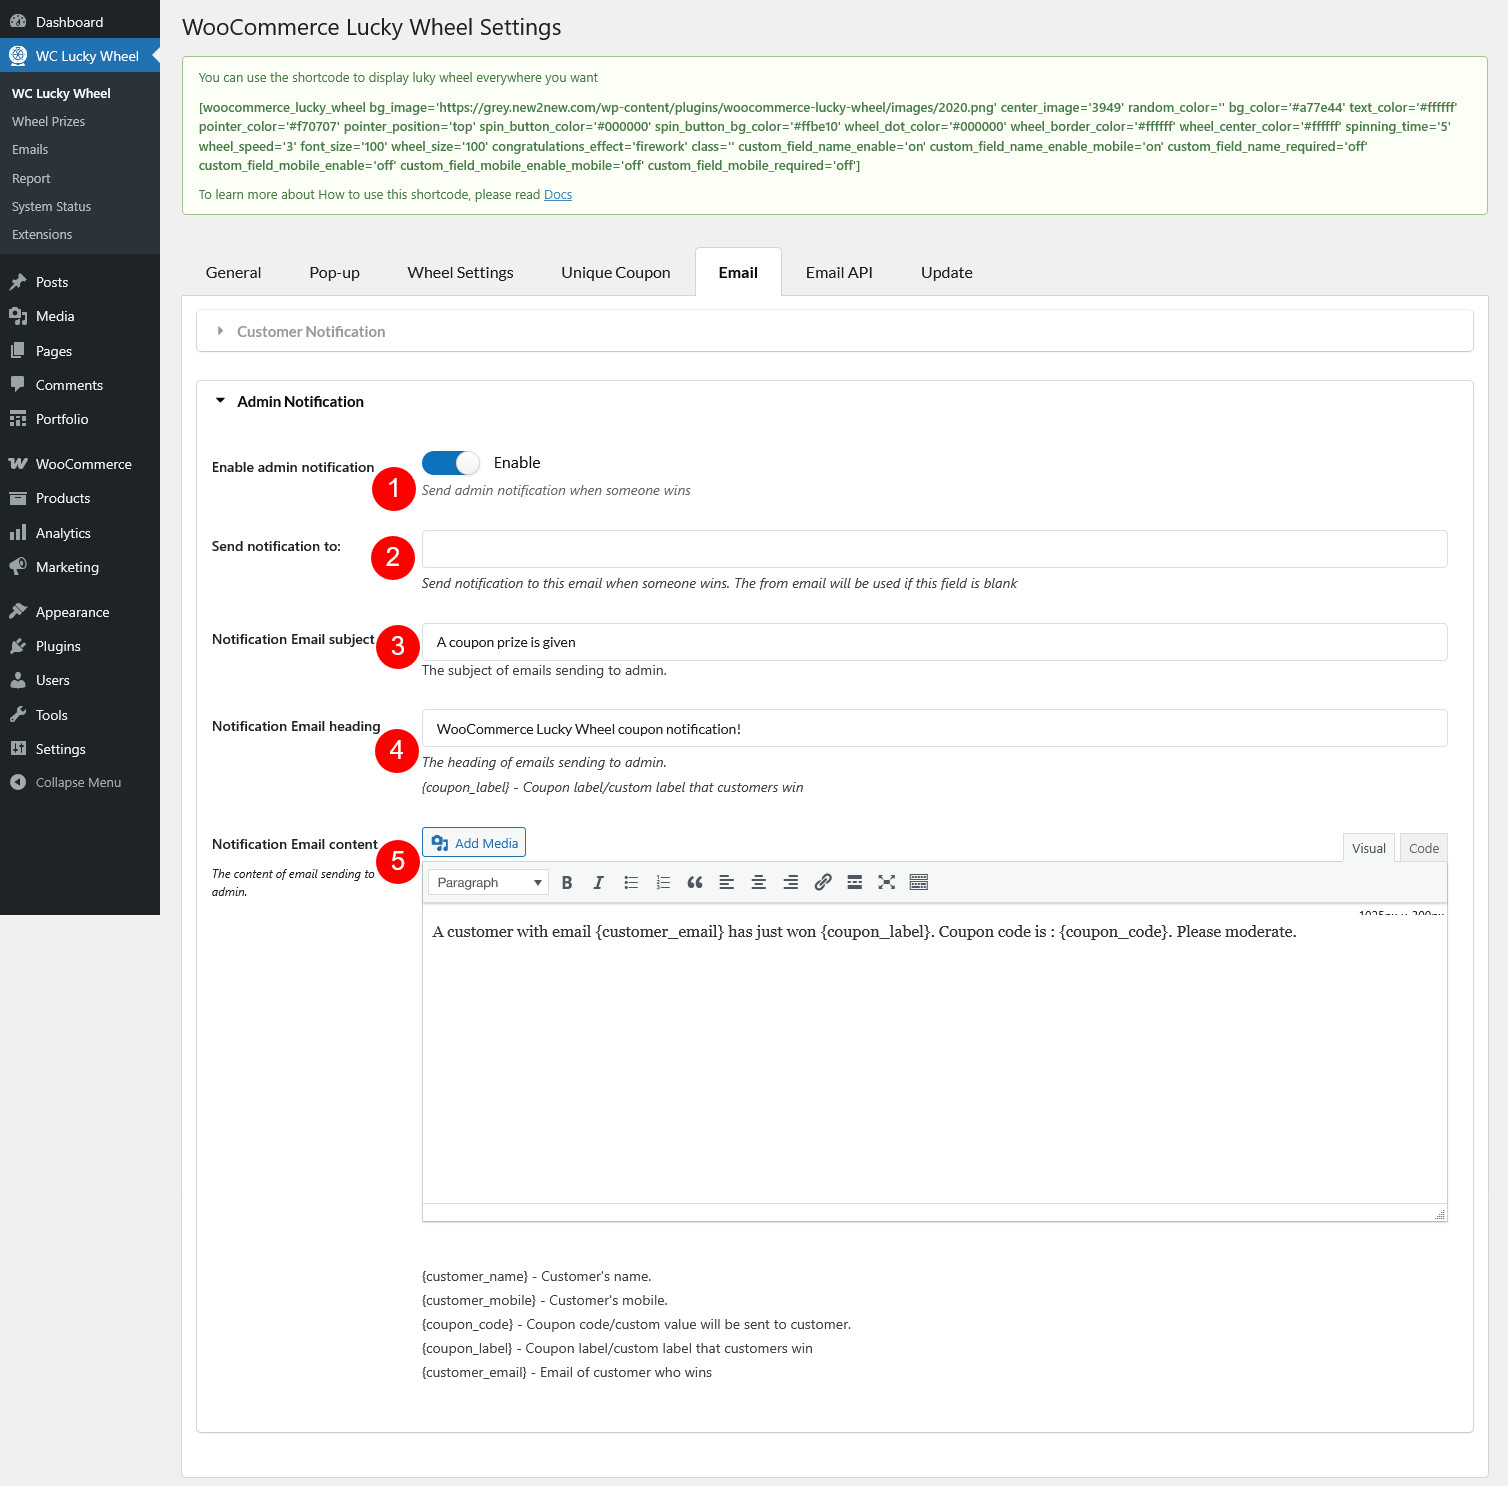
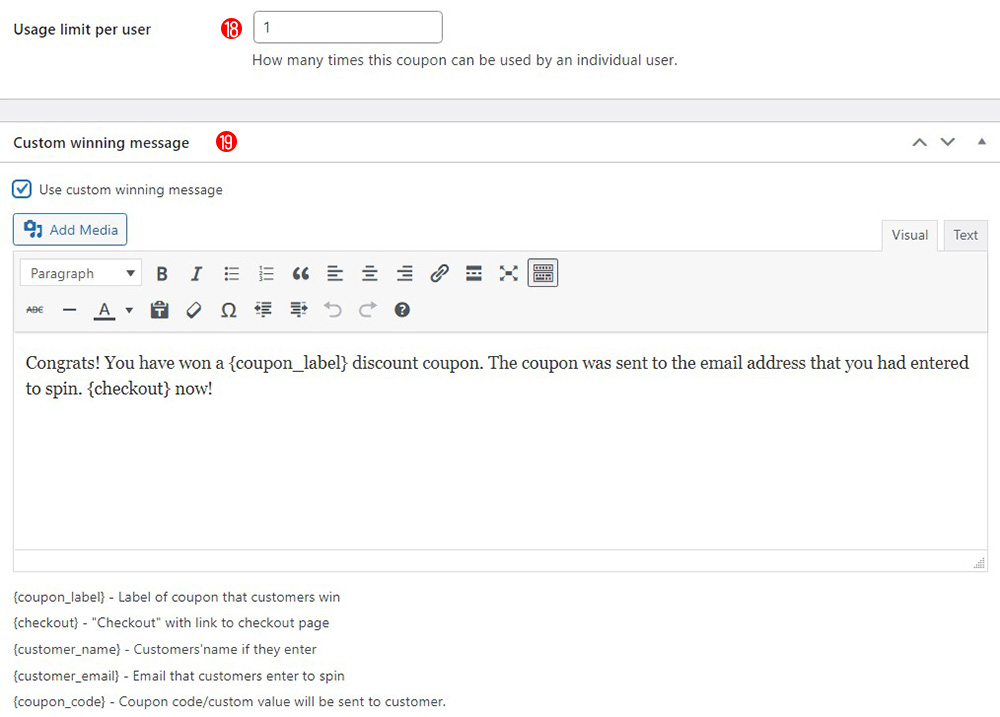
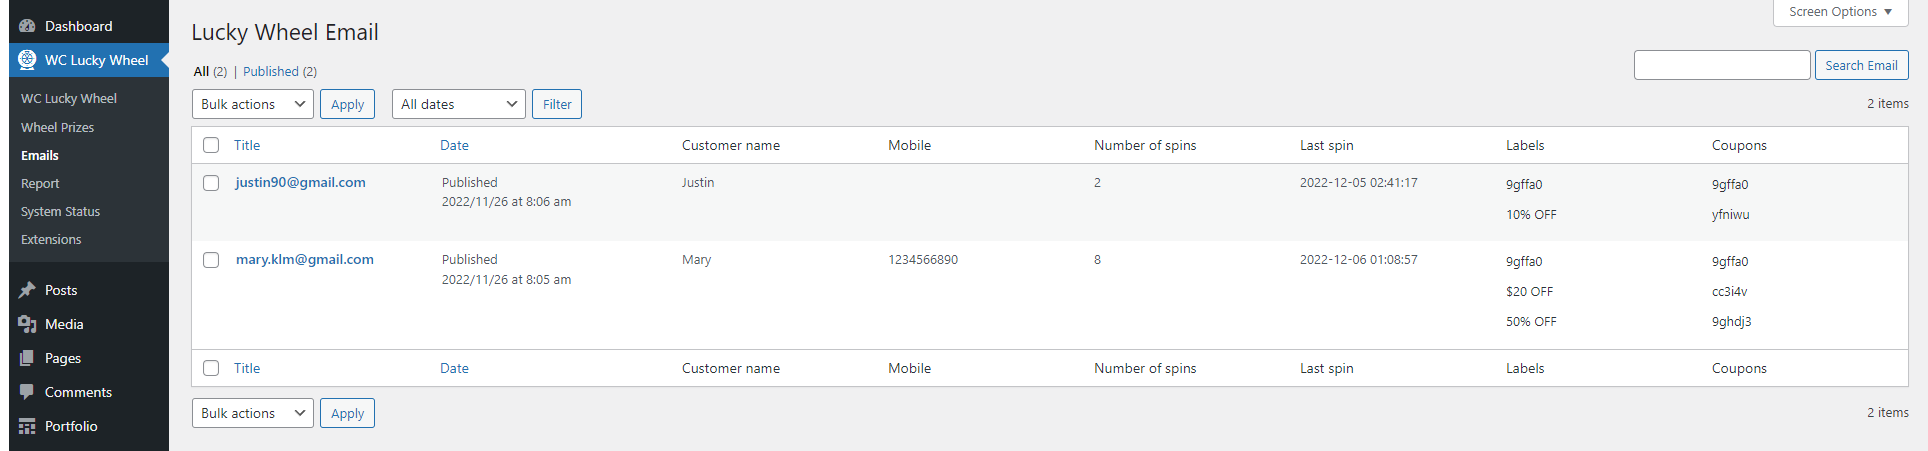
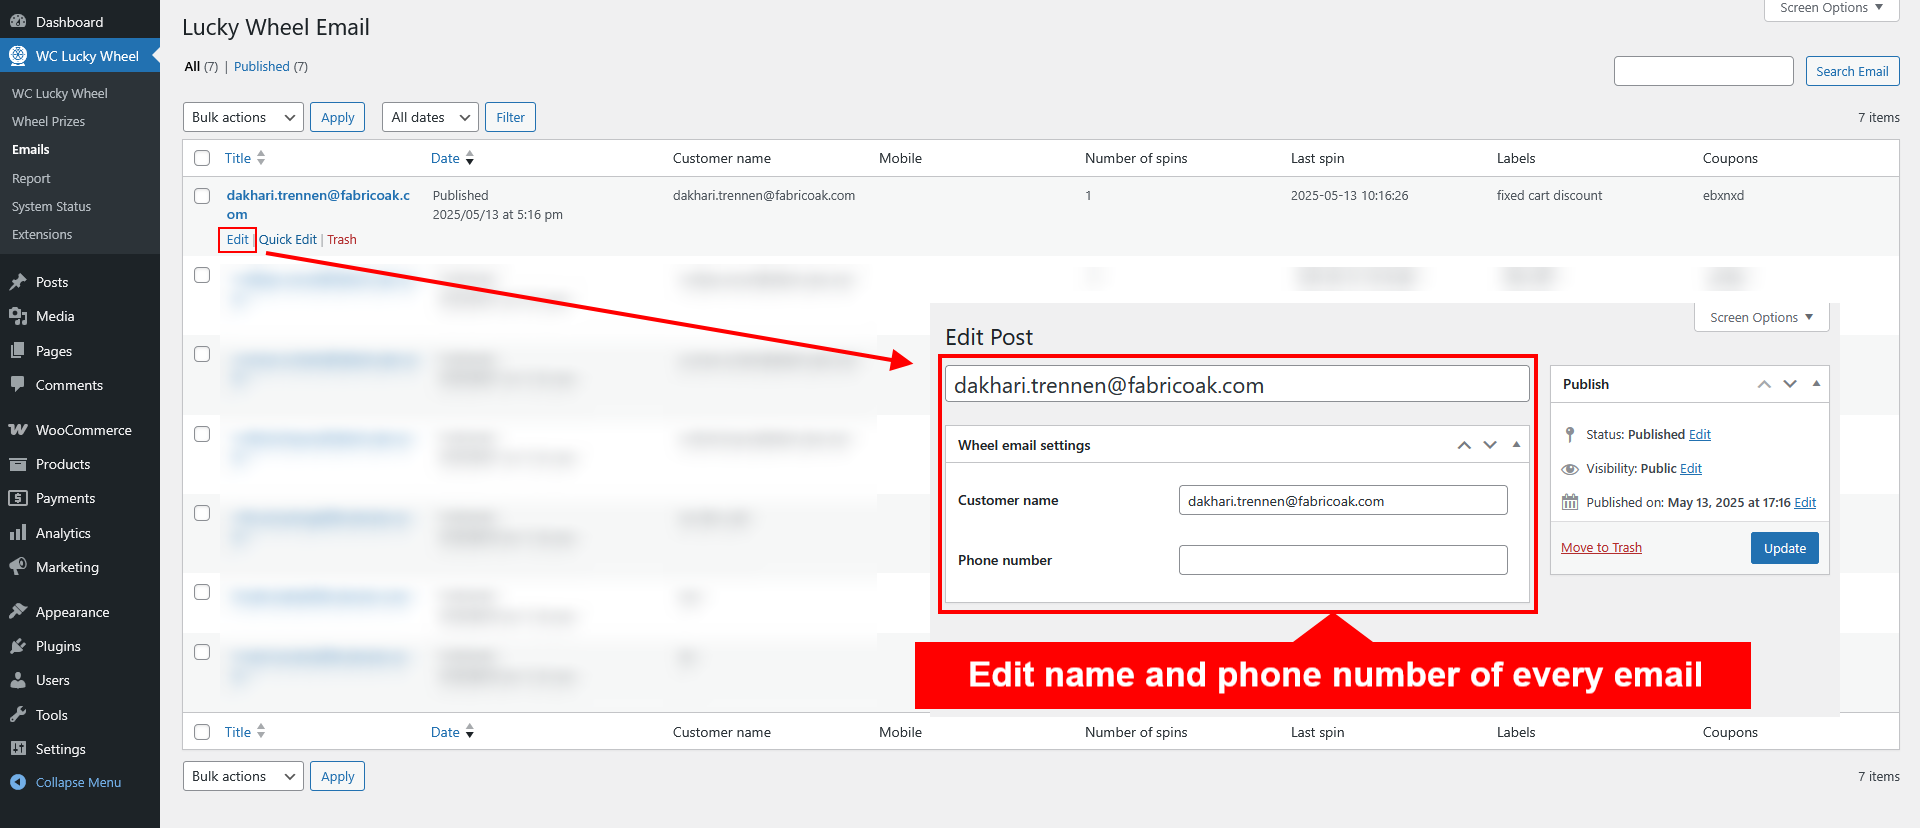
- Emails
- COMPATIBILITY
- Extra Information
Copyright Villatheme 2015-2026