Copyright Villatheme 2015-2026
Created: 01/2018
Latest updated: 6/2026 – Updated version: 1.2.9
By: VillaTheme
Thank you for purchasing our plugin. If you have any questions that are beyond the scope of this documentation, please feel free to request support at our Support Forum. Thanks so much!
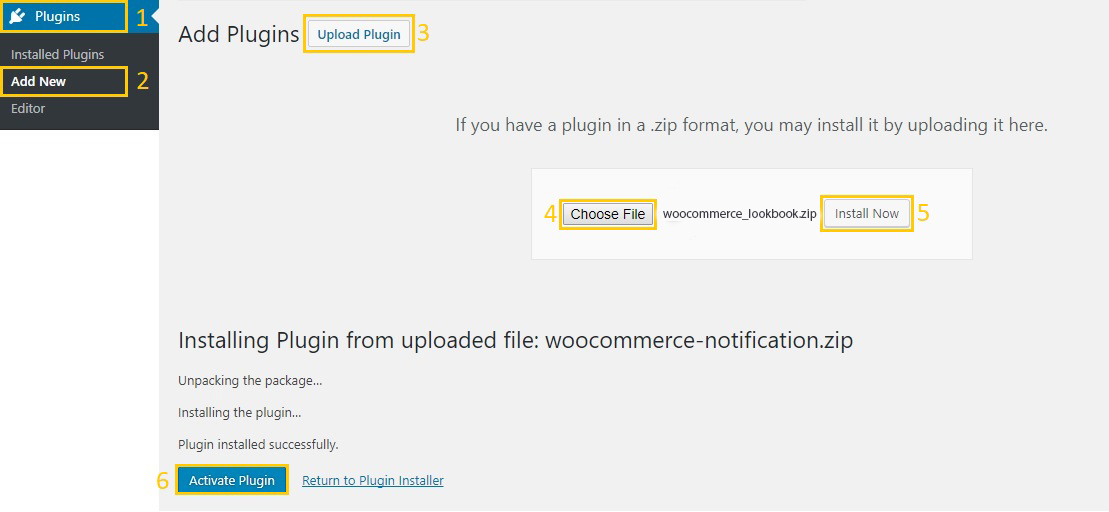
Go to Plugin/Add New /Upload Plugin/Choose file/ select plugin file zip/ Install Now/Active Plugin
Watch this tutorial video for installing and using WooCommerce Lookbook
After successful activate the WooCommerce LookBook plugin, go to Dashboard/Lookbooks to start using the plugin.
2 steps to create a lookbook.
Step 1: Upload picture
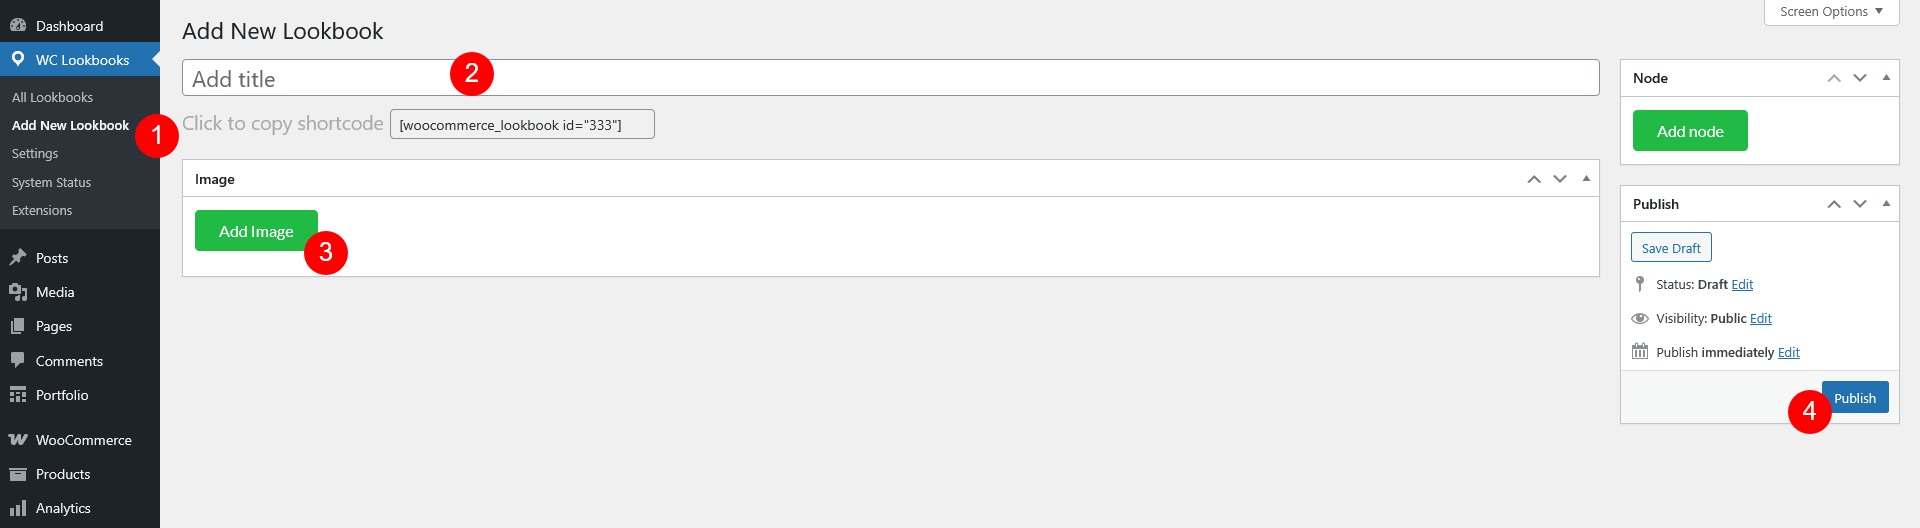
Step 2: Add nodes
Click “Add node” button: Once your image is loaded in the editor, simply click the green “Add node” button to add a hotspot, and drag that hotspot anywhere on the image where you want, each node can be linked to either a product or a category.
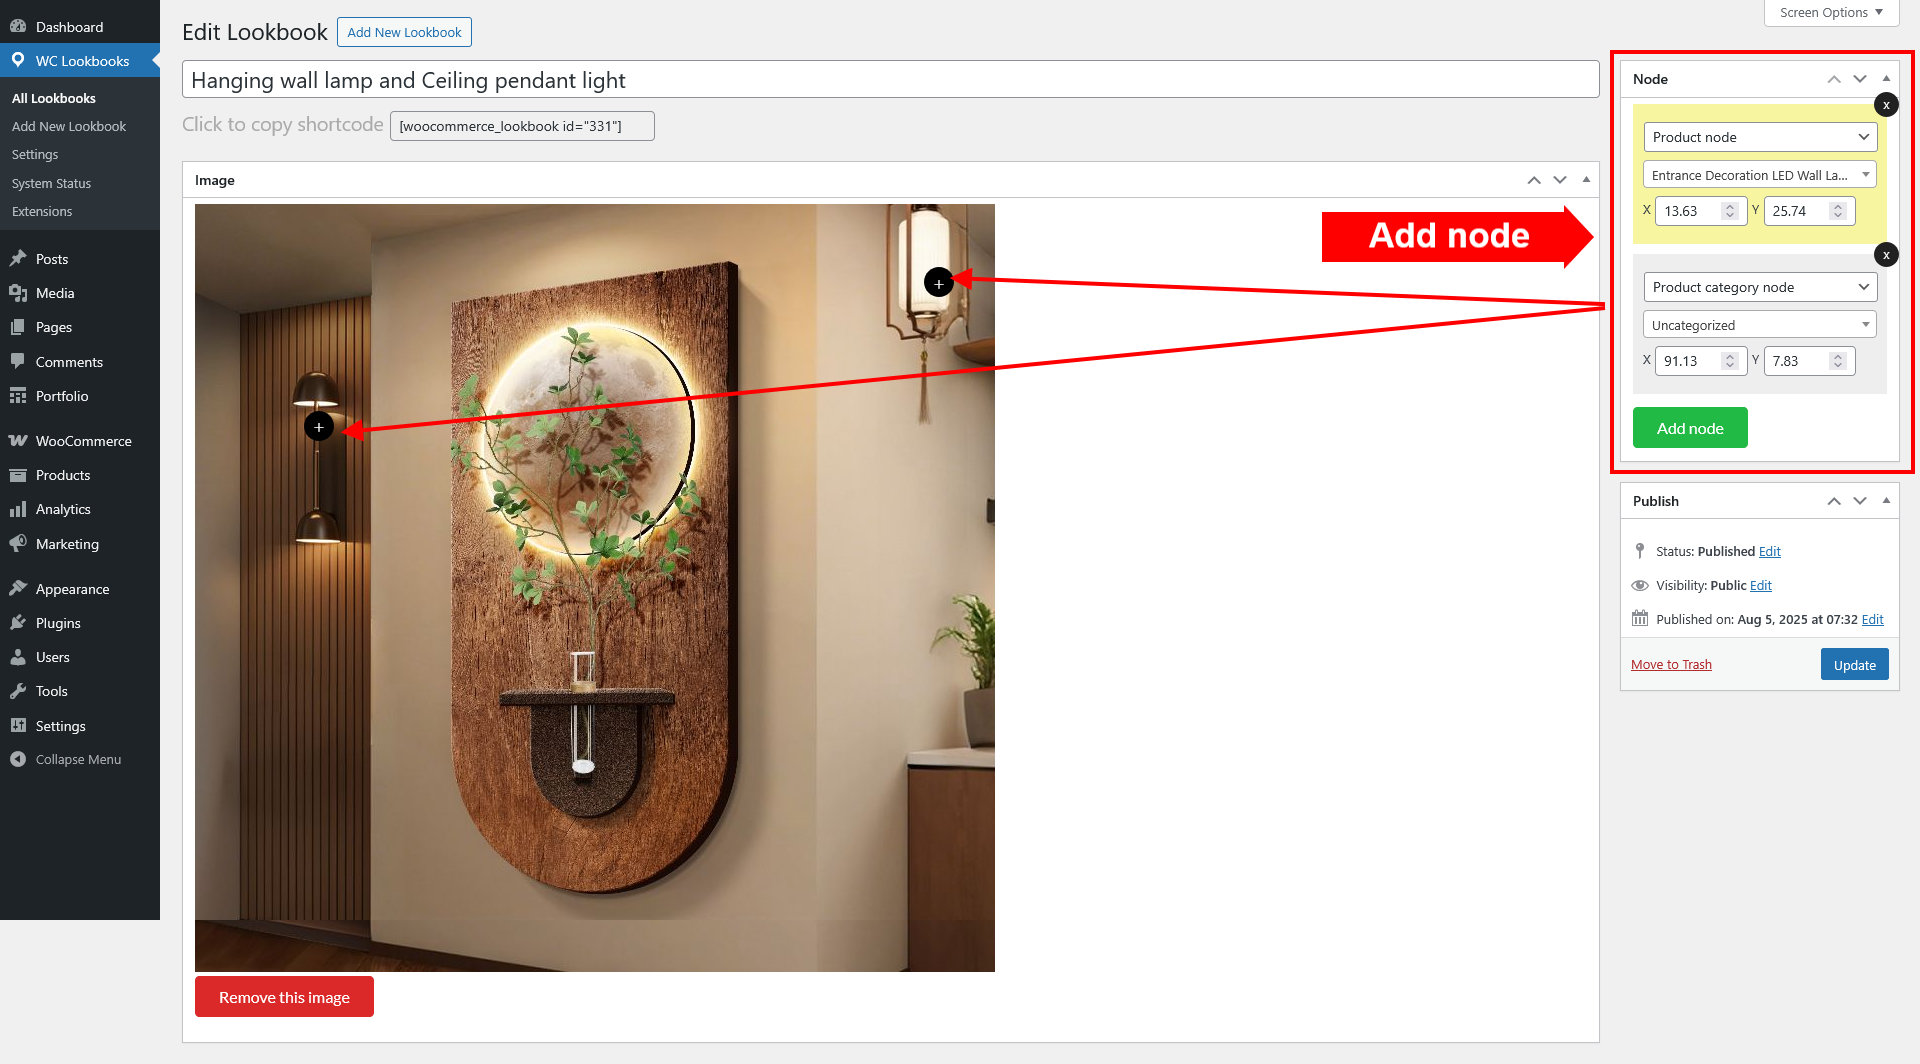
Customize the Node (Optional):
Once finished, click Publish or Update.
Use the provided shortcode to embed the LookBook into a page or post. You can change the shortcode into[woocommerce_lookbook_slide id='x,y,z' layout='carousel'] and [woocommerce_lookbook_slide id='x,y,z' layout='gallery'] with x y z is page id of lookbooks to show the 3 lookbooks as a slide, and the layout can be carousel or gallery.
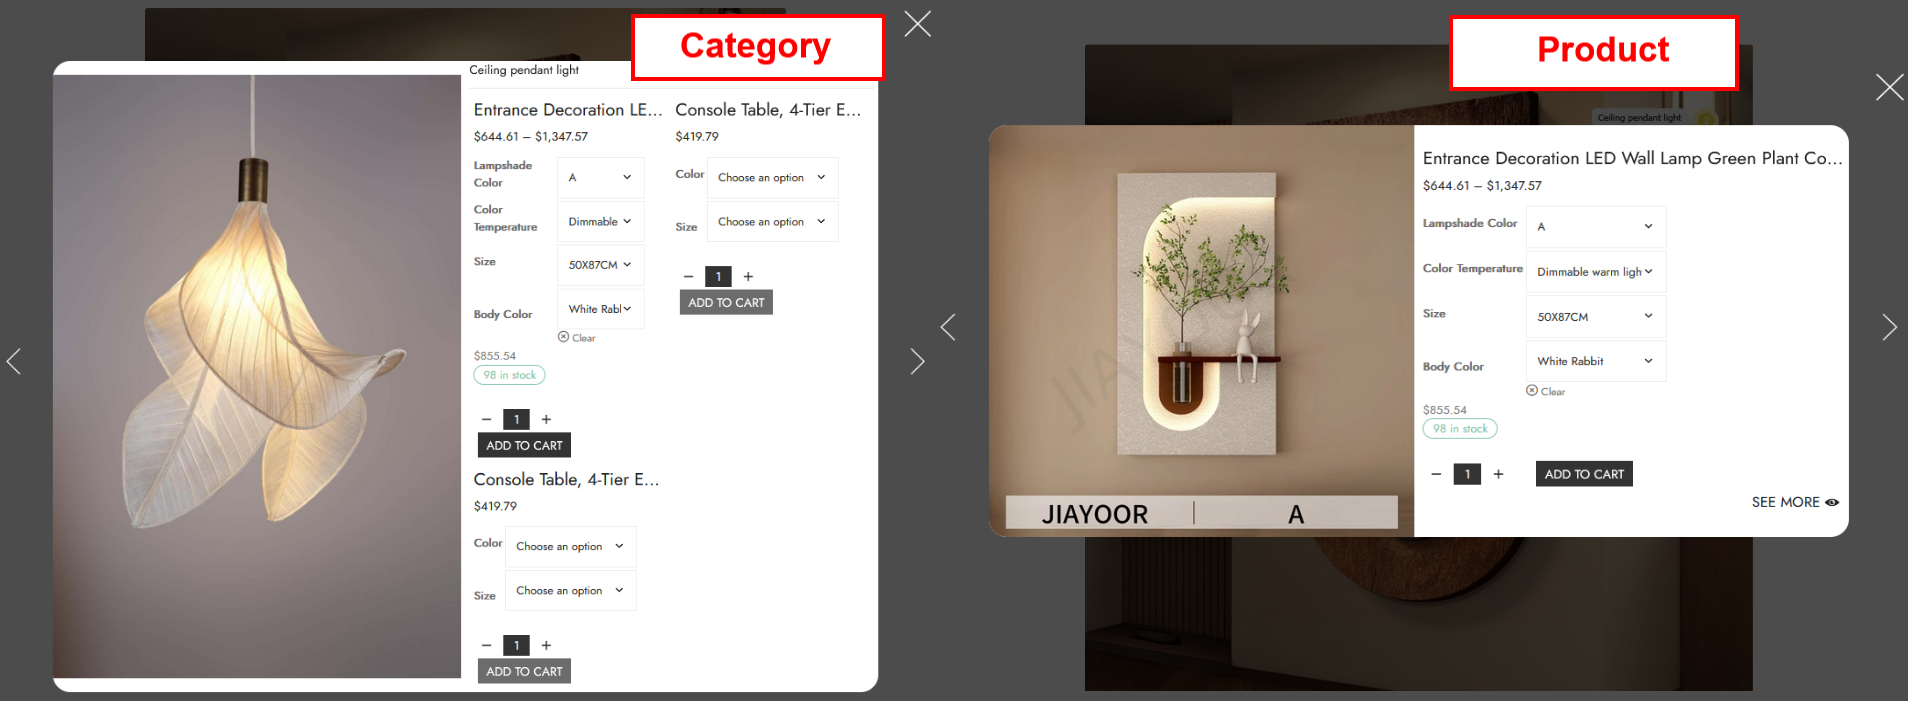
WooCommerce Lookbook will appear on the front-end as a picture with nodes that locate products

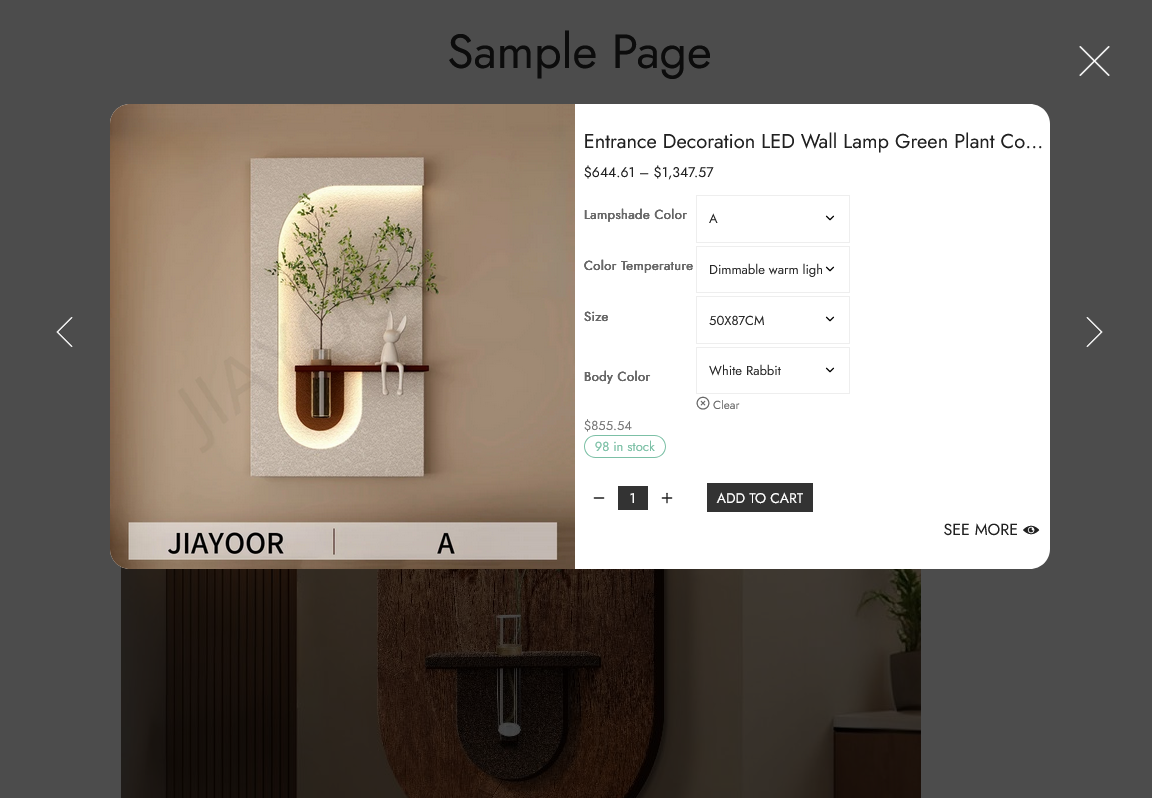
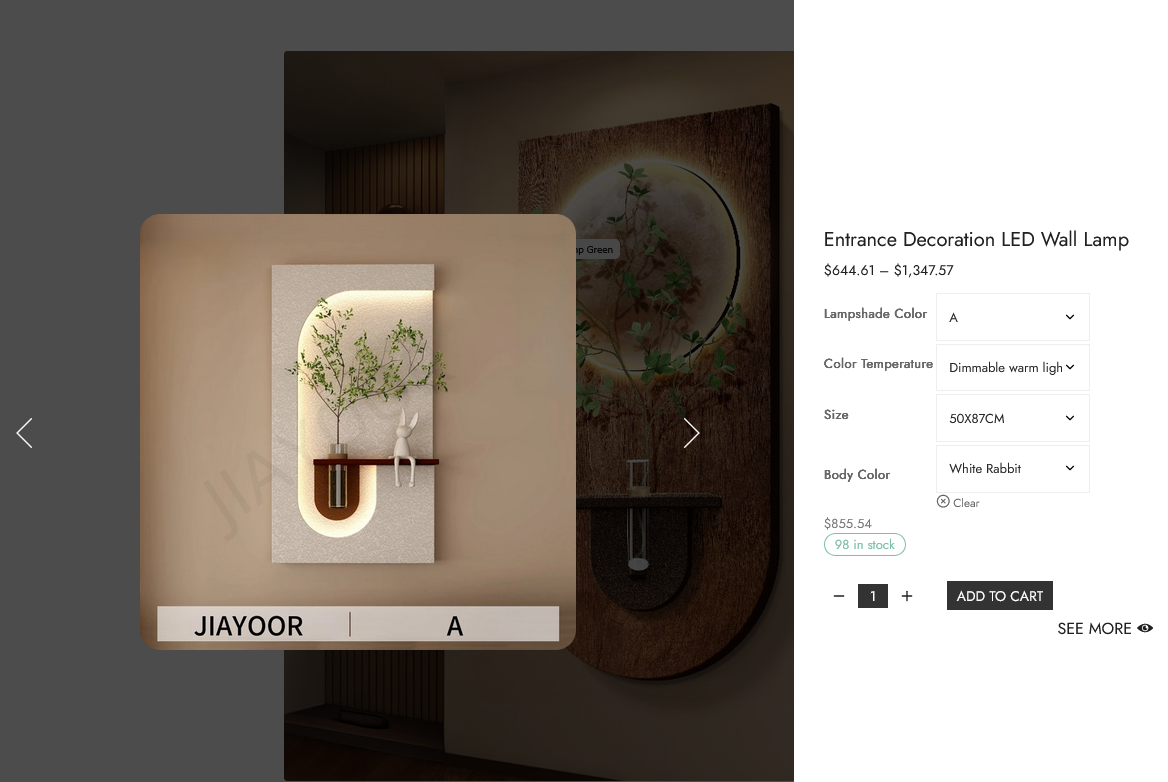
When clicking on a node, a pop-up will appear with product information.
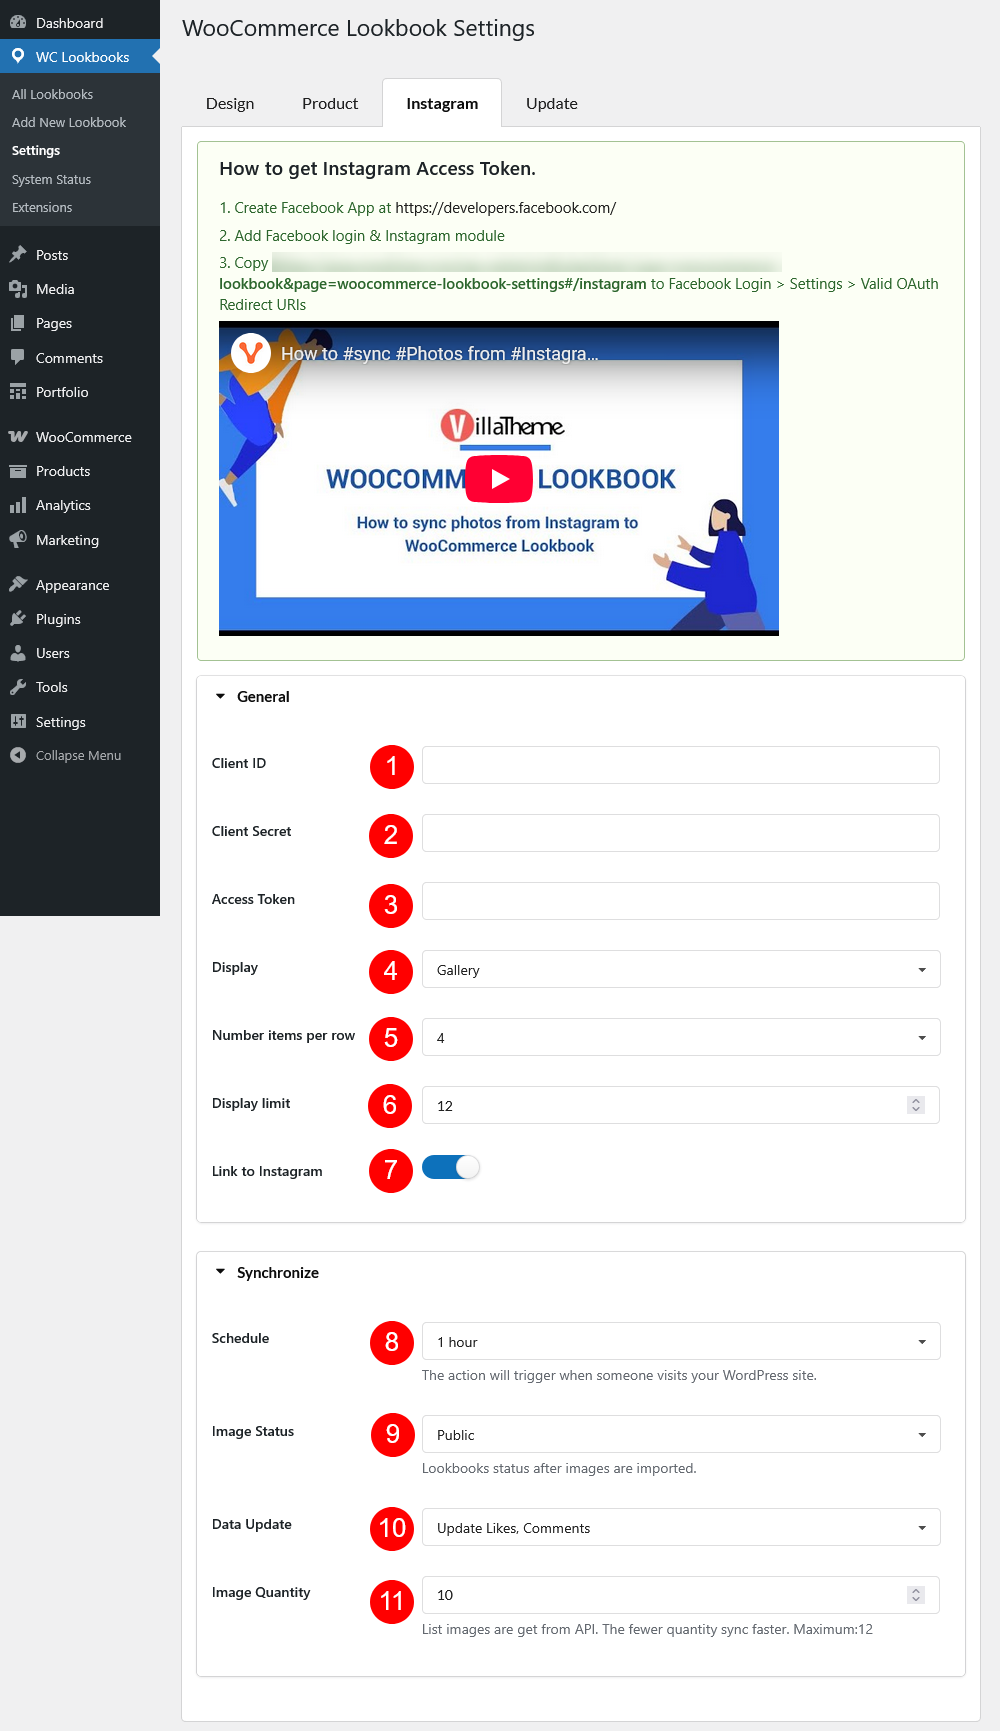
To sync Instagram pictures to WooCommerce Lookbook, follow these guides:
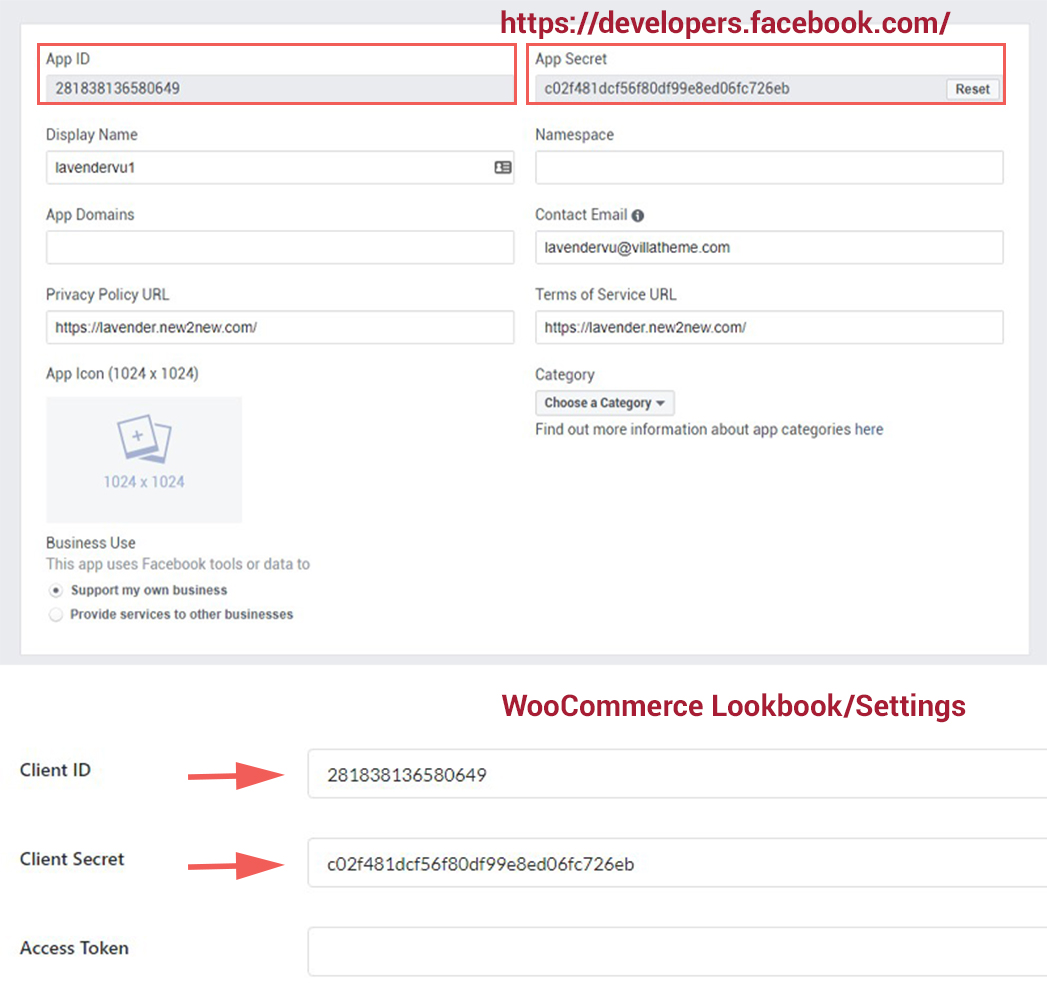
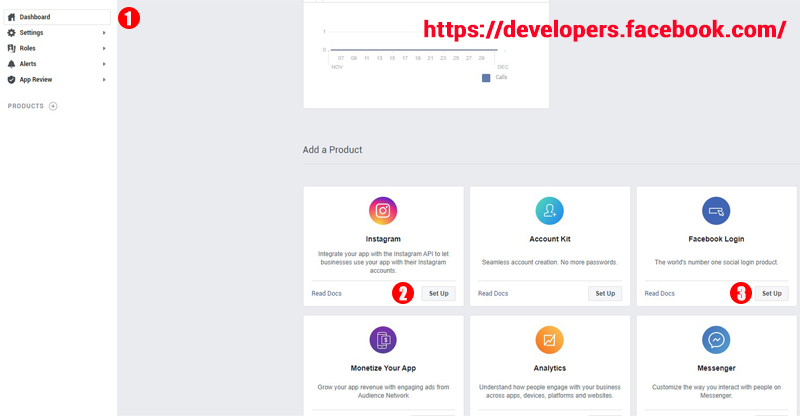
1. Create Facebook App at https://developers.facebook.com/
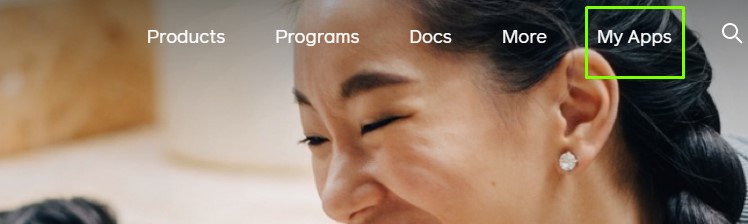
2. Click My Apps > Create App
3. Go to Settings > Basic > Copy App ID, App Secret to fields and paste in the plugin settings/ Instagram
4. Go to Dashboard > Add Facebook Login, Instagram module
5. Go to Facebook Login > Settings > Paste “provided URL into “Valid OAuth Redirect URIs” field.
Find and copy the provided URL in the plugin settings/ Instagram and paste into the Valid OAuth Redirect URLs in the Facebook login settings.
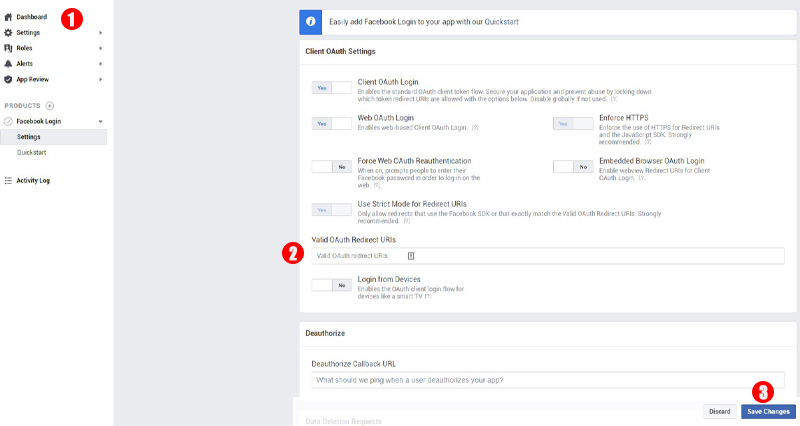
6. Go to the plugin settings/ Instagram > Save Settings
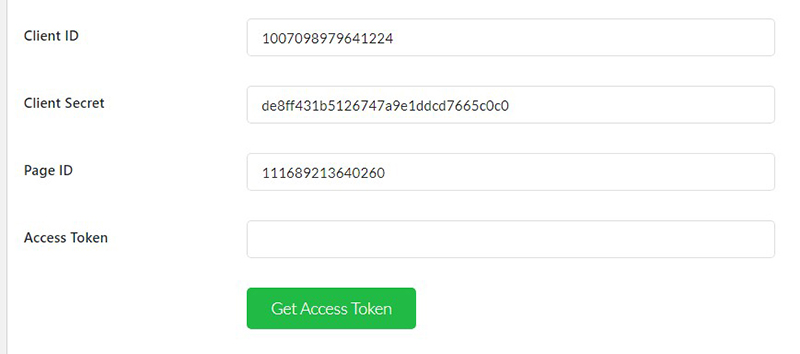
7. Click to Get Access Token > Save setting.
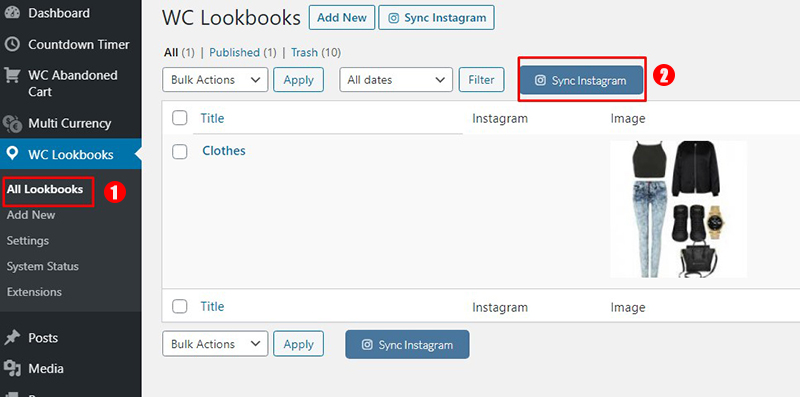
8. Go to All Lookbook/ Sync Instagram
Here is the guide video:
After creating your lookbooks, use the shortcode to display them on front-ends as a single lookbook image, gallery, carousel.
Single lookbook
[woocommerce_lookbook id='111']
Multiple lookbooks:
[woocommerce_lookbook_slide id=”123,456″ layout =”gallery”]
Argument id: Fill in lookbook IDs you want to display
Argument display: Add value “all” to display all available lookbooks
Argument layout: 2 layouts – Fill in value gallery or carousel
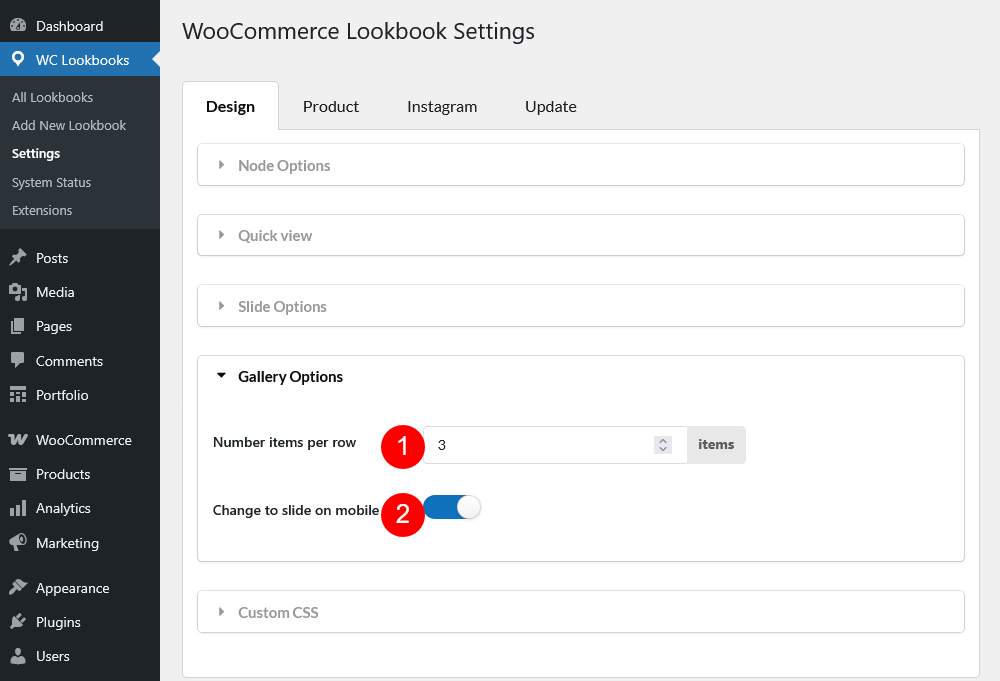
Argument gallery_to_slide: If 1, it’ll show gallery on desktop and slide on mobile, set 0 to disable this style
With Lookbooks made by Instagram sync, use these shortcodes instead:
Carousel of Instagram photos
[woocommerce_lookbook_instagram style='carousel' row='number' limit='x']
Gallery of Instagram photos
[woocommerce_lookbook_instagram style='gallery' row='number' limit='x']
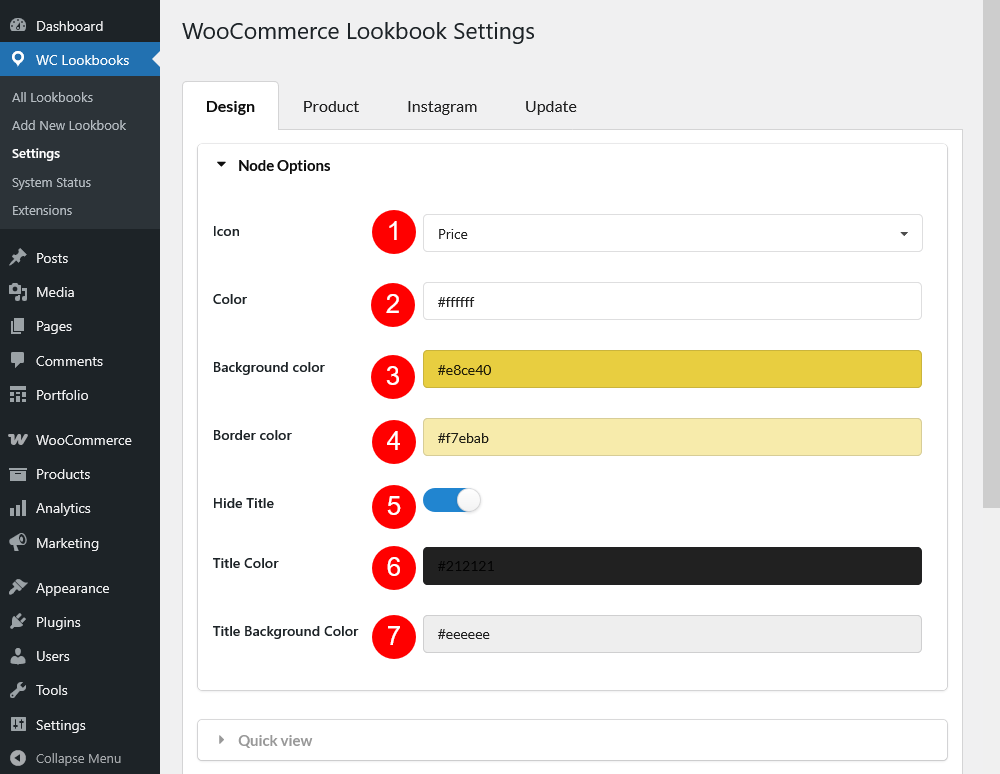
Go to Dashboard/Lookbooks/Settings/Design/Node Options to configure nodes settings
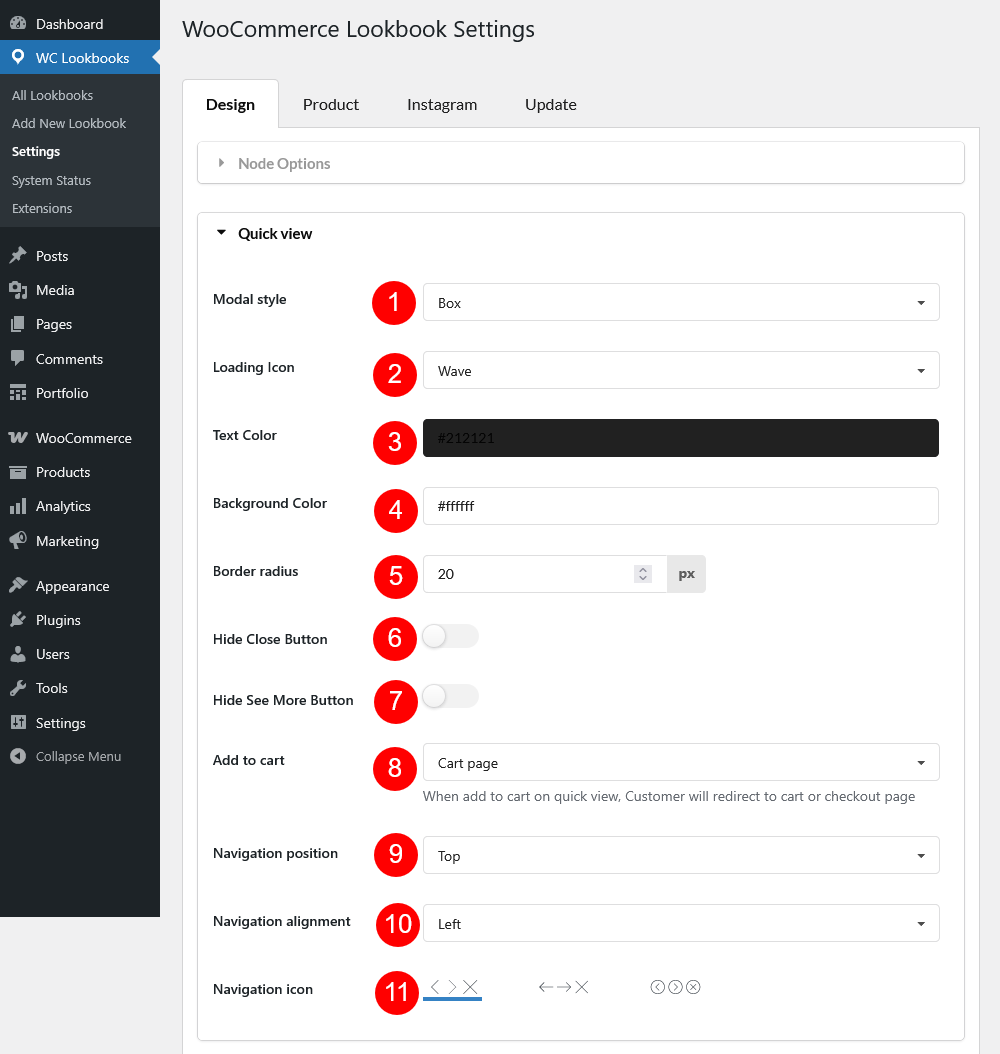
Go to Dashboard/Lookbooks/Settings/Design/Quick view to configure quick view settings
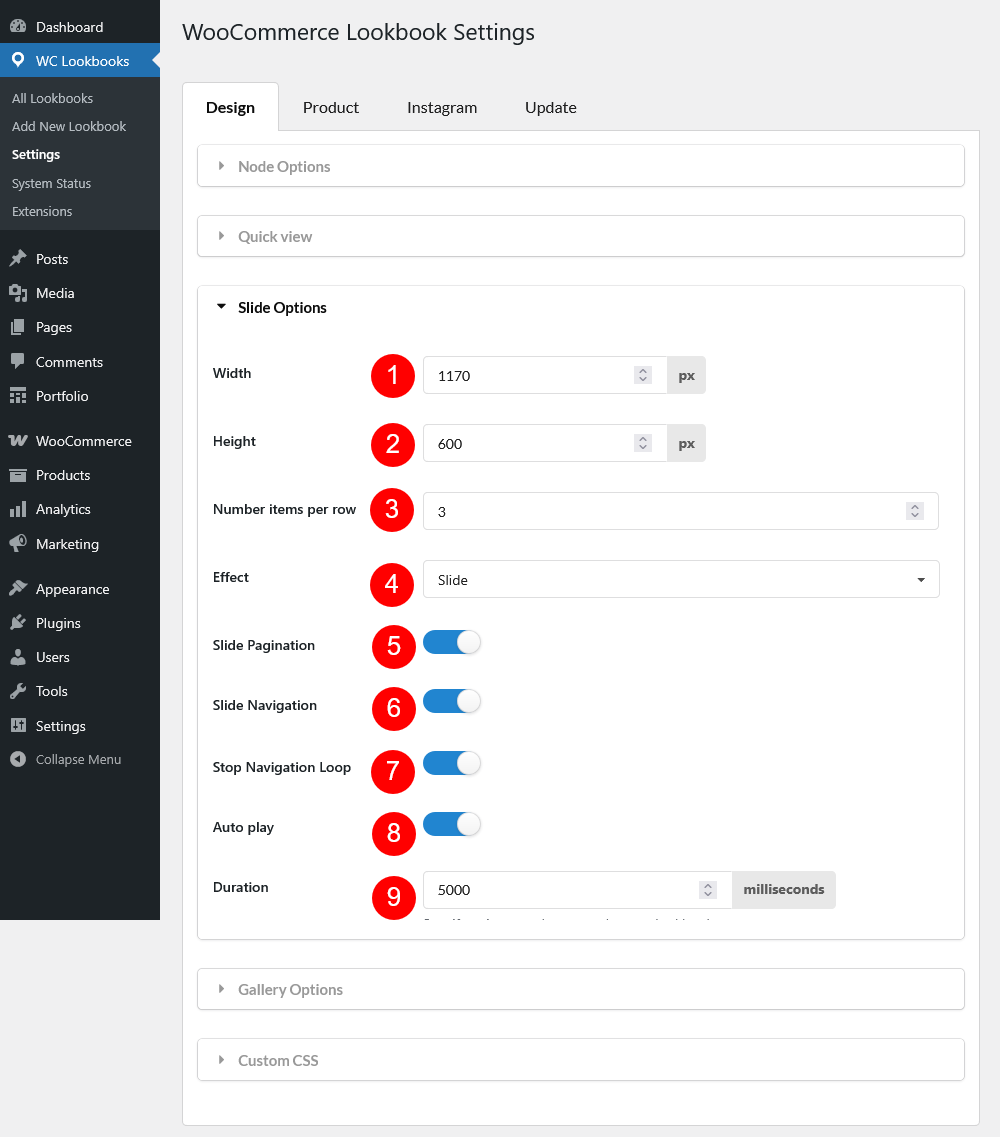
Go to Dashboard/Lookbooks/Settings/Design/Slide Options to configure slide settings
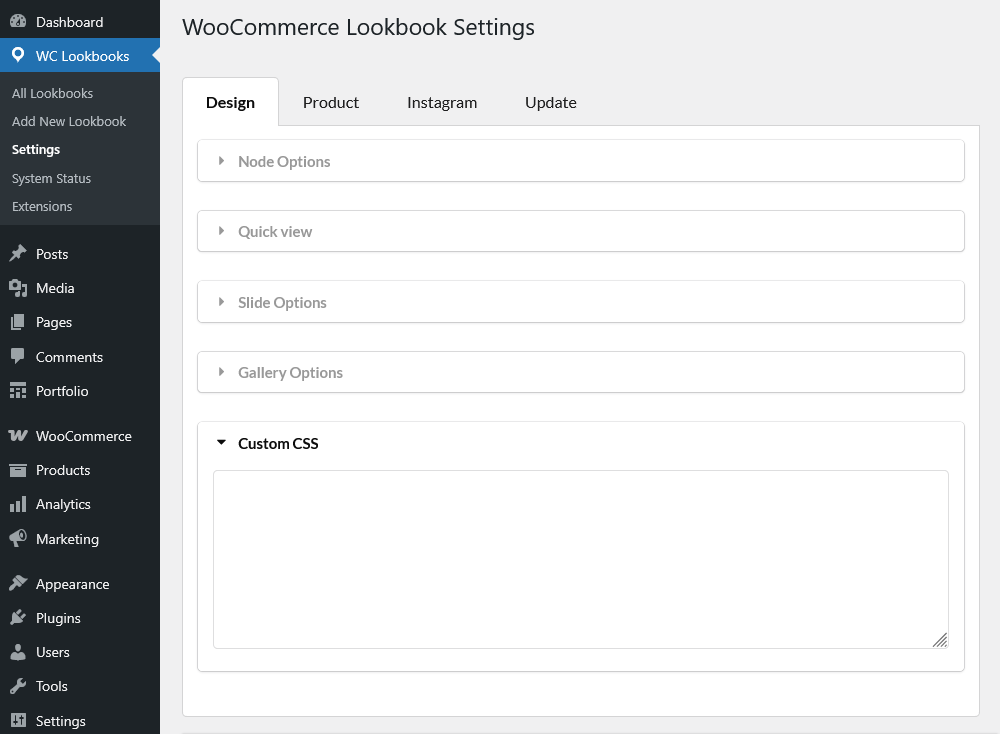
Add your own CSS to design the look as you want.
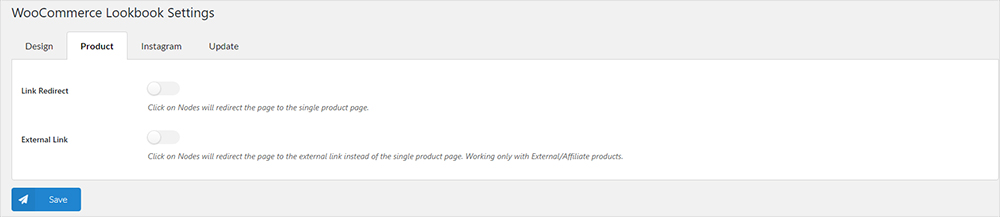
Link Redirect: If this option is enabled, clicking on nodes will redirect the page to the single product page.
External Link: If this option is enabled, clicking on nodes will redirect the page to the external link. This option only works with External/Affiliate products.
In Instagram tab, you can configure how WC Lookbook connect with Instagram. The Instagram integration feature allows you to import your Instagram images and turn them into interactive LookBooks. To set this up, navigate to Dashboard > WC LookBook > Settings >> Instagram settings
The settings are divided into two sections: General and Synchronization.

Fill in your Envato purchase code to auto-update the lookbook plugin right in your Dashboard.
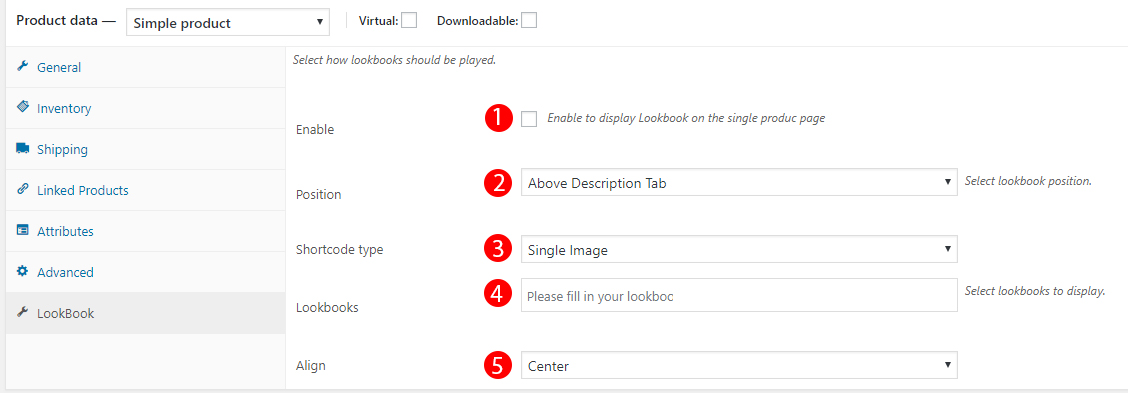
Go to any single product page to configure lookbook on the page.