Copyright Villatheme 2015-2026
Created: 07/2019
Latest updated: 01/2026- Updated version: 1.0.0
By: VillaTheme
Thank you for purchasing our plugin. If you have any questions that are beyond the scope of this documentation, please feel free to request support at our Support Forum. Thanks so much!
Required:
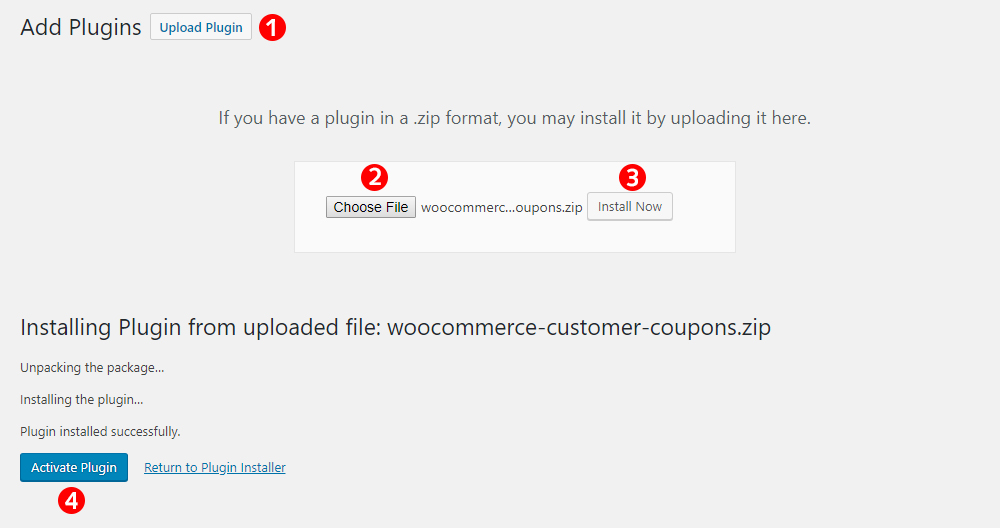
Go to Plugin/ Add New/ Upload Plugin/ Choose file/ select plugin installable file /Install Now/ Active Plugin
Take a look at this tutorial
The Customer Coupon plugin extends WooCommerce coupons with customer-specific rules, automatic display, email delivery, and advanced design options.
Follow the steps below to use the plugin effectively.
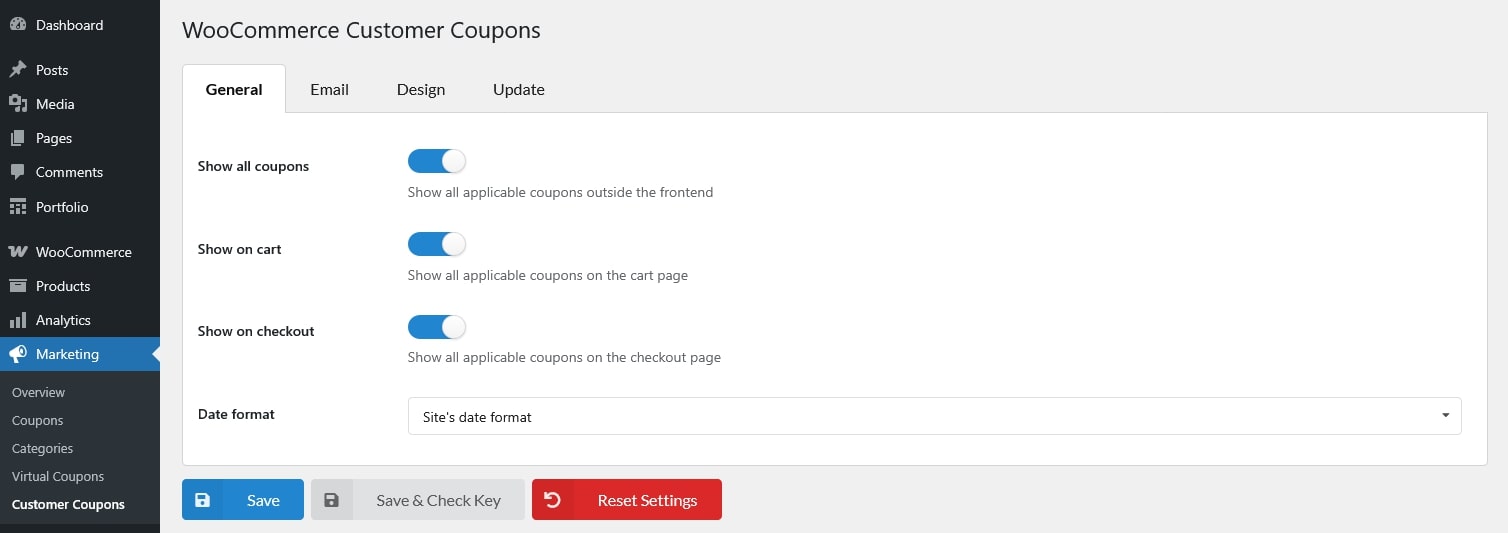
Step 1: Configure Global Plugin Settings
Go to Dashboard → Marketing → Customer Coupons → Settings.
Configure:
These settings act as global defaults for all coupons.
Step 2: Create or Edit a WooCommerce Coupon
Go to Dashboard → Marketing → Coupons. Click Add Coupon or edit an existing one.
Configure standard WooCommerce coupon settings:
Step 3: Configure Customer Coupon Settings
Inside the coupon edit page, configure the additional sections added by the plugin:
Customer Coupon
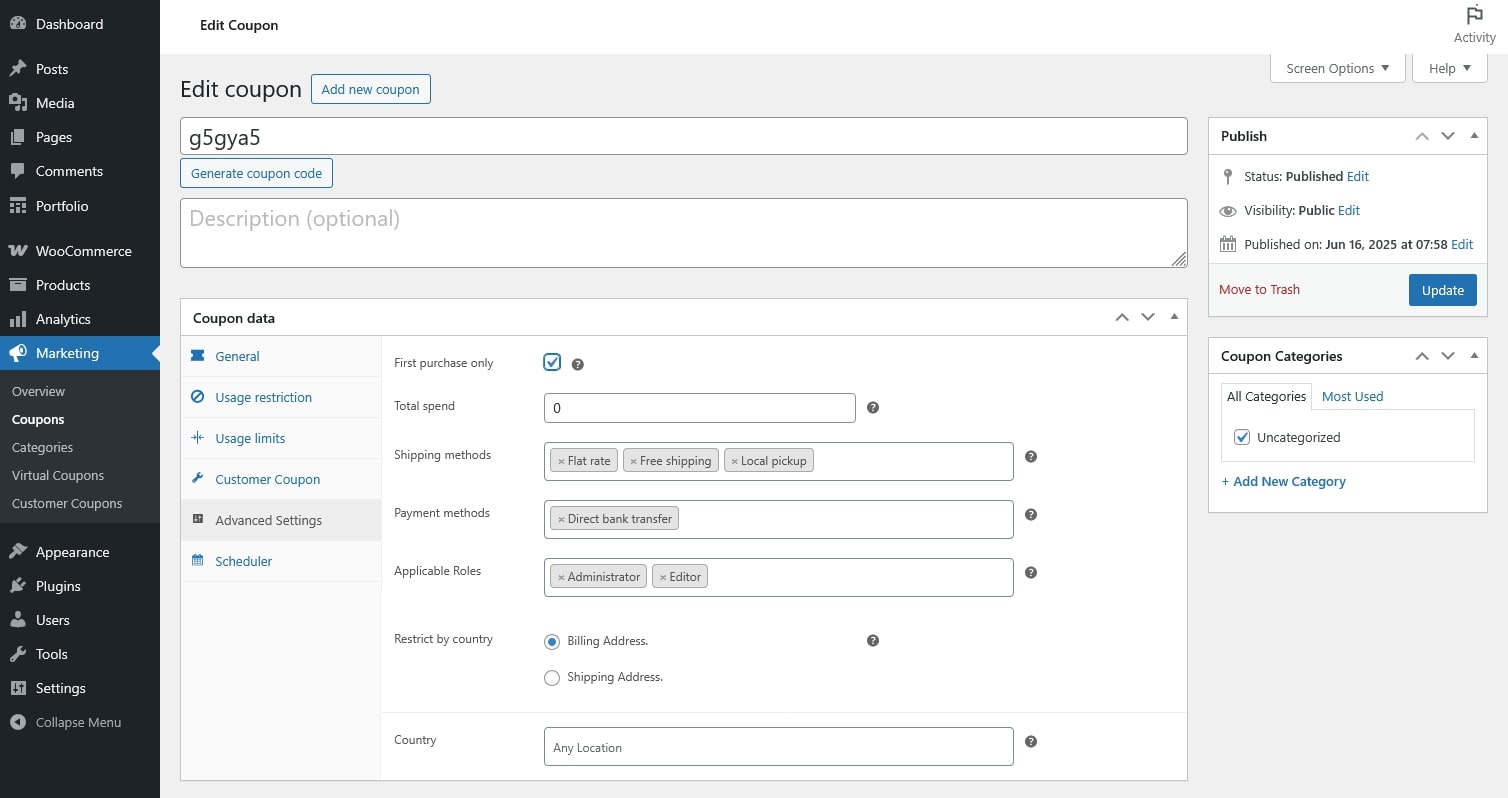
Advanced Settings
Restrict coupon usage by:
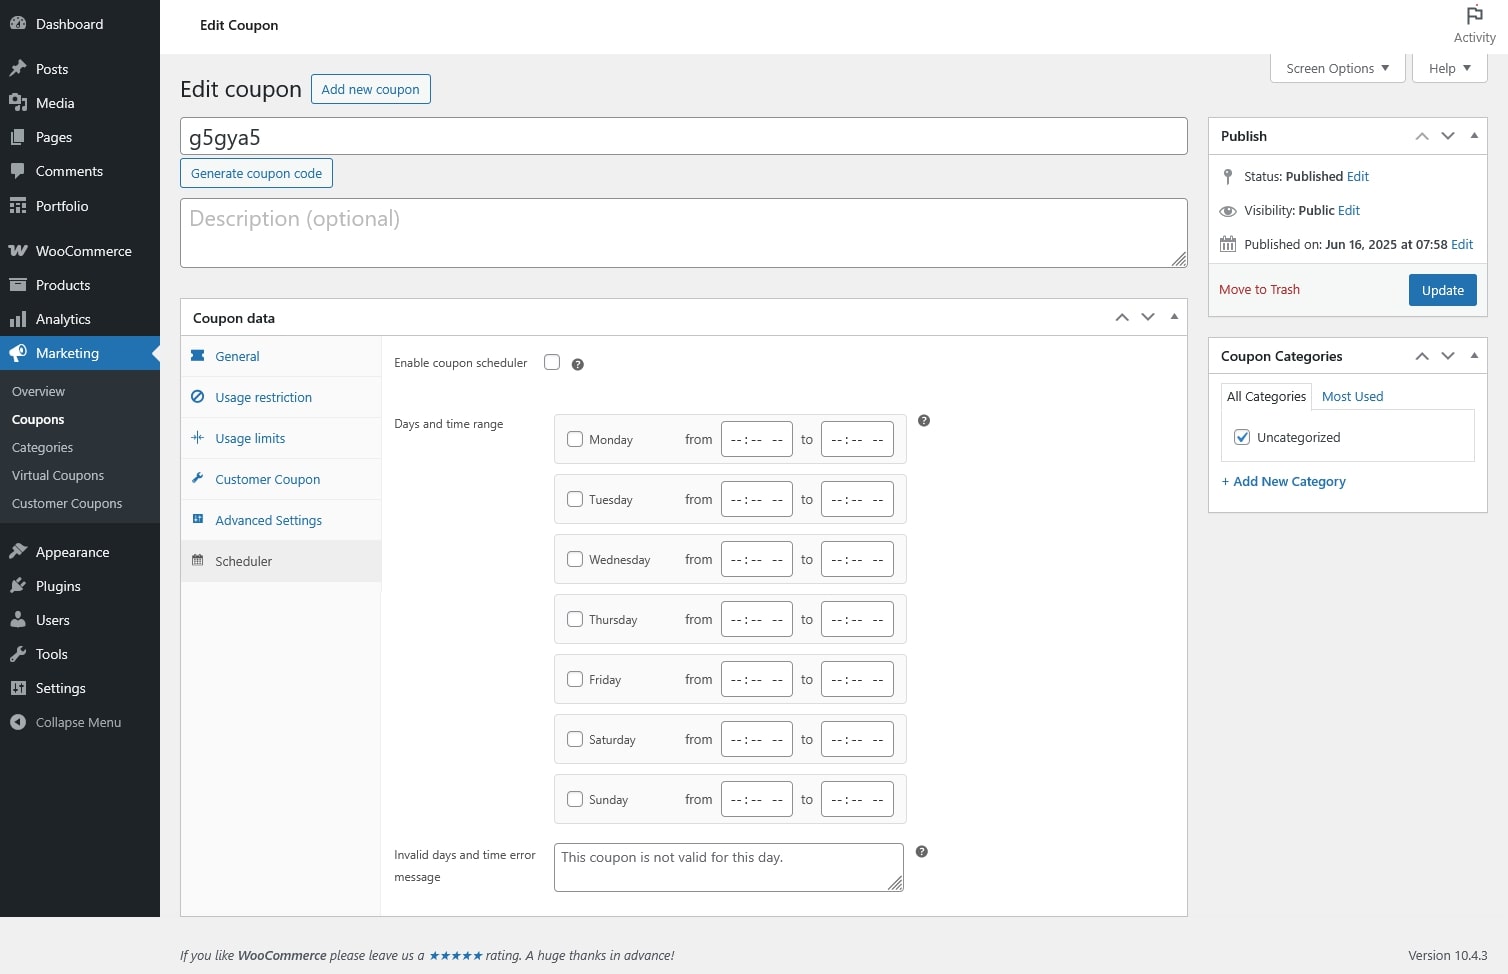
Scheduler
Set specific days and time ranges when the coupon is valid
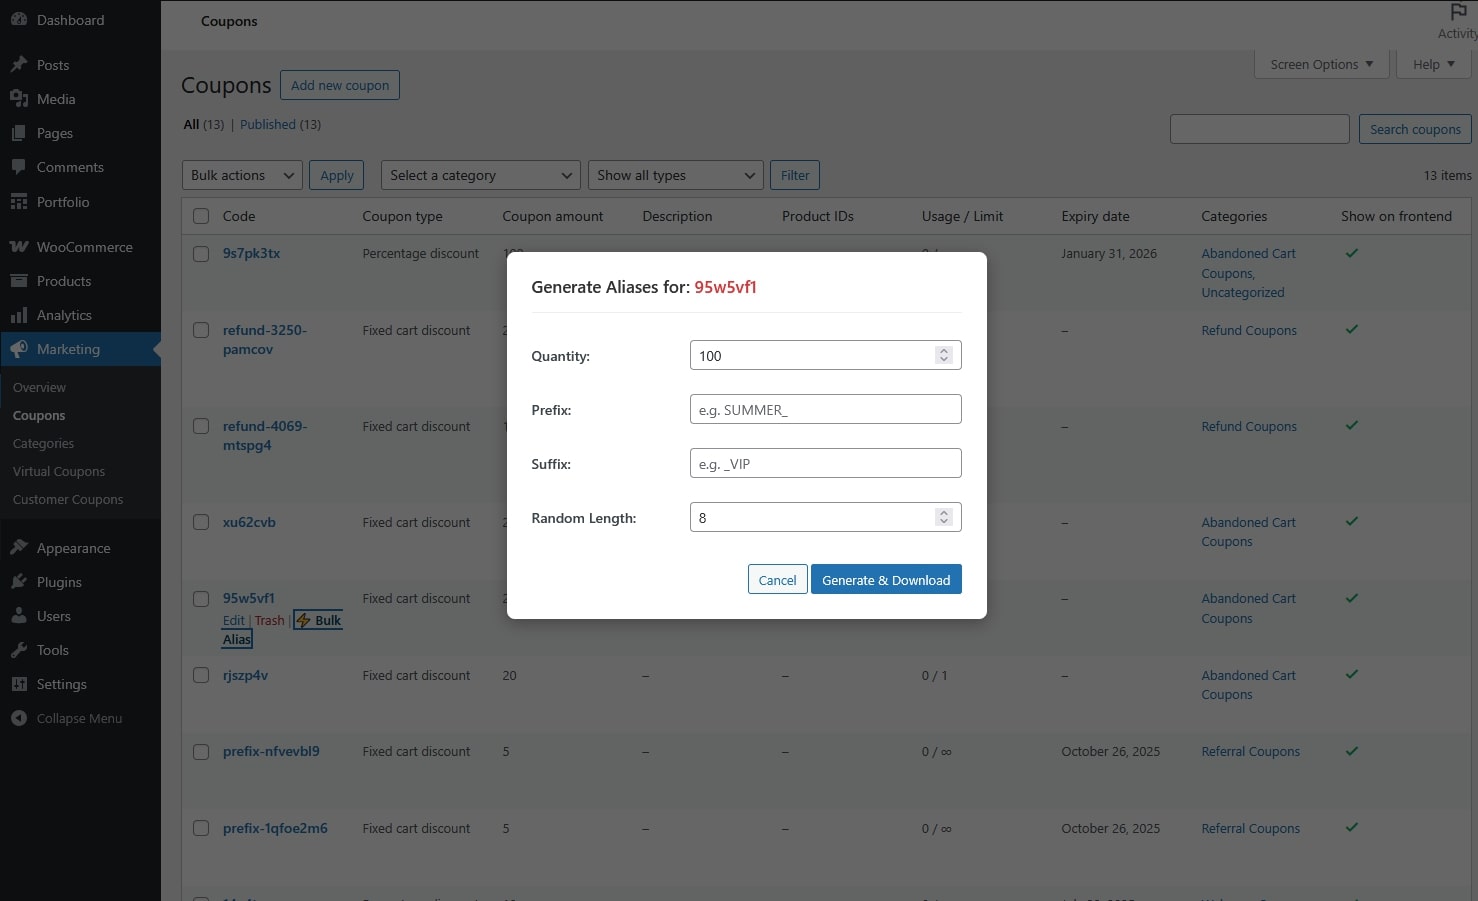
Step 4: (Optional) Generate Virtual Coupons
Use this feature when you need unique, one-time coupon codes.
The generated virtual coupons:
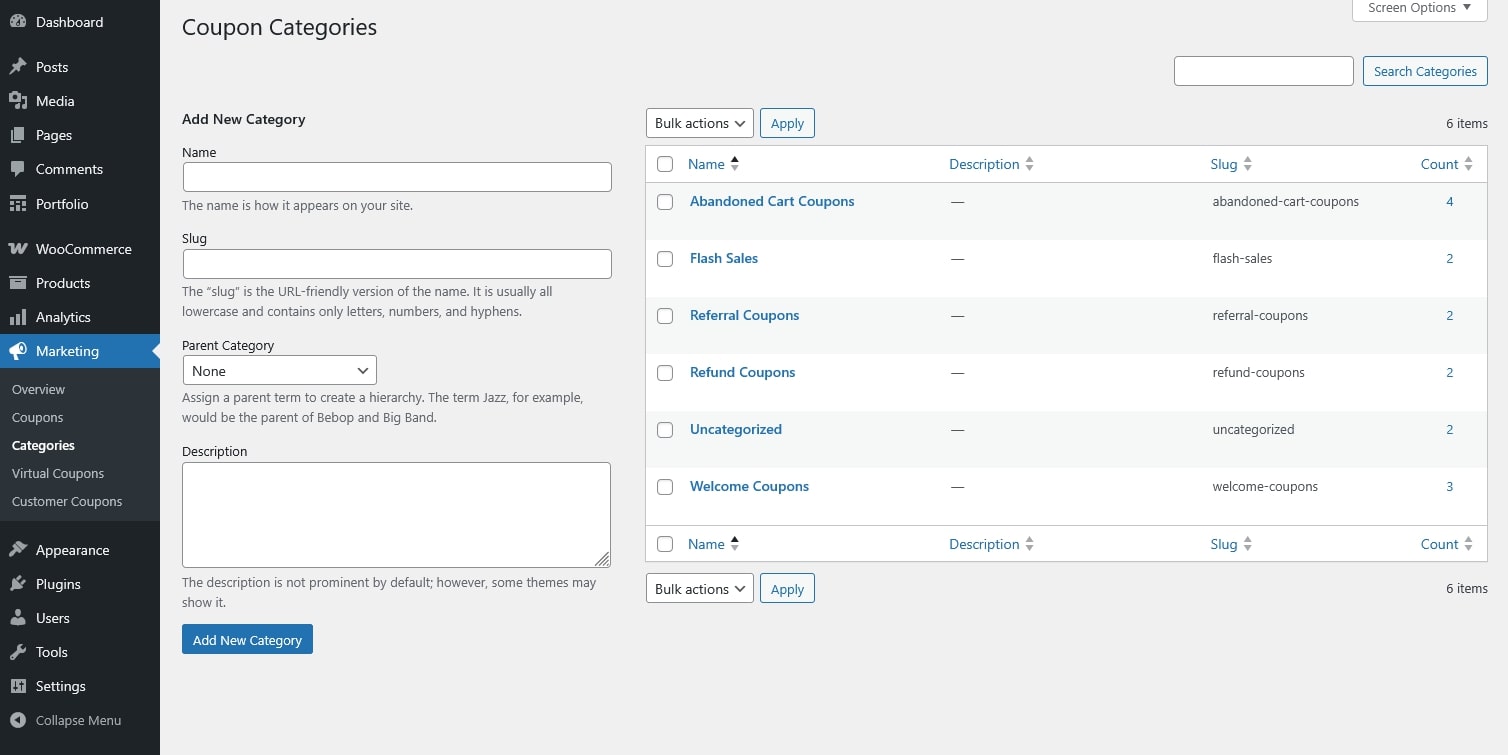
Step 5: Categorize Coupons (Recommended)
Categories help you organize coupons and do not affect discount behavior.
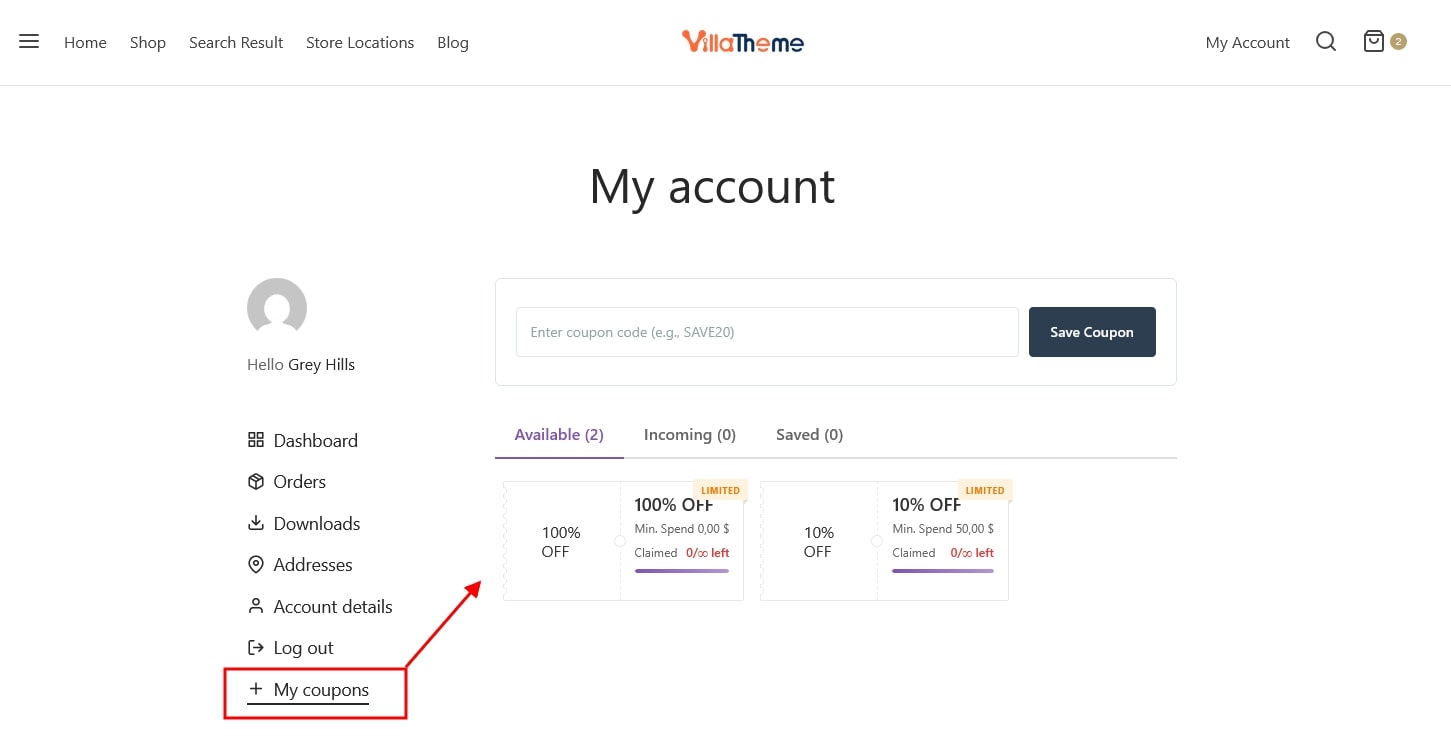
Step 6: Display Coupons on the Frontend
Depending on your settings, coupons can be shown via:
You can control visibility globally or per coupon.
Step 7: Send Coupons to Customers
Coupons can be shared by:
Customers can apply coupons at checkout like standard WooCommerce coupons.
Virtual Coupons (generated via Bulk Alias) are single-use coupon codes created from an existing coupon.
All settings are inherited from the original (parent) coupon.
Steps
That’s it. The virtual coupons are now created.
After Creation
The generated coupons:
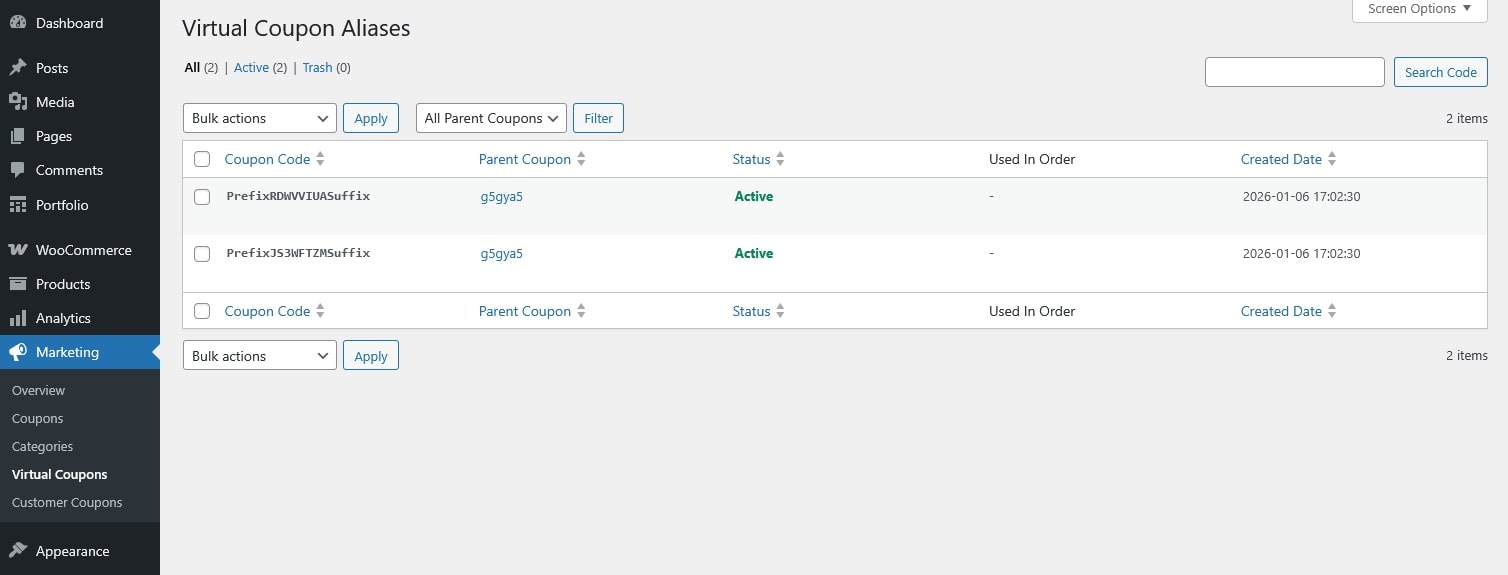
The admin only needs to send the generated coupon code(s) to customers.
Customers can apply the received code at checkout like a normal coupon.
Coupon categories help you organize and manage coupons more easily. They do not affect how discounts are applied.
Step 1: Create Coupon Categories
You can create as many categories as needed.
Step 2: Assign a Category to a Coupon

Step 3: Manage Coupons by Category
Use categories to filter coupons in the coupon list.
Group coupons by purpose (marketing, refunds, one-time use, etc.).
Quickly find and manage coupons later.
These settings control how coupons are displayed across your store frontend.
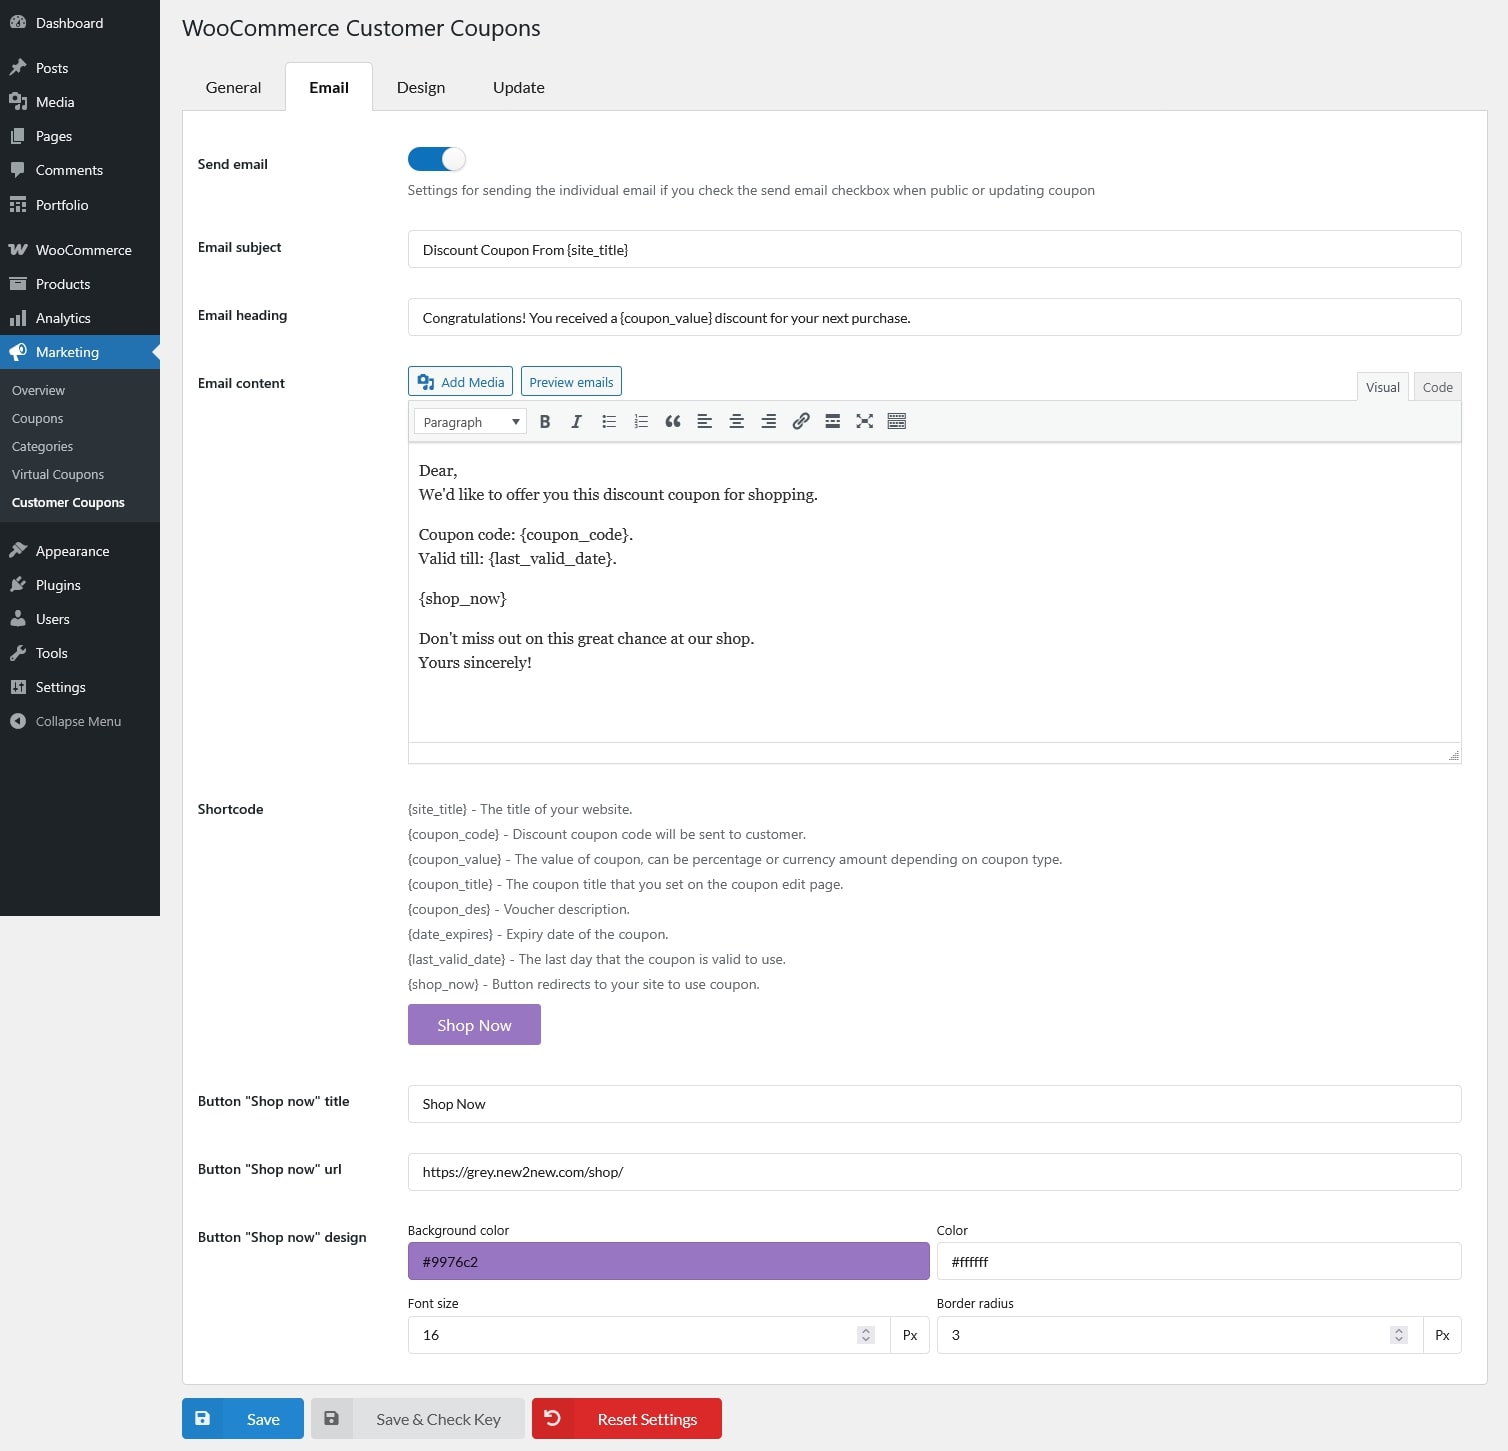
These settings control the email sent to customers when a coupon is published or updated with the “Send email” option enabled.
The Design settings allow you to control how coupons, badges, promotion messages, and the coupon bar appear on the frontend.
Changes are reflected in the live preview where available.
Coupons are shown on pages like:
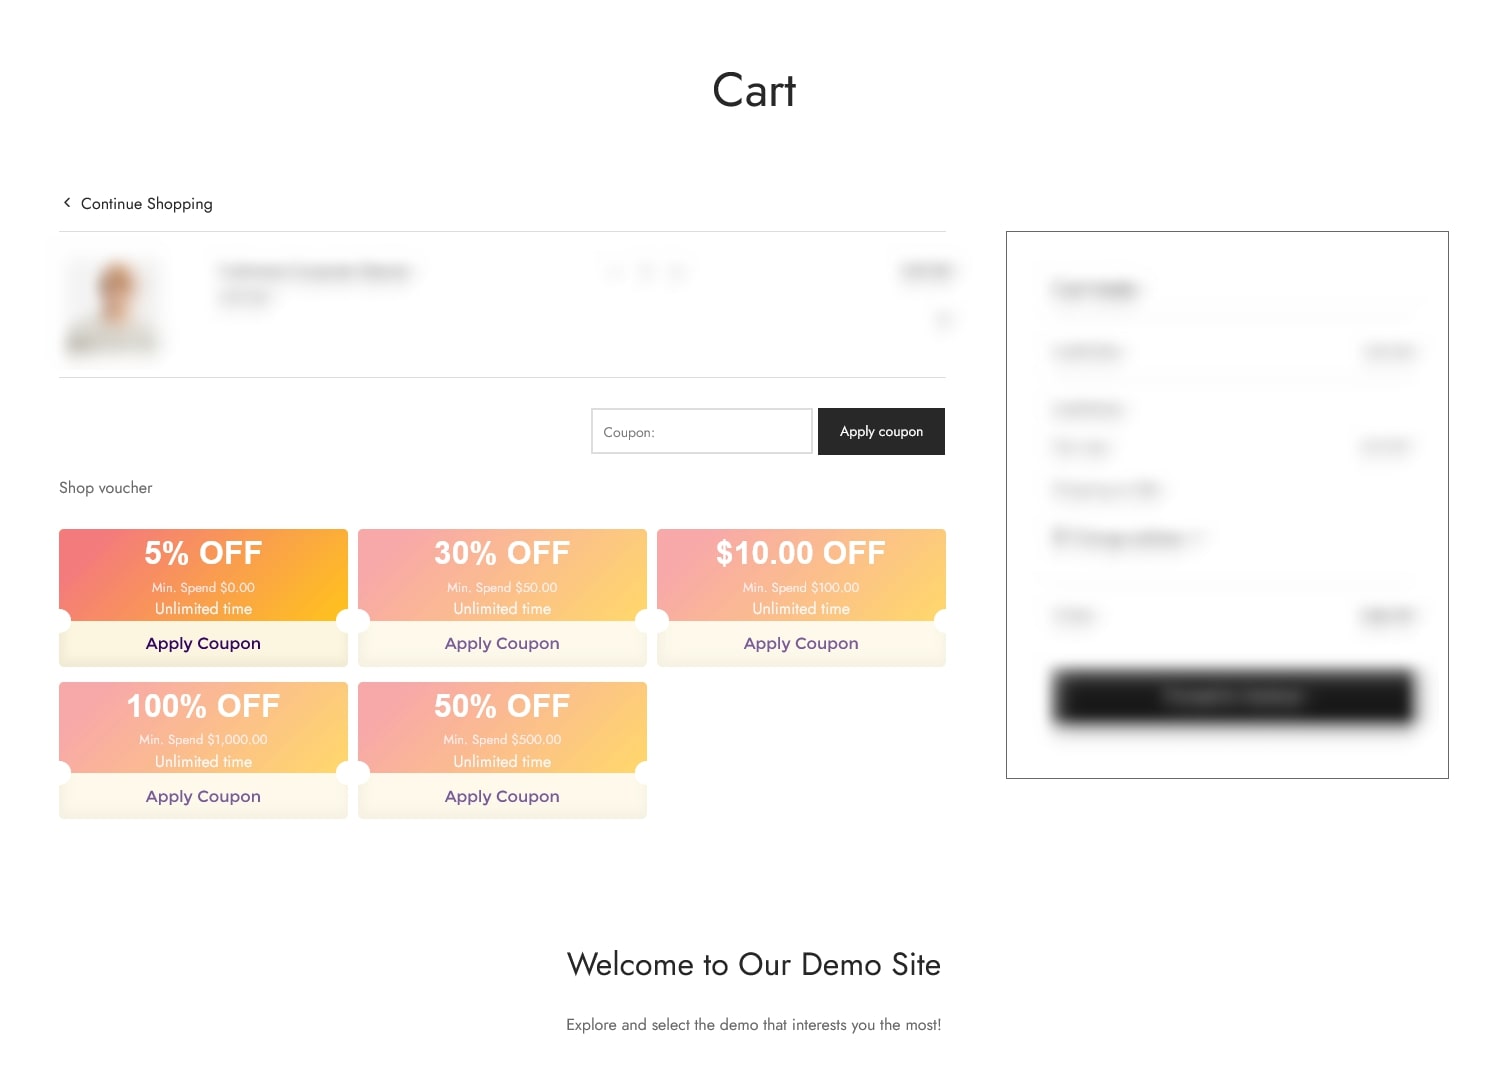
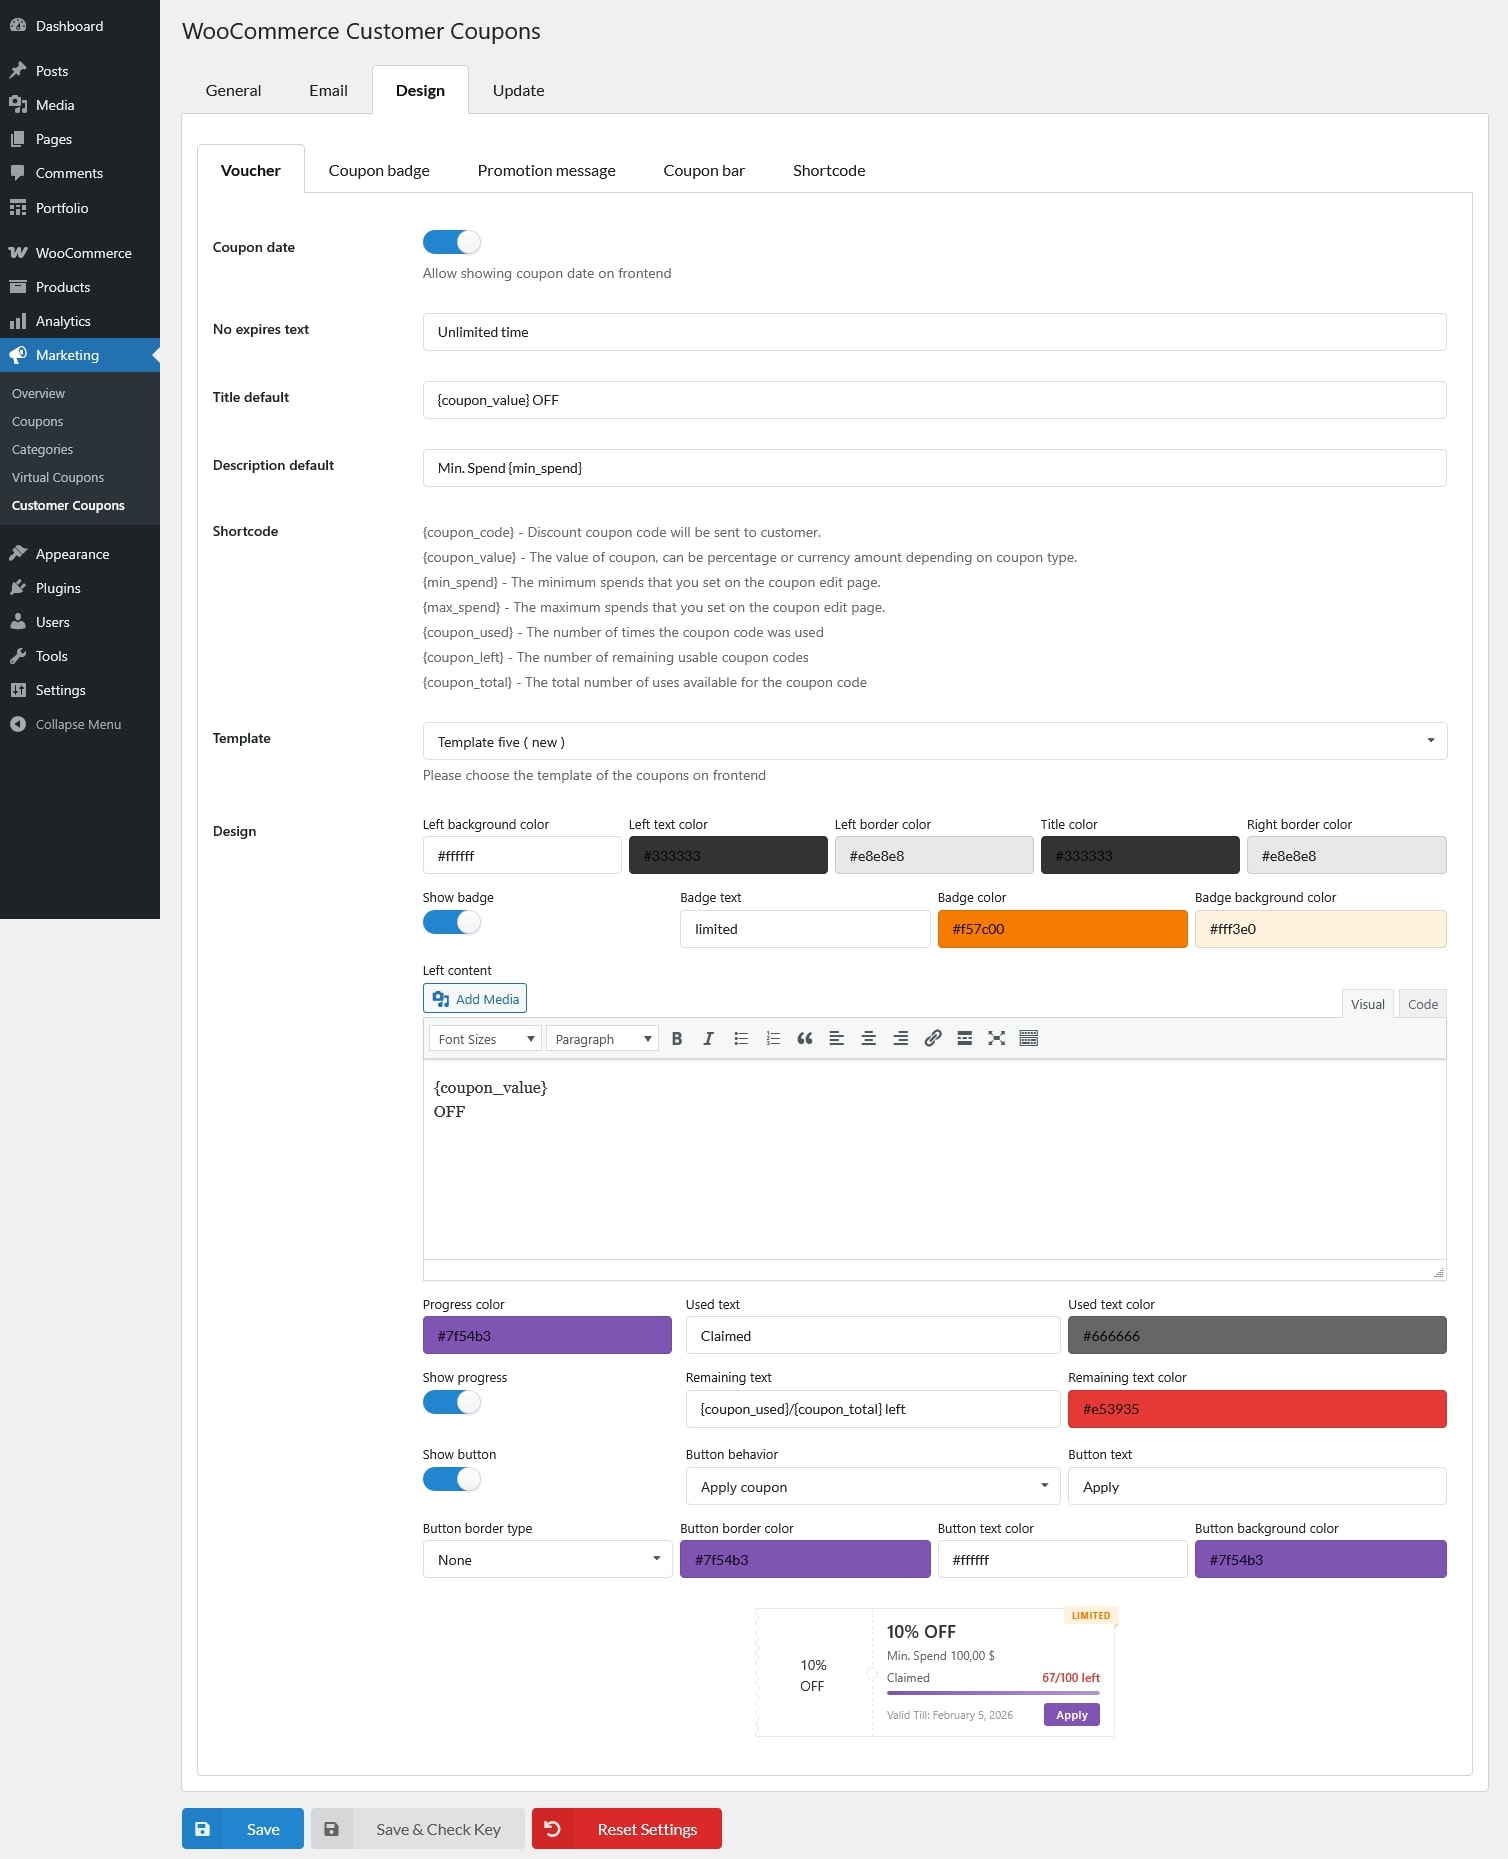
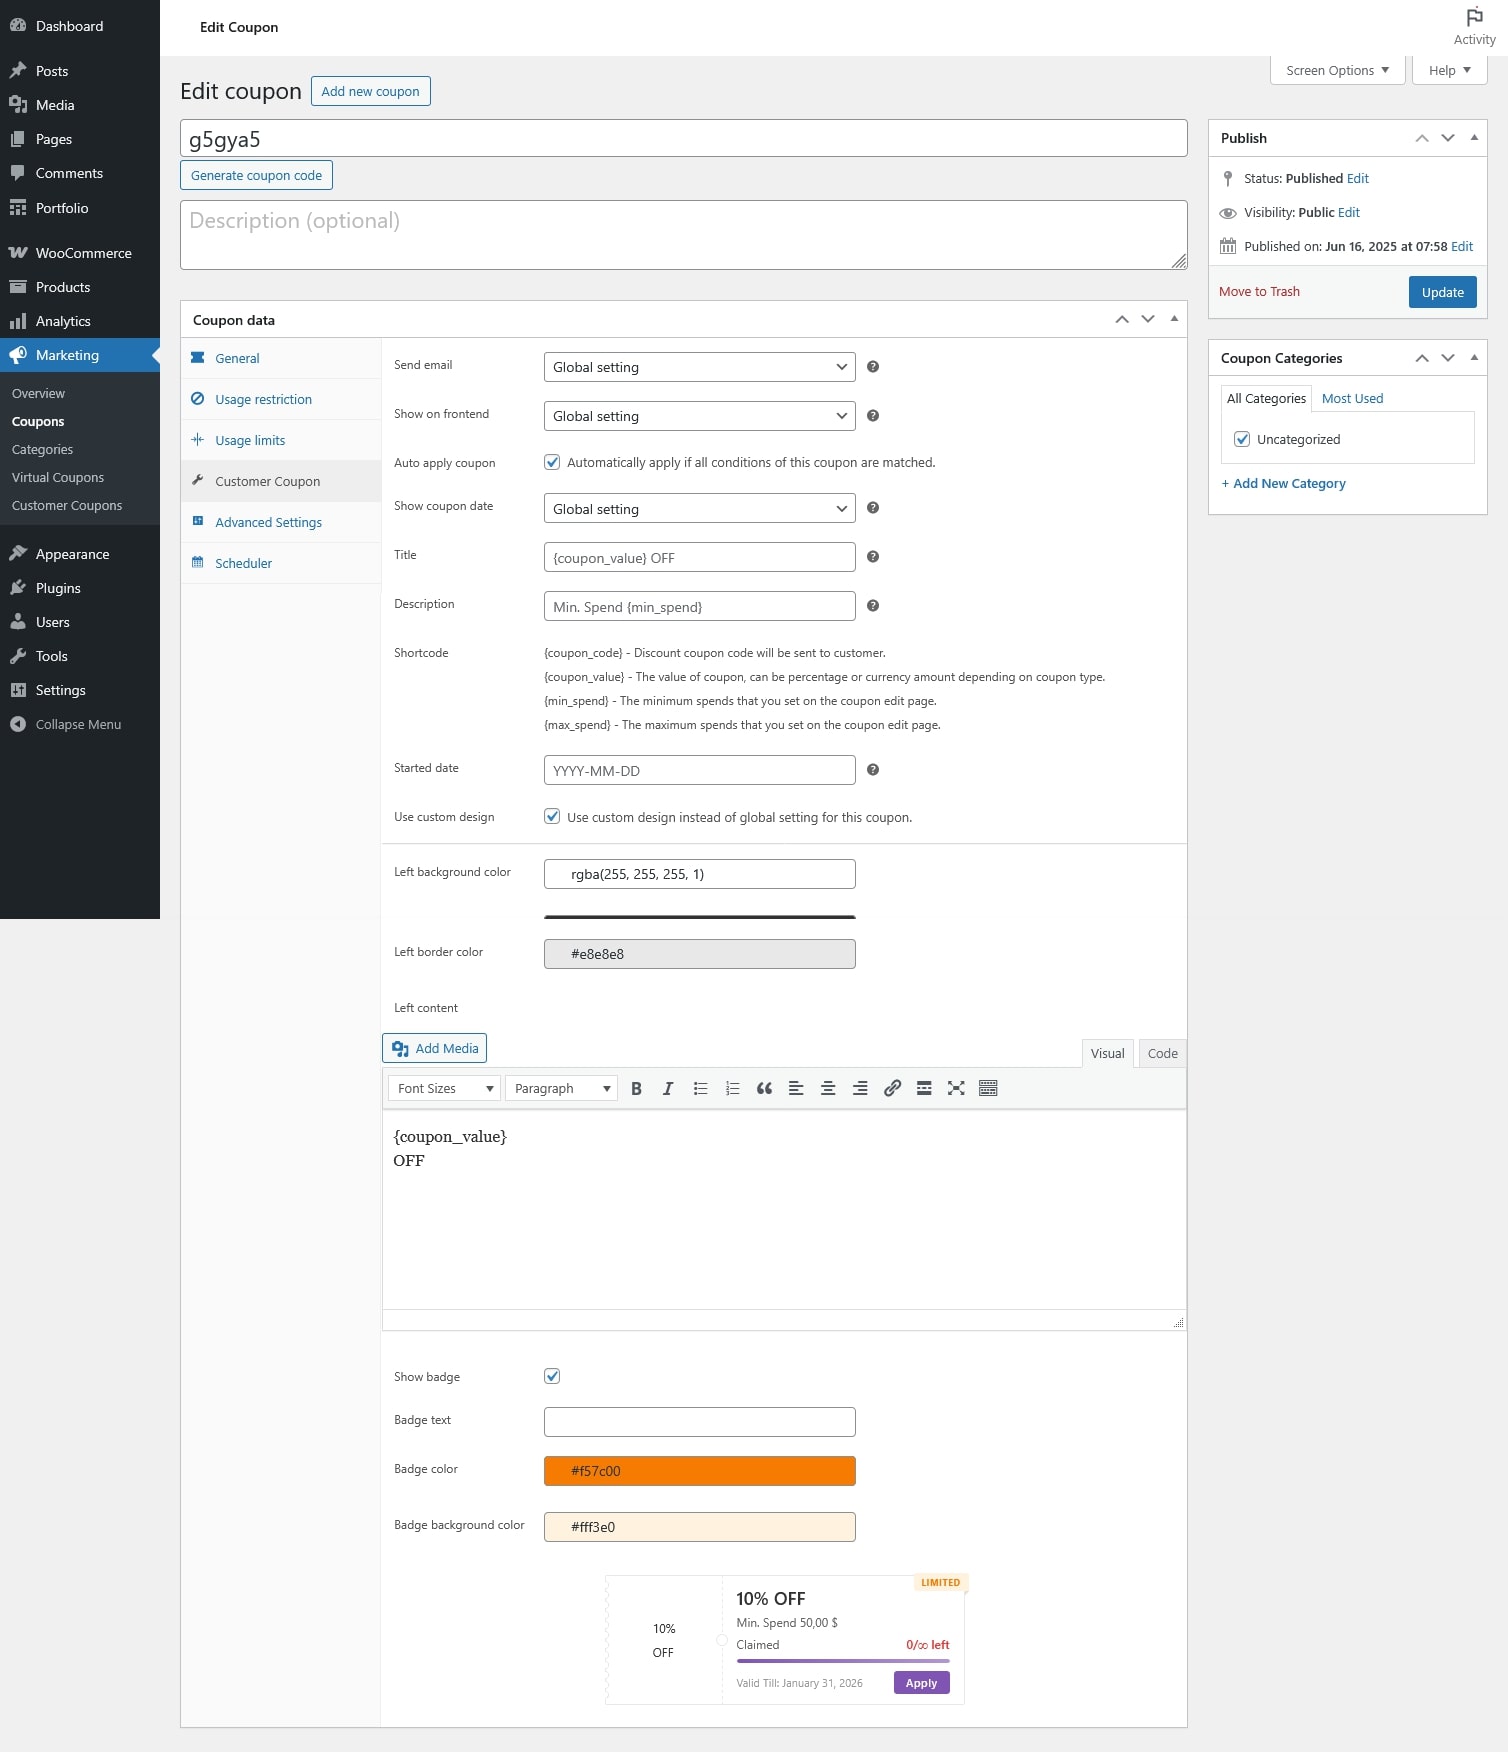
These settings control the visual appearance and content of coupon vouchers displayed to customers.

Configure discount badges shown on product listing pages.
![]()
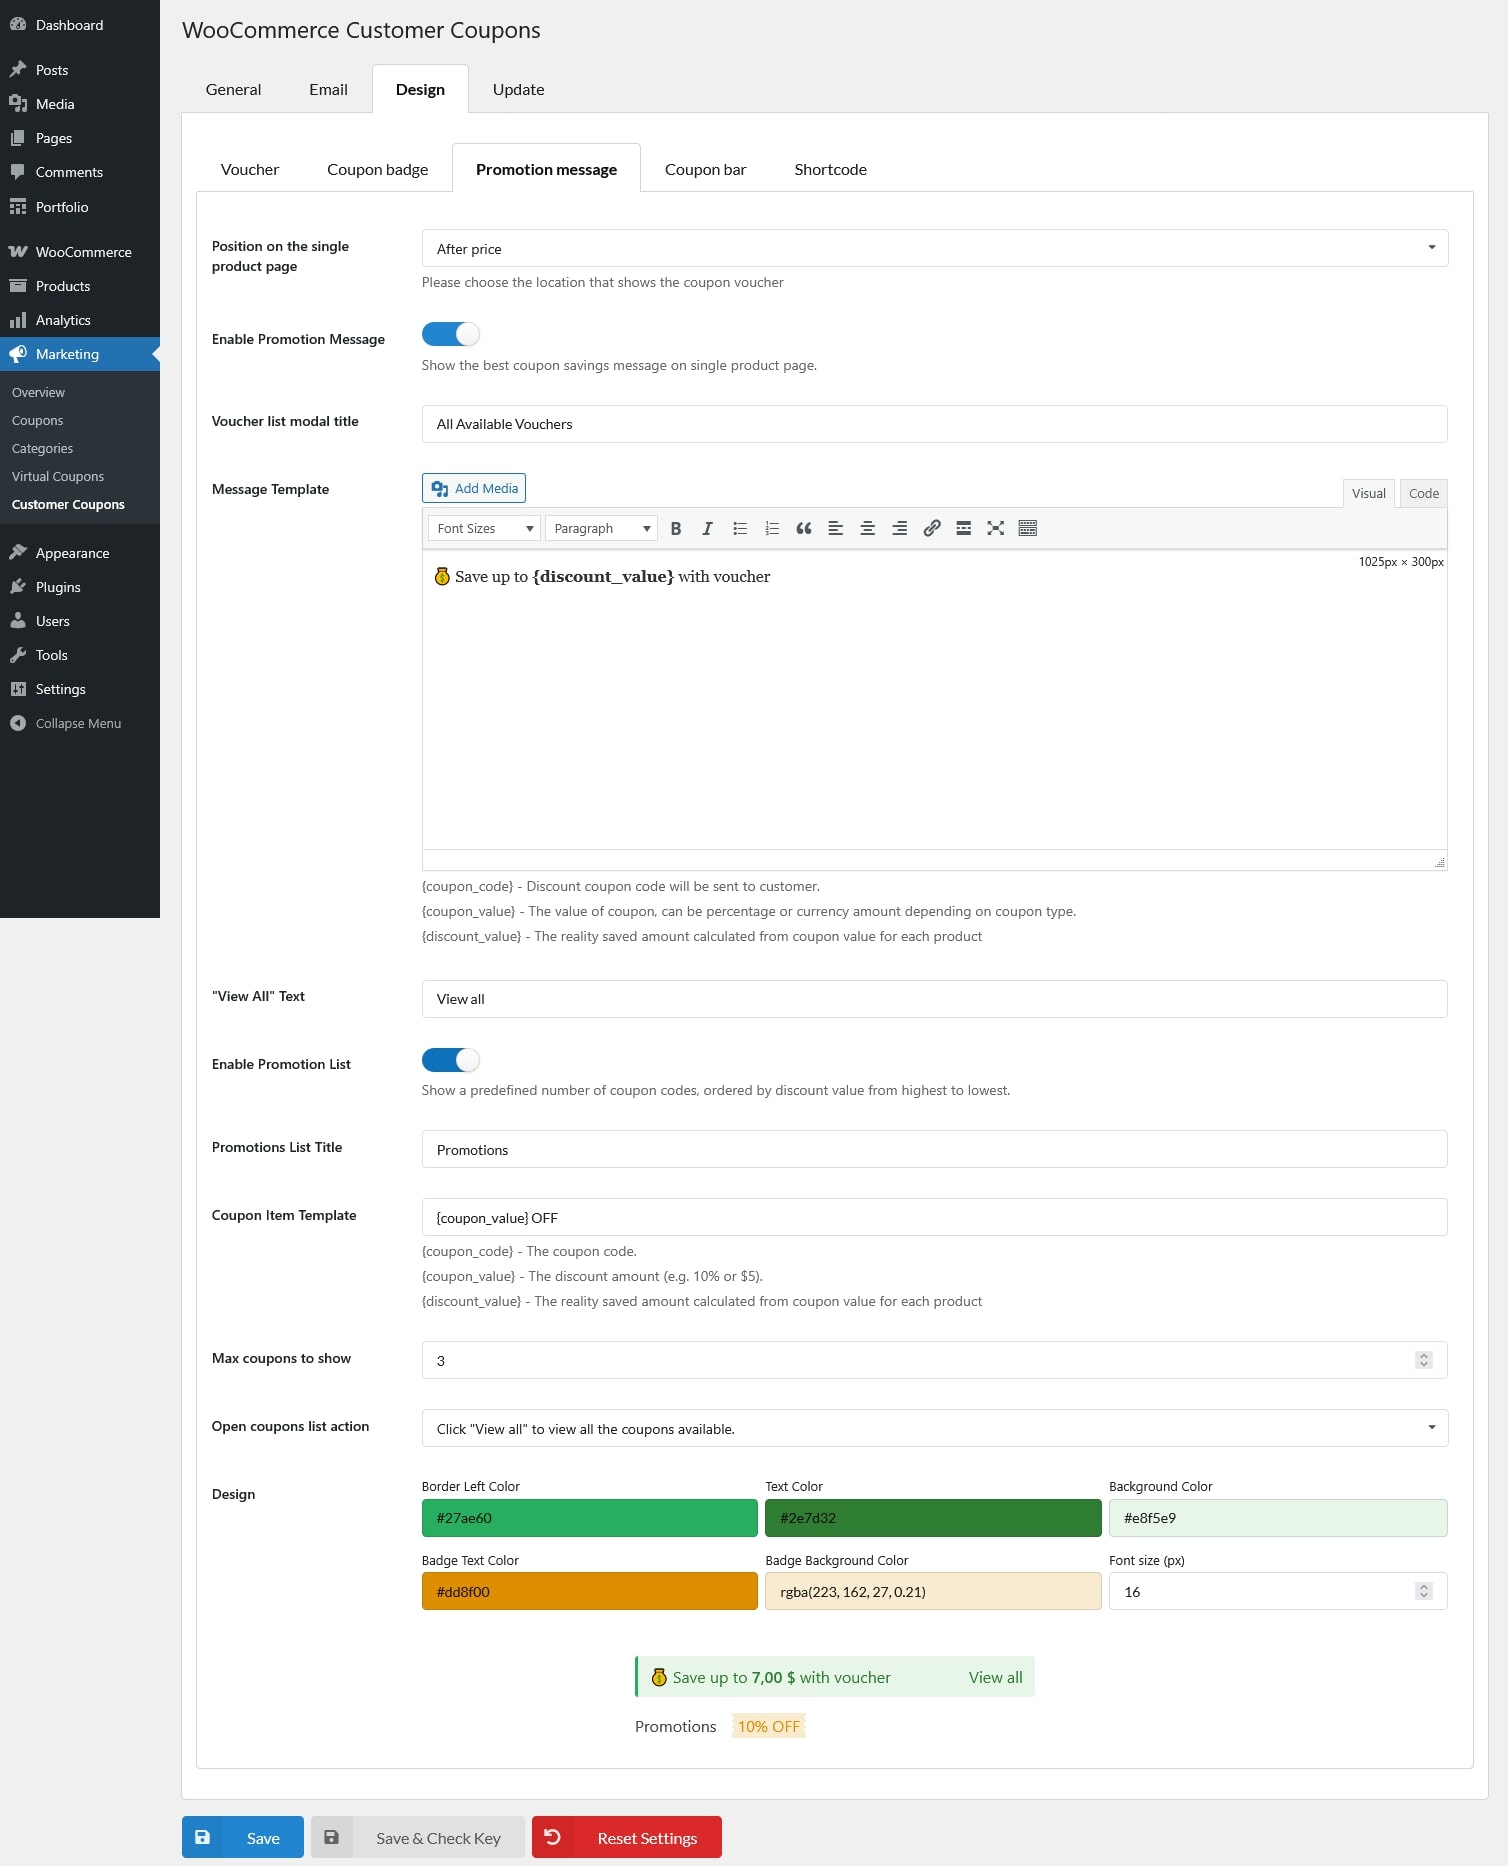
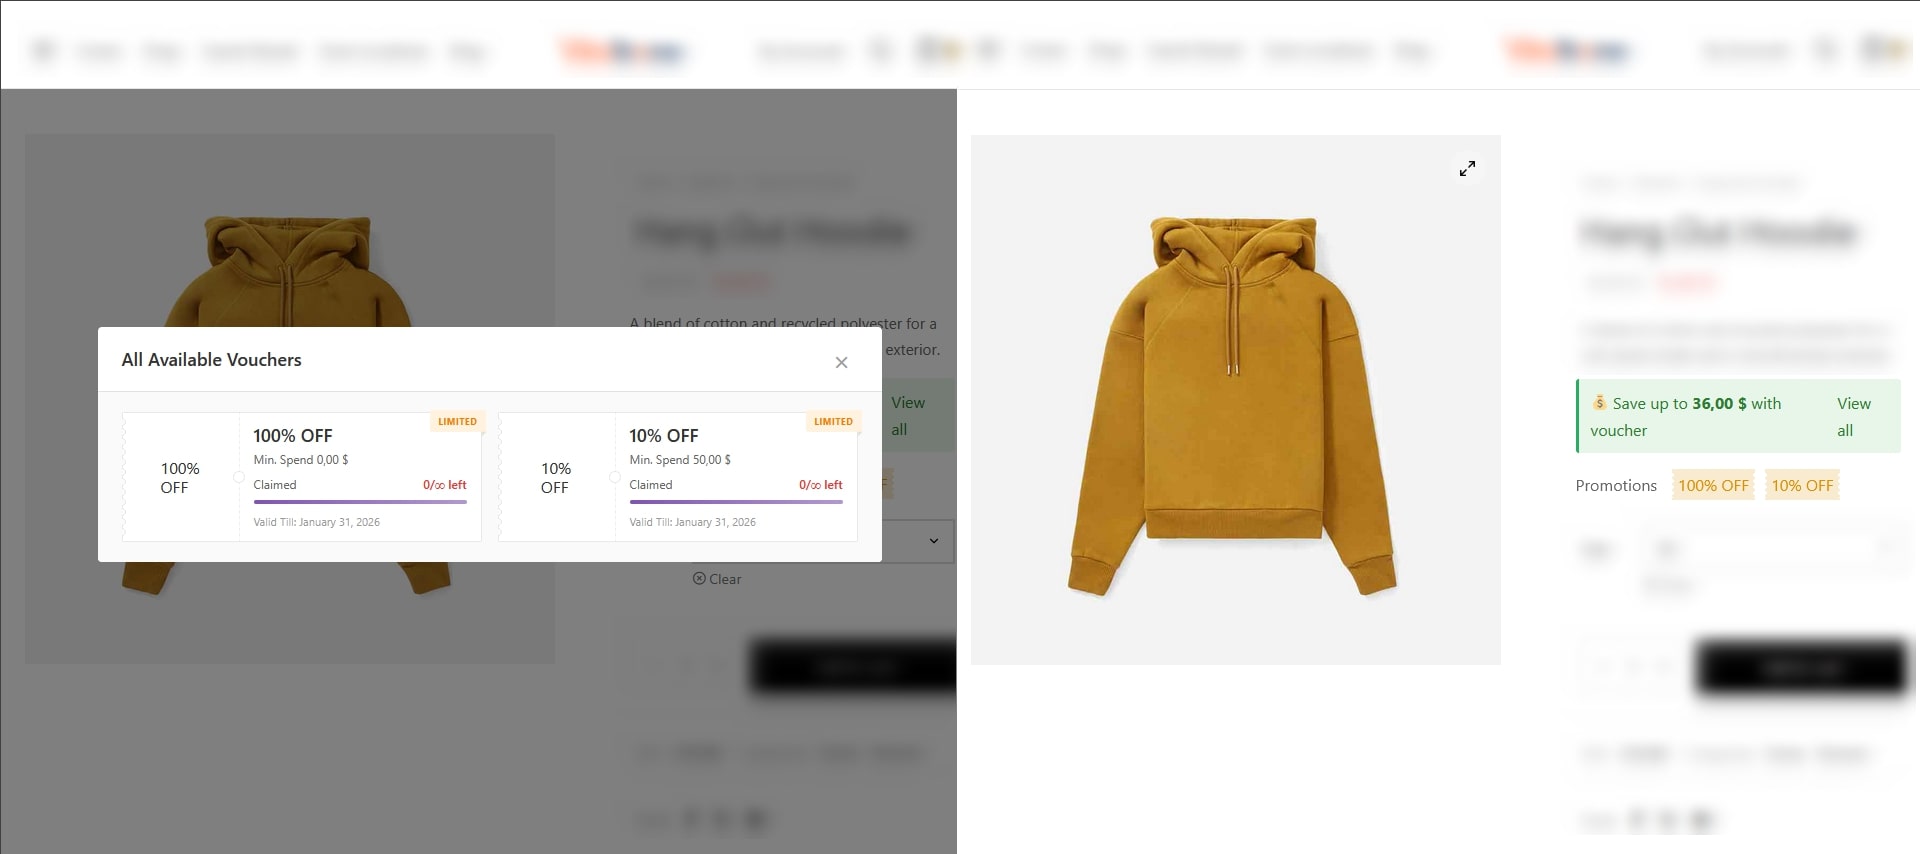
Control promotion message and/or promotion list shown on single product pages.
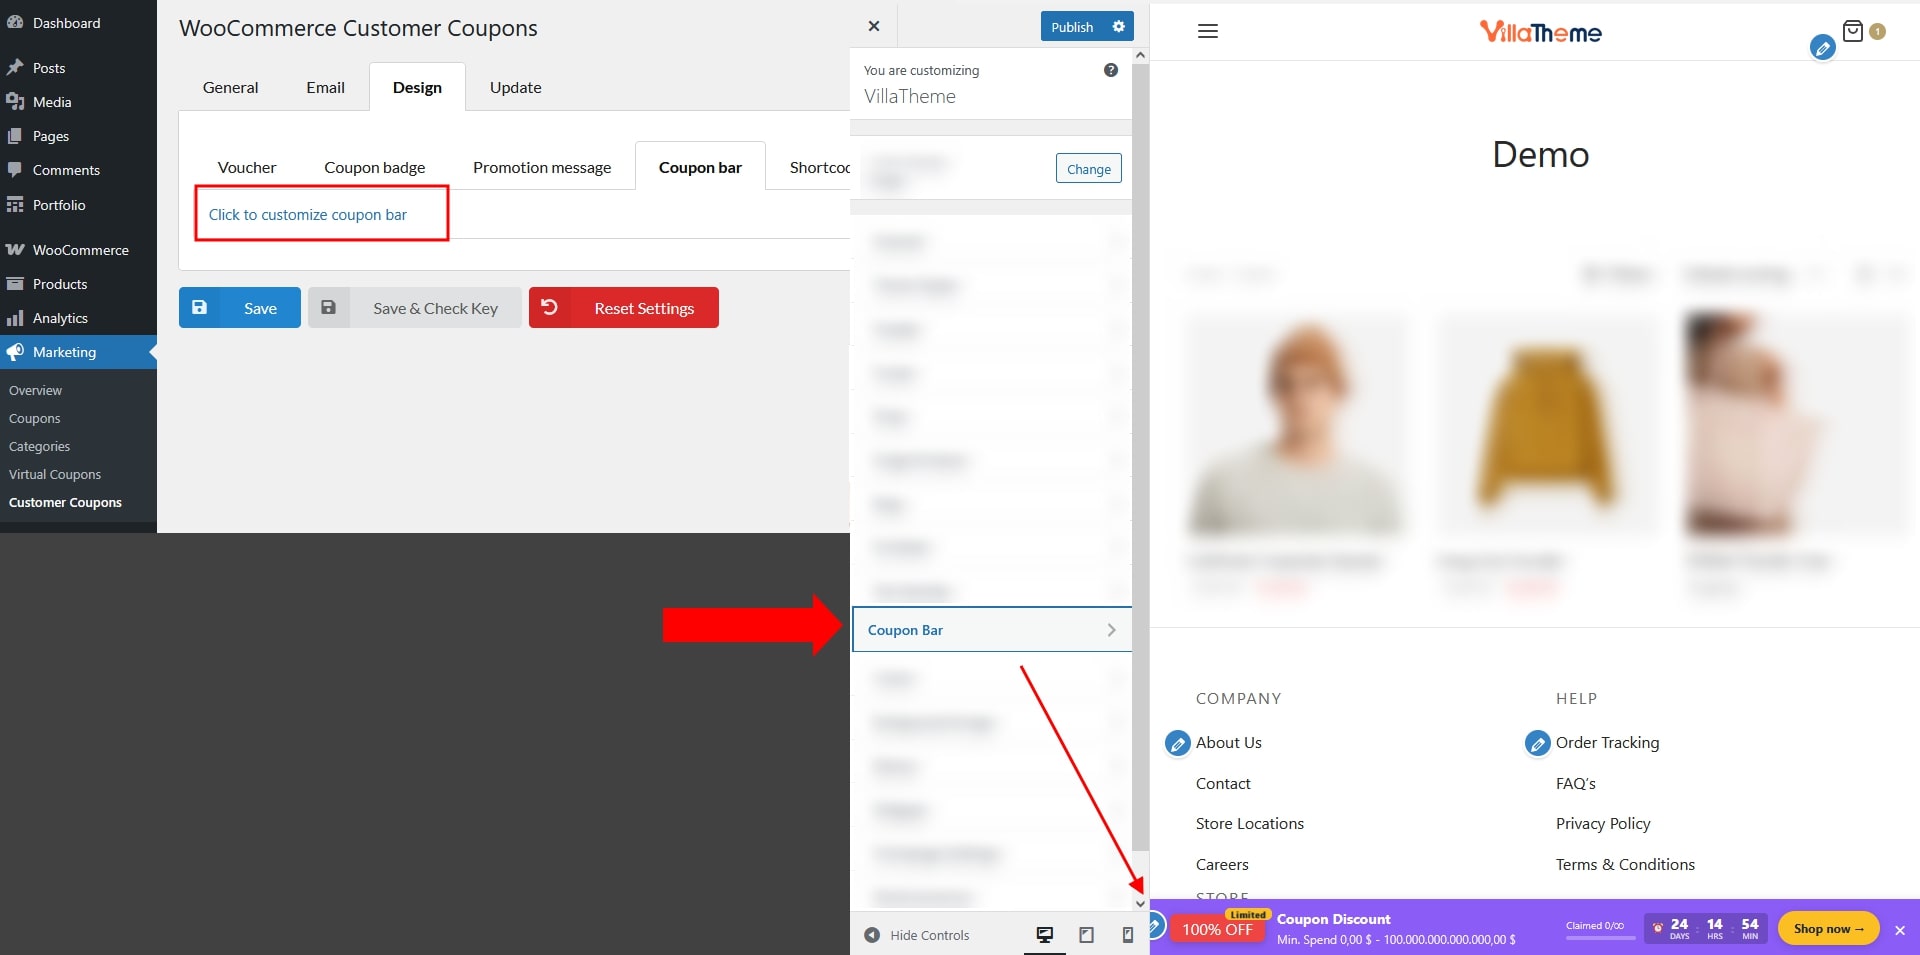
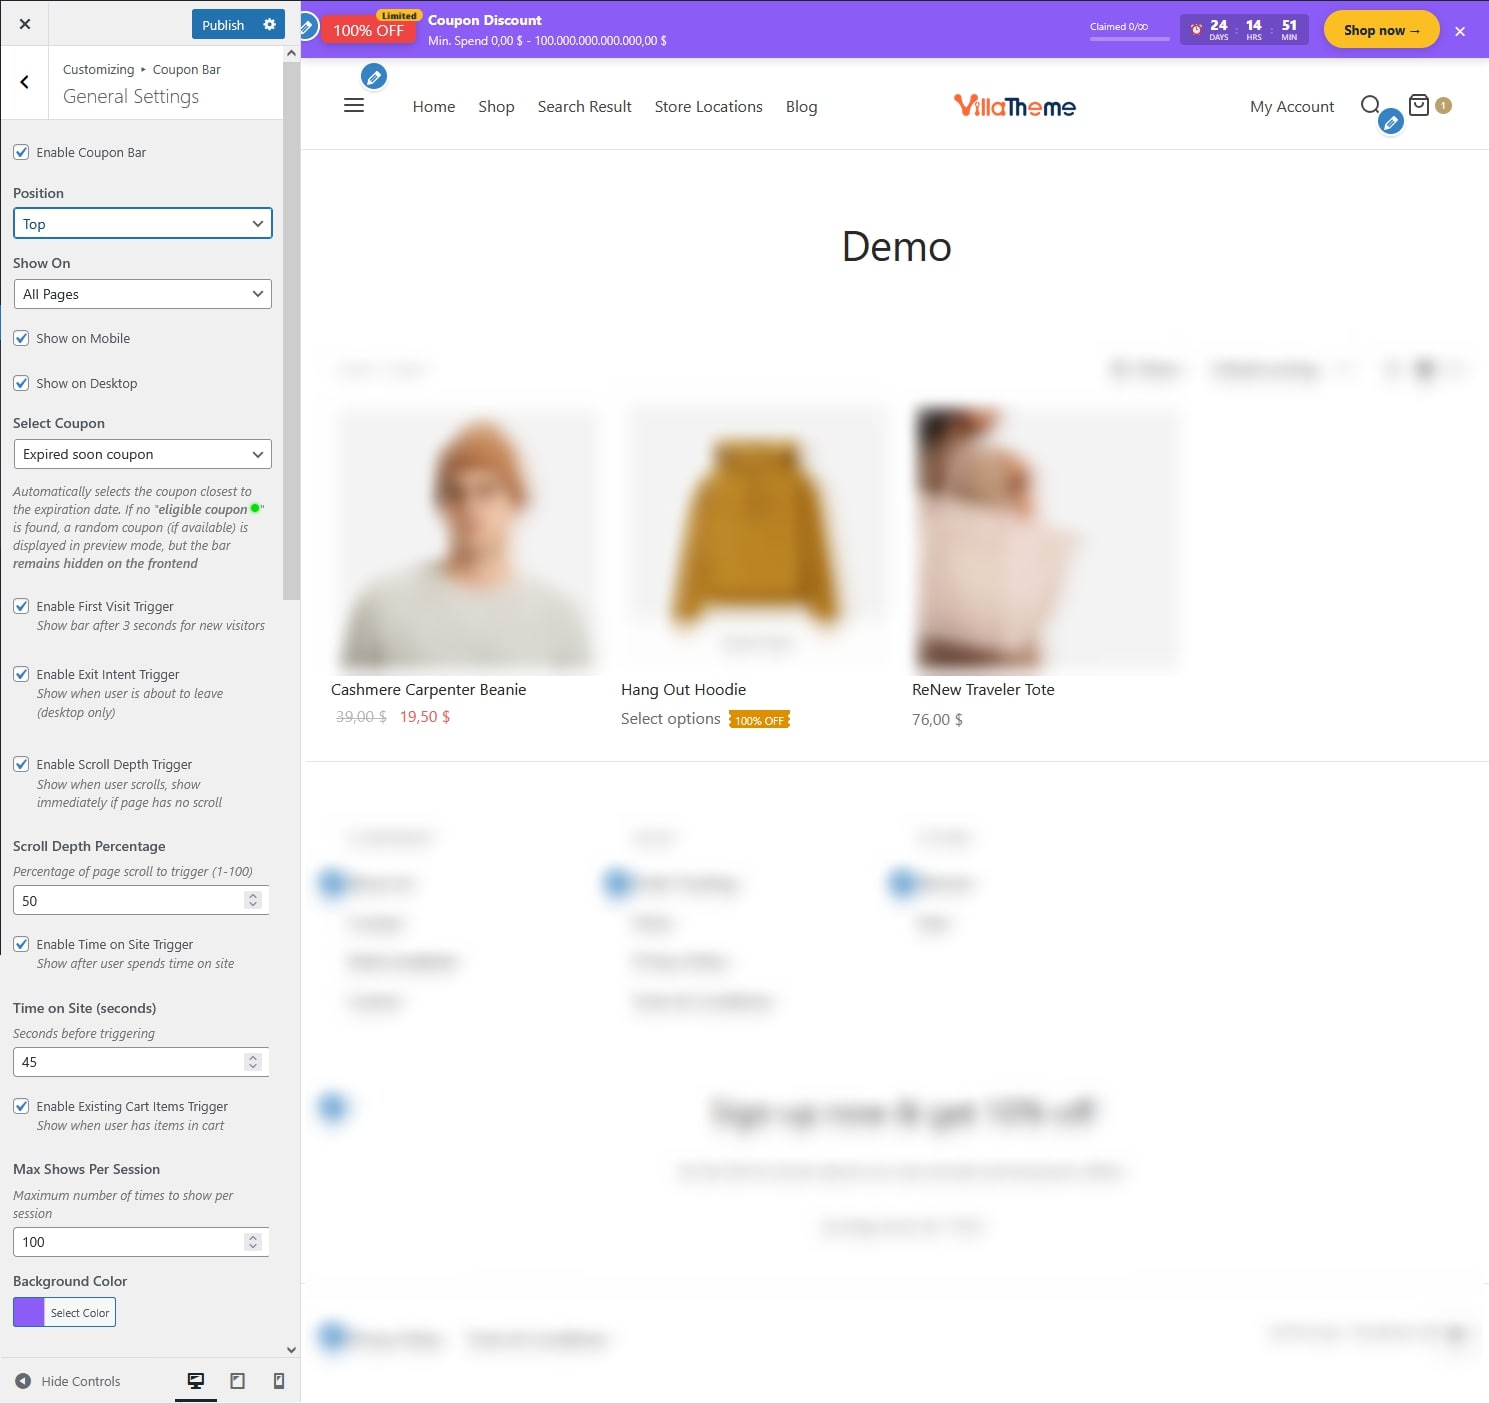
The coupon bar is a floating bar displayed at the top or bottom of the page. You can access it via:
Hover over any section in the preview and click it to open the corresponding settings panel.

This may include a progress section with a “Claimed” indicator showing the usage limit per coupon, the number of times or orders it has been successfully used, a progress bar and/or a countdown timer.
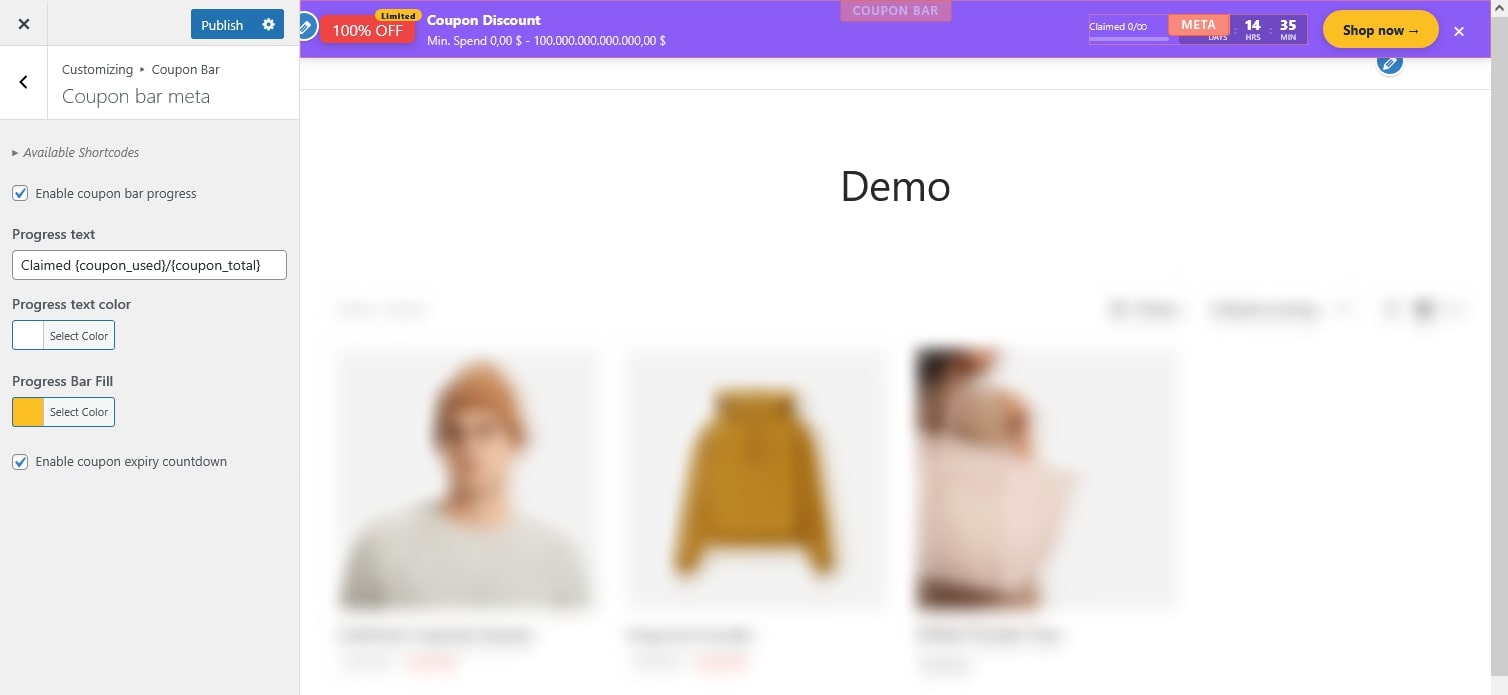
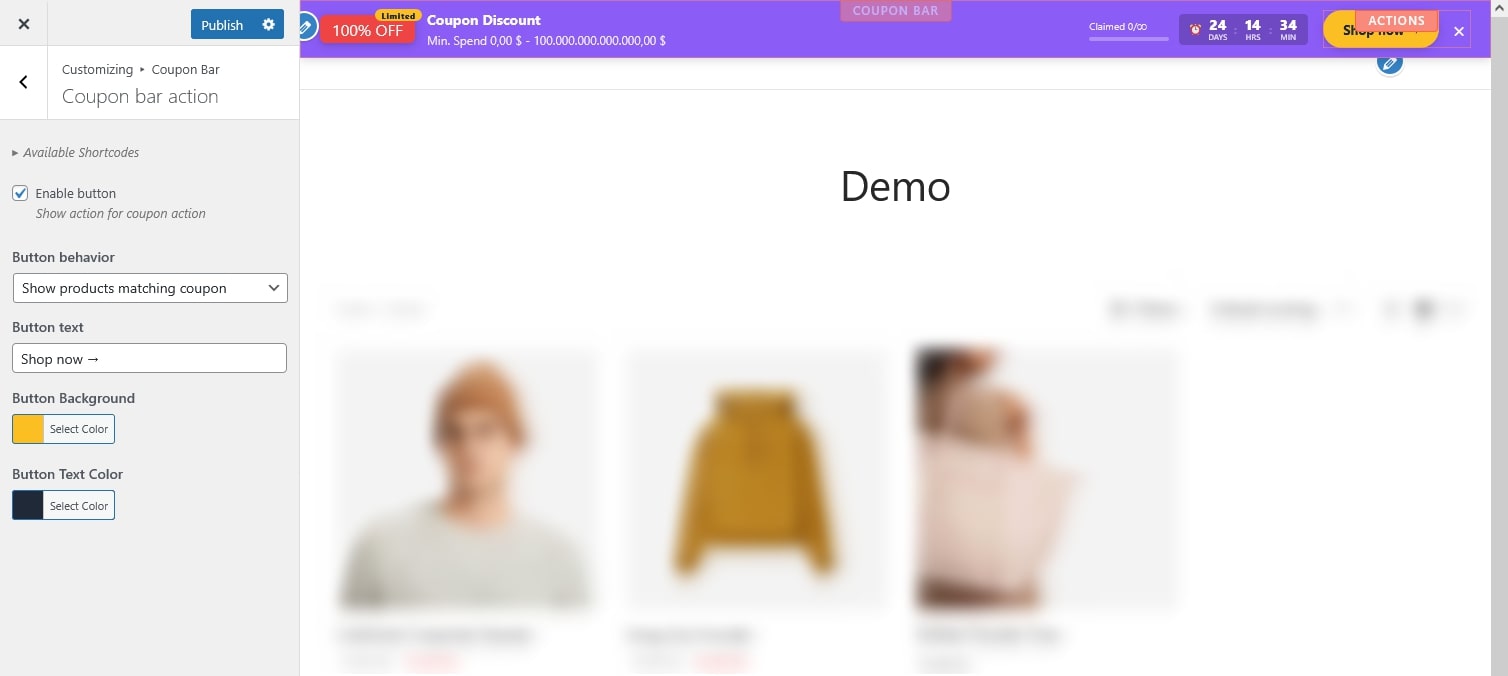
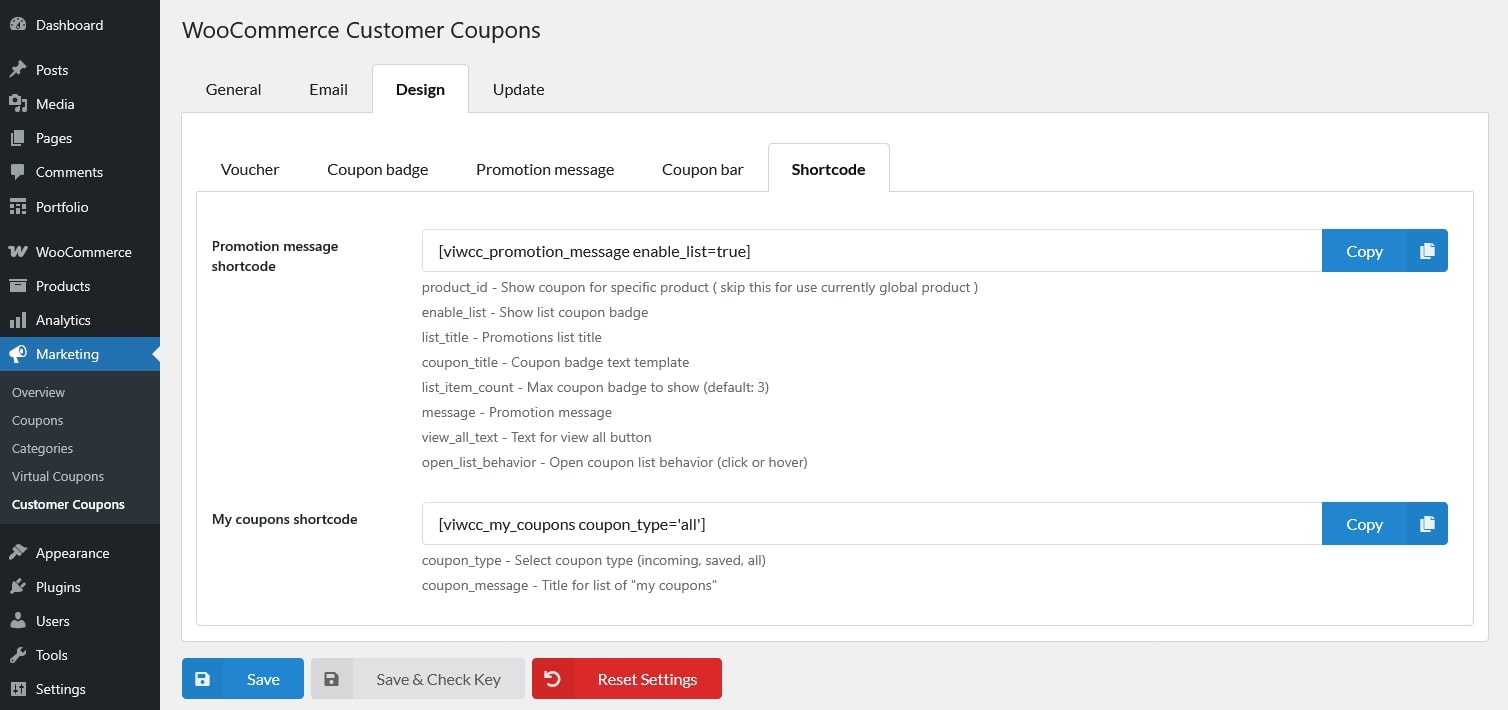
there’re 2 follwoing shortcode. copy them using the copy button in the settings page. each comes with list of param/attribute you can add
After installing the Customer Coupon plugin, each coupon includes three additional sections::
These sections extend the default WooCommerce coupon settings and control how and when the coupon is displayed, applied, and restricted.
These settings control how the coupon is presented to customers and how it behaves on the frontend.
These options control who can use the coupon and under which conditions.
These settings allow you to control when the coupon is valid.