Copyright Villatheme 2015-2025
Created: 03/2021
Latest updated: 08/2025 – Updated version: 1.0.14
By: VillaTheme
Thank you for purchasing our plugin. If you have any questions that are beyond the scope of this documentation, please feel free to request support at our Support Forum. Thanks so much!
Required:
Go Dashboard/ Plugins/ Add New and install the plugin using the installable zip file.

Video How to install and use the plugin:
After install successful the plugin, go to Dashboard/ Checkout funnel to config its settings.
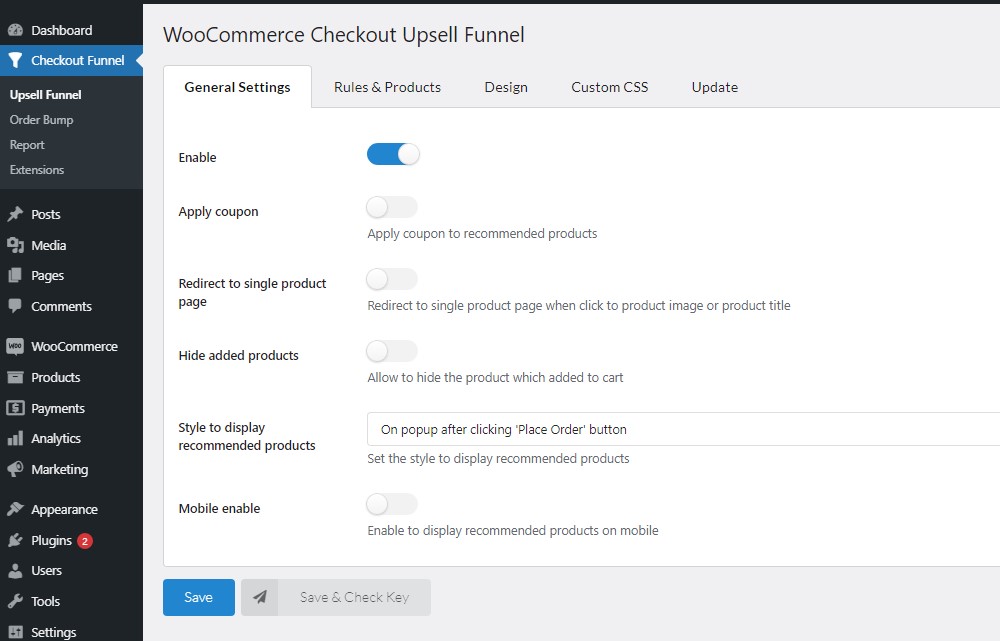
1. Go to Upsell Funnel settings to configure the Upsell Funnel as you want.
In the General settings, enable the Upsell Funnel.
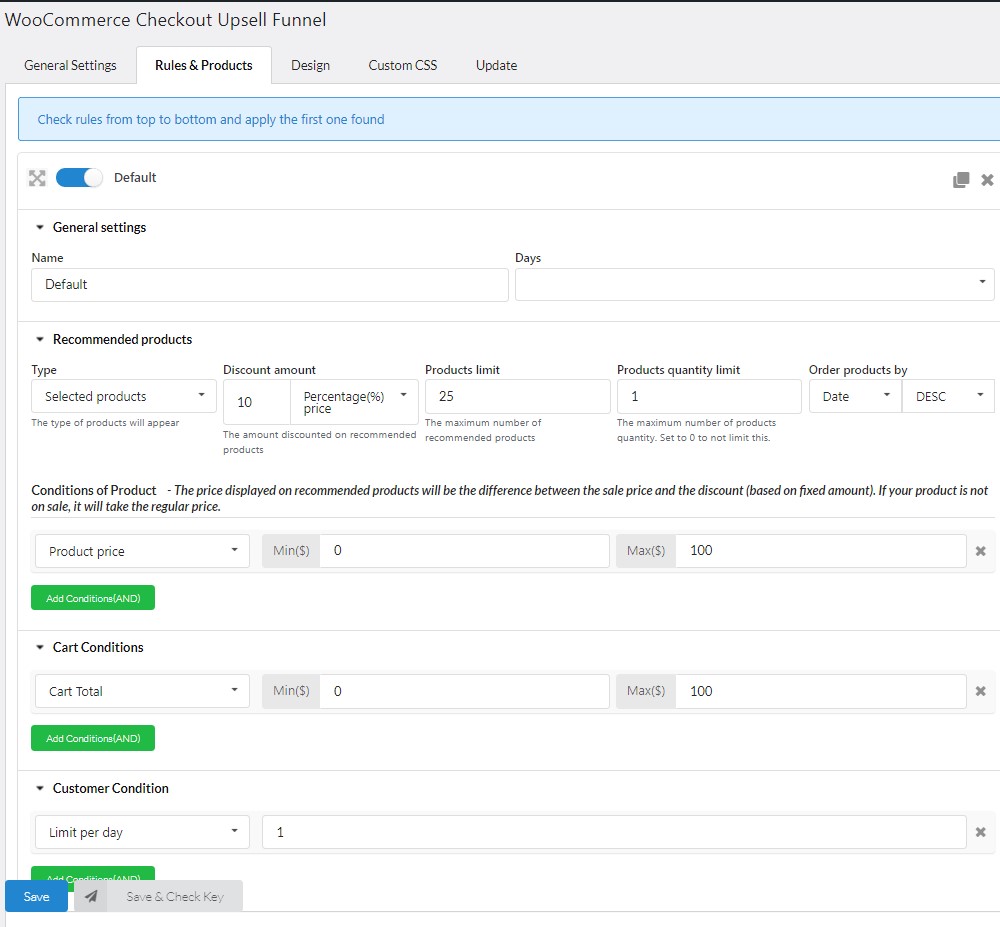
2. Go to Rules & Products tab to set all the rules for displaying Upsell funnel
3. Design the Upsell Funnel in the Design Tab

If you want to have Order Bumps on the Checkout page, Go to the Order Bump settings and configure it.

In Order Bumps Tab.
To find more detail about to use all the options, please read the section “HOW DOES IT WORK”.
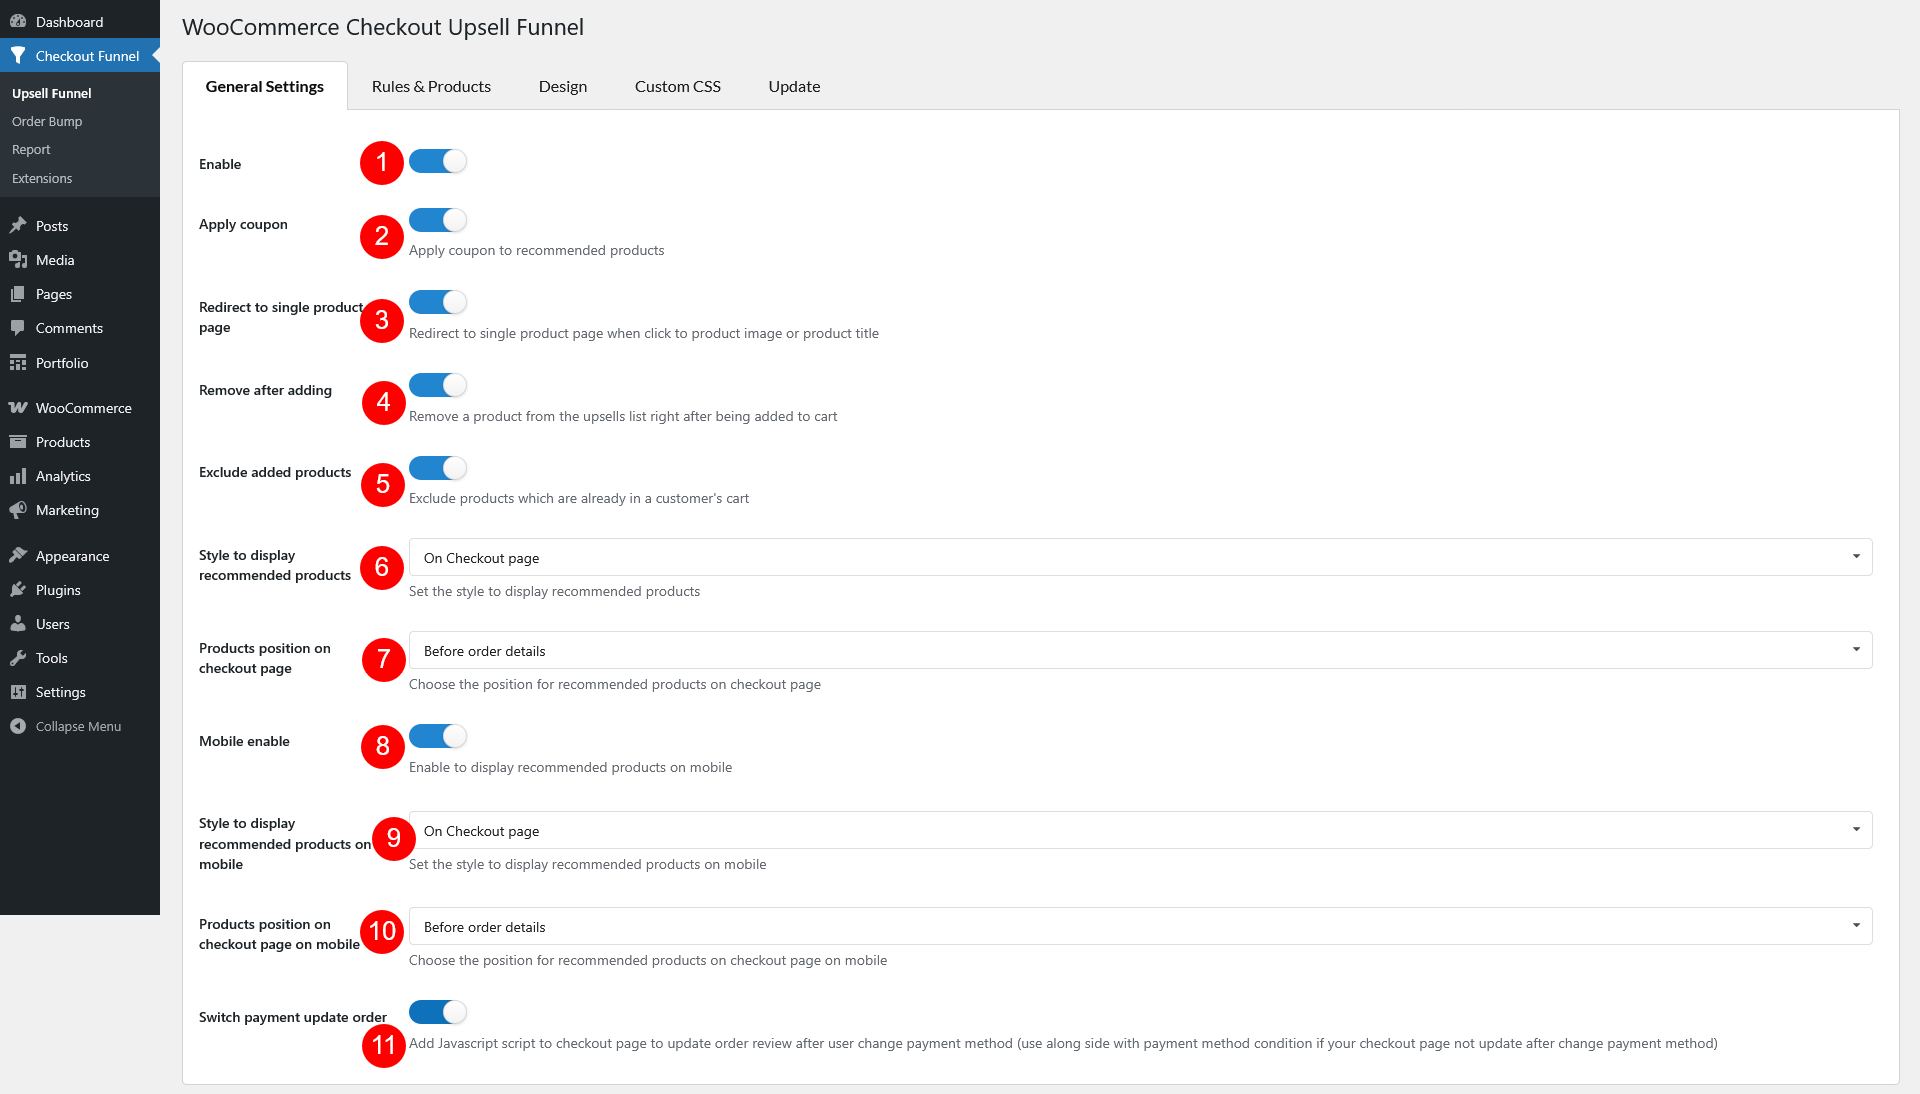
1. Enable option: Enable the Upsell Funnel.
2. Apply Coupon: enable it to apply the coupon to the recommended products on the checkout funnel
3. Redirect to single products: enable it to redirect to the single product pages when the customers click on the images or the titles of the products on checkout funnel.
4. Remove after adding: Remove a product from the upsells list right after being added to cart
5. Exclude added products: Exclude products which are already in a customer’s cart
6. Style to display recommended products: Choose the style to display recommended products on checkout funnel.
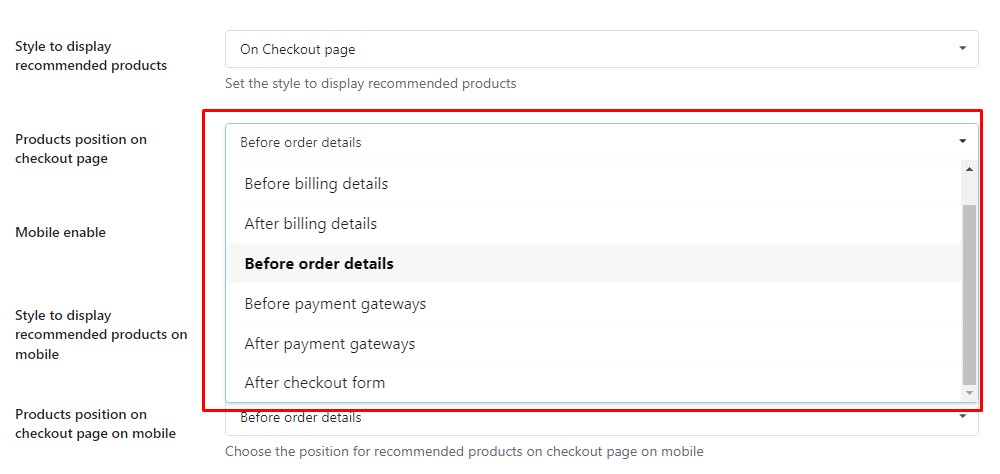
7. Product position on checkout page: In the case of choosing the on checkout page style, please choose the products position on checkout page. There are six positions to choose: before and after billing details, before order details, before and after payment gateways, after checkout form.
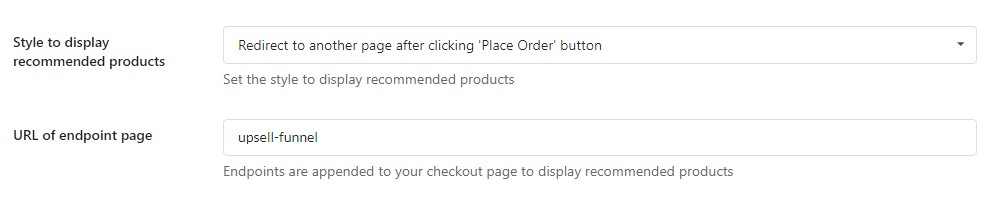
In the case of choosing redirect to another page after clicking “Place order” button, please insert the endpoint page of the URL
In the case of choosing the style “On popup after clicking ‘Place Order’ button” – there is a popup showing the recommended products after clicking on place order button.
8. Mobile enable: Enable it to display the Upsell funnel on mobile.
9. Style to display recommended products on mobile: Choose the style to display recommended products on checkout funnel on mobile. There are three styles: On checkout page, On popup after clicking “place order button”, redirect to another page after clicking “Place order” button.
10. Products position on checkout page on mobile: Choose the position of recommended products on mobile checkout page.
11. Switch payment update order: Enable this to adds a JavaScript snippet to update the order totals accordingly – useful when using Payment Method conditions if your checkout page doesn’t automatically refresh when a user changes the payment method.
General settings of Rules & Products
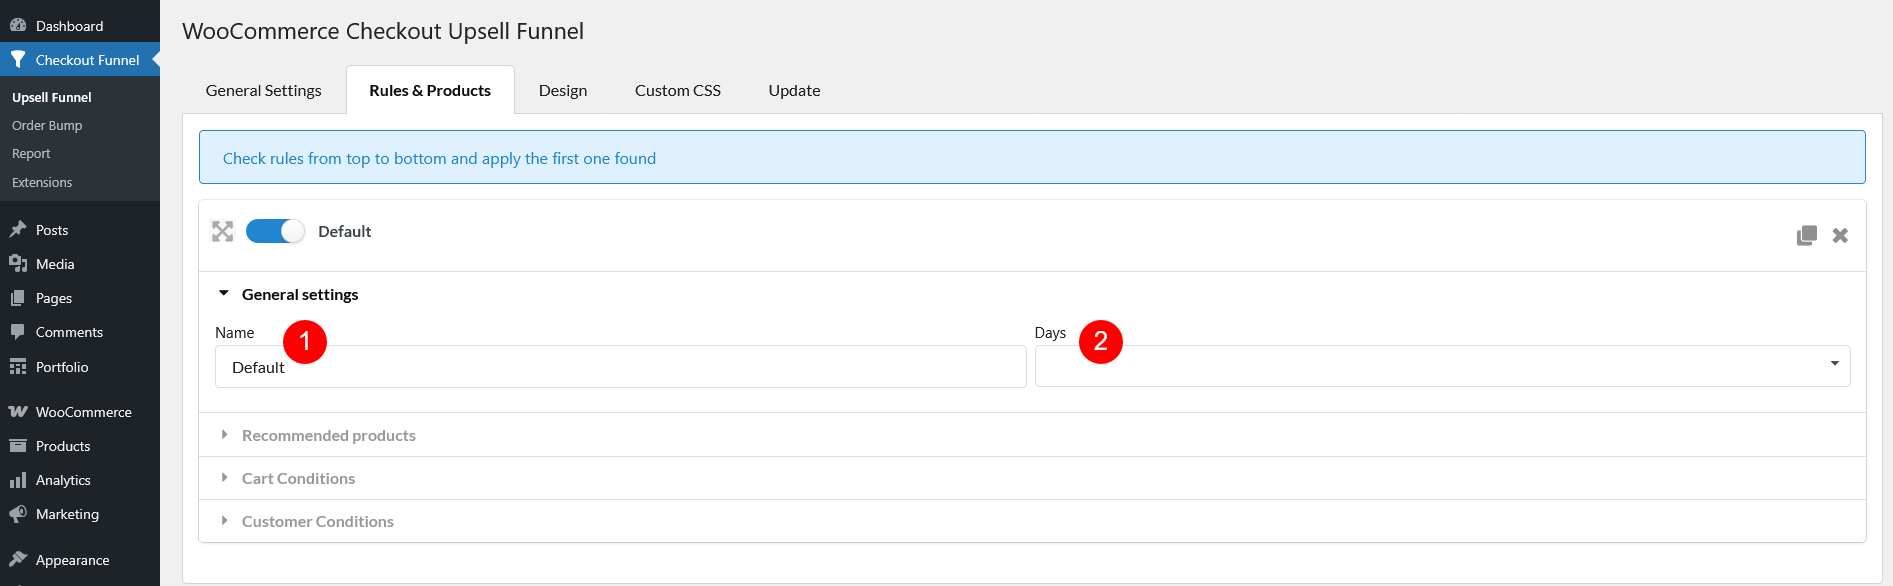
1. Name: Give the name for the upsell Funnel
2. Days: Choose the days to display the upsell Funnel in the week
Recommended products
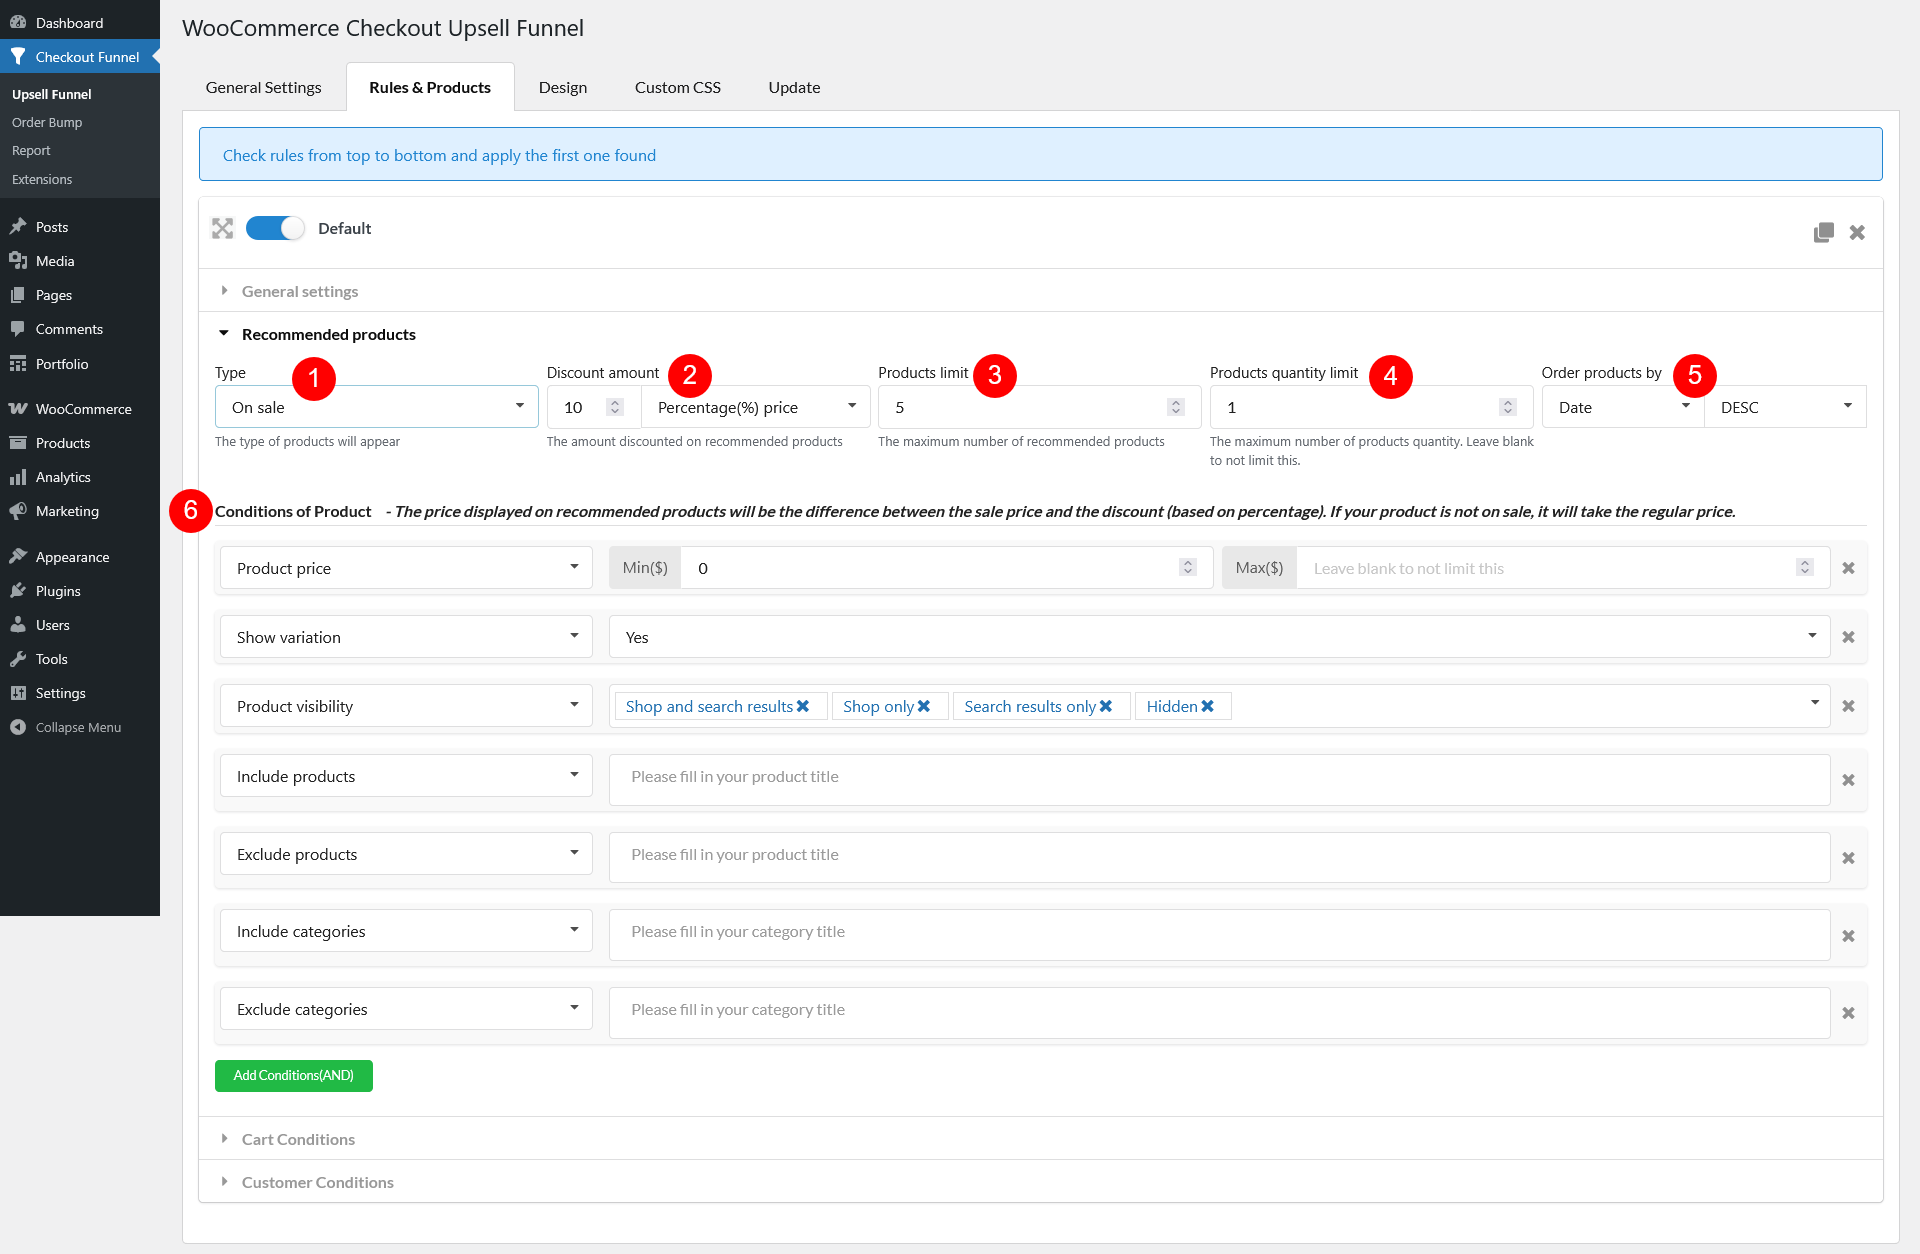
1. Types: Select which types of products will be shown in the Upsell Funnel. There are 15 available options, including:
2. Discount amount: Choose the type and the number for the discount amount applied on the Upsell Funnel. You can choose None or one of four types of discounts.
3. Products limit: Set the limitation for the number of recommended products displayed on Upsell Funnel
4. Product quantity limit: Set the limitation for the number of the items the customers can add to cart for each product from the upsell funnel.
5. Order product by: Choose the way to order products on Upsell Funnel. You can order the products by one in 8 types: date, ID, Menu order, popularity, Price, Random, rating, title.
6. Conditions of Product: Those settings help to add the conditions for the products chosen to displayed on the Upsell Funnel.
Cart Conditions
Those settings help to add the conditions for the Carts chosen to display the Upsell Funnel. Below is the categorized list of Cart Condition options
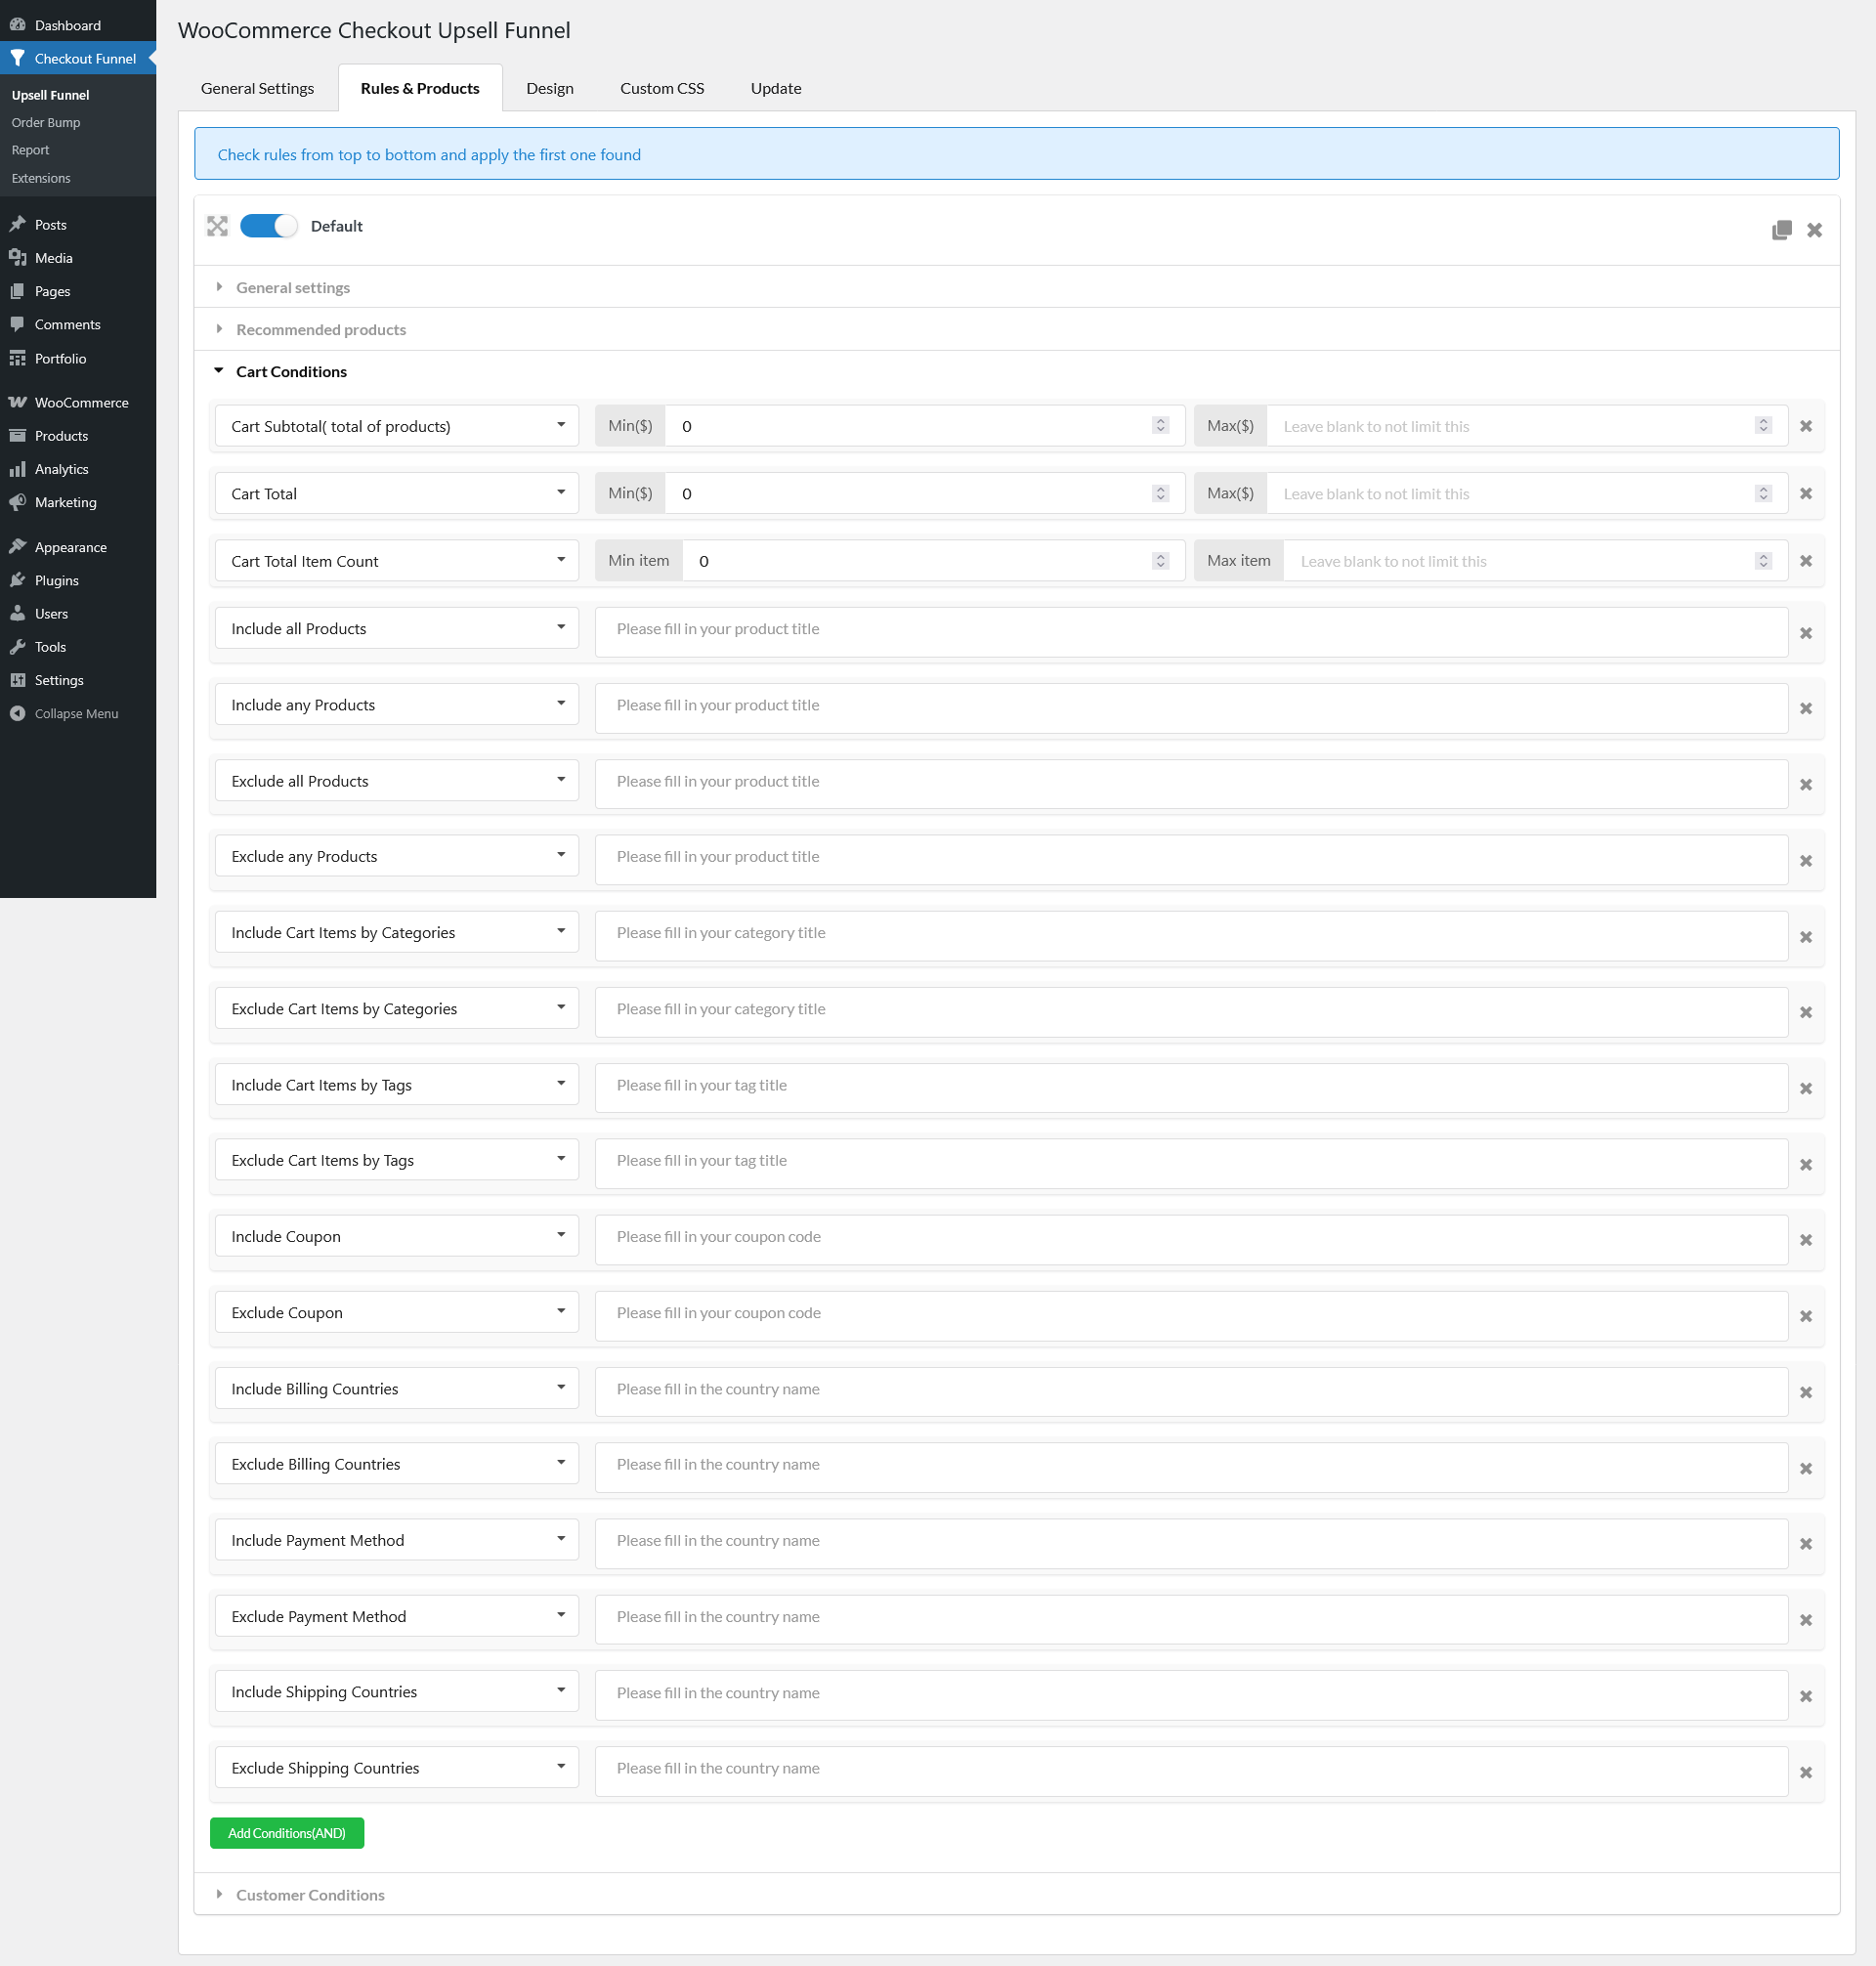
1. Cart Total: Conditions based on cart price or quantity
2. Cart Item: Conditions based on the products or categories in the cart
3. Applied Coupon: Conditions based on coupons added to the cart
4. Billing Address: Conditions based on the customer’s billing information
5. Payment Method: Conditions based on the selected payment option
6. Shipping Address: Conditions based on the customer’s shipping destination
Customer Conditions
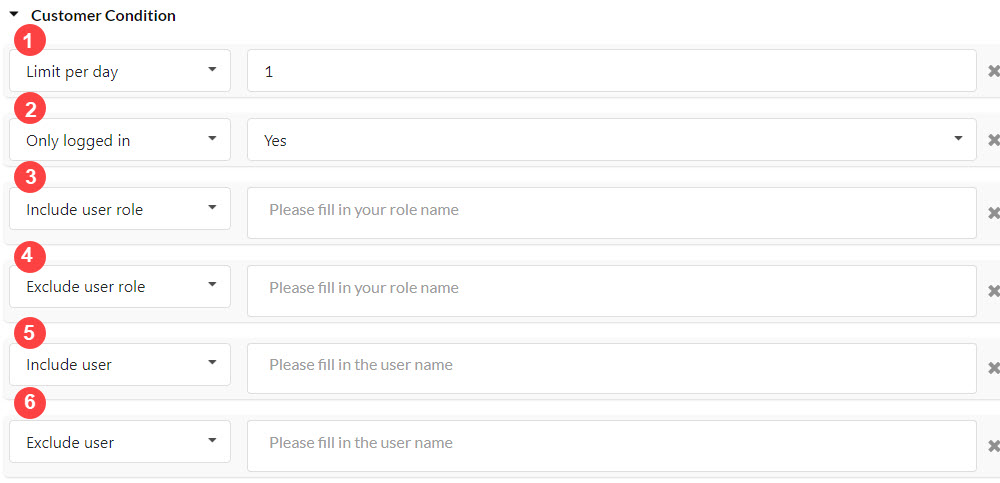
1. Limit per day: Set the limitation per day for the customers to see the Recommended products.
2. Only logged: Set up for only the customers who log in to see the Recommended products or not.
3. Include user role: Set up for the specific user roles to see the recommended products.
4. Exclude user role: Set up for the specific user roles not to see the recommended products.
5. Include user: Set up for the specific users to see the recommended products.
6. Exclude user: Set up for the specific users to not see the recommended products.
This section ensures your upsell product list matches your store’s design and improves user experience by offering customization for appearance and functionality.
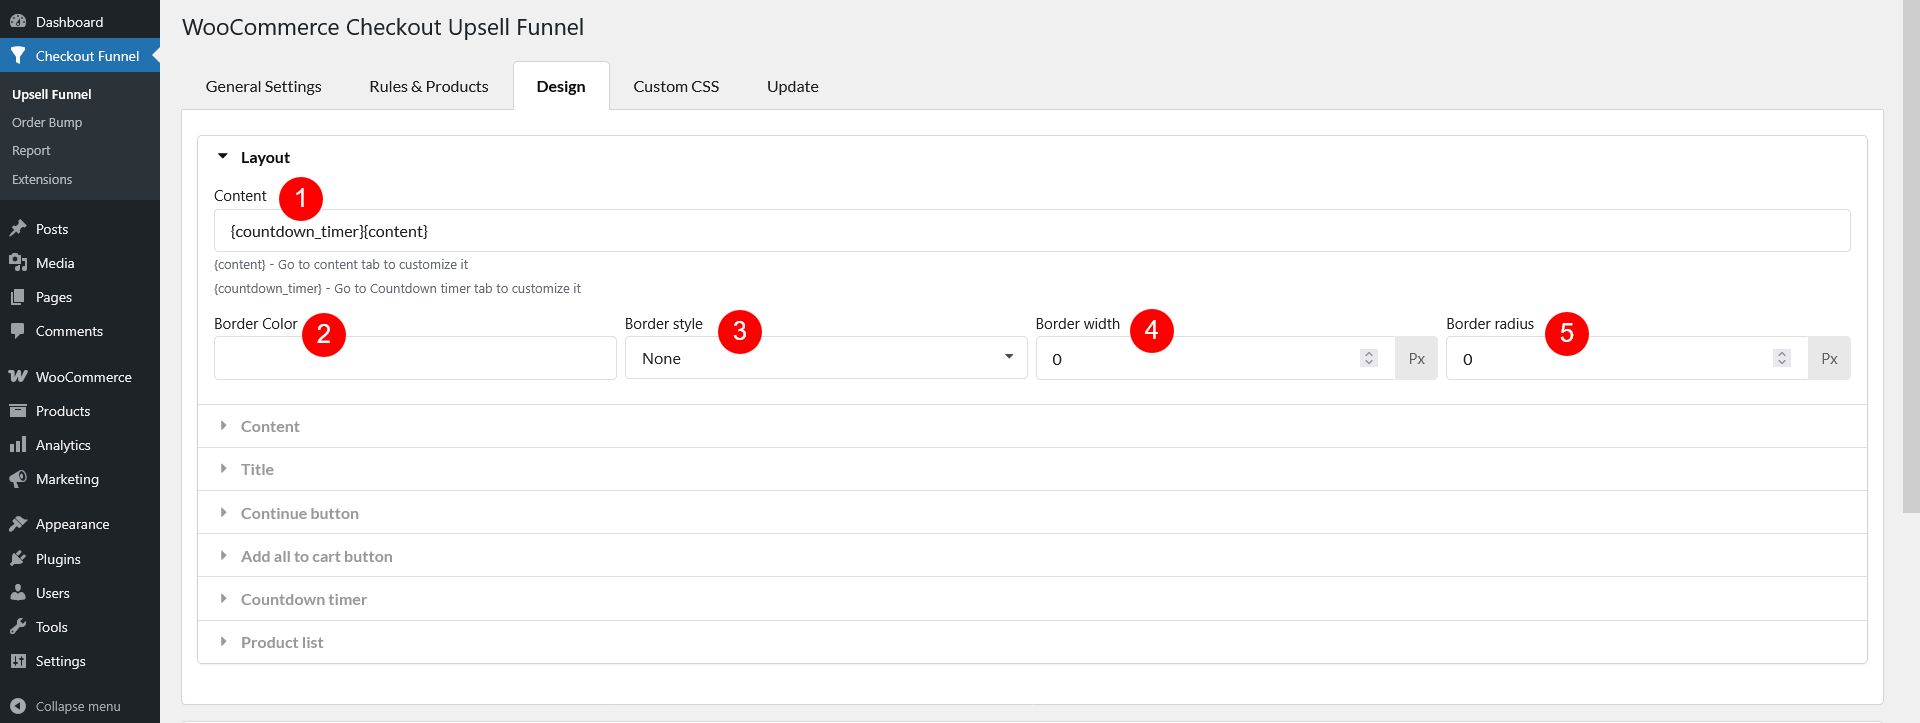
The {content} placeholder structures the upsell funnel layout, divided into the following sections:
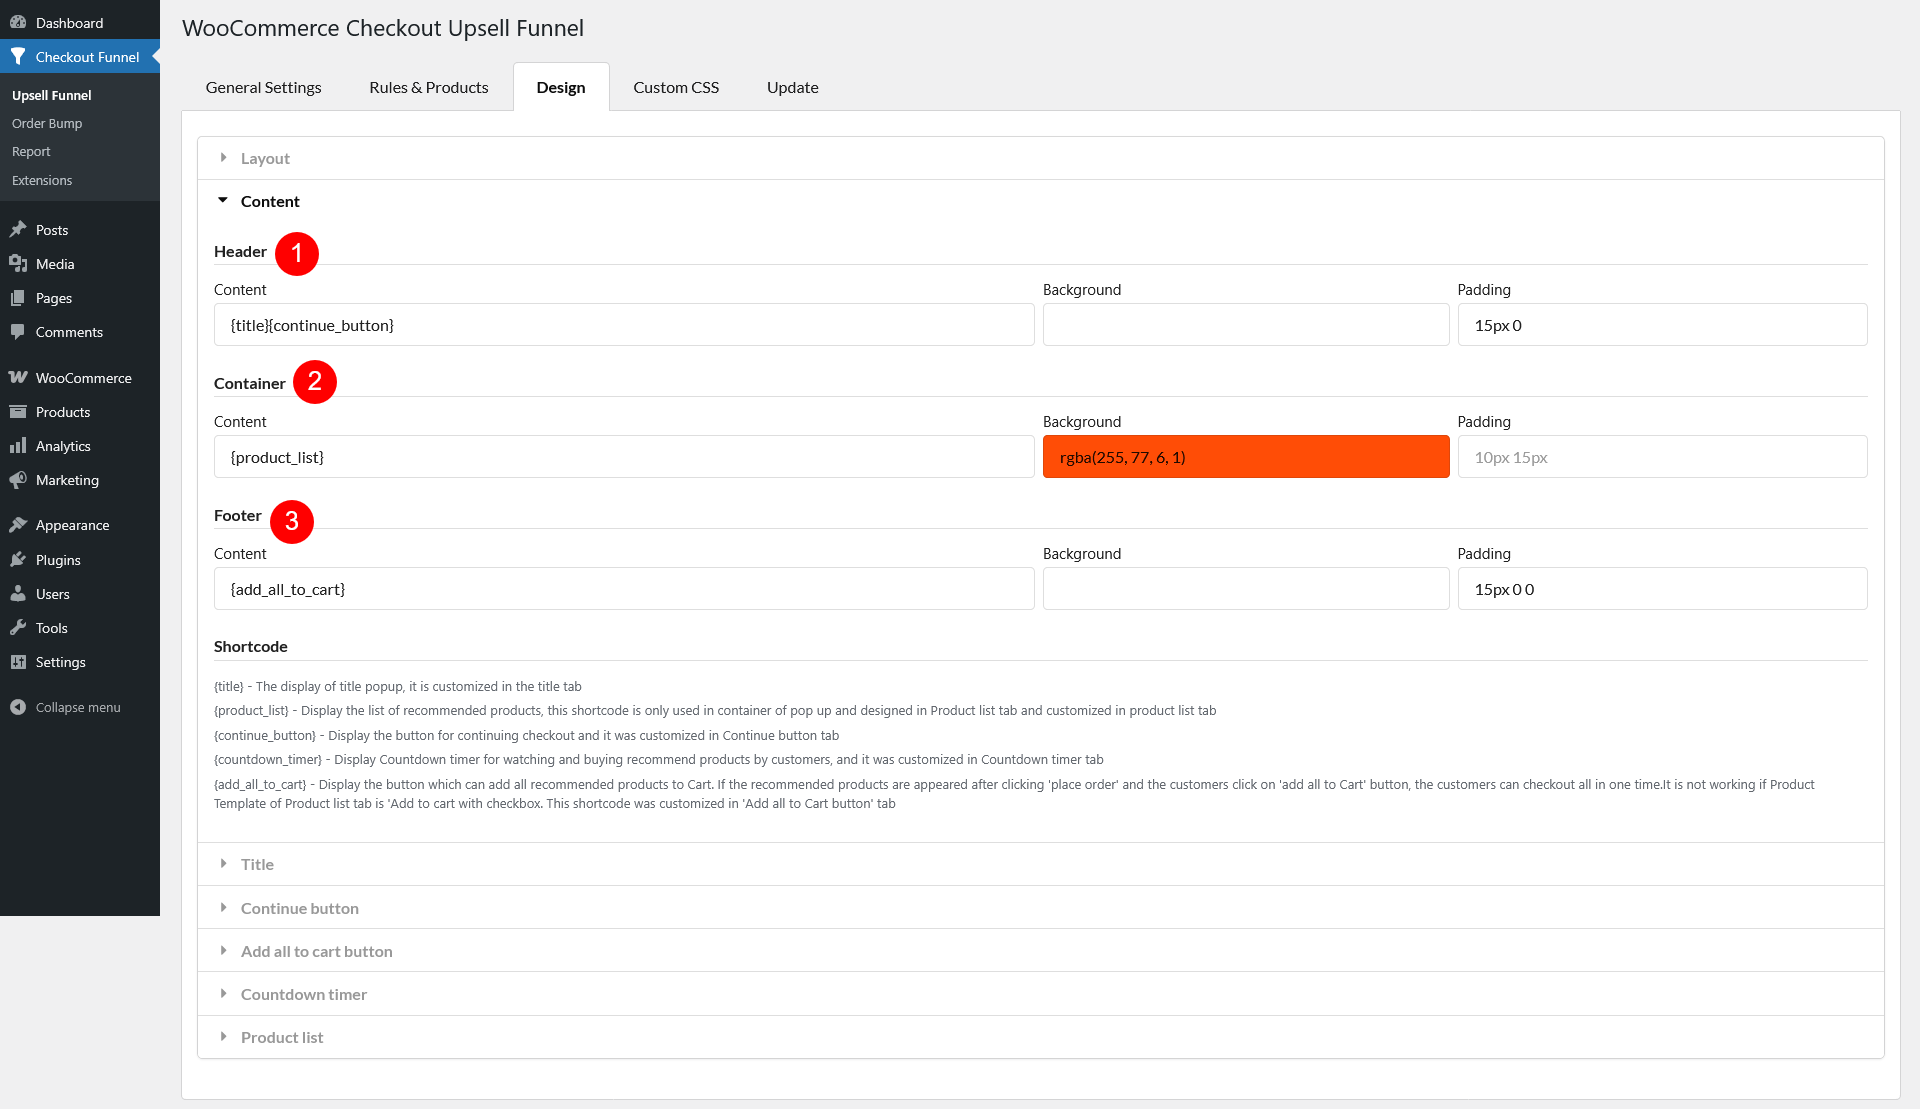
Supported placeholder:
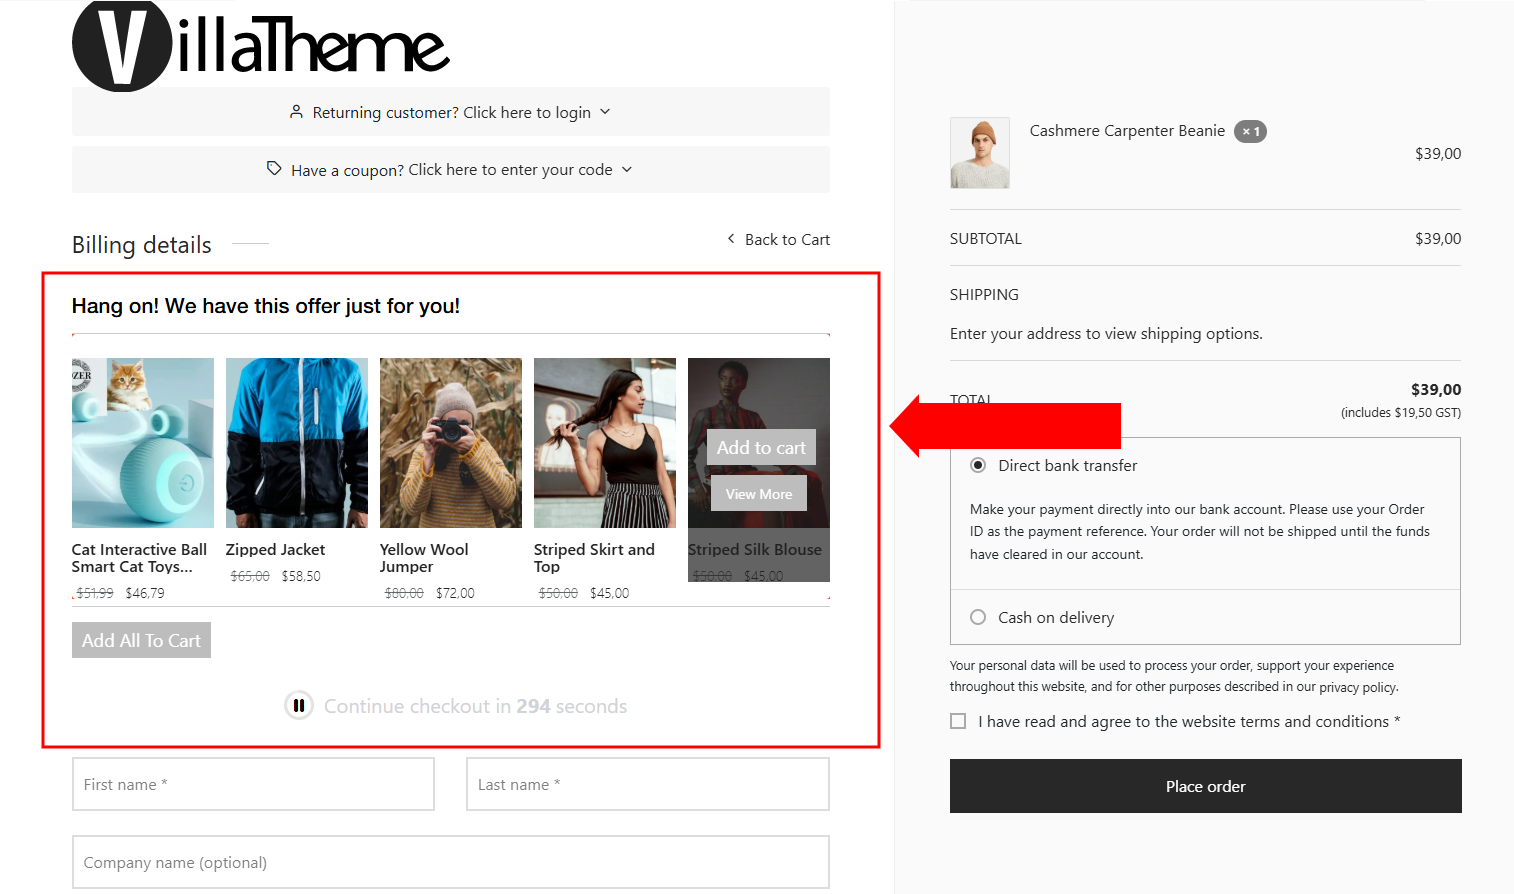
{title} – Displays the popup title, customizable in the Title tab.
{product_list} – Shows the recommended products list, customizable in the Product List tab. Only used in the popup container.
{continue_button} – Displays the “Continue Checkout” button, customizable in the Continue Button tab.
{countdown_timer} – Shows a countdown timer for purchasing recommended products, customizable in the Countdown Timer tab.
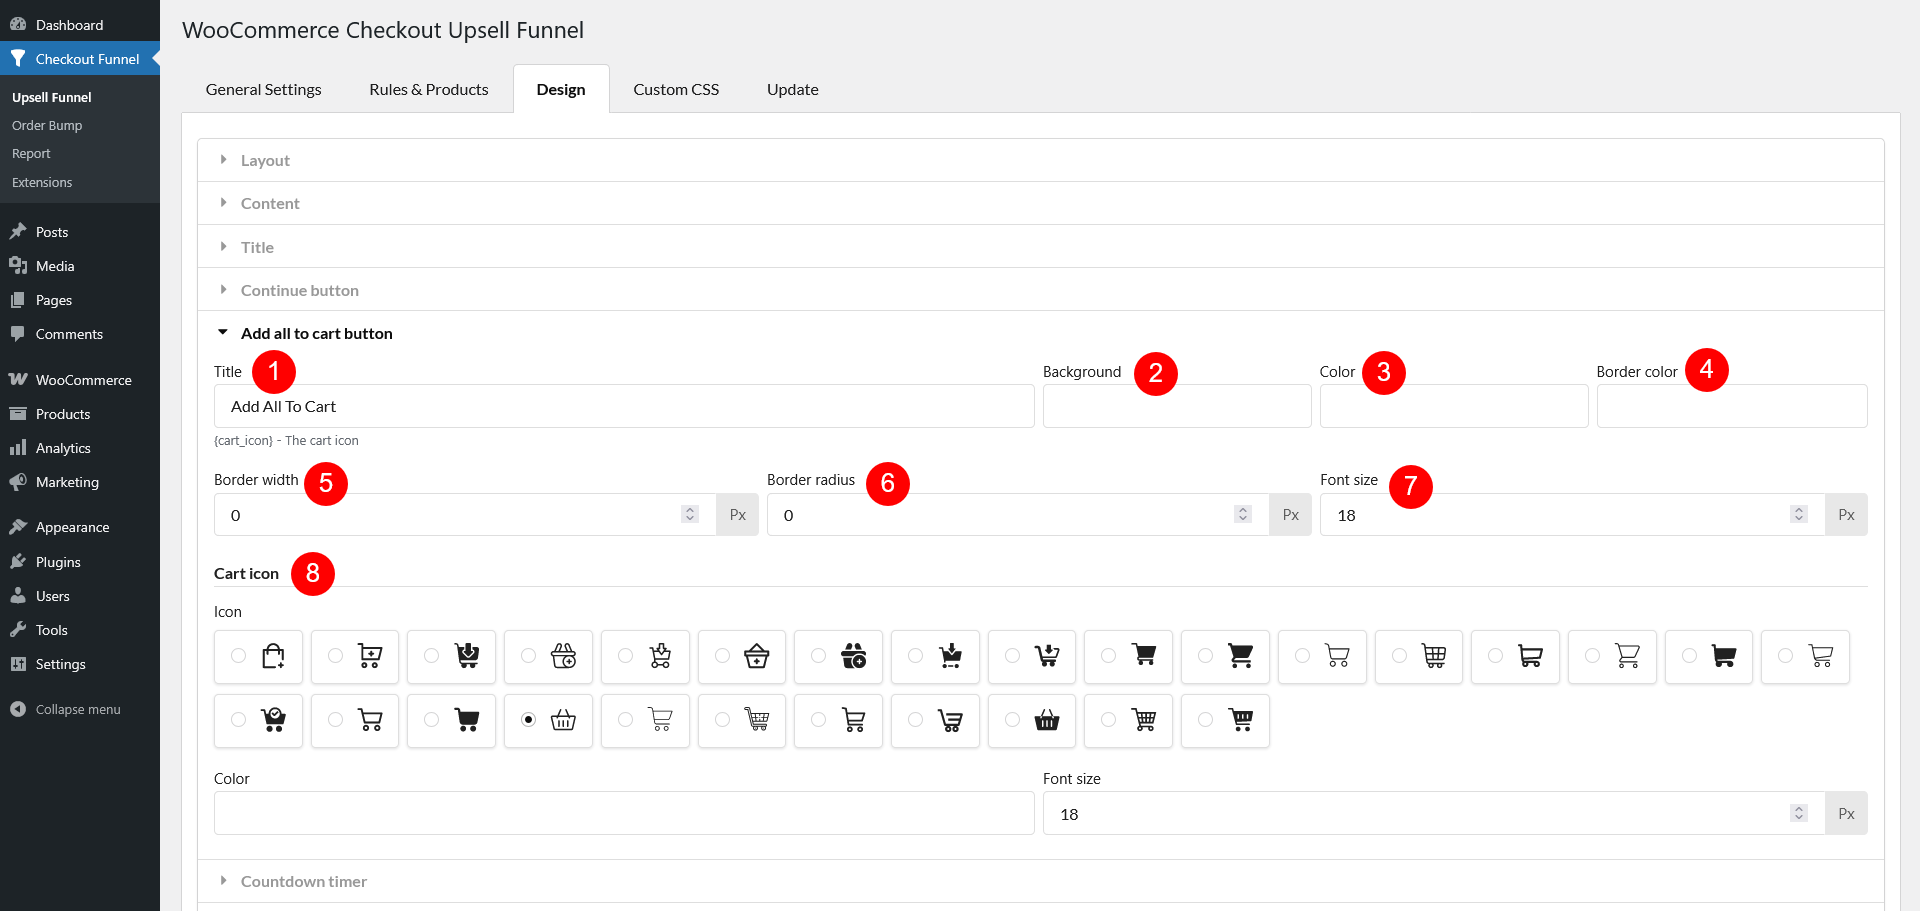
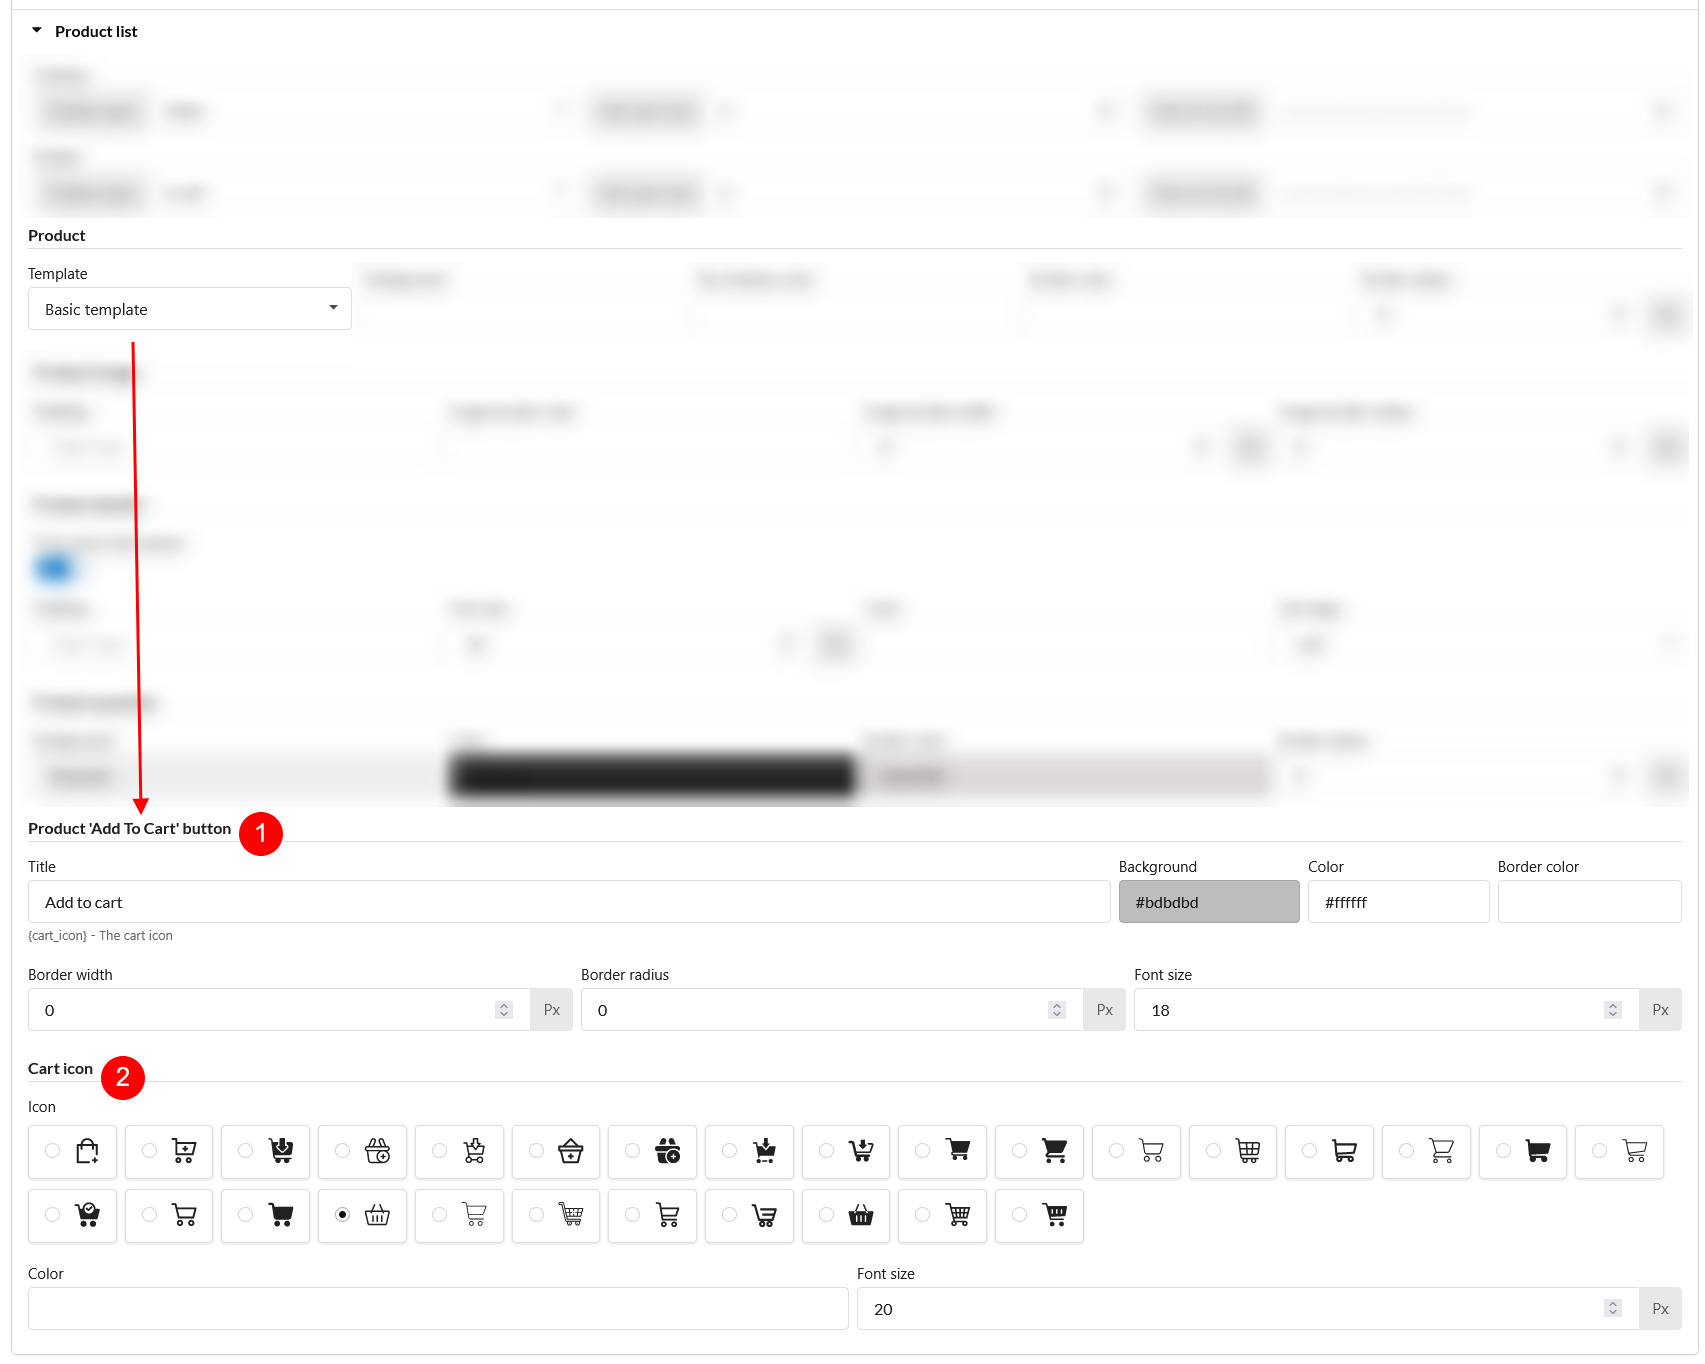
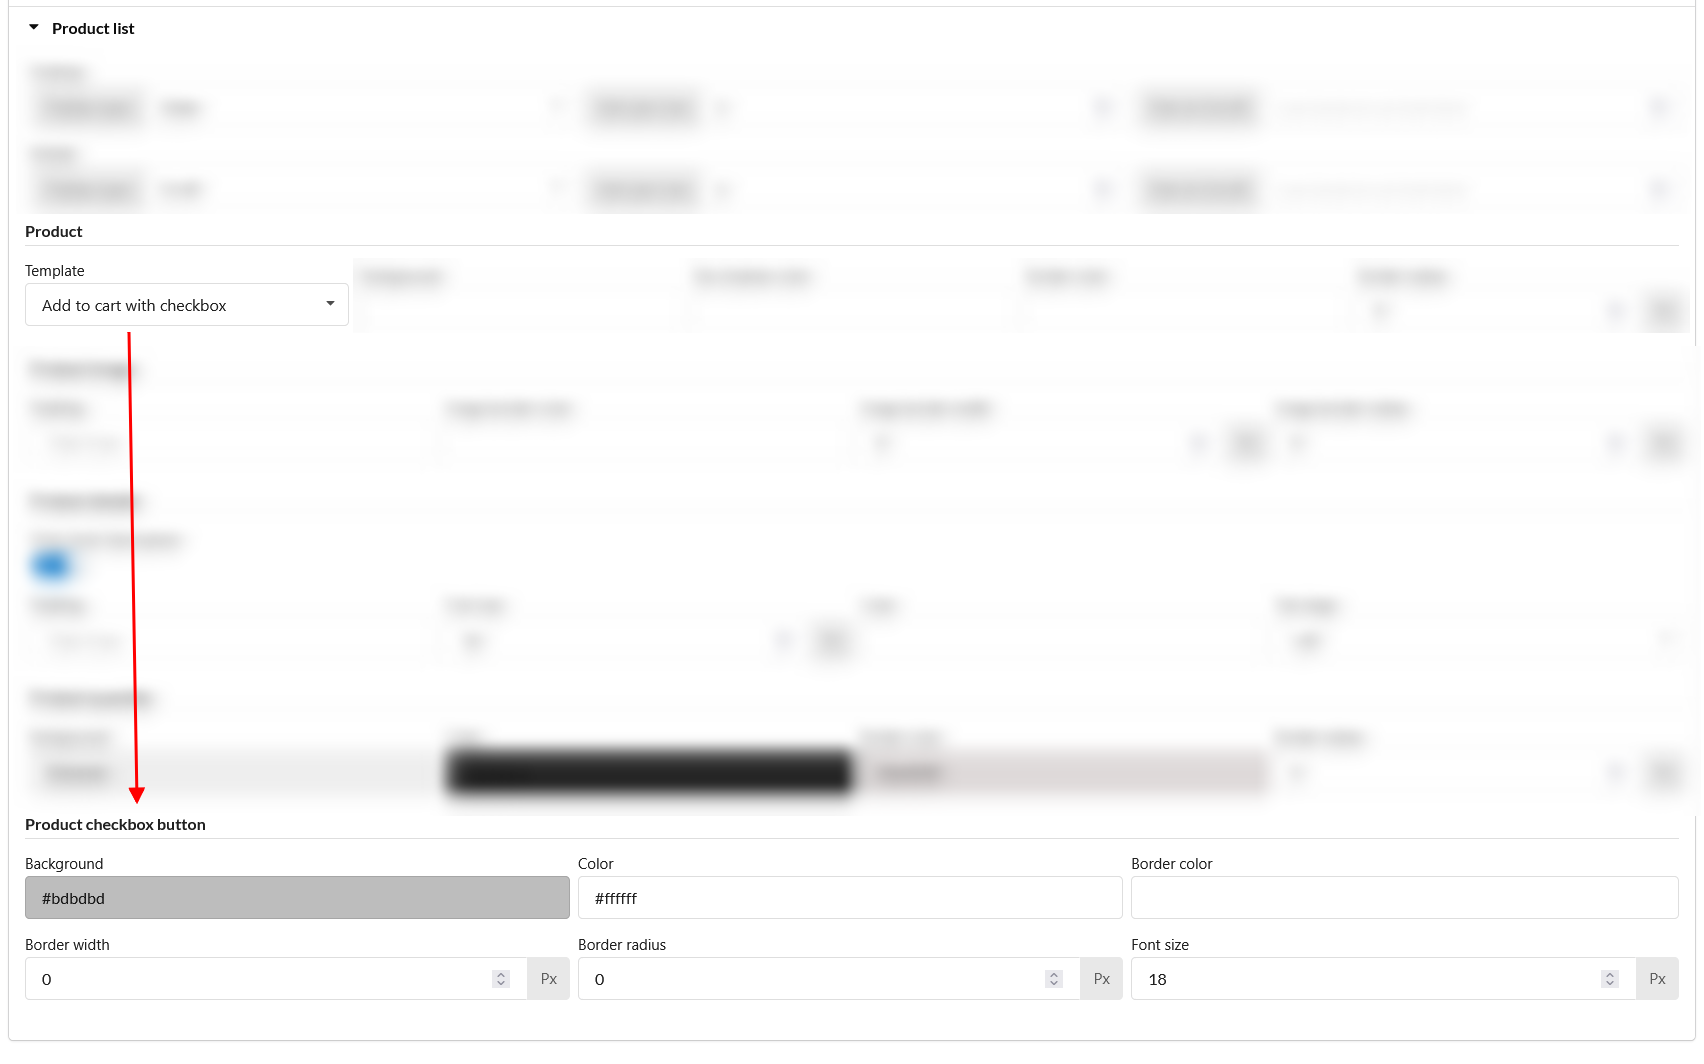
{add_all_to_cart} – Displays an “Add All to Cart” button. If products appear after clicking “Place Order,” customers can add them all to the cart and check out in one step. Not compatible with the Add to Cart with Checkbox product template. Customizable in the Add All to Cart Button tab.
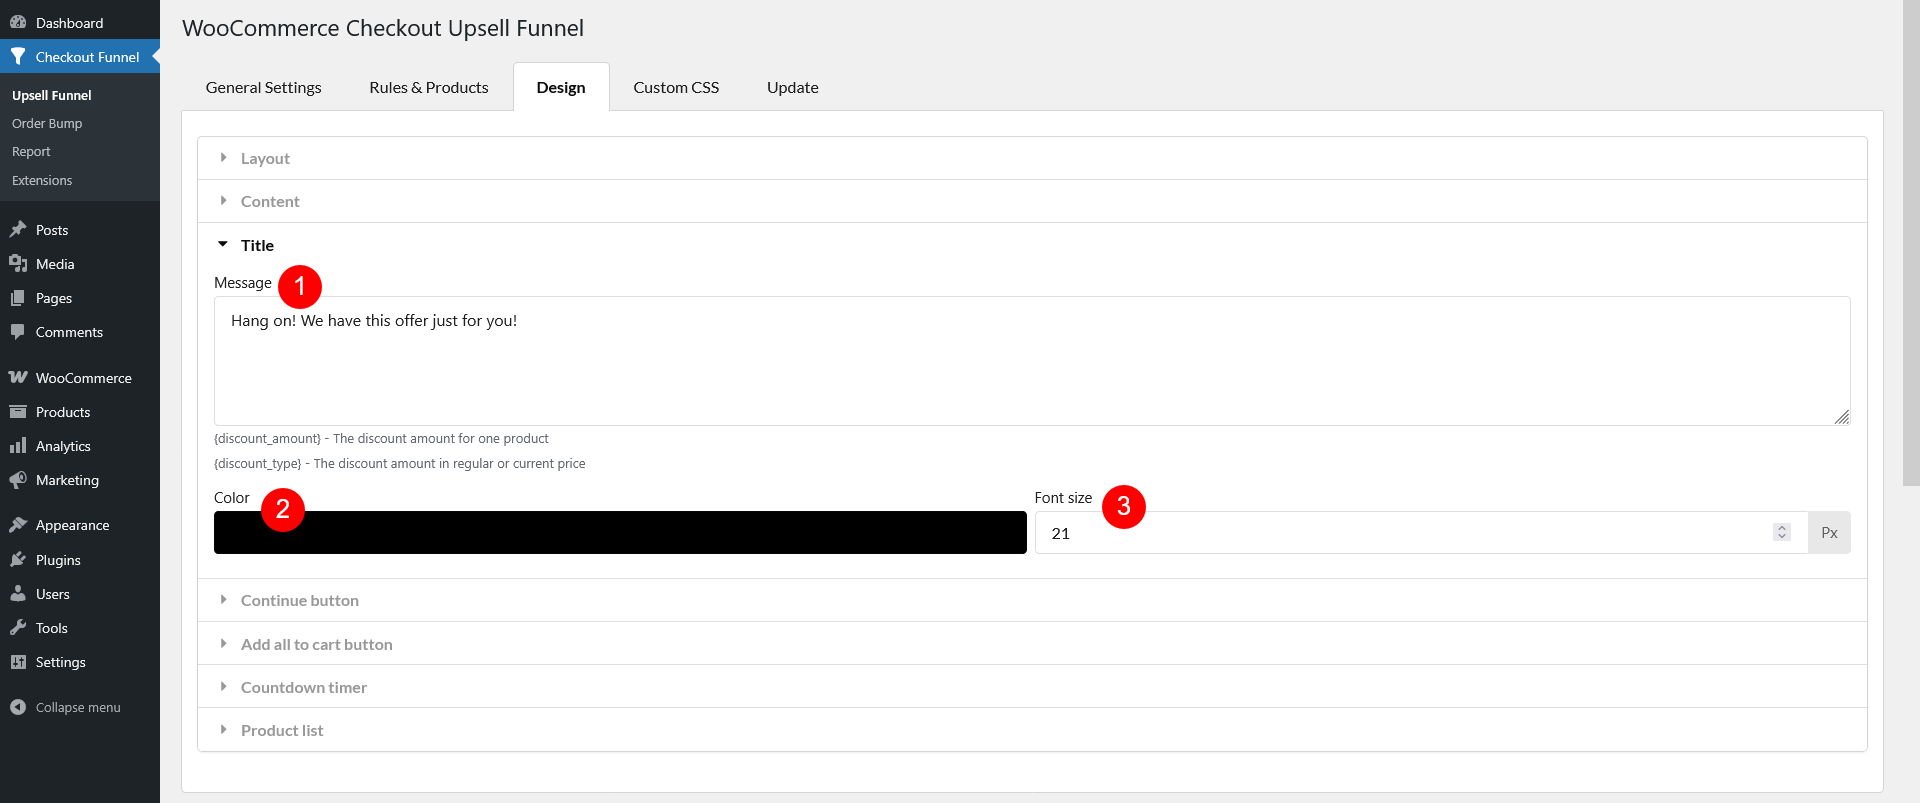
Setup for the {title} placeholder displays the popup title, which can be customized with the following options:
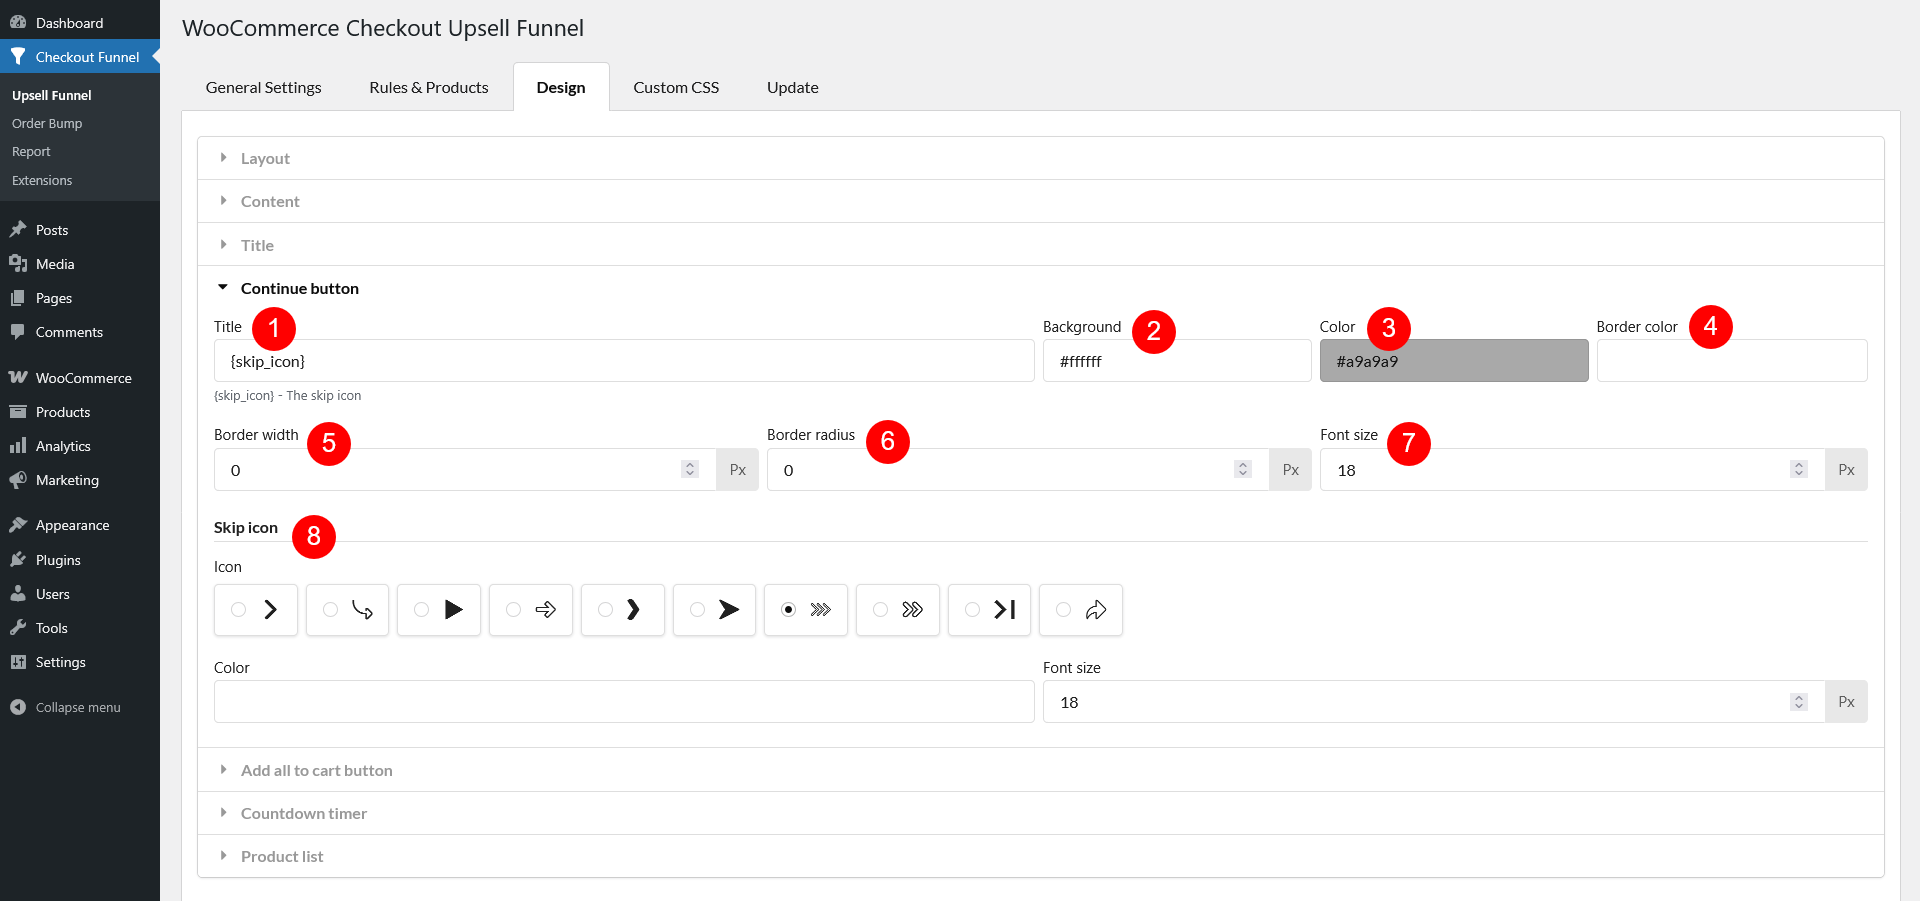
The {continue_button} placeholder displays the button for continuing checkout. Customize it with the following options:
The “Add All to Cart” button allows customers to add all recommended products to their cart at once. However, this button will not work if the Product Template in the Product list settings tab is set to “Add to cart with checkbox”
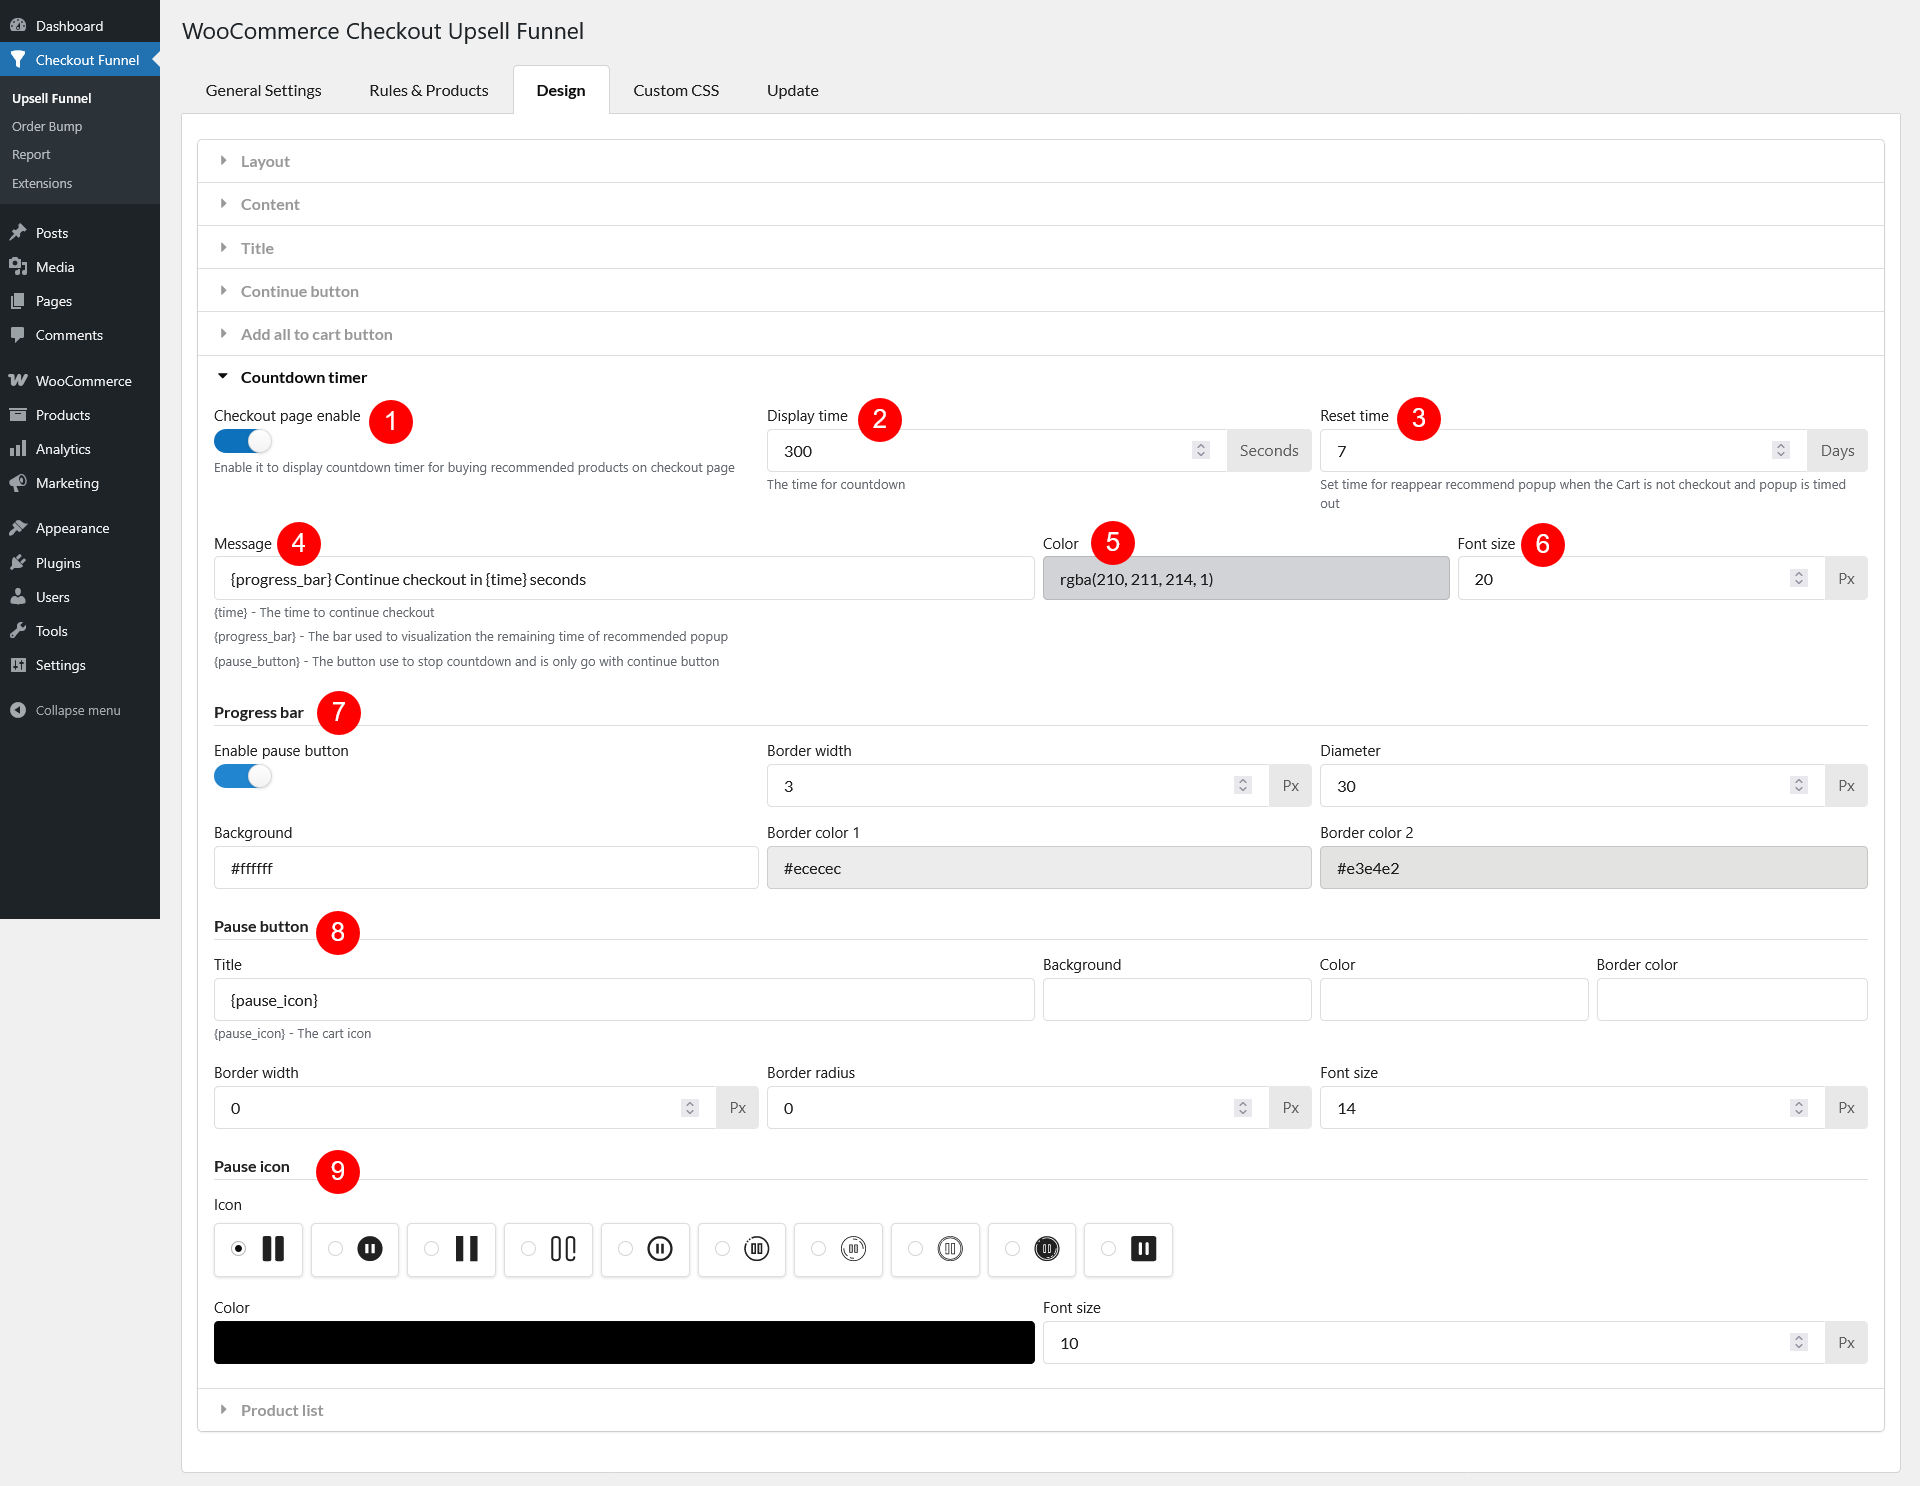
The {countdown_timer} placeholder inside the Layout section displays a countdown timer, creating urgency for customers to add recommended products to their cart before time runs out.
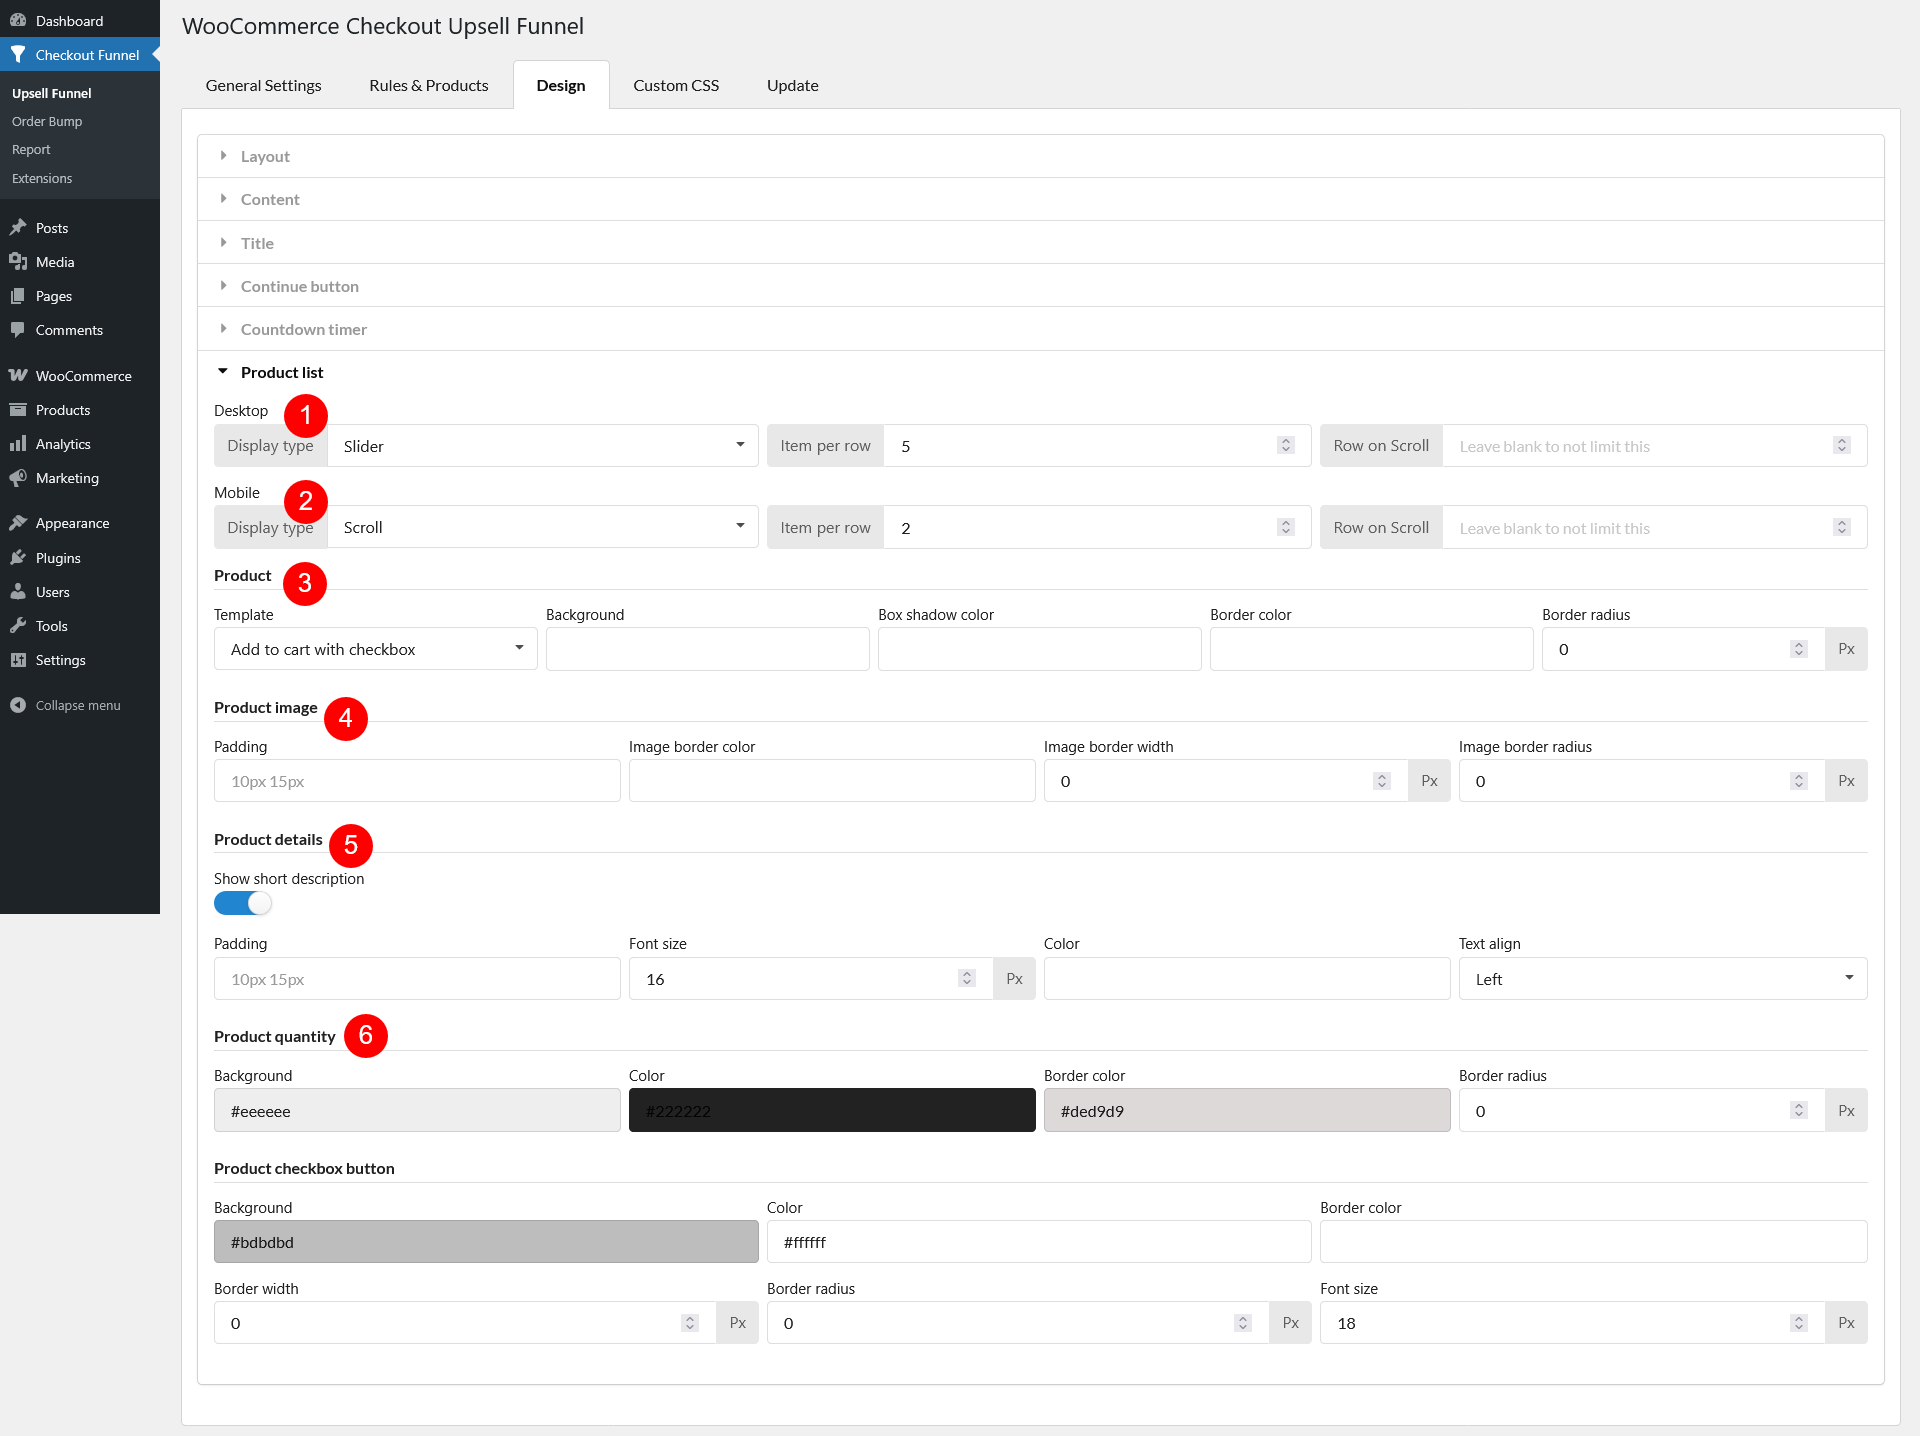
The {product_list} placeholder controls how recommended products appear inside the upsell popup. These settings allow you to adjust the layout, appearance, and functionality of the product list for both desktop and mobile views.
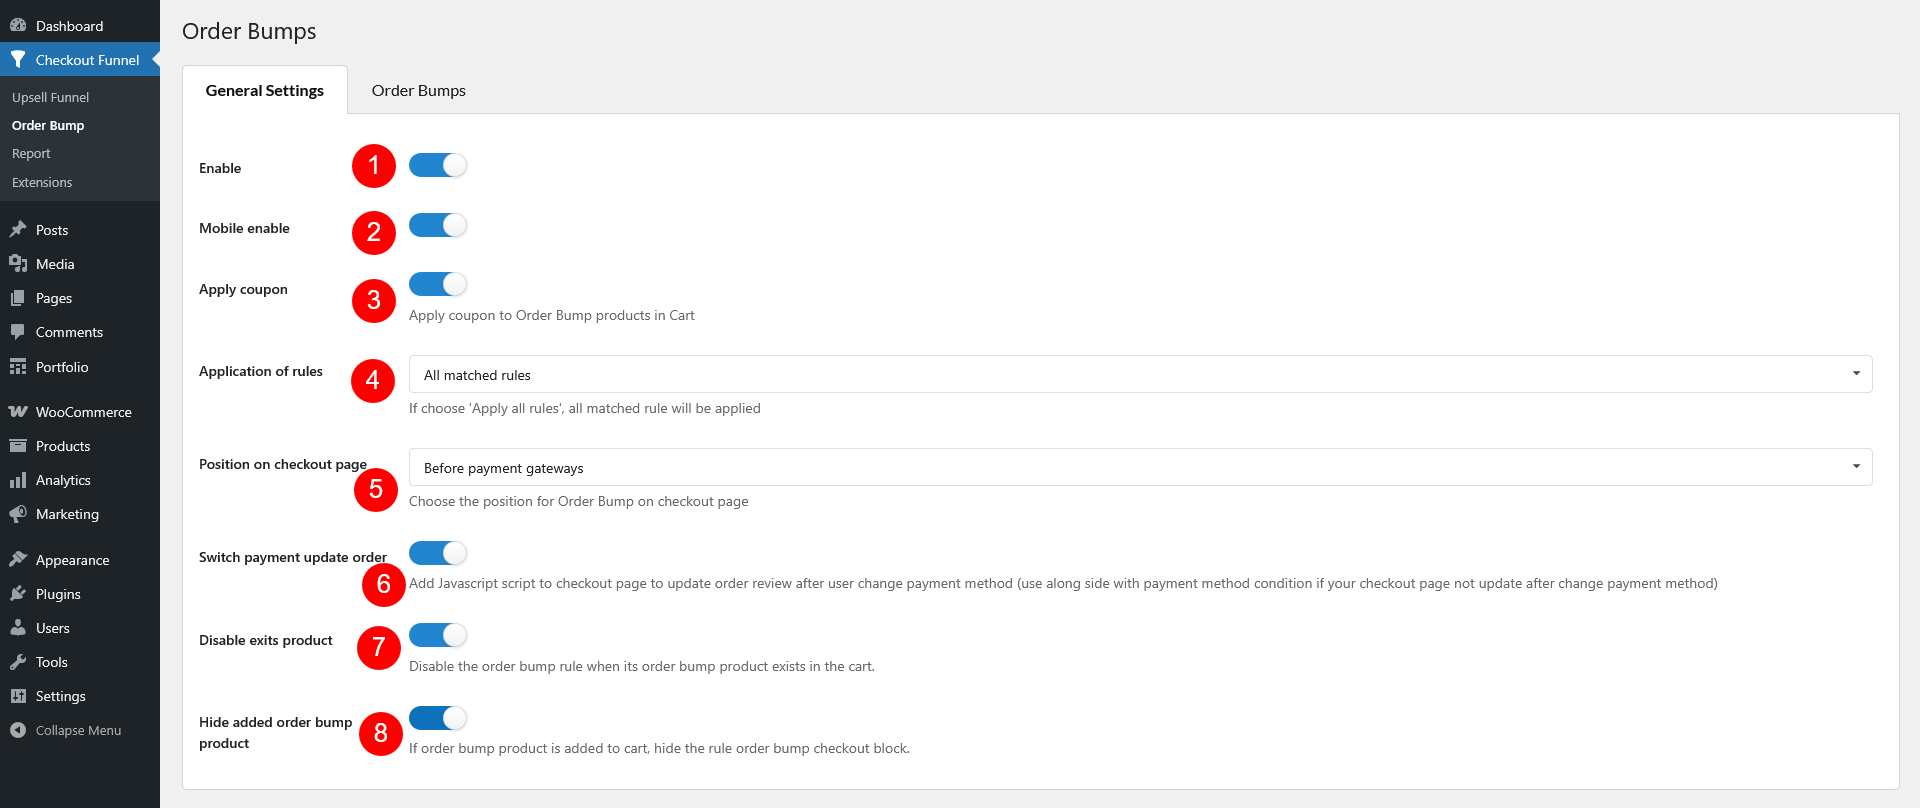
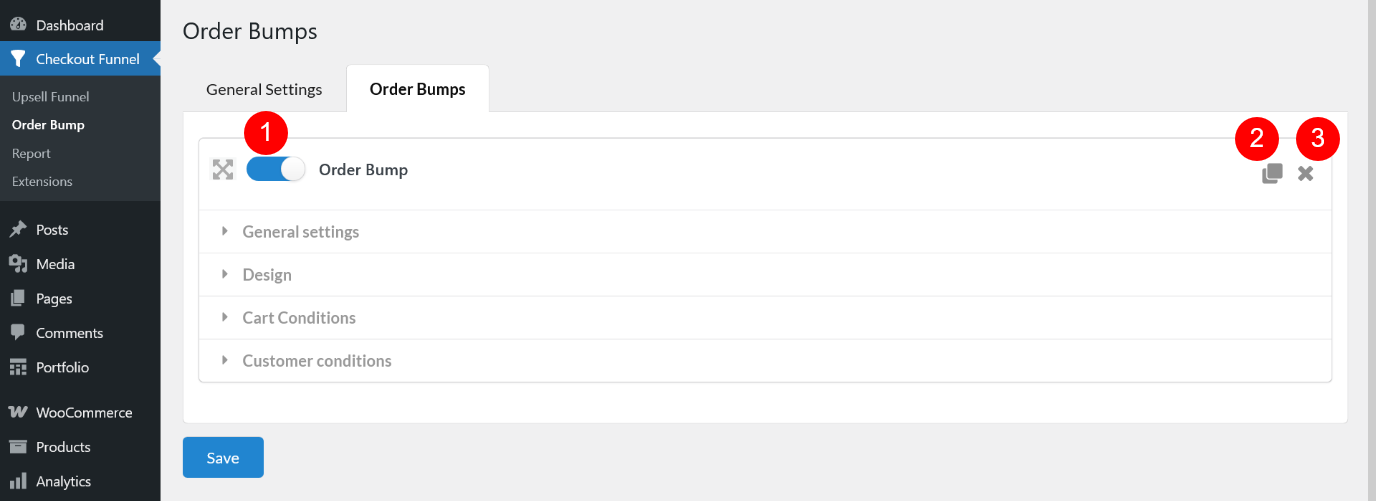
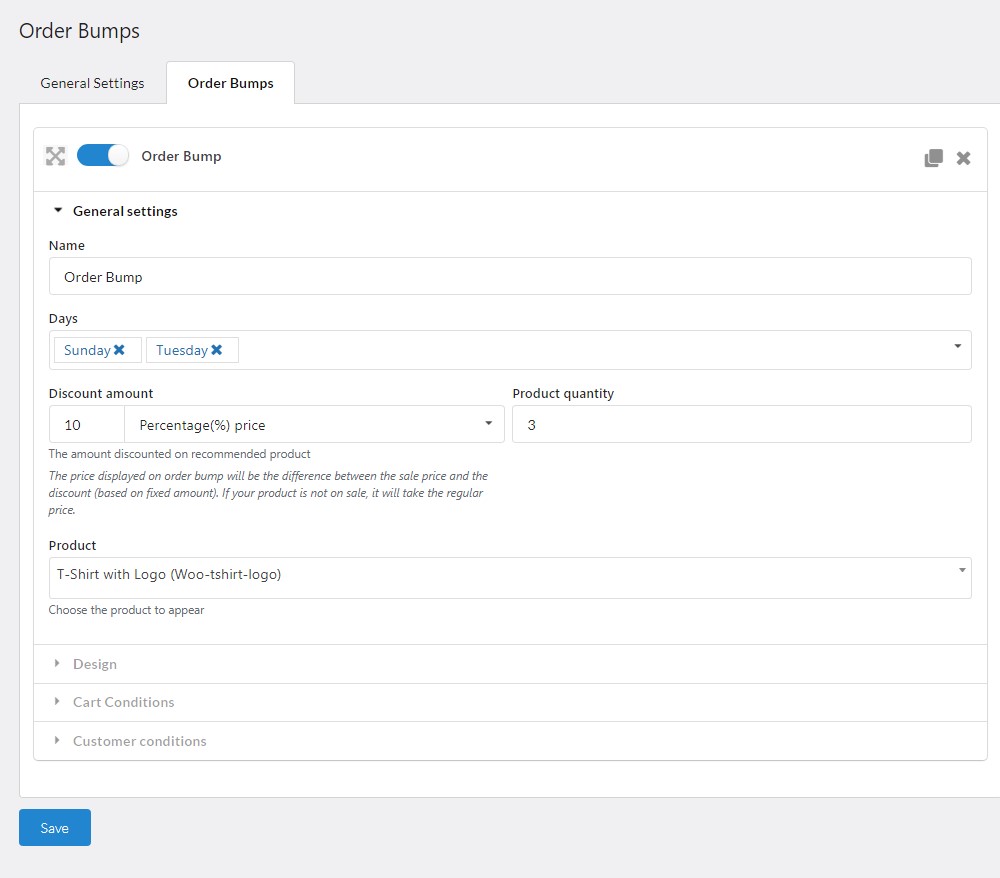
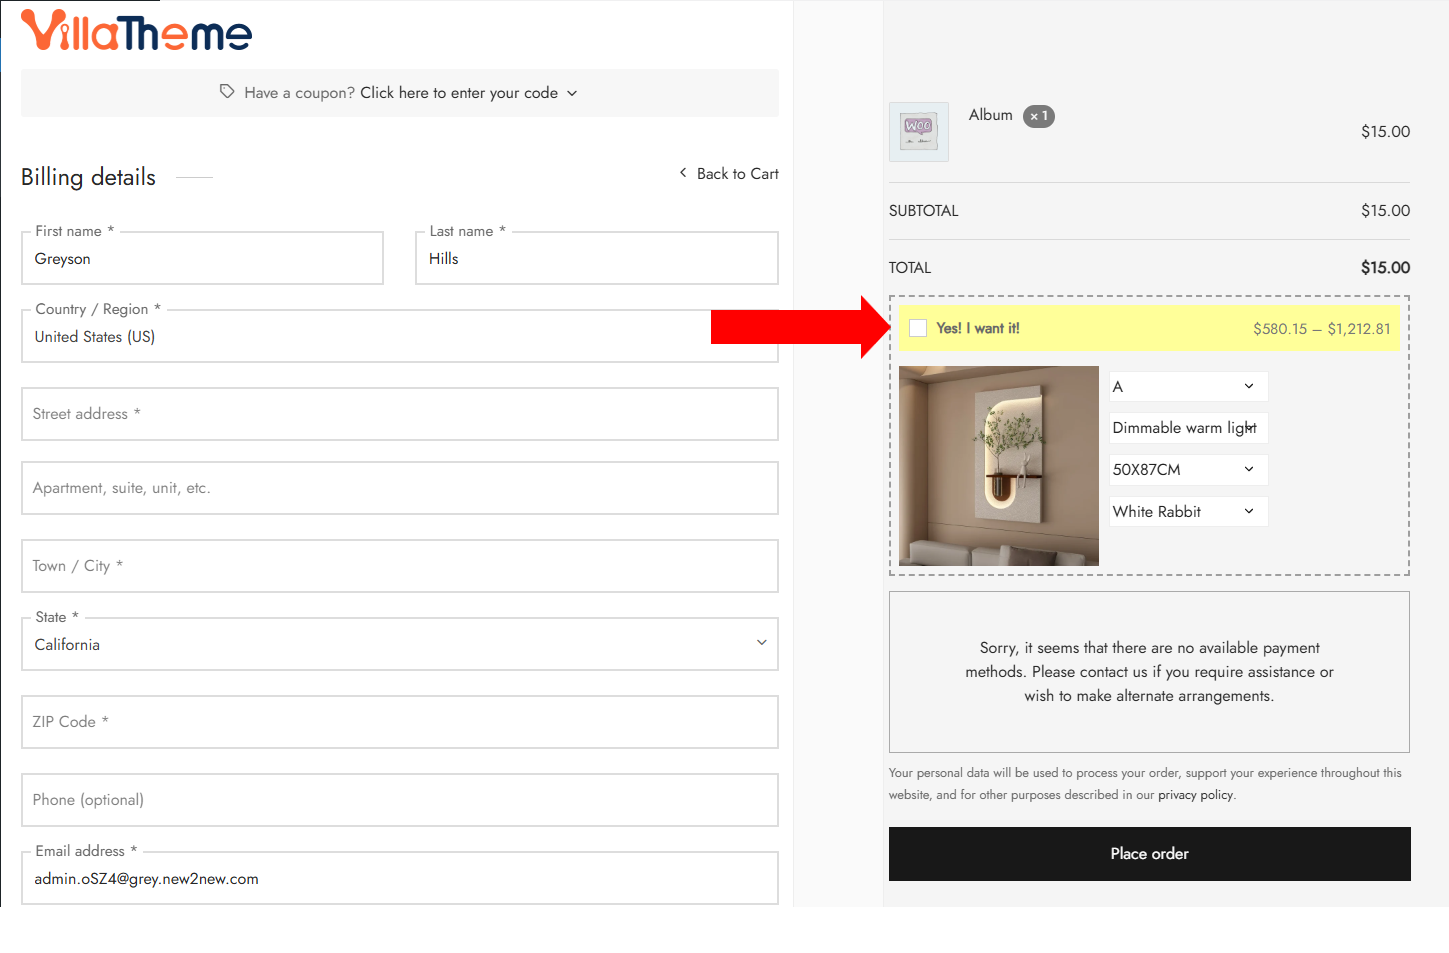
1. Enable the specific Order Bumps. You can create many order Bumps with different rules and designs, enable it to make the plugin run the order bump you choose.
2. Duplicate the Order Bumps.
3. Remove the Order Bumps.
General settings
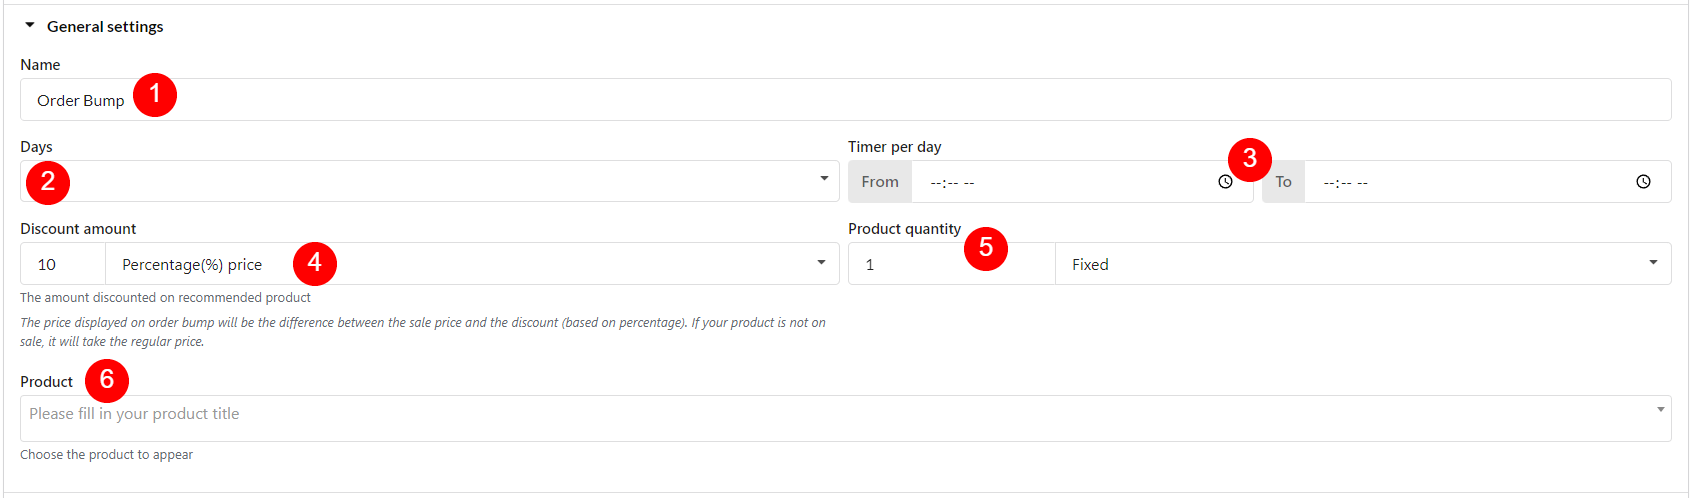
1. Name: Create a name for the Order Bumps.
2. Days: Choose the days in the week to display the Order Bumps to the Customers.
3. Timer per day: Set timer to show Order Bump per day.
4. Discount amount: Choose the type and the number for the discount amount applied on the Upsell Funnel.
5. Product quantity: Set up the number of products, which customers can buy each time on order bump.
6. Products: Choose the product to display on the Order Bumps.
Design
These settings allow you to customize the design and appearance of your Order Bump offers at checkout, helping them look professional and engaging.
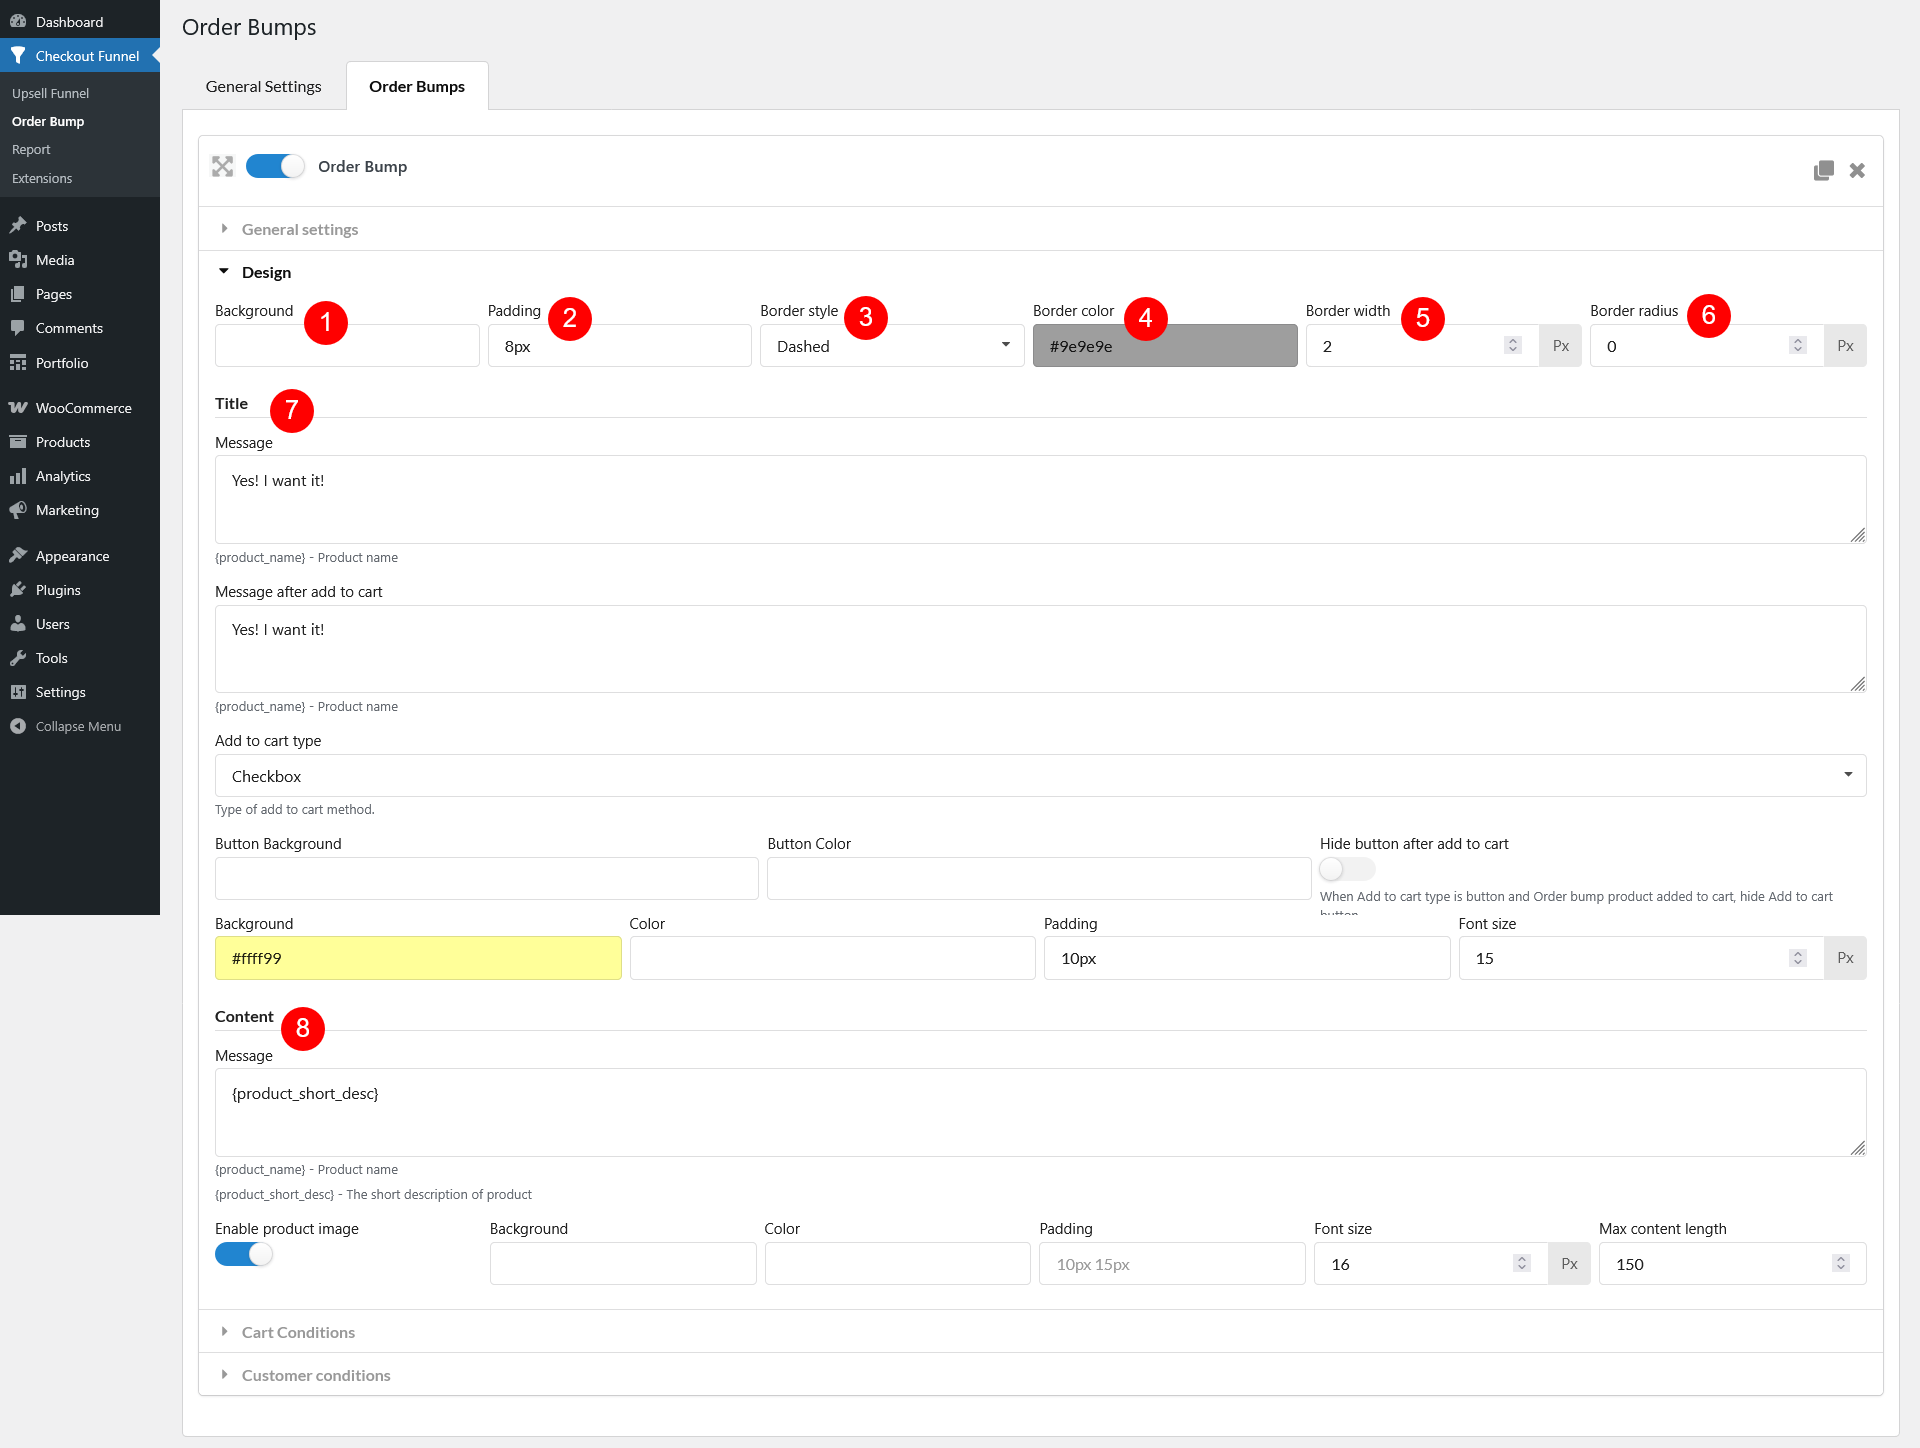
1. Background: Set the background color for the entire Order Bump box, make your offer stand out or blend with your checkout page, depending on your design preferences.
2. Padding: Define the space inside the Order Bump box. Adjusting padding gives your content room to breathe and ensures everything is visually balanced.
3. Border style: Choose how the border around your Order Bump appears. Available styles include:
4. Border color: Set the color of the border surrounding the Order Bump box. You can match it with your brand colors or use a contrasting color to draw more attention.
5. Border width: Control how thick the border is. A thinner border keeps it minimal, while a thicker one makes the bump box more prominent.
6. Border radius: Adjust the roundness of the corners on the Order Bump box. Higher values make the corners more curved, giving a softer, modern look.
7. Title
8. Content
Cart Conditions
Use these settings to show or hide Order Bumps based on what’s in the cart, who the customer is, or how they’re checking out. Each condition helps you target the right customers with the right offers. Below is the categorized list of Cart Condition options
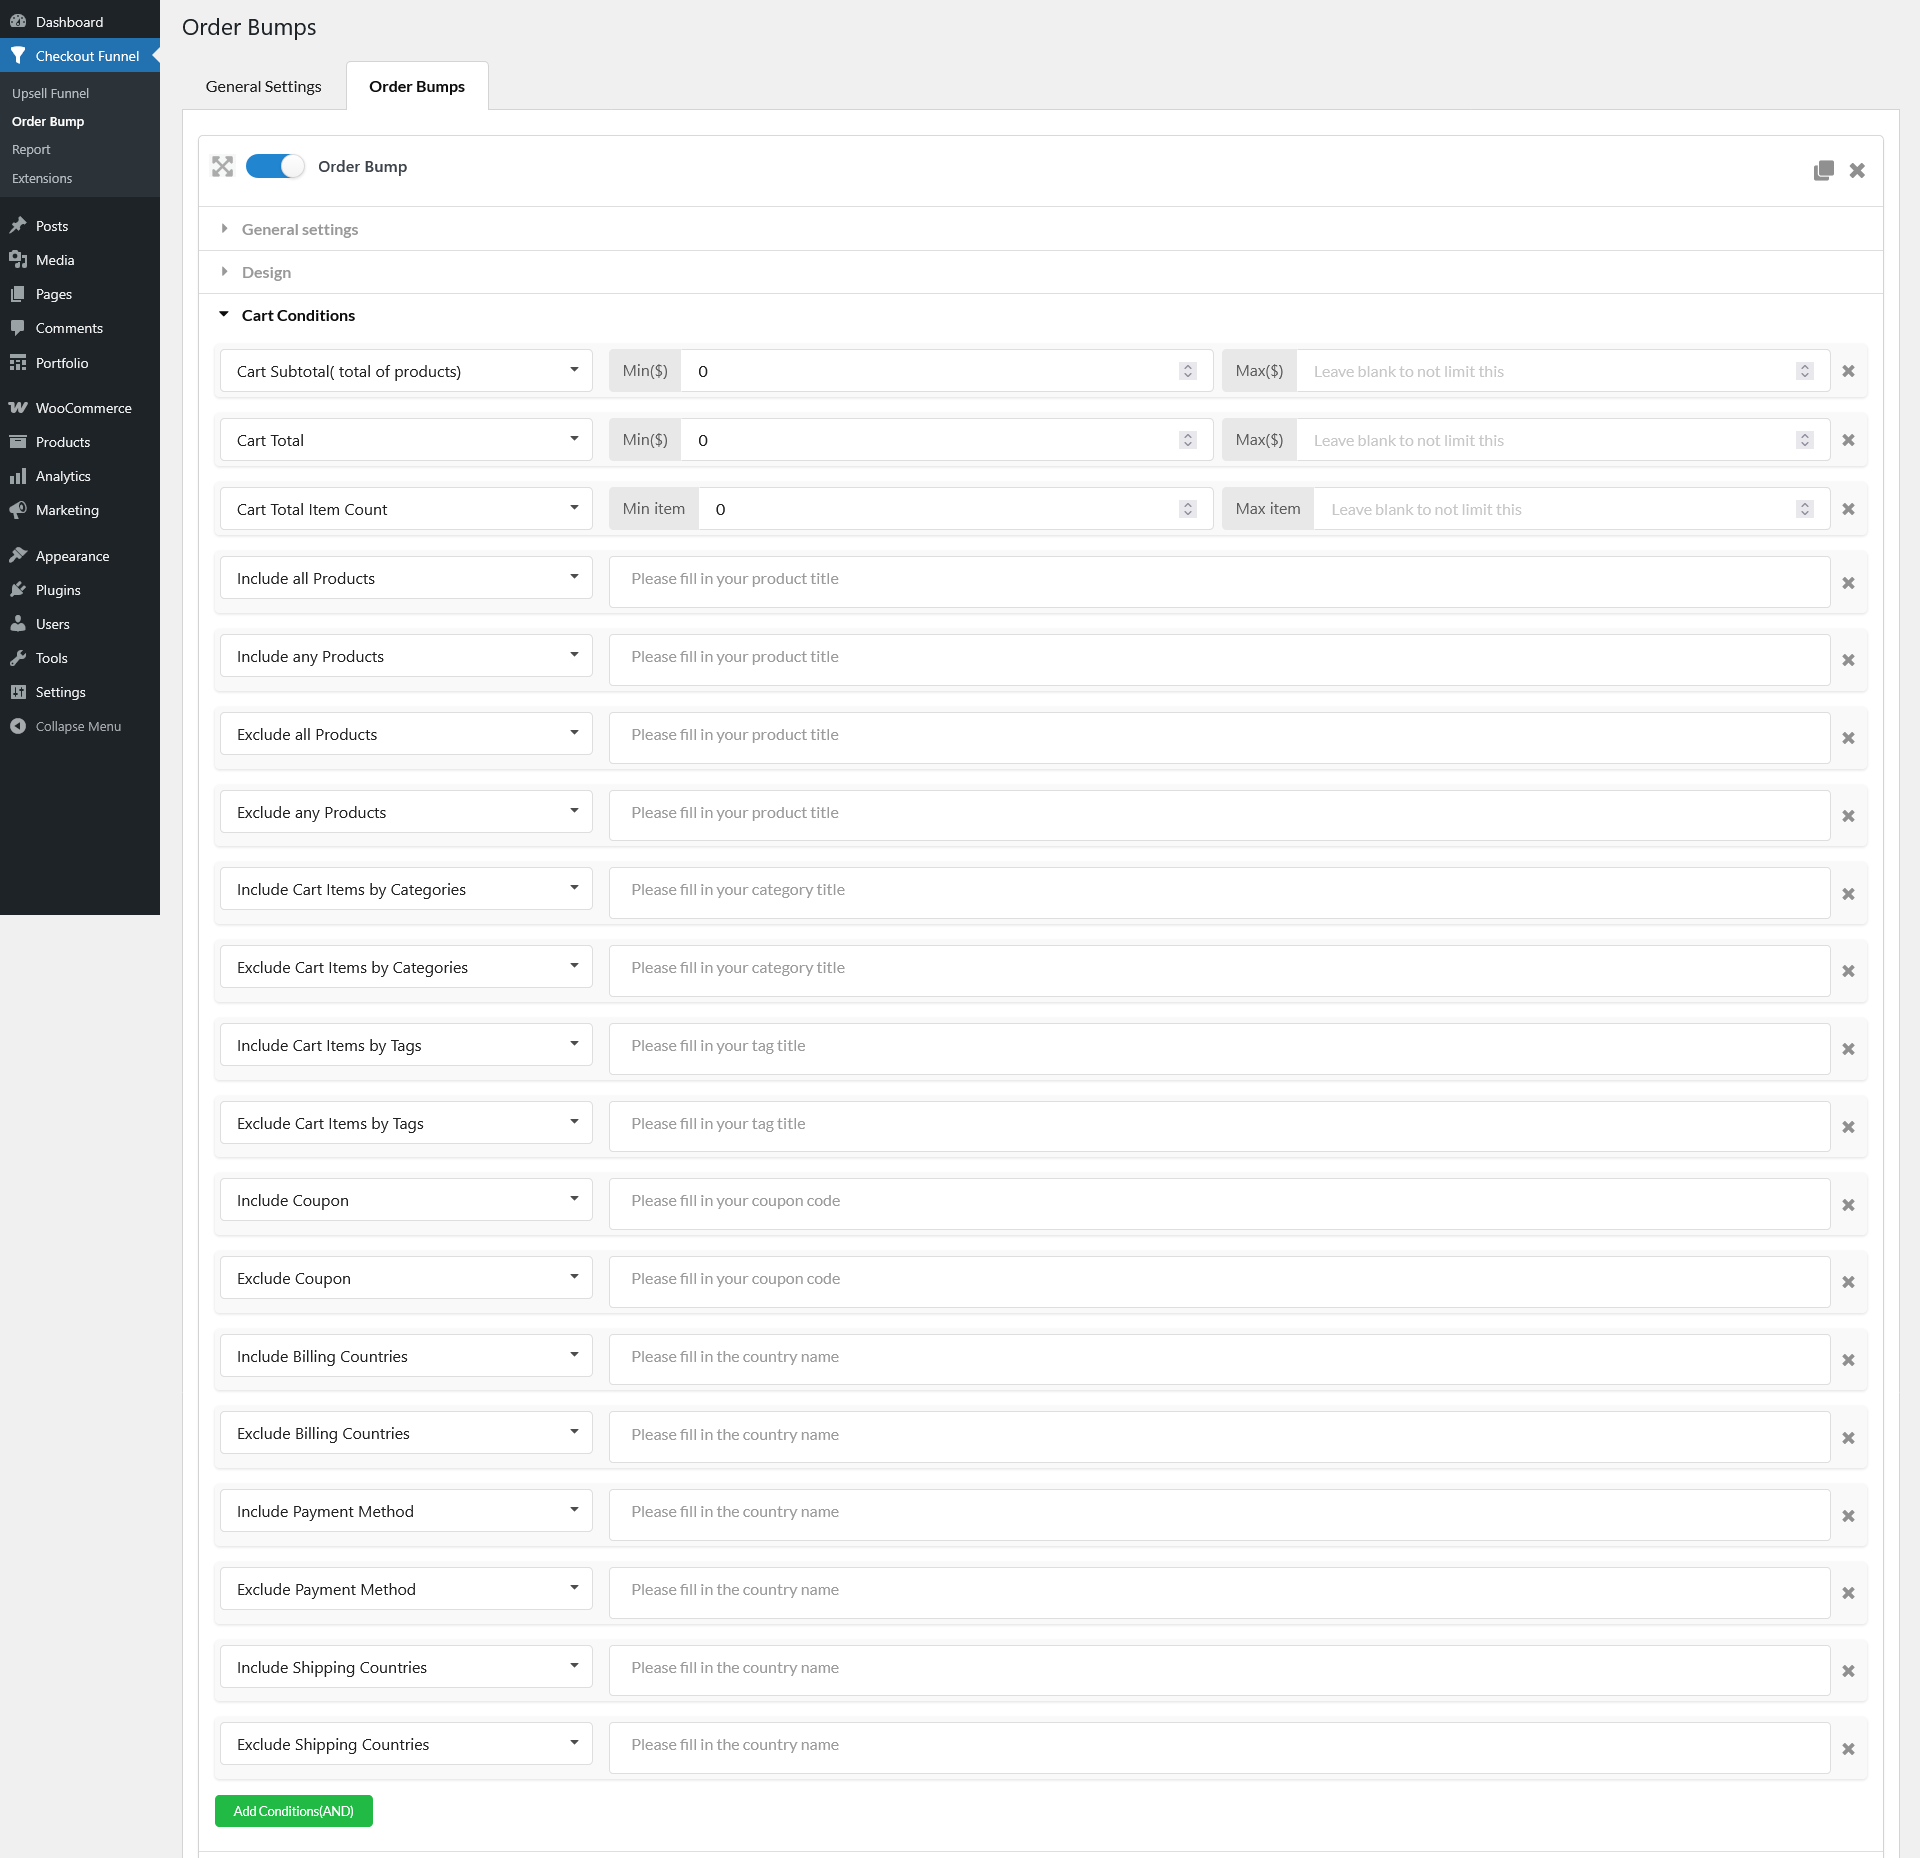
1. Cart Total: Conditions based on cart price or quantity
2. Cart Item: Conditions based on the products or categories in the cart
3. Applied Coupon: Conditions based on coupons added to the cart
4. Billing Address: Conditions based on the customer’s billing information
5. Payment Method: Conditions based on the selected payment option
6. Shipping Address: Conditions based on the customer’s shipping destination
Customer conditions

1. Limit per day: Set the limitation per day for the customers to see the Order Bumps.
2. Only logged: Set up for only the customers who log in to see the Order Bumps or not.
3. Include user role: Set up for the specific user roles to see the Order Bumps.
4. Exclude user role: Set up for the specific user roles not to see the Order Bumps.
5. Include user: Set up for the specific users to see the Order Bumps.
6. Exclude user: Set up for the specific users to not see Order Bumps.
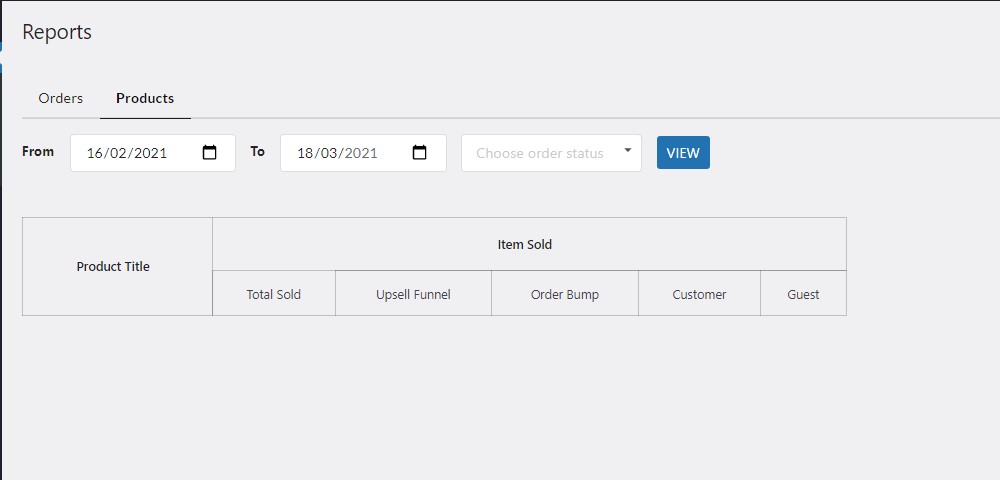
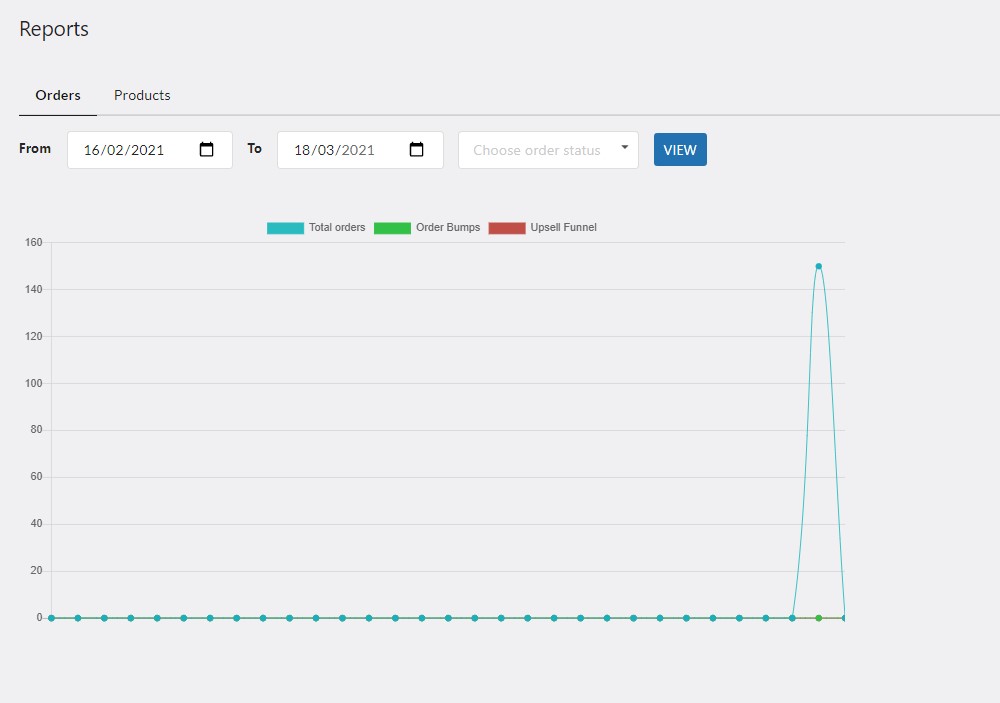
Orders Report
Products Report