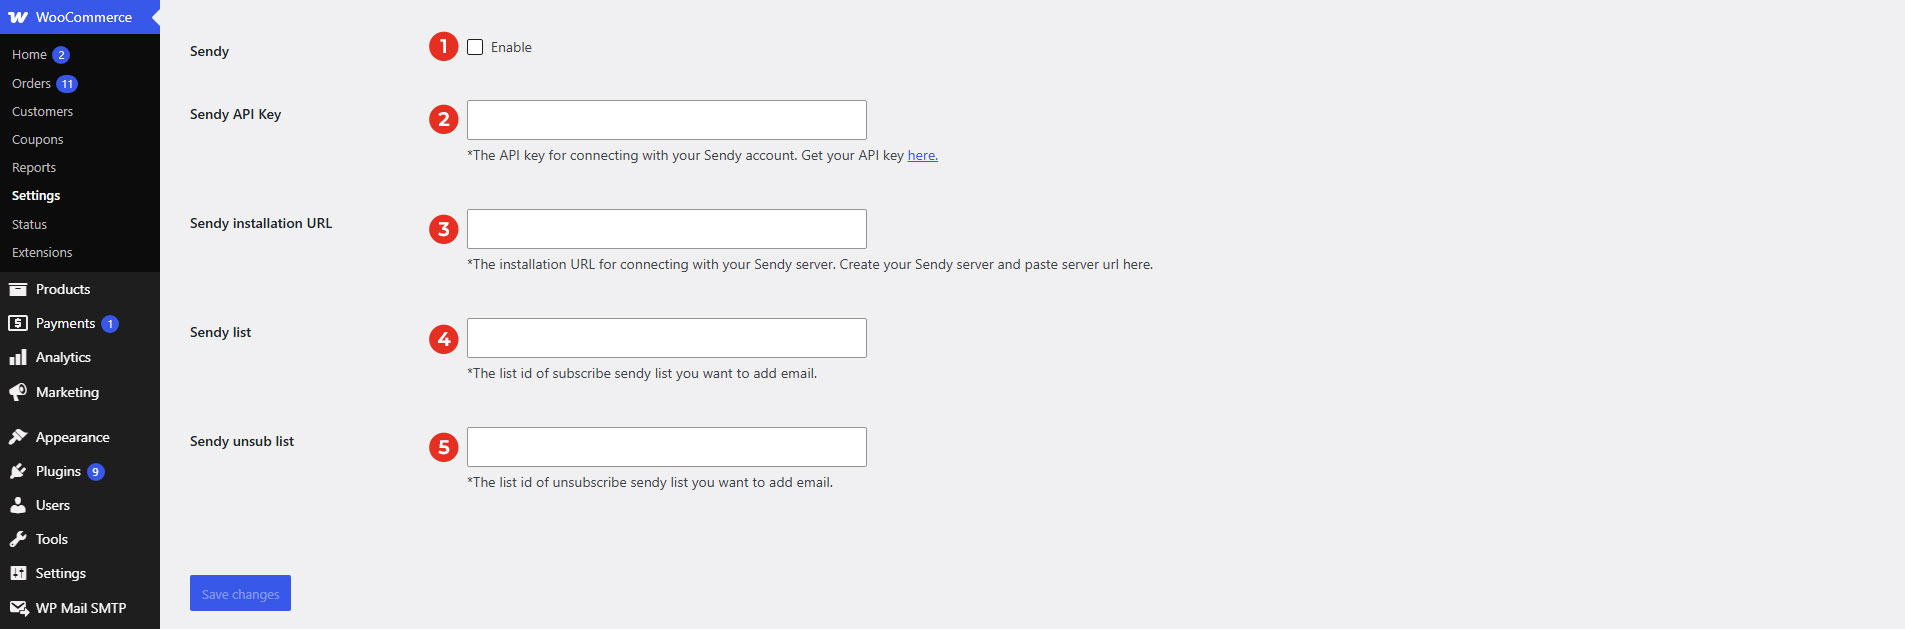
- Sendy: Enable/Disable Sendy API.
- Sendy API Key: Copy the generated API key, then paste them into this field.
To connect to your email list on Sendy, you must have a Sendy account activated, and follow the steps below:
Step 1: Enable SendyStep 2: Go to your account settings and get the API key. See instruction at: https://sendy.co/api
Step 3: Enter your Sendy login URL >> Hit “Save” button
Step 4: Now your Sendy brands are available to select. After selecting brand in “Sendy Brand” field >> Hit “Save” button again
Step 5: After step 4, email list of the brand you select is available >> Choose the list you want your spinners’ email to go to >> Hit “Save” the last time.
That’s pretty much for the connecting Sendy to our plugin.
- Sendy Installation URL: Enter the installation URL of your Sendy server.
This should be the full URL where Sendy is installed, including the protocol (
https://orhttp://). The plugin uses this URL to connect to your Sendy server and synchronize subscribers.Example:
https://sendy.example.com - Sendy list: Enter the ID of the Sendy list where new subscribers from the Coupon Box will be added.
When a visitor subscribes through the Coupon Box, their email address will be added to the specified Sendy list. You can find the List ID in your Sendy dashboard.
- Sendy unsub list: Enter the ID of the Sendy list used for unsubscribe synchronization.
If this option is configured, users who unsubscribe from the Coupon Box email list will also be unsubscribed from the specified Sendy list, helping keep subscriber statuses synchronized between Coupon Box and Sendy.