Copyright Villatheme 2015-2026
Created: 2018.08
Latest update: 2026.03 – Updated to Sales Countdown Timer version 1.1.9
By: VillaTheme
Thank you for purchasing our plugin. If you have any questions that are beyond the scope of this documentation, please feel free to request support at our Support Forum. Thanks so much!
Make sure that those limits to a minimum as follows in order for free-trouble while installing:
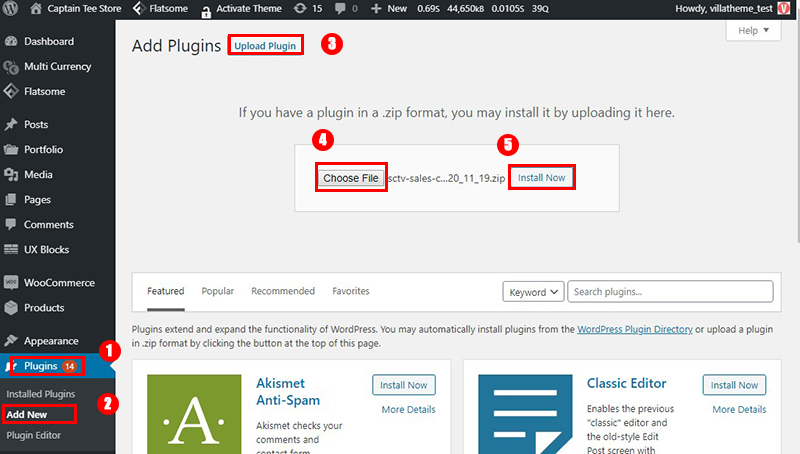
Go to Plugin/Add New/Upload Plugin/Choose file/ select plugin zip file sale-countdown-timer /click “Install Now“/click “Active plugin“.
Done! Let’s start using the plugin.
Guiding video on how to install and set up:
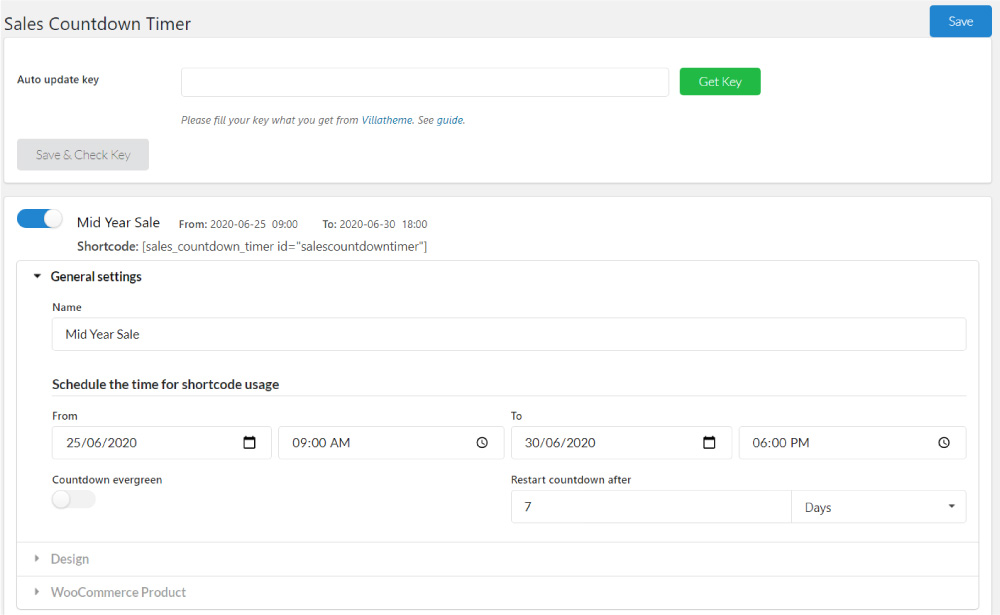
To use the WooCommerce Sales Countdown Timer feature, you need to configure a Sale Countdown Timer profile in Dashboard/ Countdown Timer then assign that profile to a product.
Set up a Sales Countdown Timer with General Settings, Design and WooCommerce Product settings. We will discuss more details about these settings in How does it work chapter.
After configuring settings, go to any product edit page to assign the Sales Countdown Timer to that product.
In a single product edit page,you need to assign a Sales Countdown Timer profile to that product.
To set bulk sales countdown timer for variable products:
Set the sale time for variable products: Go to any variation product page/Product data/ Variation and set sale time for the variations you want.
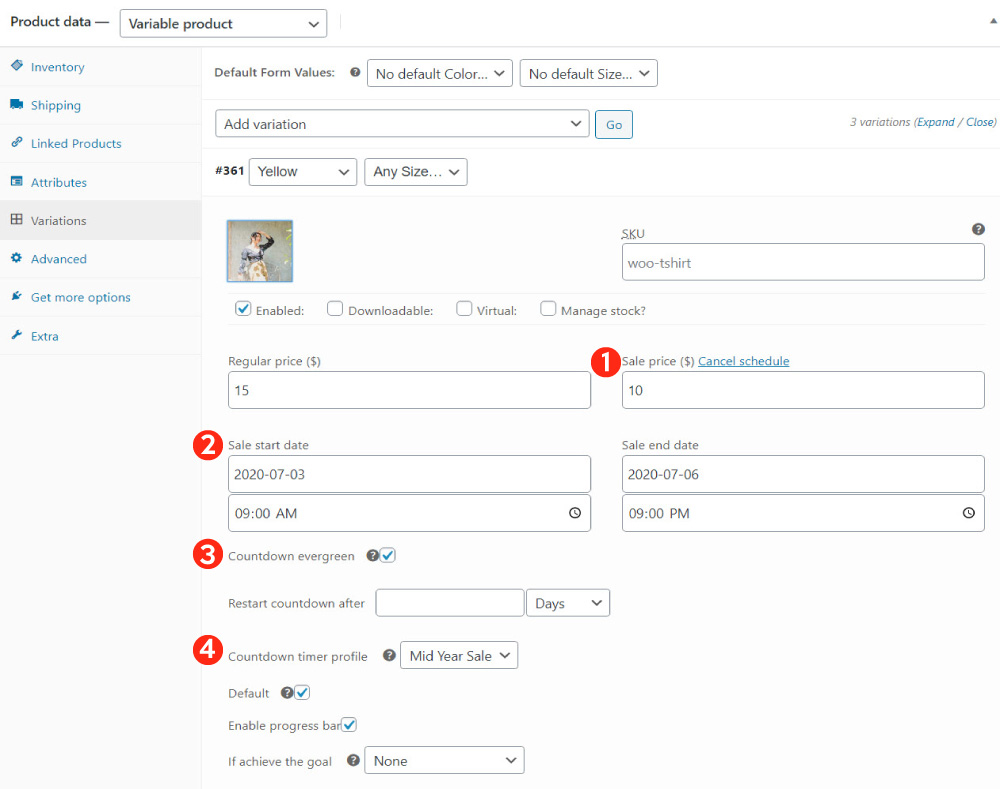
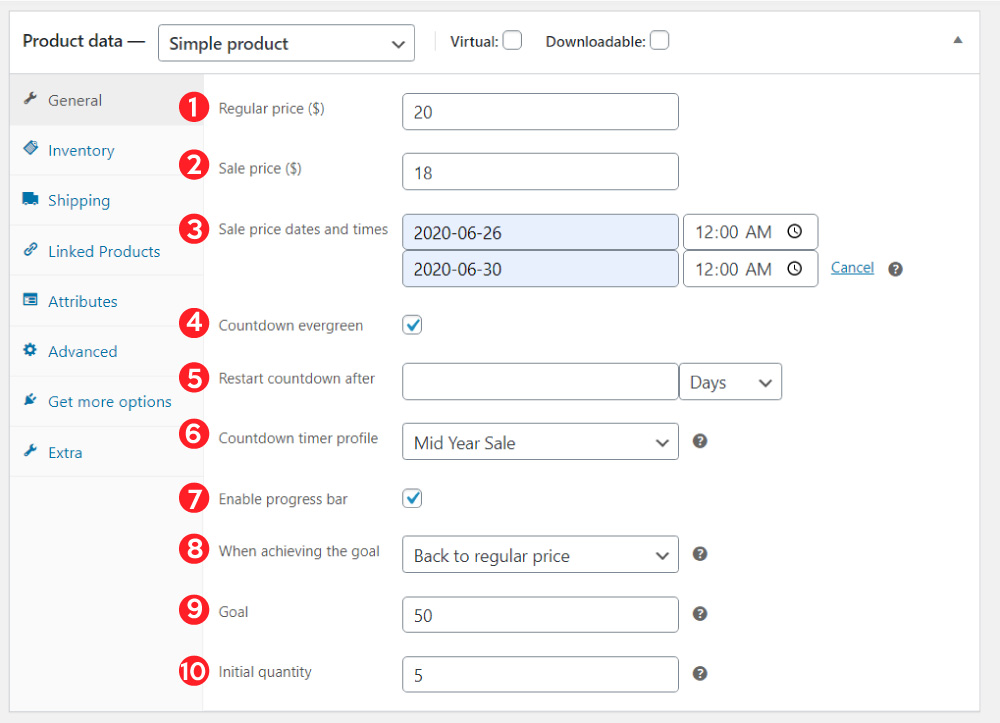
1. Enter sale price for each variation of variable product.
2. Schedule time for sales countdown timer: sale start date and sale time date.
3. Check on for enabling Countdown evergreen.
4. Choose the countdown timer profile.
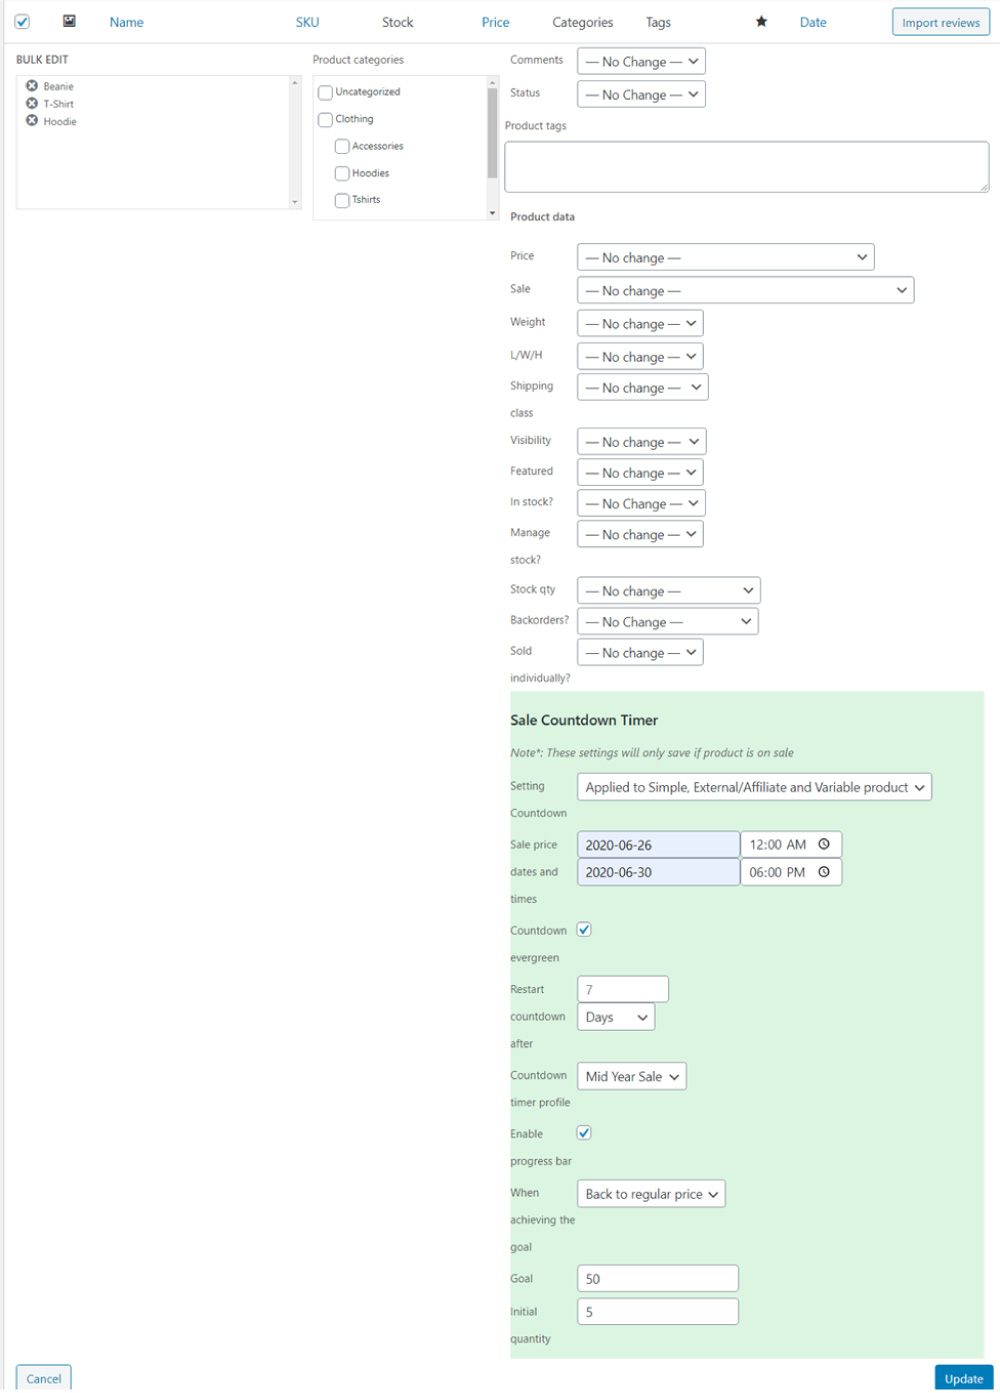
To change the sales countdown timer profile, price… for many variations, go to Products/ All products/ filter Variable products, then select the variable products that you want to bulk set sales countdown timer.
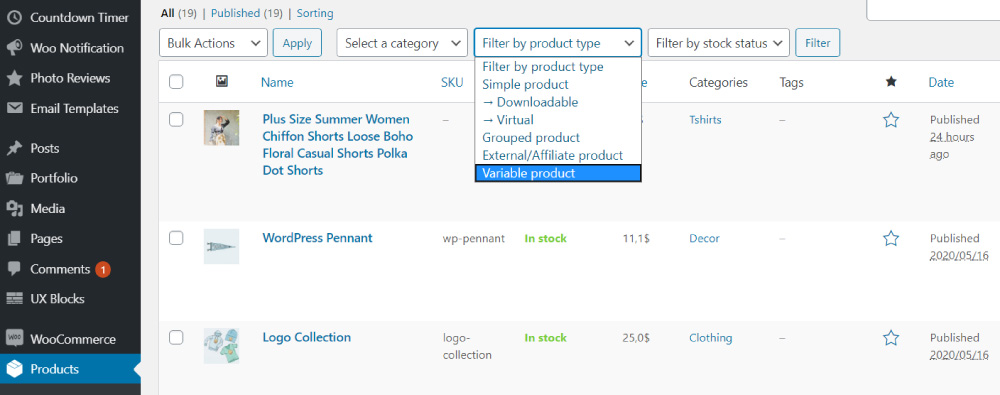
In the Bulk Actions field select Edit/ Apply, then you can set bulk sales countdown timer for the variable products.
This plugin supports 2 shortcodes which:
B. Display a list of products with active sale countdown timers
If the start date/time for the timer linked to the shortcode is set in the future, the timer will not be visible on the frontend. To display a countdown for an upcoming sale (i.e., a countdown to the sale start time), add this parameter to the shortcode: countdown_upcoming_enable
E.g. [sales_countdown_timer id="salescountdowntimer" countdown_upcoming_enable="1"]
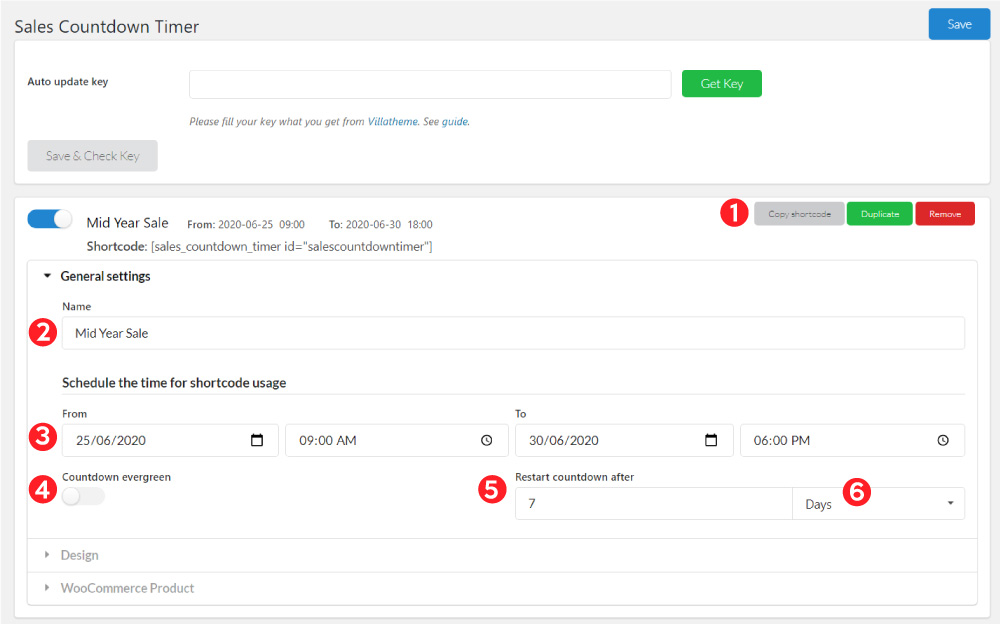
Steps to get the countdown timer shortcode:
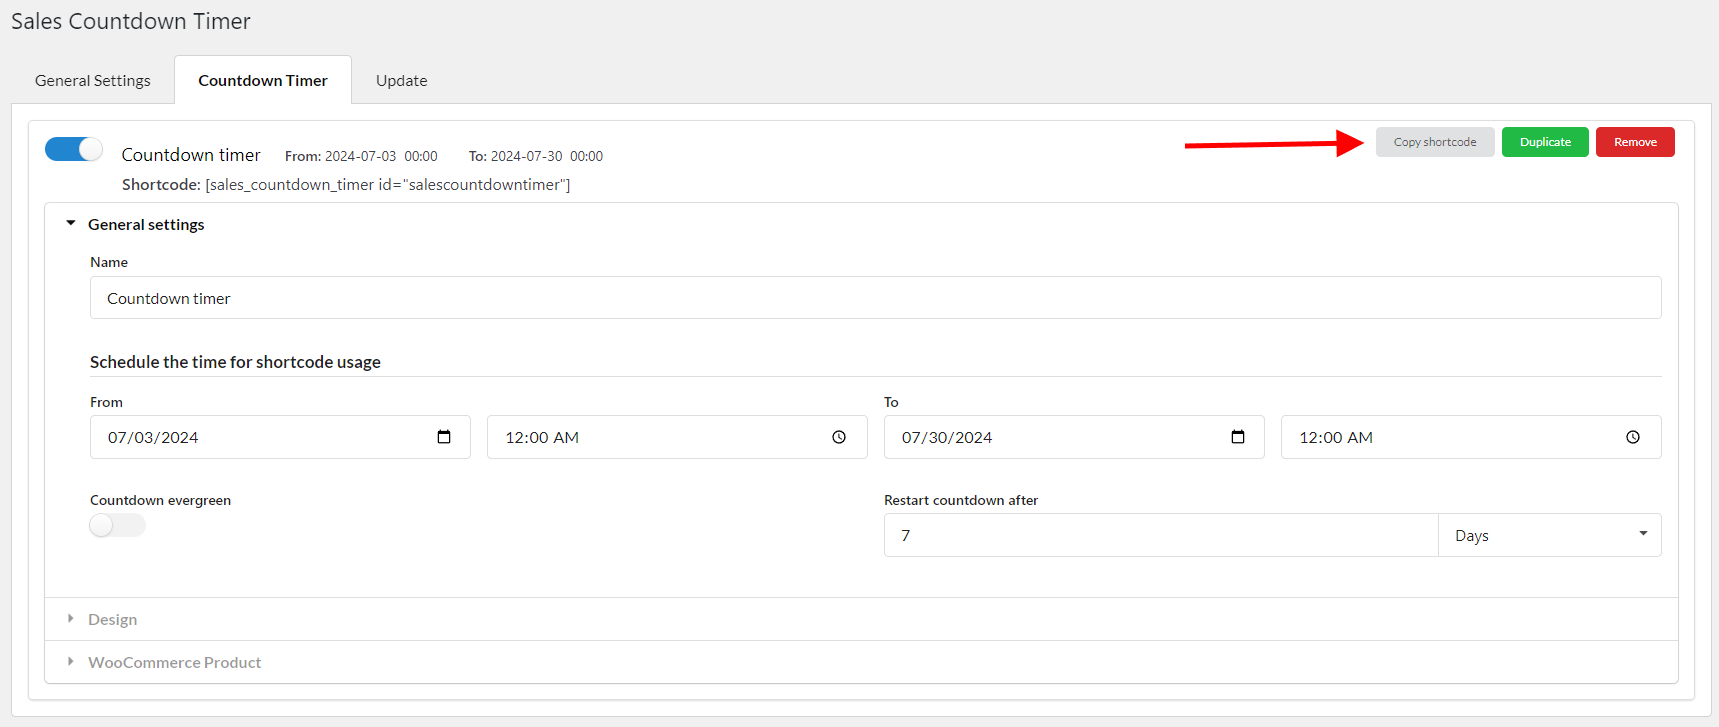

Besides, we support a shortcode to display all products which have sale countdown timers: [sales_countdown_timer_list]
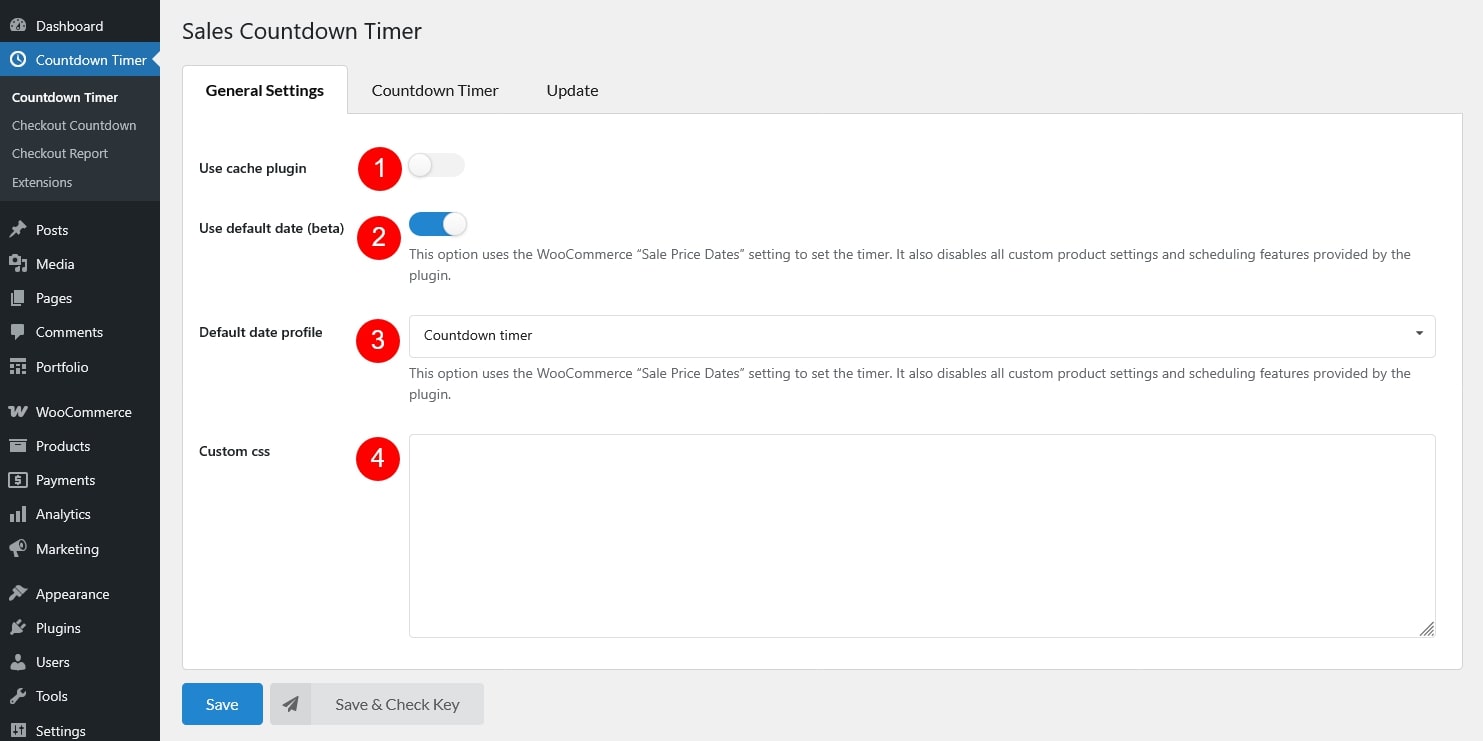
In the General settings tab of the Countdown timer, you can add new or remove the Sales Countdown Timer profile.
In Design settings, you can configure how the sales countdown timer looks like in front-end.

Datetime value and Datetime unit settings are Display type-specific (5). Scroll down to learn the options for each type.
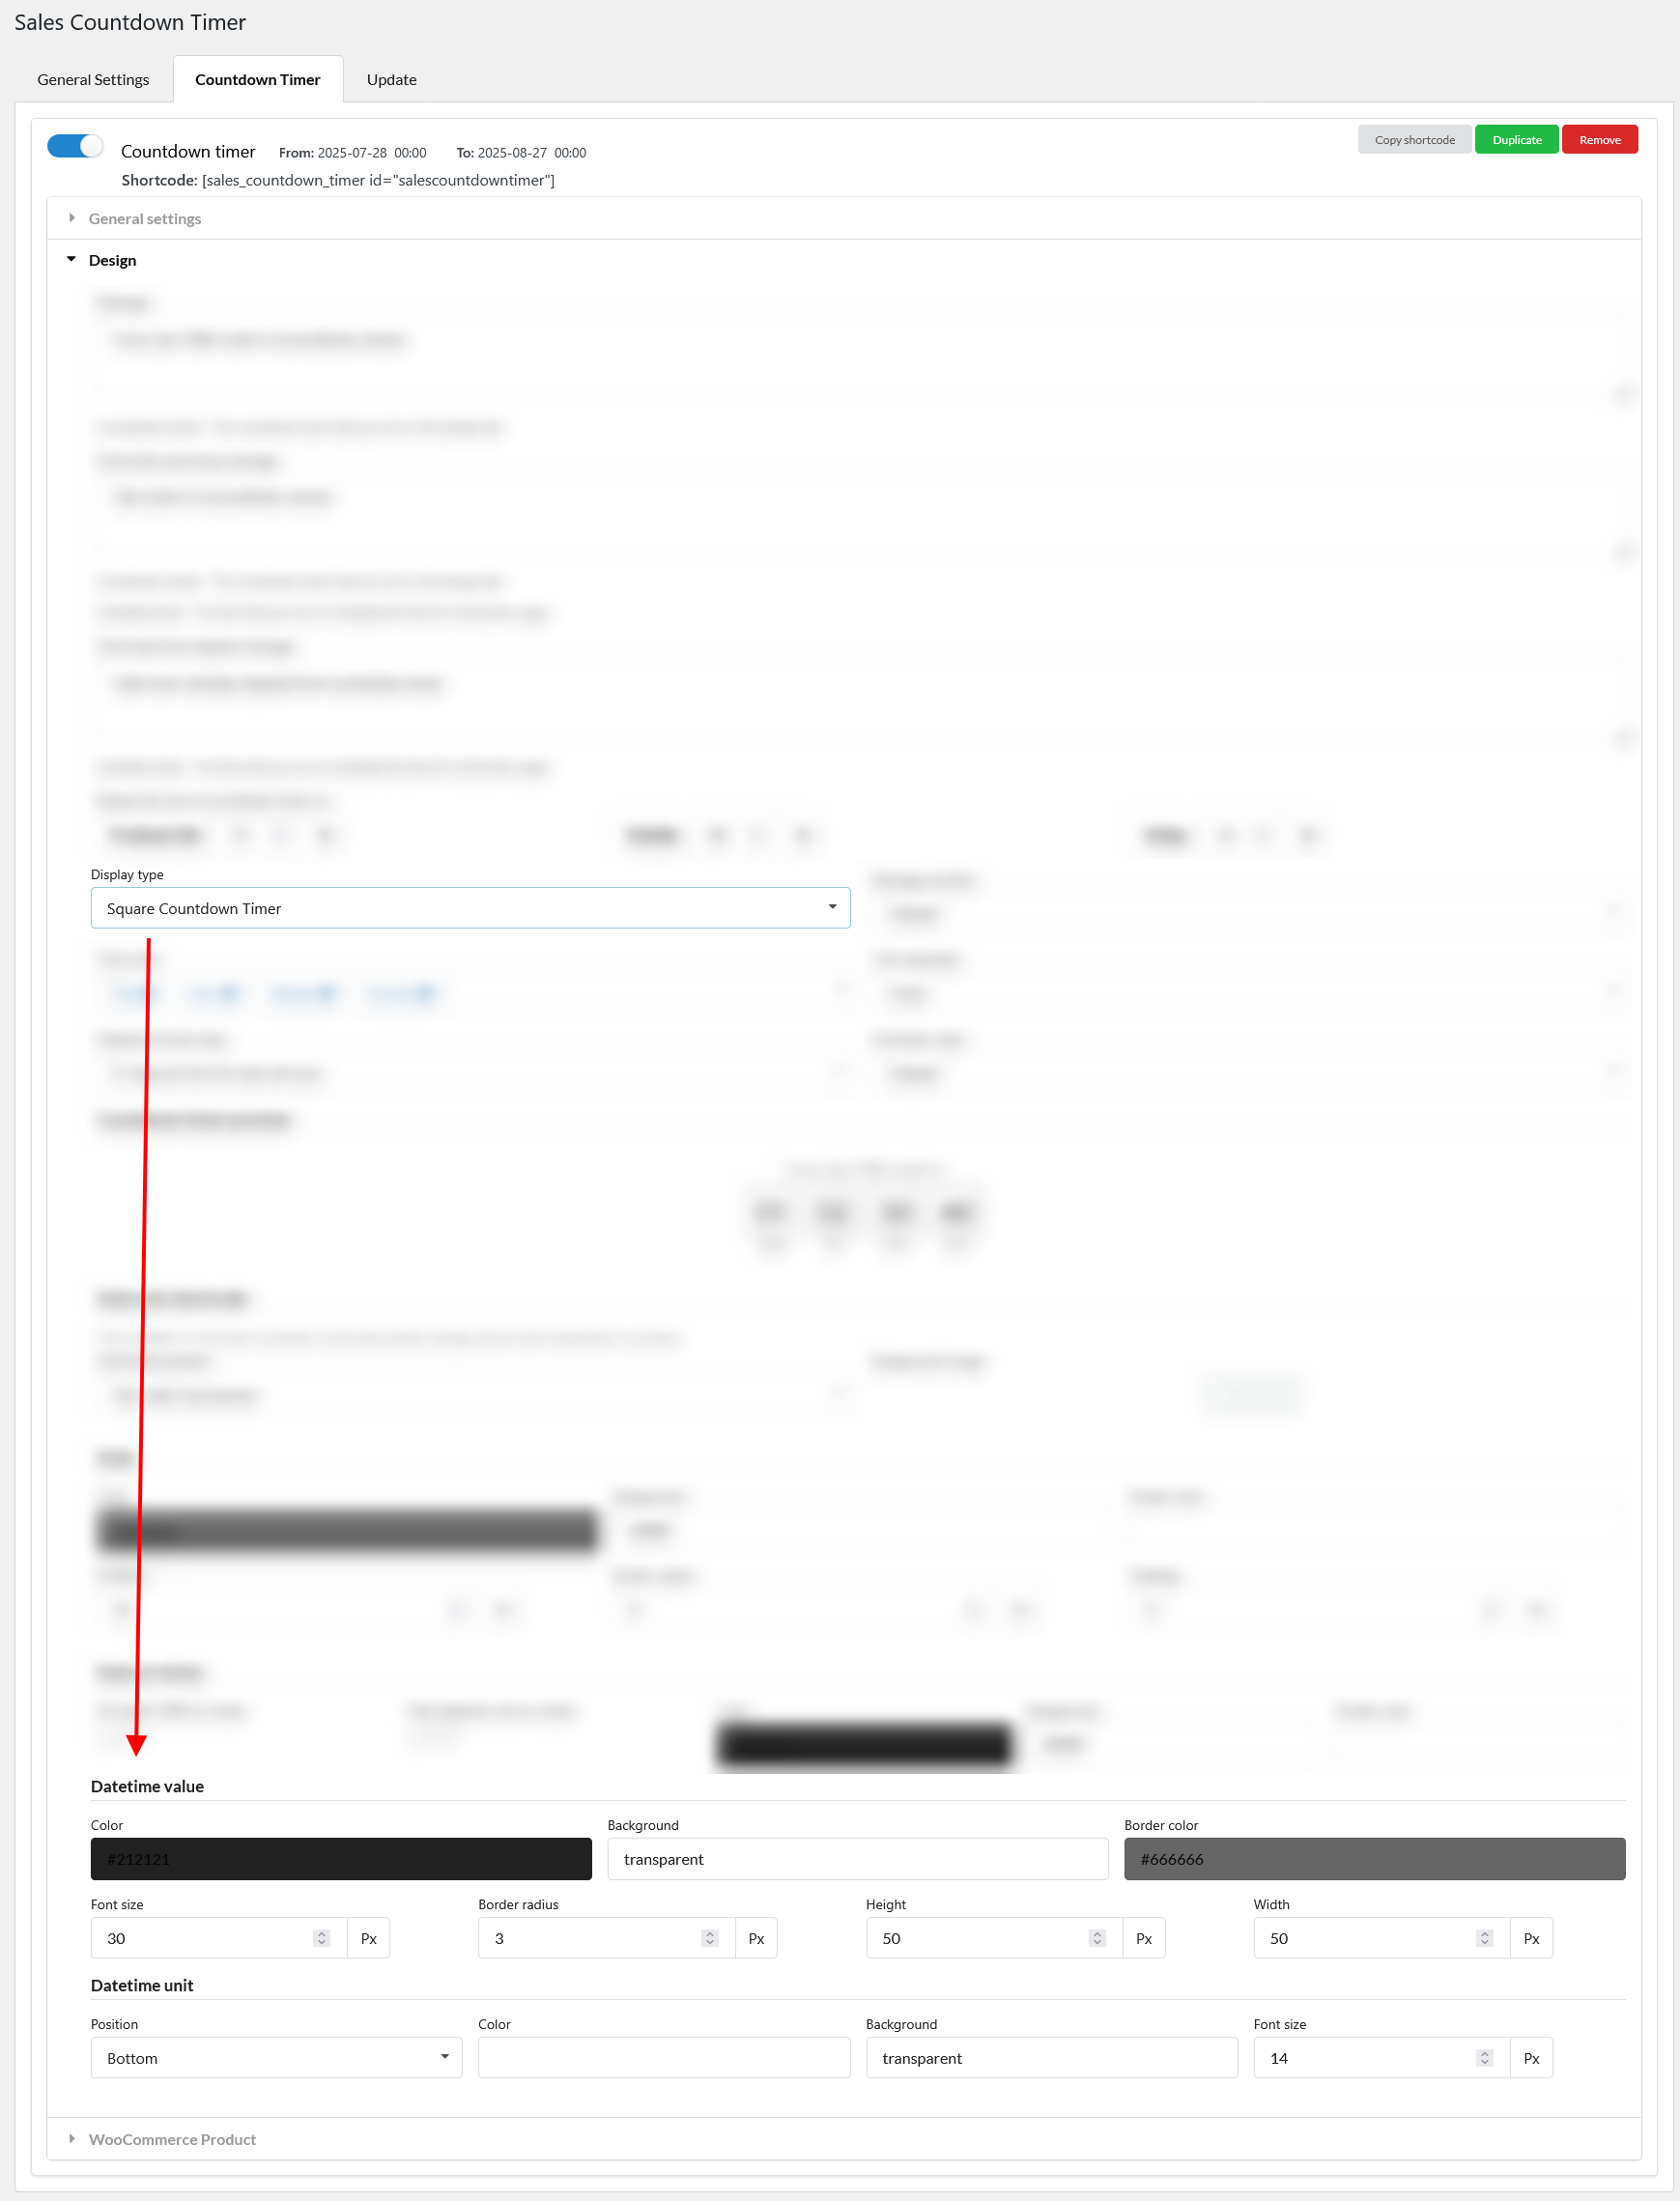
Square Countdown Time
Square Countdown Timer 1
Basic Countdown Timer
Circle Countdown Timer
This style displays each time block (e.g., days, hours) inside a circular timer. The circle’s outer border represents the total time (100%), and it visually fills as time passes:
Circle Countdown Timer 1
This type shows each countdown timer item (date, hour, minute, second) in a circle block just like Circle Countdown Timer, but with individual style settings for each unit. Each time unit (Date, Hour, Minute, Second) can be styled with its own colors. The circle border visually fills as time progresses – similar to a progress ring.
Sleek Countdown Timer
This countdown timer style features a clean, split layout, where each time block (e.g., hours, minutes, seconds) is divided into two distinct halves by a horizontal dividing line if enabled.
Sleek Countdown Timer 1
Under Dashboard >> Countdown Timer, you can configure to display the Sales Countdown Timer on WooCommerce pages.
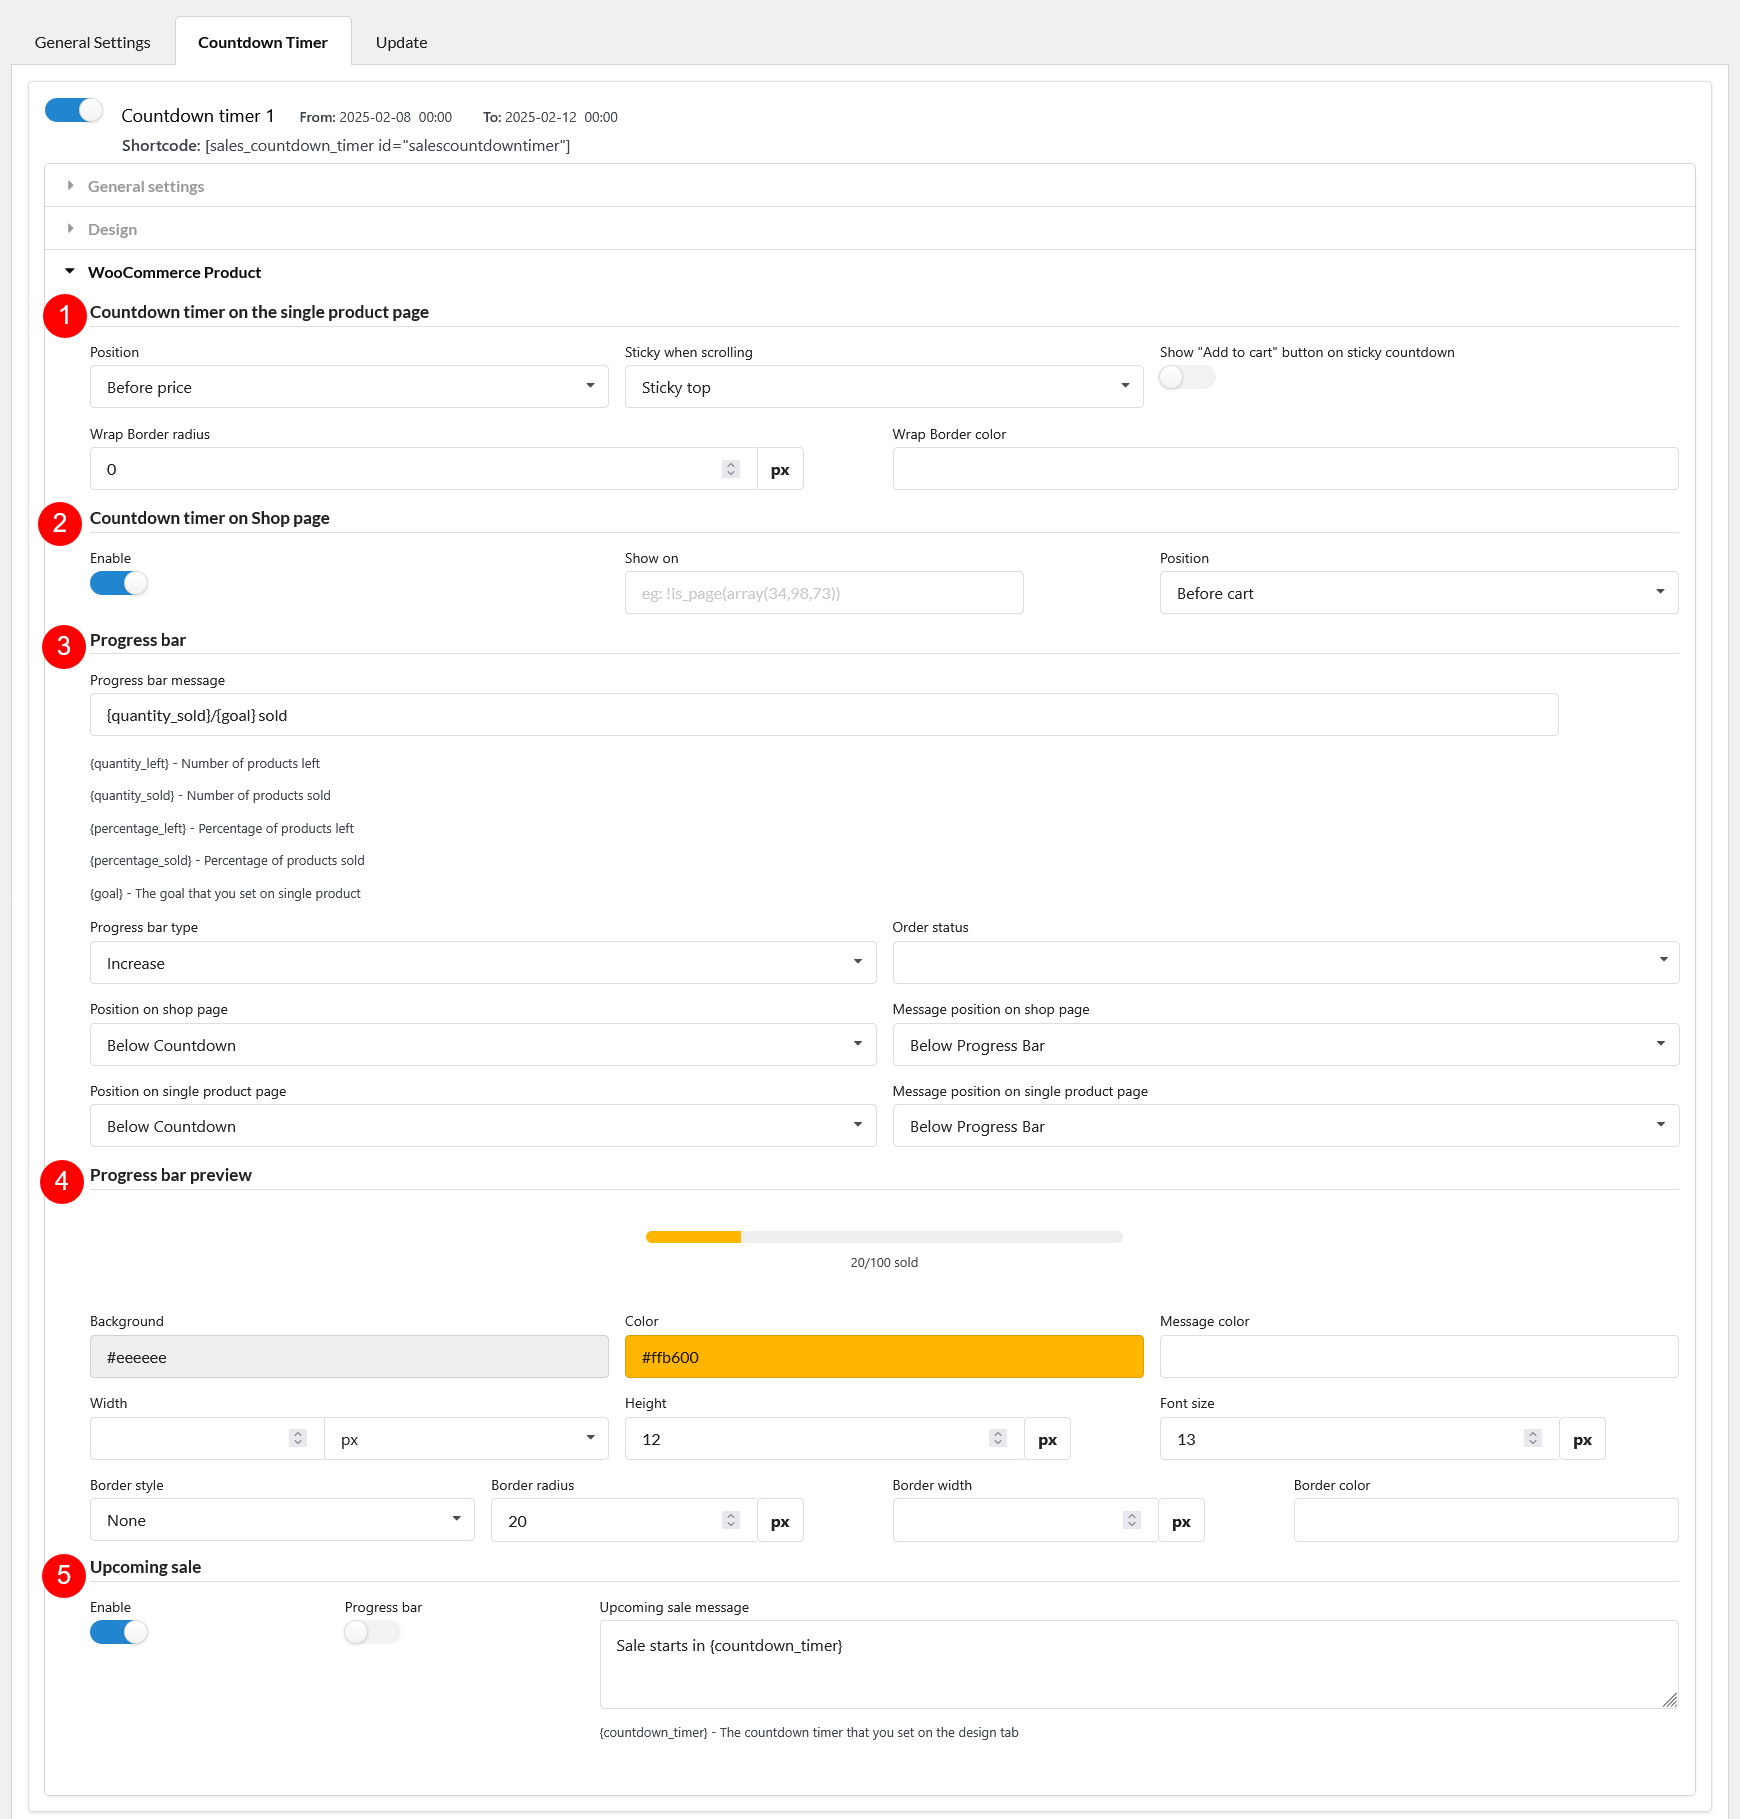
This feature is available if WooCommerce is in use
In the general setting of the checkout countdown, you can set the checkout countdown timer for a minimum cart total to get a special offer.

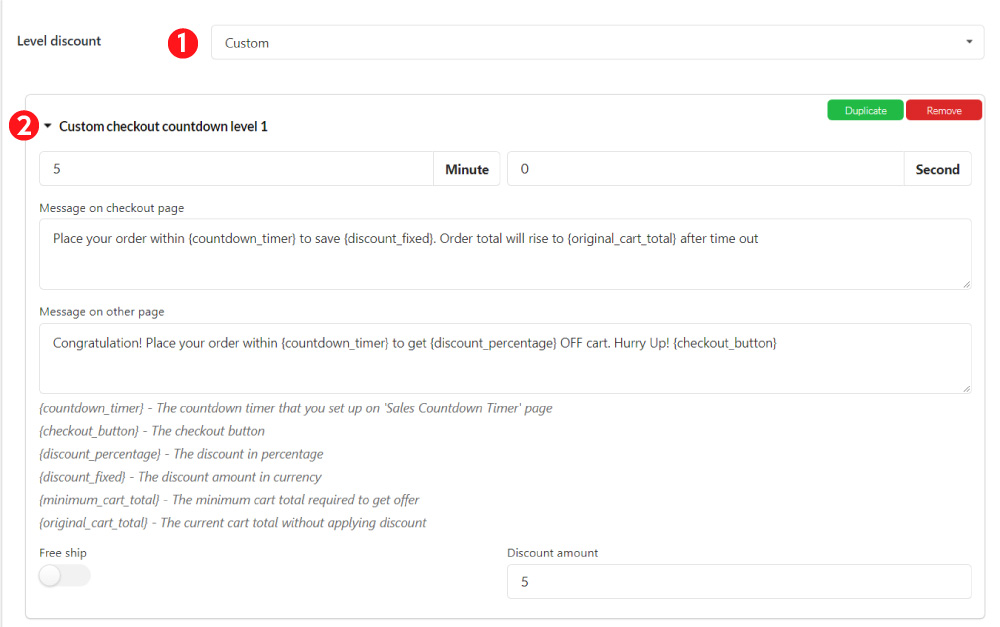
* You can duplicate the custom checkout countdown level to add other countdown levels.
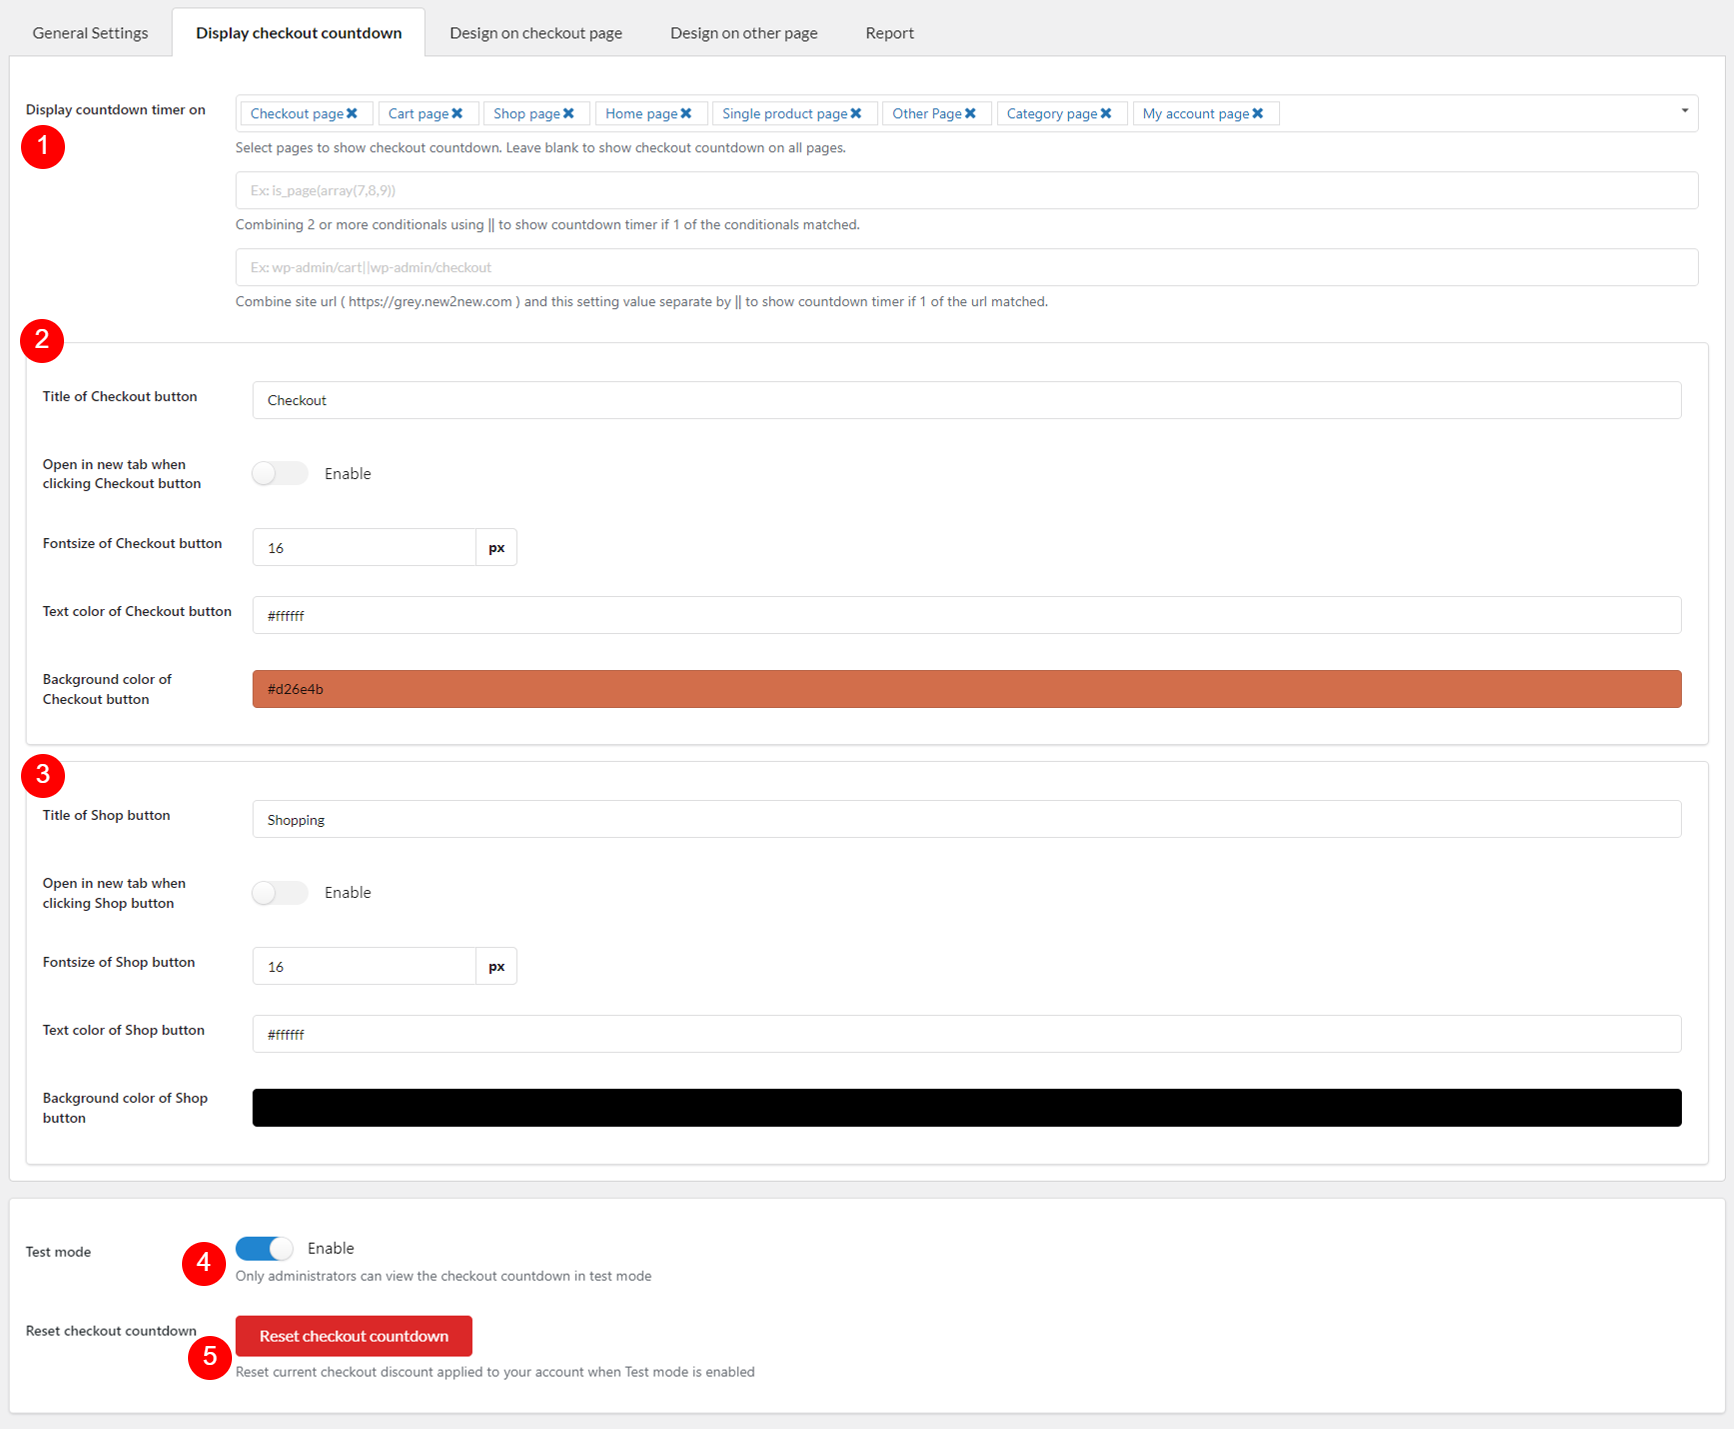
This setting allows you to design the checkout countdown and assign pages the checkout countdown will show up.
This setting allows you to design the checkout countdown timer on the checkout page. 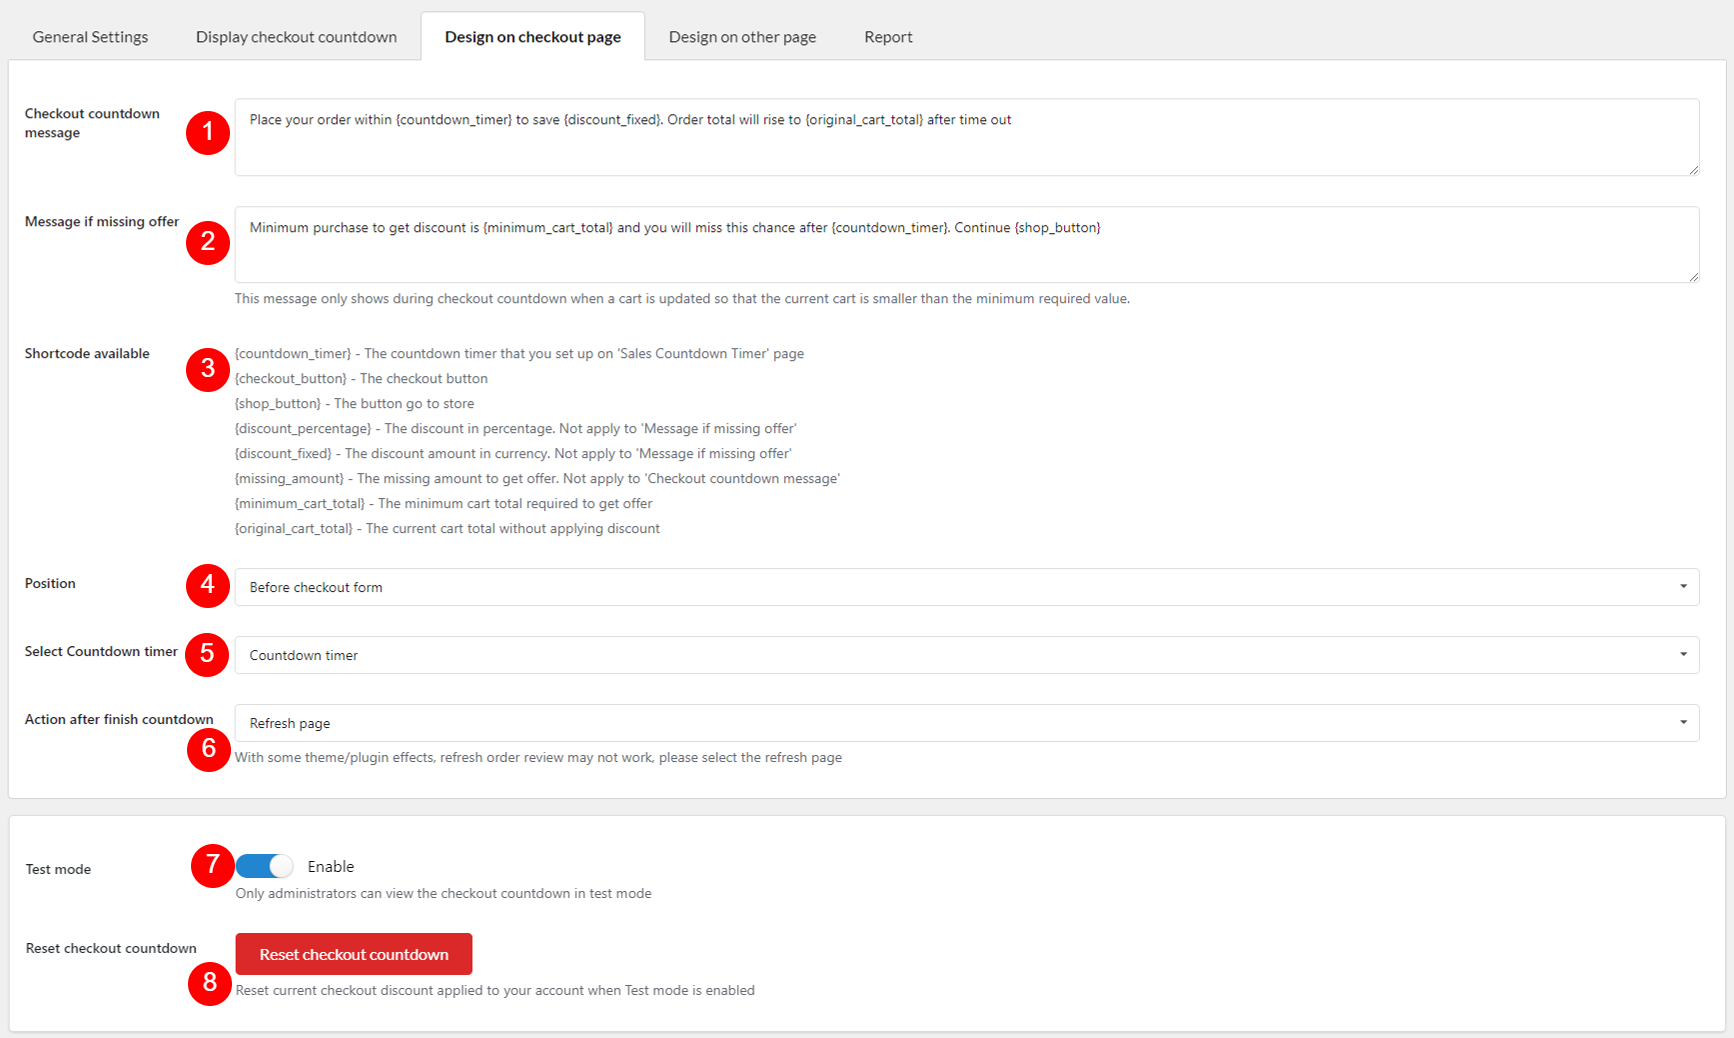
This setting allows you to design the checkout countdown timer on the other page.
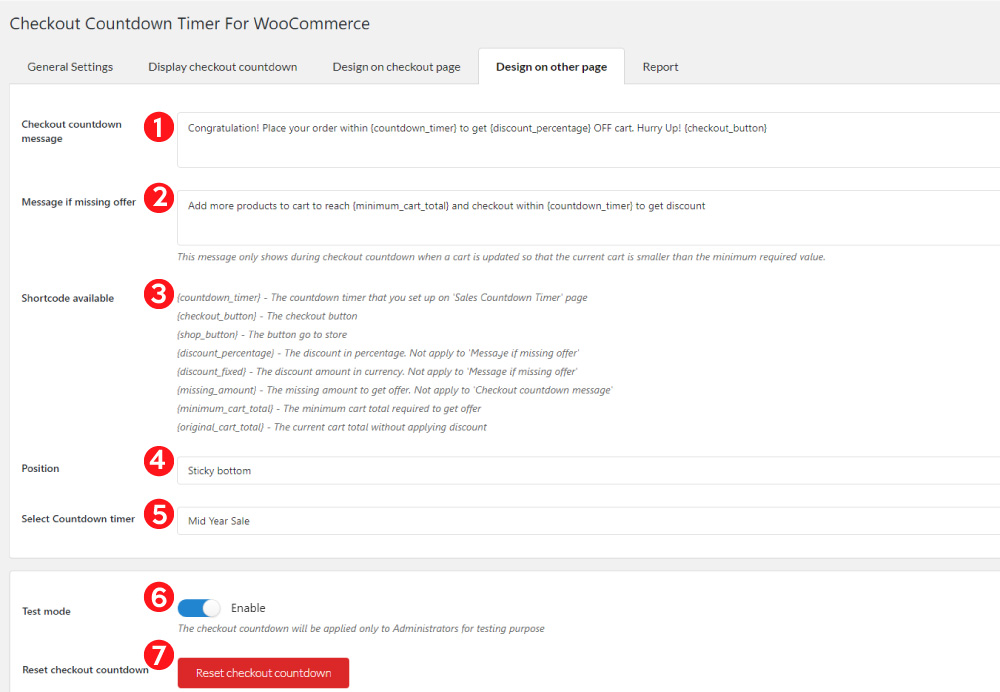
1. Checkout countdown message: Customize the message that appears on the countdown timer on an assigned page.
2. Message if missing offer: Customize the message appearing on the countdown timer on the assigned page if the offer is going to be over.
3. Shortcode available: Customize the text message in the countdown timer on the assigned page.
4. Position: Put the position of the countdown timer on the assigned page.
5. Select countdown timer: Select the countdown timer profile that you created to show up on the assigned page.
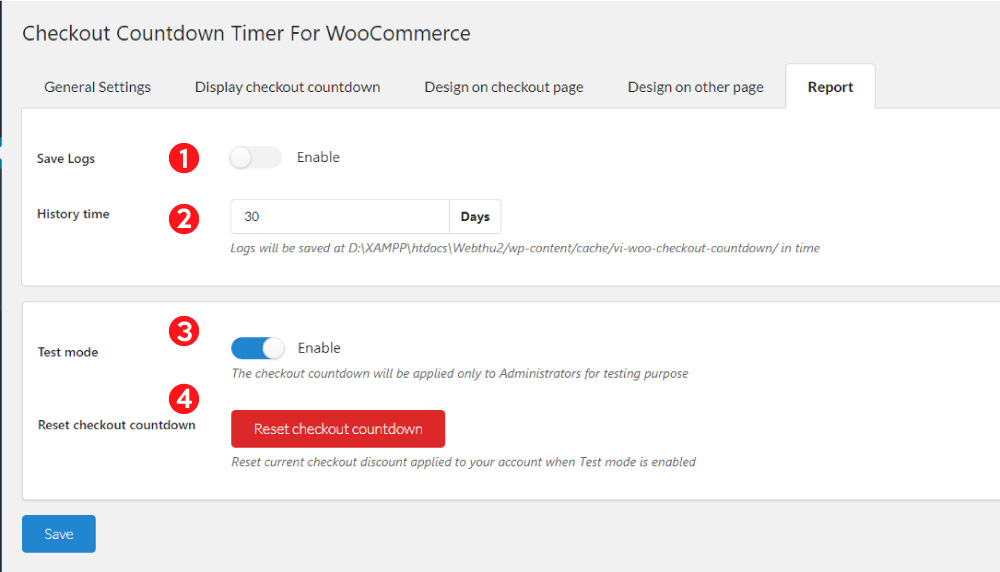
6. Test mode: The checkout countdown will be applied only to Administrators for testing purpose
7. Reset check out countdown: Reset current checkout discount applied to your account when Test mode is enabled
Go to Dashboard/Countdown Timer/ Checkout Countdown/ Report