Go to Dashboard >> Multi Currency >> Location. Here, you can set up the plugin to automatically select currency based on customers’ country or language.
Auto Detect: No
It shows the default currency, and won’t be changed automatically based on any criteria
Auto Detect: Auto select currency
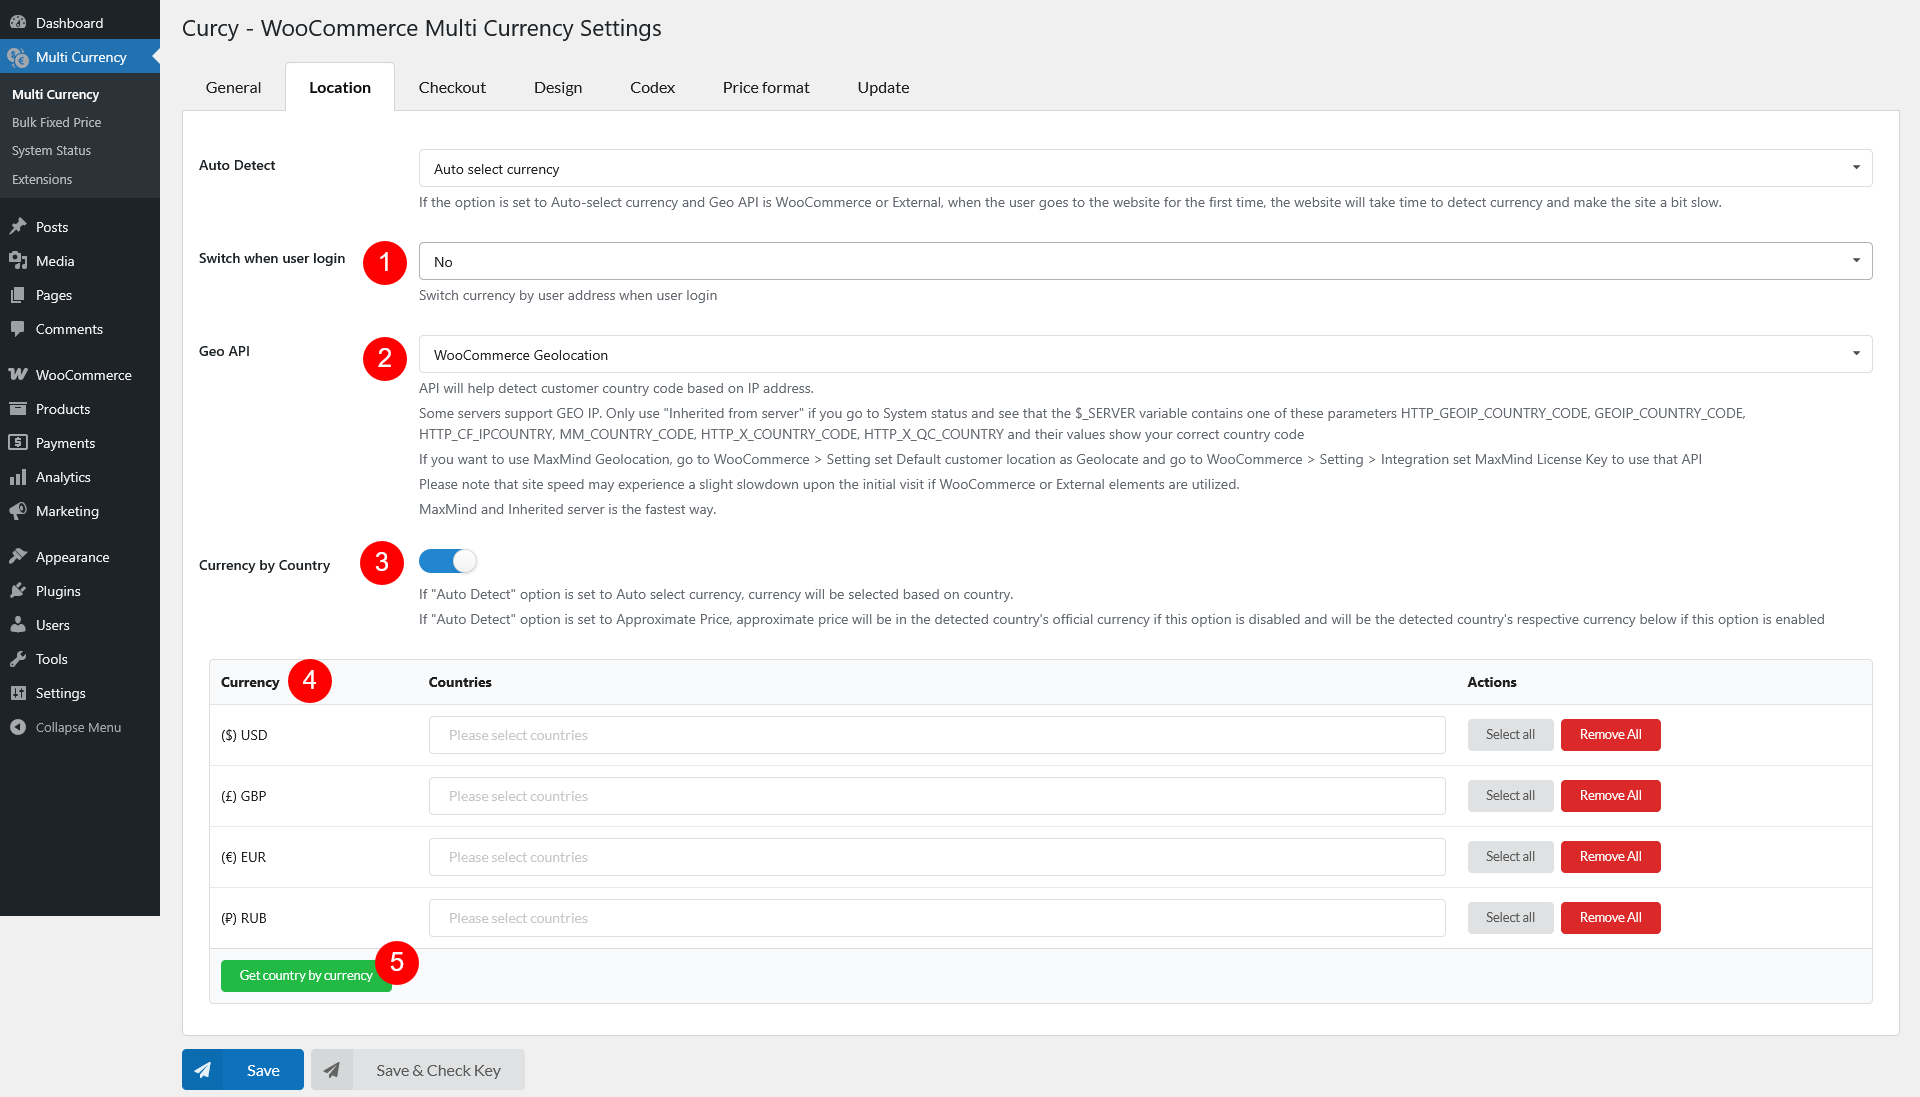
- Switch when user login: Automatically change the displayed currency based on the user’s location when they log in.
- No
- Billing Address: Use the user’s billing address to determine currency.
- Shipping Address: Use the user’s shipping address
- Billing, if empty, select Shipping
- Shipping, if empty, select Billing
- Geo API: The Geo API detects a customer’s country based on their IP address. If currency doesn’t change correctly based on location, try switching to another API option. MaxMind and Inherited server is the fastest way. And site speed may experience a slight slowdown upon the initial visit if WooCommerce or External elements are utilized.
- WooCommerce Geolocation: If you choose “WooCommerce”, the 3rd service WooCommerce uses:
- ‘ipinfo.io’ => ‘https://ipinfo.io/%s/json‘,
- ‘ip-api.com‘ => ‘http://ip-api.com/json/%s‘,
- External: If you choose “External”, we use: http://www.geoplugin.net
- Inherited from server: Some servers support GEO IP. Only use “Inherited from server” if you go to System status and see that the $_SERVER variable contains one of these parameters HTTP_GEOIP_COUNTRY_CODE, GEOIP_COUNTRY_CODE, HTTP_CF_IPCOUNTRY, MM_COUNTRY_CODE, HTTP_X_COUNTRY_CODE, HTTP_X_QC_COUNTRY and their values show your correct country code
- MaxMind Geolocation (WooCommerce Integration): If you want to use MaxMind Geolocation, go to WooCommerce > Setting set Default customer location as Geolocate and go to WooCommerce > Setting > Integration set MaxMind License Key to use that API. And the process of fetching location data is managed by WooCommerce, if you’re using MaxMind, and our plugin doesn’t interfere with that
- WooCommerce Geolocation: If you choose “WooCommerce”, the 3rd service WooCommerce uses:
- Currency by Country: Choose how currencies are displayed based on a visitor’s country.
- Enabled: Use the Currency/Countries table to assign currencies to specific countries.
- Disabled: Currency is based on each country’s native currency without custom mapping.
- Currency/Countries: Assign countries to each currency manually as needed. Use “Select All” or “Remove All” to quickly assign or clear countries for each currency. When users visit your site, their country will be detected and the matching currency will be shown.
- Get country by currency: Automatically assigns countries whose official currency matches your selected currency.
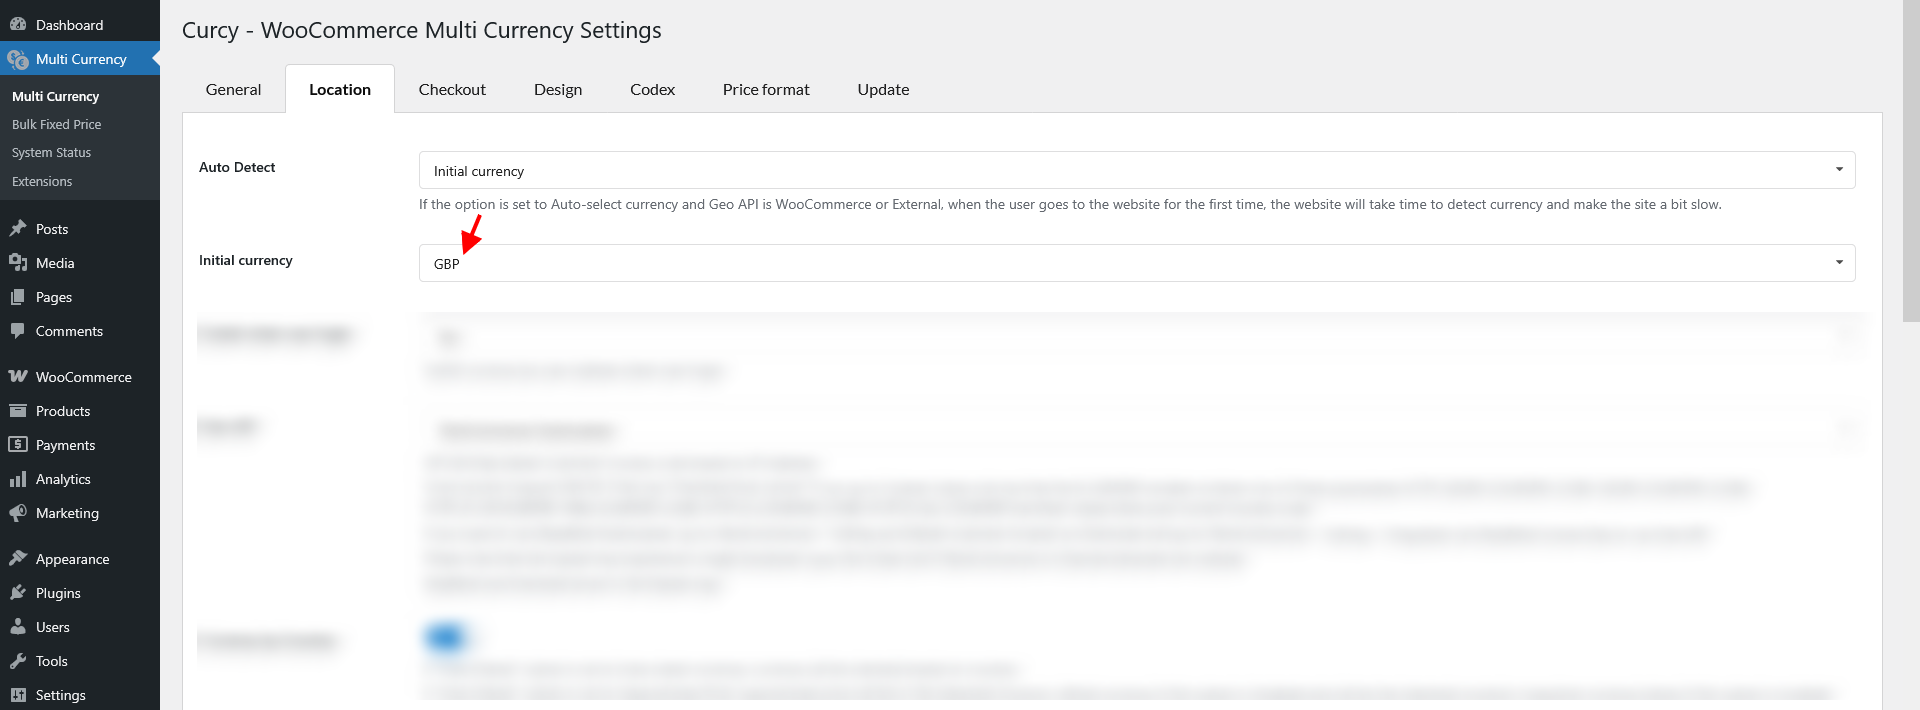
Auto Detect: Initial currency
This feature automatically displays the currency set under ‘Initial Currency’, regardless of the customer’s location. To use it, choose ‘Initial Currency’ as the detection method and select your preferred currency in the ‘Initial Currency Selection’ dropdown. User can still change to other currency
Auto Detect: Approximate Price
Show prices in the default currency and an additional one. The plugin will detect customers’ country based on their IP, then display an approximate price in their native country under WooCommerce price. Geo API, Currency by Country and Currency/Countries options have the same function as “Auto select currency”.

- Show Approximate price for: Select where you want to show approximate price, other than only show with product price
- Approximate price’s label: Add label for Approximate price if you want
- Approximate price’s position: Choose a position for the approximate price
- Geo API: The Geo API detects a customer’s country based on their IP address. If currency doesn’t change correctly based on location, try switching to another API option. MaxMind and Inherited server is the fastest way. And site speed may experience a slight slowdown upon the initial visit if WooCommerce or External elements are utilized.
- WooCommerce Geolocation: If you choose “WooCommerce”, the 3rd service WooCommerce uses:
- ‘ipinfo.io’ => ‘https://ipinfo.io/%s/json‘,
- ‘ip-api.com‘ => ‘http://ip-api.com/json/%s‘,
- External: If you choose “External”, we use: http://www.geoplugin.net
- Inherited from server: Some servers support GEO IP. Only use “Inherited from server” if you go to System status and see that the $_SERVER variable contains one of these parameters HTTP_GEOIP_COUNTRY_CODE, GEOIP_COUNTRY_CODE, HTTP_CF_IPCOUNTRY, MM_COUNTRY_CODE, HTTP_X_COUNTRY_CODE, HTTP_X_QC_COUNTRY and their values show your correct country code
- MaxMind Geolocation (WooCommerce Integration): If you want to use MaxMind Geolocation, go to WooCommerce > Setting set Default customer location as Geolocate and go to WooCommerce > Setting > Integration set MaxMind License Key to use that API. And the process of fetching location data is managed by WooCommerce, if you’re using MaxMind, and our plugin doesn’t interfere with that
- WooCommerce Geolocation: If you choose “WooCommerce”, the 3rd service WooCommerce uses:
- Currency by Country: Choose how currencies are displayed based on a visitor’s country.
- Enable: Plugin will detect the customer’s IP address, and the approximate price will be shown with currency based on the country’s respective currency as in the table below the option
- Disable: Approximate price will be detected based on the country’s official currency
- Currency/Countries: Assign countries to each currency manually as needed. Use “Select All” or “Remove All” to quickly assign or clear countries for each currency; and “Get country by currency” to automatically enter the countries that use the corresponding currencies. When users visit your site, their country will be detected and the matching currency will be shown.
As in the image below, the approximate price is displayed below the original price, with the label “Approximately” 
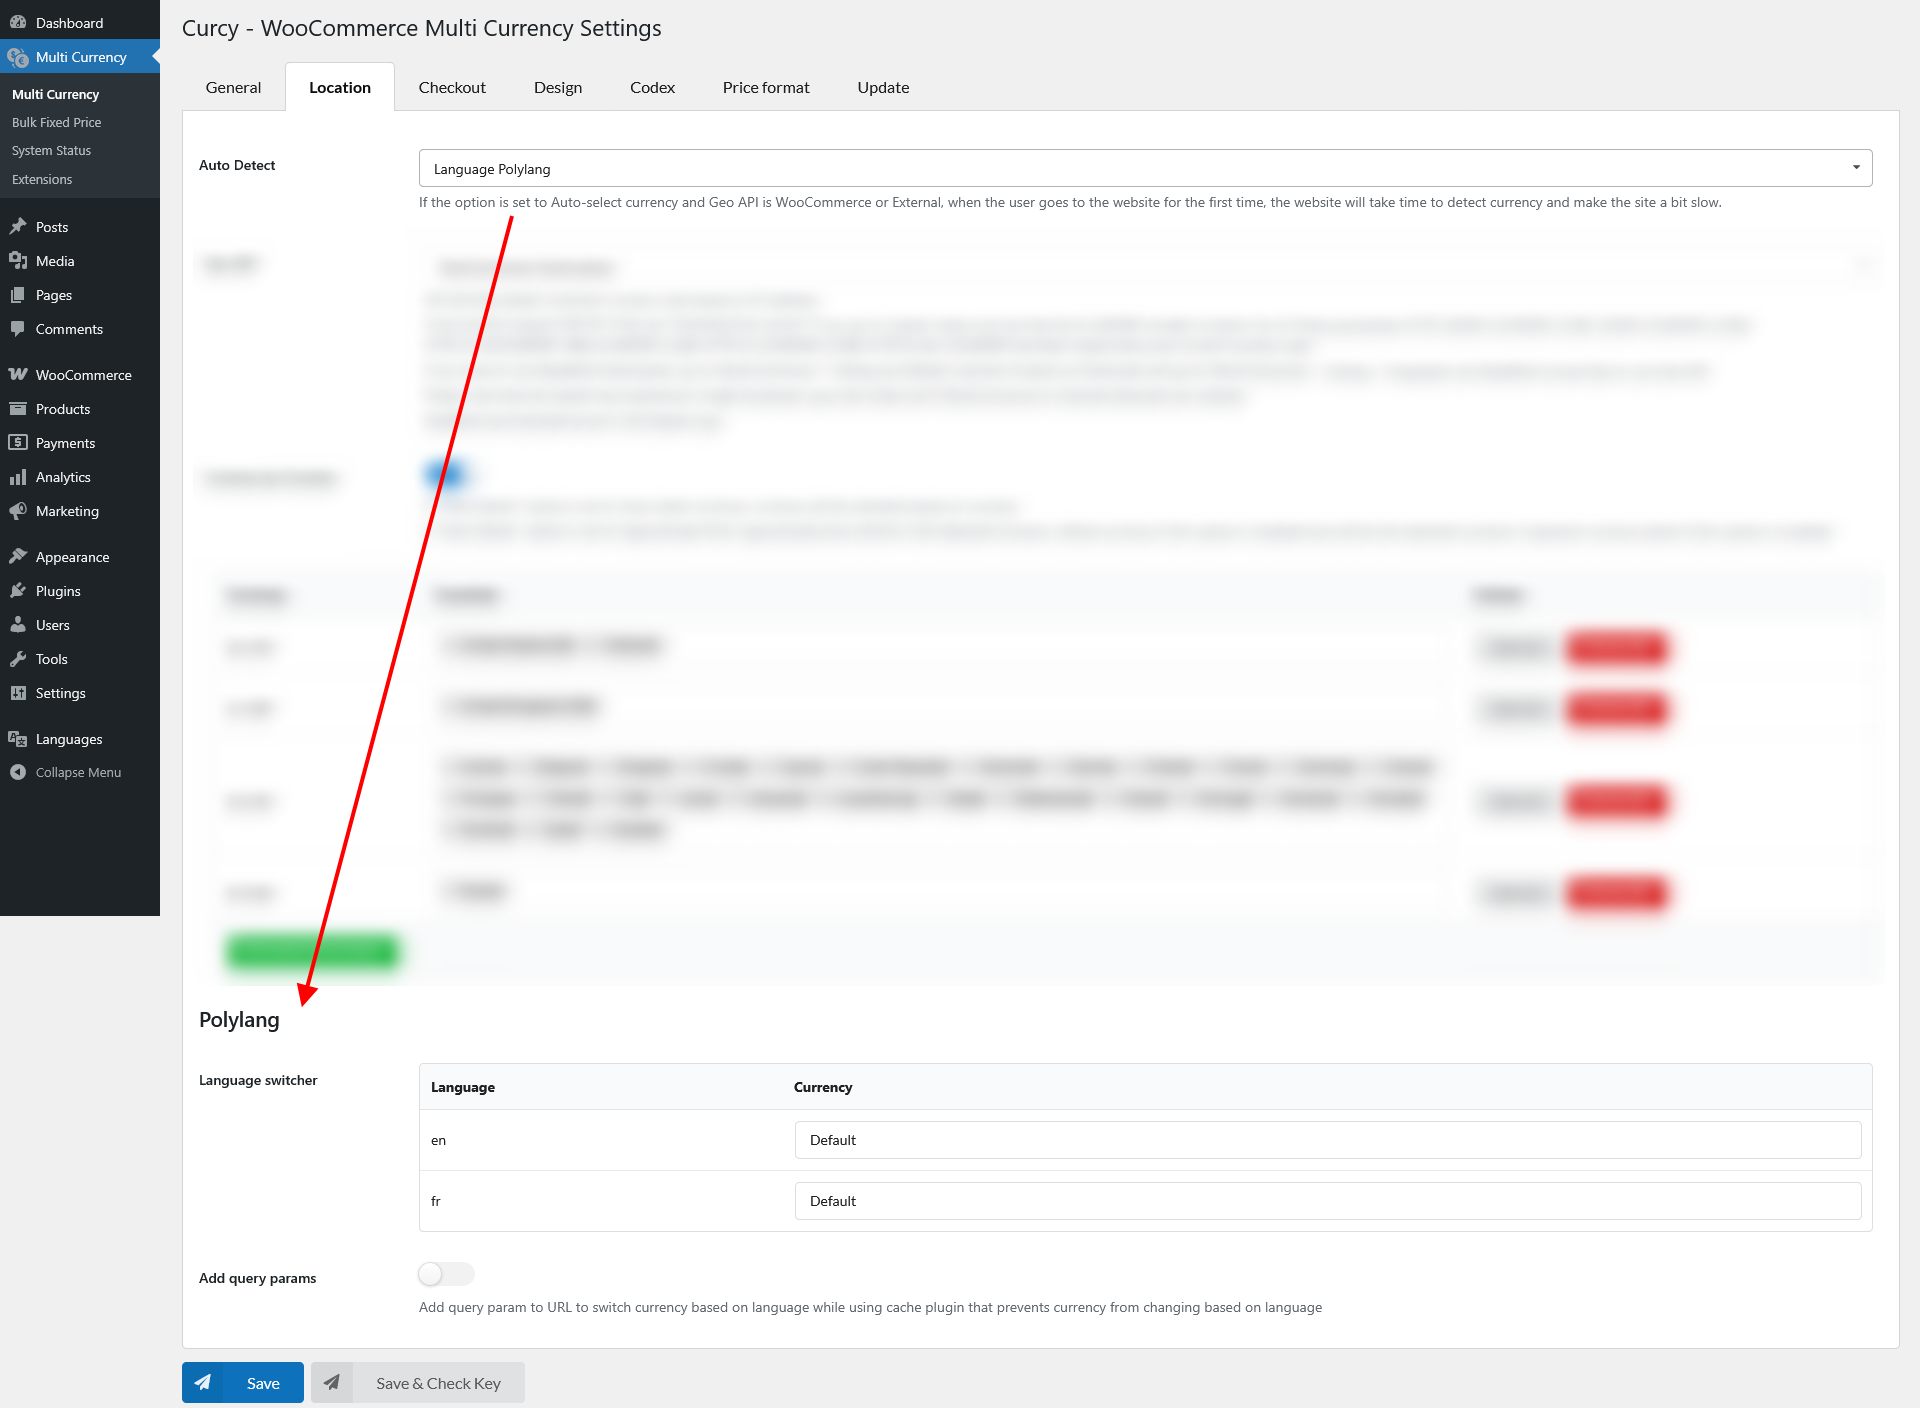
Auto Detect: Language Polylang
Auto-select currency based on Polylang language. You can refer to this video guide.
Auto Detect: TranslatePress
This feature also allows the currency to change automatically when the site language is switched. After installing and configuring the TranslatePress plugin, you can assign a specific currency to each language in this setting

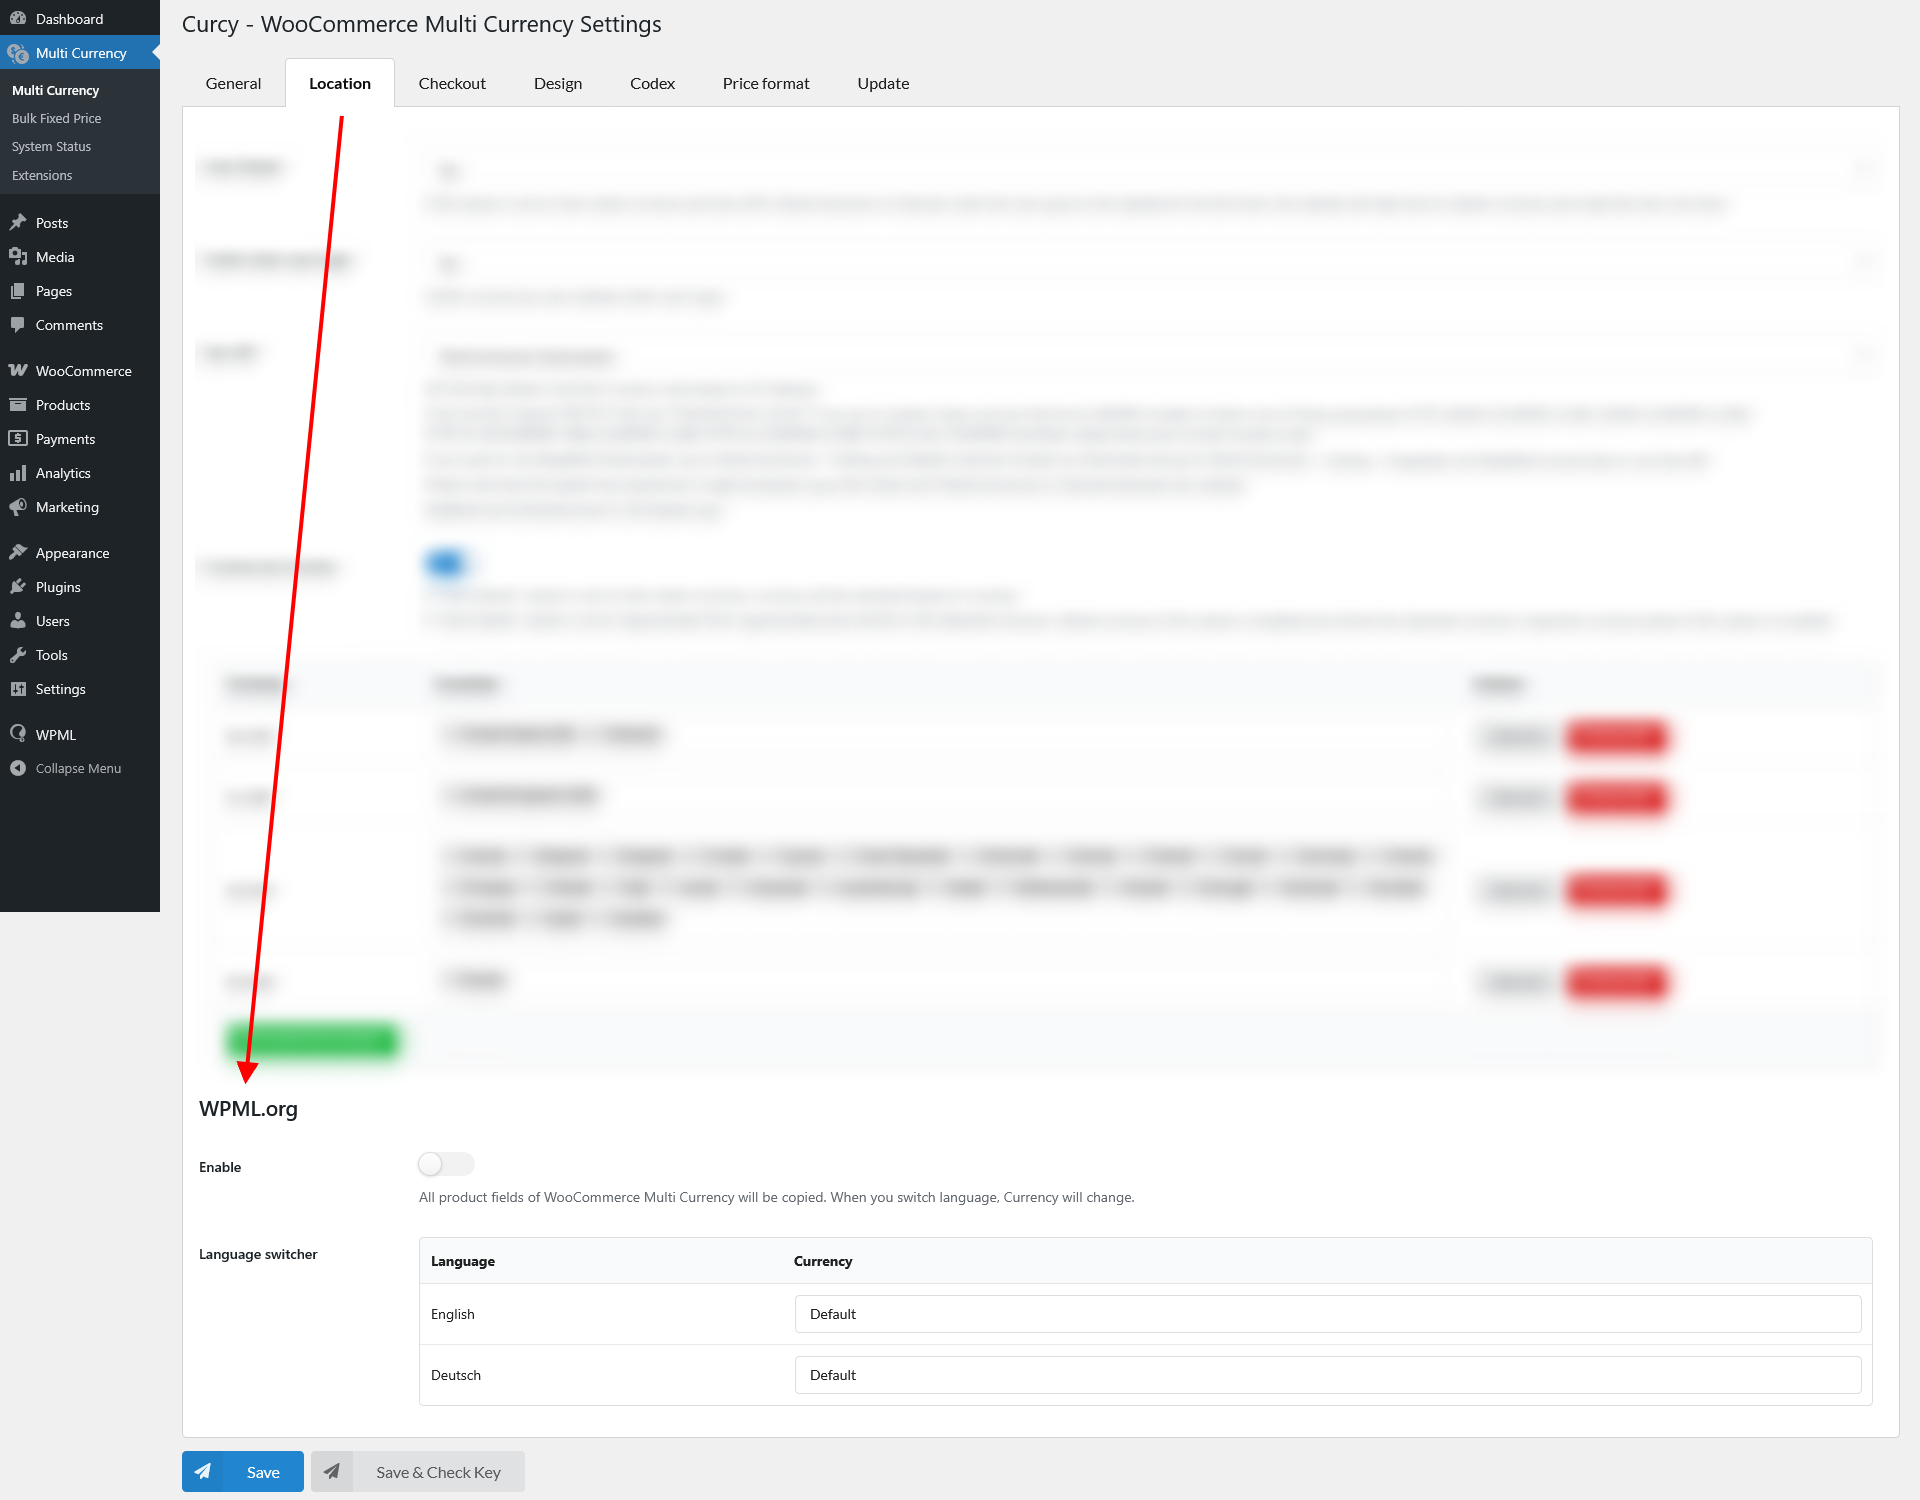
Auto Detect: WPML
Change currency when the user changes languages, just like Polylang. See this tutorial video.