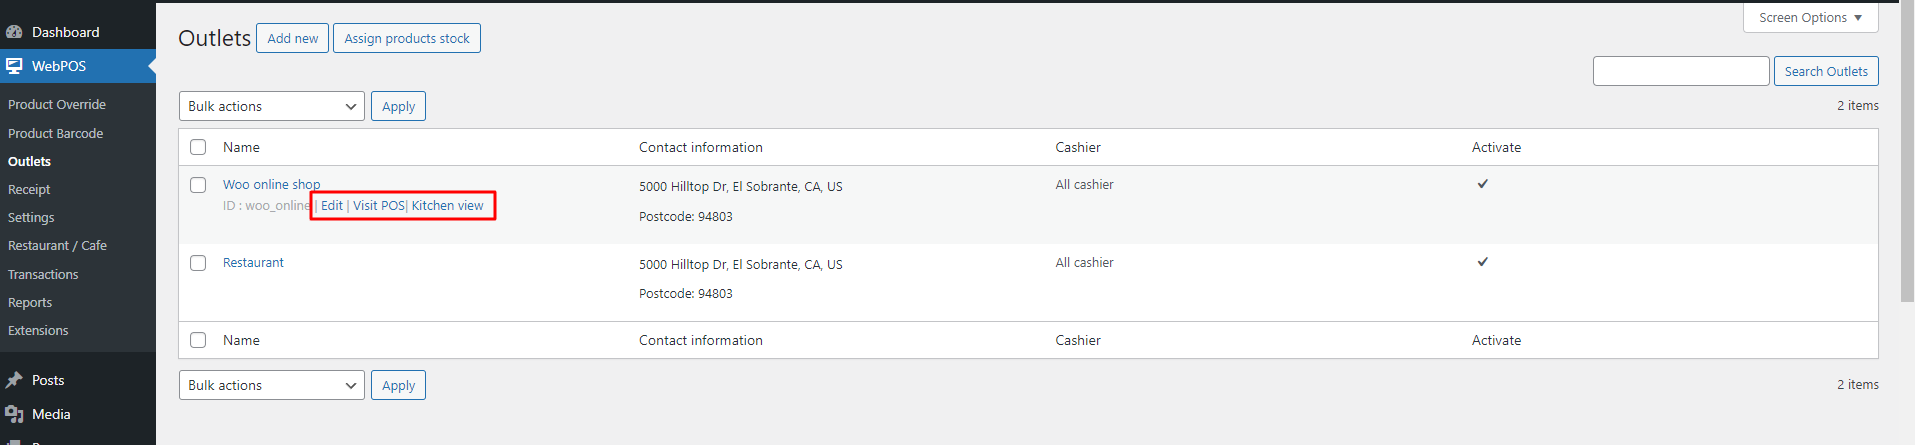
Before we go to the detailed instruction of Outlets, we’ll learn how to enter an outlet POS page. You can go to an outlet POS page from frontend, as instructed in this documentation. Alternatively, you can do the same on the backend using the shortcut “Visit POS” or “Kitchen view” when hovering the Outlet
Now let’s get started.
A. Outlet overview
Go to the Outlets section in the backend to create and manage all outlets of POS transactions. There are 2 types of outlets (Groceries and Restaurants), so there will have settings for these 2 types of outlets.
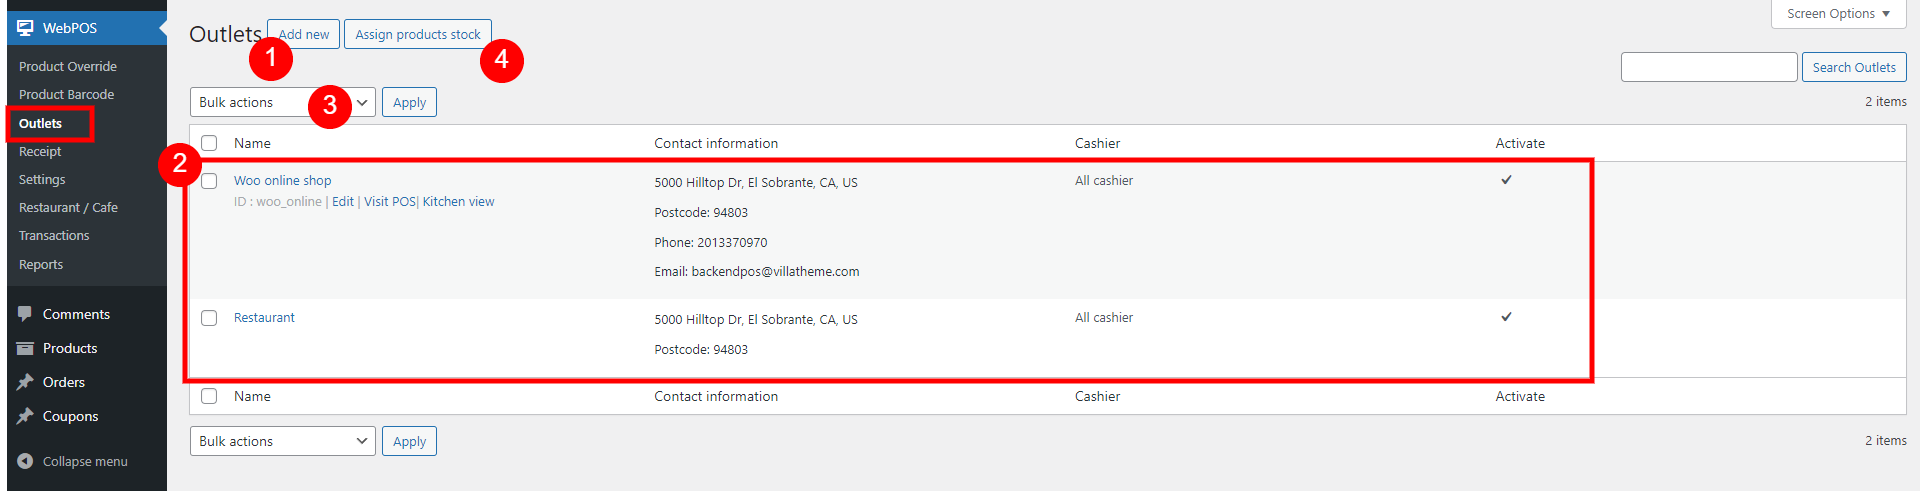
1. Add new: Create as many outlets as you want to sell with POS.
2. Available outlets: List of available outlets for POS. There will be a default outlet of your current POS site. You can edit, delete, change the outlet’s status, quickly view outlet information on the outlet list page.
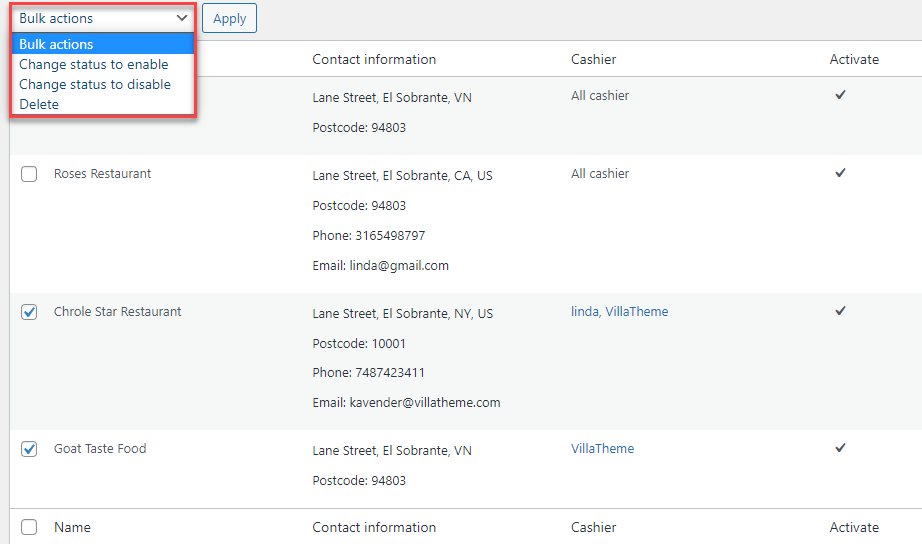
3. Bulk action: Treat bulk outlets at once. You can select many outlets, then change statuses’: Enable, disable or delete them.
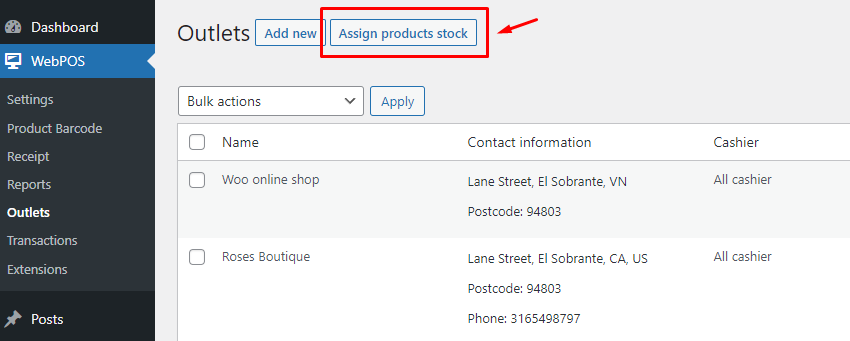
4. Assign product stock: Go to the Product list page to manage stocks of the outlets. Go to the D. Manage outlet stocks section for more information.
B. Create an outlet
Go to Outlets, Click “Add new” to create new outlets.
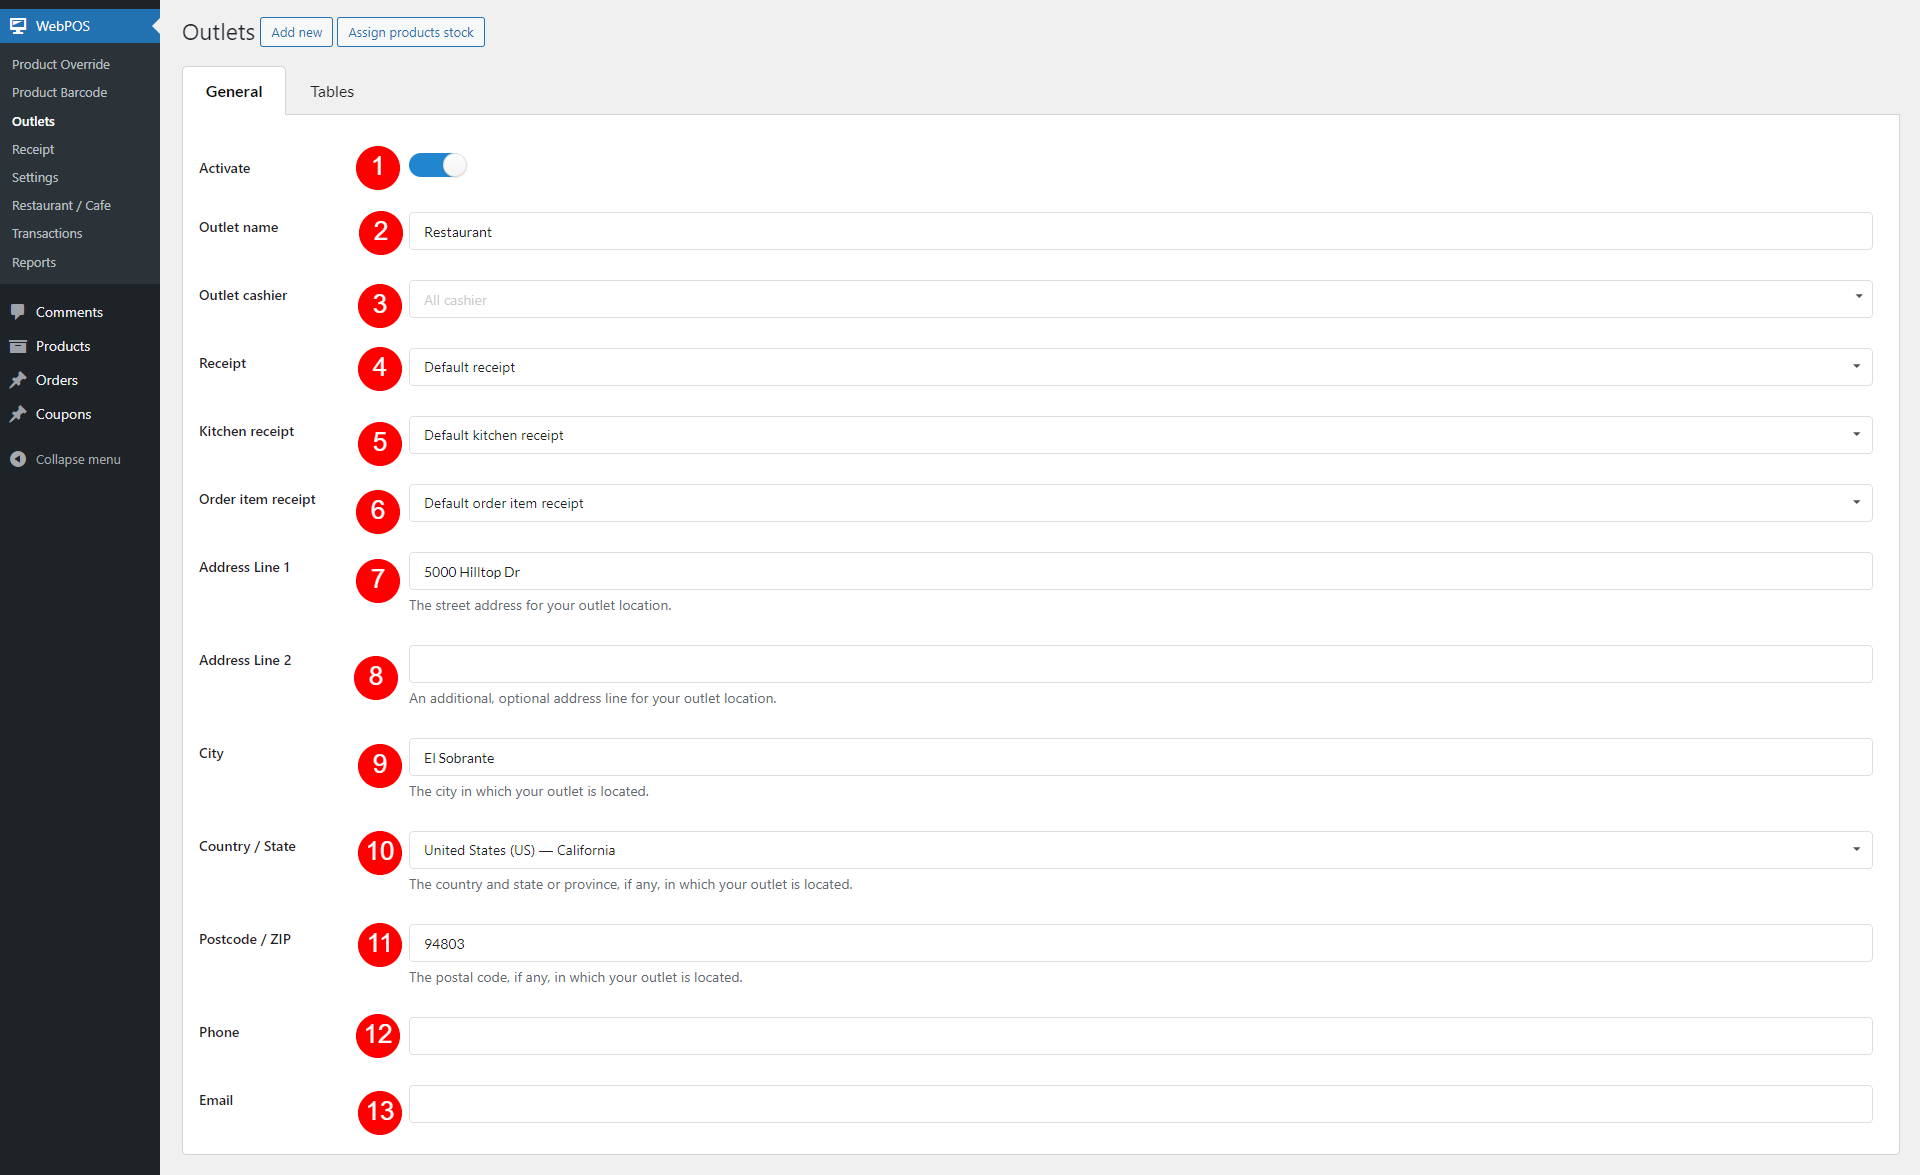
- Activate: Set the outlet’s status: Active or deactive.
- Outlet name: Name for the outlet.
- Outlet cashier: Assign (a) cashiers for this outlet.
- Receipt: Set the receipt of this outlet. Each outlet may be unique, so they may need their own receipt. Go to the Receipt template configuration to create new receipt. Visit this documentation.
- Kitchen receipt: This is the kitchen bill that the cashier/waiting staff sends to the kitchen so the chefs can prepare the food. Go to the Receipt template configuration to create new receipt. Visit this documentation.
- Order item receipt: This is the product decal which contains the general info of the order item. Go to Receipt template to configure/create new template. Visit this documentation.
- Address Line 1: Enter the outlet address line 1.
- Address Line 2: Enter the outlet address line 2 (If any).
- City: Enter the city where the outlet is located.
- Country / State: Select the country, the state or province in which your outlet is located.
- Postcode / ZIP: The postal code, if any, in which your outlet is located.
- Phone: Enter the outlet’s phone number.
- Email: Enter the outlet’s email.
C. Resraurant/ Cafe POS mode
Go to the Outlets > Tables, this part supports the outlets such as restaurants, cafes.
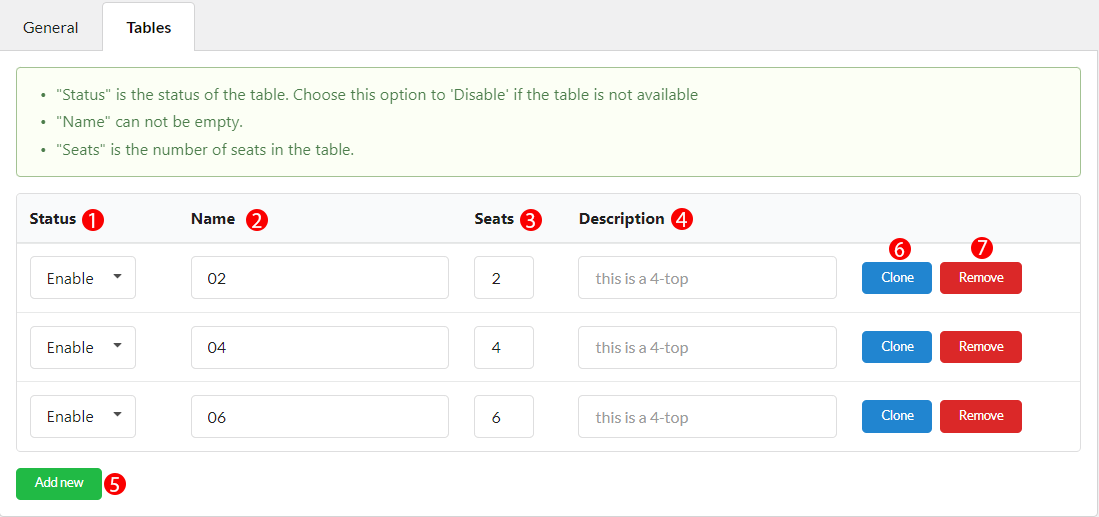
1. Status: The table’s status is indicated by the word “Status” If the table is not available, select ‘Disable’.
2. Name: You will name for the table, it should be a memoriable and unique name of the customer.
3. Seats: Set the number of seats of the table.
4. Description: Give a description for the table.
5. Add new: Add new table
6. Clone: Duplicate the above table row.
7. Remove: Remove a table.
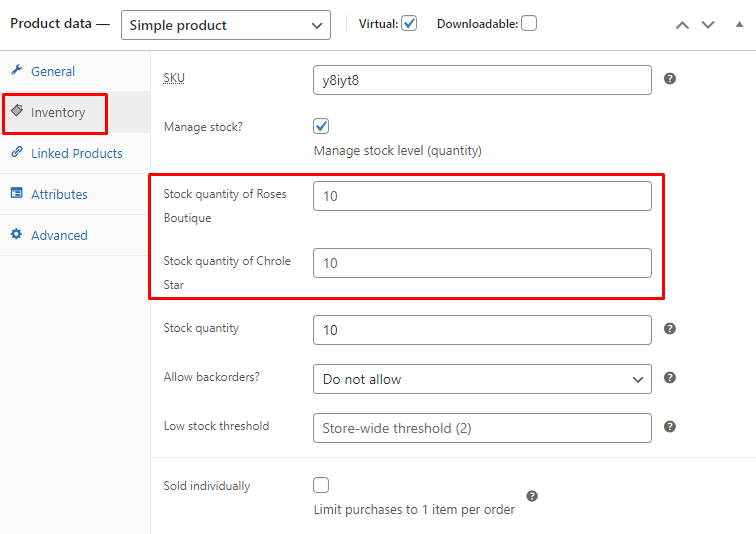
D. Manage outlet stocks
You can click on the Assign product stock button or go to the admin product list to manage the stocks of the outlets.
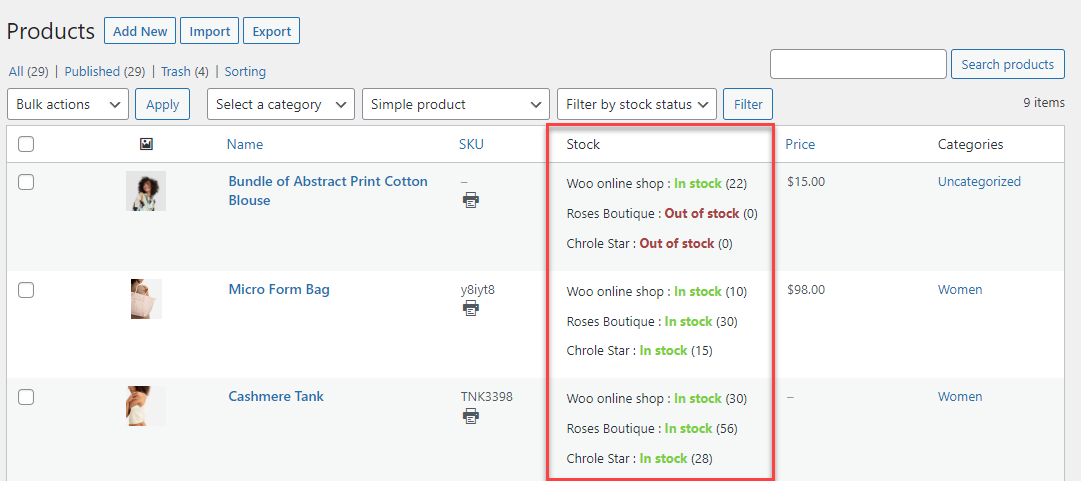
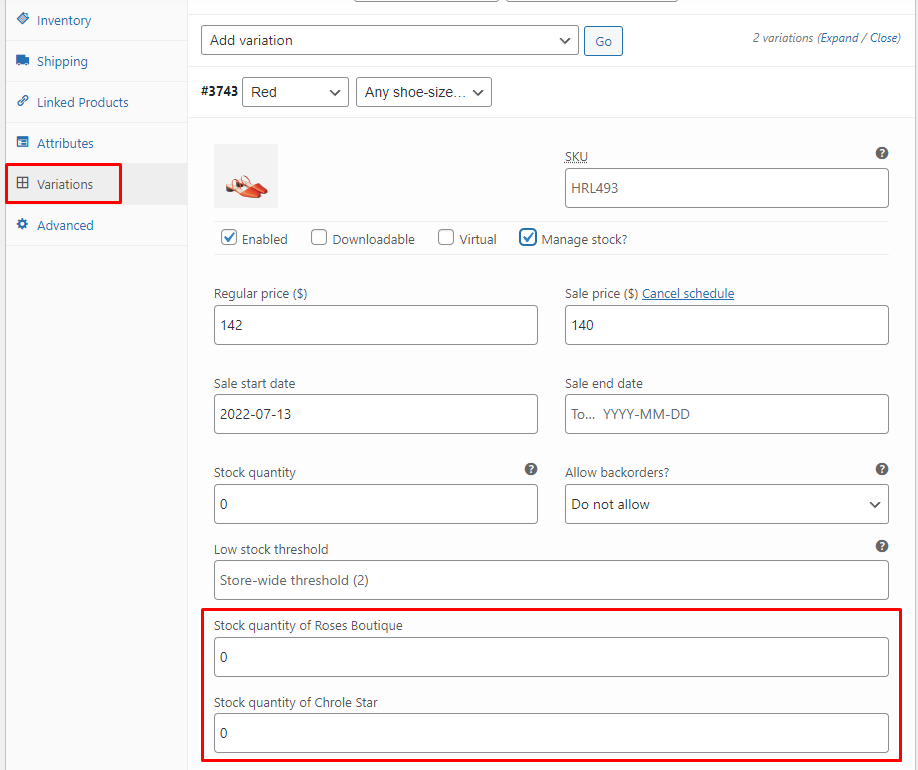
Go to each product editing page, you can manage the stocks of simple and variable products:
+ For simple products:
+ For variable products: