Copyright Villatheme 2015-2026
Created: 2022.04
Last updated: 2026.01 – Updated version: 1.0.15
By: VillaTheme Thank you for using our plugin.
If you have any questions that are beyond the scope of this documentation, please feel free to request support at our Support Forum. Thanks so much!
System Requires
It is recommended to using
1. WordPress 5.0.x
2. PHP 7
Step 1: Download the plugin
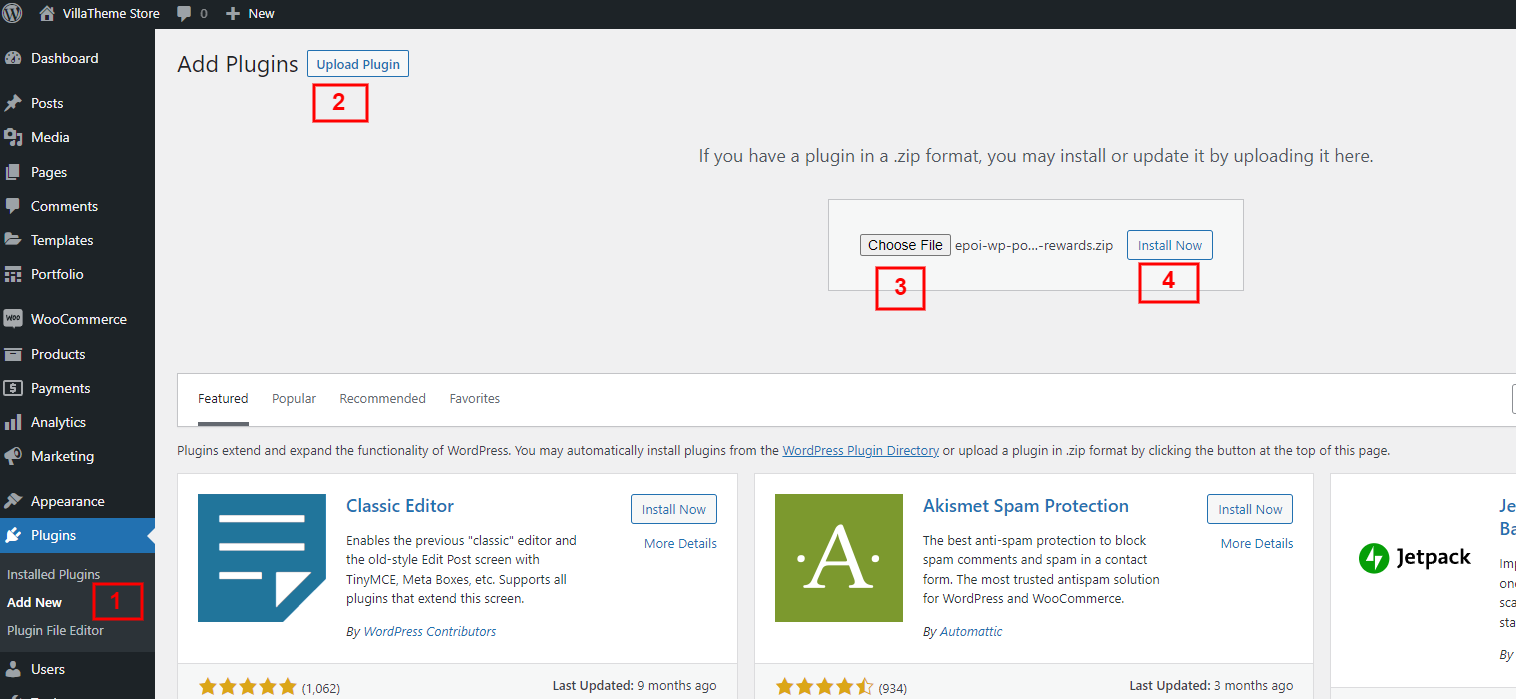
Step 2: Go to Dashboard > Plugins > Add new > Upload plugin > Choose file
Step 3: Activate the plugin
Now the plugin is activated and ready to use.
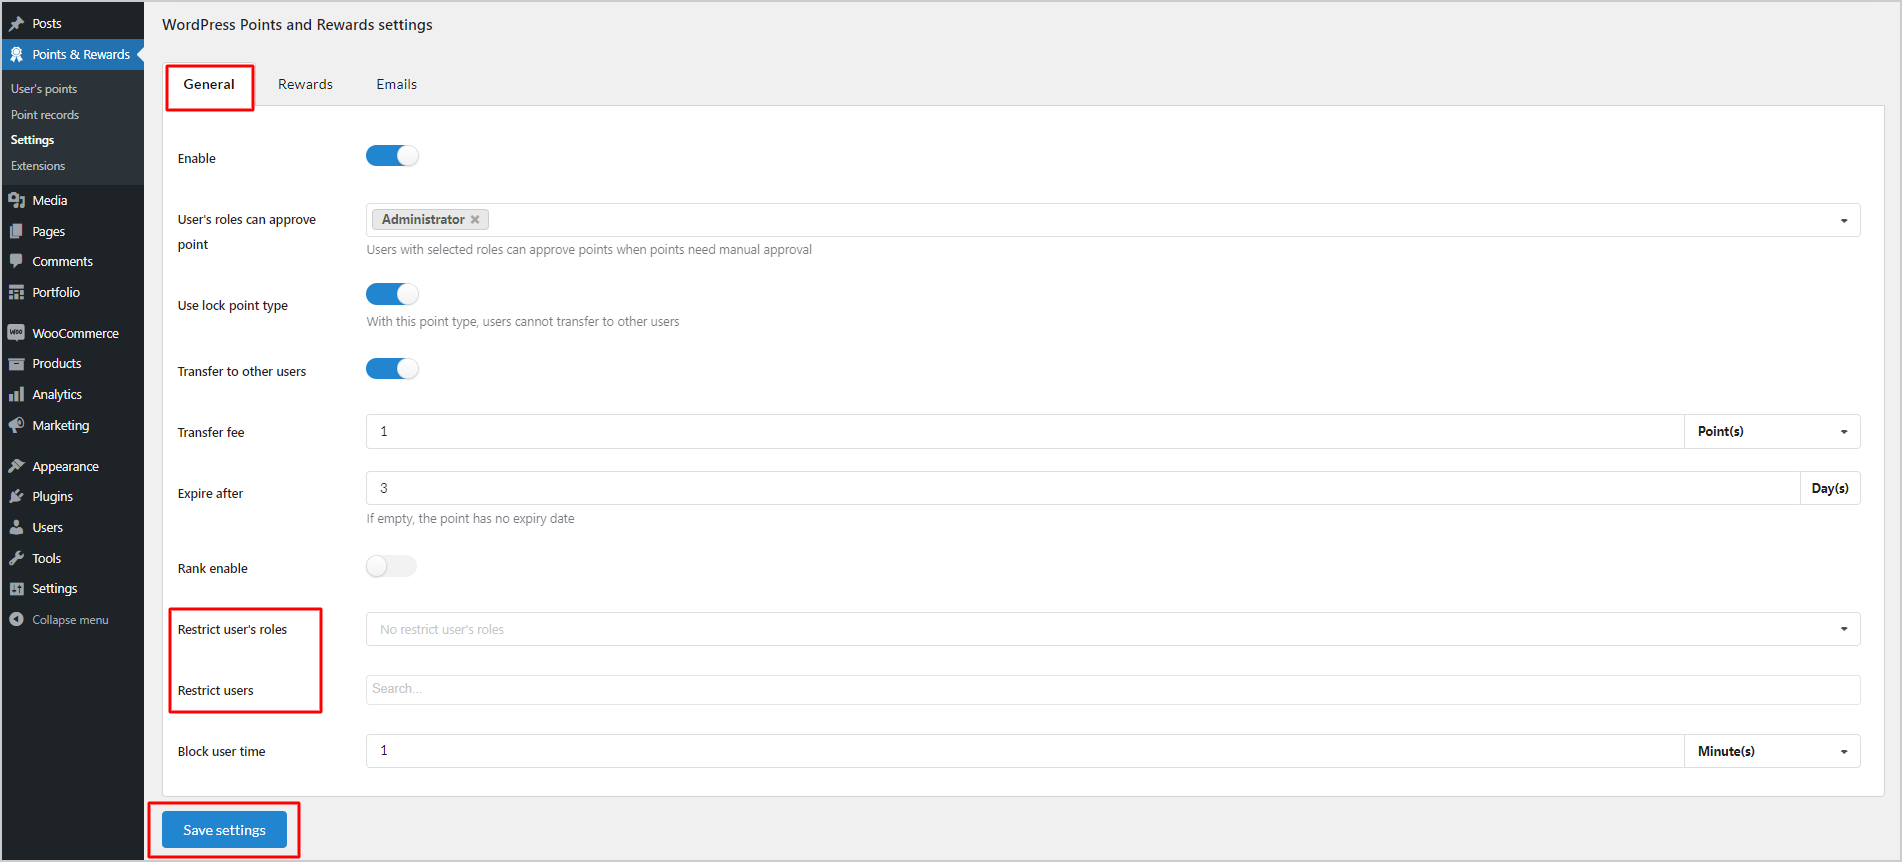
After activating EPOI, first of all, enable the plugin in the General tab.
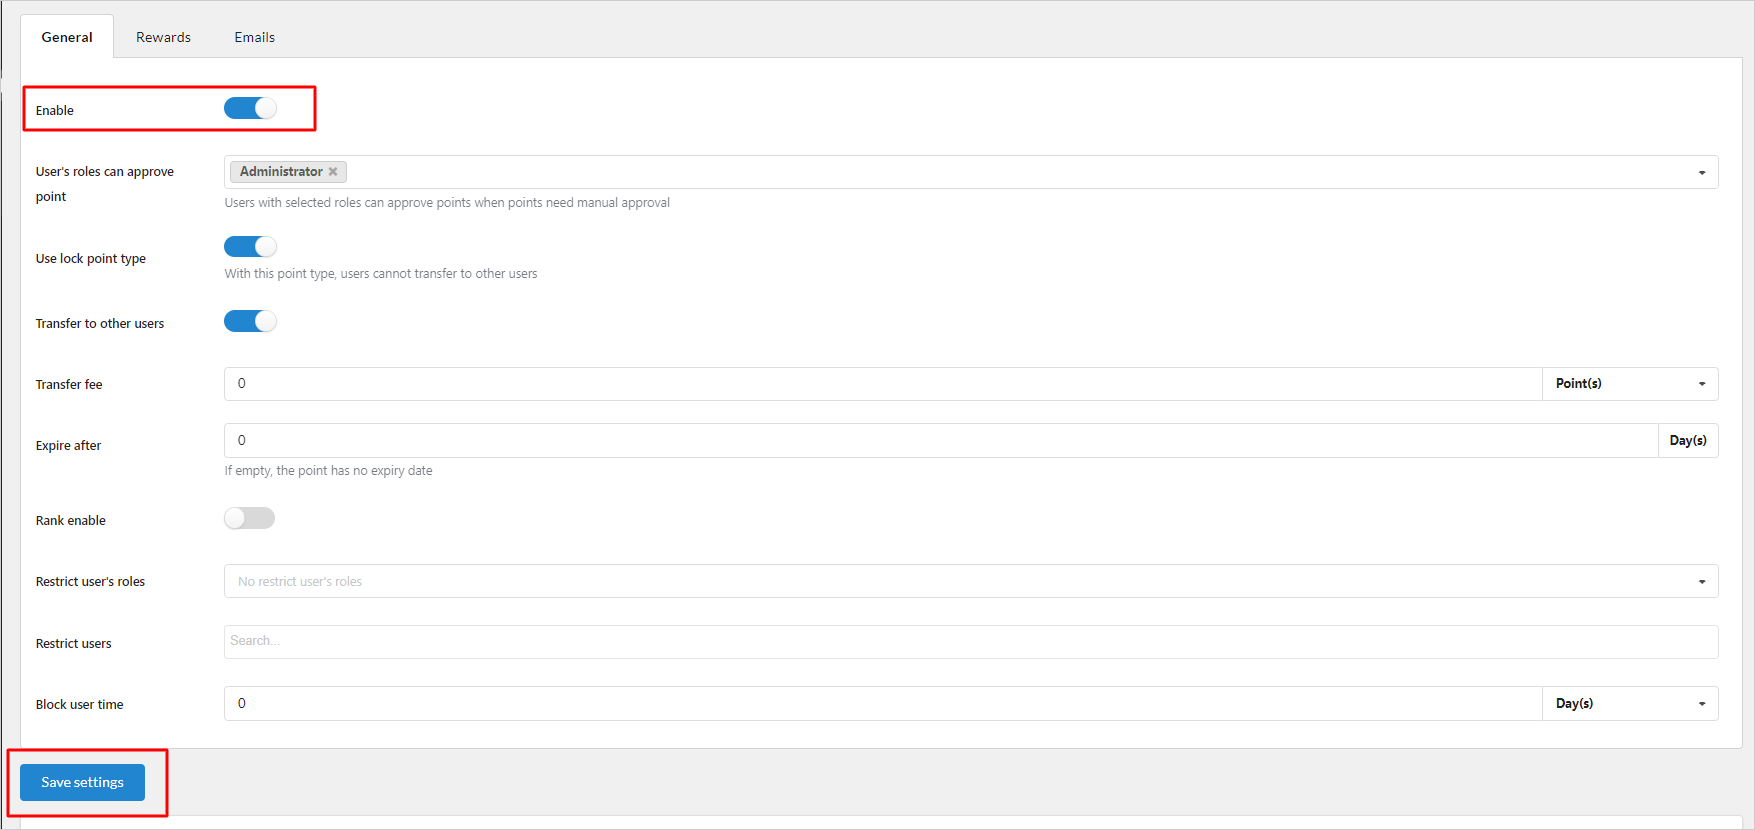
Step 1: Go to Dashboard > Points and Rewards > Settings > General
Step 2: Enable the plugin settings by turning on the option
Step 3: Click “Save settings”
Now you can manage the plugin settings one by one:
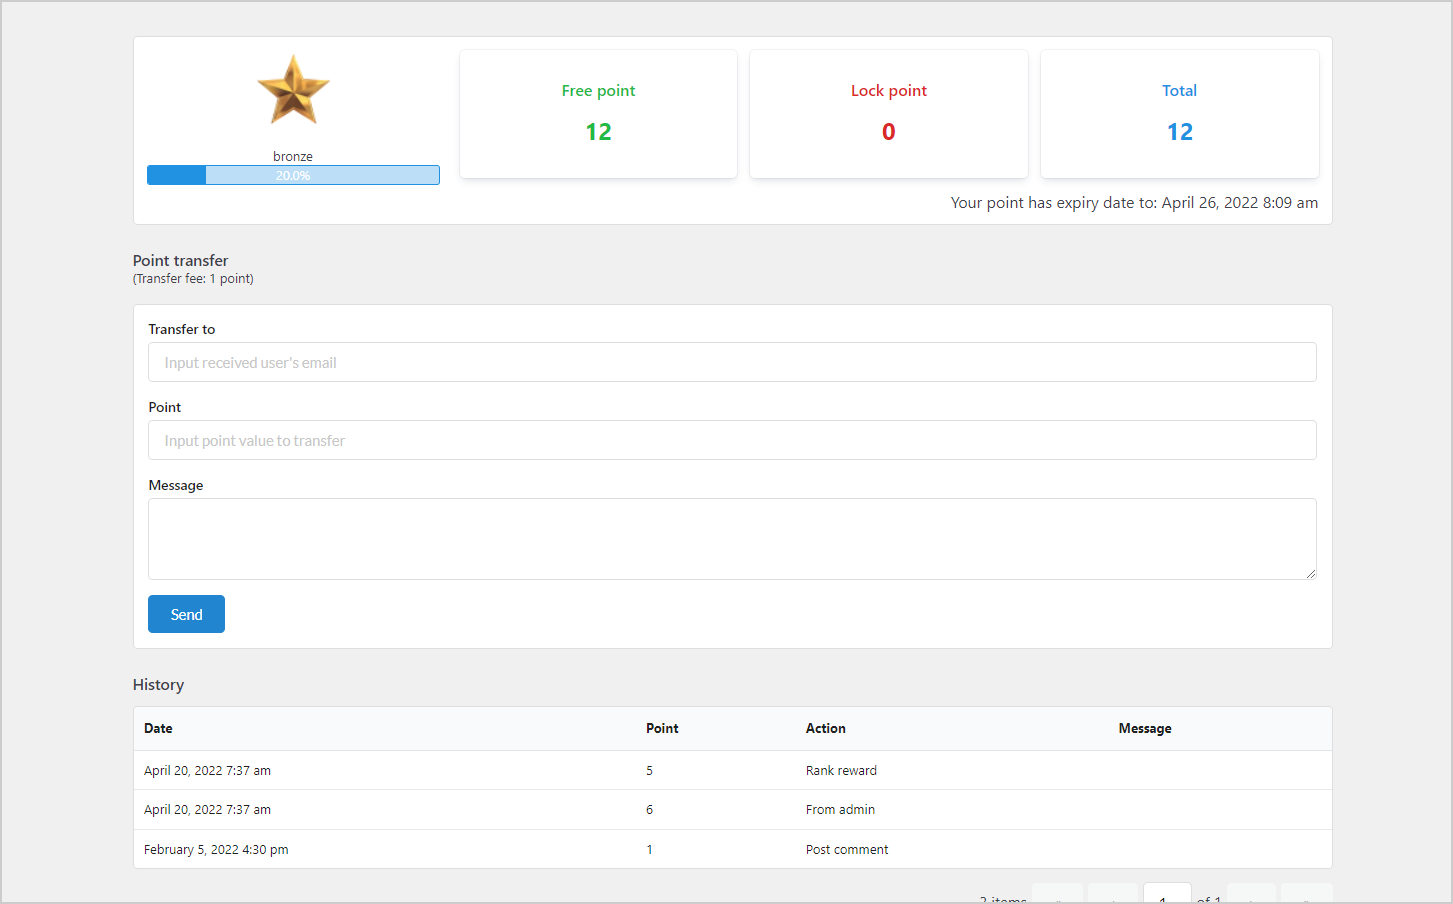
After EPOI is activated, you can instantly see your point balance in your profile. Go to Dashboard > Users > My points.
On this page, it logs all your current points.
You can view not only your points, point records, and your current rank, but also transfer your points to someone else with the “Point Transfer” function.
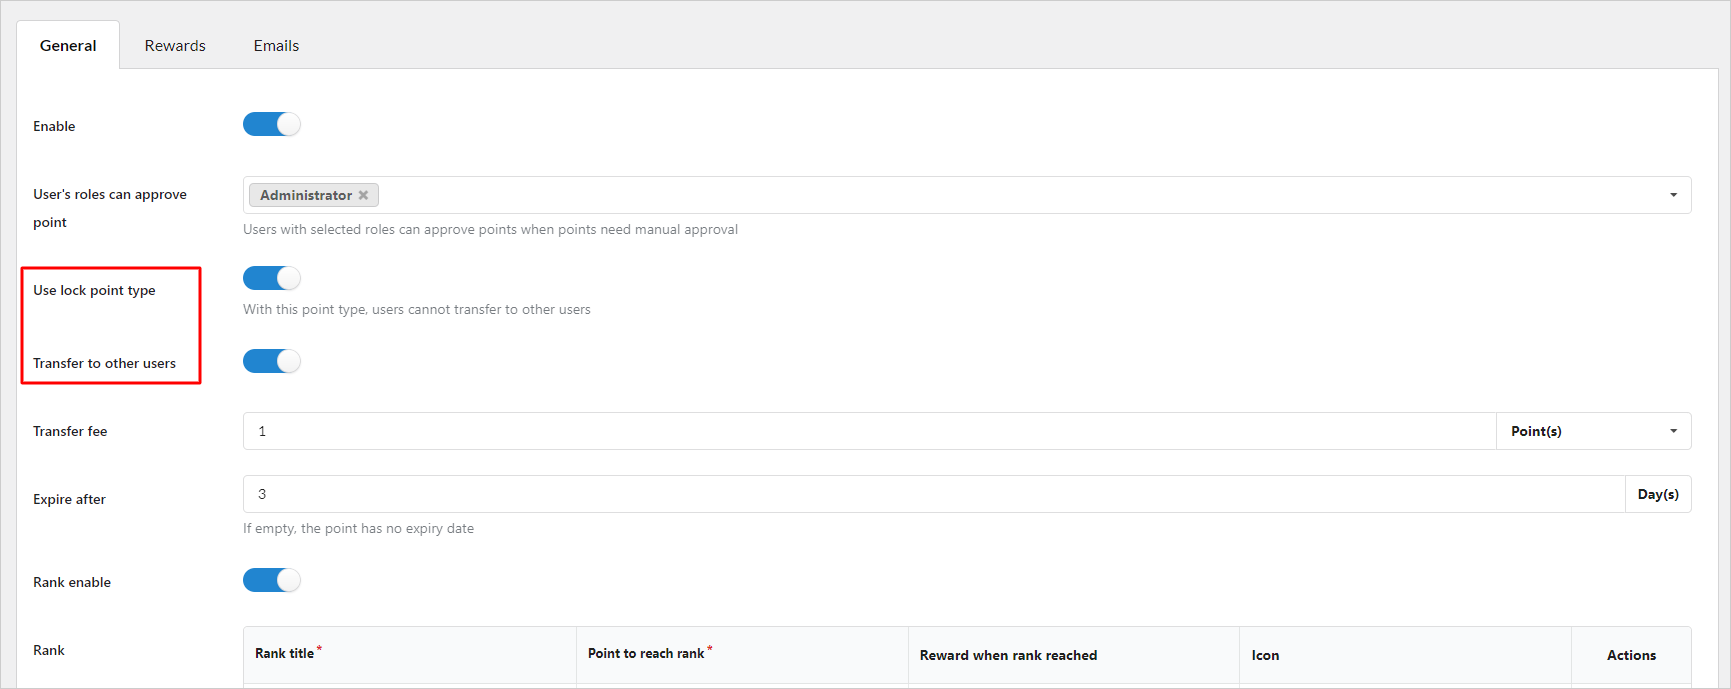
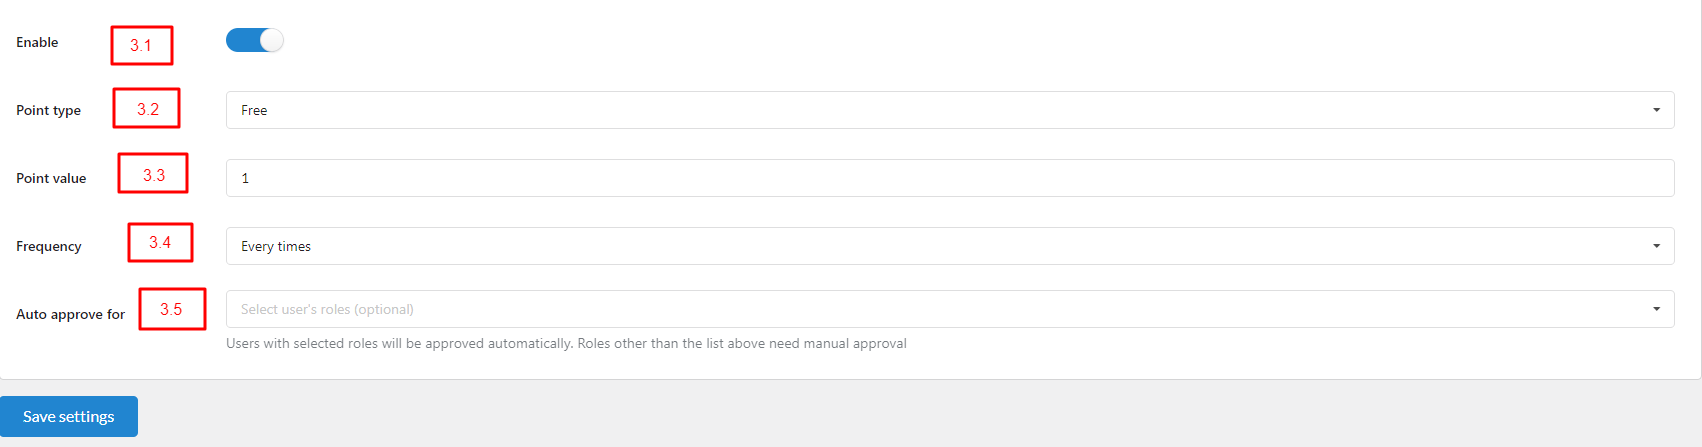
Before assigning points, you would need to check the point type options in the General settings first. If these options are disabled, you can not select the point types while assigning points.
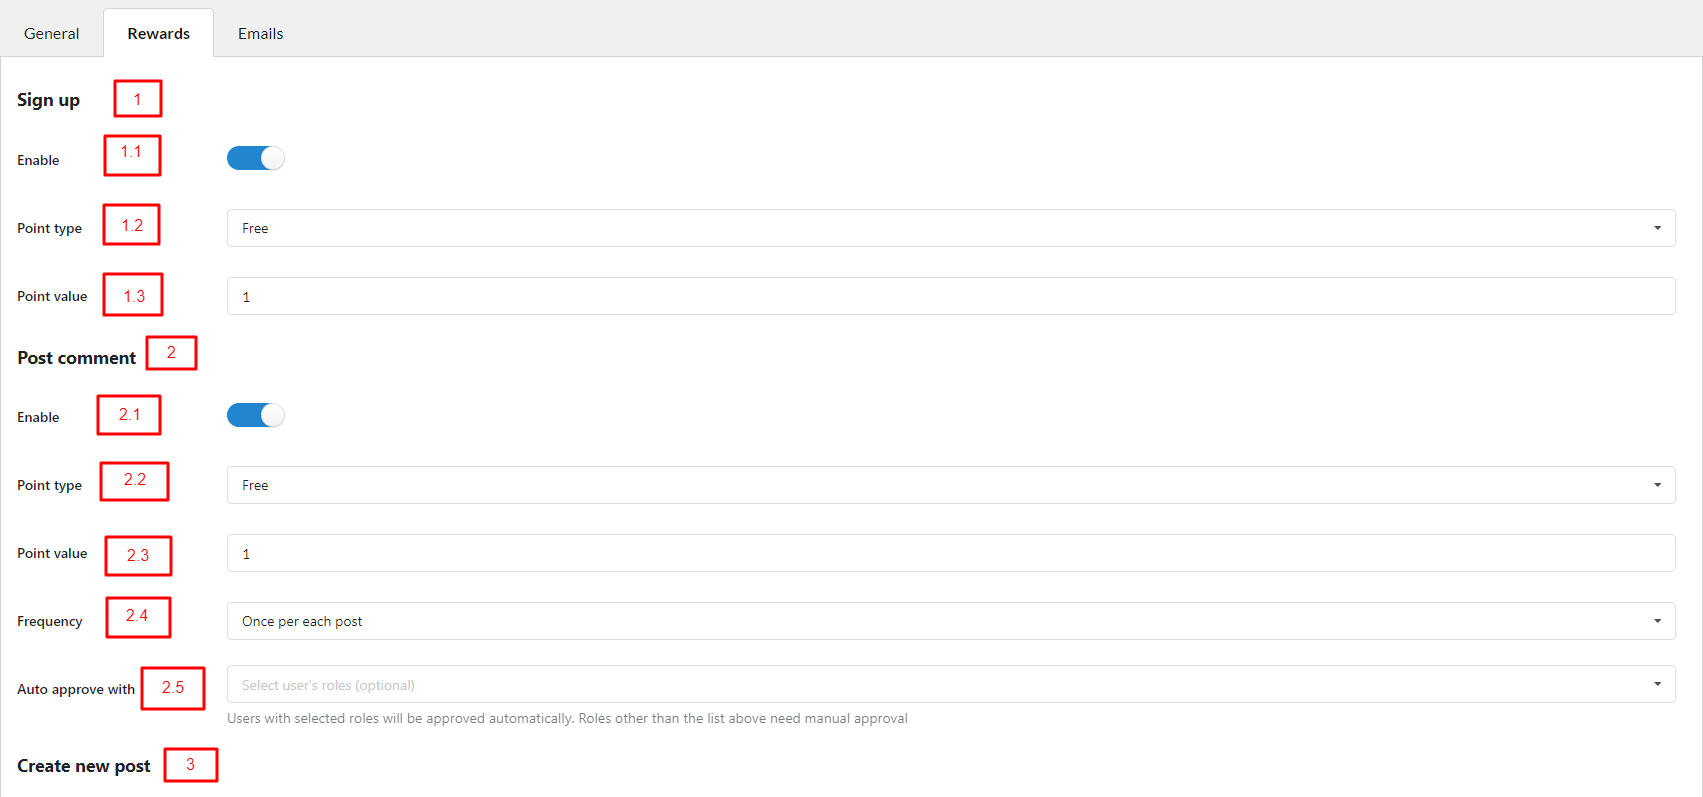
To start letting users gain points by doing different activities on your site, assign a particular value of point to each action and enable them.
Step 1: Go to Dashboard > Points & Rewards > Settings > Rewards.
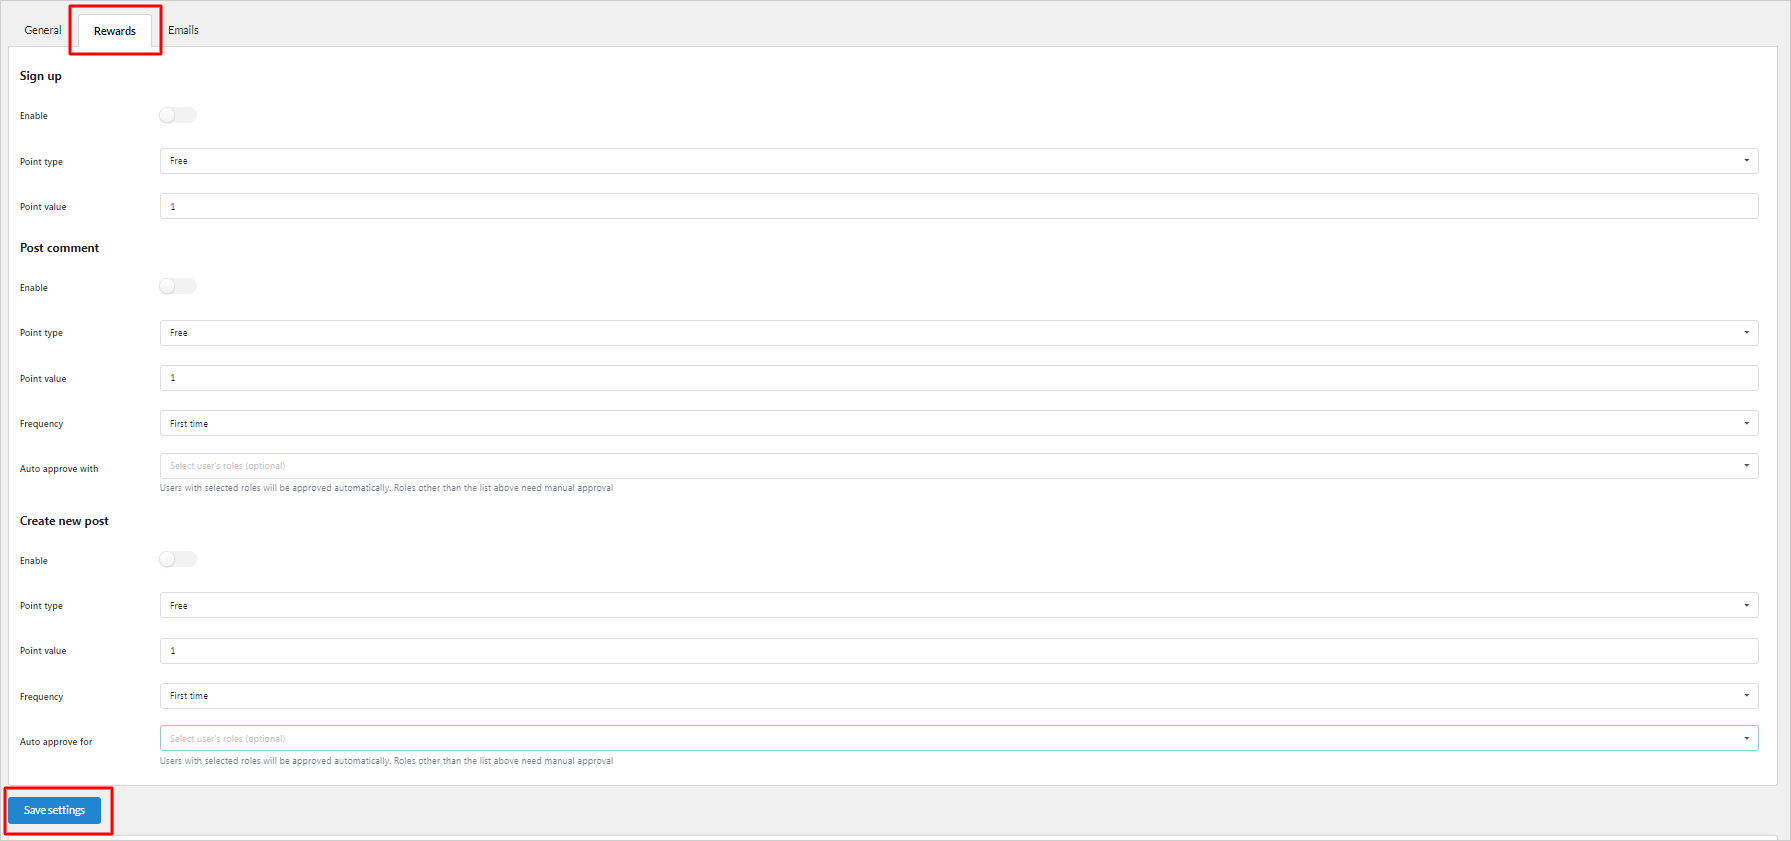
Step 2: Assign point values here. Letting them gain points by:
+ Signing up: When an users register on your site, they’ll get some signup points as a rewards.
+ Posting comment: When user post a comment, they’ll receive point depending on when you allow them to get that point – First time; Once per each post; or Every time
+ Creating a new post: This settings allow users to get points when they create a new independent post on your site, based on the Frequency rule you set, they can receive point the first time they create a post, or every time.
See this documentation for specific explanation of each option.
Step 3: Click “Save settings”
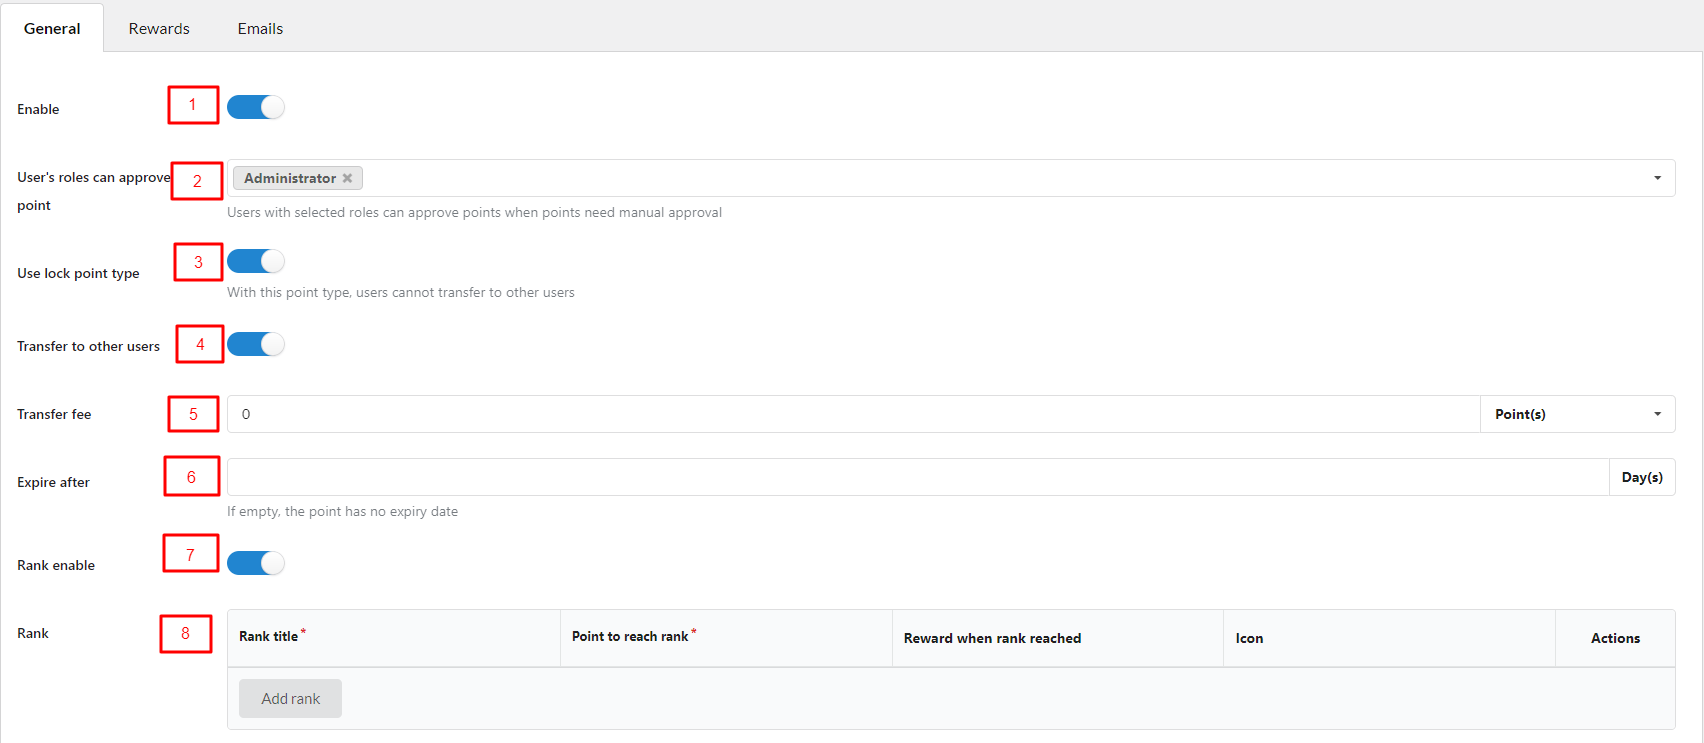
After assigning point values, you can build a ranking system to encourage users to gain more point to reach a higher rank
Step 1: Go to Points & Rewards settings > General
Step 2: Enable the “Rank enable” option.
Step 3: With this option turned on, you can build your own ranking and make changes to it.

Manage the settings above to build your own ranking system. Regard this documentation for specific explanation of each option.
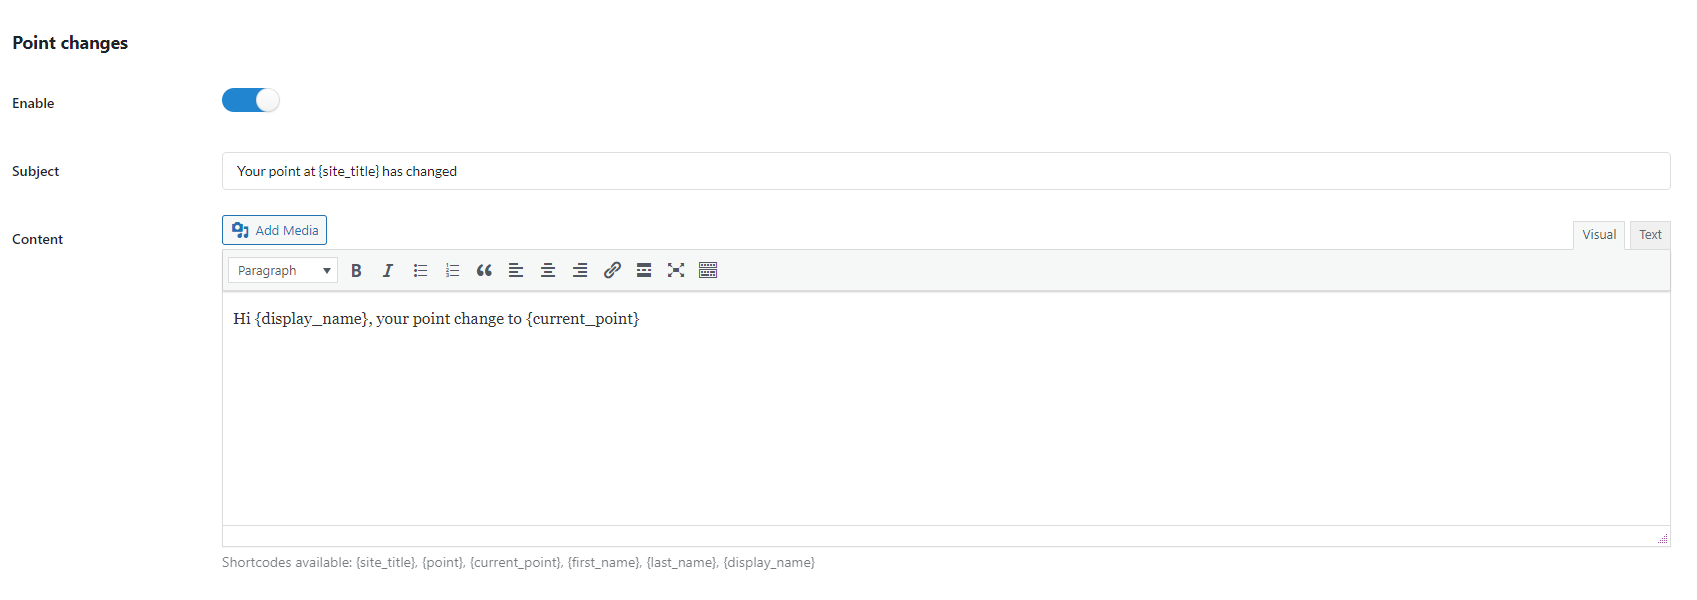
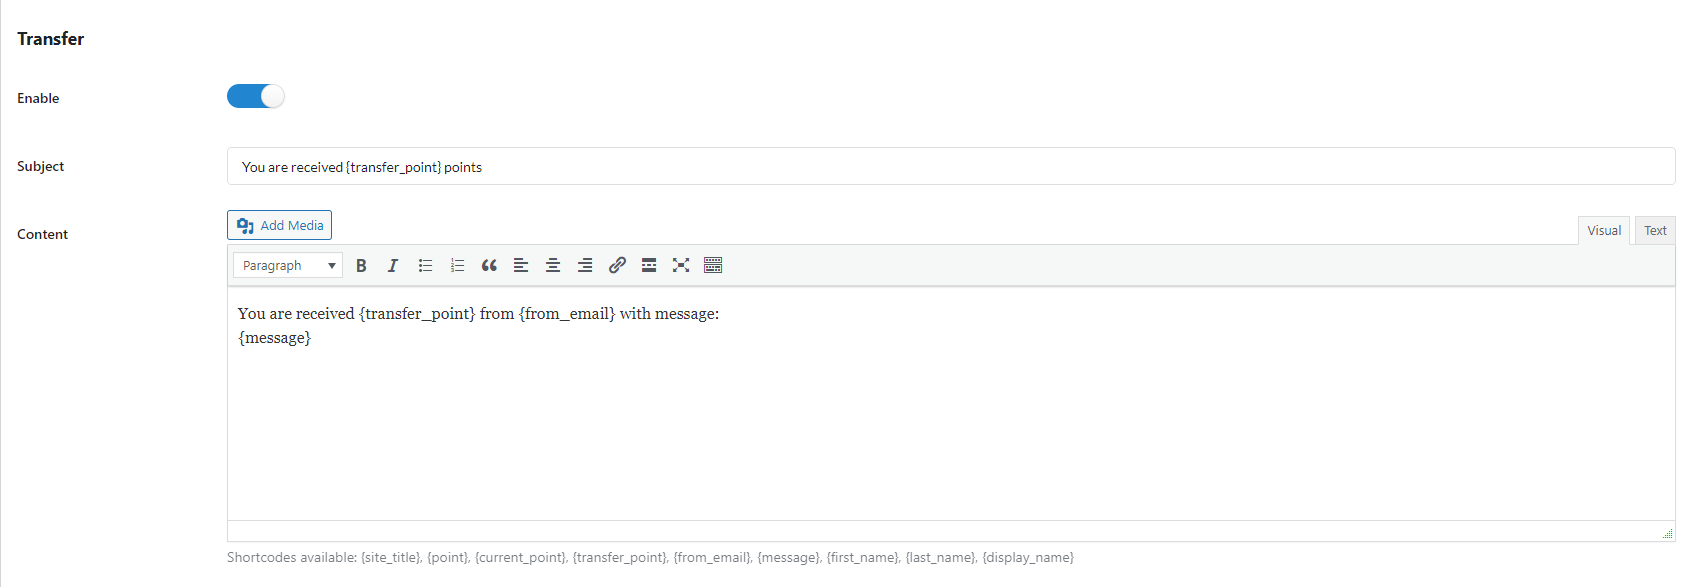
Let users know when their points change; when they reach a new rank on the ranking ladder; or when they receive some points from other users.

The point manager can view the point log of any user and apply actions to change the points through settings.
Go to Dashboard > Points & Rewards > Point records.
In these settings, all user’s point history is visible and ready for you to modify by approving/revoking
– To find particular point history, filter the point with action/status
– Click “Filter”

Then to approve/revoke points, select the “Approve/Revoke” option or use “Bulk action” > Click “Apply”

Go to Dashboard > Points & Rewards > User’s points

With these settings, the point manager can edit the point of any user.
Quick edit the user’s point with the editing button, or “Bulk action” to change all selected users’ points.
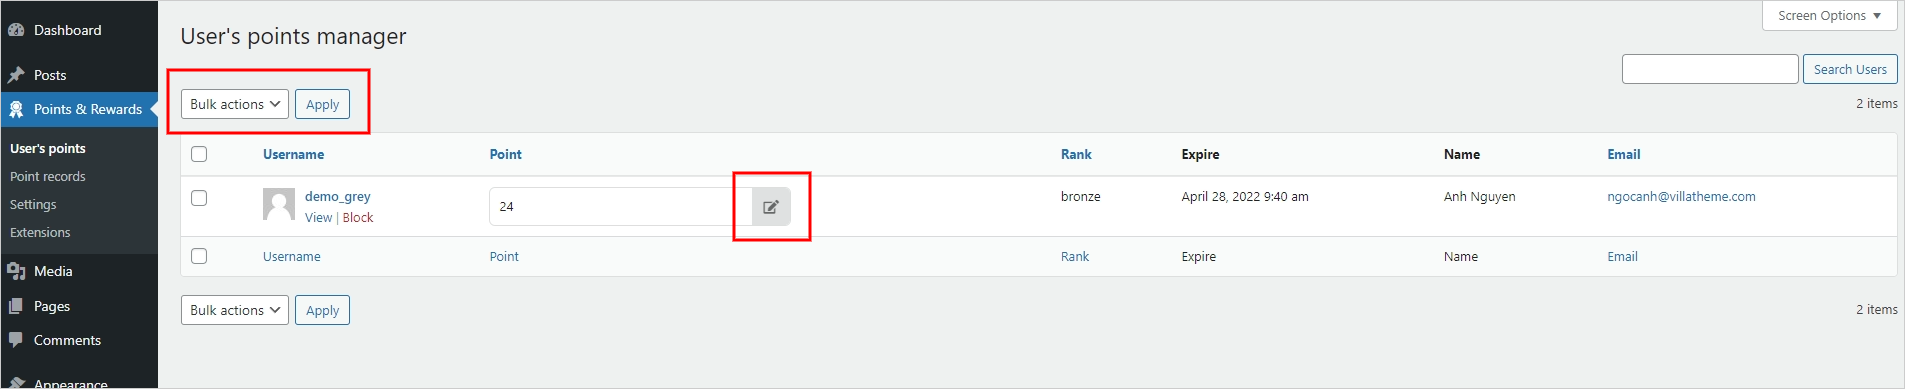
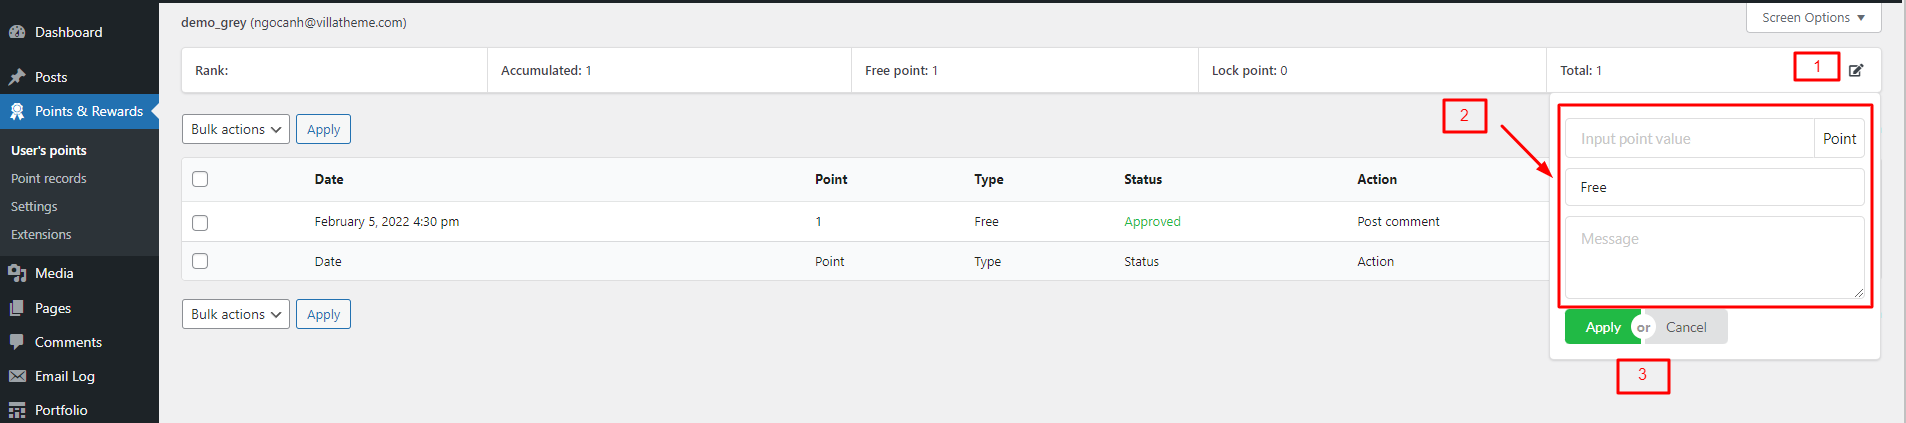
Or click on that user name to view the full point history and edit their points there.
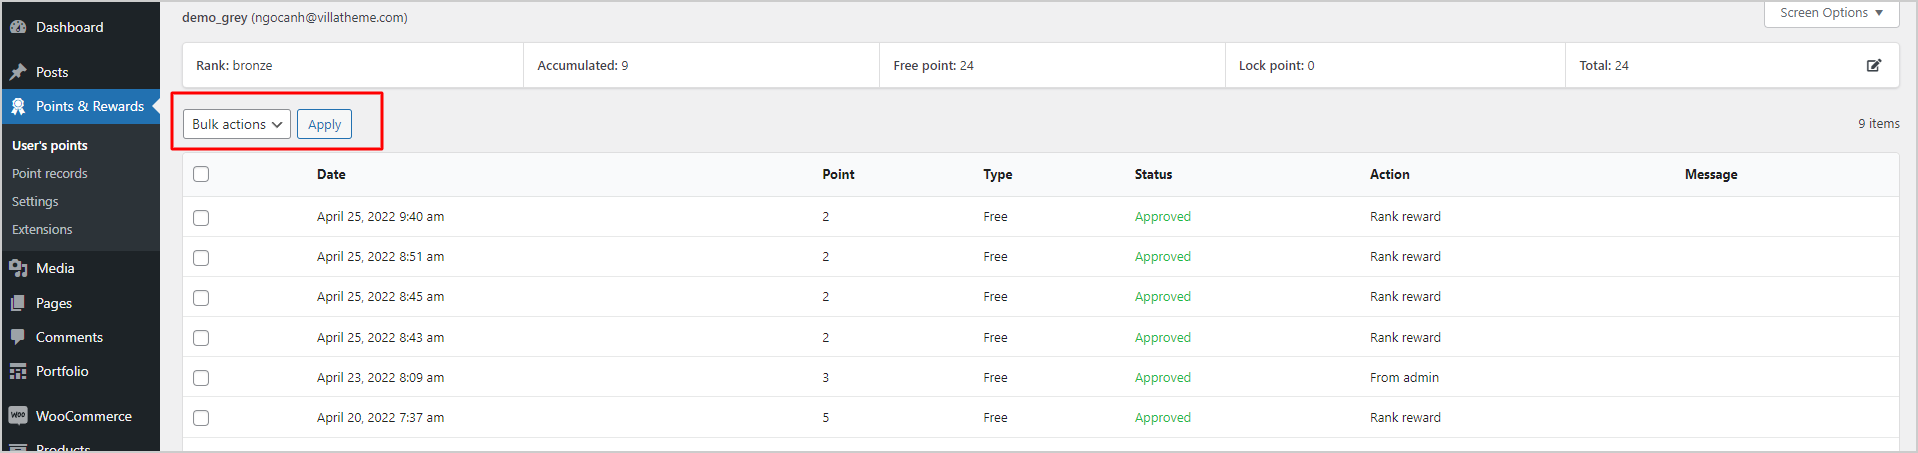
To view the full history of one user, click on their Username, you will be redirected to the user’s point accumulating history with this information: their current rank; points they have accumulated – number of free points, and numbers of lock points; and the total point.

In this point accumulating history, you can change their total point, and approve/revoke their point.
The plugin allows you to put restrictions and block particular users.
To place restrictions on users/user roles, you can do it in the General settings, go to Dashboard > Points & Rewards > General
– Add the user name/user roles to these 2 fields below. The selected users/user roles will not be able to gain points until you remove their user name/roles from these fields.
– Click “Save settings”
The point manager can block particular users on the list, go to Dashboard > User’s points > find the user you want to block:
Step 1: Hover over a username
Step 2: Select “Block”

This user will not be able to gain points until you unblock them manually (The same way as to how you block them).
Or till they reach the blocking time and are unblocked automatically.
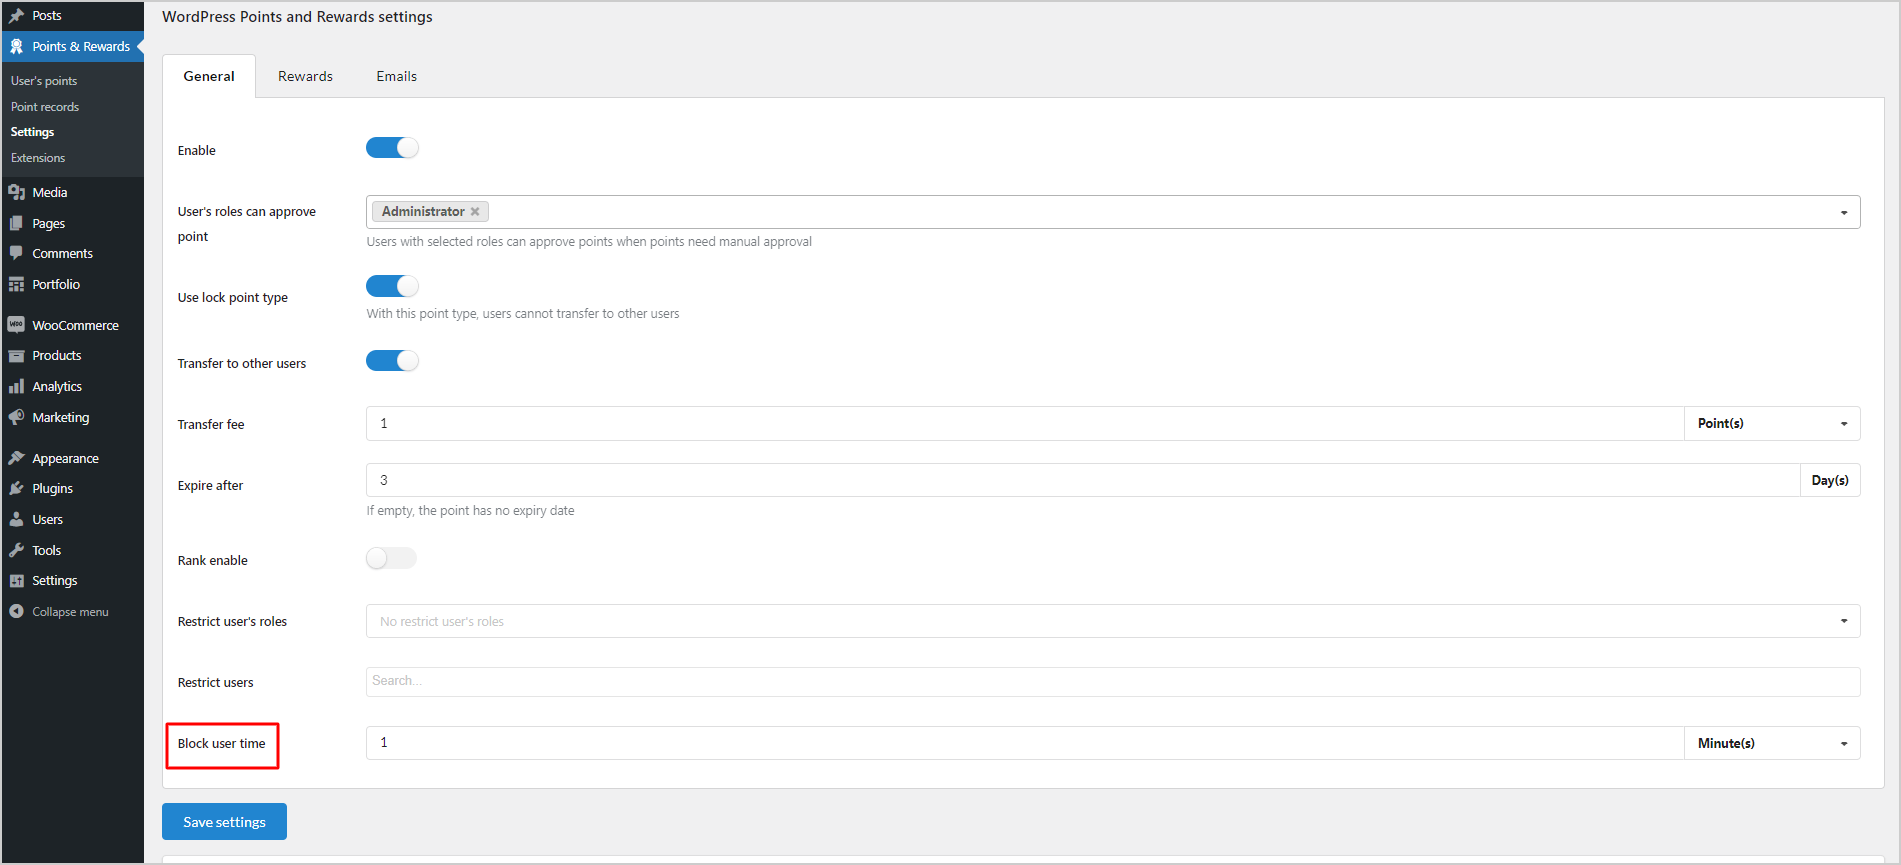
To set the blocking time, go to Points & Rewards > General
– Set the time in the “Block user time” option.
– Select the time unit: Minute; Hour; Day.
– Click “Save settings”.
First, go to Dashboard > Point & Rewards > Settings.
This tab allows the point manager to manage the general settings of the plugin: scoring rules, ranking order, and other settings.

In this tab, the point manager can assign point values to each action. Through these settings, the point manager can enable earning points for different actions, when the user signs up, posts a comment, or creates a new post, they will get some points as a rewards.
In this tab, you can configure it to send email notifications to customers. Currently, the plugin provides 3 email types. A list of email settings for the point manager allows him to enable or disable email notifications for different activities.

To view and manage the user’s points, go to Dashboard > Points & Rewards > User’s points.

On this setting page, you can:
In the Point records settings, the point manager can view all actions of all users that were done to gain points, with the details as below:
