After successful activate the WooCommerce LookBook plugin, go to Dashboard/Lookbooks to start using the plugin.
2 steps to create a lookbook.
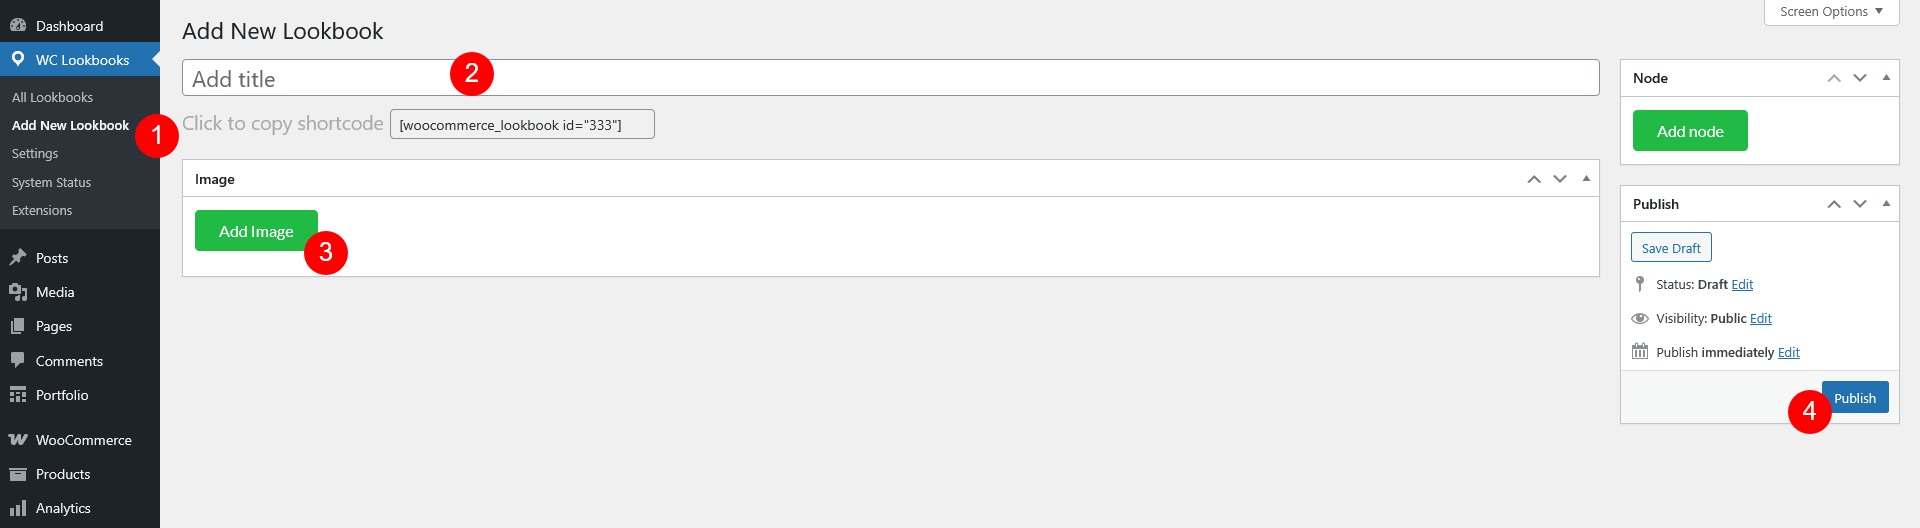
Step 1: Upload picture
- In your WordPress dashboard, navigate to LookBook > Add New Lookbook (or edit an existing LookBook item).
- Add a title
- Upload the LookBook image: Upload or select the image you want to use as your LookBook.
- Click “Publish”
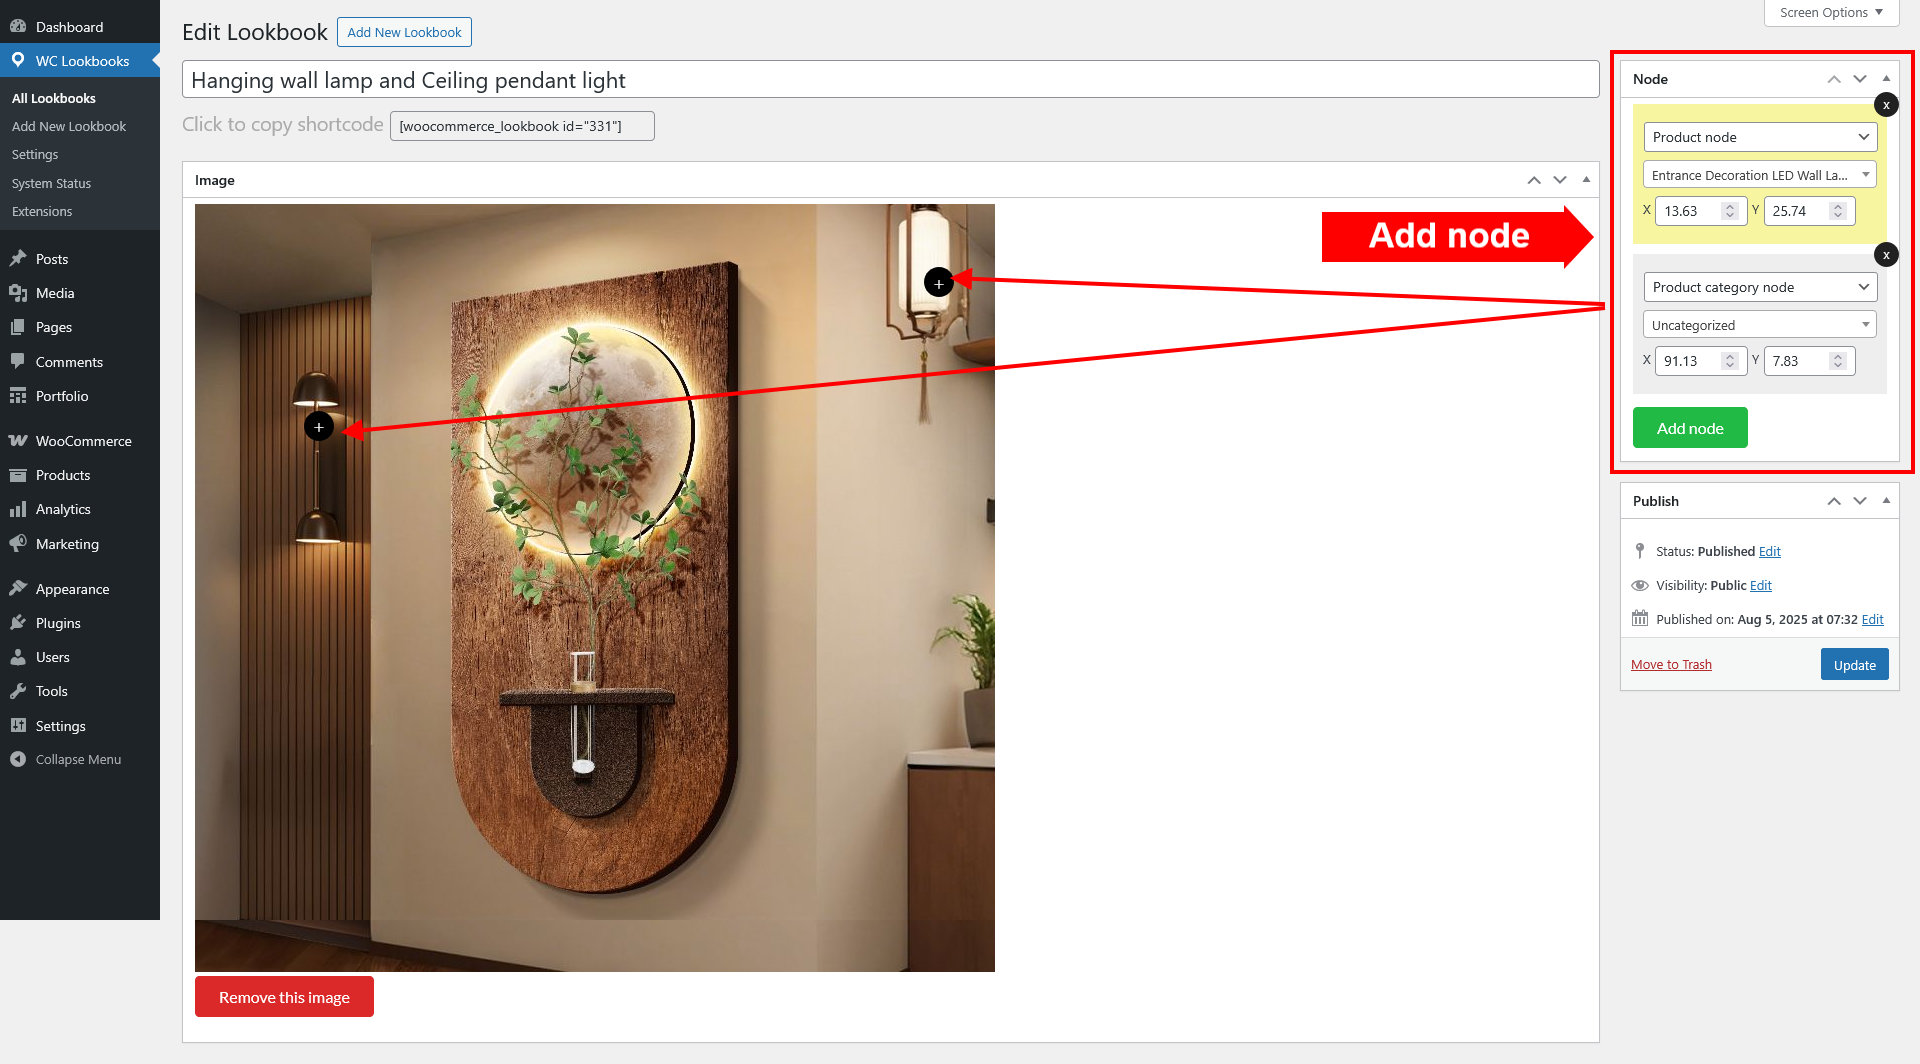
Step 2: Add nodes
Click “Add node” button: Once your image is loaded in the editor, simply click the green “Add node” button to add a hotspot, and drag that hotspot anywhere on the image where you want, each node can be linked to either a product or a category.
- Select a type in the first dropdown – Product node or Product category node
- Choose Product or Category by searching their title
Customize the Node (Optional):
- Set the icon and customize the nodes
- You can drag and reposition the node if needed.
- Repeat step 2 for more nodes: You can add multiple nodes to a single image, each linking to a different product.
Once finished, click Publish or Update.
Use the provided shortcode to embed the LookBook into a page or post. You can change the shortcode into[woocommerce_lookbook_slide id='x,y,z' layout='carousel'] and [woocommerce_lookbook_slide id='x,y,z' layout='gallery'] with x y z is page id of lookbooks to show the 3 lookbooks as a slide, and the layout can be carousel or gallery.
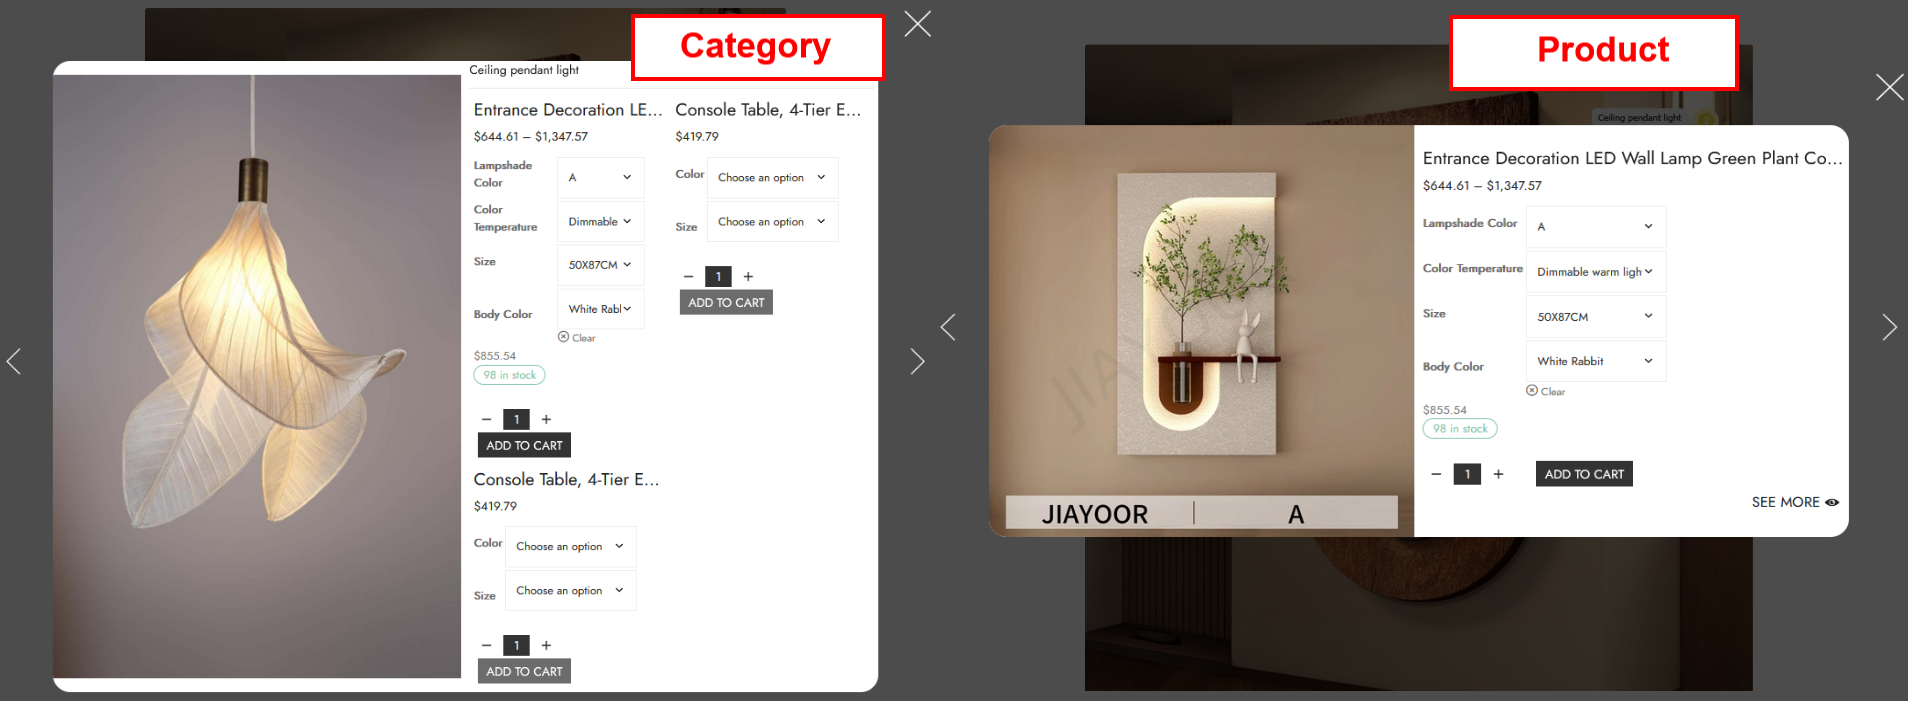
WooCommerce Lookbook will appear on the front-end as a picture with nodes that locate products

When clicking on a node, a pop-up will appear with product information.