CONNECT WOOCOMMERCE TO SHOPIFY STORE(S)
After installing and activating the plugin, the first step is to connect your WooCommerce store to one or more Shopify stores using Shopify API credentials – learn how to get the app credentials in this document.
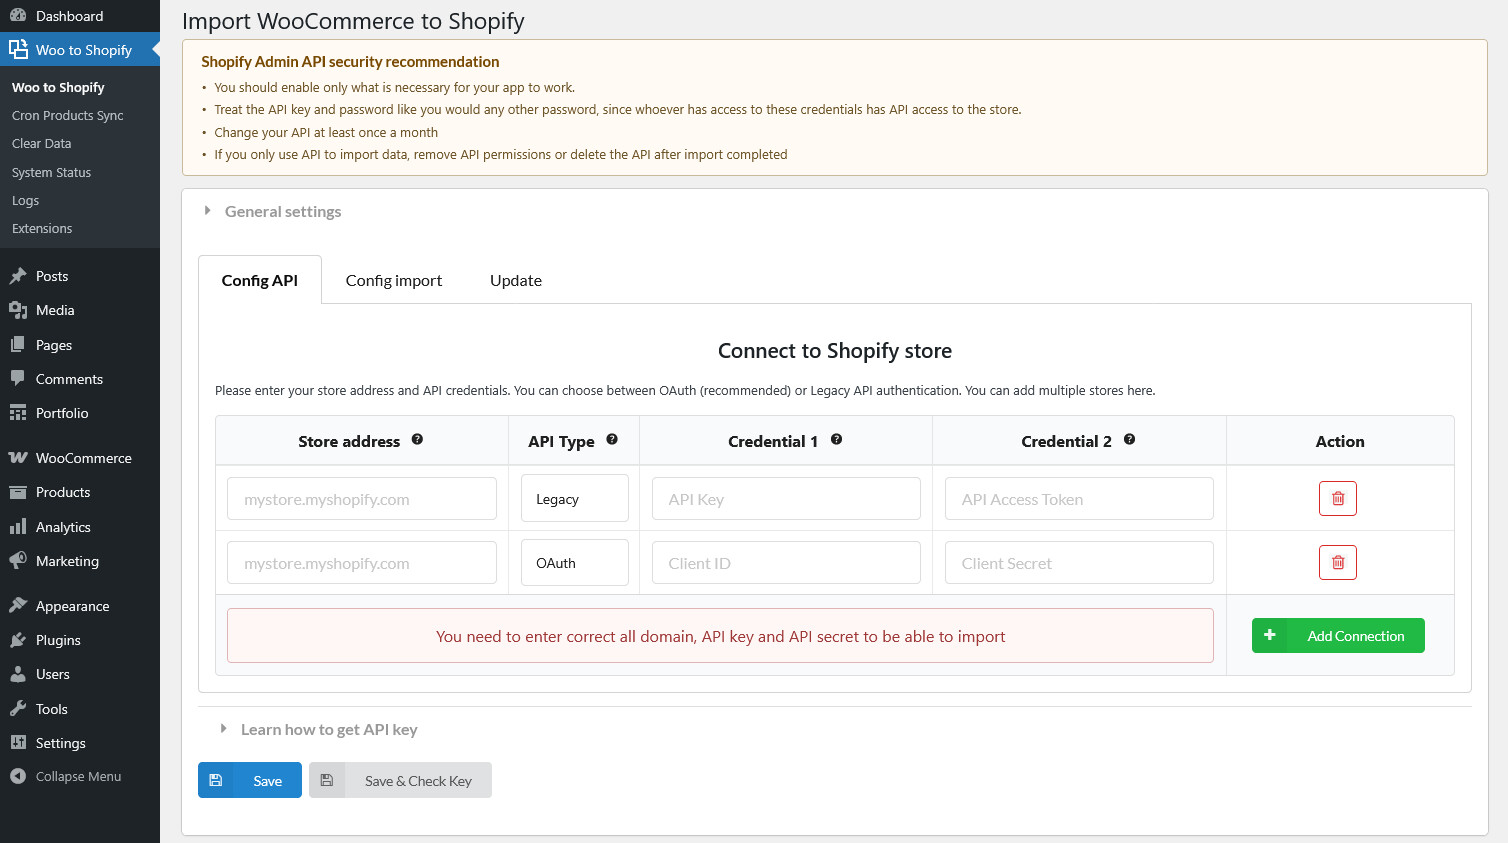
Step 1: In your WordPress admin, go to: Woo to Shopify → General settings → Config API
Step 2: In the Connect to Shopify store section, configure the following fields:
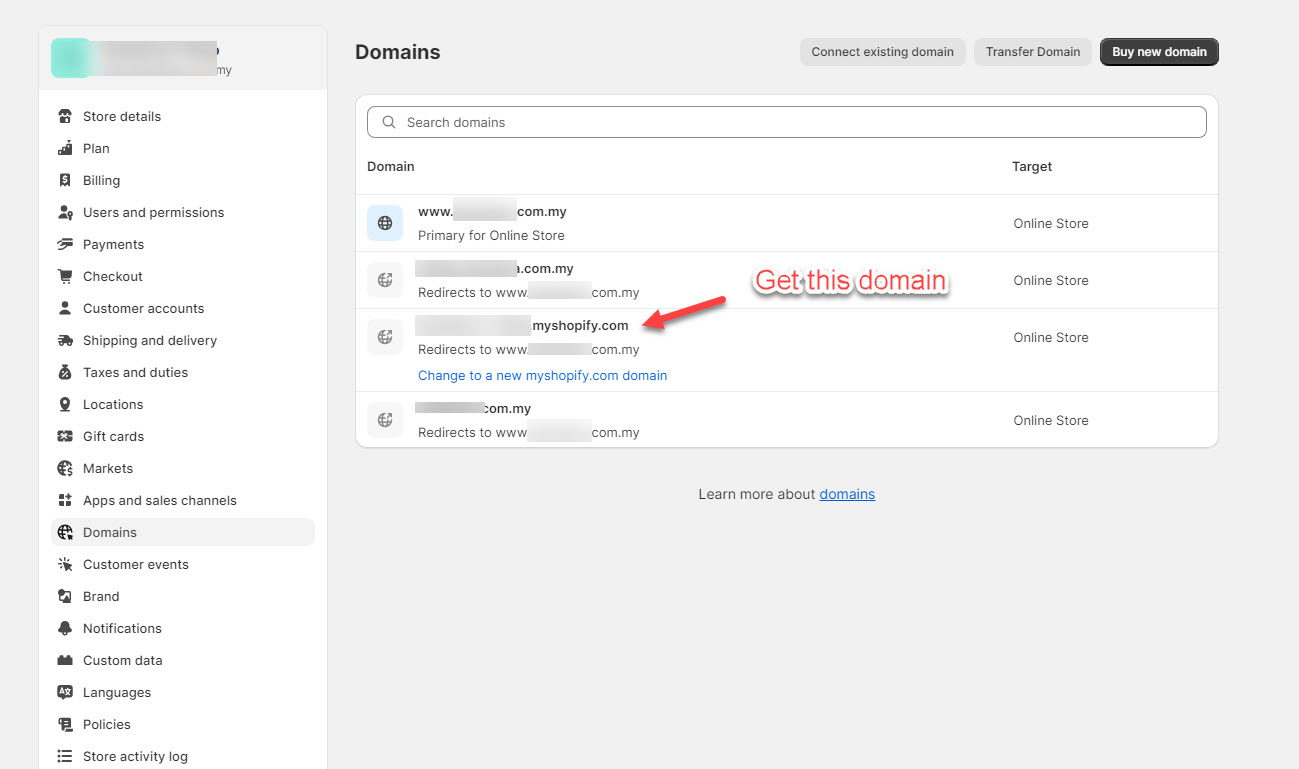
- Store address: Enter your Shopify store domain in this format myshop.myshopify.com. You can find this value in your Shopify admin at: Settings → Domains
- API Type: Choose the API type based on how your Shopify app was created:
- OAuth (Recommended): Select this option if you’re using a newly created Shopify custom app. Add your app’s Client ID and Client Secret
- Legacy: Select this option only if you’re an existing user using a legacy custom app. Add your app’s API Key and API Access Token
Step 3: Save the connection
If the credentials are valid, the Shopify store will be added successfully.
Important Notes
- You can connect multiple Shopify stores by using the Add store button.
- Each connected Shopify store will have its own separate sync and import area inside the plugin.
- Make sure the store domain is entered correctly using the myshop.myshopify.com format.
You can now start syncing and migrating products from WooCommerce to Shopify.
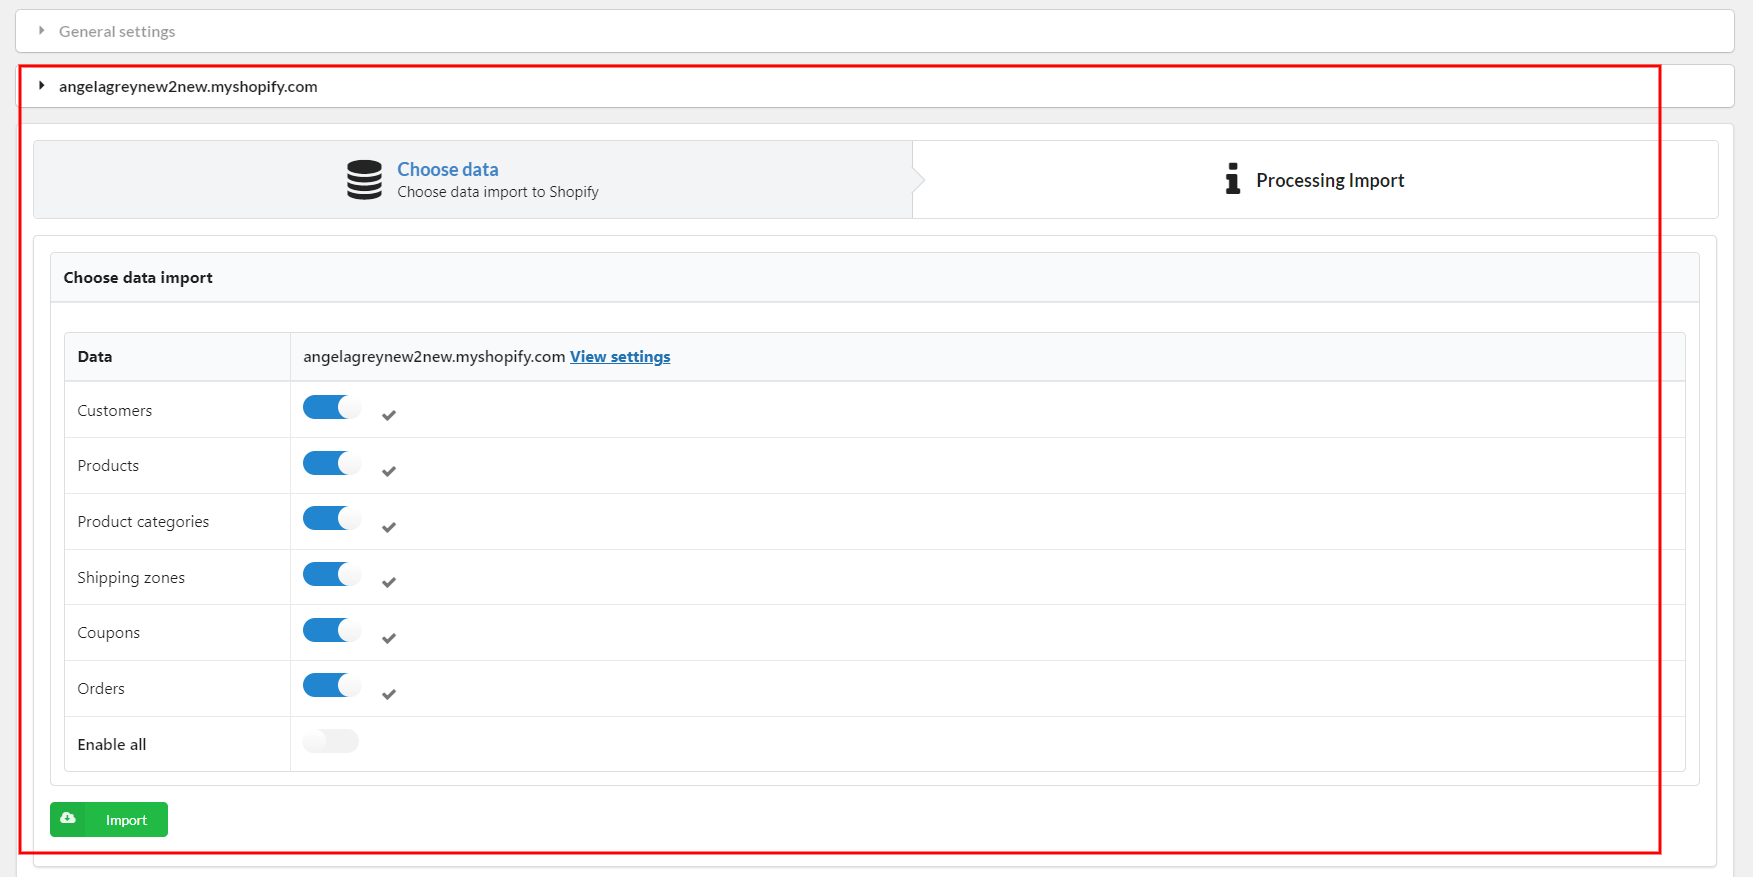
- If you want to check again the settings you configured for a particular store, no need to scroll up and find them manually, simply click View settings.
- Once you click “Import”, the plugin will import the data to all Shopify stores, if you want to leave out some stores, do it with “Enable all“.
PAGINATE FOR BIG DATA USERS & EXCLUDE TRANSLATED PROUDCTS FOR WPML USERS
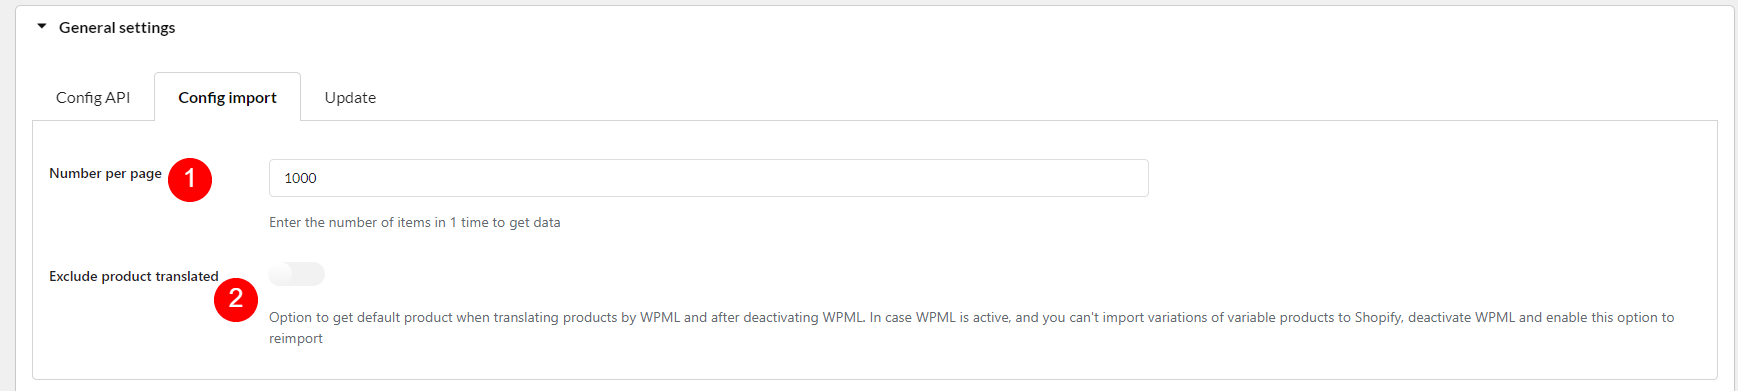
If you have too much data of Products, Users and Orders to import, go to General settings >> Config import to divide the data entry process into small batches to avoid loading too much data at once, which leads to the data can’t be loaded properly.
![]() Change the value in the “Number per page” option according to the need to adapt it to your site.
Change the value in the “Number per page” option according to the need to adapt it to your site.
![]() Enable this option to get default product when translating product using WPML
Enable this option to get default product when translating product using WPML
You can learn this video on how to create a custom app and connect Shopify API using an Access token.