After installation, follow the steps below to configure tracking synchronization with Dianxiaomi.
Step 1: Configure tracking synchronization in your Dianxiaomi account
- Before proceeding, please connect your store using the WooCommerce REST API. For setup instructions, please refer to the Dianxiaomi Authorization Guide.
- Enable the carriers you want to use in Orders Tracking > Shipping Carriers. You can follow the carrier configuration guide here: Shipping Carriers Configuration
- Configure and map carriers in your Dianxiaomi account. Please follow Method 2 and configure “Orders Tracking for WooCommerce” as instructed in the Dianxiaomi documentation: Dianxiaomi Documentation Tutorial
Note: The Dianxiaomi documentation is written in Chinese. If needed, you can use your browser’s automatic translation feature (such as Google Chrome Translate) to translate the page into your preferred language.
Step 2: Configure the integration settings in Orders Tracking
Go to Orders Tracking > Integration and enable the integration options you want to use with Dianxiaomi.
Configure the integration settings.
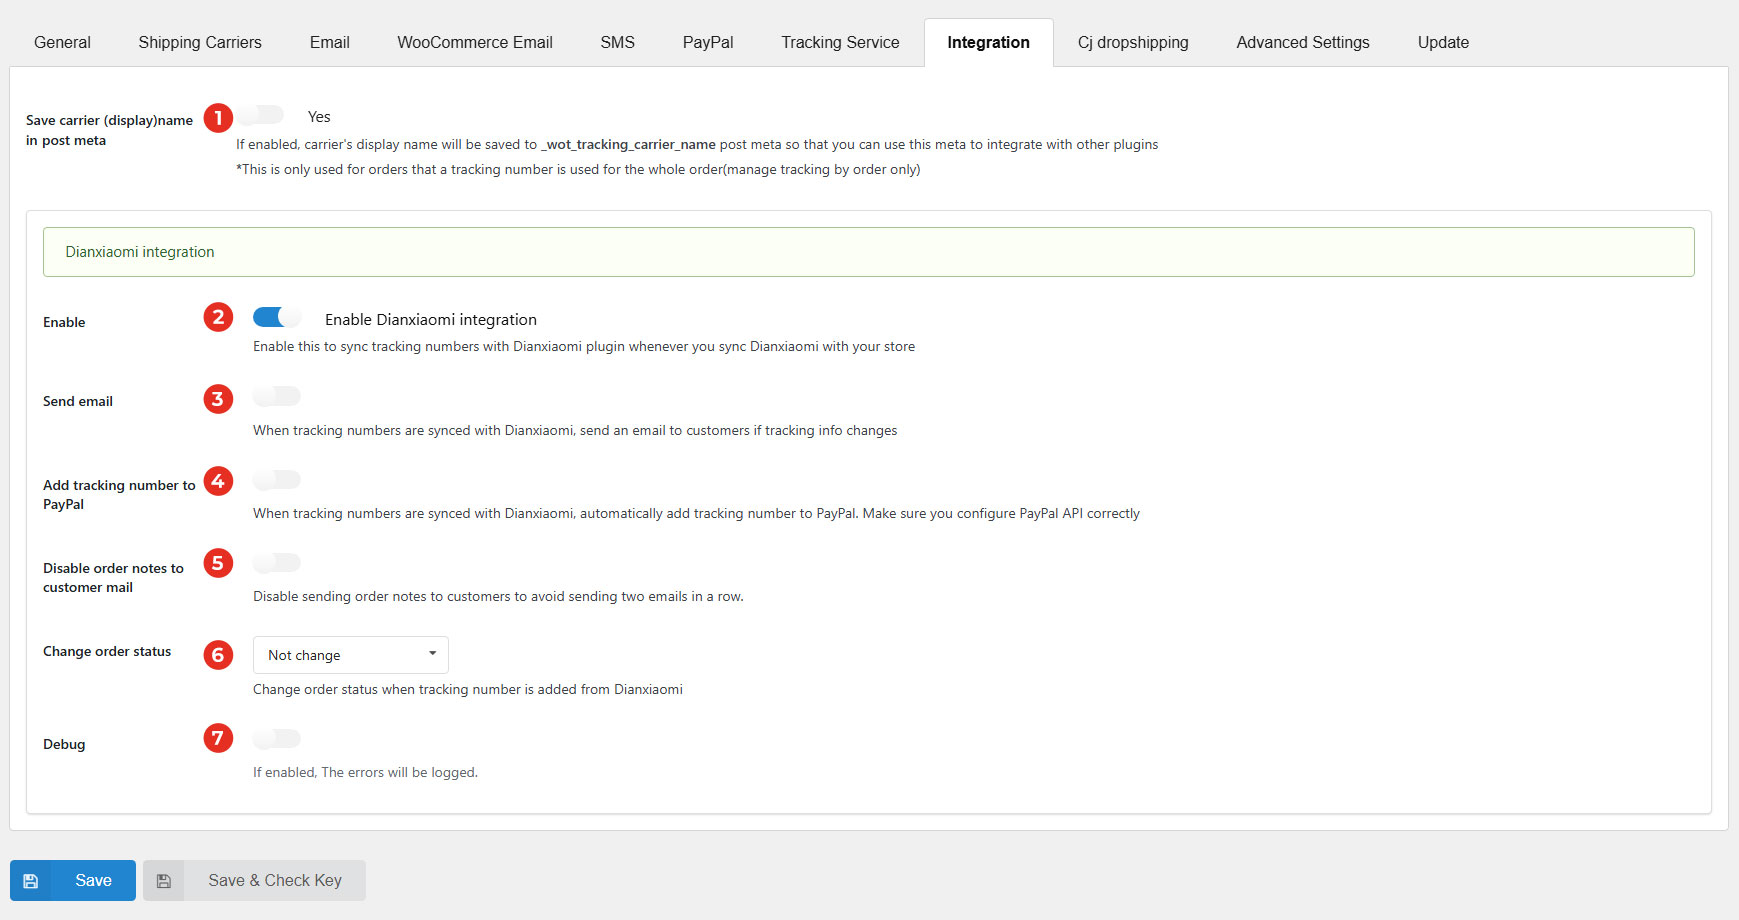
- Save carrier (display)name in post meta: If enabled, carrier’s display name will be saved to _wot_tracking_carrier_name post meta so that you can use this meta to integrate with other plugins. *This is only used for orders that a tracking number is used for the whole order(manage tracking by order only)
- Enable: Turn this on so that tracking information from Dianxiaomi is automatically synced to your store whenever you perform a sync.
- Send email: Automatically send an email notification to the customer after a tracking number is successfully synced from Dianxiaomi to the order.
- Add tracking number to PayPal: Automatically add the synced tracking number from Dianxiaomi to the corresponding PayPal transaction. Make sure your PayPal API credentials are configured correctly before enabling this option.
- Disable order notes to customer mail: Turn this option on to prevent WooCommerce from sending order note emails to customers. This is useful when tracking updates are already being emailed through the Orders Tracking plugin, helping you avoid sending two emails in a row for the same update.
- Change order status: Choose the order status that should be applied when a tracking number is added from Dianxiaomi.
- Debug: Enable this option to record errors in the plugin’s debug log.