In the Settings, you will set up the general configurations of Products, Customers, Orders, and Payments on the WooCommerce POS page.
A. General configuration
Go to WebPOS > Settings > General, enable to use of the plugin.
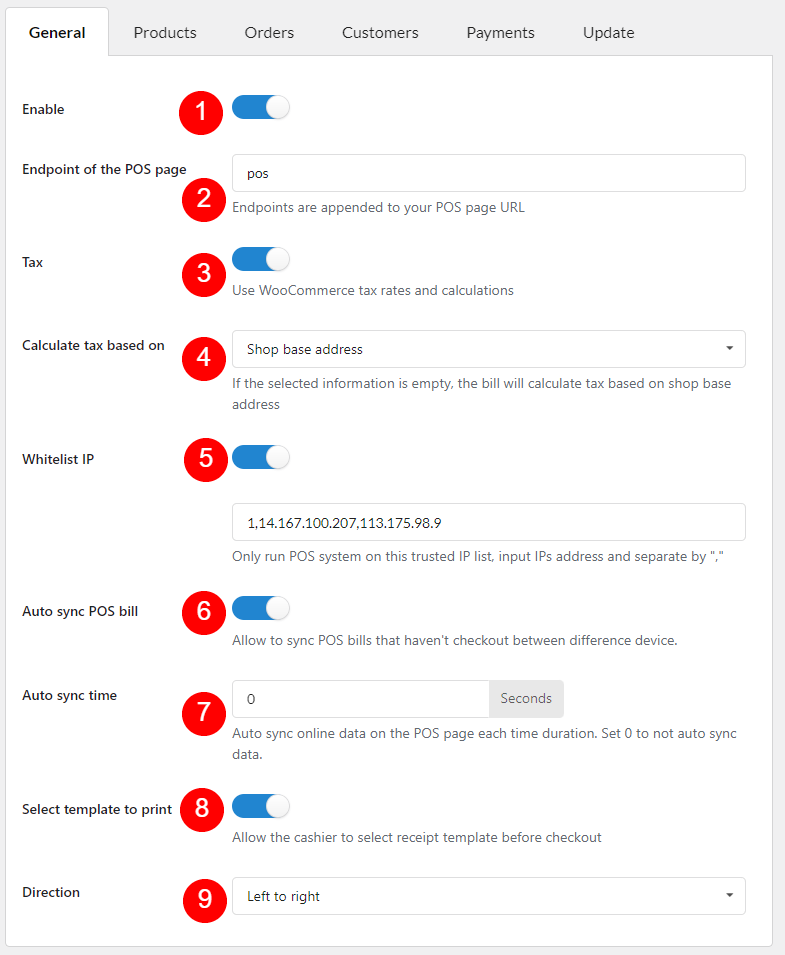
- Enable to activate all plugin functions.
- Add a custom endpoint in the POS page URL: You can flexibly edit the endpoint in the POS page URL by the text you want.
- Tax: Enable to use WooCommerce tax rates and calculations
- Calculate tax based on: You can choose to calculate tax based on one of the addresses: Shop base address, outlet address, order shipping address, customer billing address, or customer shipping address.
- Whitelist IP: You will accept to run POS system limitedly on some trust IPs, just add these IPs and separate them by “,”
- Auto sync POS bill: Unpaid orders in the POS appear as bills in the ‘Point of Sale’ tab. To save them to the server or display them on other devices, activate this option
- Auto sync time: Automatically update the POS page with online data each time. Set 0 to disable data auto-sync.
- Default template: You can create as many receipt templates as you want in the Receipt section and select one template as the default in the Default template field
- Receipt direction: support both Left to Right and Right to Left
- Select template to print: Enable or disable this option to allow the cashier to select a receipt templat before checkout. You can follow this guide steps.
B. Product configuration
Go to WebPOS > Settings > Products
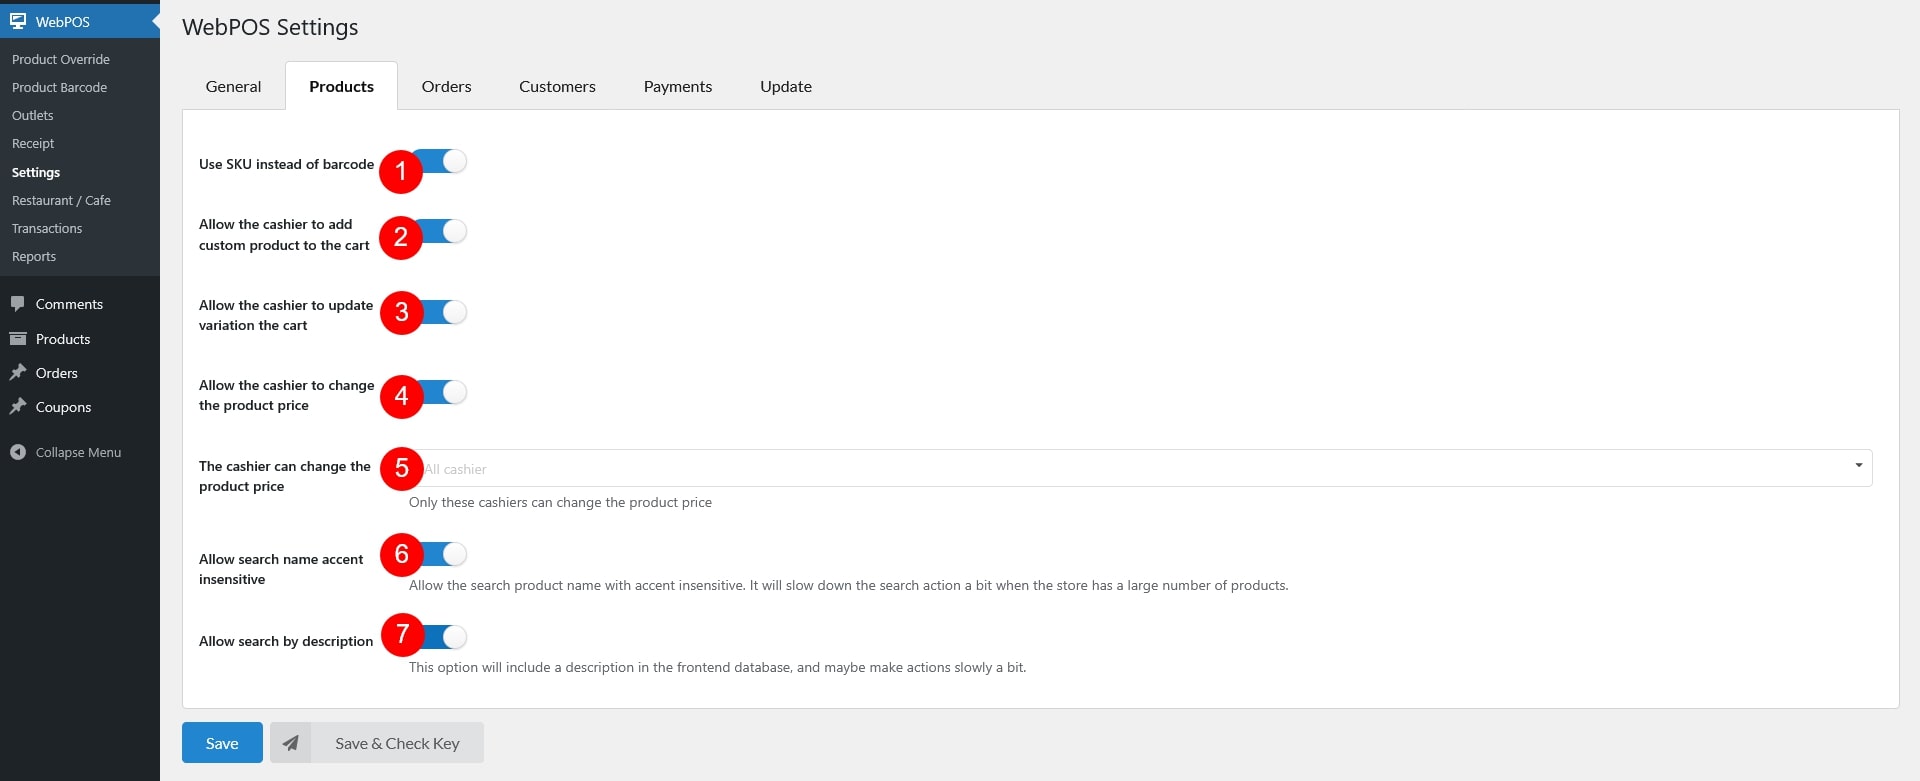
- Use SKU instead of barcode: If enable this option, the product barcode will be automatically assigned as the product SKU, so you will not need to enter a value for the barcode.
- Allow the cashier to add custom product to the cart: In case, new products have not been updated to the store, cashiers can add new custom products to the cart.
- Allow the cashier to update variation to the cart: The cashier can alter a new variation for the selected variation.
- Allow the cashier to change the product price: The cashier can update the product price directly on the POS page if she is allowed.
- The cashier can change the product price: Determine which cashiers have access to update the product price on the POS page.
- Allow search name accent insensitive: Allow product searches to ignore accents in product names (e.g., searching “cafe” will match “café”). This can slightly slow down search performance if your store has a very large number of products.
- Allow search by description: Allow cashiers to search products by key words in description. May slow down the actions.
C. Order configuration
Go to WebPOS > Settings > Orders

- Sequential invoice numbering: You can use a custom order number to print receipts in a sequential order. This option is only applicable to the new order.
- Custom order number: Set up the custom order number per outlet with prefix and starting number
- Maximum applied coupons : Coupons can be applied on POS orders. You can limit the number of coupons that can be applied per order.
- Order status: Pick a default status for orders which is created on POS page
- Send orders email: This option is available if “Order status” is not “Pending”. Define how the order emails are sent after POS order is placed
- None: Emails are not sent
- Woo default: Emails are sent based on settings in WooCommerce >> Settings >> Emails
- Only send to admin: Only sends admin emails in the WooCommerce Emails settings
- Only send to customer: Only sends customer emails in the WooCommerce Emails settings
- Show receipt in email: Allow the display of the POS order receipt in WooCommerce email orders. To use this feature, you must install the WooCommerce Email Template Customizer plugin, just follow this guide.
- Restrict receipt in Pos order email: If “Show receipt in email” is enabled, turn this option on to show receipts in emails only for POS orders
- Show orders on POS page: Show the orders that were created on specific days. To display all orders, leave the field blank.
- Allow the cashier to update orders: Cashier can up order info
- The cashier can update orders: Assign the cashiers who are allowed to update the orders.
- Order status can edit: The status of POS orders that the cashier can change.
- Restock refund order: For online orders, if one is refunded, restock the order item
- Order search fields: Select fields used to search an existing POS order.
- Product name permalink: Choose what the product name links to in POS → Orders:
- Link to product edit: Clicking the name opens the product edit screen in the WordPress admin.
- Link to product page: Clicking the name opens the product’s frontend page.
- None: The product name is displayed without a link.
D. Customers configuration
Go to WebPOS > Settings > Customers
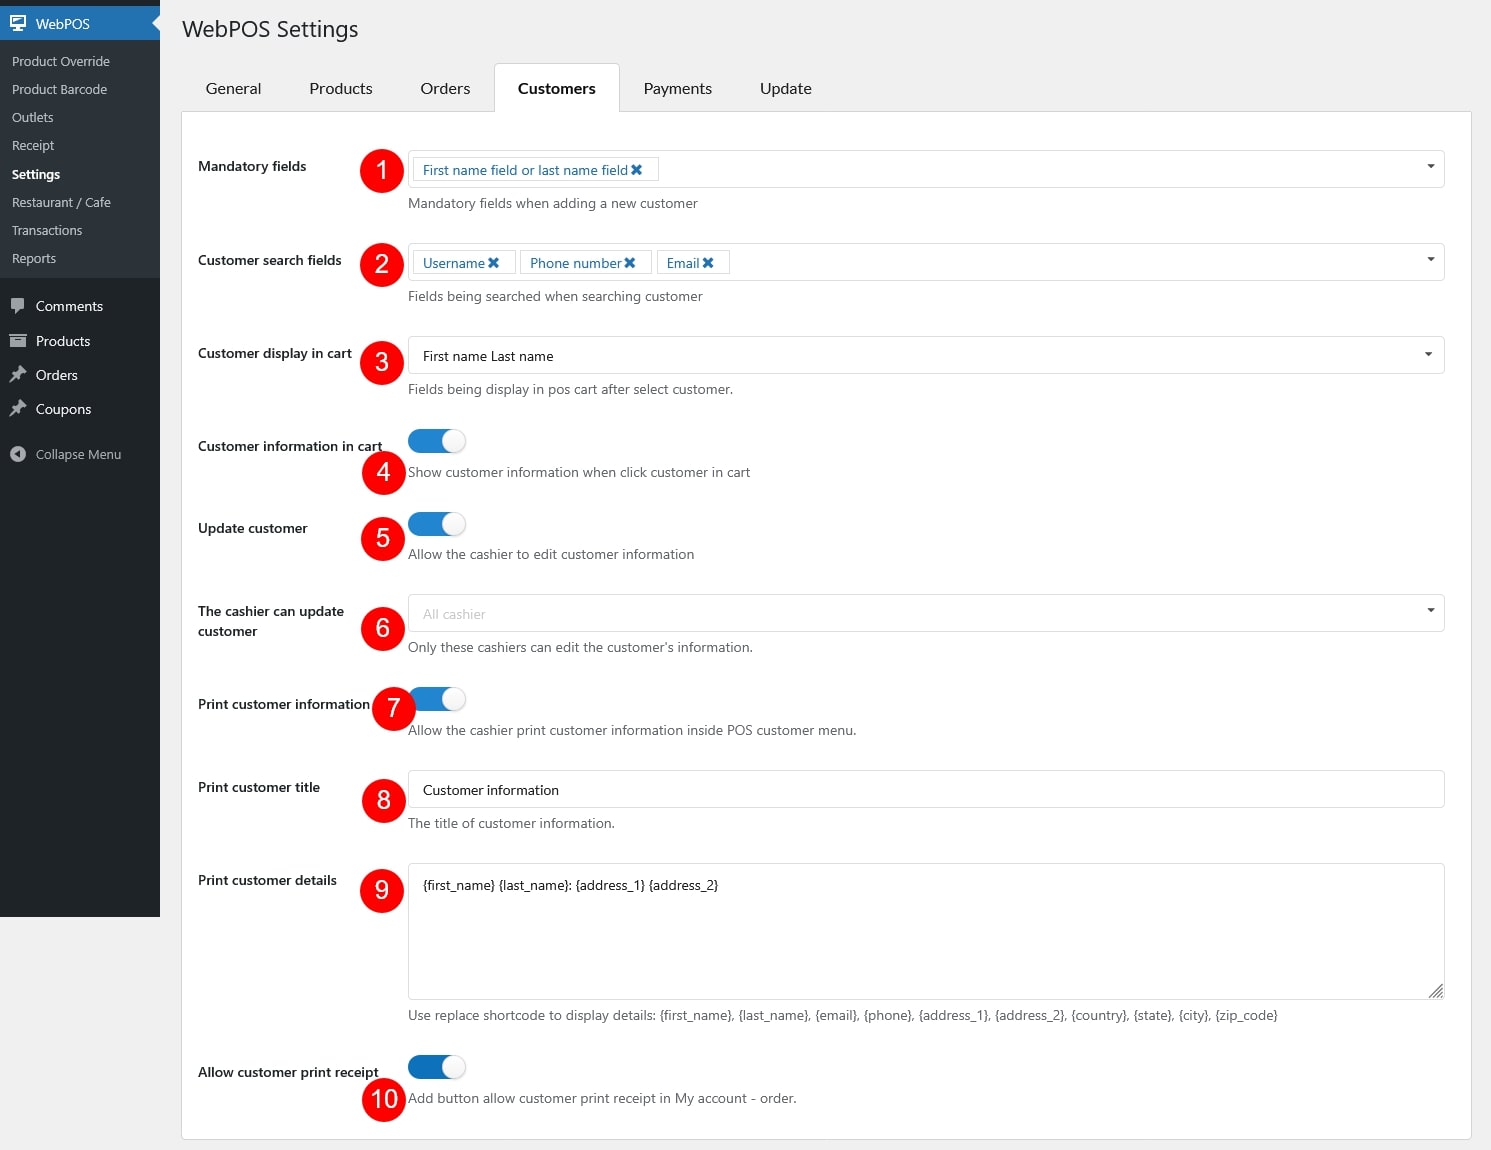
- Mandatory fields: Select which fields are mandatory when adding a new customer.
- Customer search fields: Select fields used to search and add an existing customer for the POS order.
- Username
- Phone number
- First name
- Last name
- Address line 1
- Address line 2
- Customer display in cart: Fields displayed in POS cart after selecting a customer
- First name
- Last name
- First name Last name
- Last name First name
- Display name
- Username
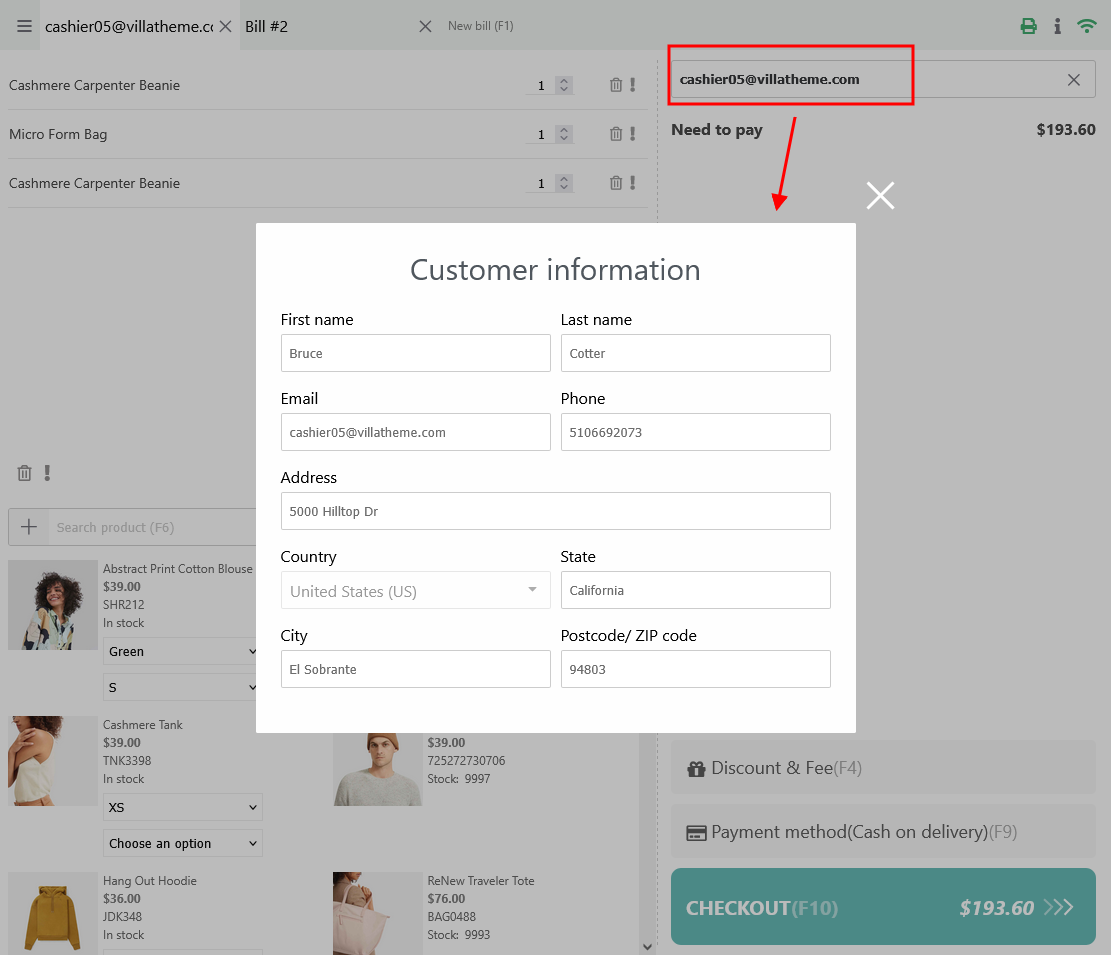
- Customer information in cart: Show customer information popup upon clicking the customer in POS cart
- Update customer: The customer information on the POS page can be changed by the cashiers if you allow it
- The cashier can update customer: Select certain cashier who can update customer’s info
- Print customer information: Allow cashier to print customer details from the POS customer menu
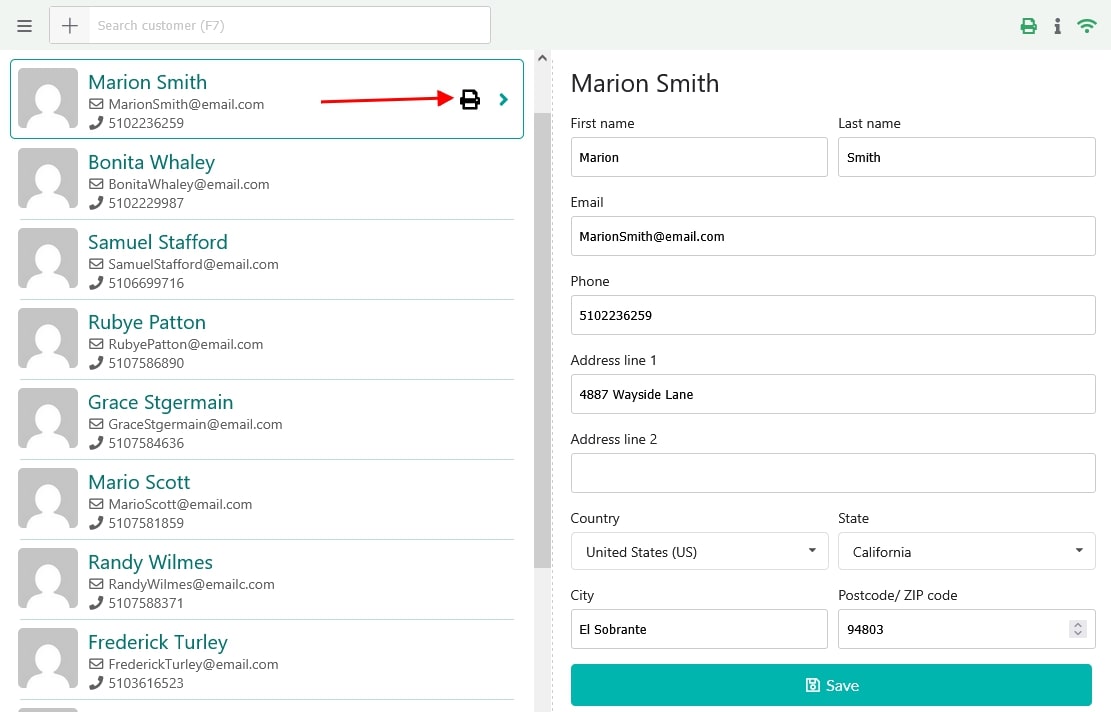
- Print customer title: The title of customer information to be printed.
- Print customer details: Use replace shortcode to display details that you want to print out: {first_name}, {last_name}, {email}, {phone}, {address_1}, {address_2}, {country}, {state}, {city}, {zip_code}
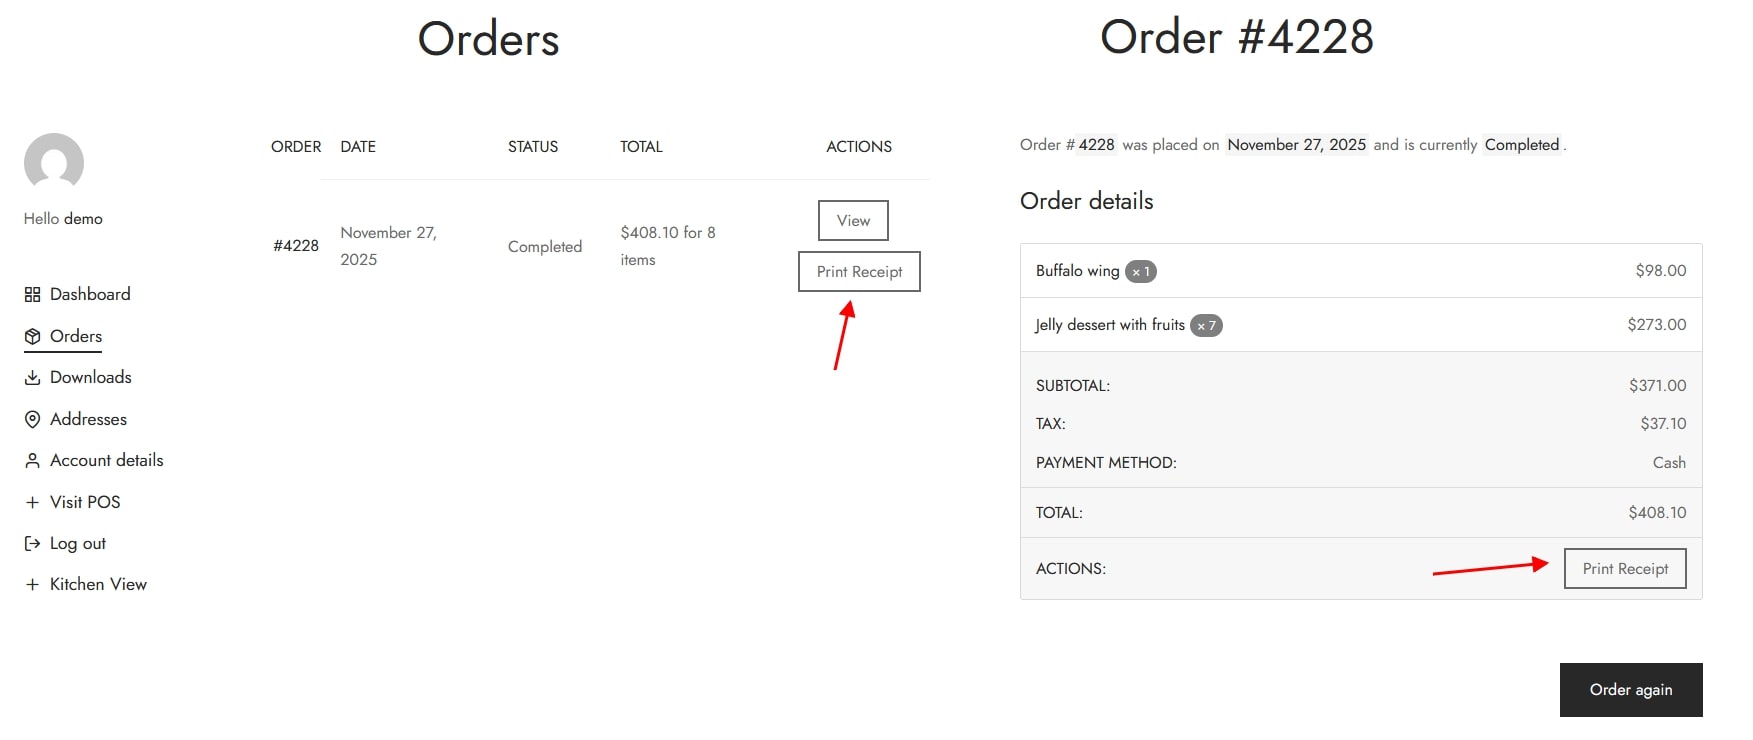
- Allow customer print receipt: Add button allow customer print receipt in My account – order.
E. Payment configuration
Go to WebPOS > Settings > Payments:
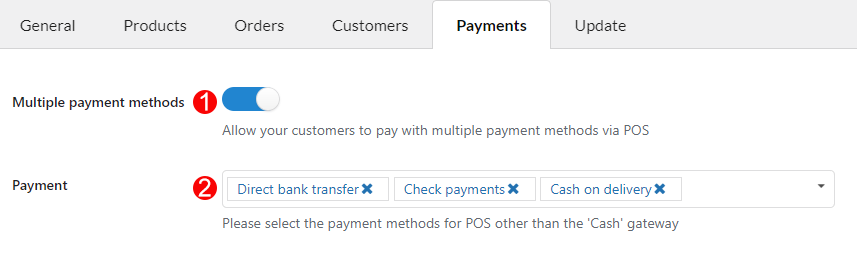
- Allow customer to pay in multiple payment methods: Allow customers to use more than one payment method to pay for the same order.
- Payment: Select payment methods for WebPOS orders in available WooCommerce payment methods. Apart from these payment methods, Cash will always be accepted at the POS store.