After importing the products and set the general rules for all imported products, the imported products now are on the Import List where allows you to manage all imported products from aliexpress.com on your Woo store.
Go to Dashboard/ Import List.
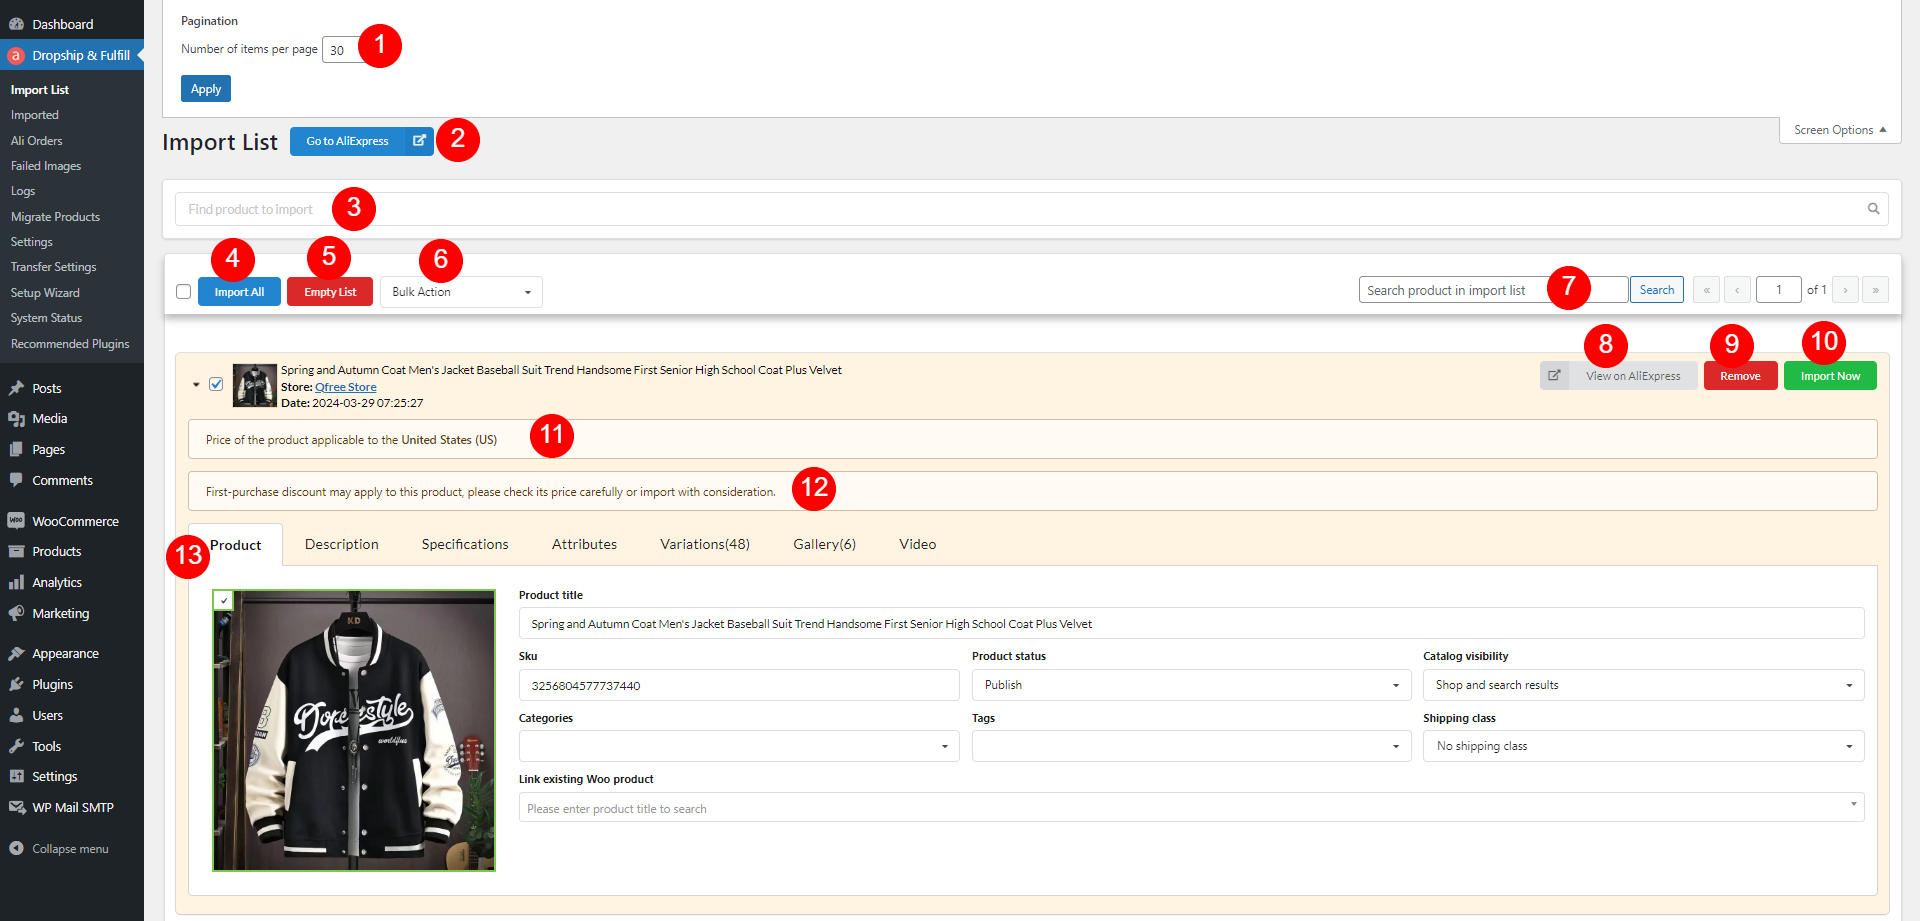
1. Pagination: Click on Screen options and customize number of product items per page.
2. Go to AliExpress: Click this button and you’ll be redirected to https://www.aliexpress.com/
3. Find product to import: Click this field to open the popup like below. This allows you to import products right in this Import List without the need to go to AliExpress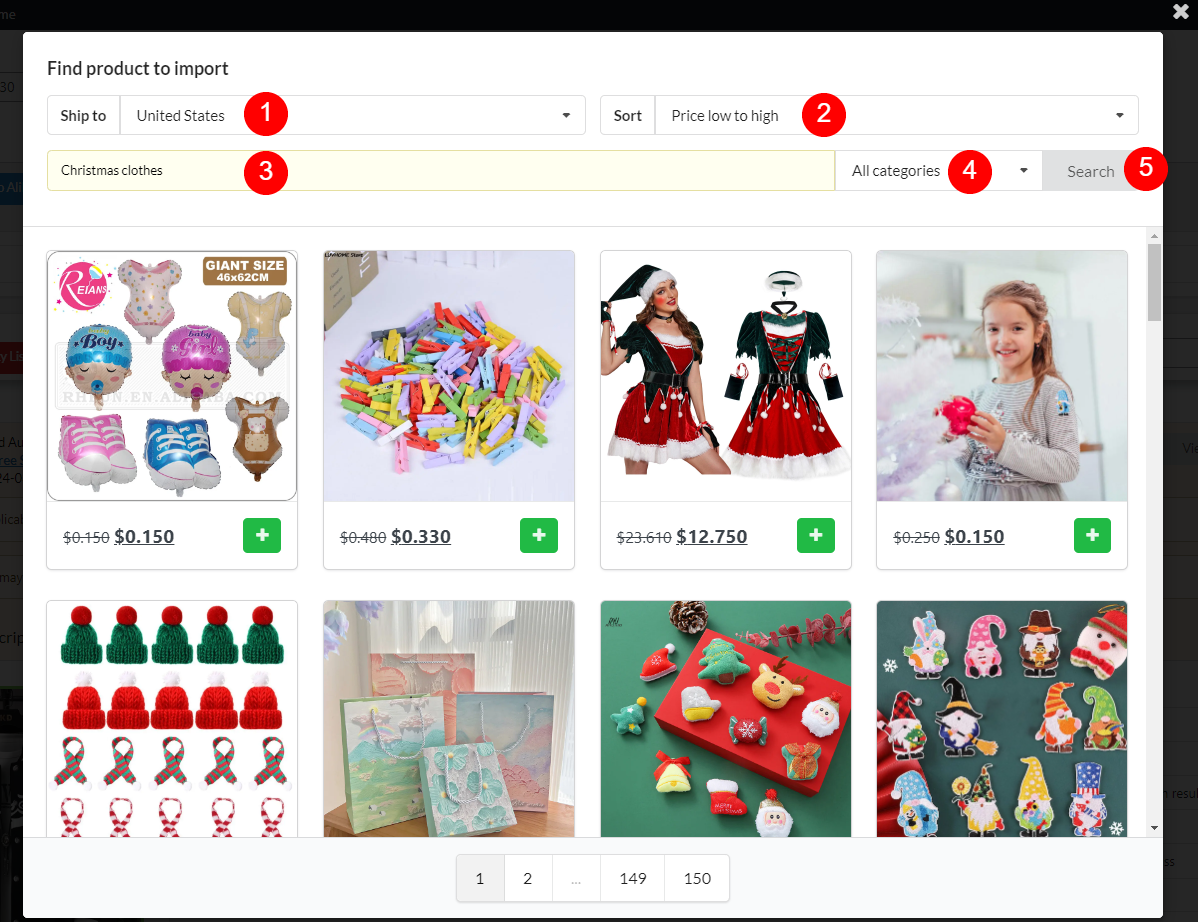
- Ship to: Which country you select in this option will affect the product price and in case you sync product using extension, you would need to ensure the current “Ship to” country is the same as the one you selected when you imported the product. Associated with the option (11) in this section.
- Sort: How you sort the found items. There’re 4 options
- Price low to high: Sort based on price, from low to high
- Price high to low: Sort based on price, from high to low
- Last volume low to high: Product volumes refer to the number of products that the suppliers sell over a certain period of time. Set it from low to high
- Last volume high to low: Like above, but make it from high to low
- Search: Enter the keyword here
- All categories: Find the items within the selected category
- Search: Once you’ve done the configuration above, hit this button to find the one you want. After you get the results just like in the image above, hit the green plus sign to import the item you want.
4. Import All: Click to import all products on the current Import List page to your WooCommerce (only in the current page, you need to move to the next page and hit this button again to keep importing). This button doesn’t work for all items on all pages of the Import List page.
5. Empty list: Click to delete all products in the import list
6. Bulk Action: To make this option show up, you need to check the small checkbox in the top left corner of at least a product in this Import List page, then you can select what to do with the selected item(s). Watch the tutorial below for a better view
- Set categories: Bulk set categories for the selected products.
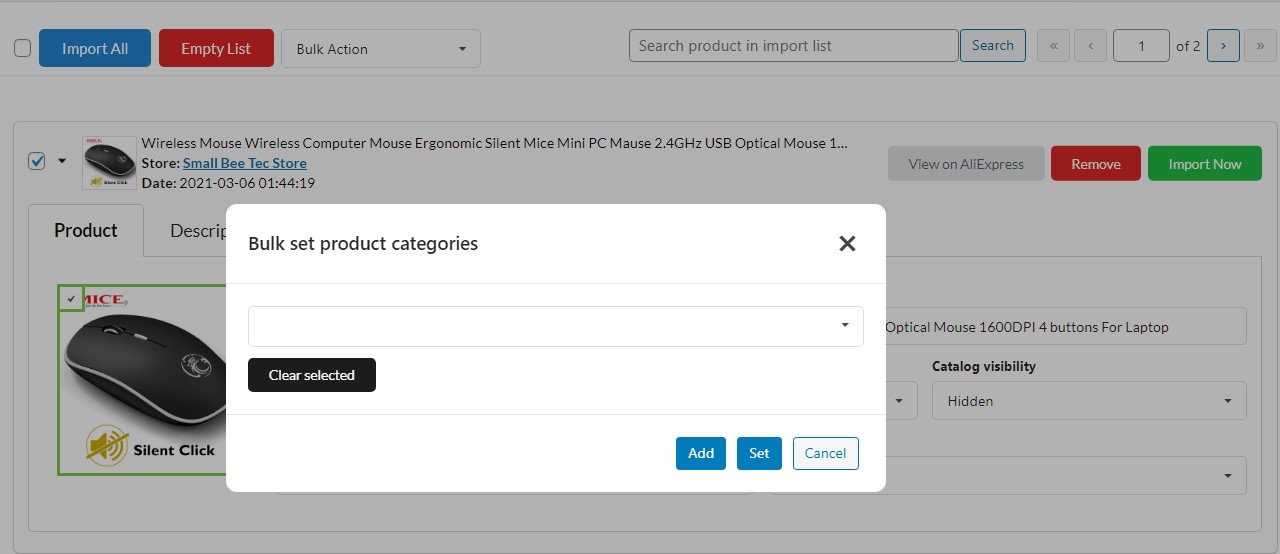
- Add: Products will be added selected categories
- Set: Products will be set with selected categories. Current categories of products will be replaced.
- Clear selected: Remove current selected categories in selector. Leave selector empty and click Set to remove current categories of products.
- Set shipping class: Bulk set shipping class for the selected products.
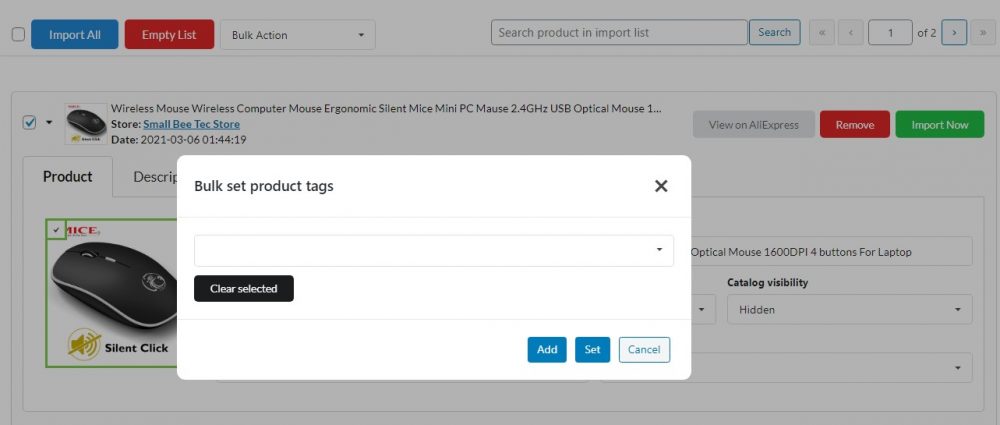
- Set tags: Bulk set tags for the selected products. It works the same as bulk set categories.
- Set status – Publish: Publish all the selected products
- Set status – Pending: Set all selected products to “Pending”
- Set status – Private: Set all selected products to “Private”
- Set visibility – Shop and search results: Selected products will be visible both within the shop section of your website or application and in search results
- Set visibility – Shop only: Selected products will only be visible within the shop section of your website. They will not be displayed on other pages or sections outside of the shop
- Set visibility – Search results only: Selected products will only appear in search results and will not be visible on the front end of your website or application outside of search results pages.
- Set visibility – Hidden: Selected products won’t be displayed on the front end of your website
- Import selected: Import all the selected products
- Removed selected: Delete all the selected products
7. Search product in import list: Search for a specific product on the import list.
8. View product on Aliexpress: Redirect you to the original product page of this product on AliExpress.
9. Remove: Select to remove the product on the import list
10. Import now: To import this product.
11. “Ship to” country: This message lets you know which country in the “Ship to” field you selected when you imported this product.
12. First-purchase alert: AliExpress has their discount offer for the first time purchase on some products. This message lets you know if the item has this discount applied. For details, please visit this article.
13. Product: Customize Aliexpress product information.
These tab settings allow you to customize and manage individually imported products.
Product
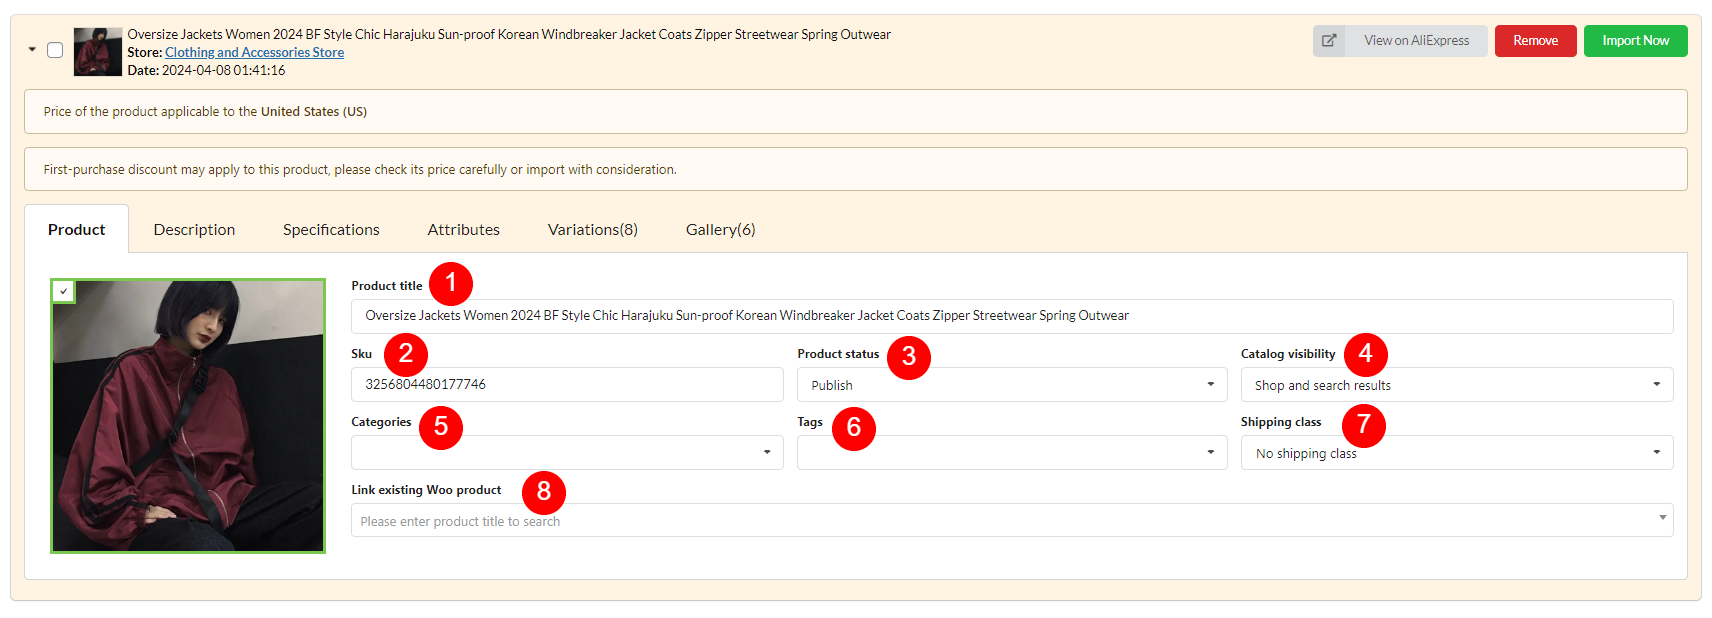
- Product title: Name of the product
- SKU: Product SKU or ID of Aliexpress product
- Product status: Aliexpress product status on WooCommerce store: Public, Pending or Draft.
- Catalog visibility: Select type of product visibility: Shop and search results; Shop only; Search result only.
- Categories: Choose categories the Aliexpress product belong to.
- Tags: Tag for the Aliexpress product on WooCommerce store.
- Shipping class: Shipping class for the Aliexpress product on WooCommerce store.
- Link existing Woo product: This product will replace for an existing woo product. Follow the steps in this documentation – B. Proceed overriding a product.
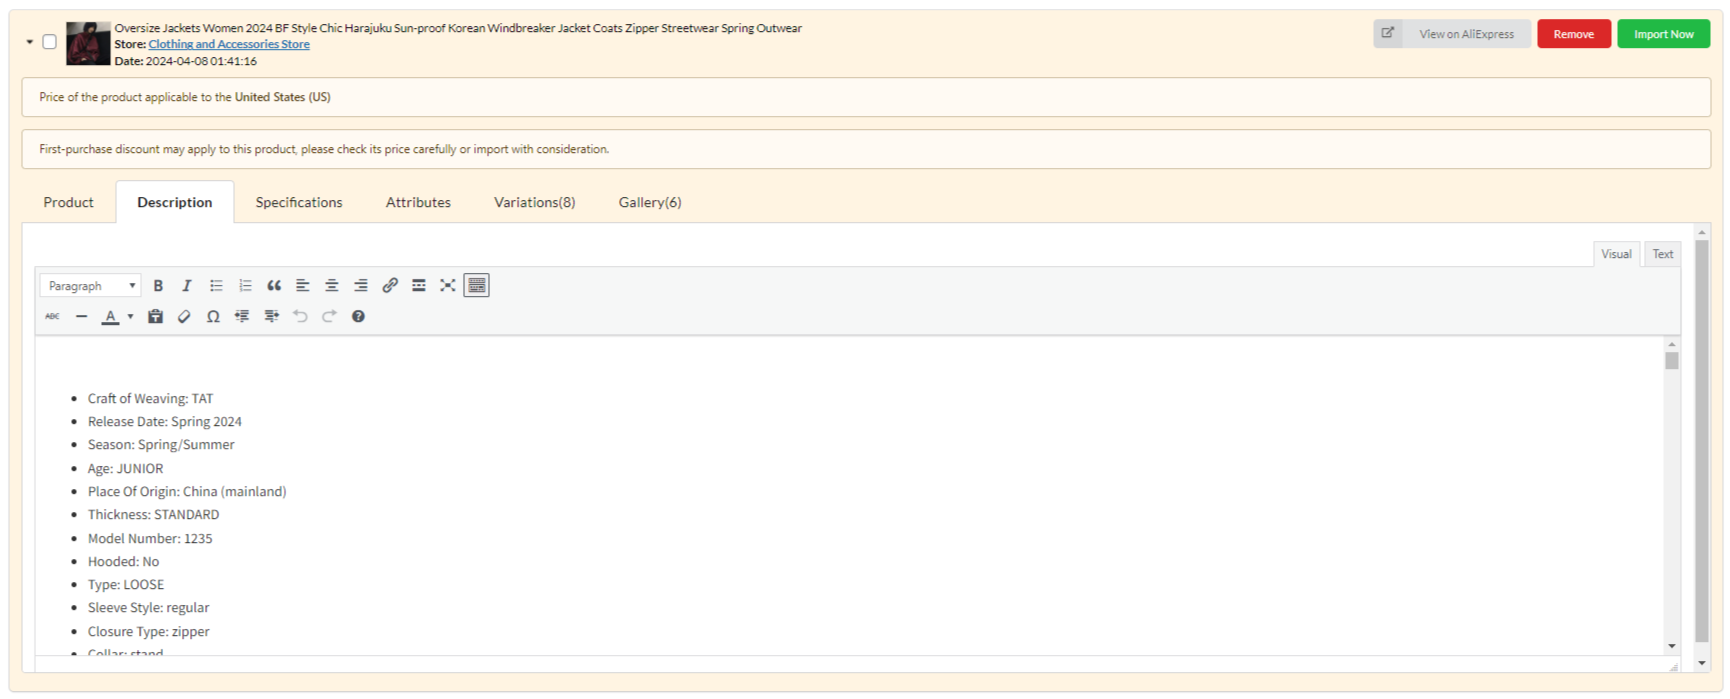
Description: Customize AliExpress product descriptions.
You can customize product descriptions before importing to WooCommerce store.
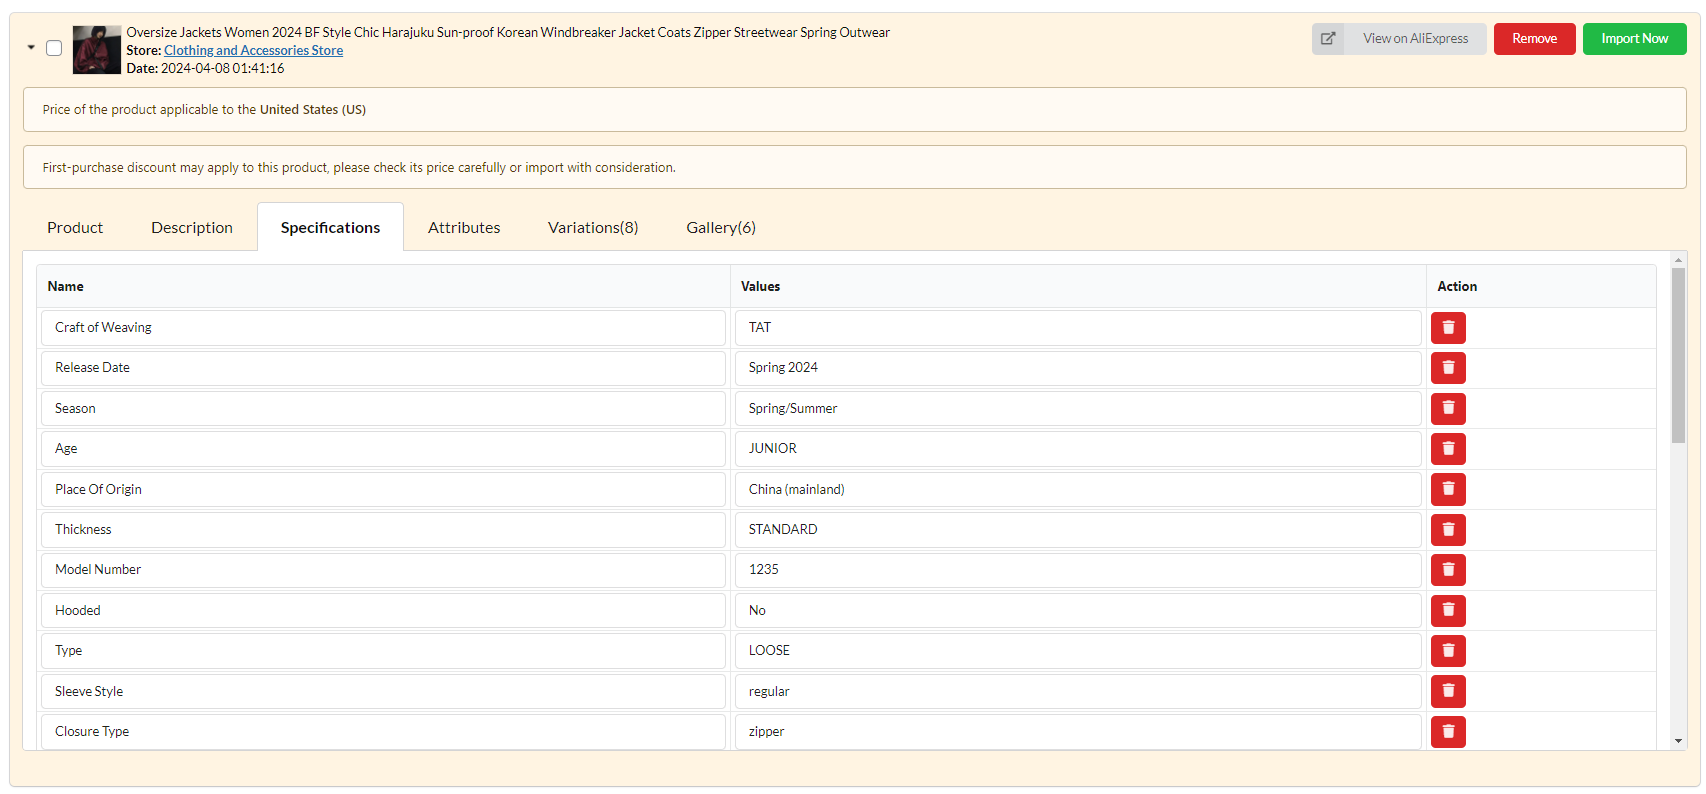
Specifications: This tab will appear if you enable the “Import specifications” option in the Products settings.
Attributes: Customize AliExpress product attributes
In this page, you can:
- Edit attribute name and attribute terms. Once you done editing the attributes, hit the green “Save” button in the “Action” column to save the changes. The attribute slug will change accordingly with the new attribute name after you save.
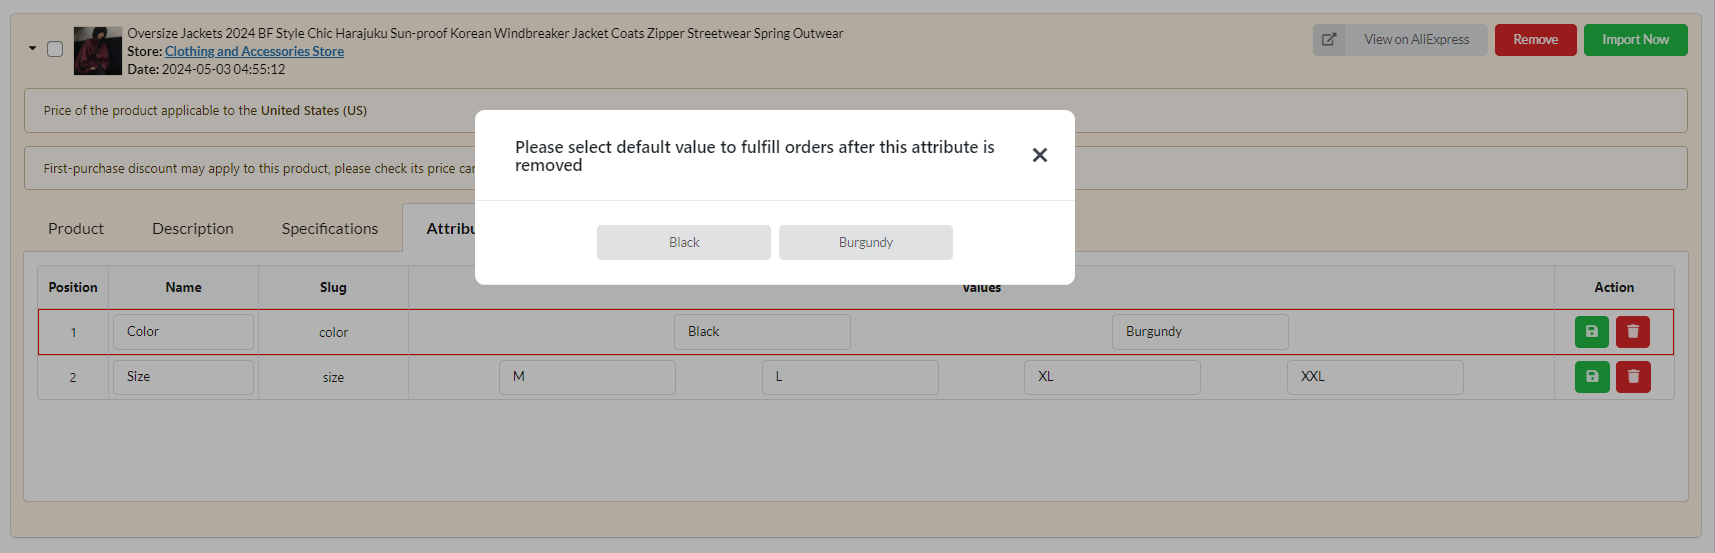
- Remove an attribute using the red “Remove this attribute” button in the Action column
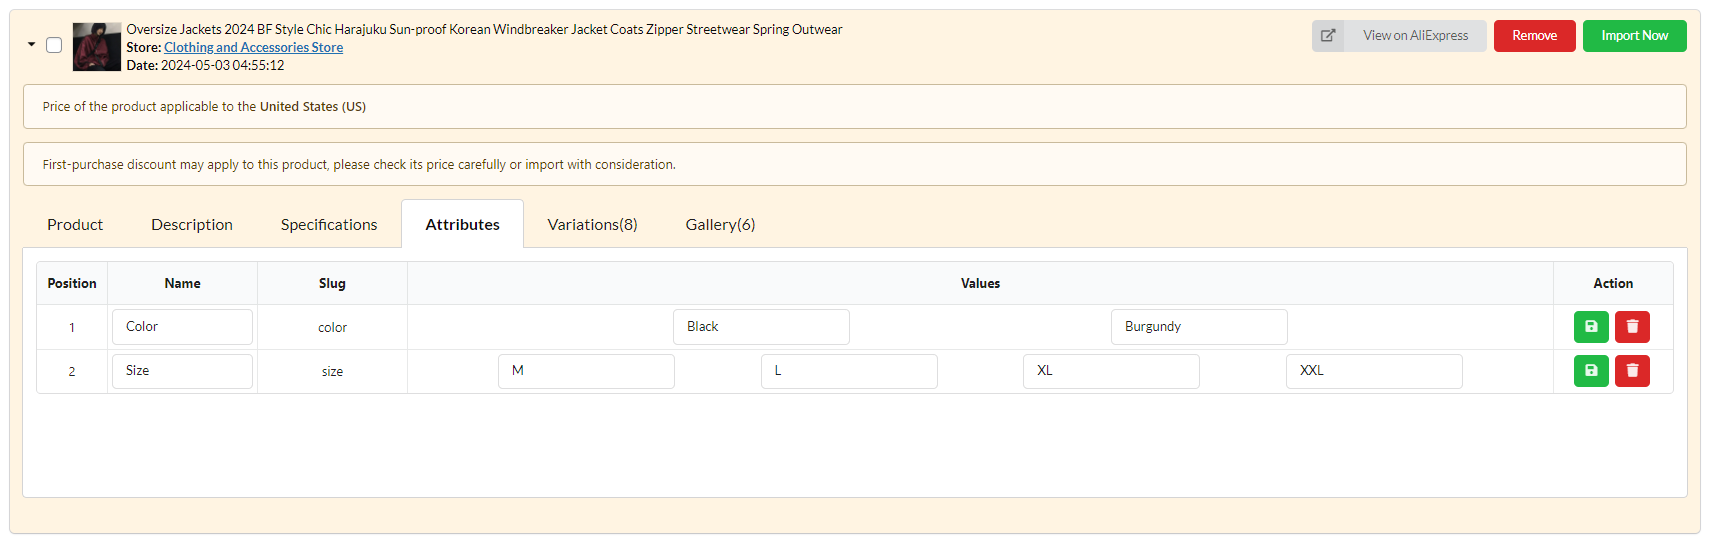
If remove attributes, you will be asked to set a default value for this attribute.
Variations: Customize AliExpress product variations.
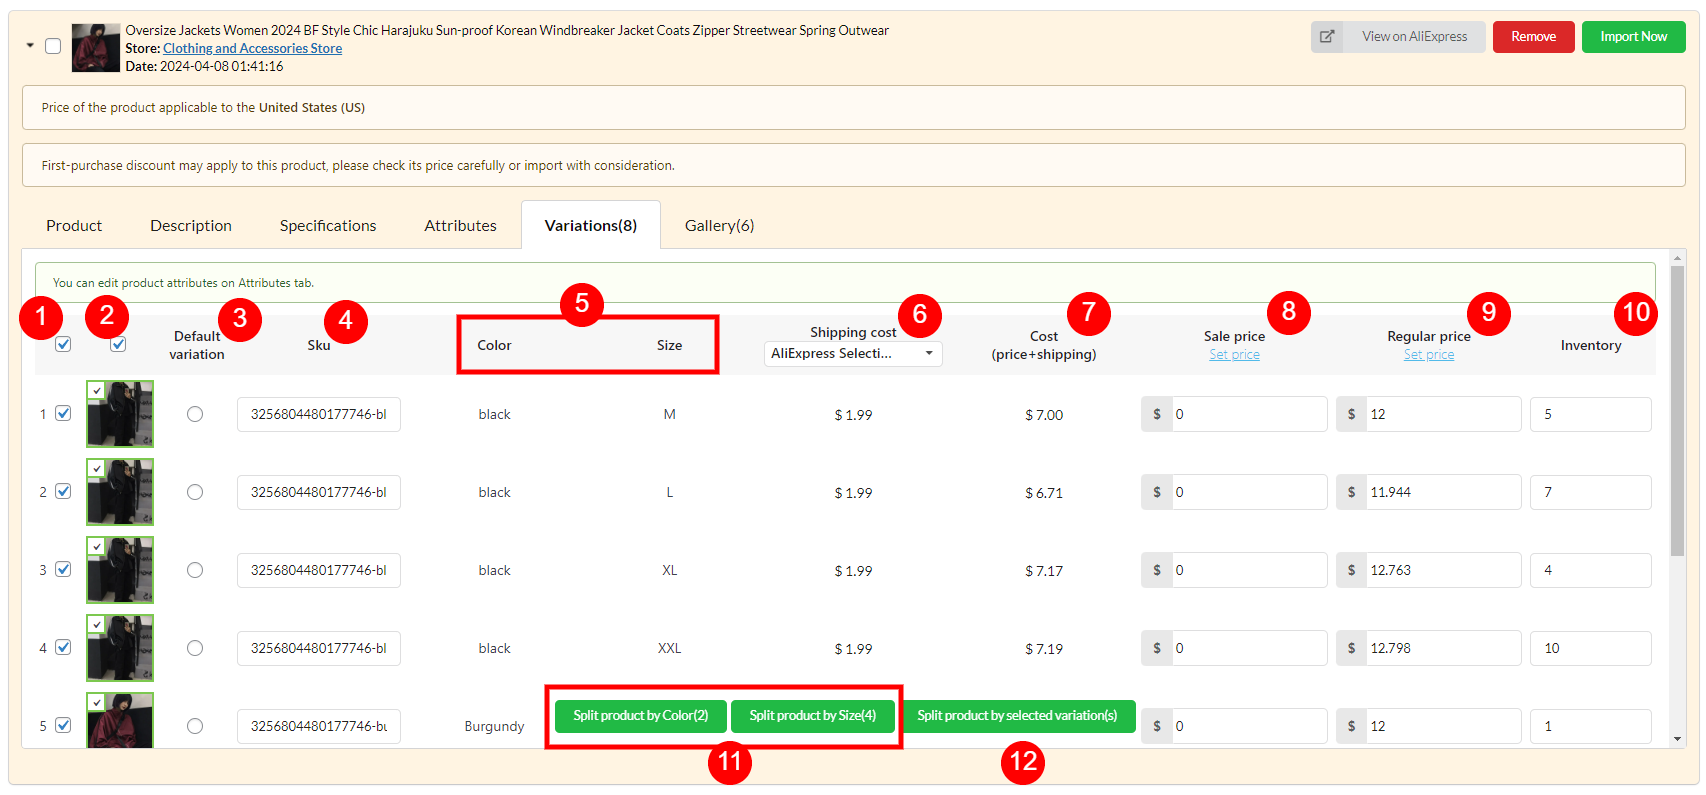
- Number of variations of the products – Each variation has their attribute terms associated in the (5) columns. By default all those variations are checked to be imported, uncheck the checkbox of any specific variations you want to exclude before importing.
- Product variation images. WooCommerce products can have an image for each variation. You can uncheck the variation image checkbox if you want that variation to not have the image. You can’t change the variation image in this Import List – the image is pulled from AliExpress. But you can change it in the product edit page after importing.
- Default variation: WooCommerce variable product has option to set one default variation in the product edit page >> Product data >> Variations >> Default Form Values (Choose a default form value if you want a certain variation already selected when a user visits the product page).
- Sku: Sku of variations.
- Attributes:
- Hover over the attribute name in the top of the column and you’ll see a dropdown of its all terms. Select specific term(s) and it’ll show only variations which has this selected term(s). Reselect the term to deselect it.
- You can edit variation terms in the Dropship & Fulfil > Product Attribute tab for all attributes of all imported products or in the Import List > Attributes for each individual product.
- Shipping cost: This column shows up when you enable the Show shipping option in the Product settings, and this info is to calculate the price when importing product to WooCommerce so ensure to check the “Add shipping cost after price rules” option right under “Show shipping option” as per your needs.
- Cost: If “Add shipping cost after price rules” is on >> Cost is only product price (AliExpress original price). If “Add shipping cost after price rules” is off, cost includes AliExpress original price and shipping cost.
- Sale price: Prices in this column will be imported to WooCommerce product variation sale price as set up in the pricing rules in the Product Price settings. However, they can be edited here, price set up here will override the global pricing rule in the Product Price settings.
- Regular price: Same as Sale price column, but prices in this column will be imported to variation regular price.
- Inventory: Display number of variations in stock.
- Split product by attributes: If you split product by attribute (any attribute), each term of that attribute will become a new single product, along with other attribute. E.g. in the image above, the product has Color and Size, let’s say Color has Burgundy and Black terms; then Size has M, L, XL and XXL. Each color has its version in each size.
If I split product by Color >> We’ll have 2 products – One in Black with full sizes and another in Burgundy with full sizes also (4 variations each)
If I split product by Size >> We’ll have 4 products – Each size is one single variable product with 2 colors as variations. - Split product by variations: With this option, you’ll make the selected variation(s) another single product – The initial product loses your selected variation(s) and the new one has them. Choose the variation(s) you want to make the new product by checking their checkboxes in the first column (1).
E.g. With the product in the image above, if I select first 4 variations and hit “Split product by selected variation(s)” >> It’ll split this one to 2 product, and the new one will have the first 4 variations.
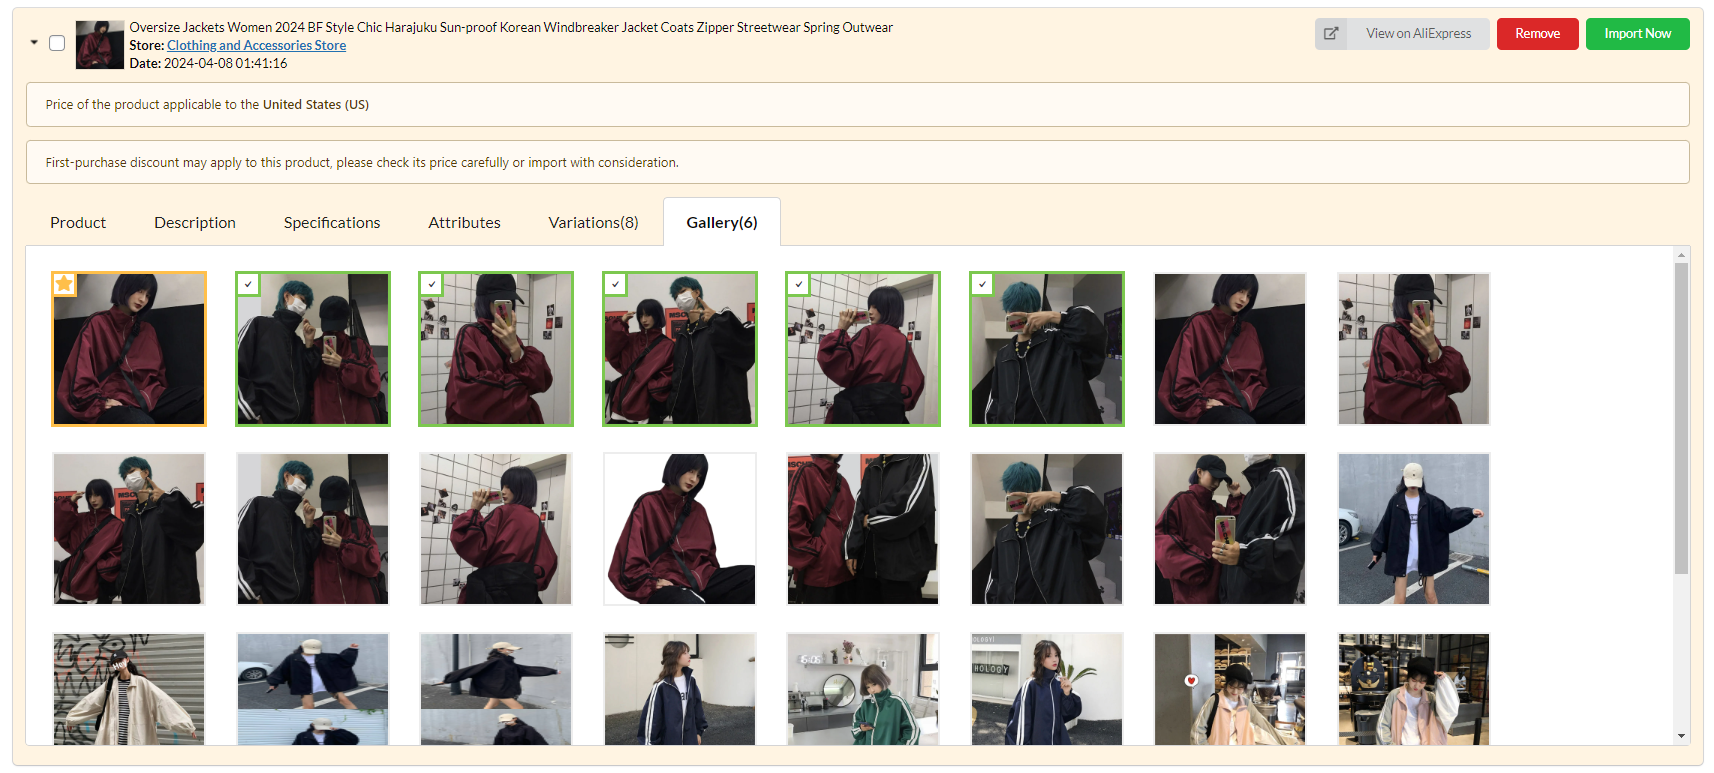
Gallery: Observe and select images to import media library.
In this page, you can select product images, including:
- Product image (Featured image): You can select only one featured image for each product. Hover over the image, you’ll see a grey star on the top left corner of the image, click that star to make the image featured image. Selected image will have the orange star and borders indicating it’s the product featured image
- Product gallery: You can select any and as many images as you like for the product image gallery. Simply click the image you want, there will be green borders around the image and a small tick in the top left corner of that image letting you know that it will be imported to the product gallery.
- Product variation image: By default, ALD automatically matches the variation image from AliExpress to your imported WooCommerce product. You can set the variations up in the Variations page, but here in this Gallery page, you can bulk set variation images.
- To bulk set images, you choose the variation(s) you want by selecting the checkbox linked to each variation listed in the first column of the Variation page
- After selecting the variations, back to the Gallery page, hover over the image you target, you’ll see a small circle next to the tick mark. That’s the “Set image for selected variation(s)” option. Click it to bulk set variation image.
- Note: If you hover over the product image and don’t see the “Set image for selected variation(s)” option, try accessing the Variations page and then come back the Gallery page
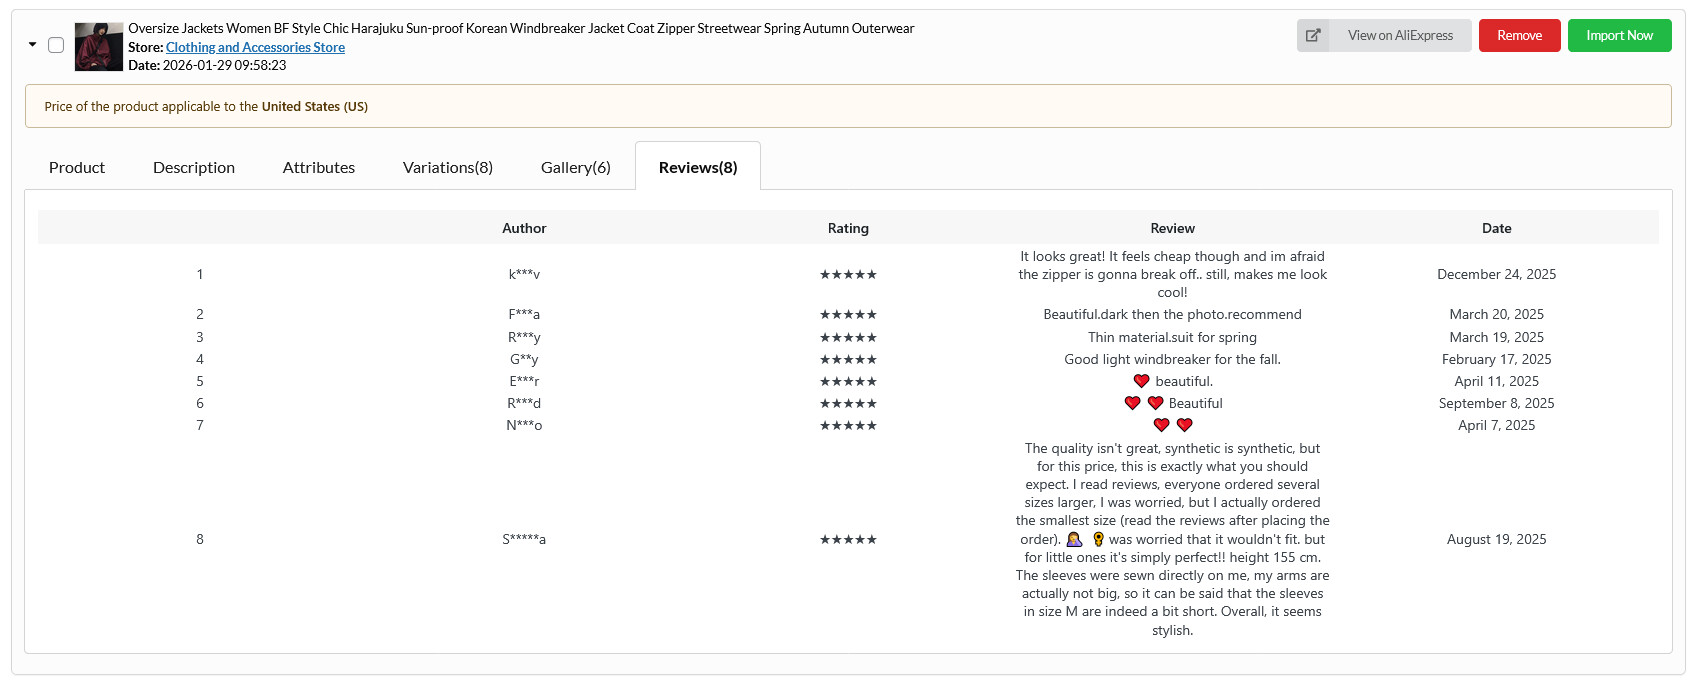
Reviews
Reviews imported from AliExperss will appear here once this feature is enabled and configured
Watch this short tutorial video for selecting image in Gallery page