How to Get Your CJ Dropshipping API Key
If you have already created a CJ API key, visit https://www.cjdropshipping.com/myCJ.html#/apikey to copy it. If you haven’t created one yet, please follow the instructions below to generate your API key.
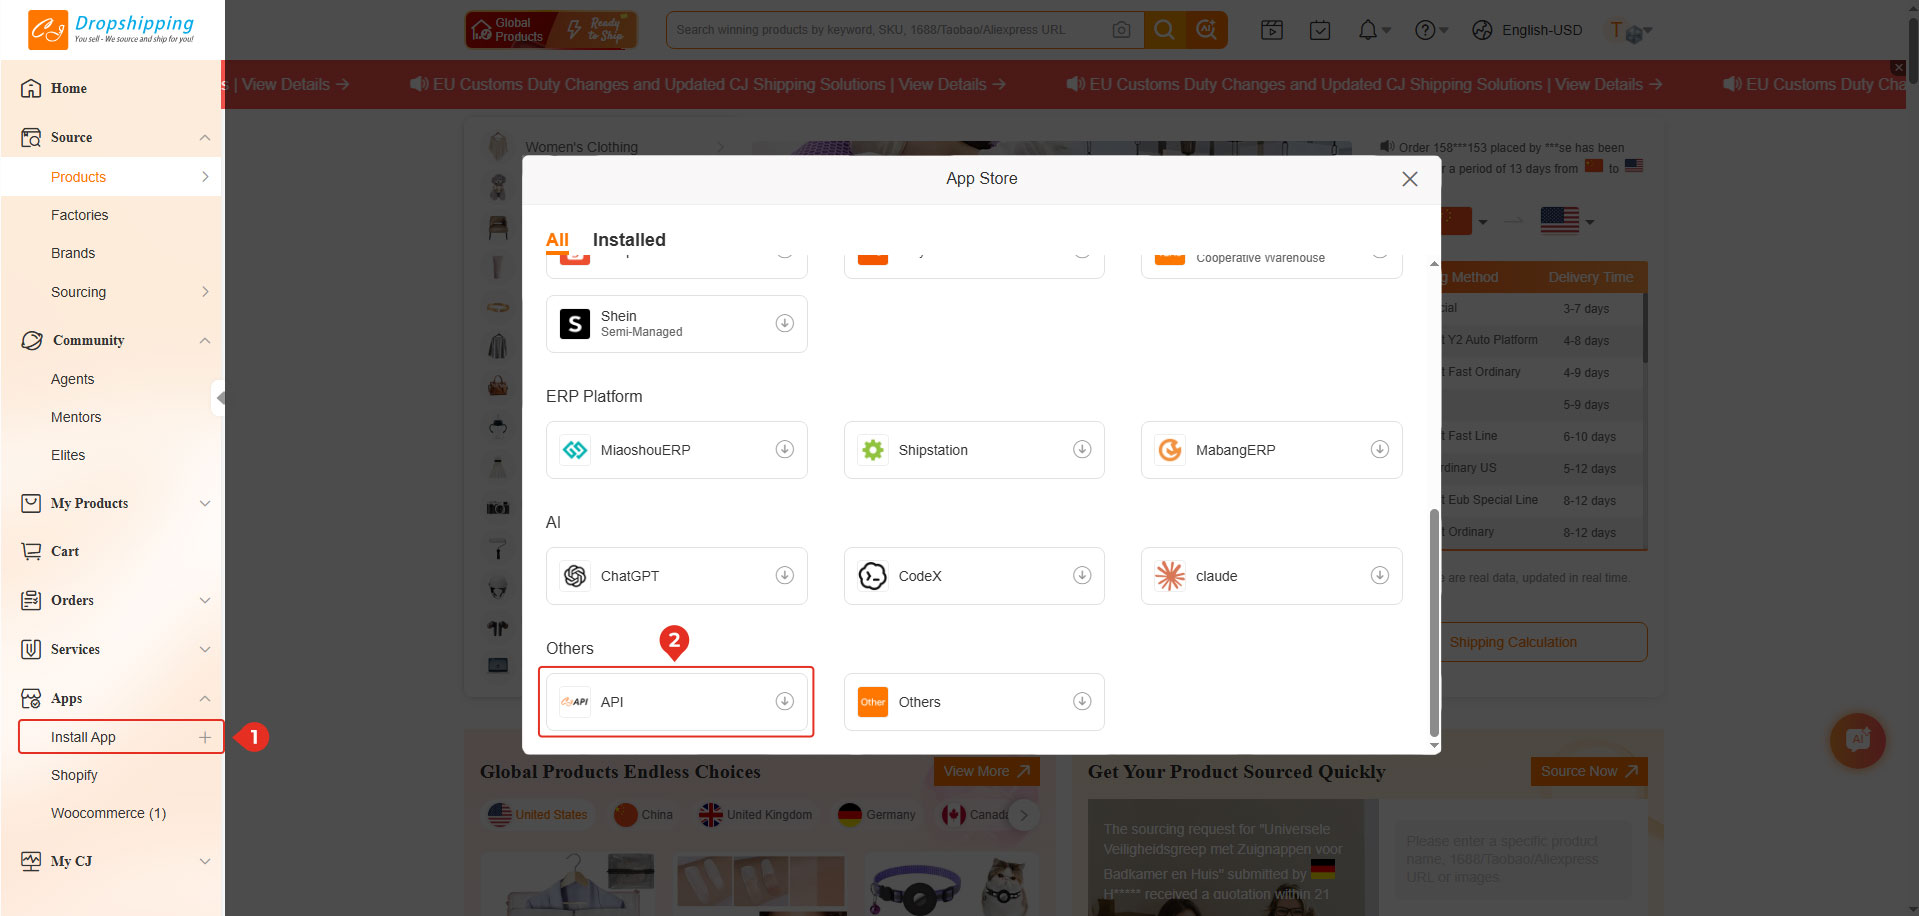
Step 1: From the left-hand navigation menu, click Apps, then choose Install App.
Step 2: In the pop-up window, click the API app. It will be installed automatically.
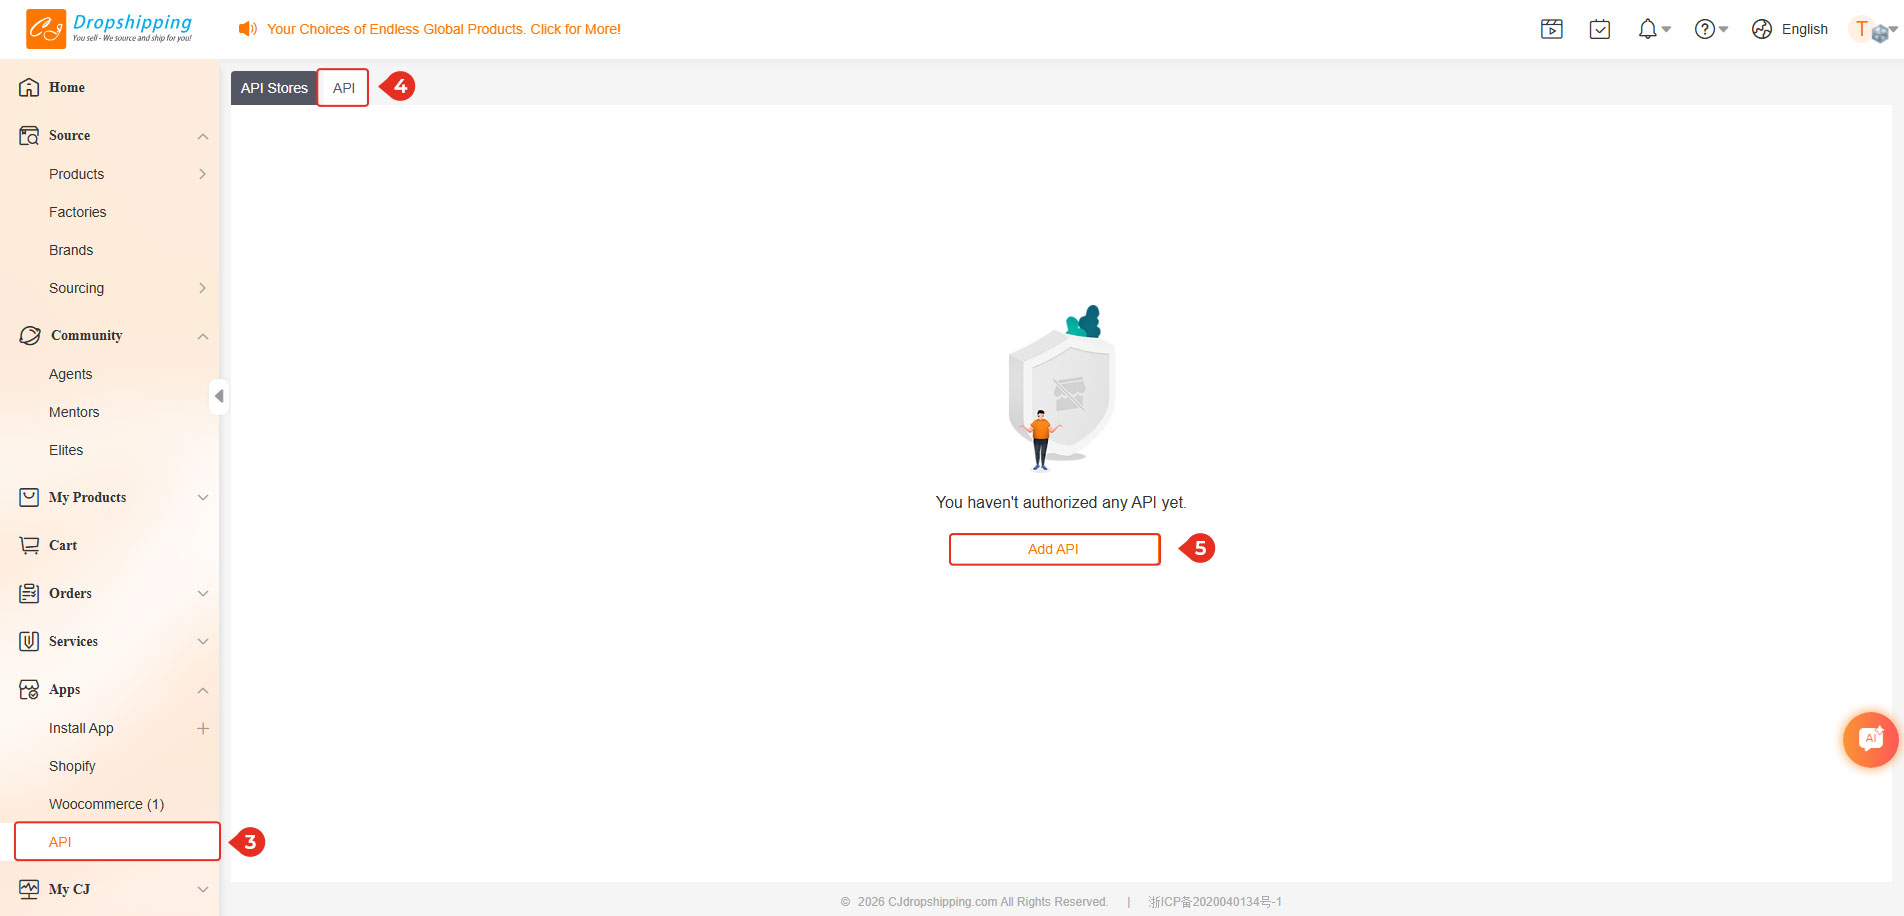
Step 3: After the installation is complete, a new API item will appear under Apps in the left-hand menu. Click API to continue.
Step 4: Click the API tab.
Step 5: Click Add API to create a new API key.
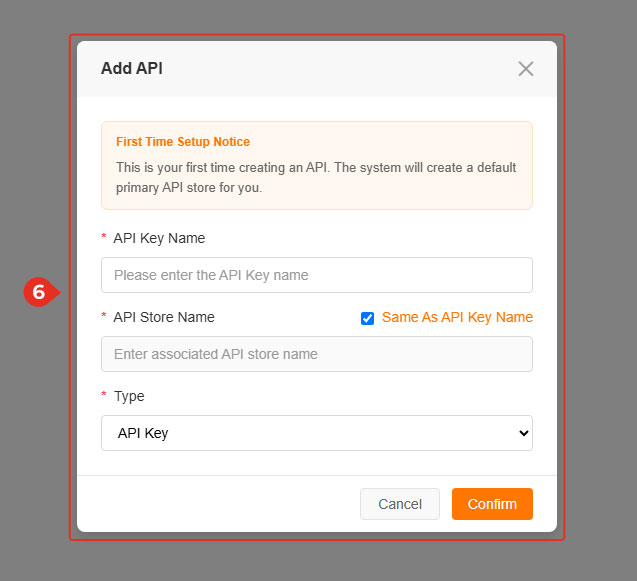
Step 6: In the Add API pop-up window, enter the required information, including API Key Name, API Store Name, and Type. Then click Confirm to create the API key.
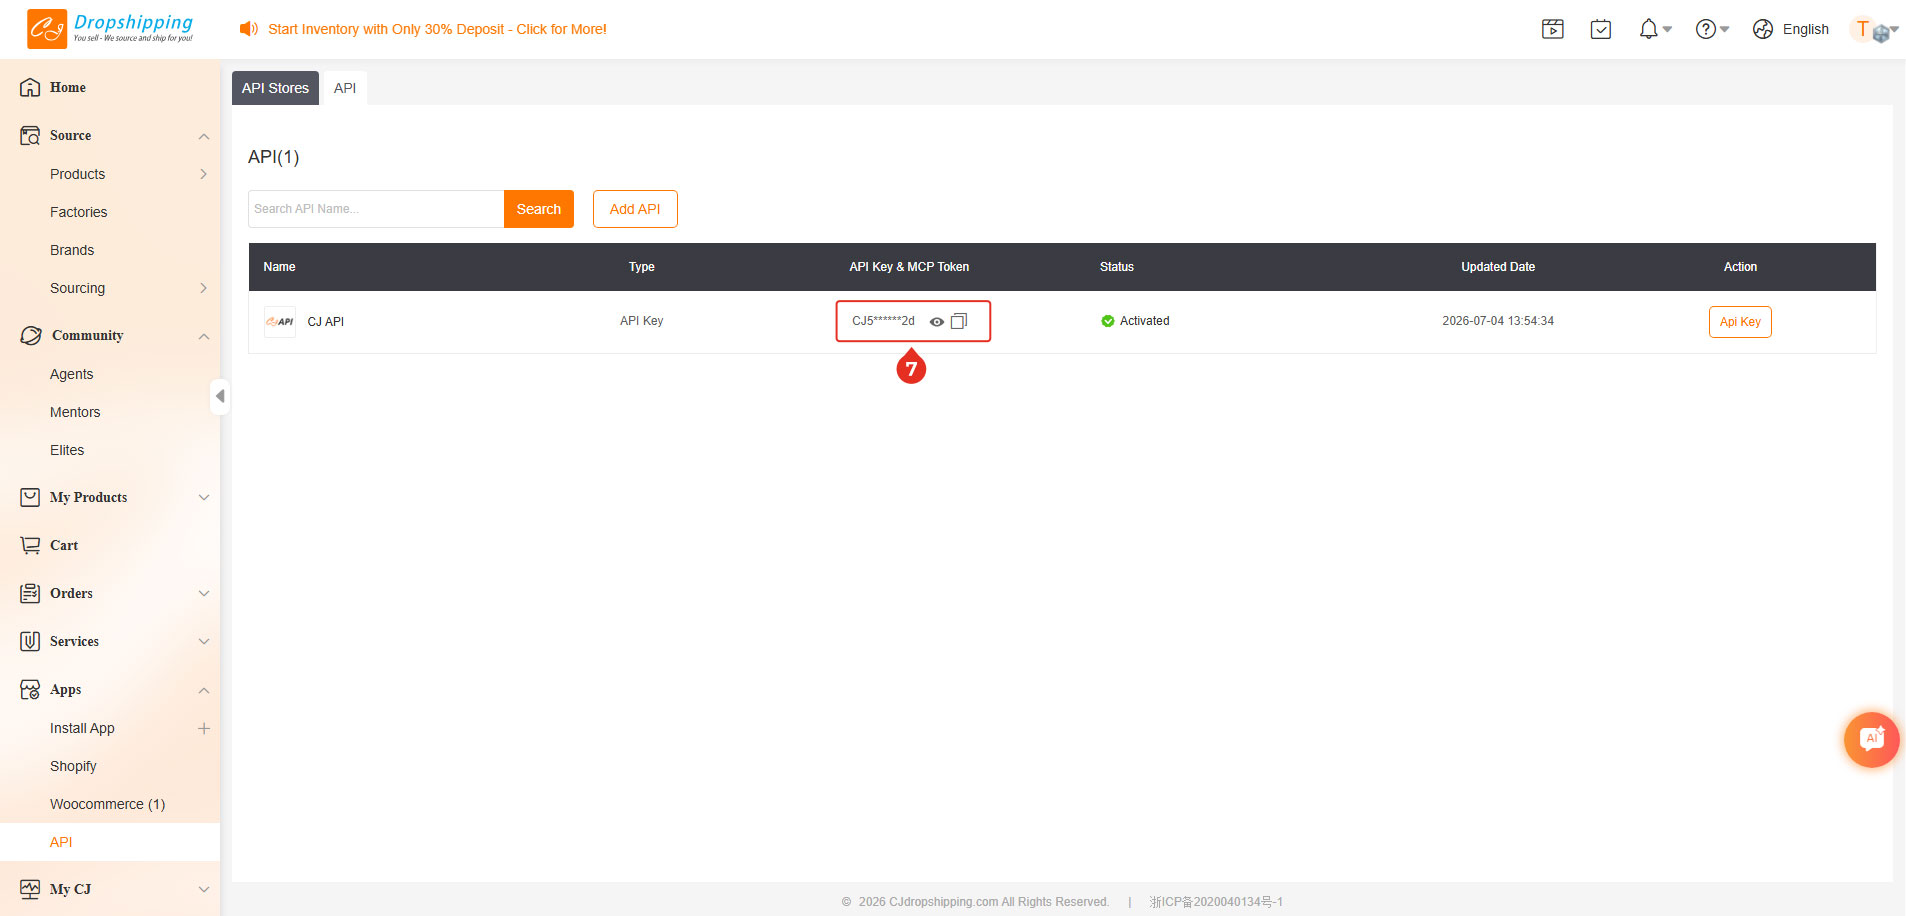
Step 7: After the API key is created successfully, it will appear in the API list. Click the Copy icon next to the API key to copy it.
How to Set Up CJ Dropshipping Integration
- Choose a tracking method
Go to the plugin settings and select Manage tracking by. Choose either Both order and order items or Order only, depending on your needs. - Create and enter your CJ API Key
Generate an API key in your CJ Dropshipping account, then copy and paste it into the CJ API Key field in the plugin.
Guide: How to Get Your CJ Dropshipping API Key - Configure the integration settings
Review and configure the available options in the CJ Dropshipping tab to match your workflow. Important: Before configuring Carrier Mapping, click Save Settings to save your current configuration.
Configure the integration settings:
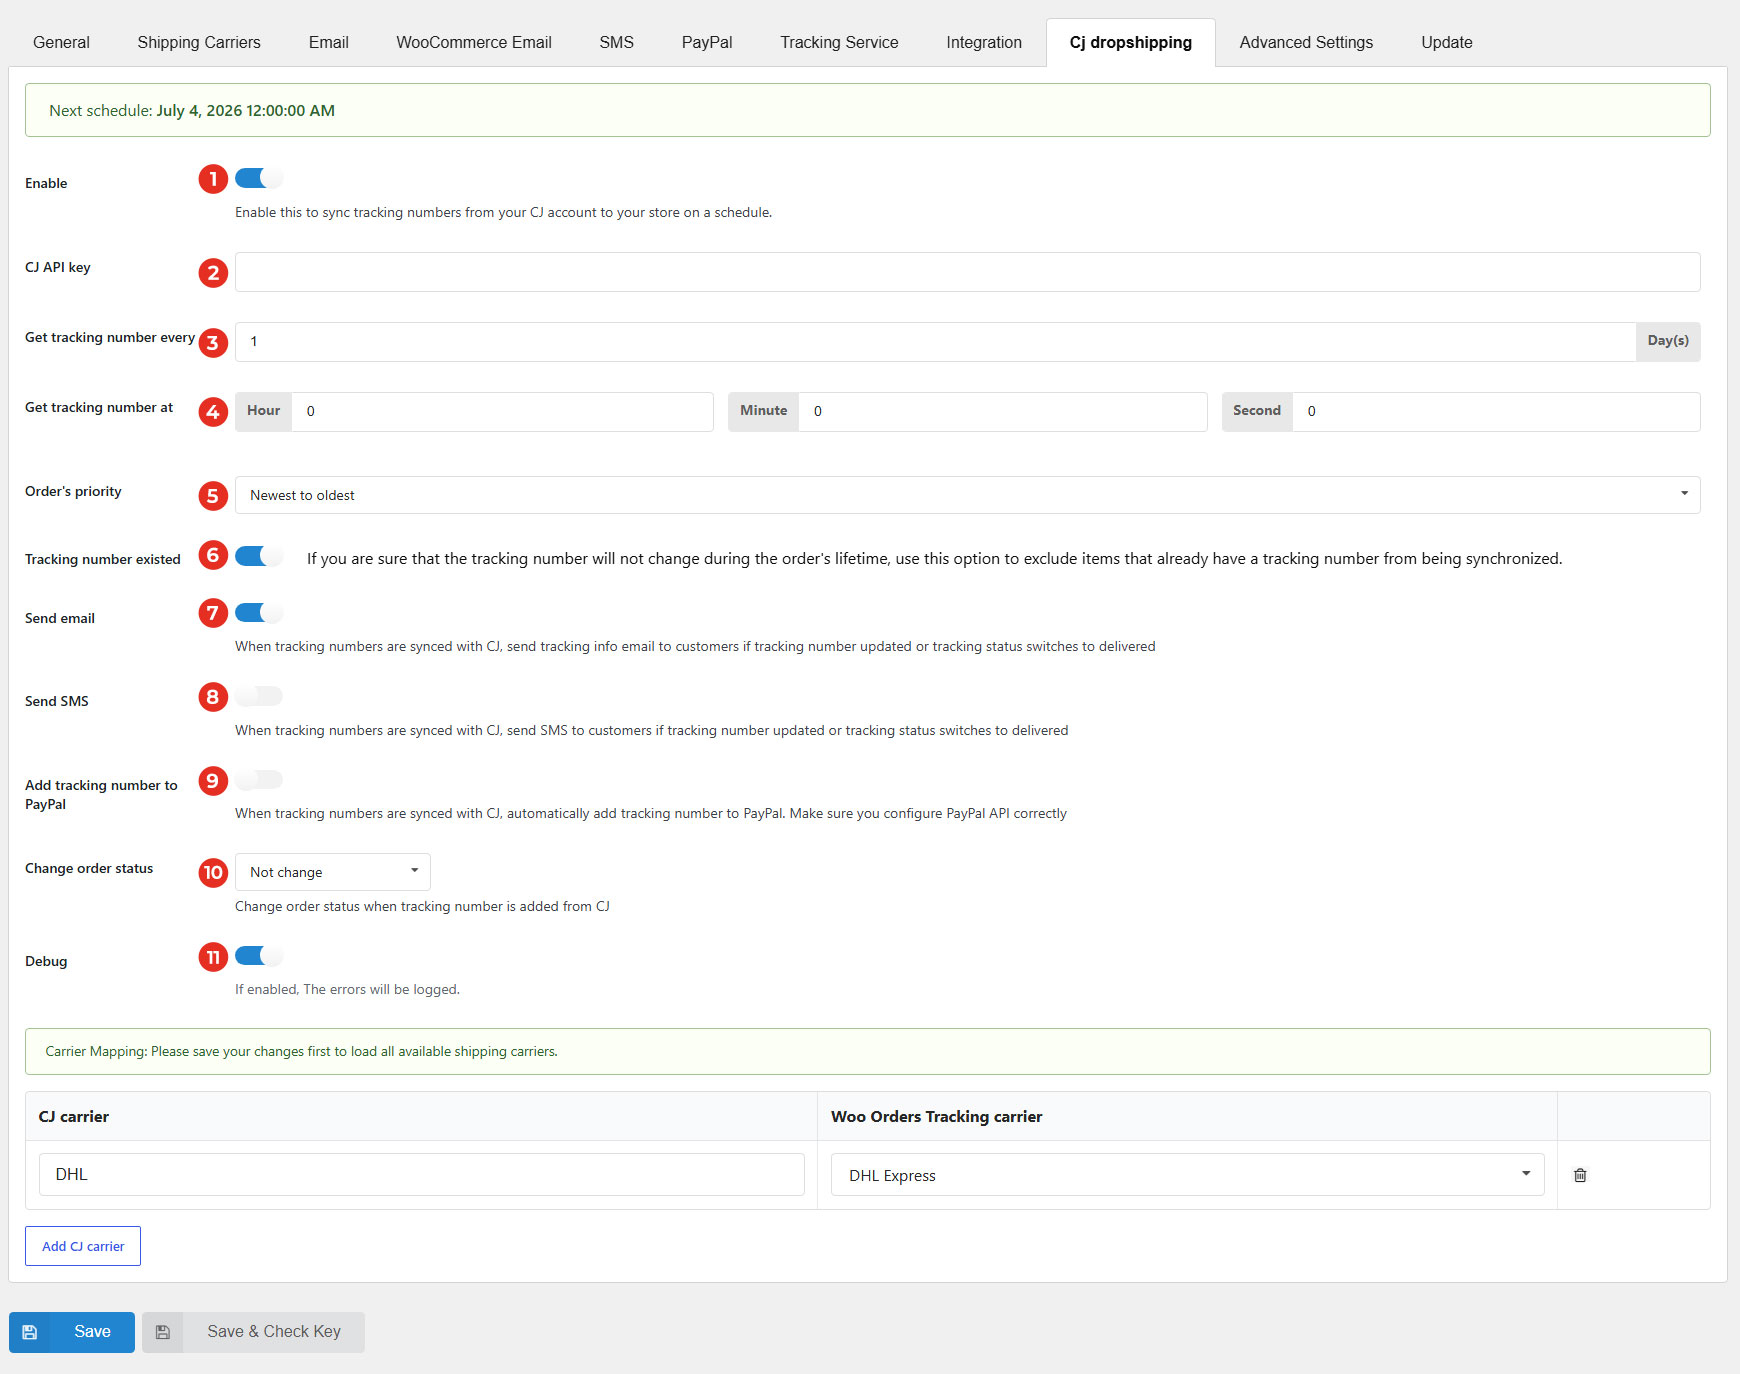
- Enable: Enable automatic synchronization of order tracking information from your CJ Dropshipping account to your store based on the schedule configured below.
- CJ API key: Generate an API key in your CJ Dropshipping account, then copy and paste it into this field to connect the plugin with your CJ account. Guide: How to Get Your CJ Dropshipping API Key
- Get tracking number every: Set how often the plugin checks CJ for new tracking information (in days). For example, enter 1 to check every day or 2 to check every 2 days.
- Get tracking number at: Set the time (HH:MM:SS) when the scheduled tracking synchronization will run each day.
- Order’s priority: Choose the order in which eligible orders are processed during tracking synchronization.
- Tracking number existed: If tracking numbers in CJ never change after they are assigned, enable this option to skip orders that already have a tracking number. This reduces unnecessary synchronization and improves performance.
- Send email: Enable this option to automatically send a tracking email to customers after a tracking number is successfully synced from CJ. You can customize the email content, style, and other settings in the Email tab.
- Send SMS: Enable this option to automatically send an SMS notification to customers after a tracking number is successfully synced from CJ. You can configure the SMS settings in the SMS tab.
- Add tracking number to PayPal: Automatically submit the synced tracking number to the corresponding PayPal transaction after it is retrieved from CJ. Make sure your PayPal API credentials are configured correctly before enabling this option.
- Change order status: Automatically update the WooCommerce order status after a tracking number is successfully synced from CJ.
- Debug: Enable debug logging to record synchronization errors and other diagnostic information. Use this option for troubleshooting if tracking synchronization is not working as expected.