- Start
- FILE INCLUDES
- Instruction
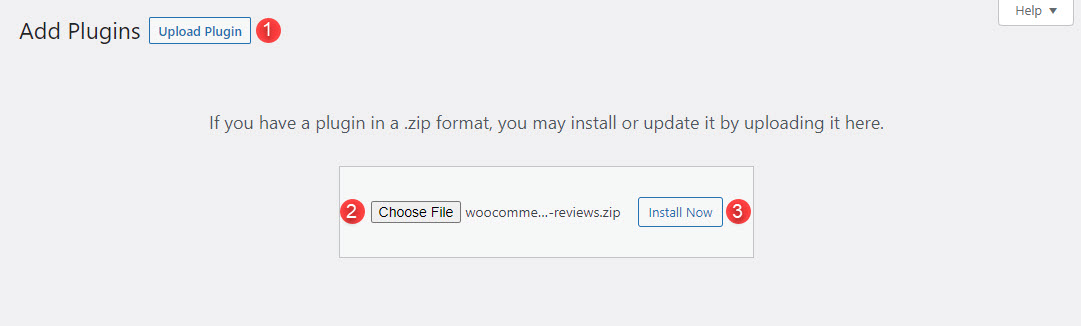
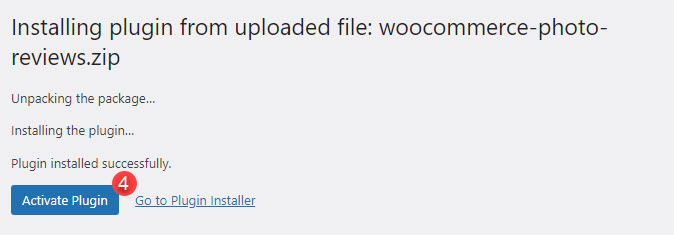
- Installation
- How to use
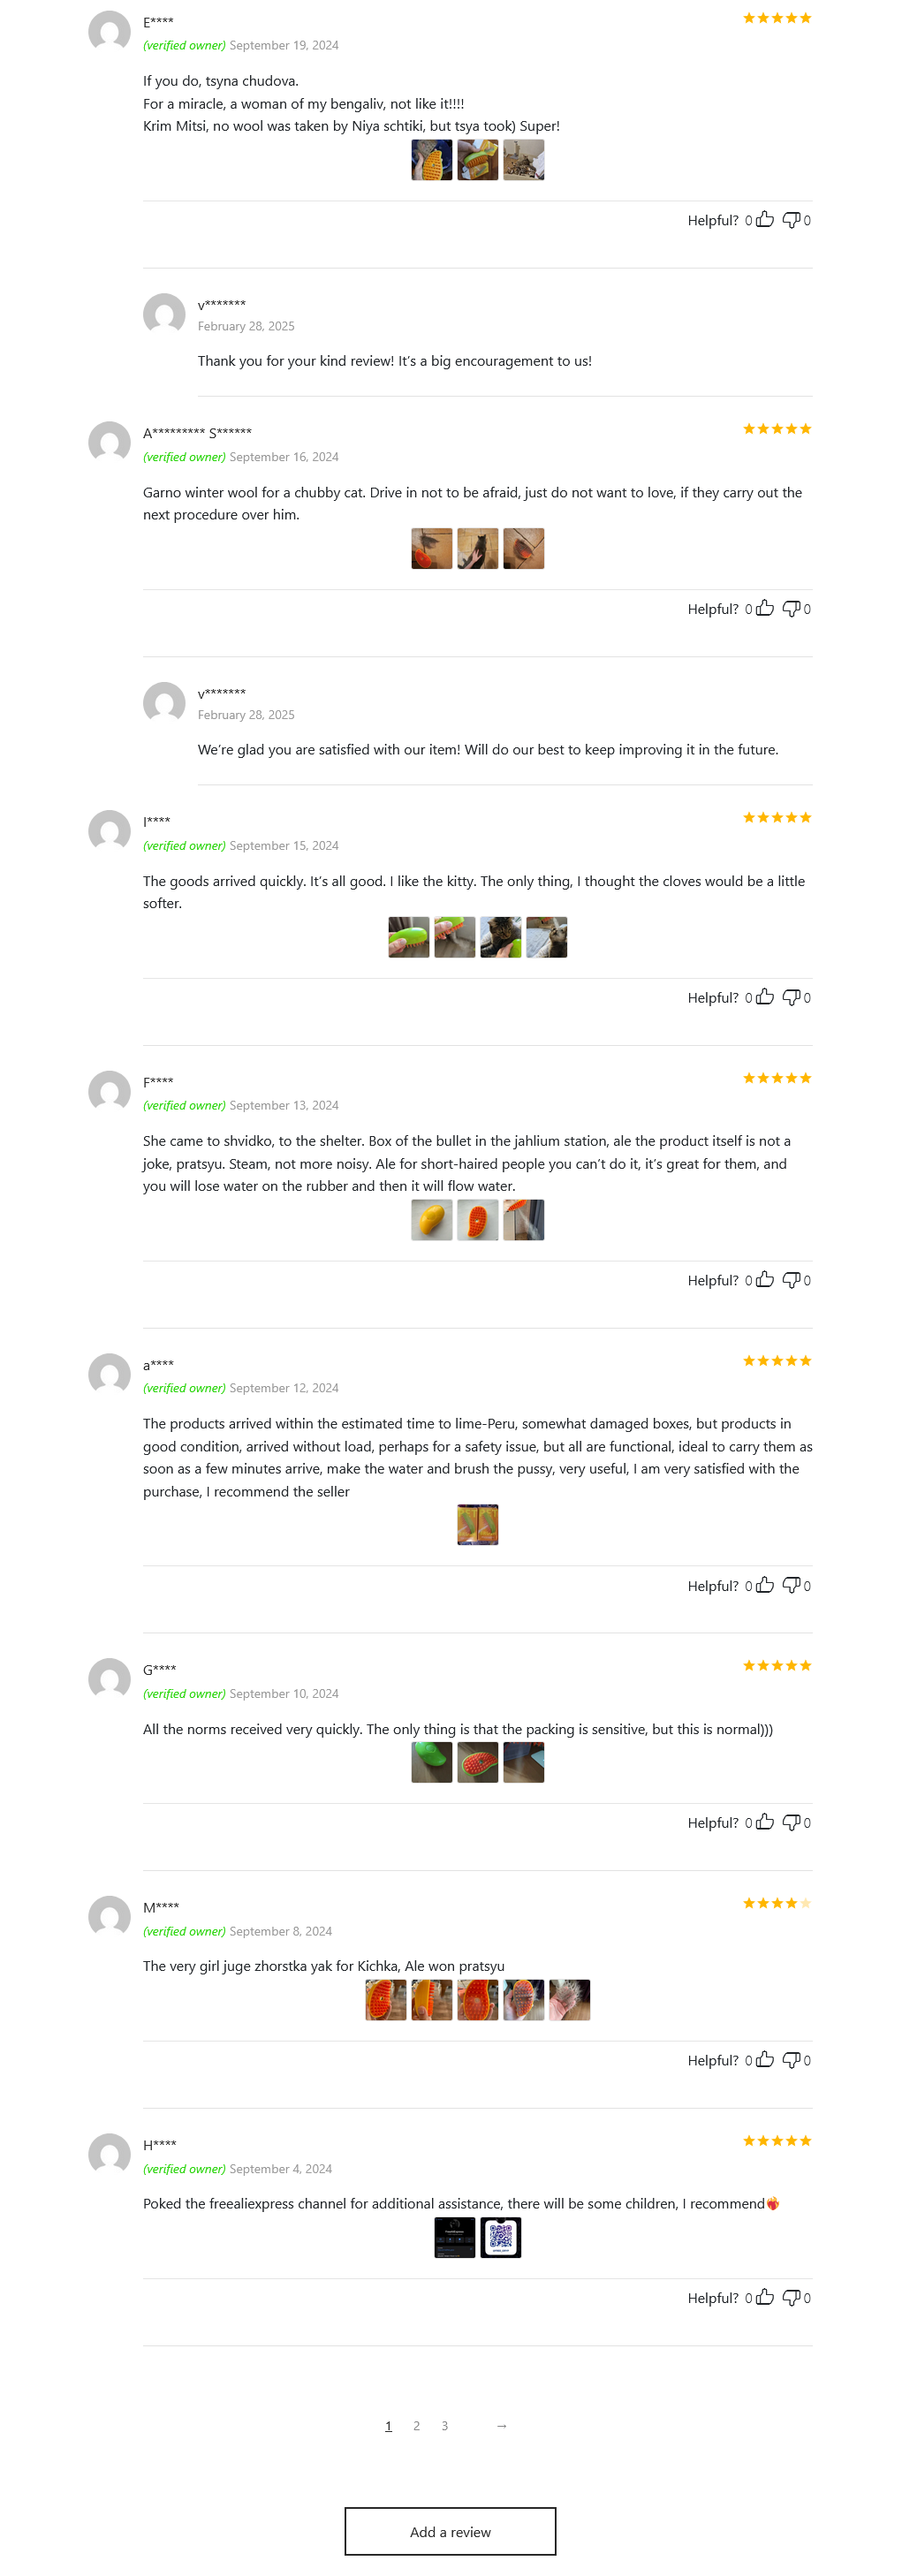
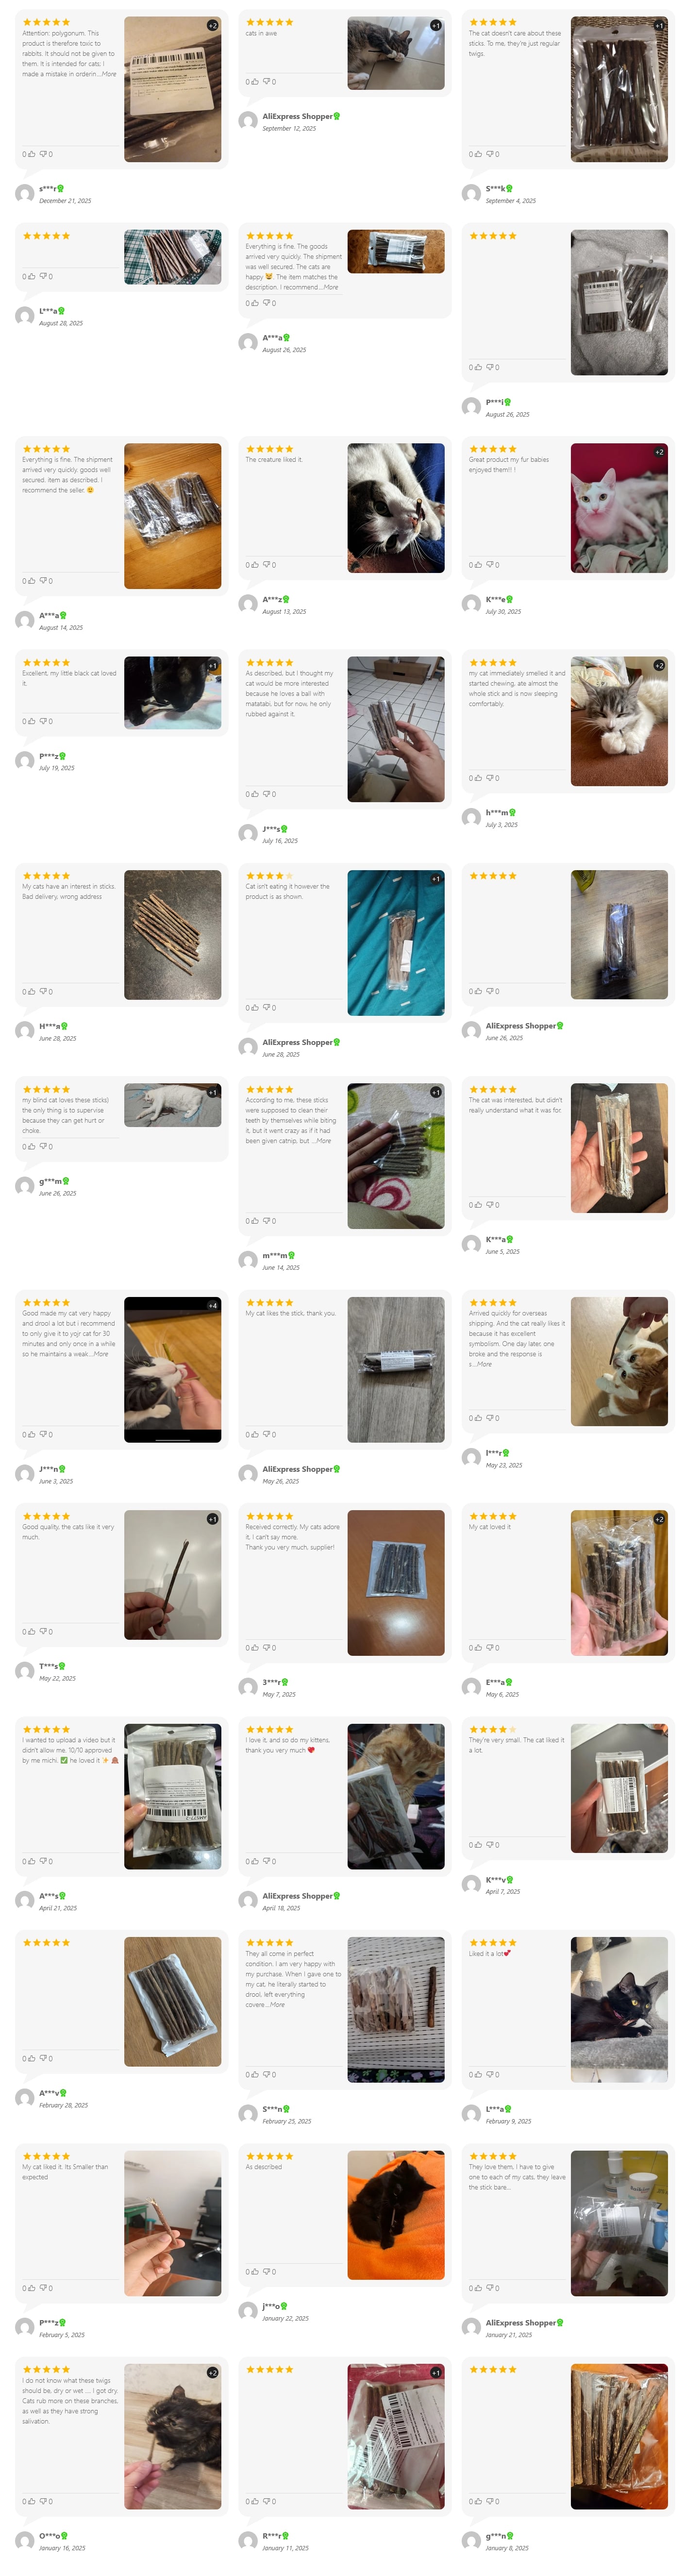
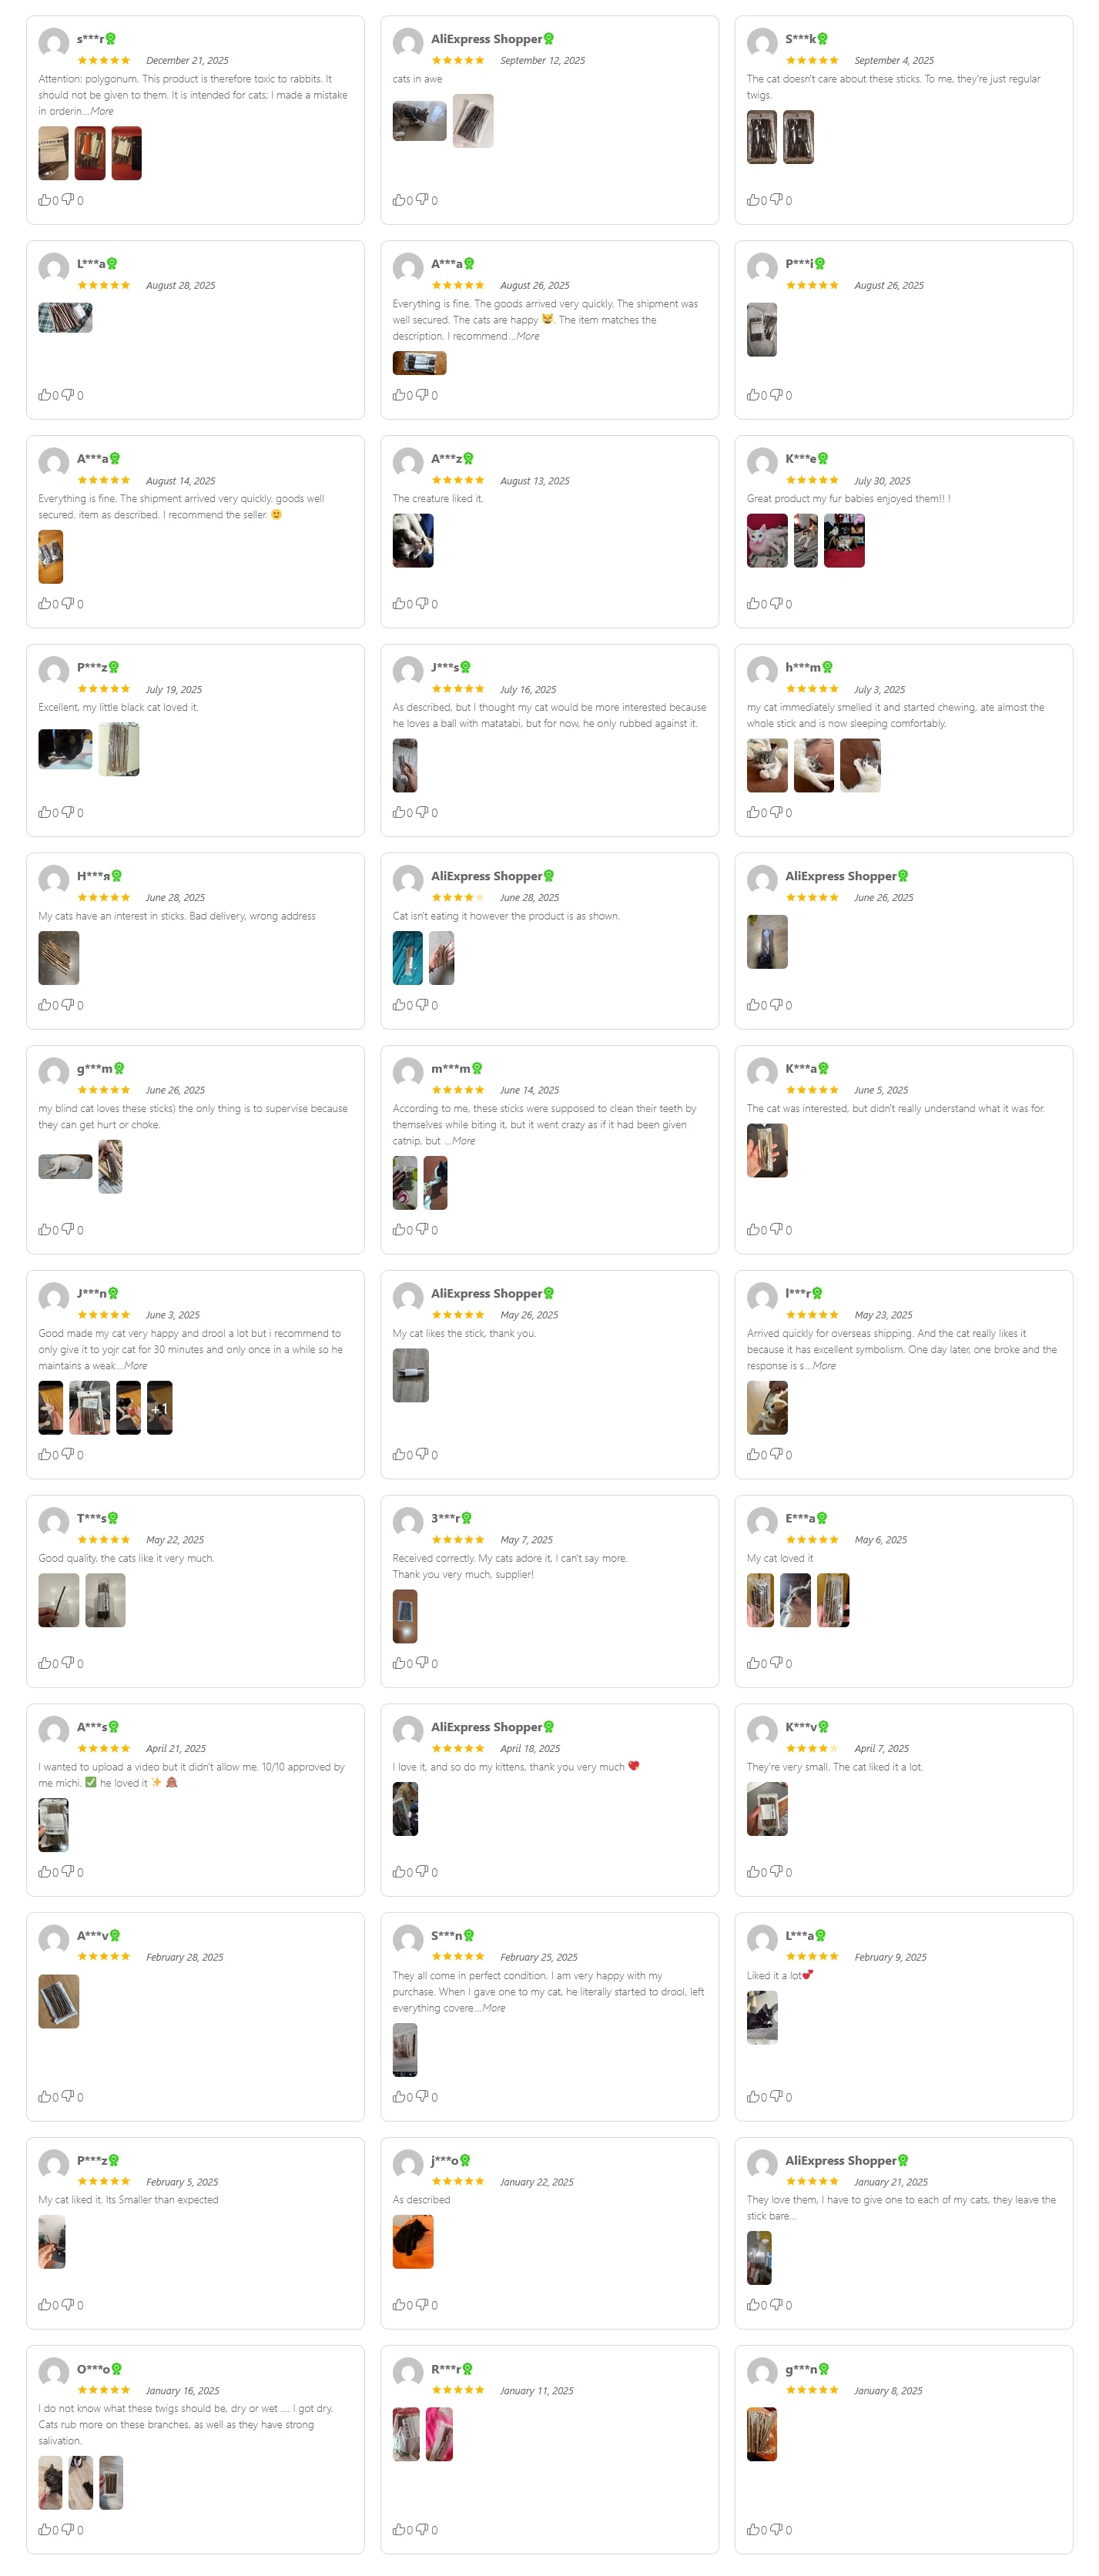
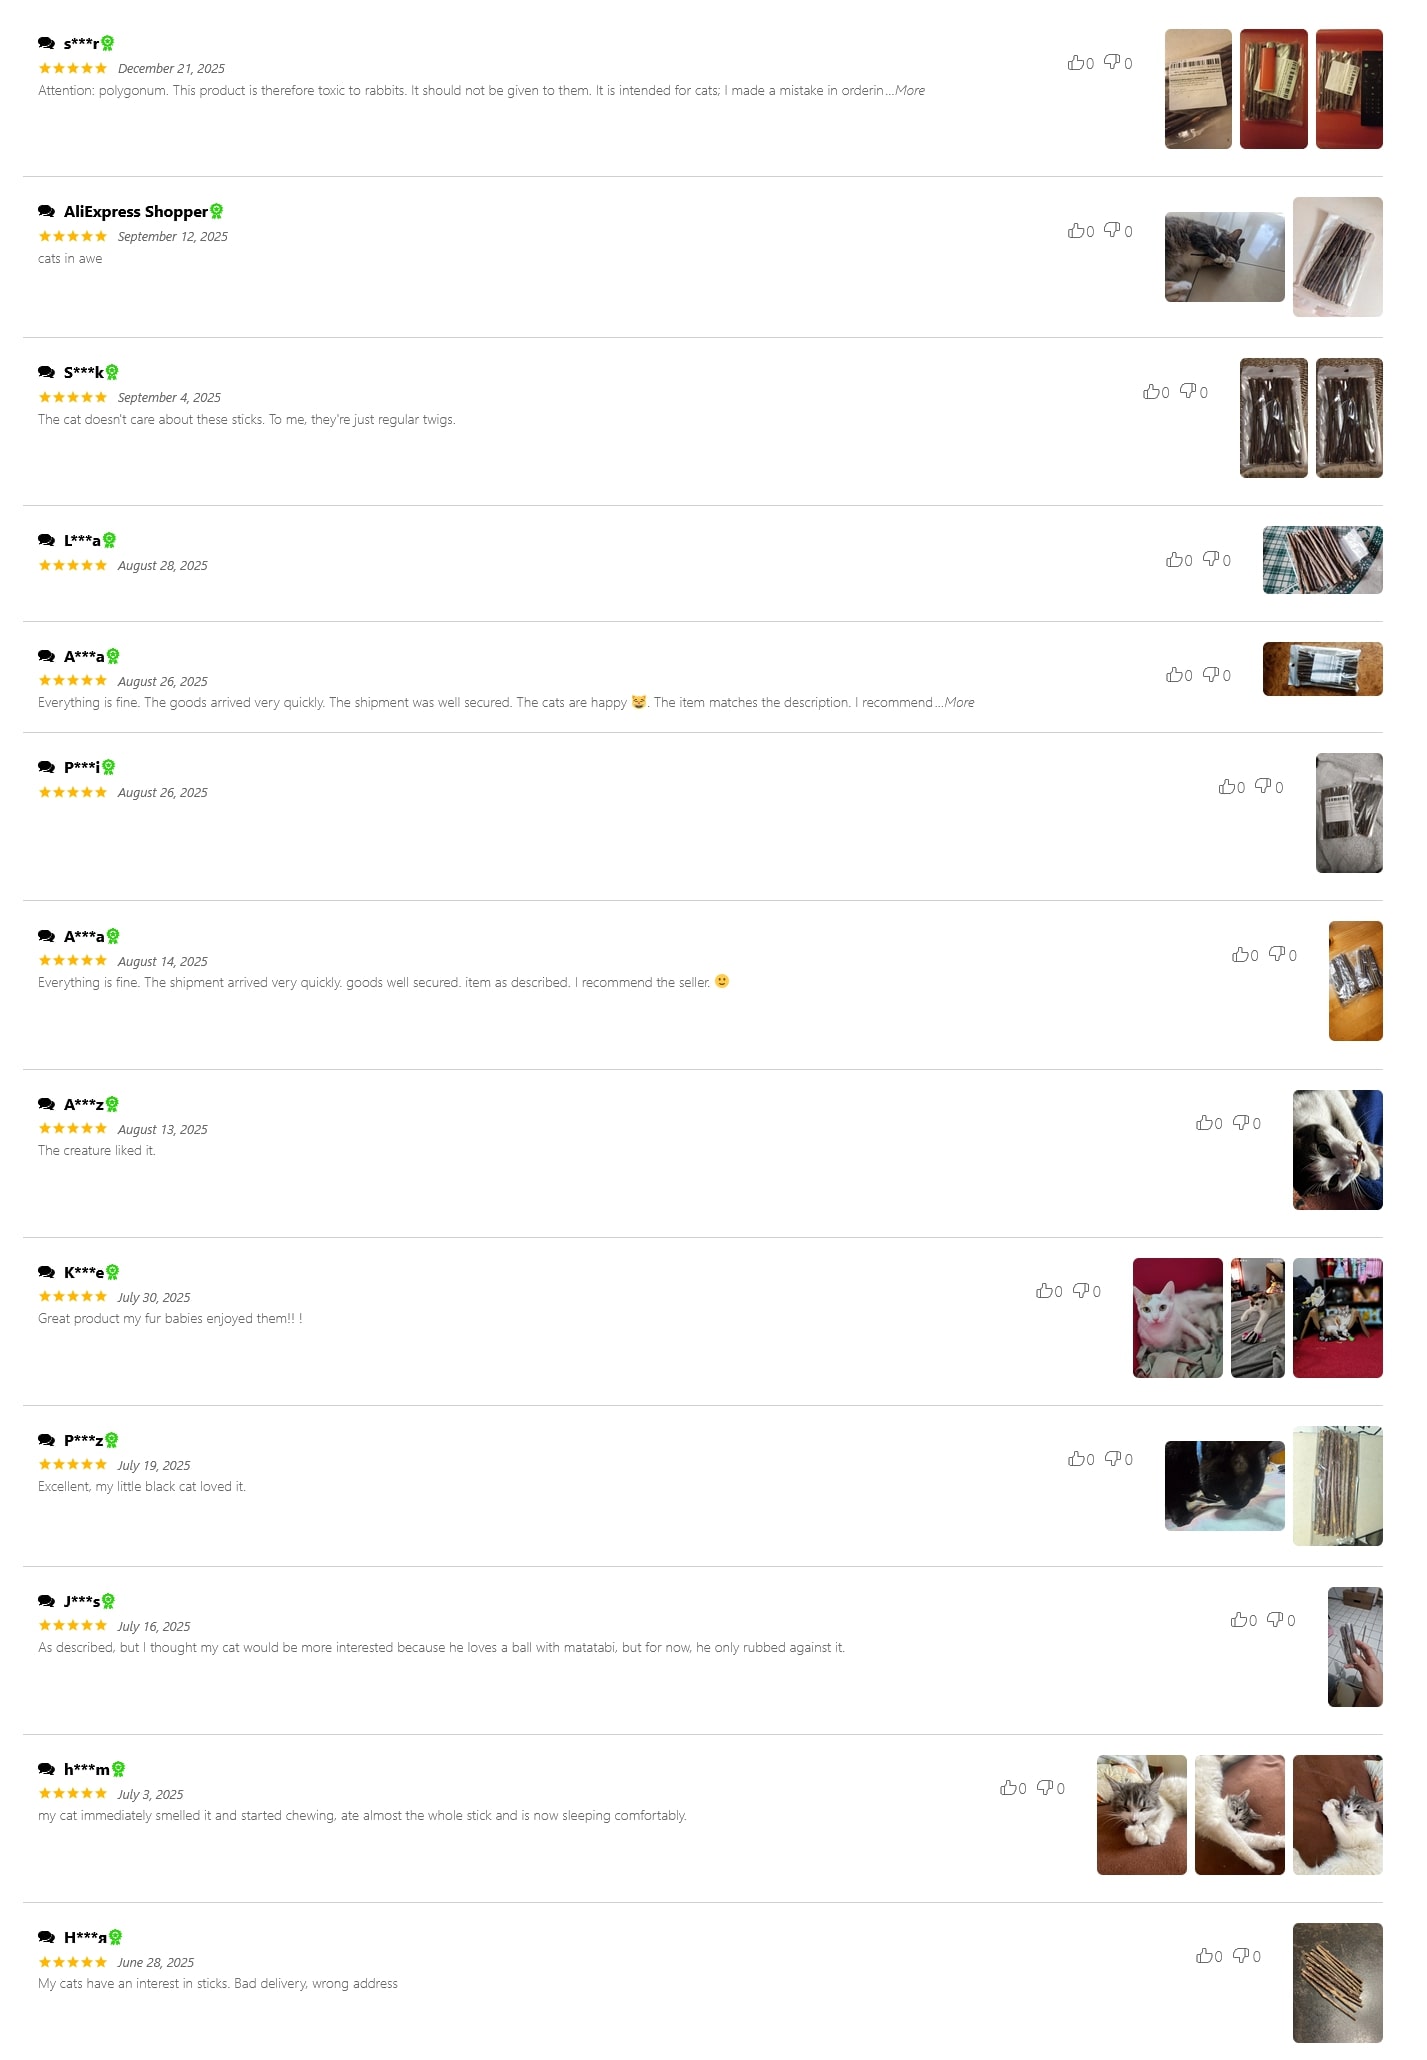
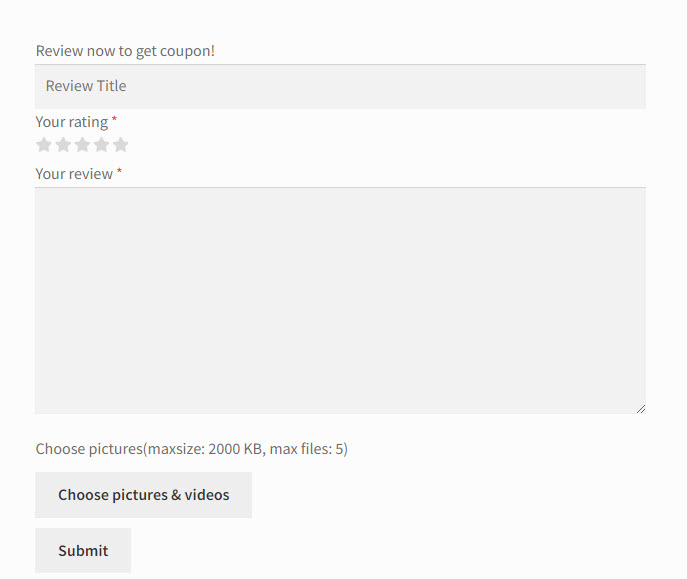
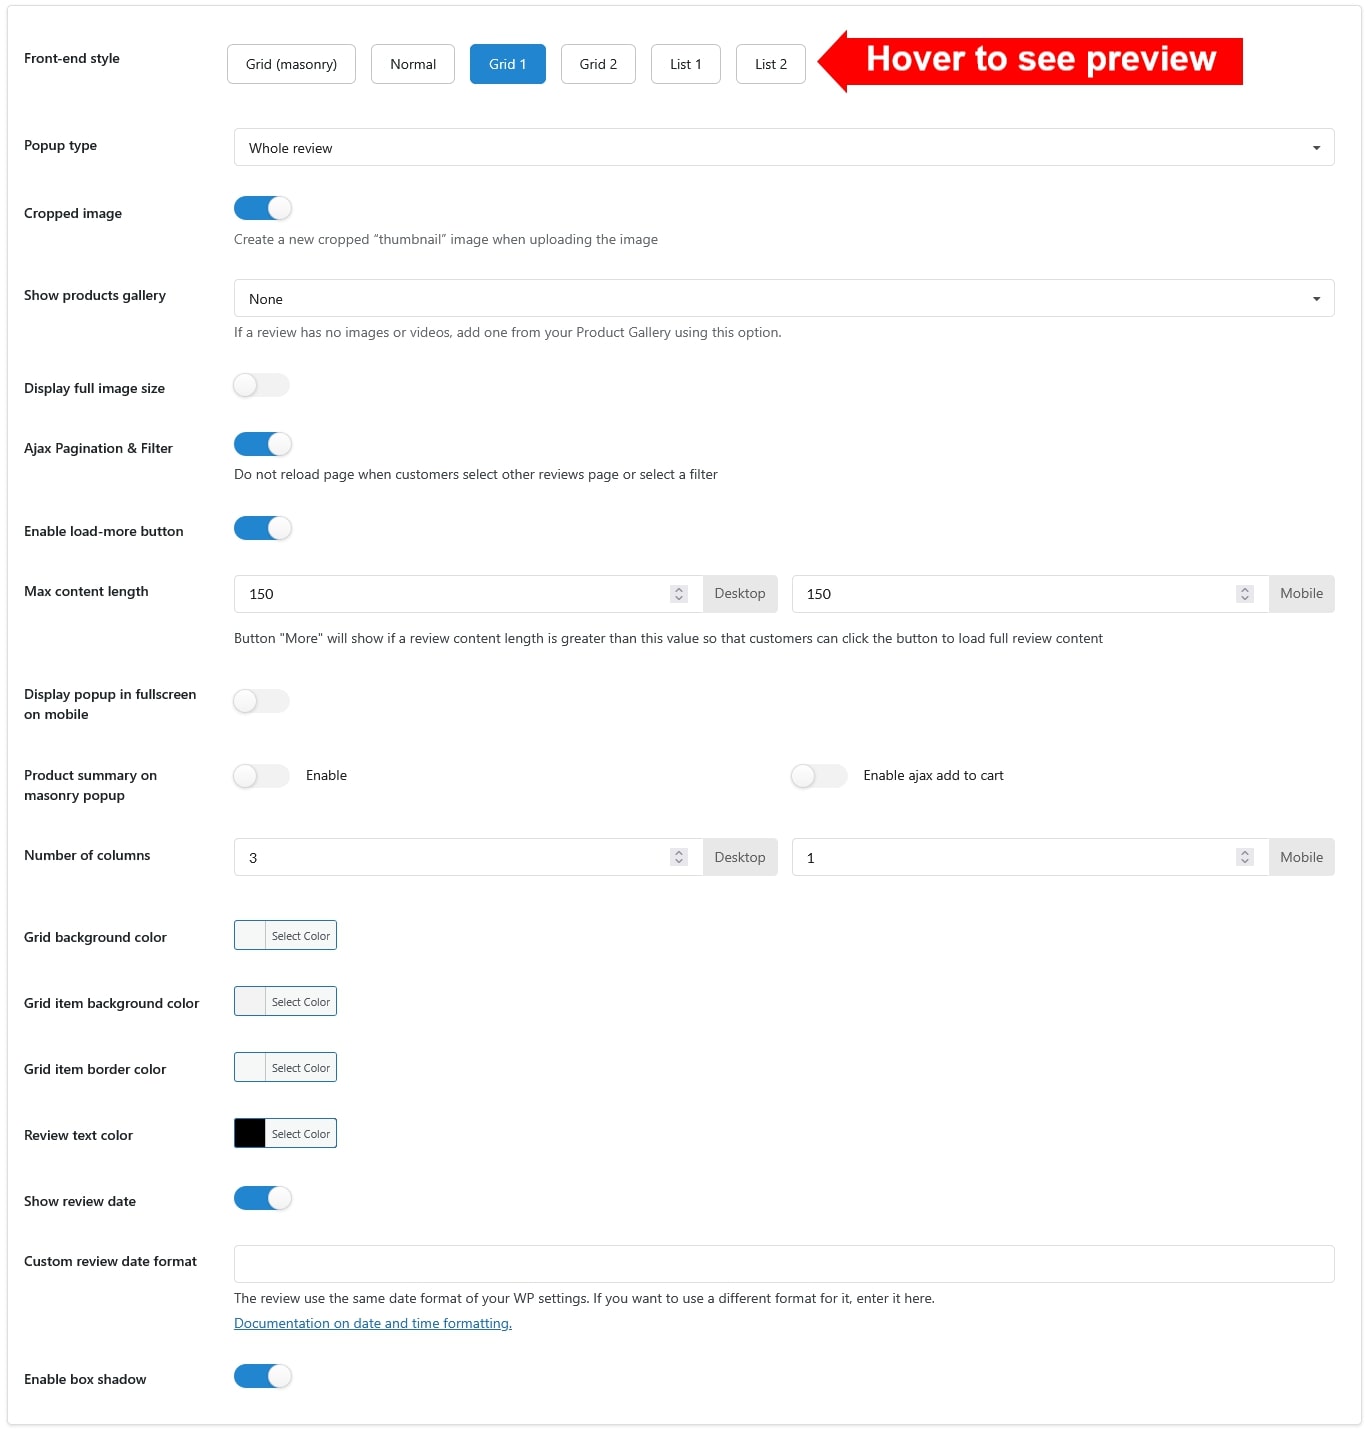
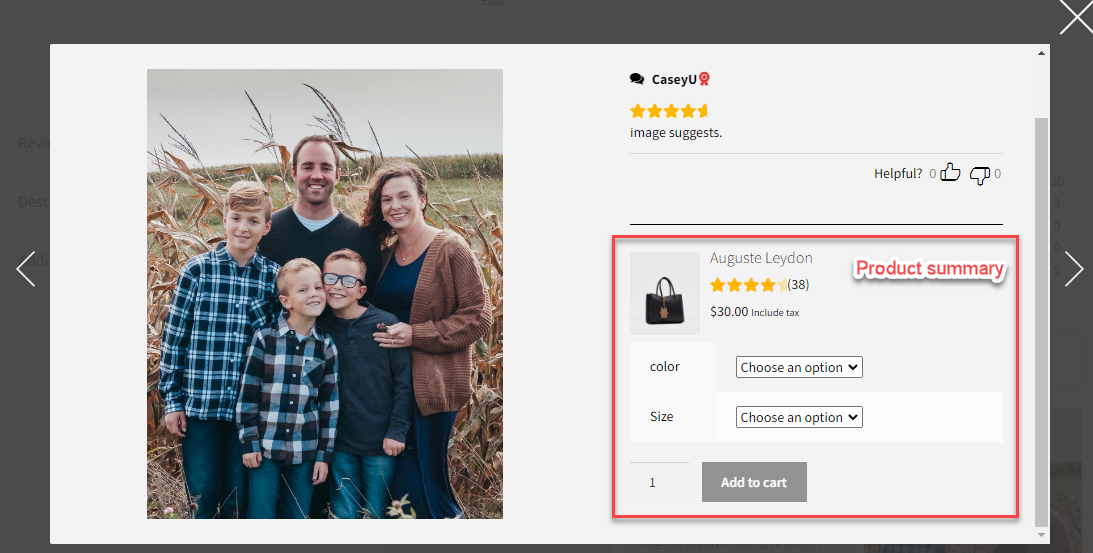
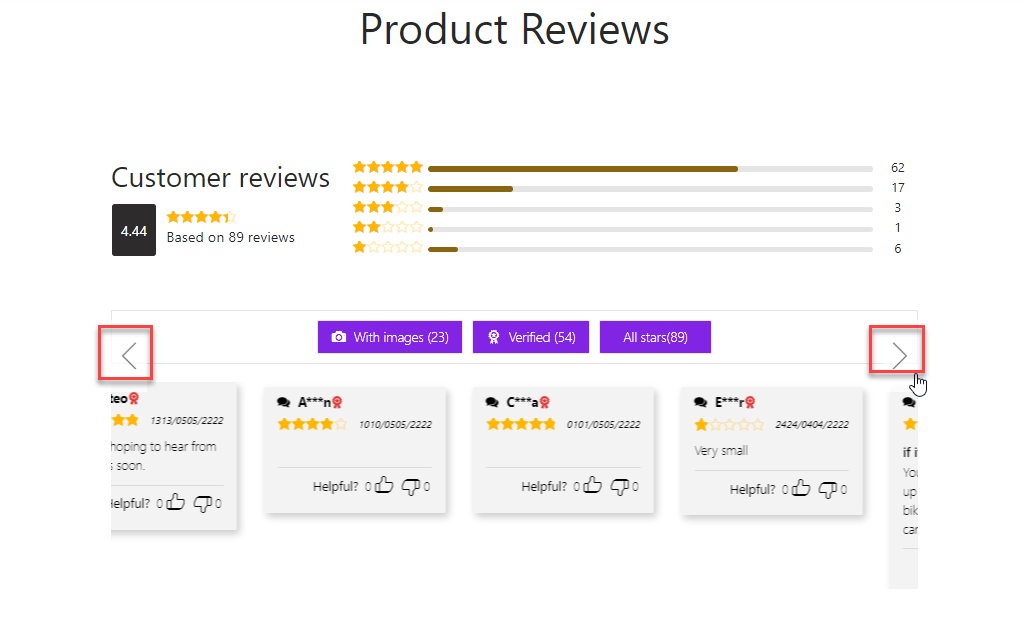
- Front-end style
- How does it work
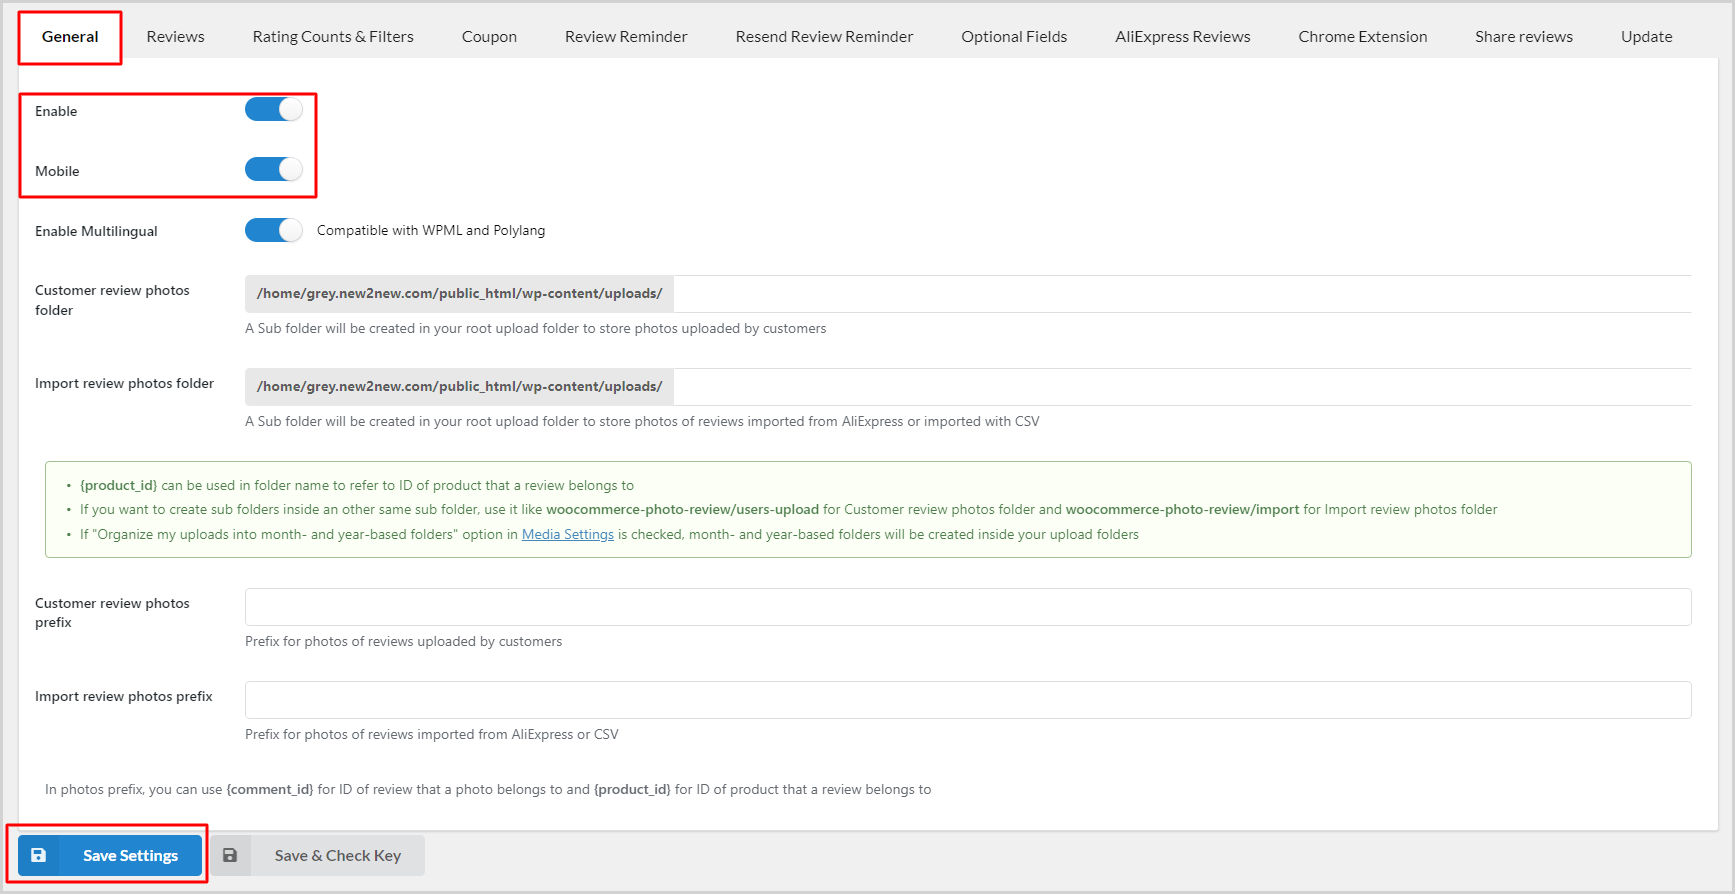
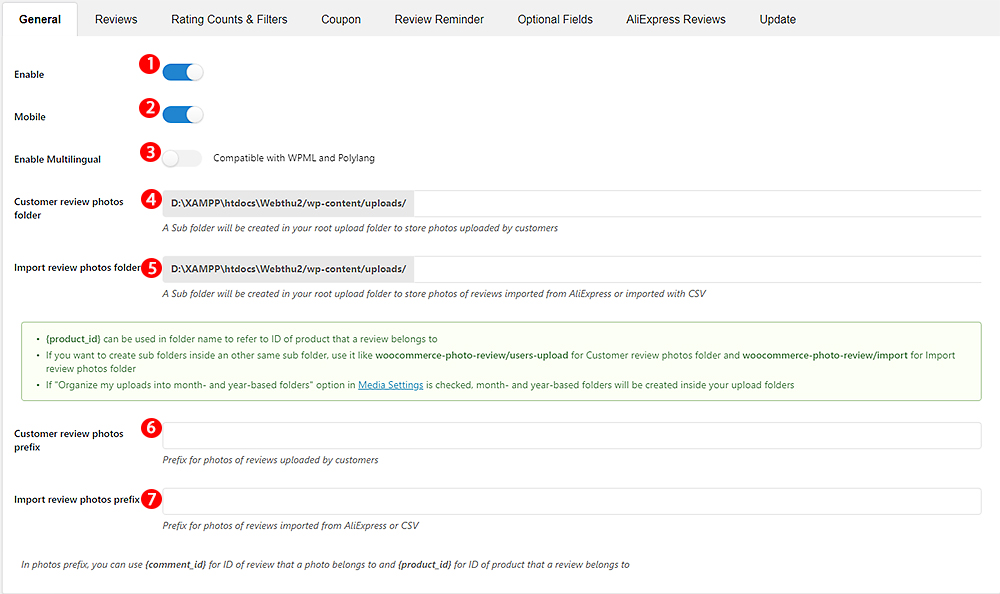
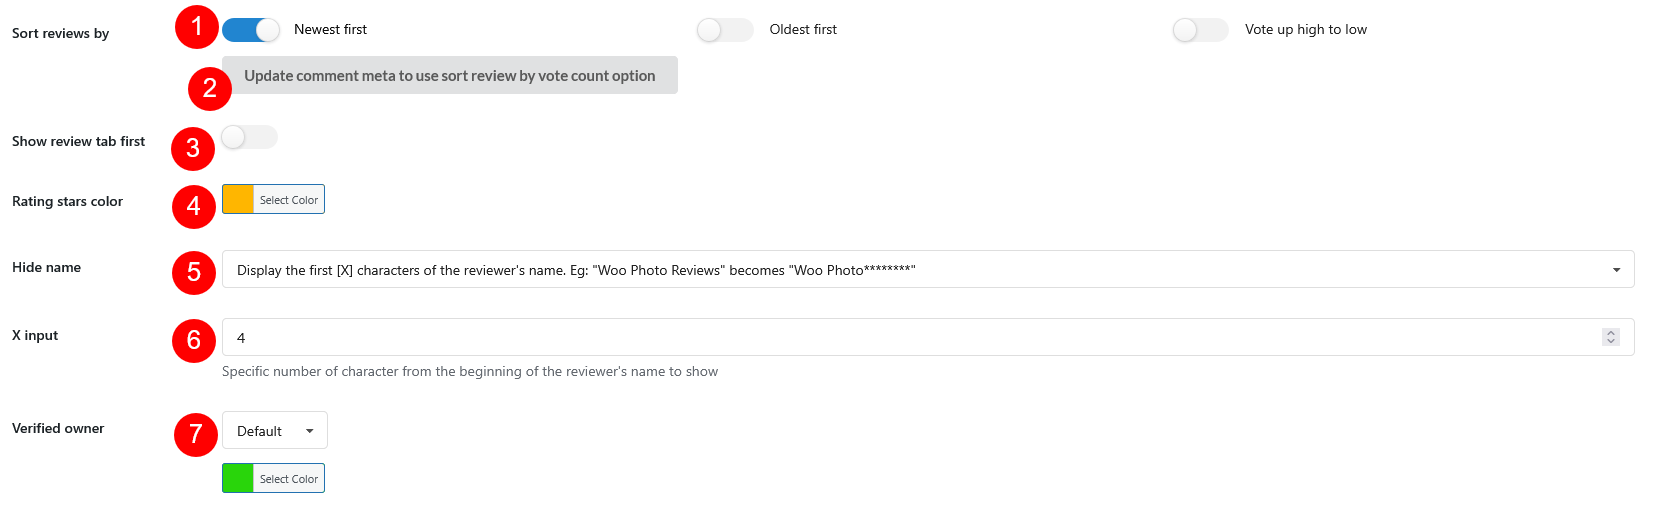
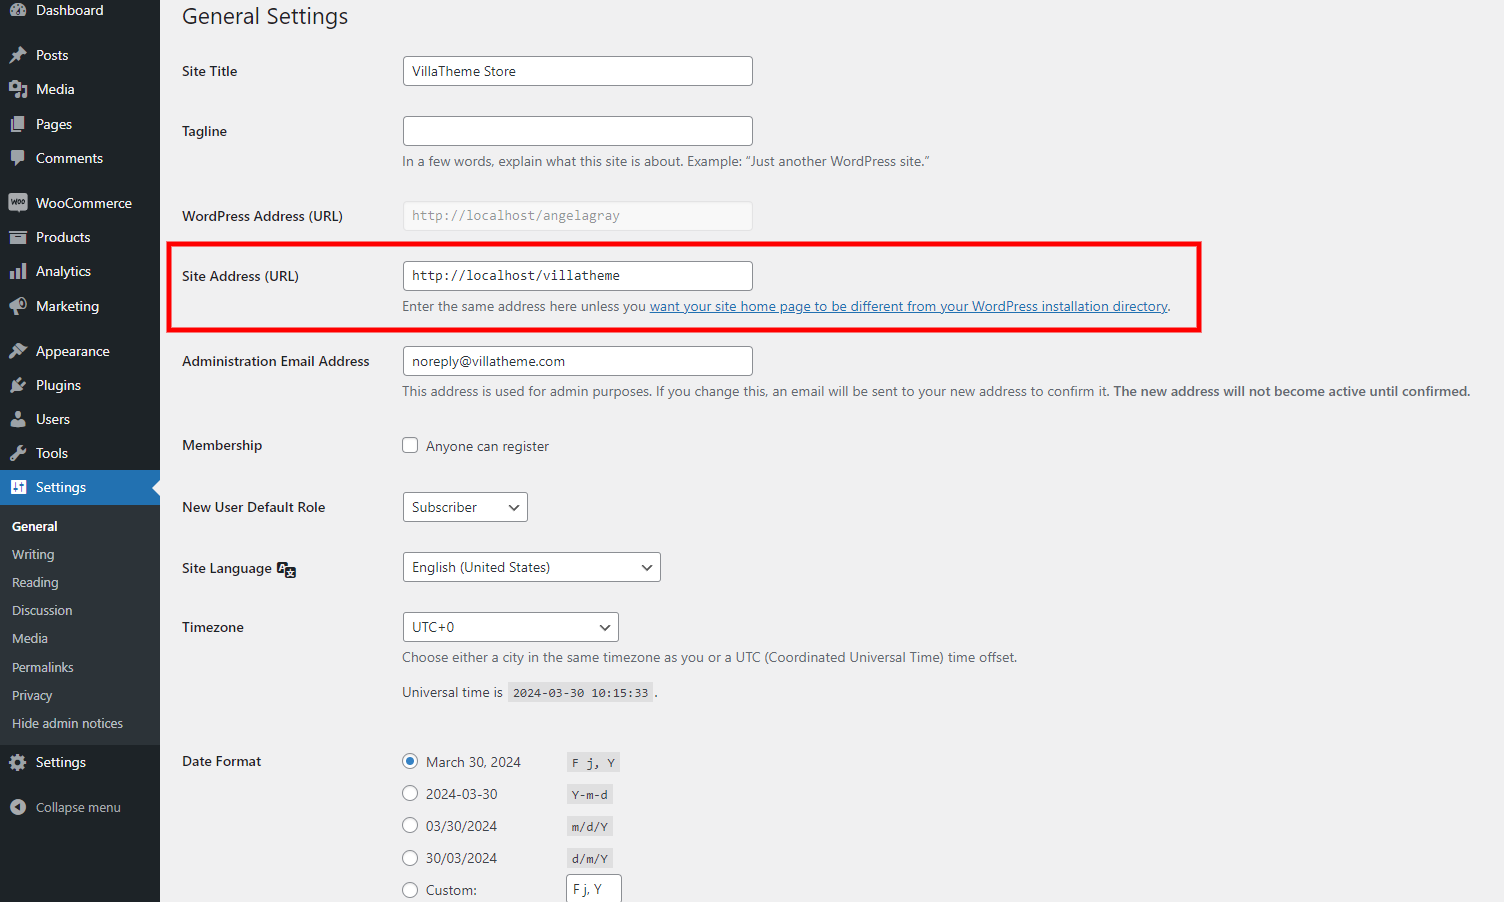
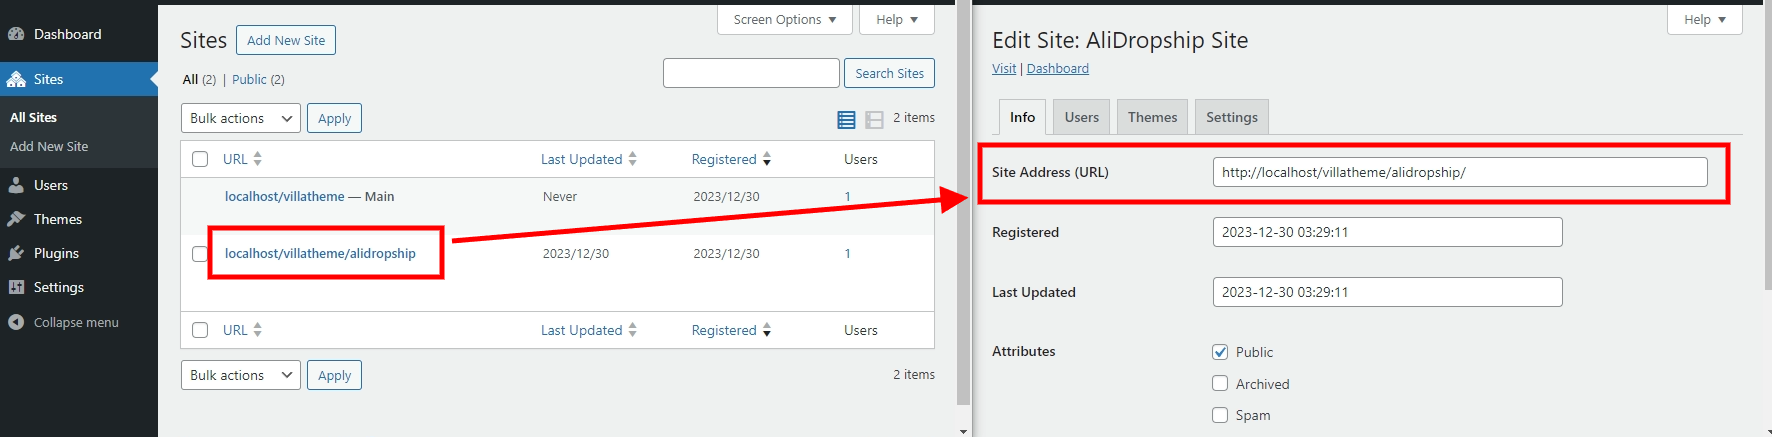
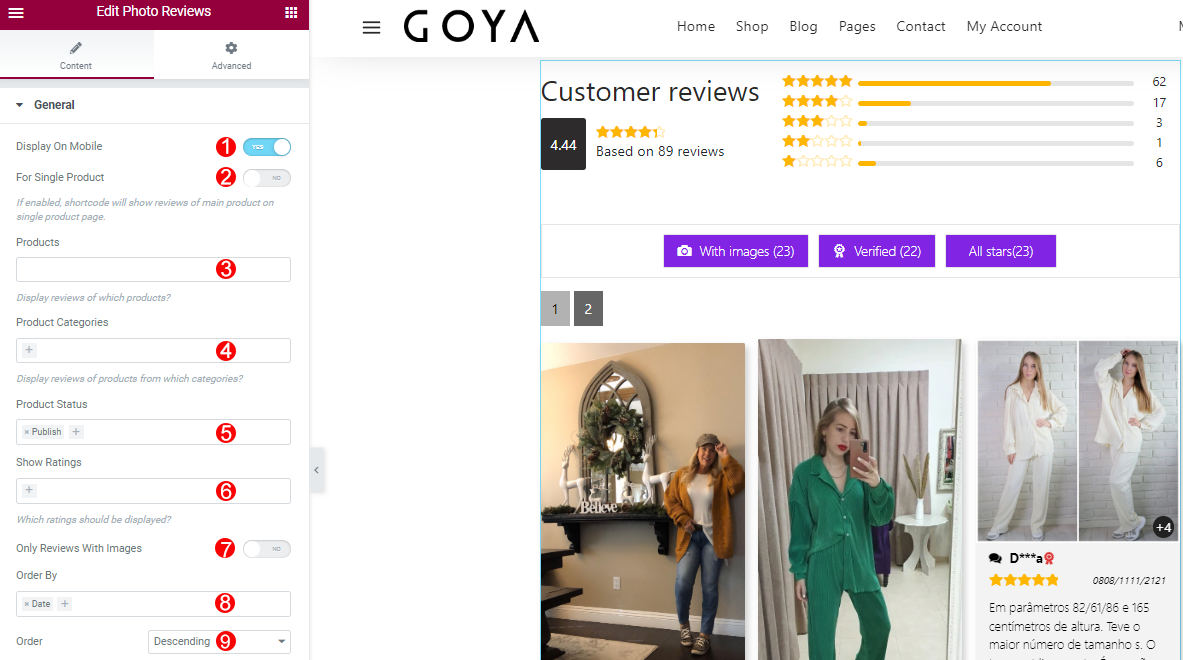
- General settings
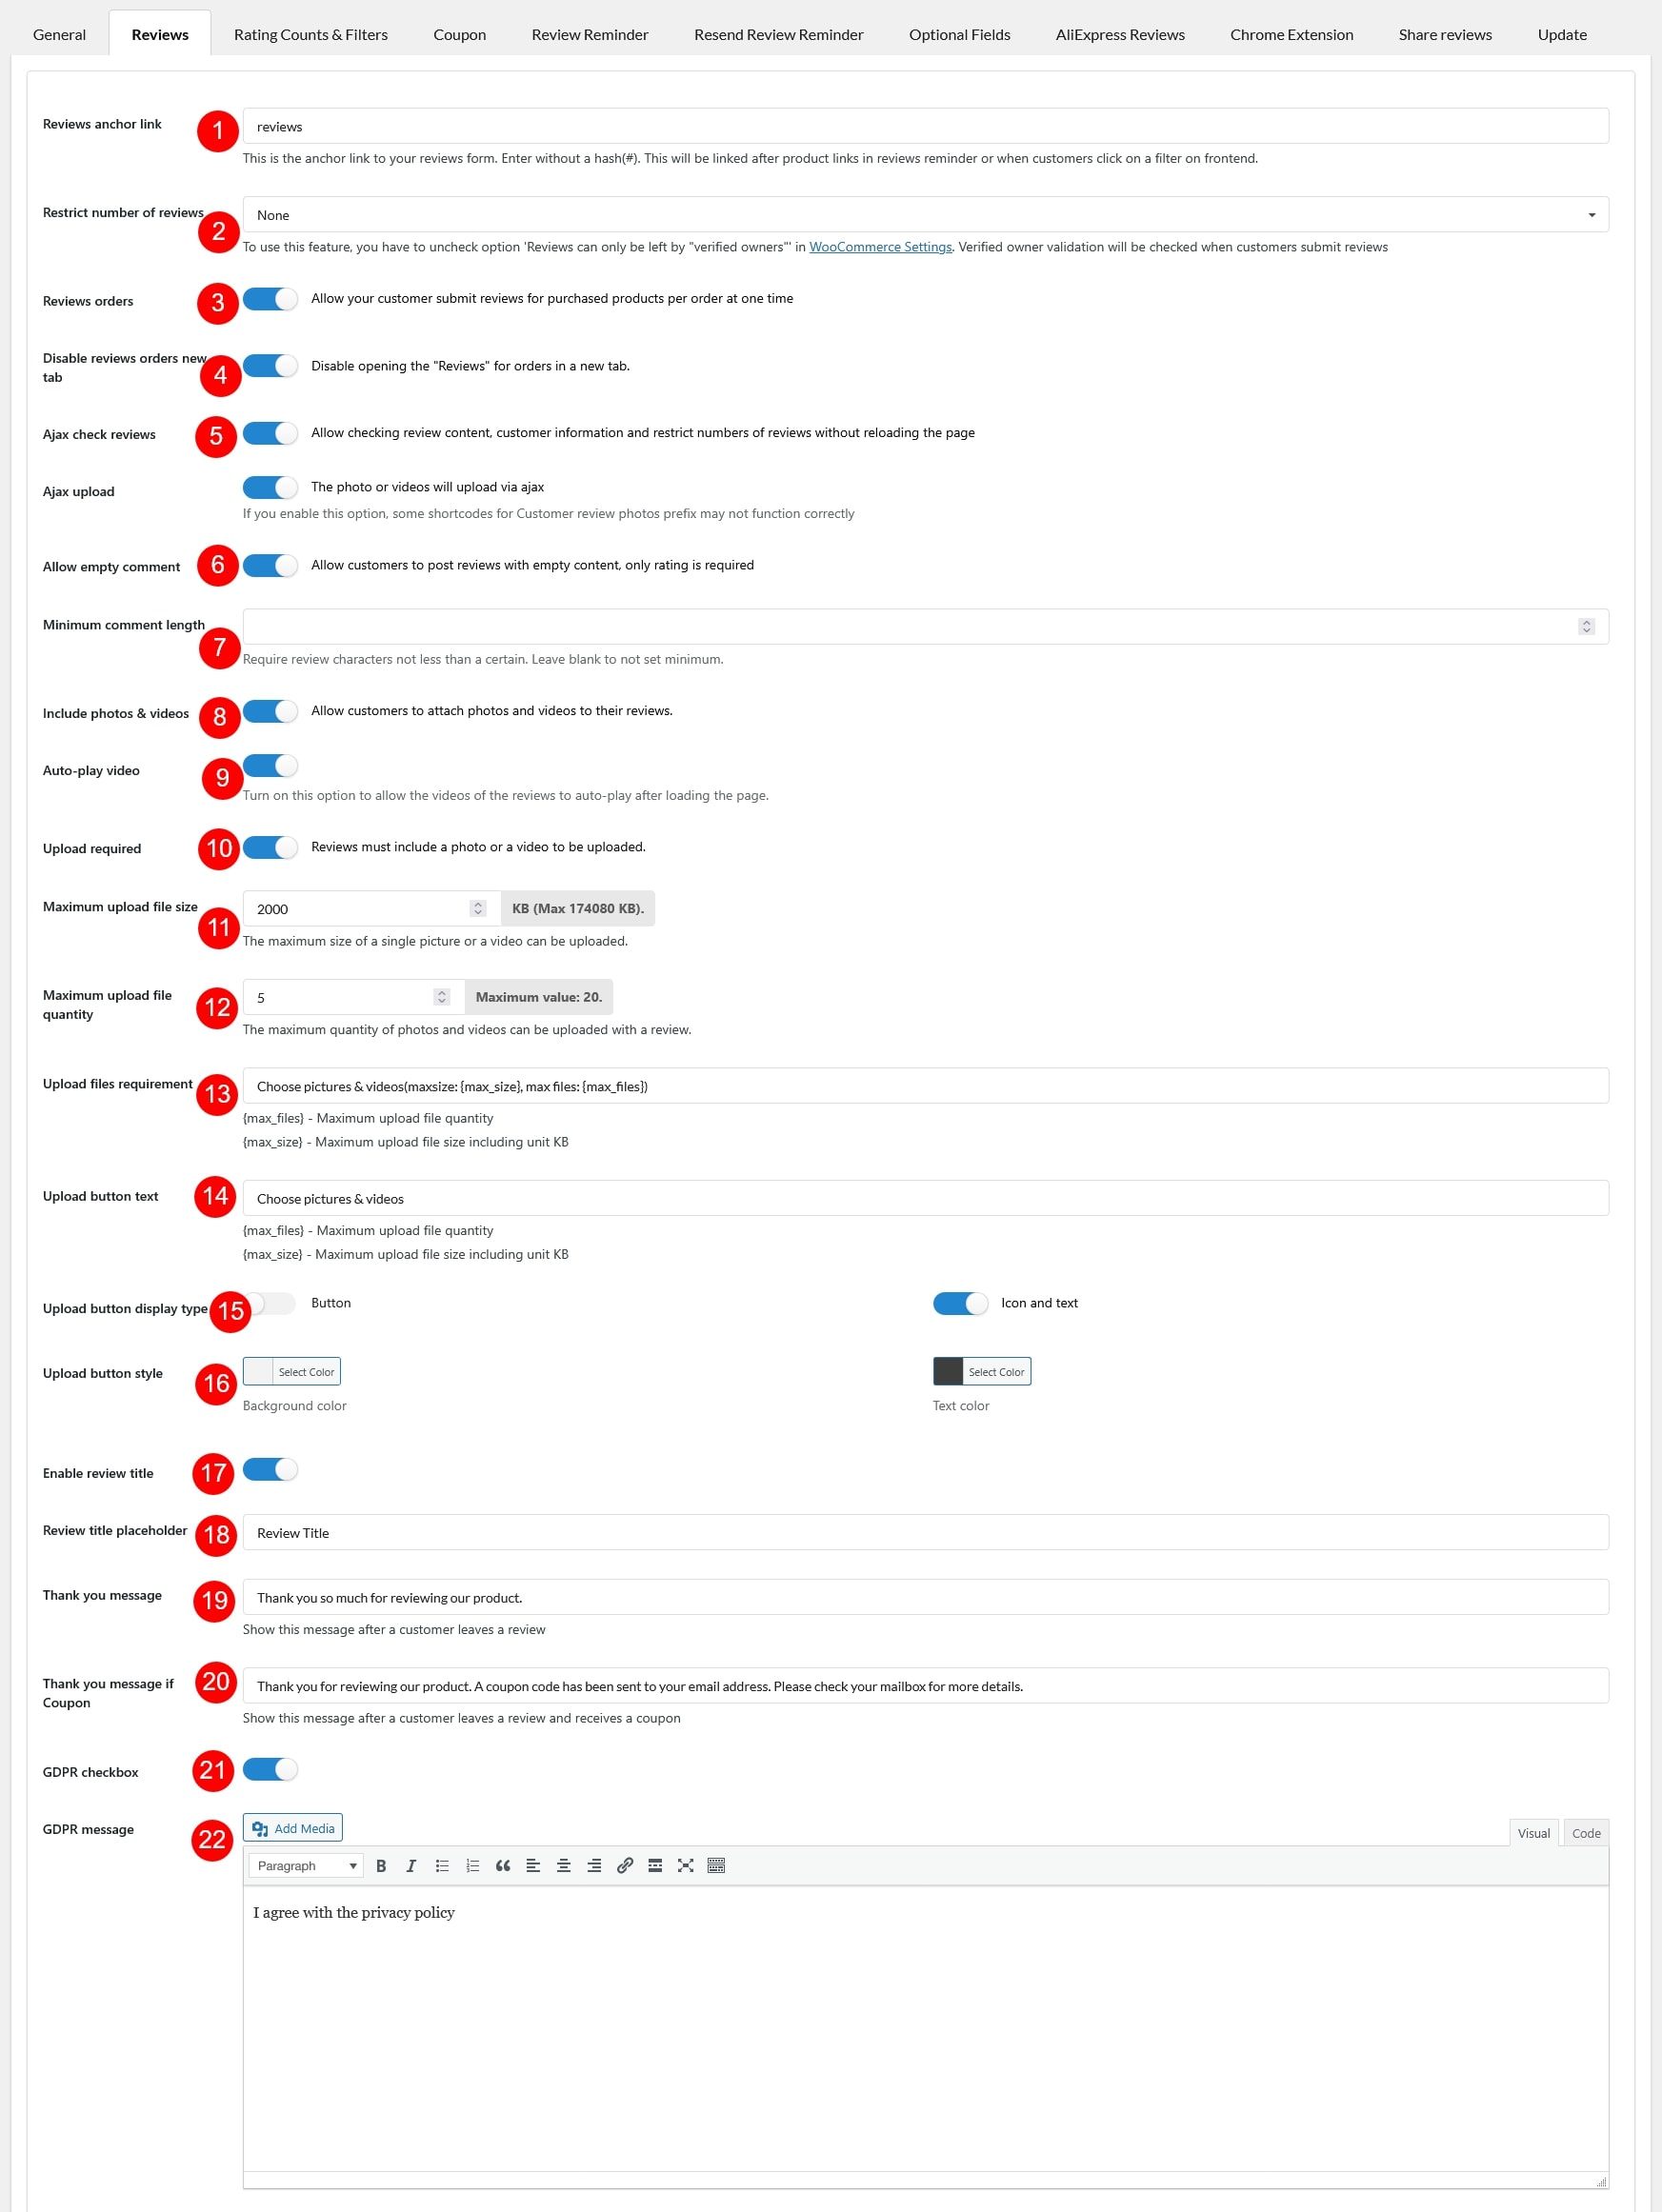
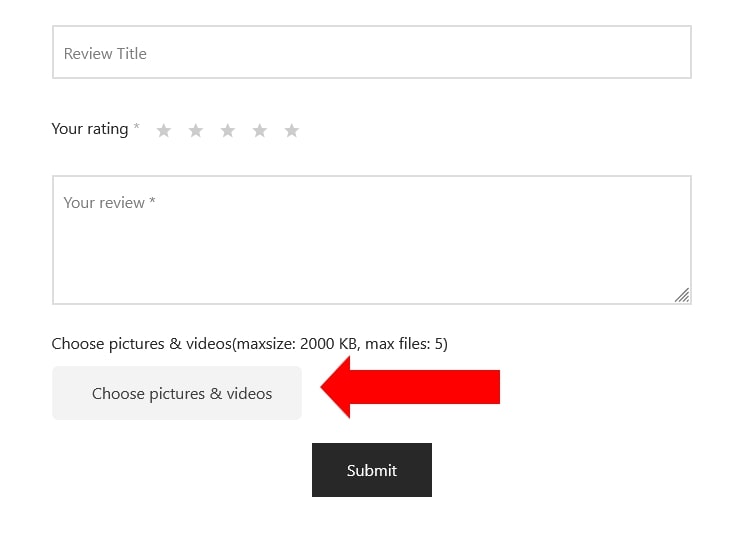
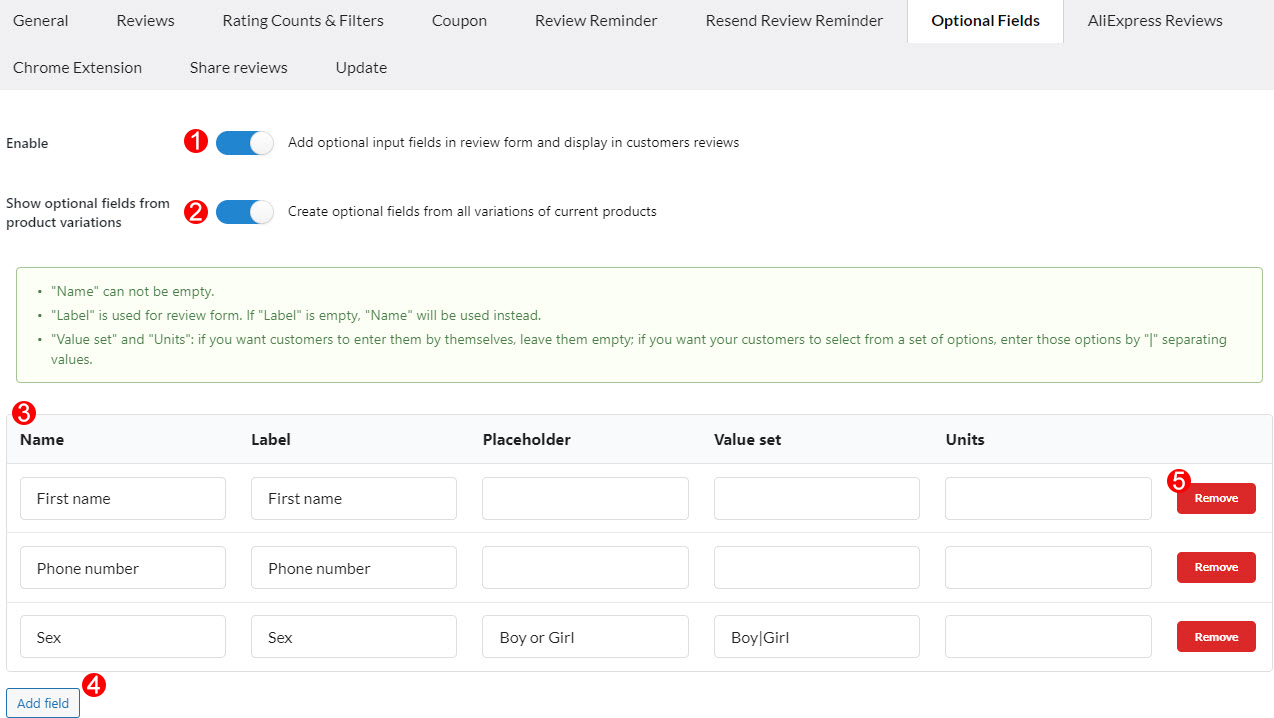
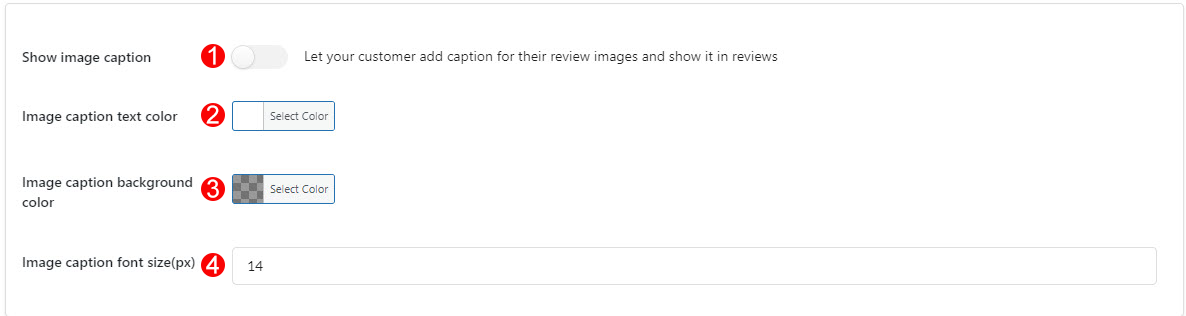
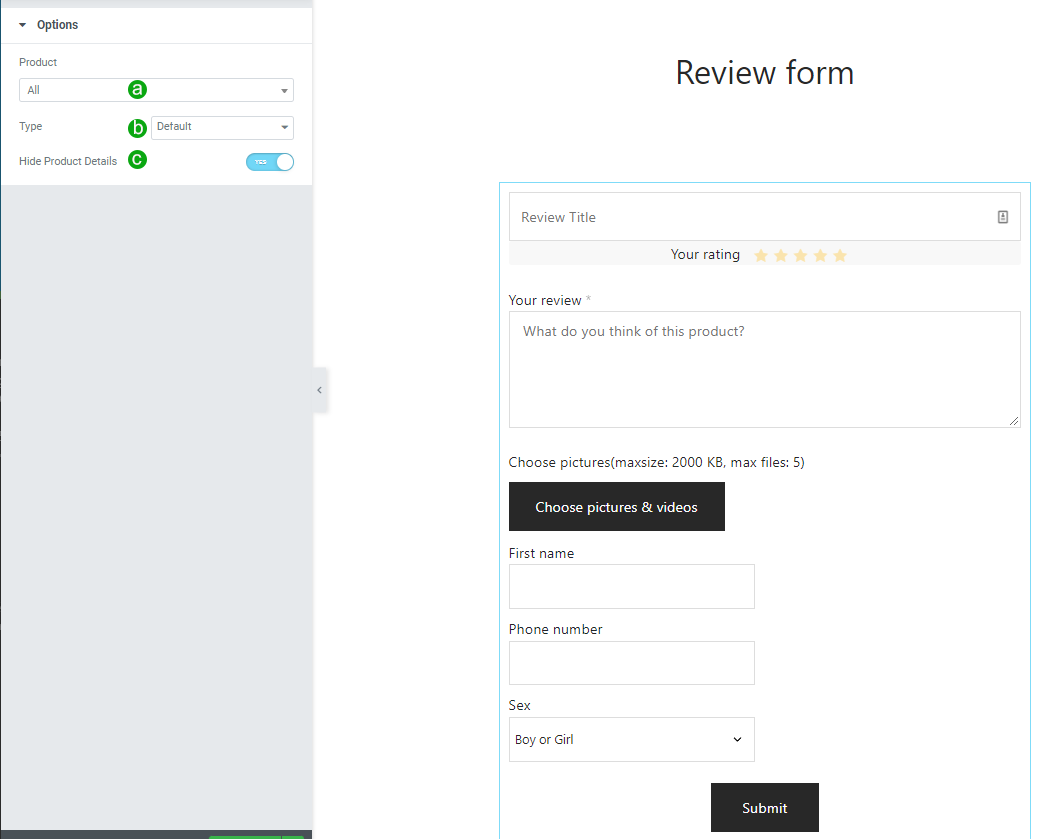
- Review Form Settings & Design Reviews
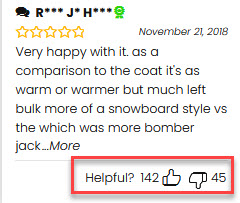
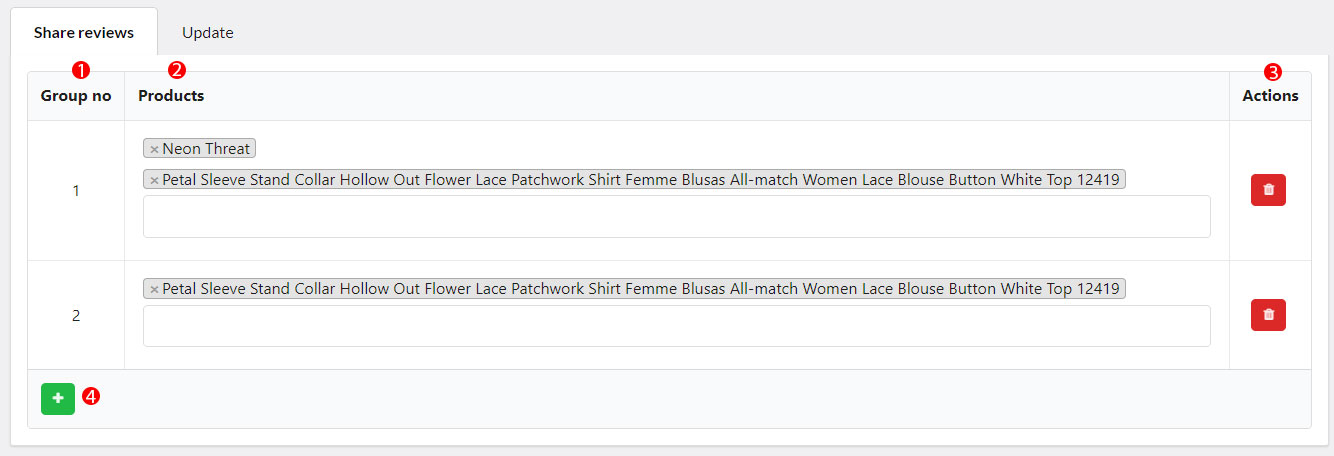
- Share reviews
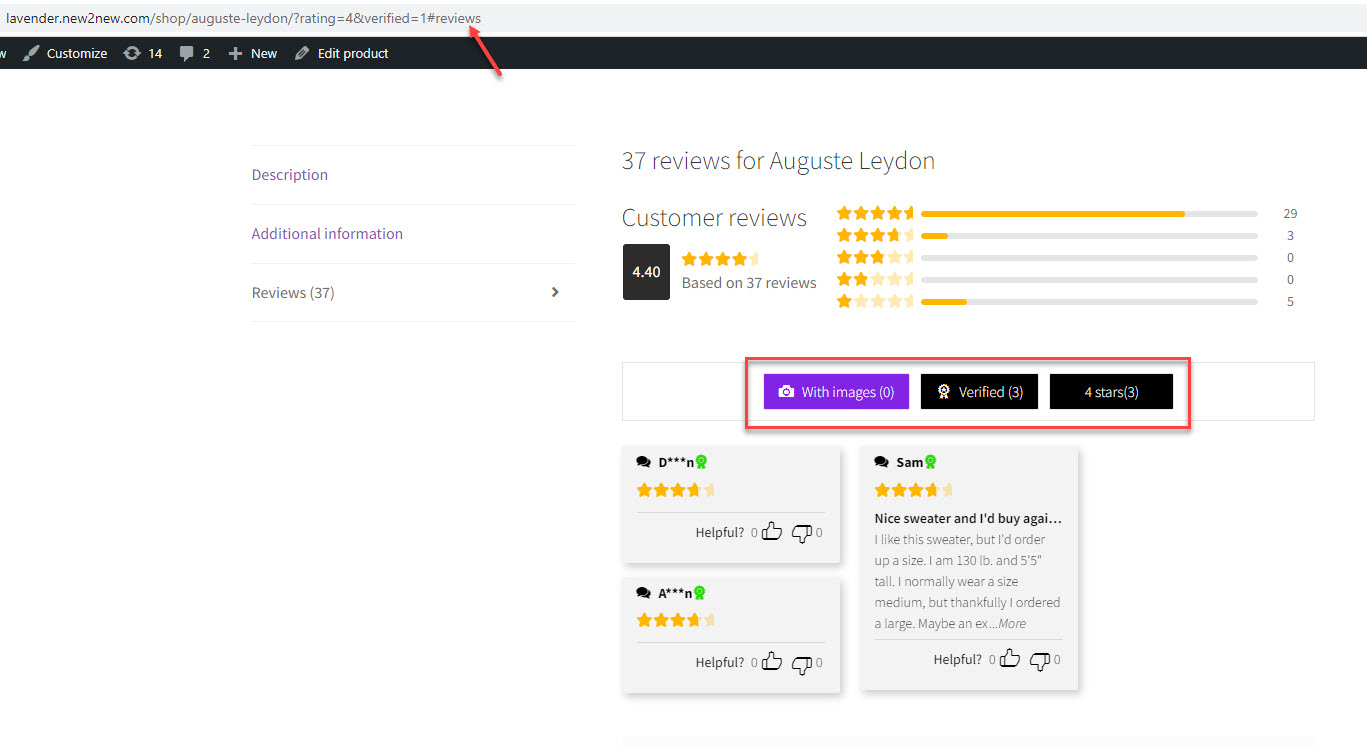
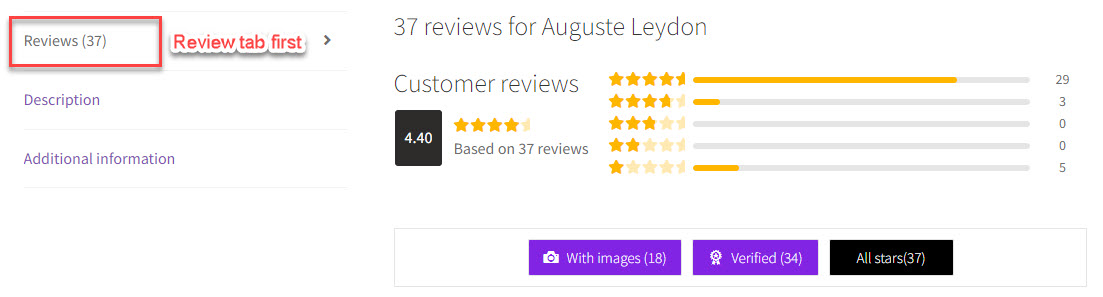
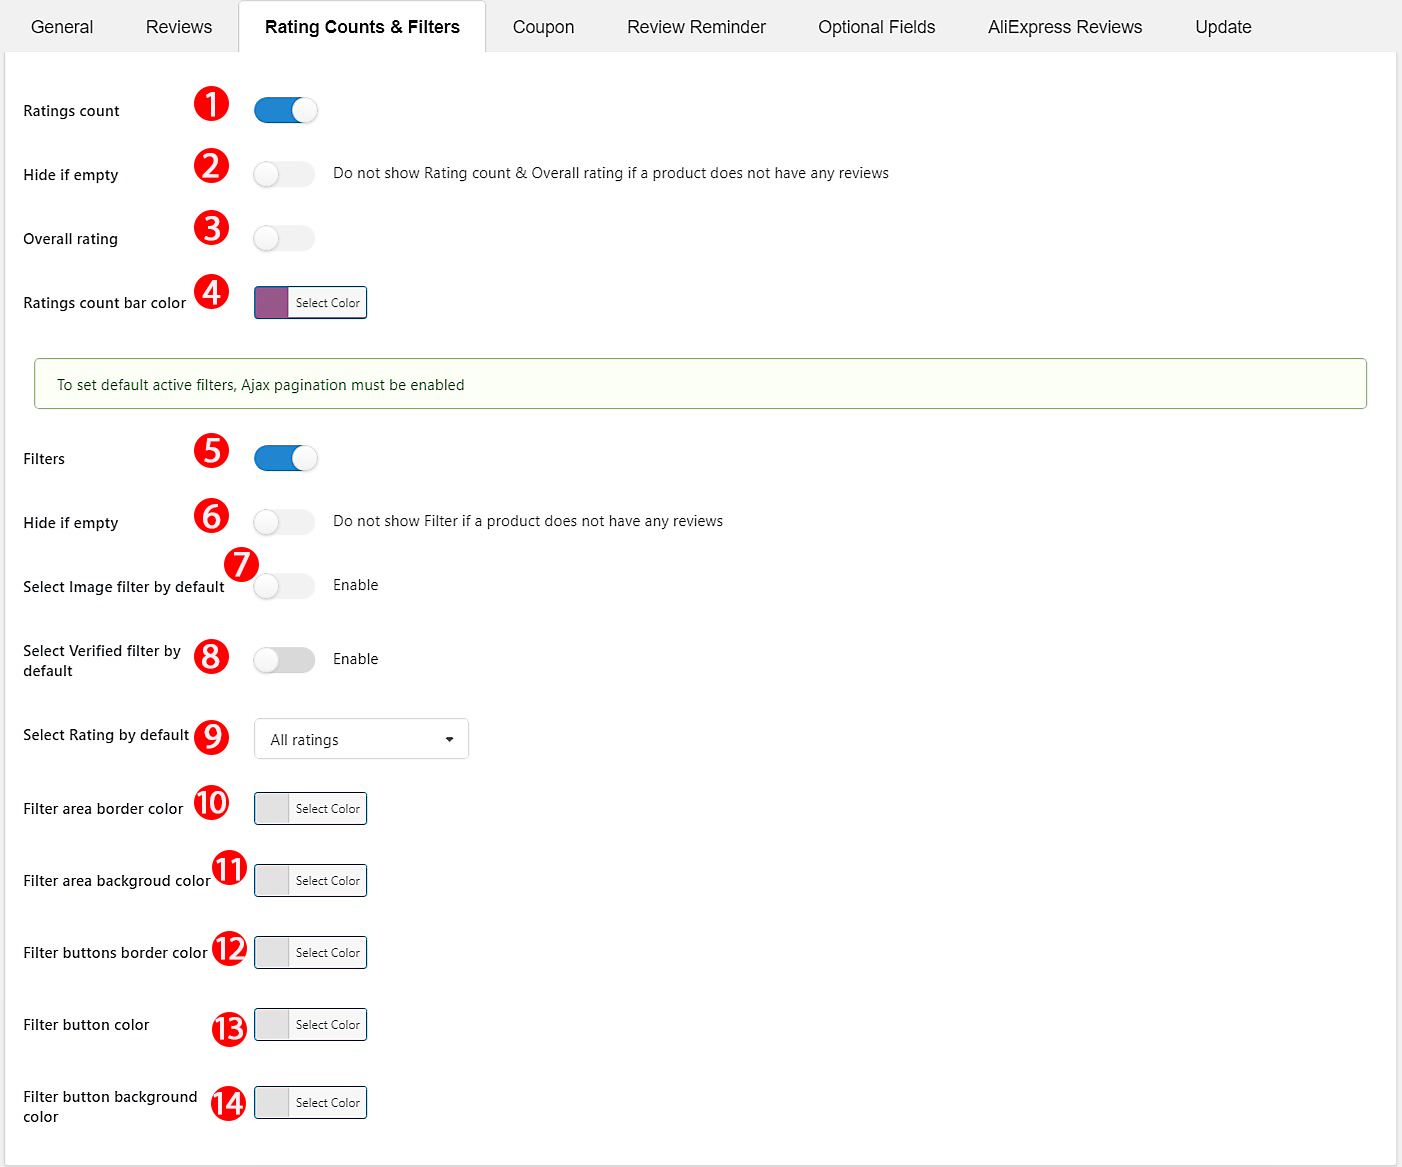
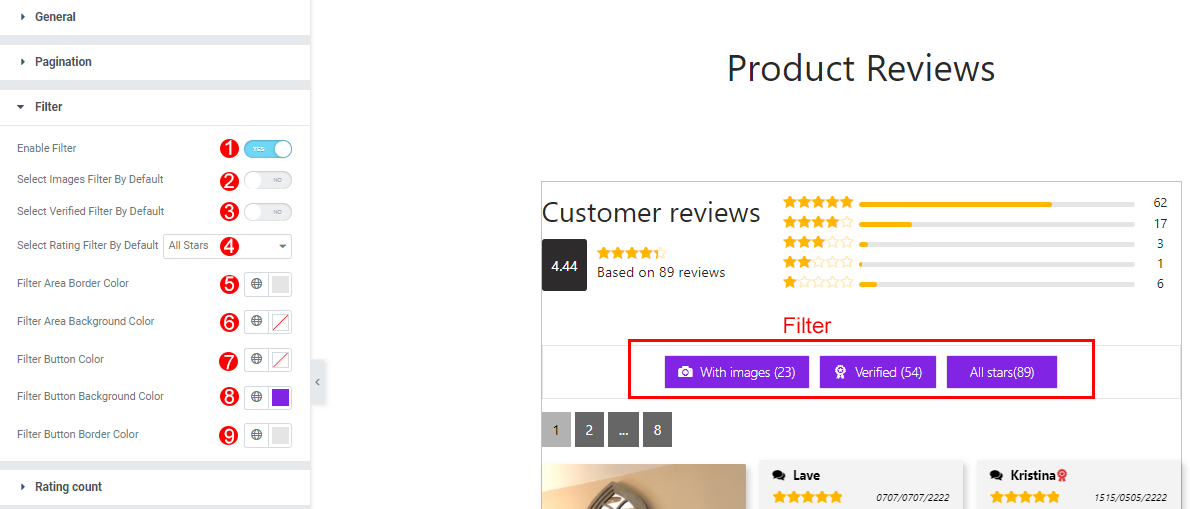
- Rating Counts & Filters
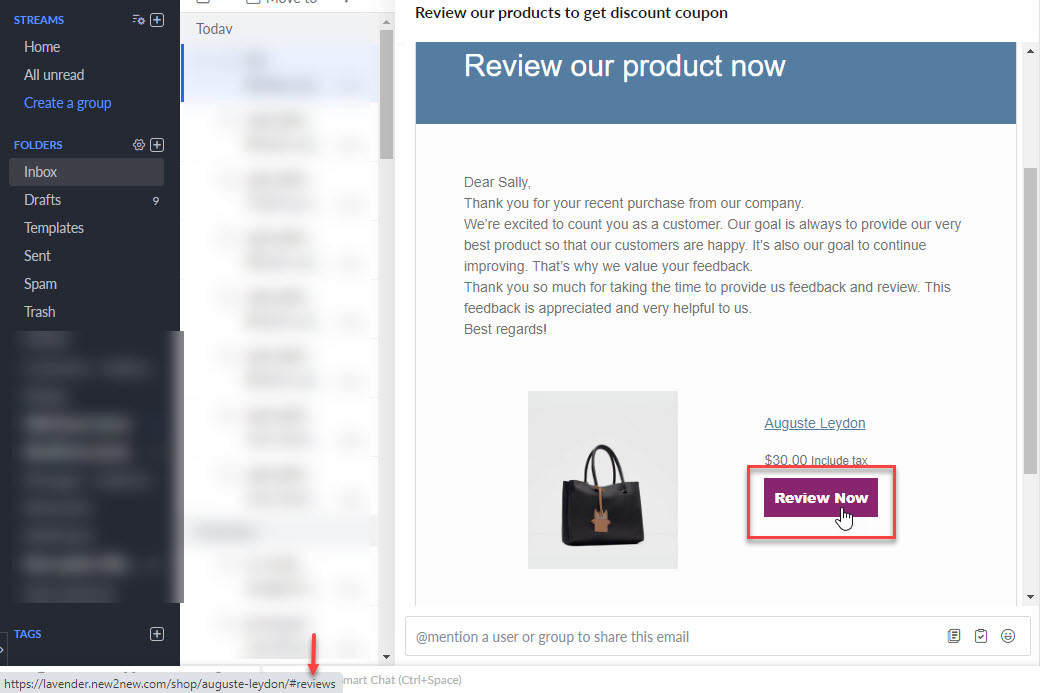
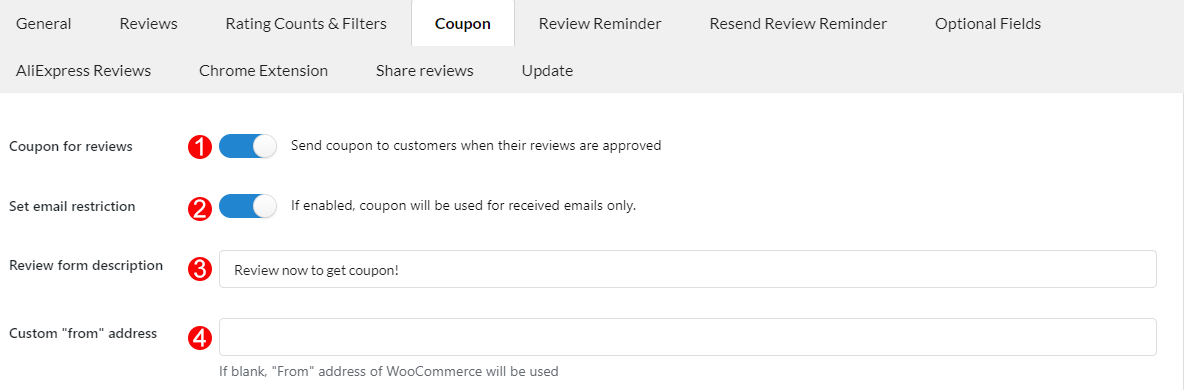
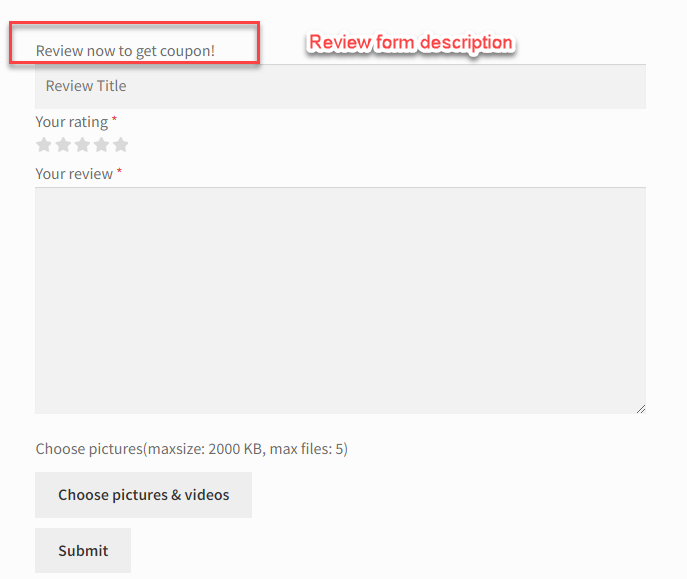
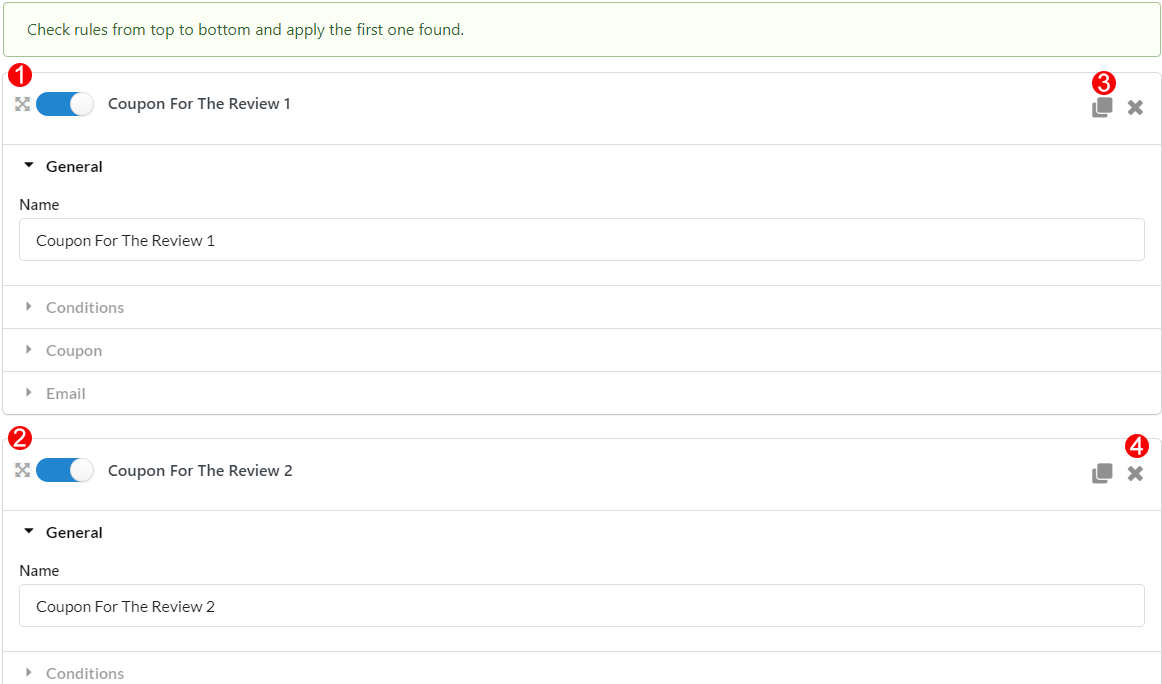
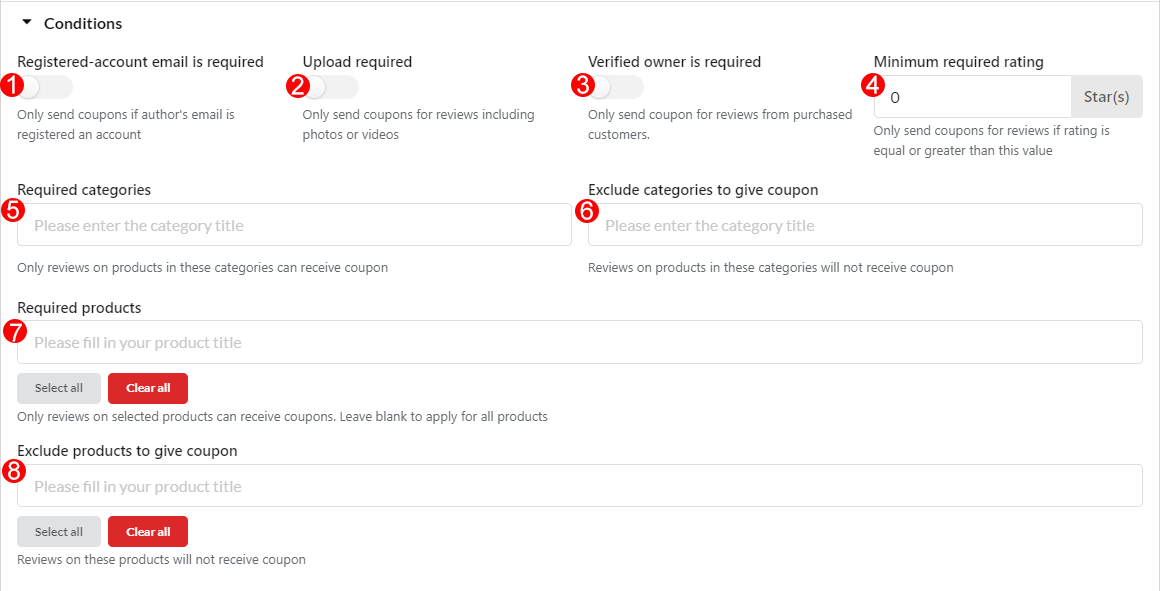
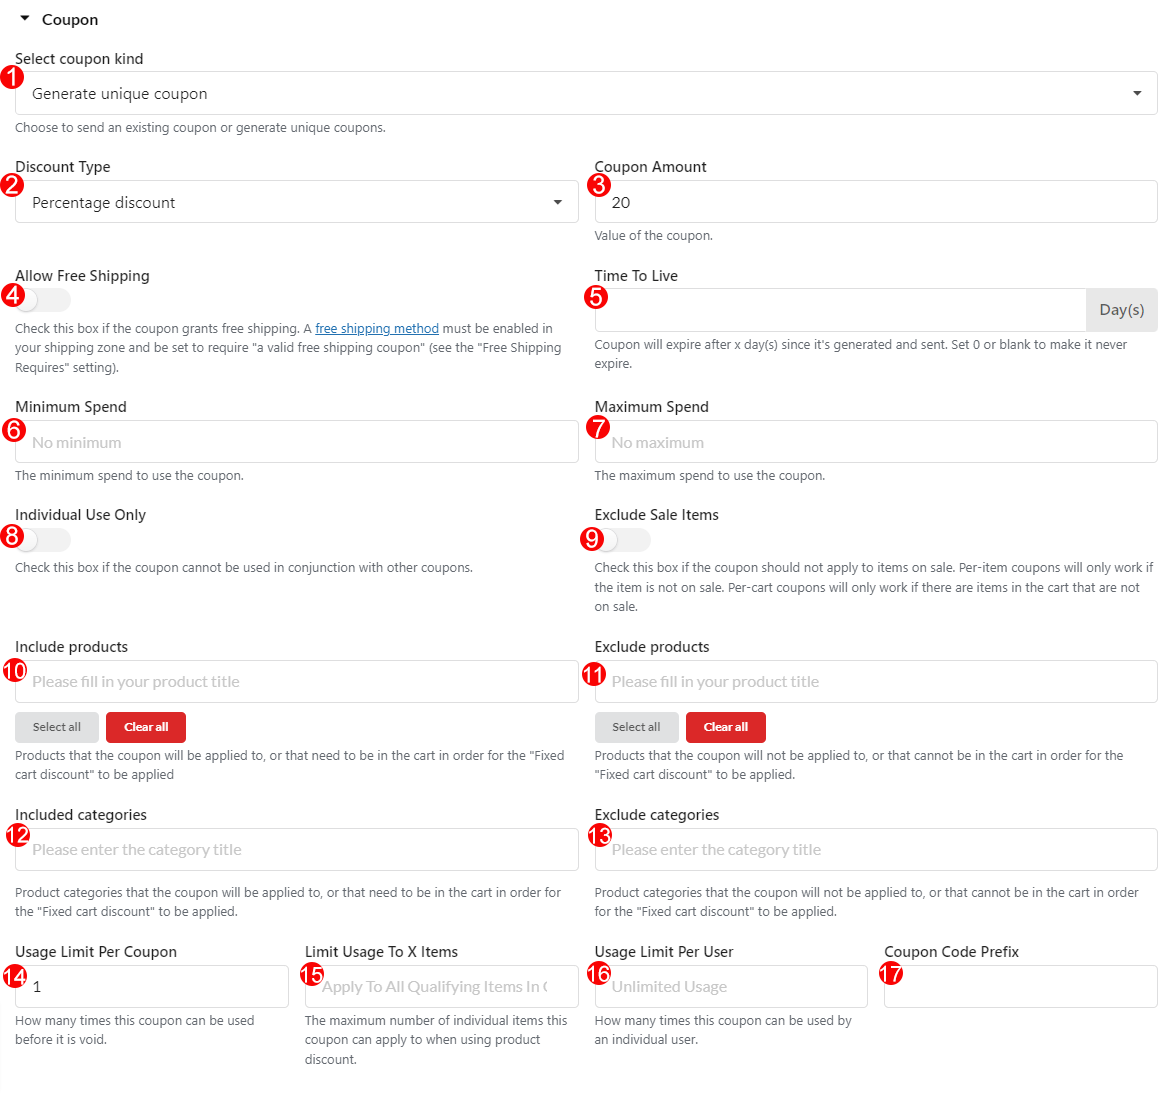
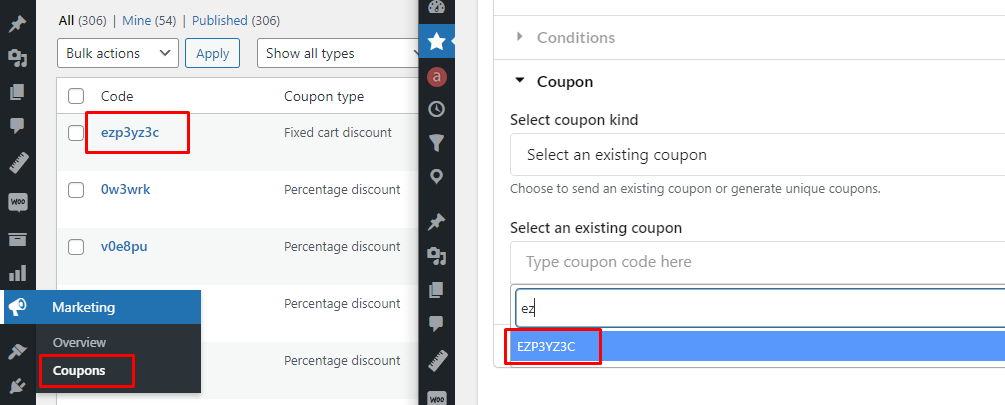
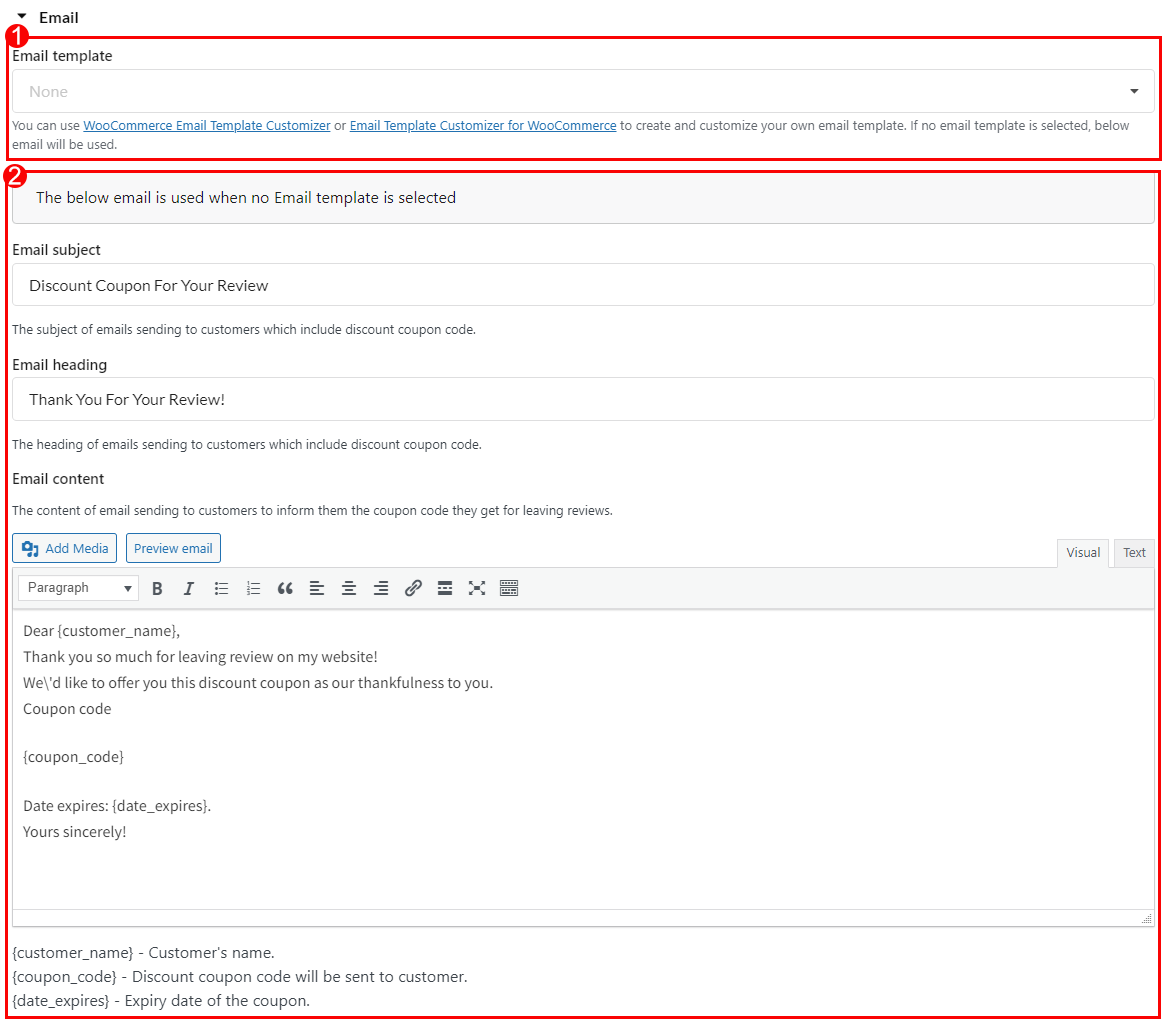
- Coupon Email
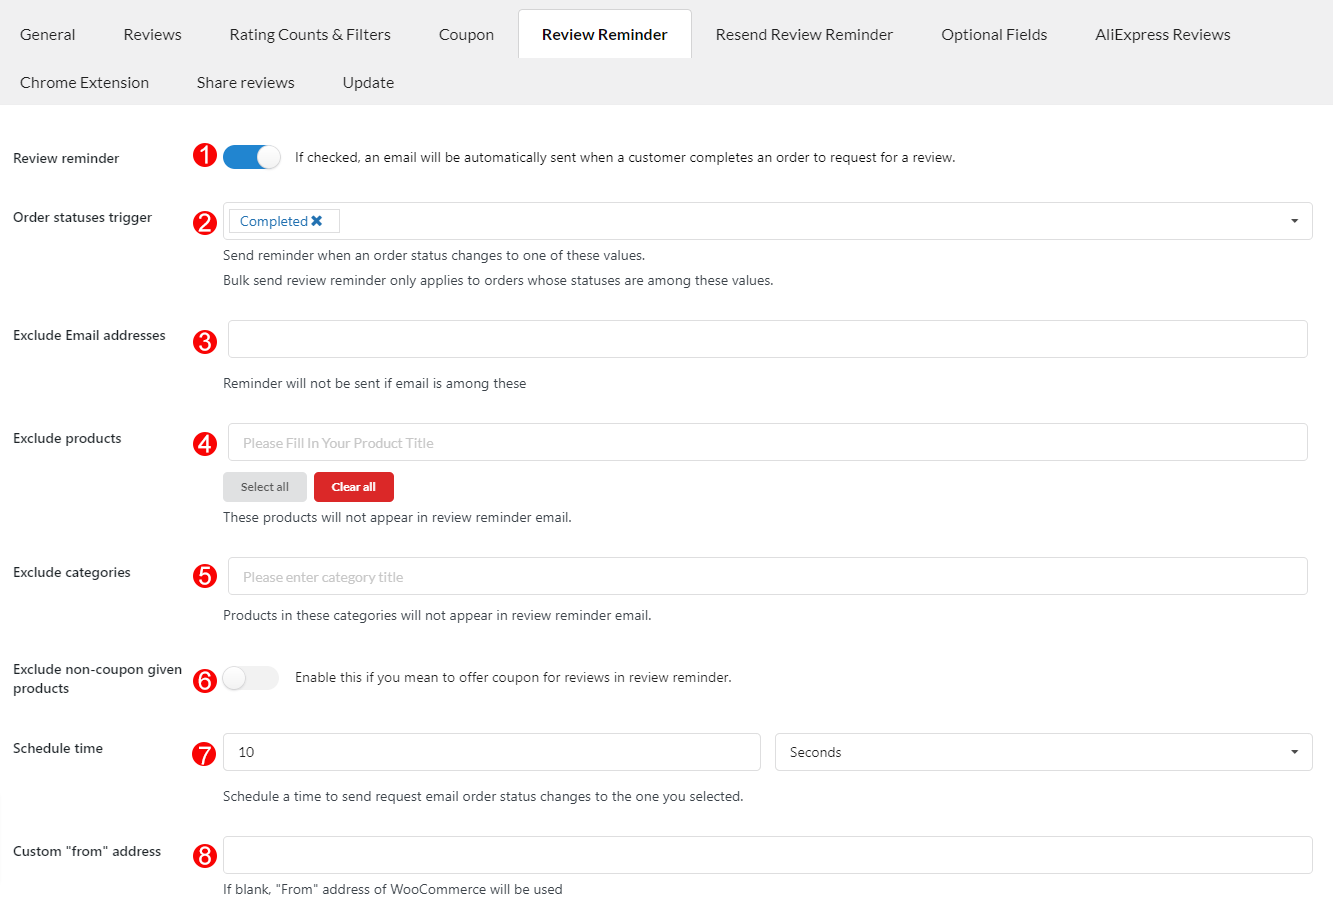
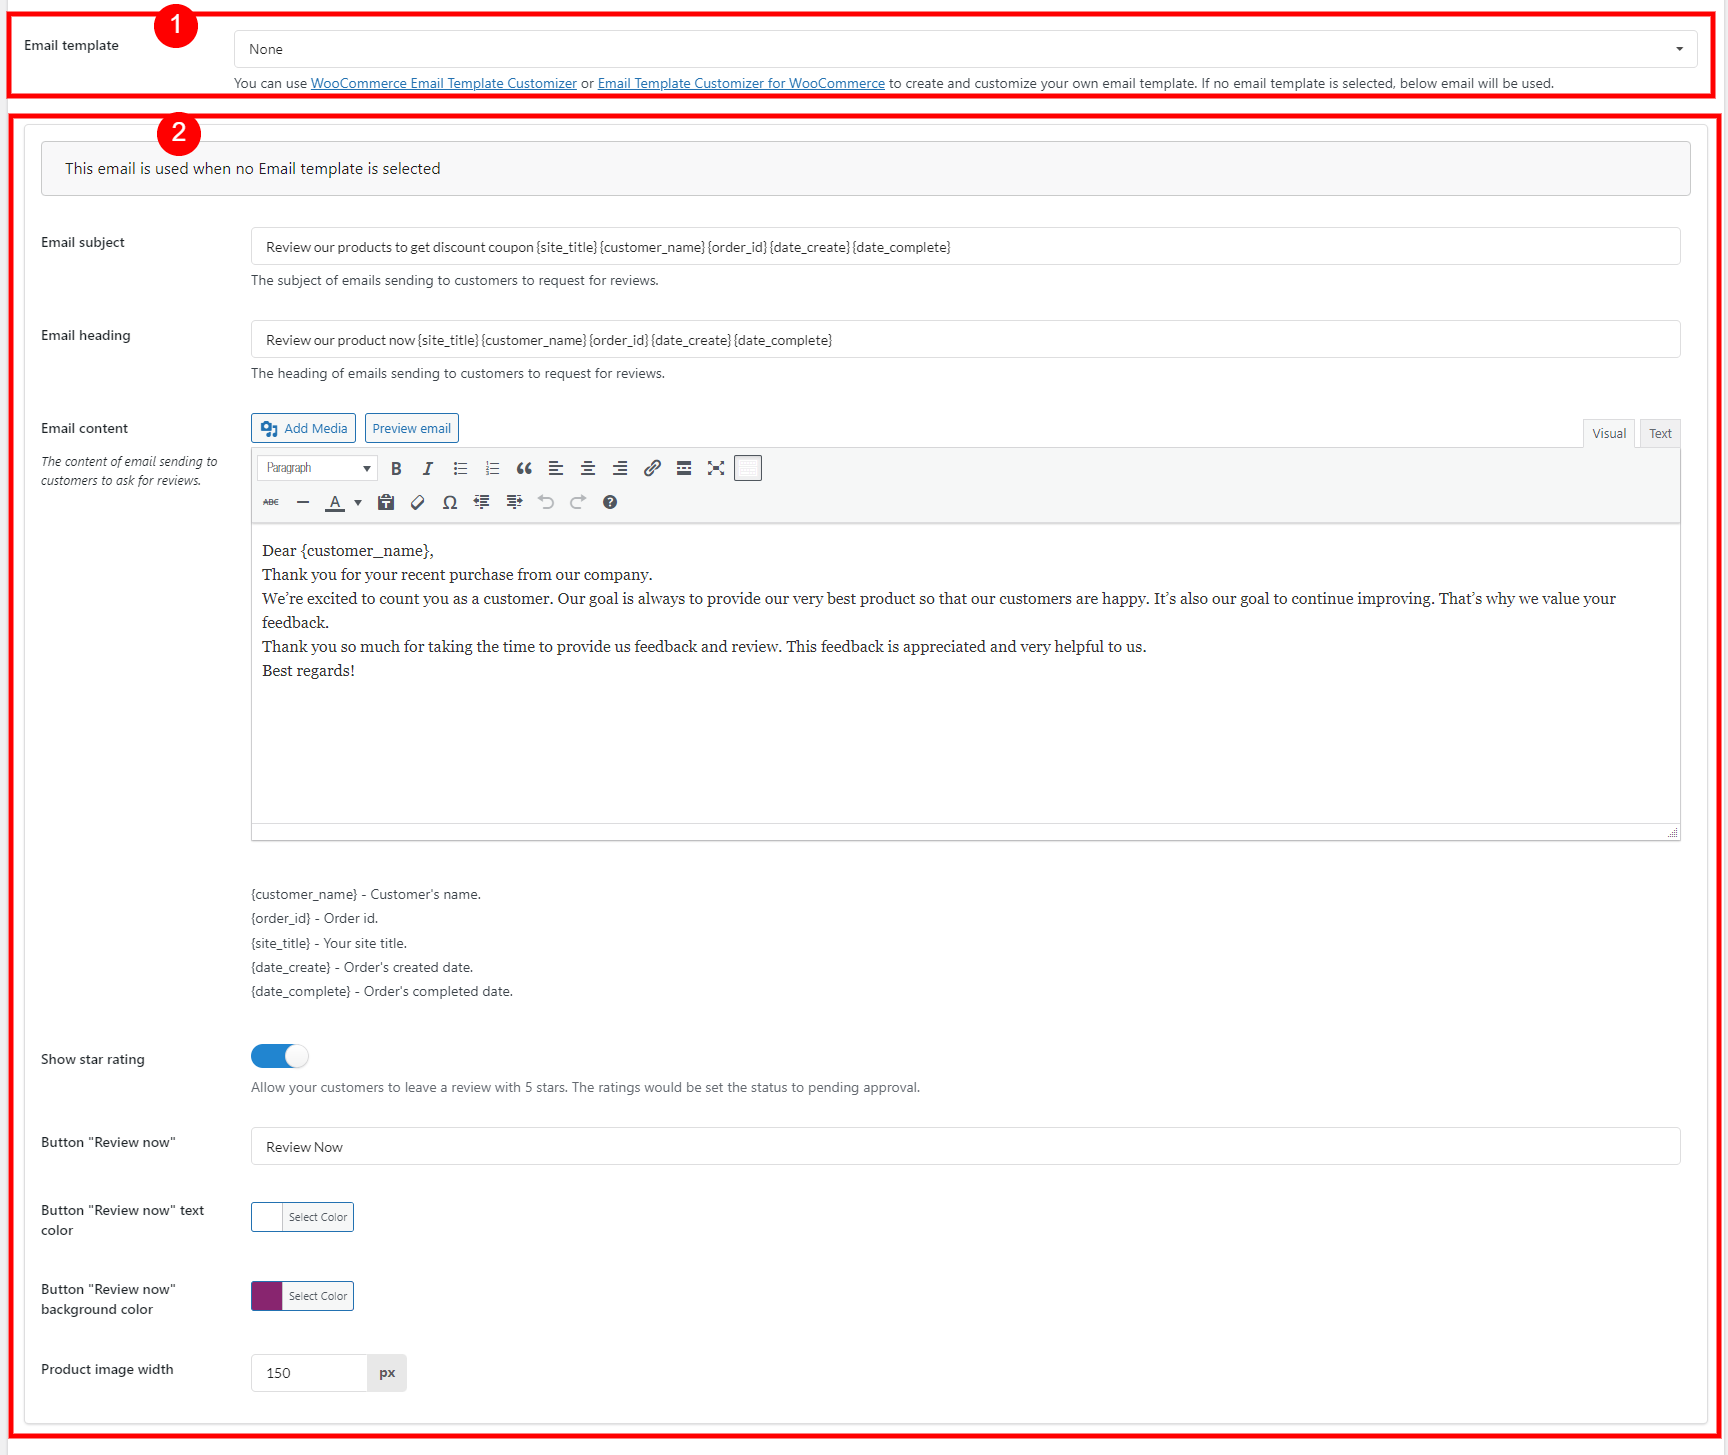
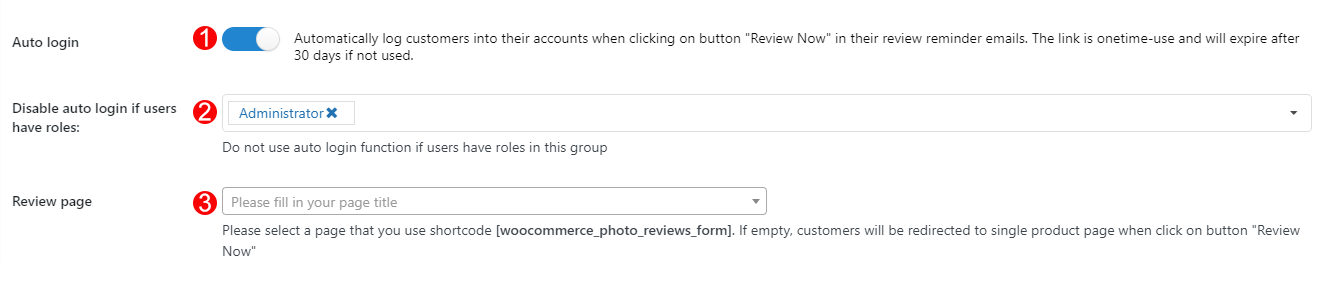
- Review Reminder Email
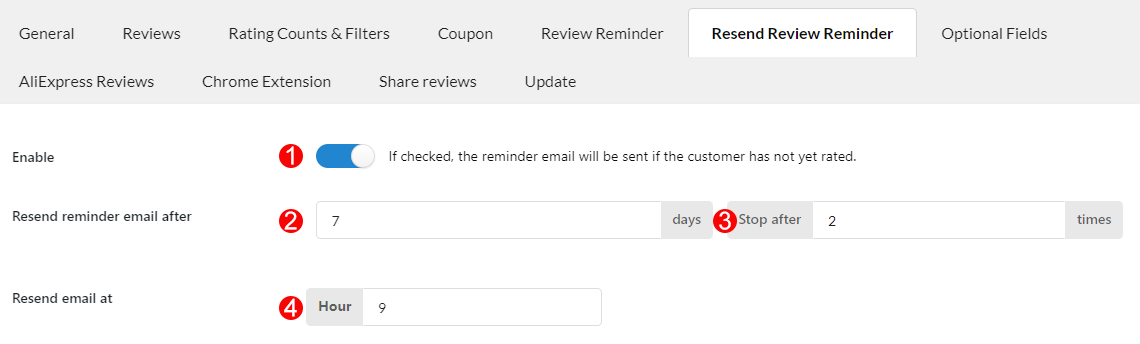
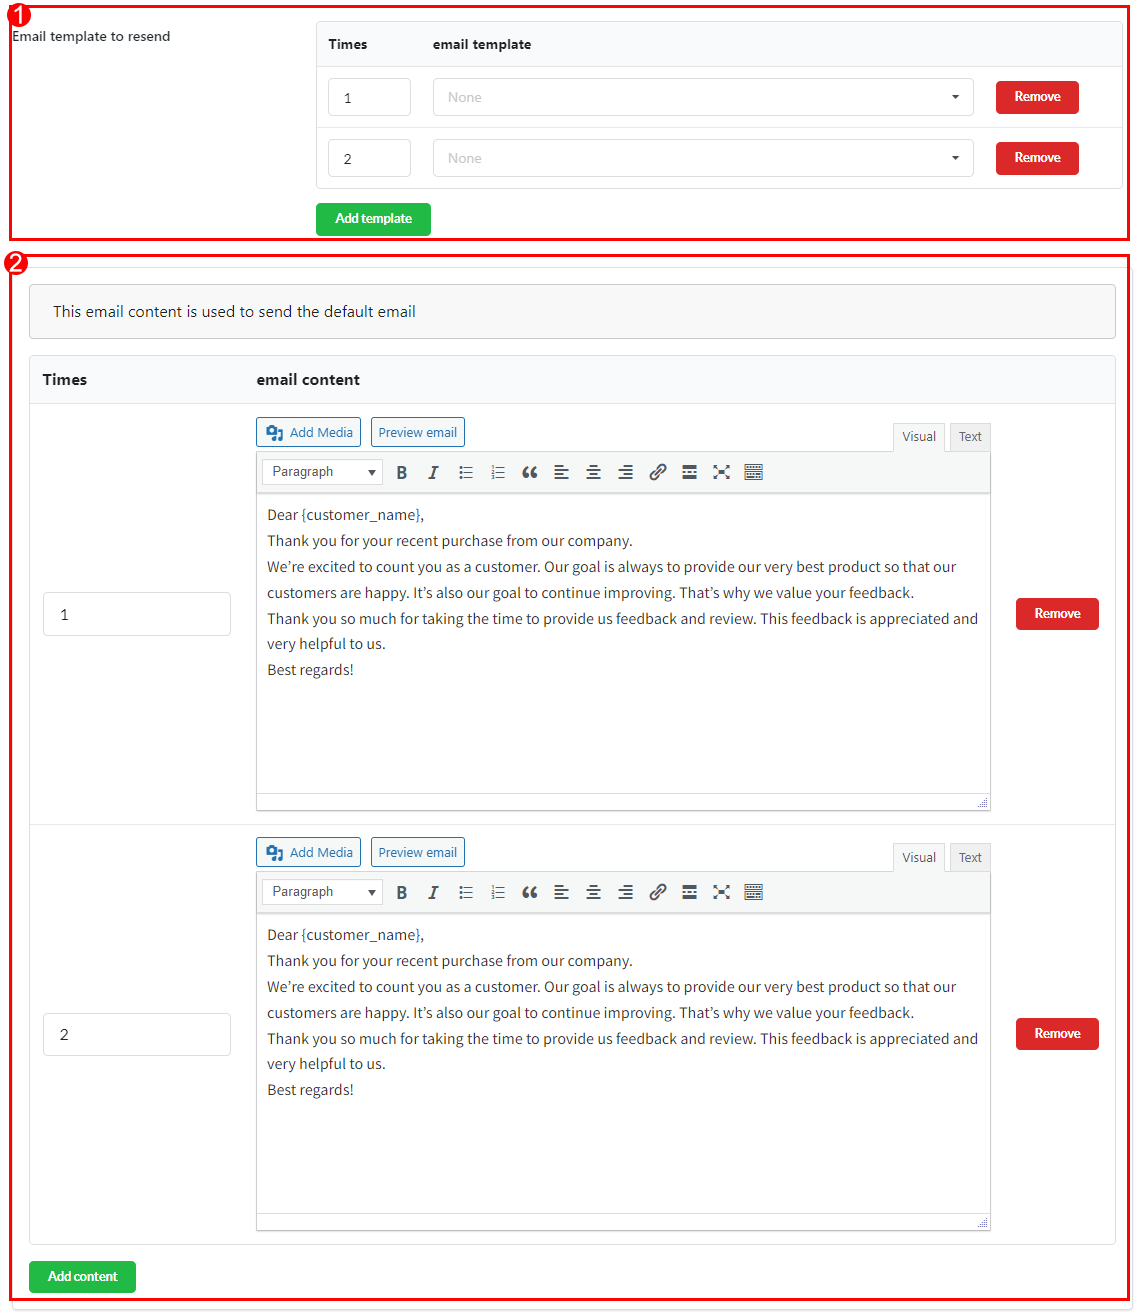
- Resend Review Reminder
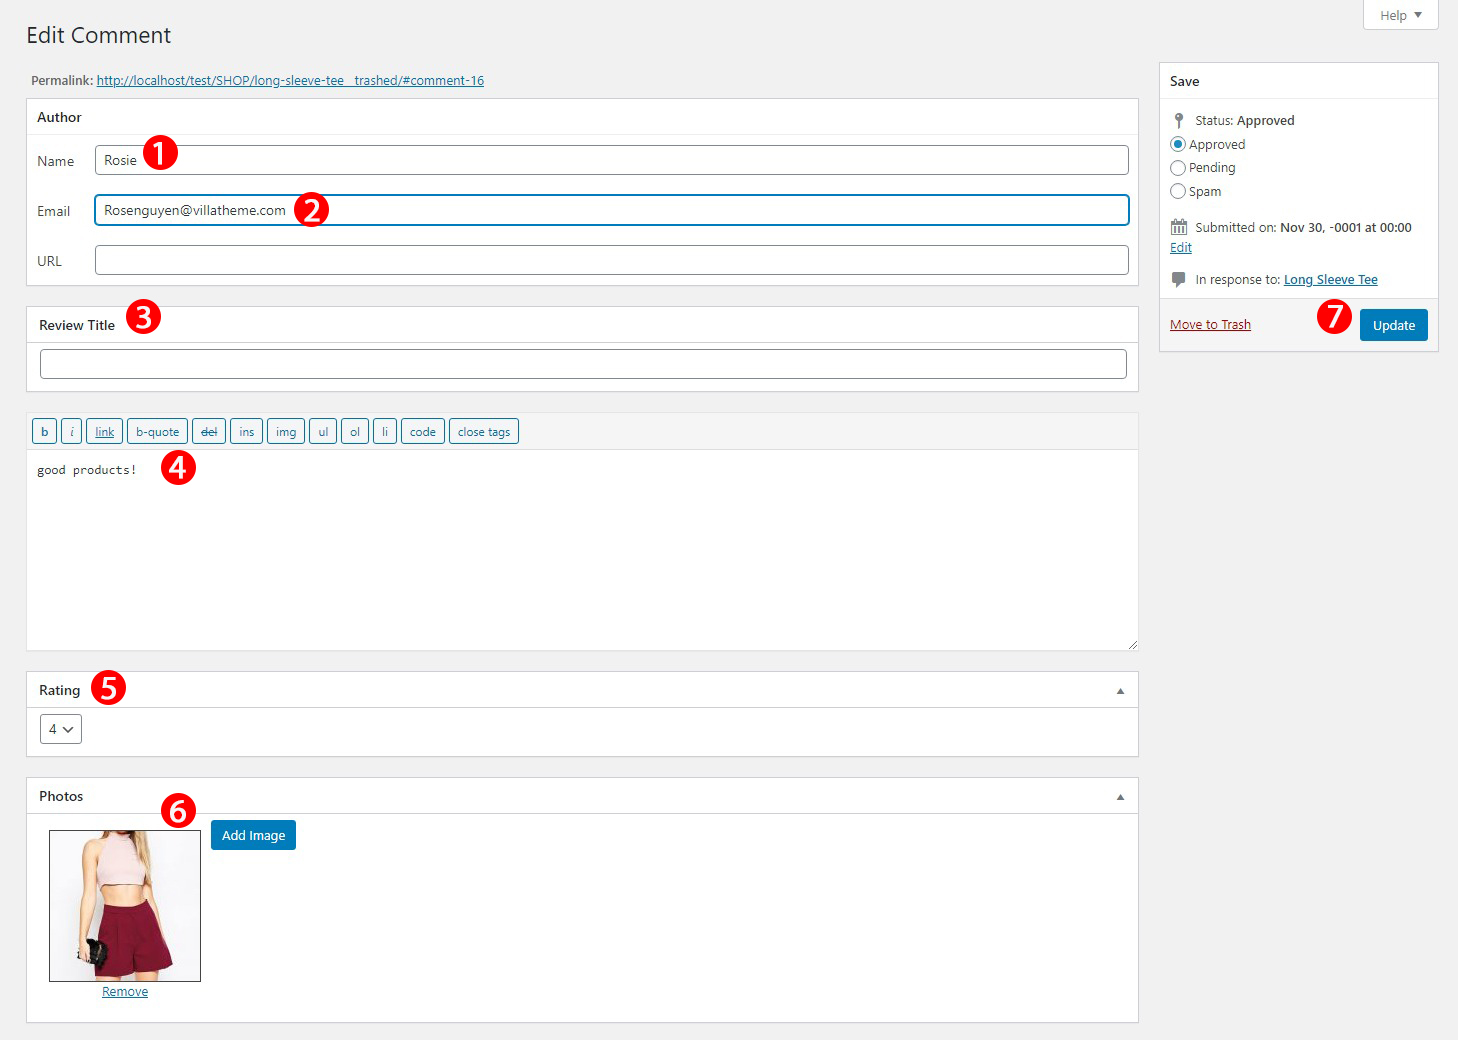
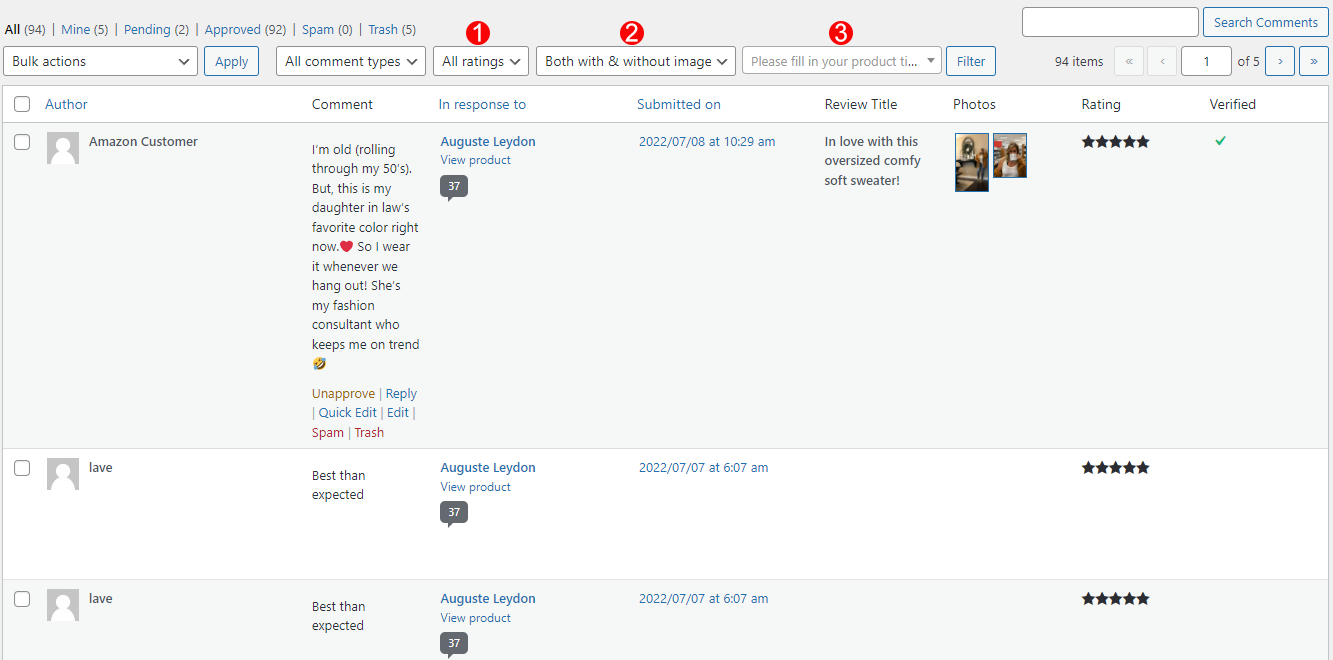
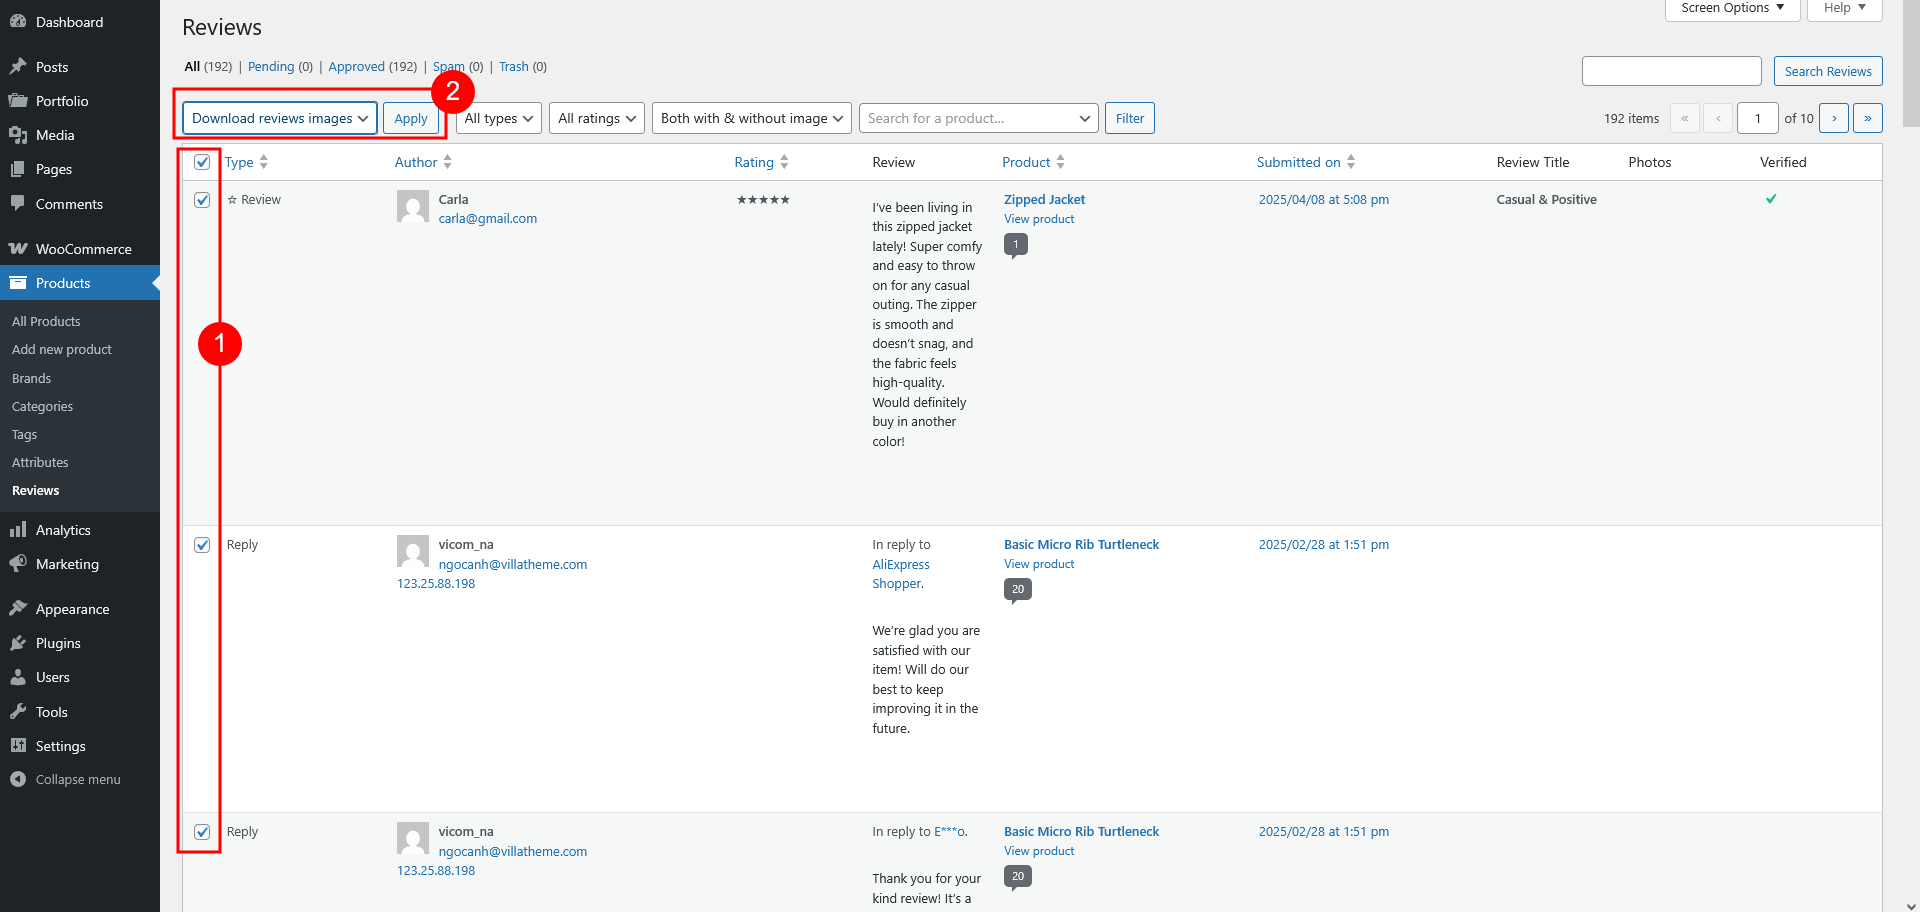
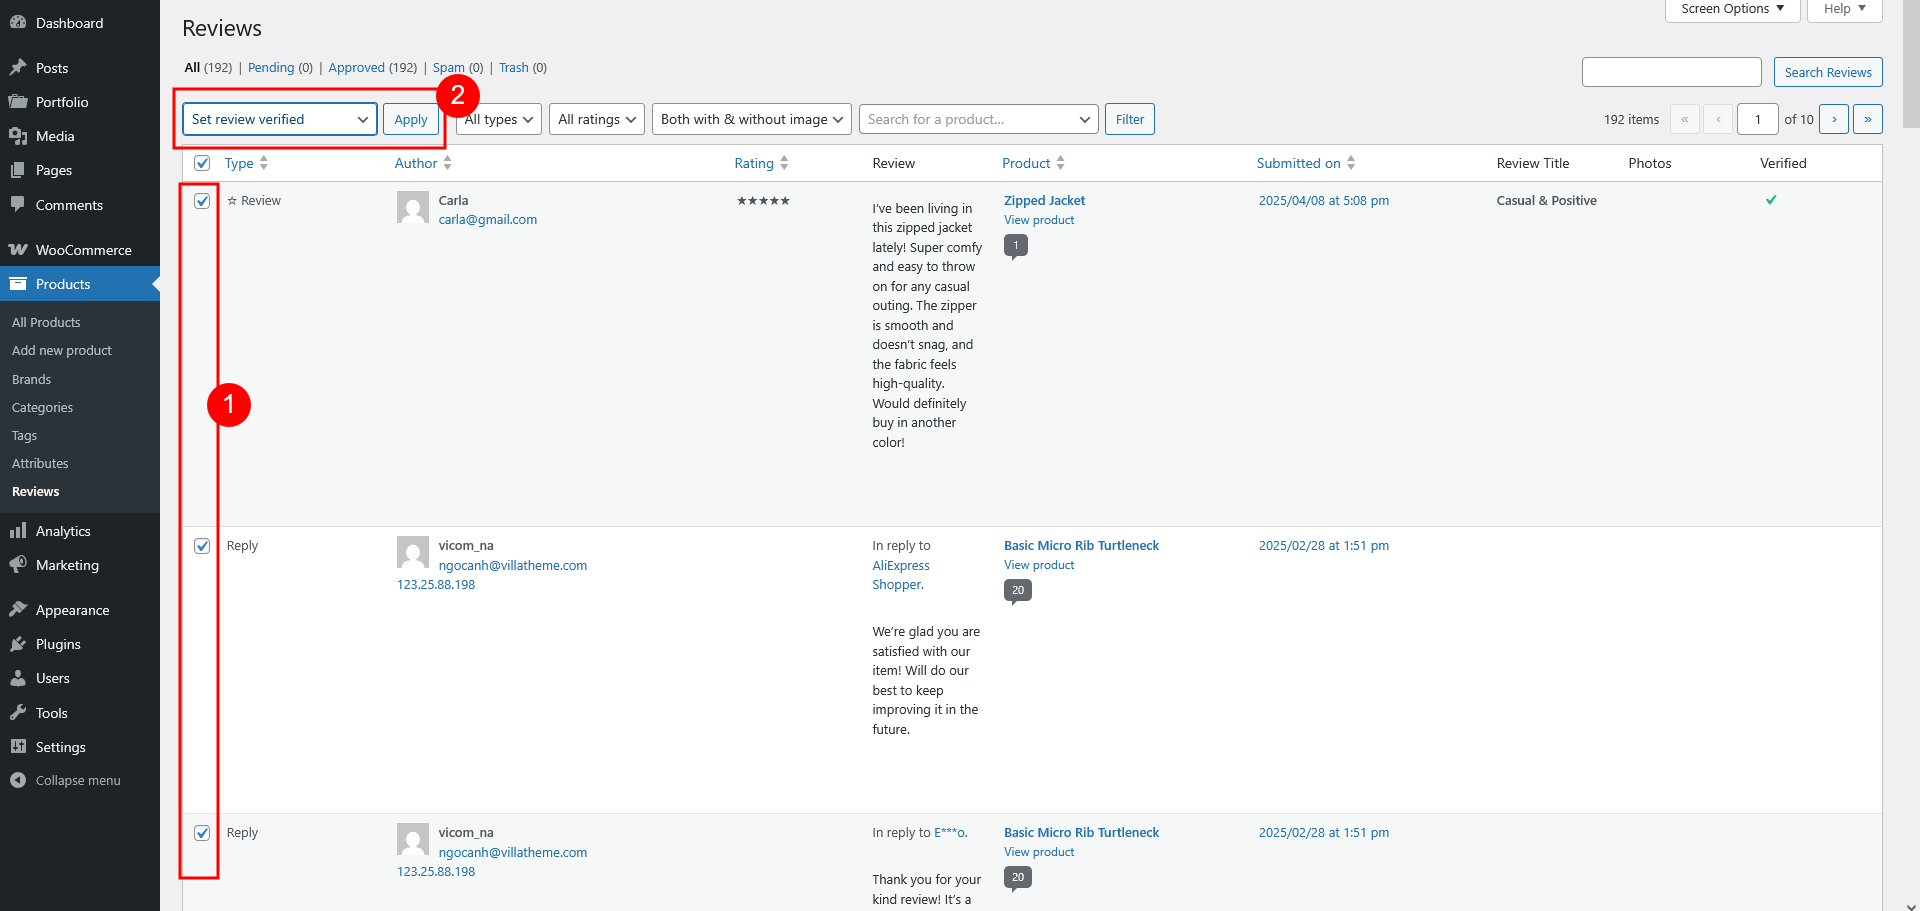
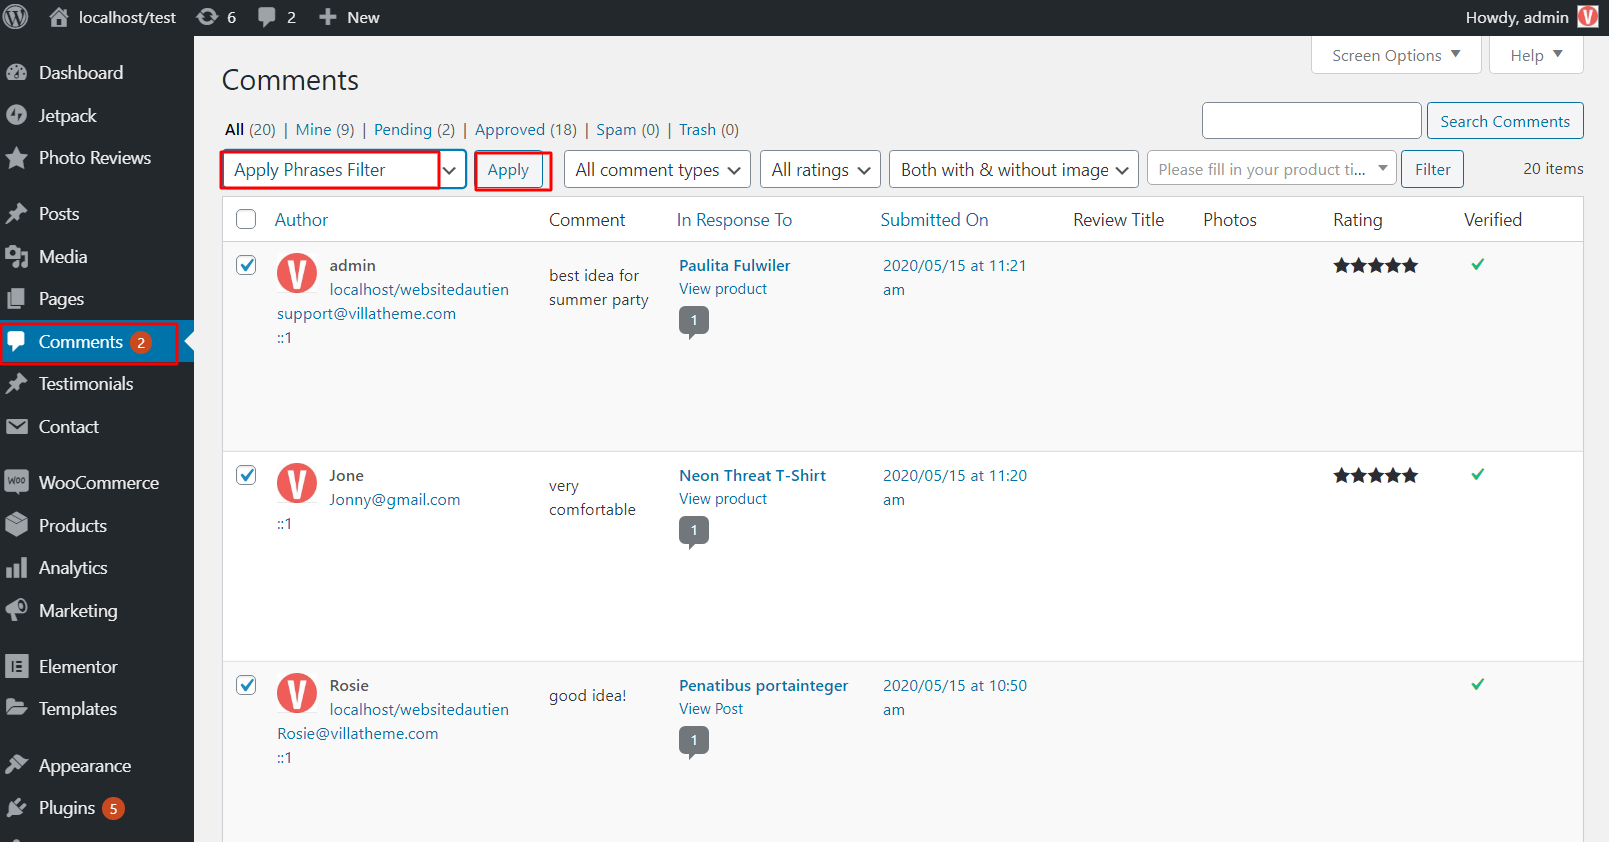
- Manage Customer Reviews in Backend
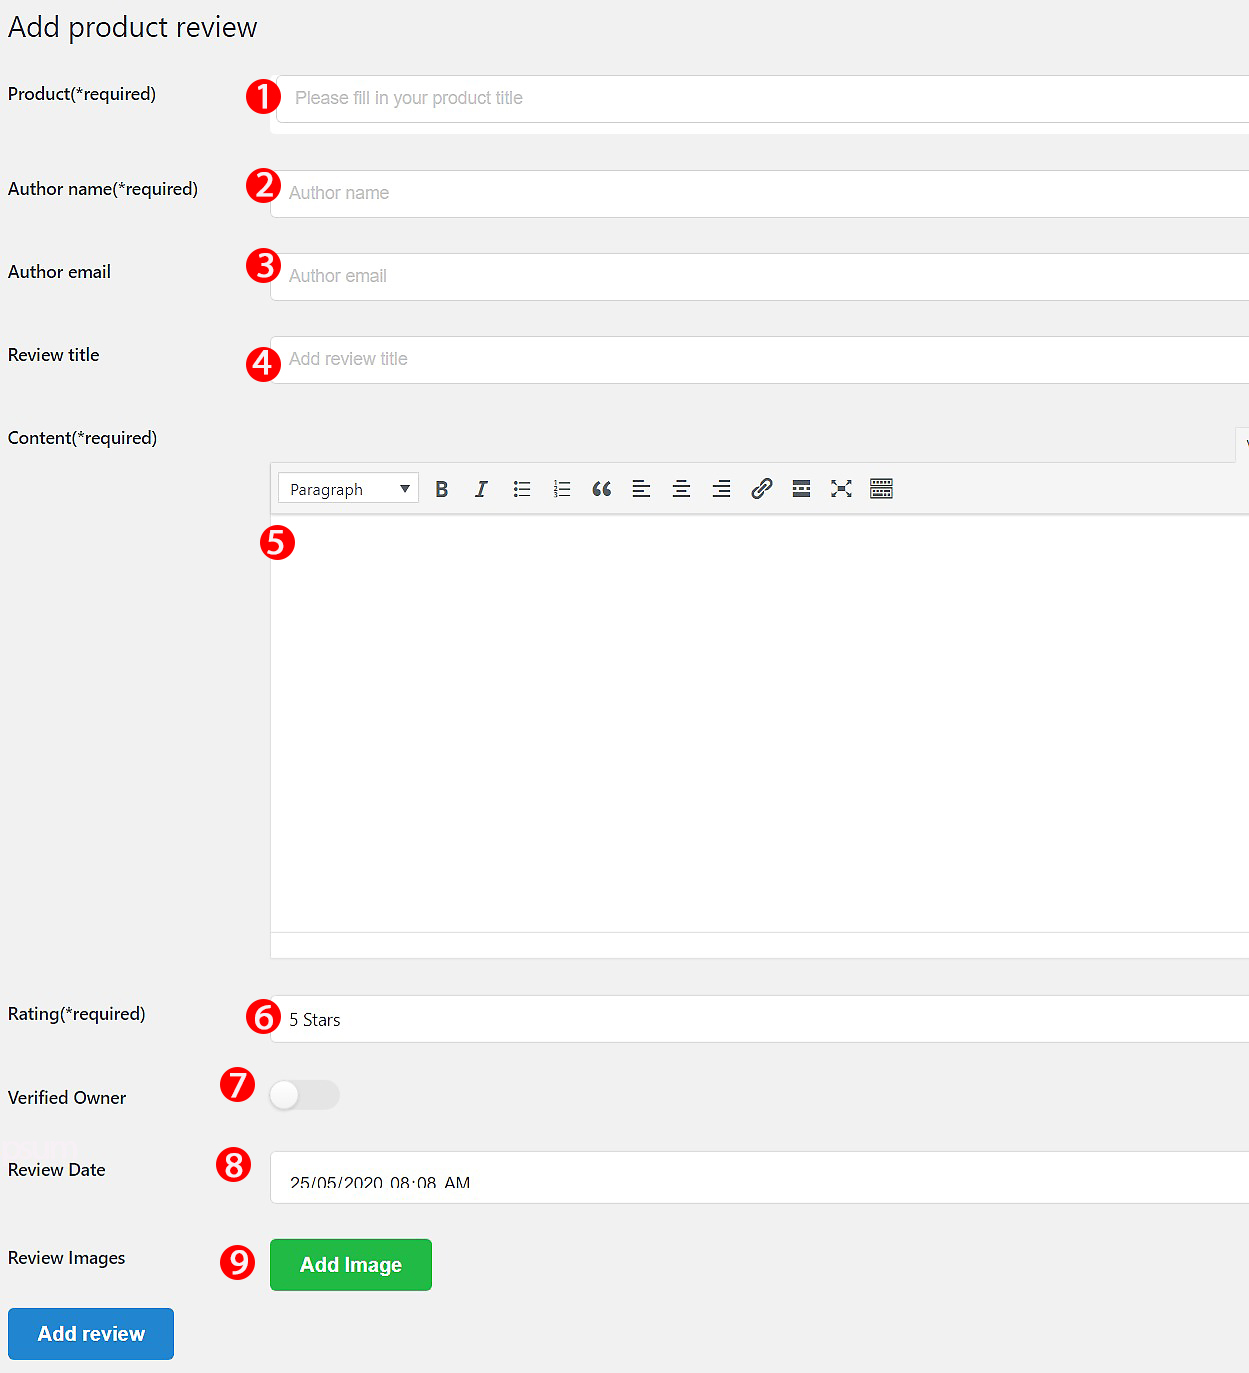
- Add Reviews Manually
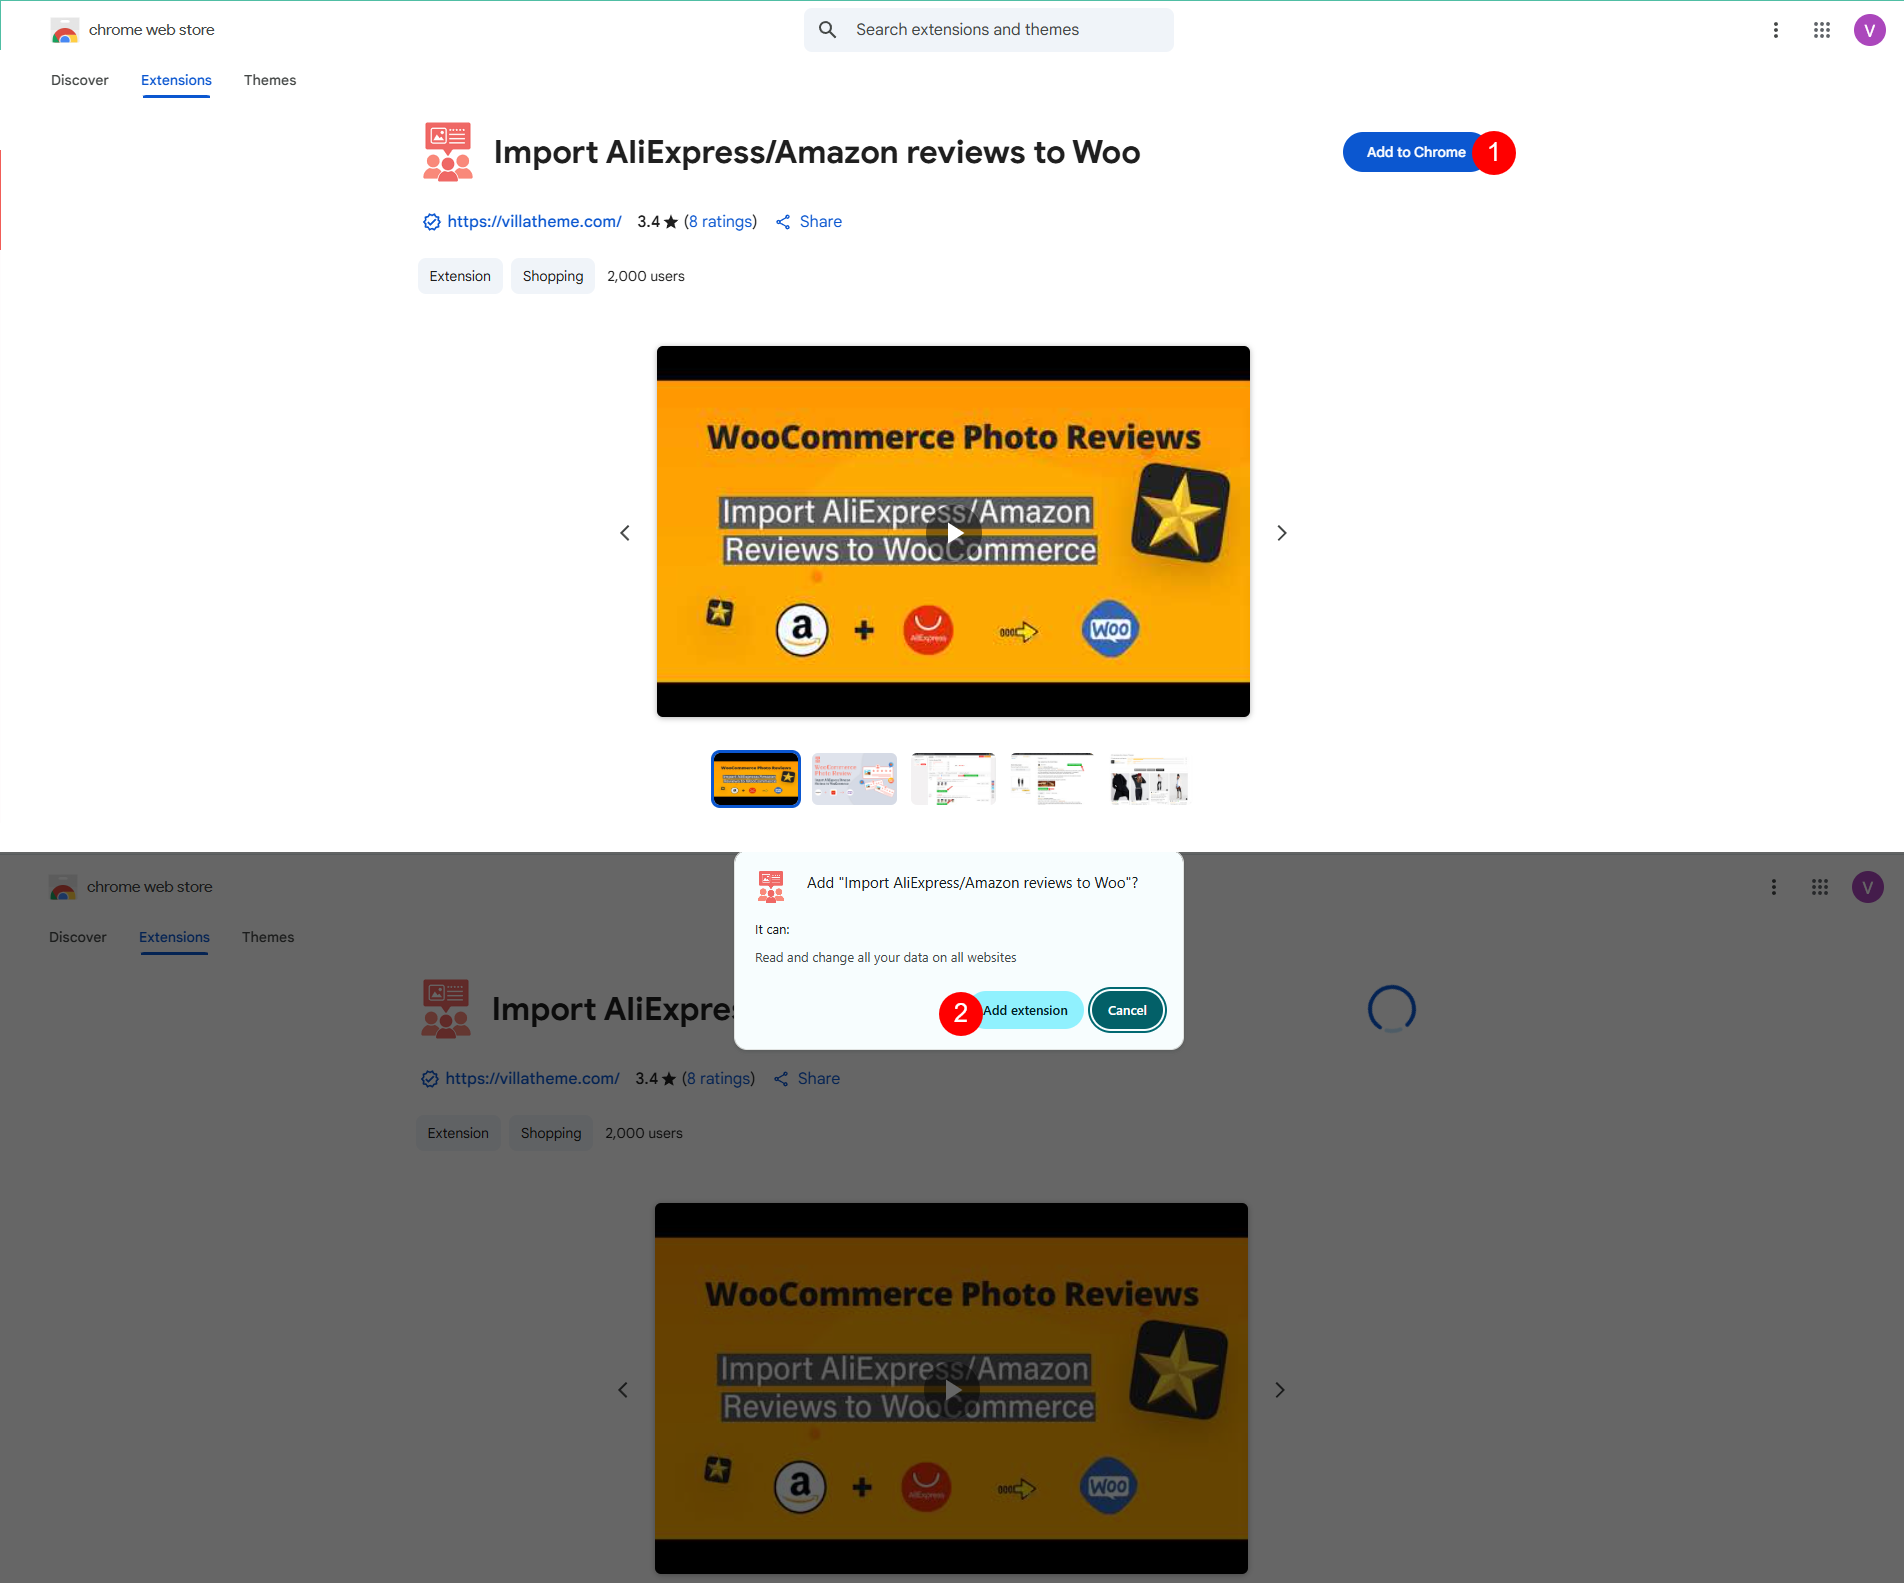
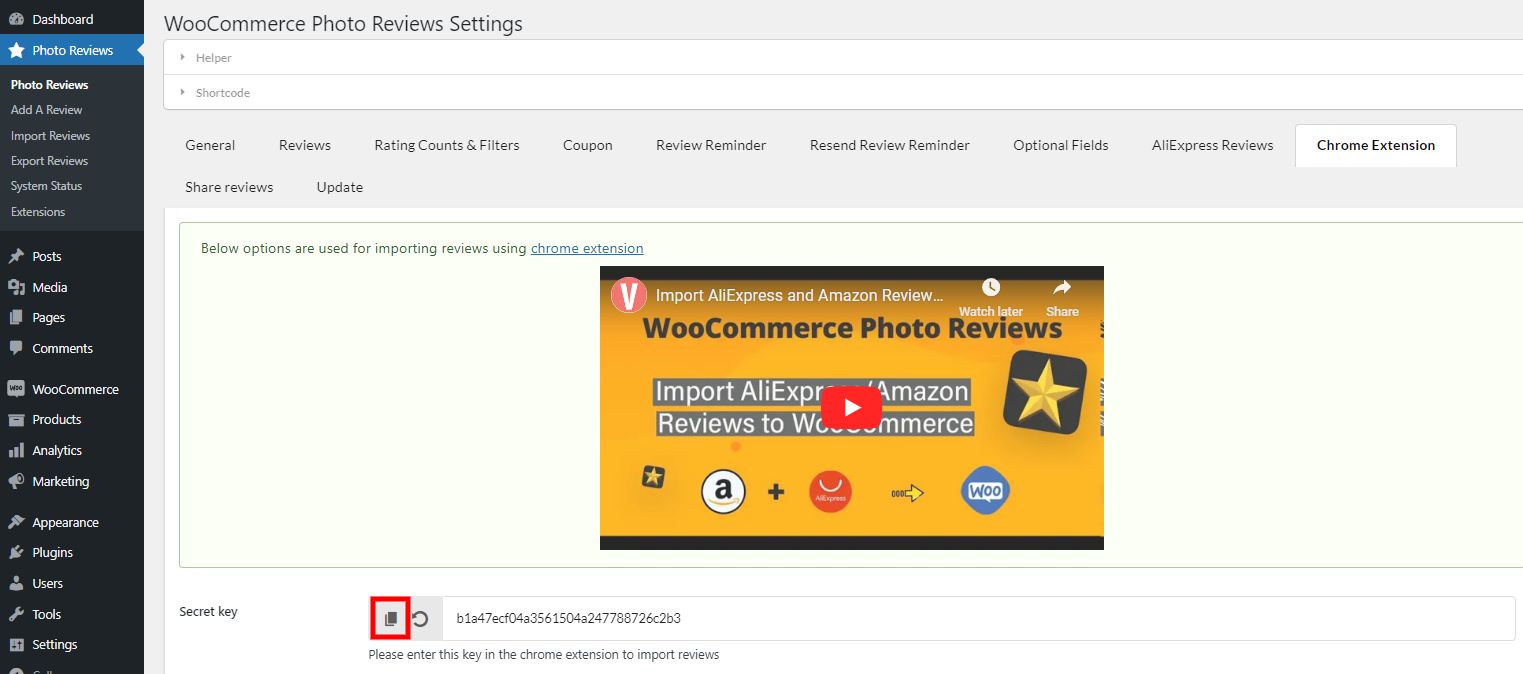
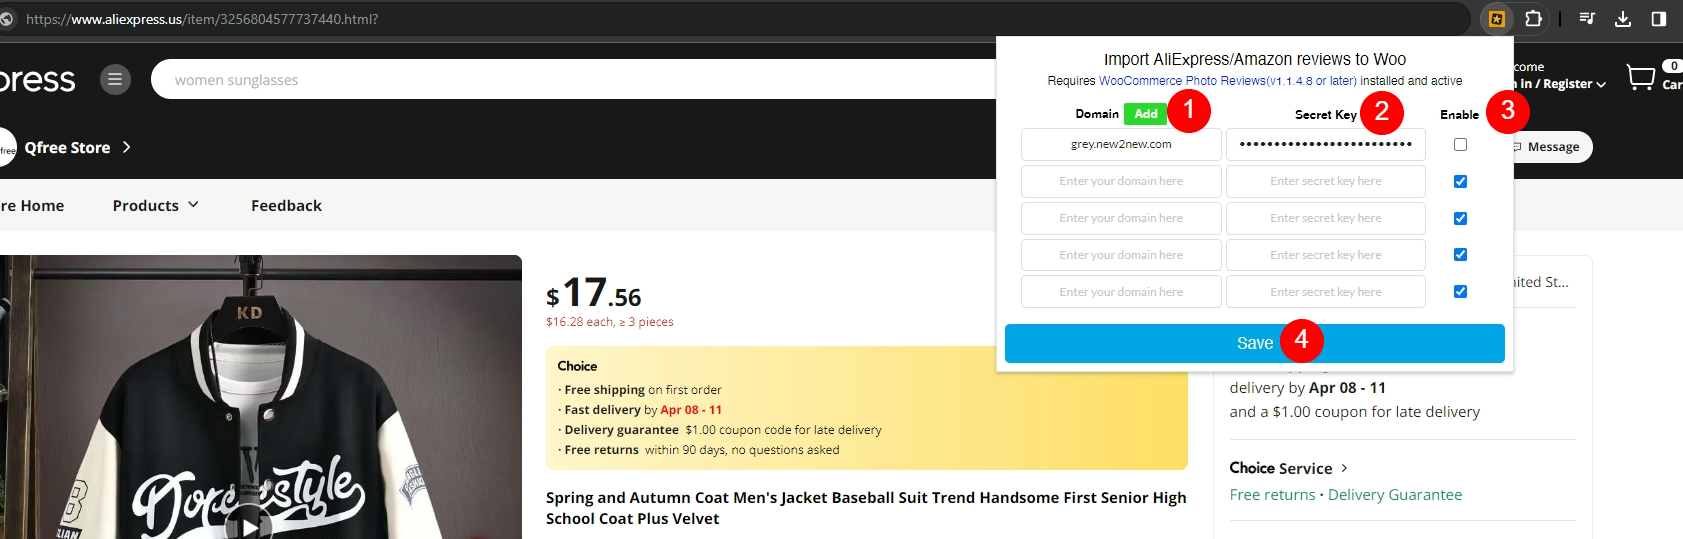
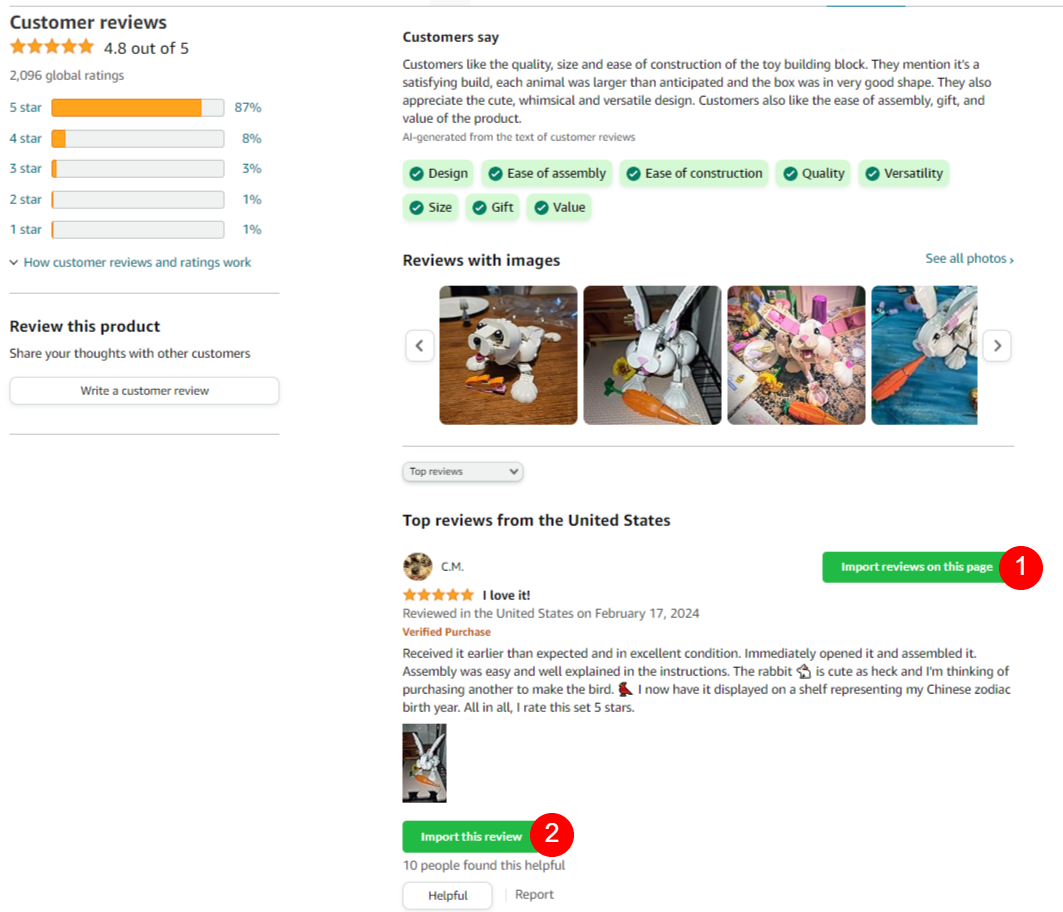
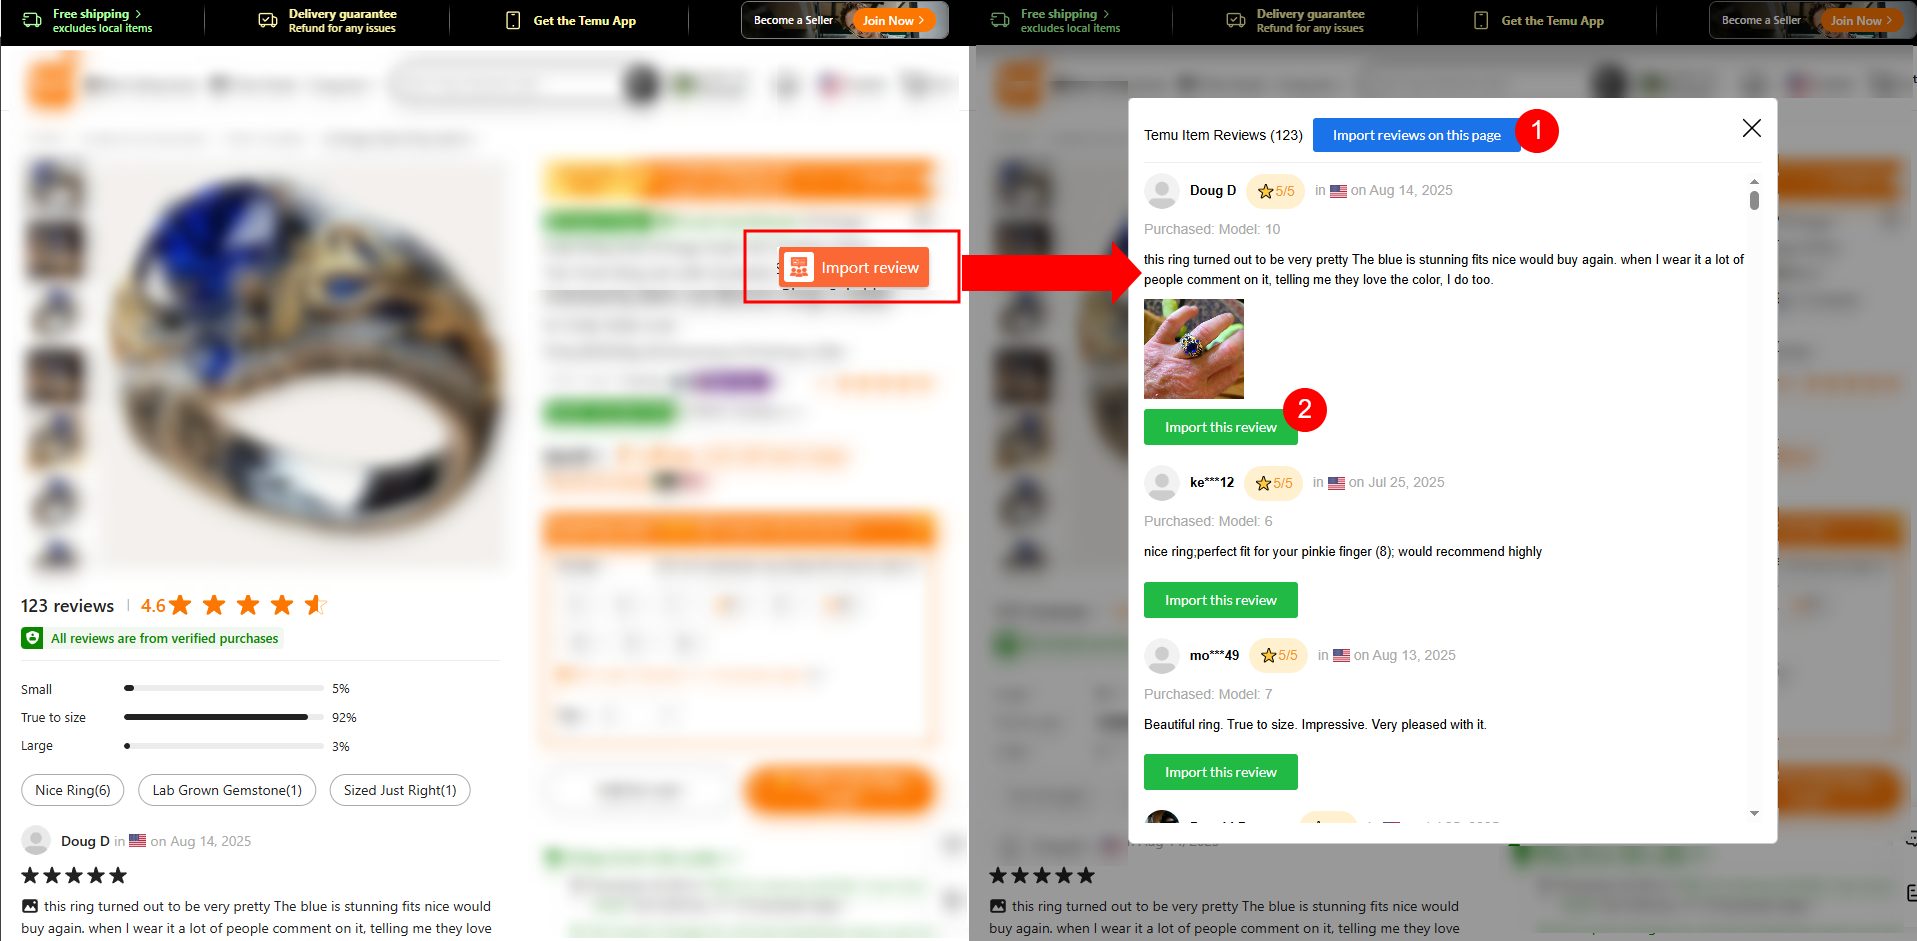
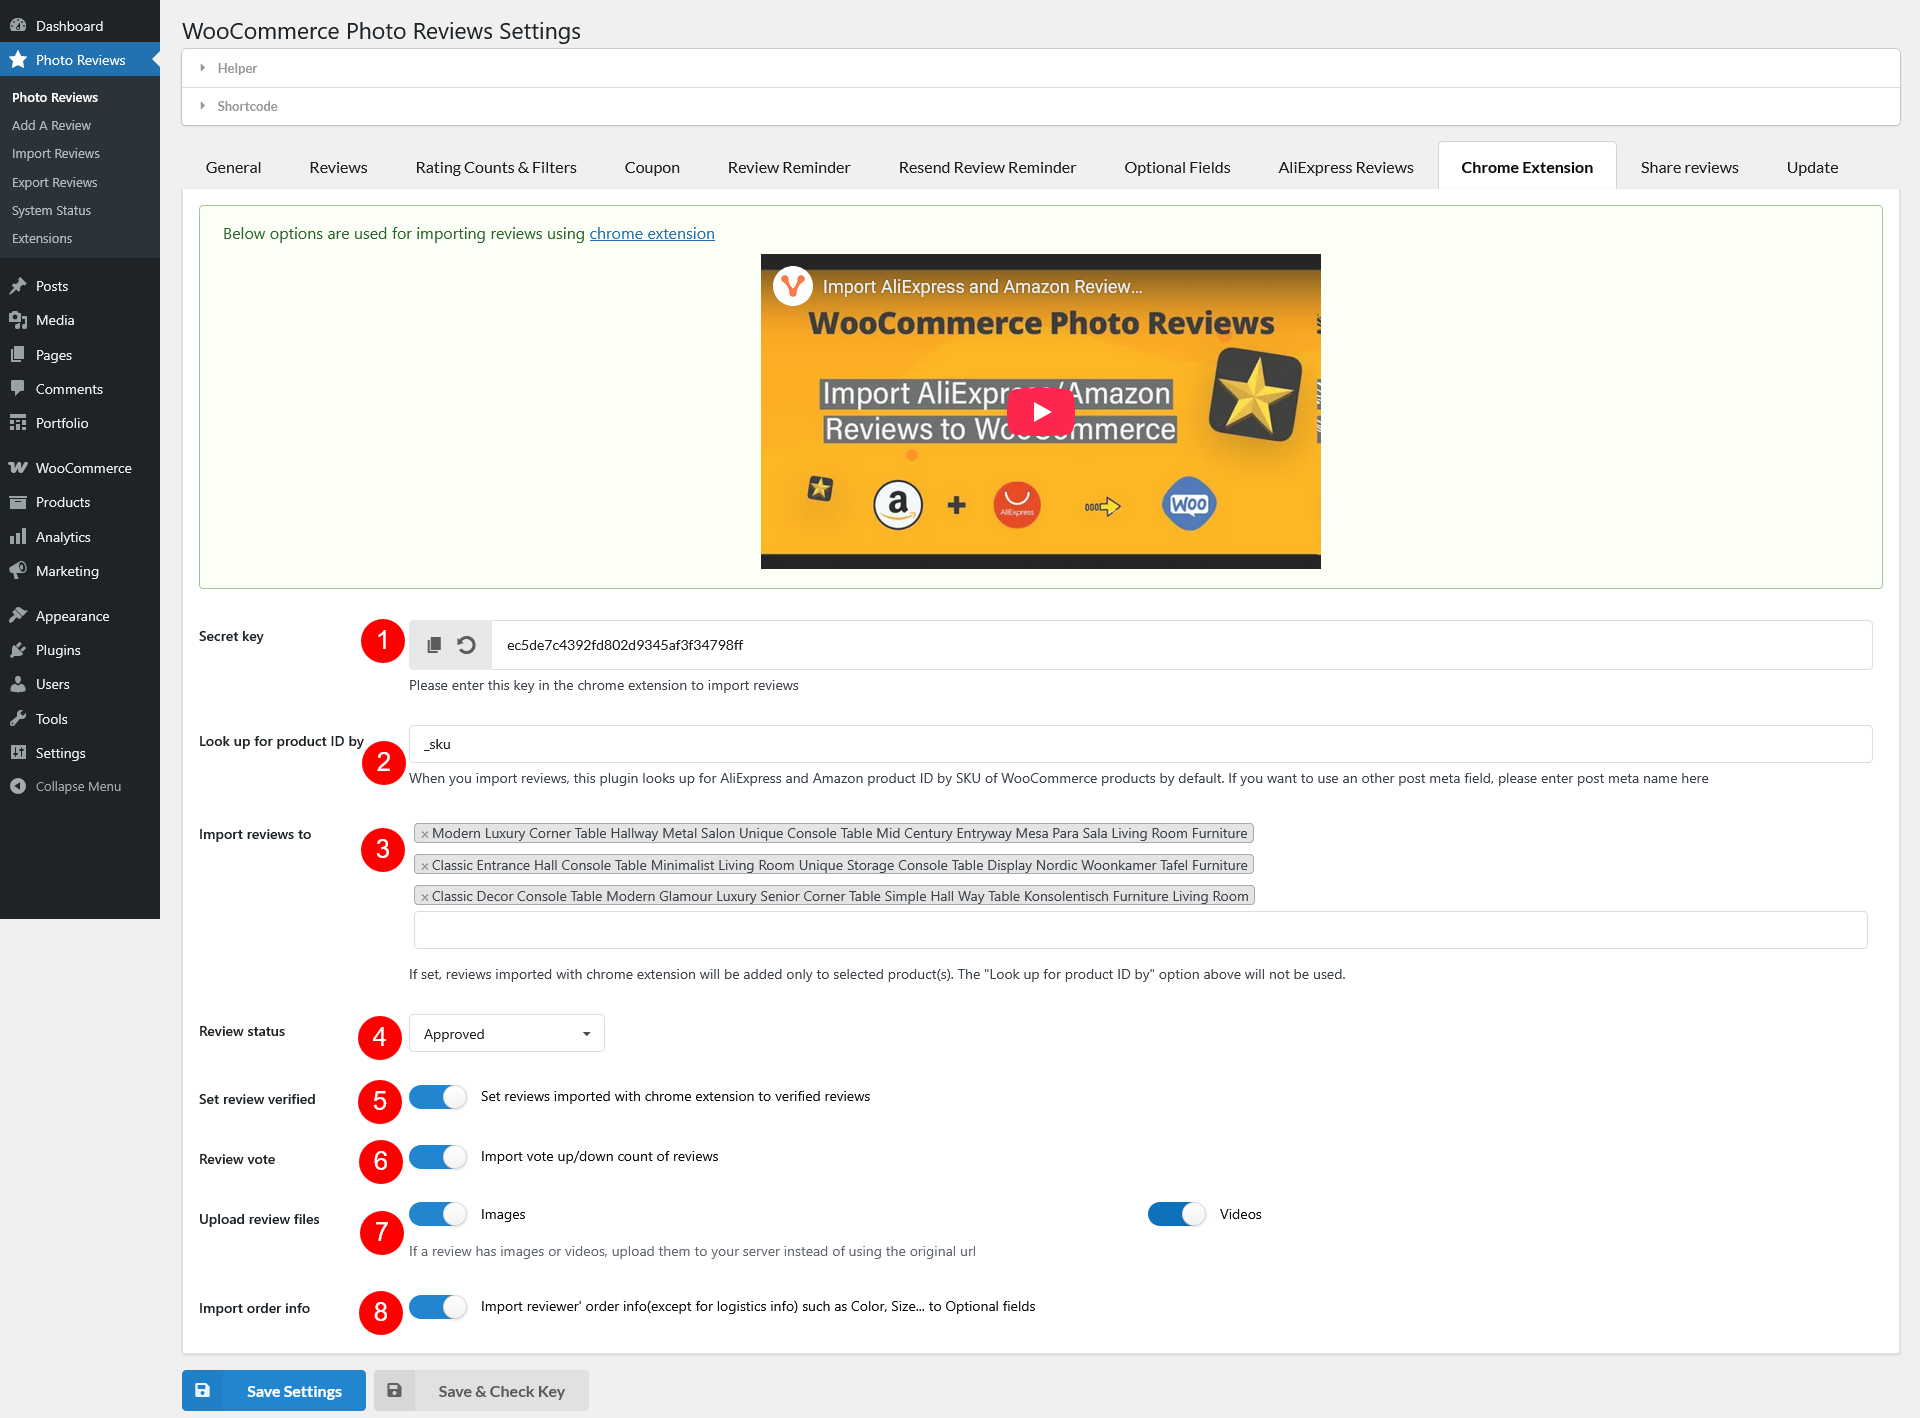
- Chrome Extension
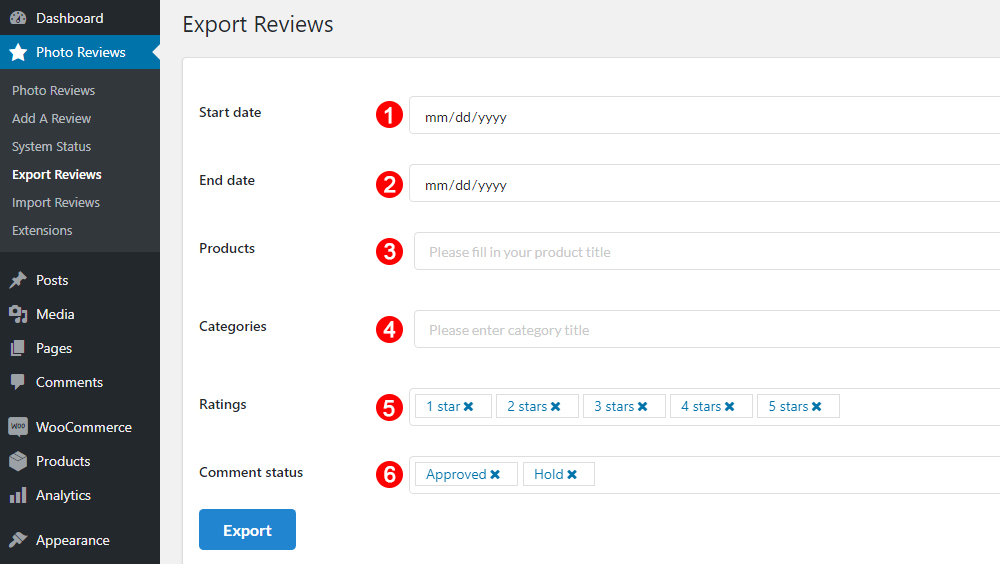
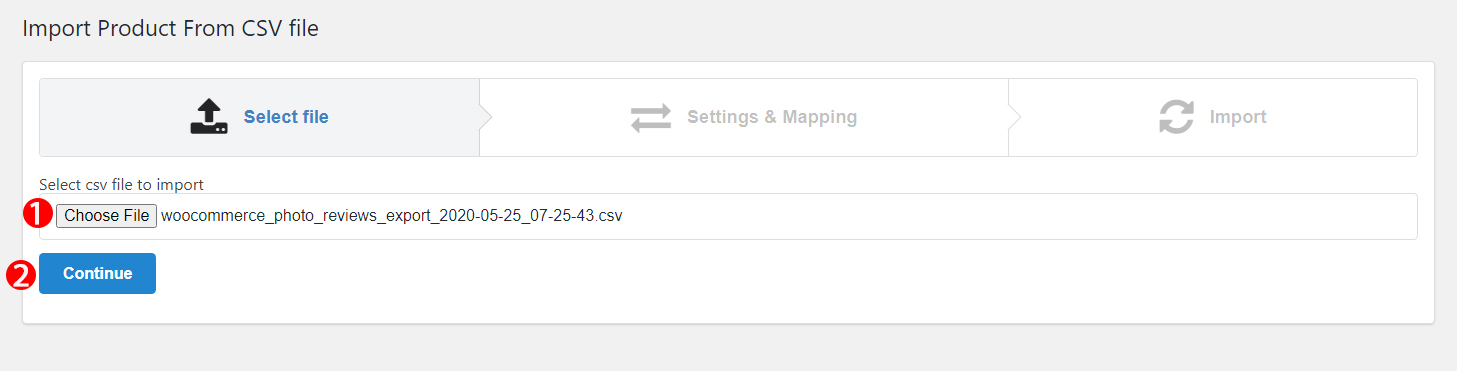
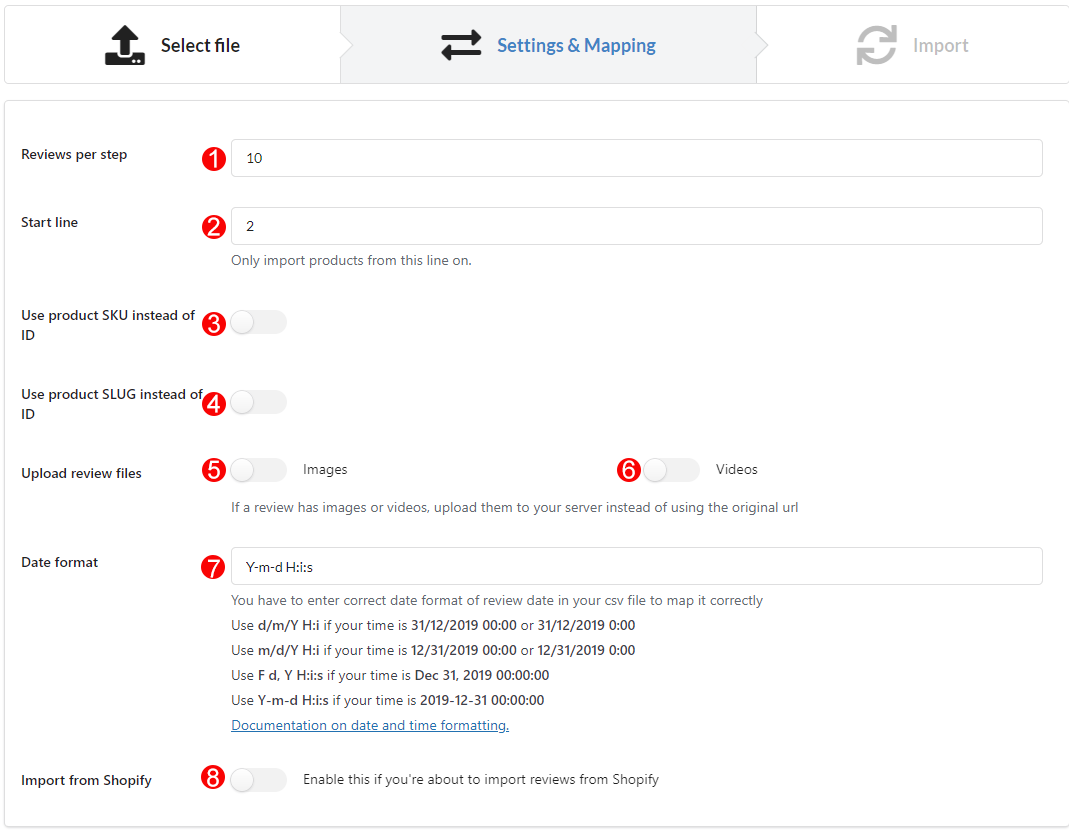
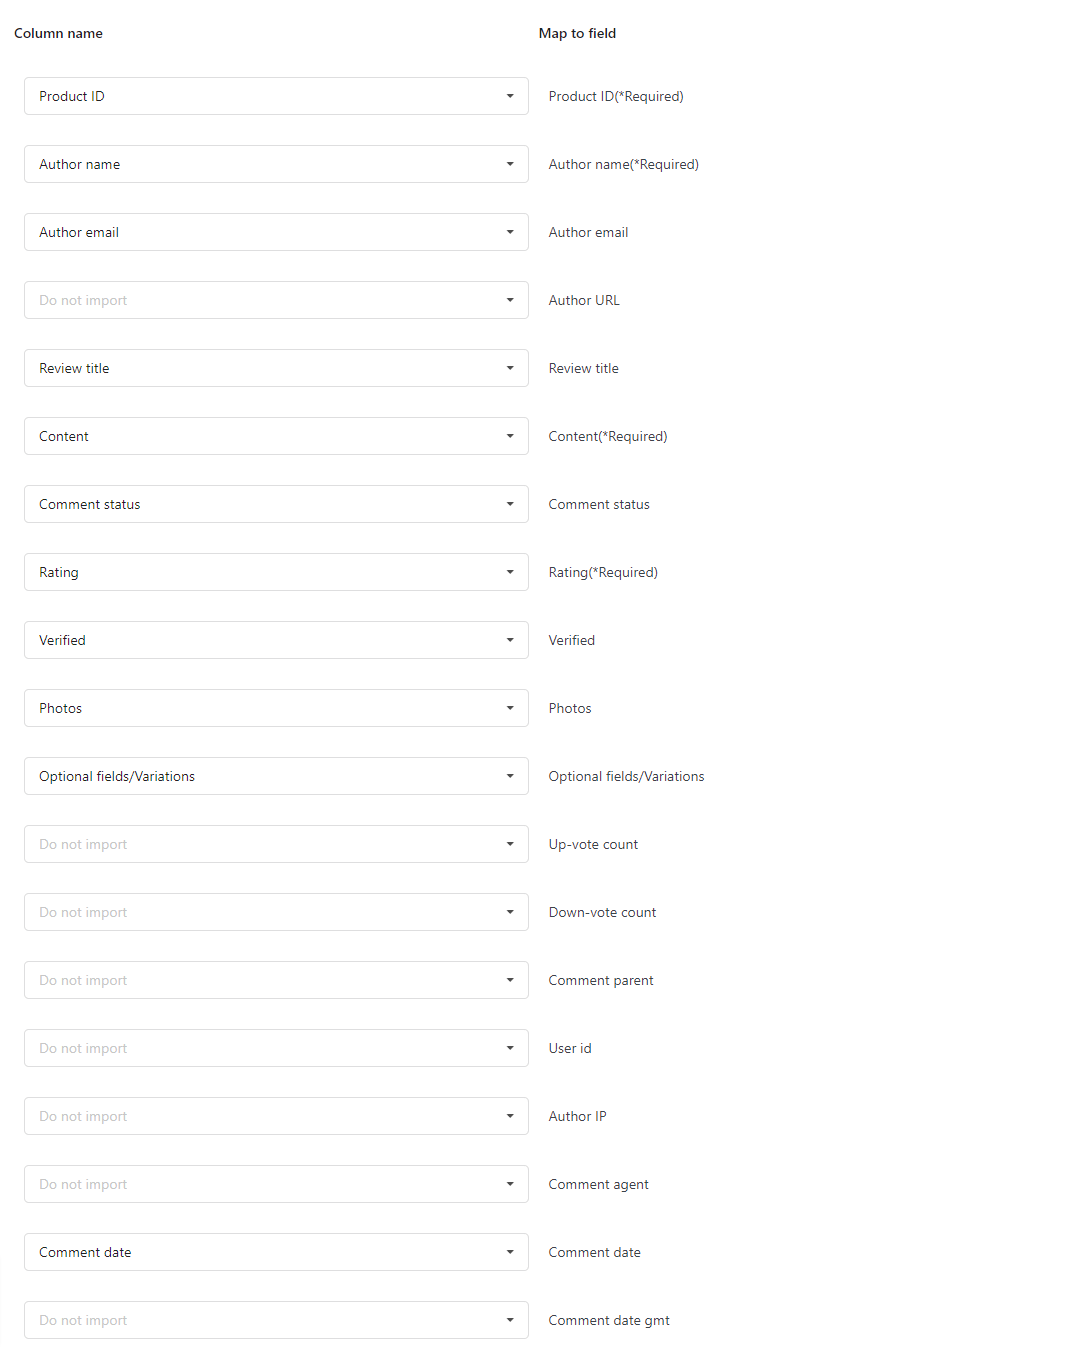
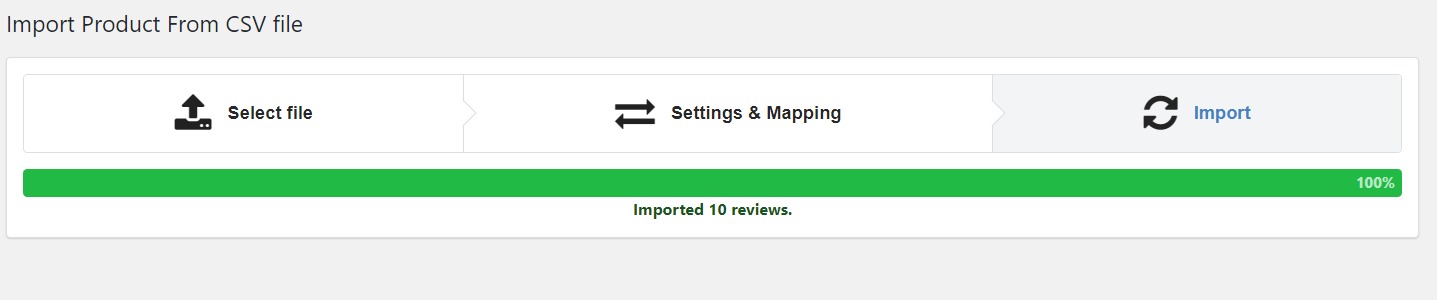
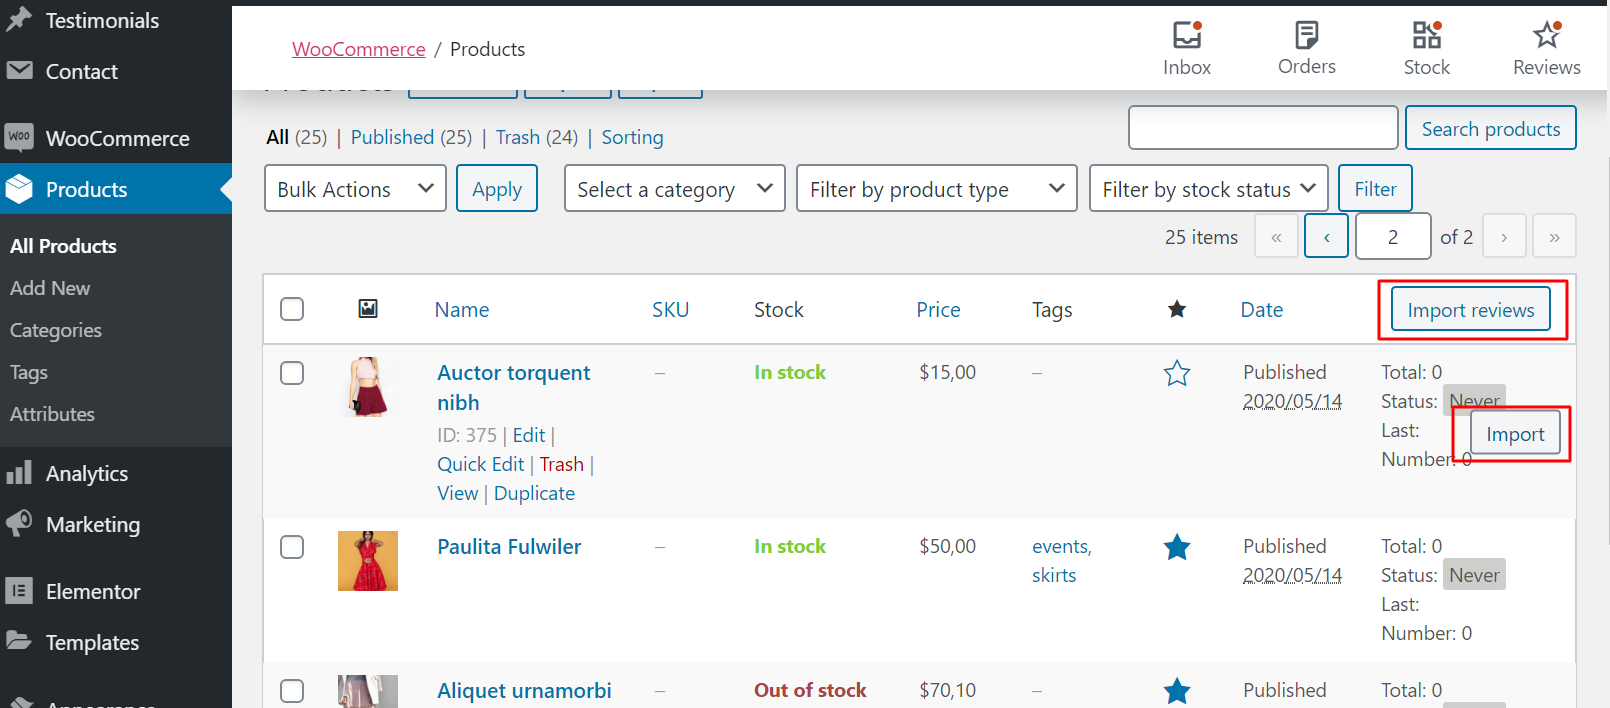
- Import/Export Reviews
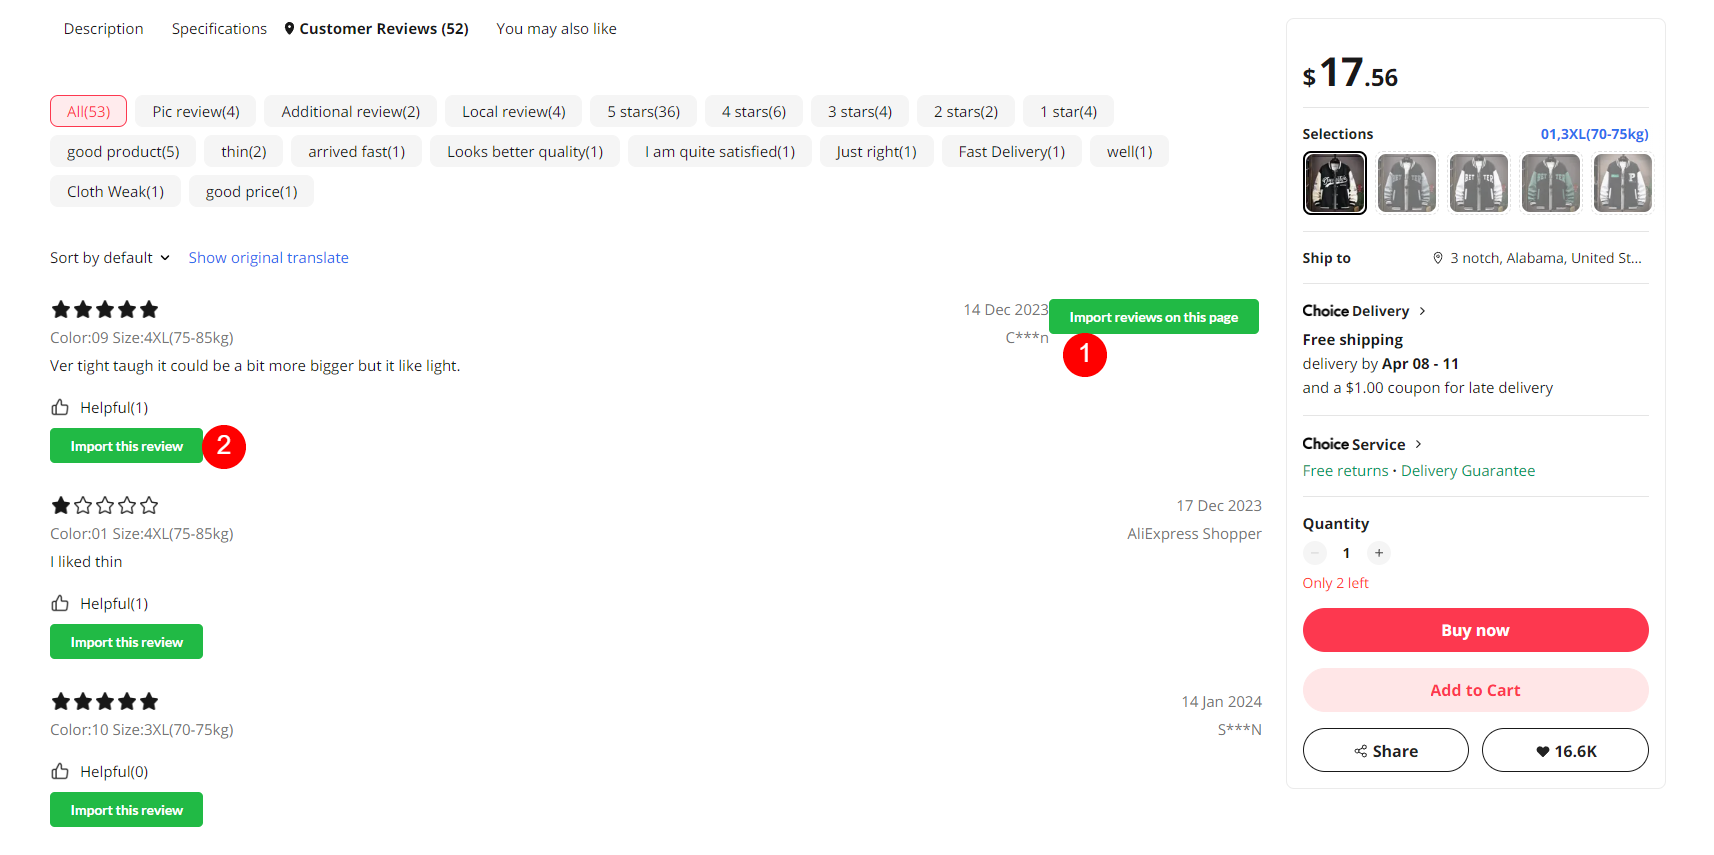
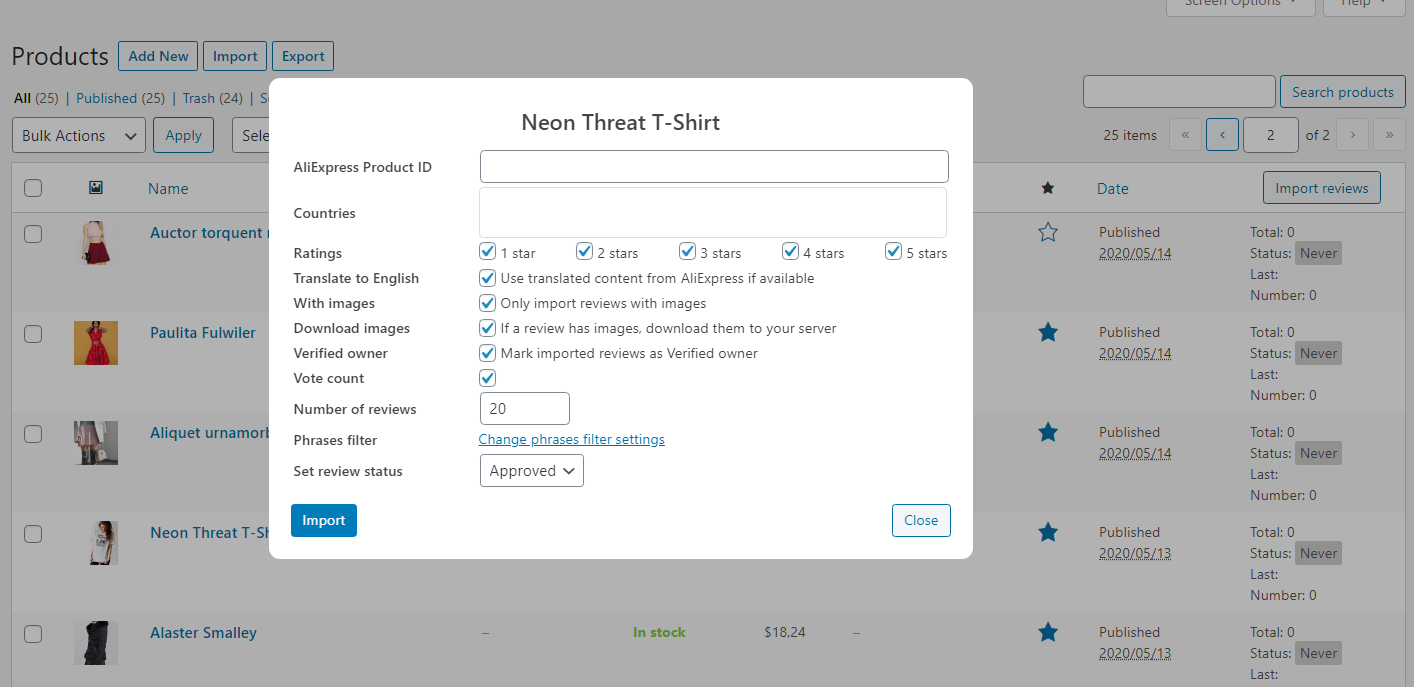
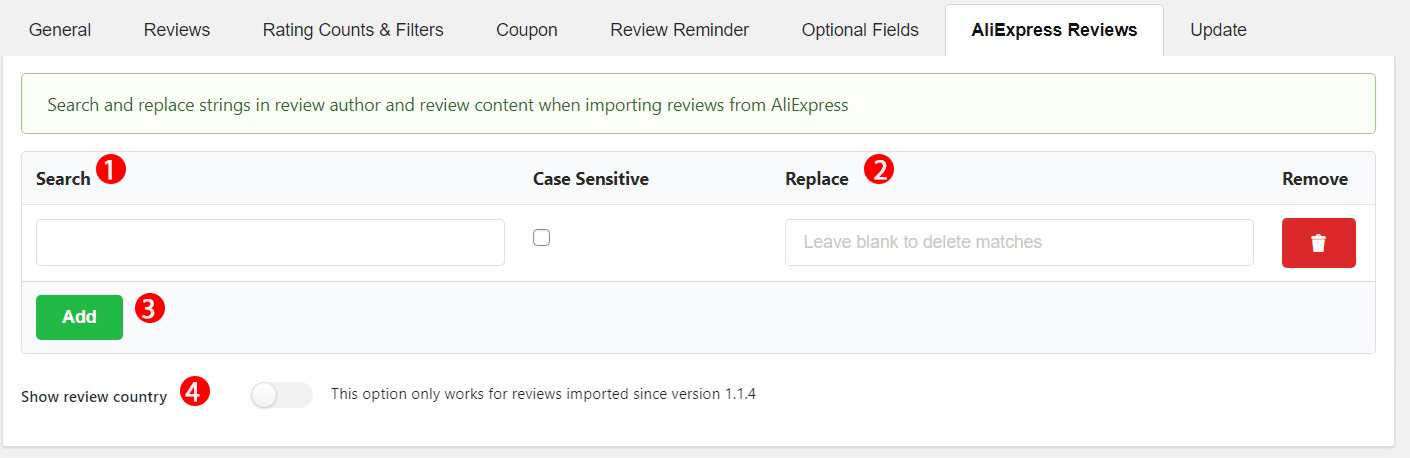
- AliExpress Reviews
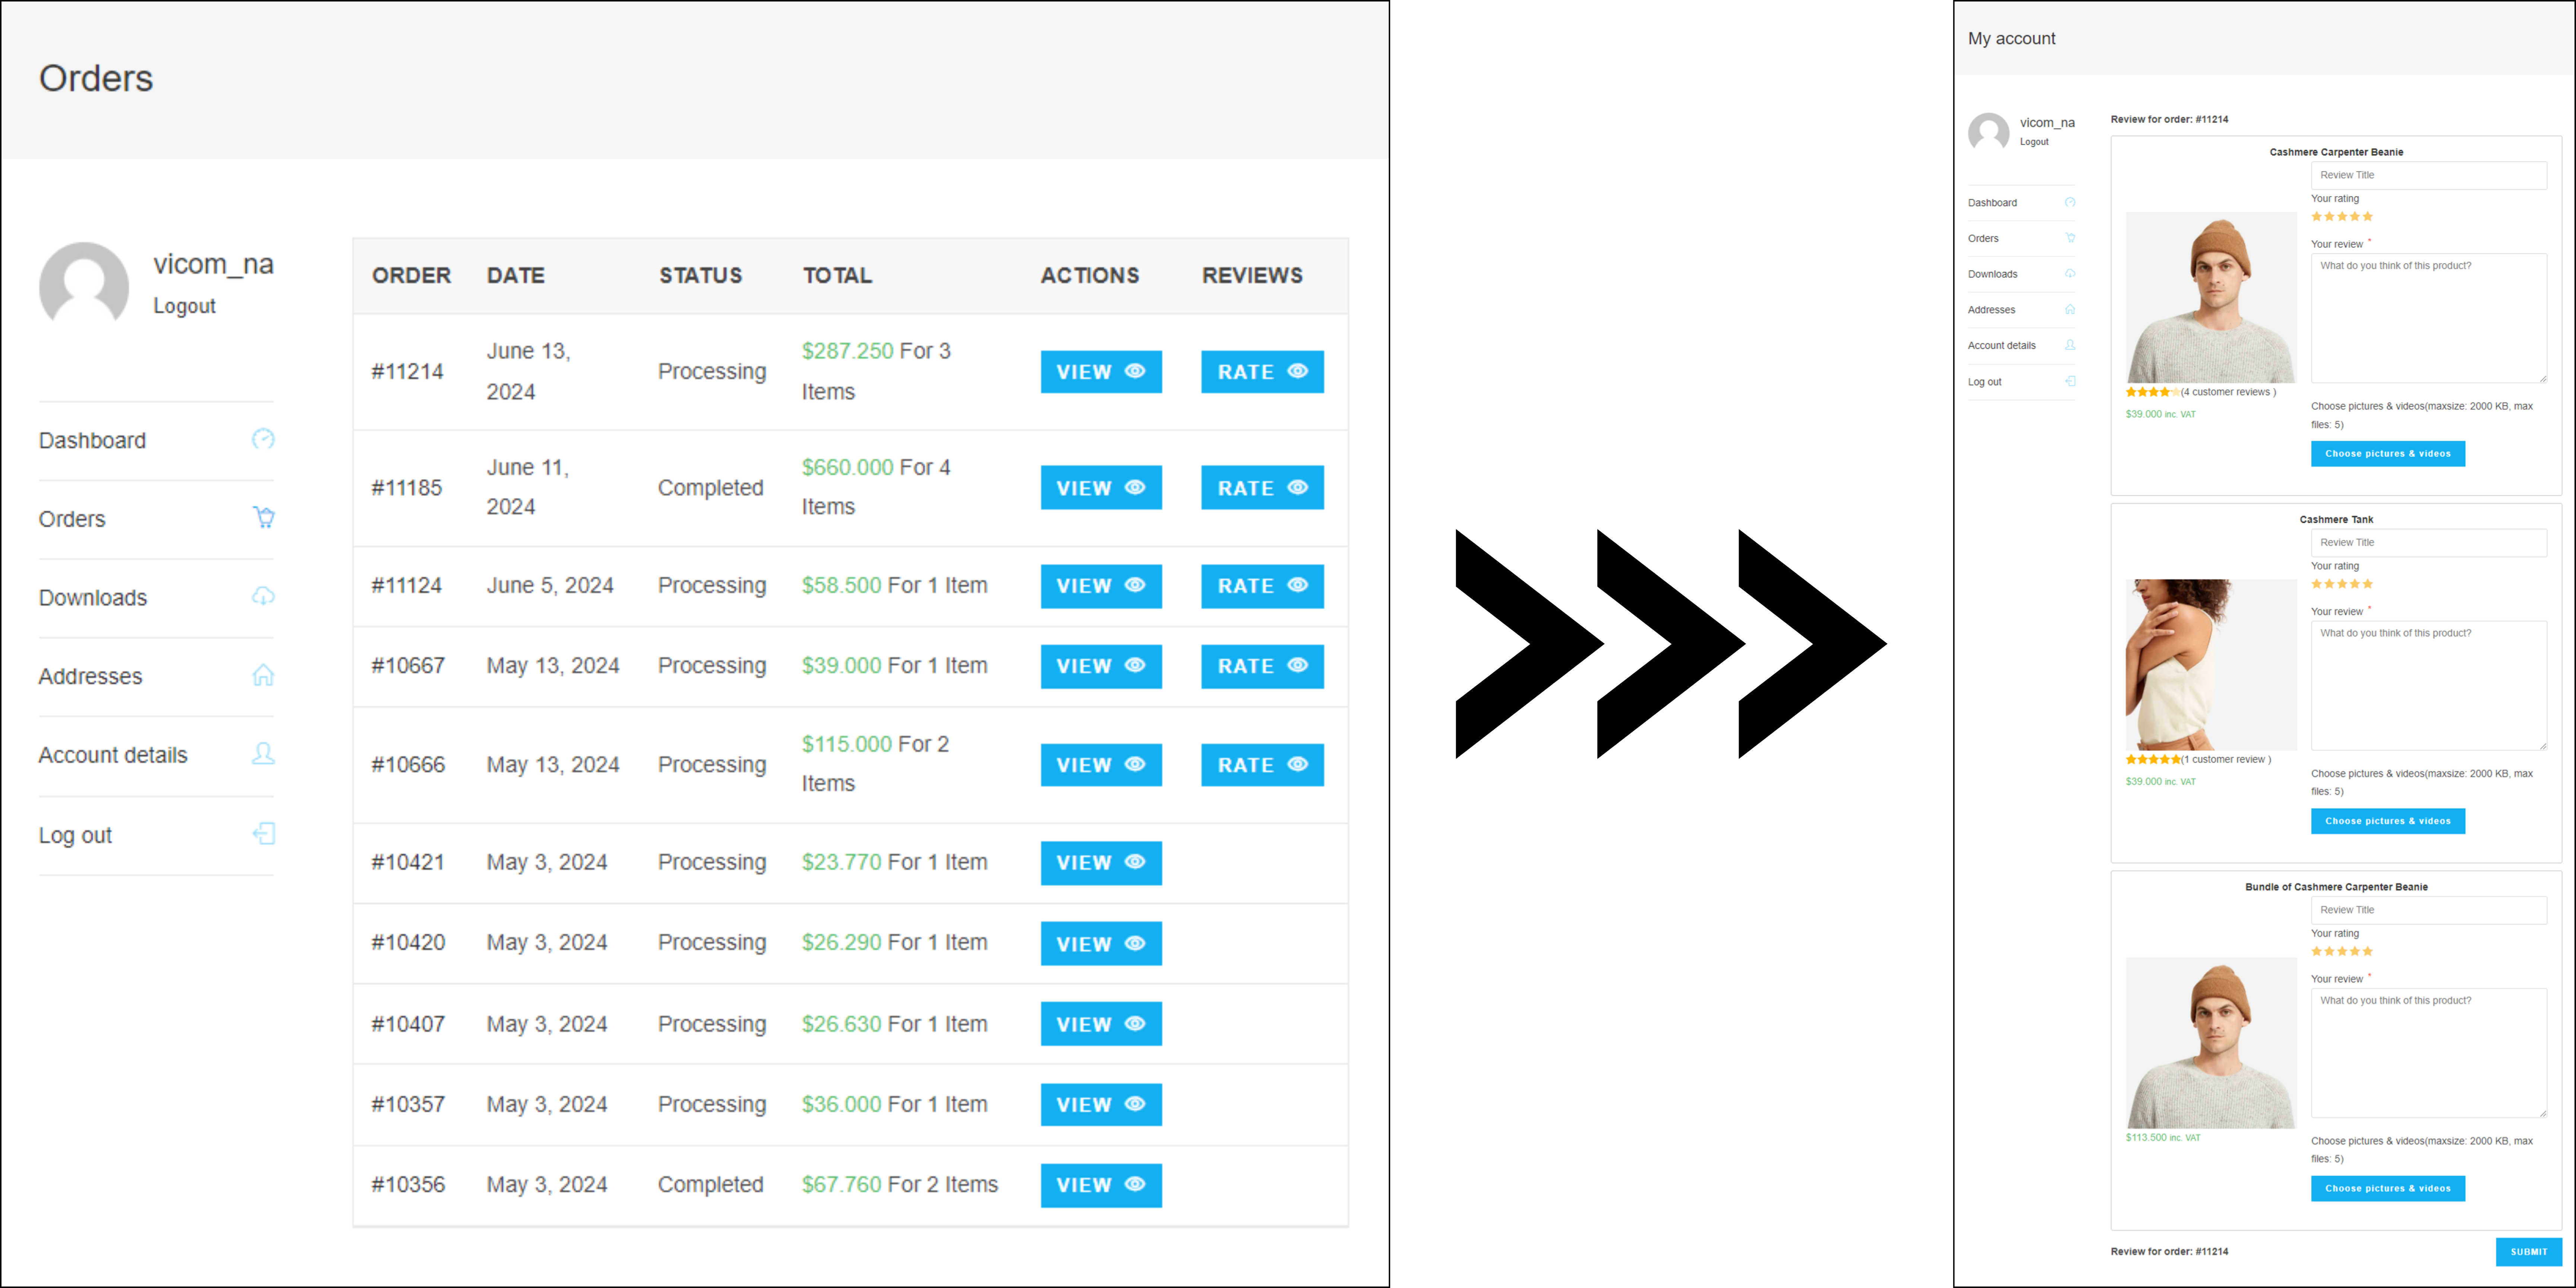
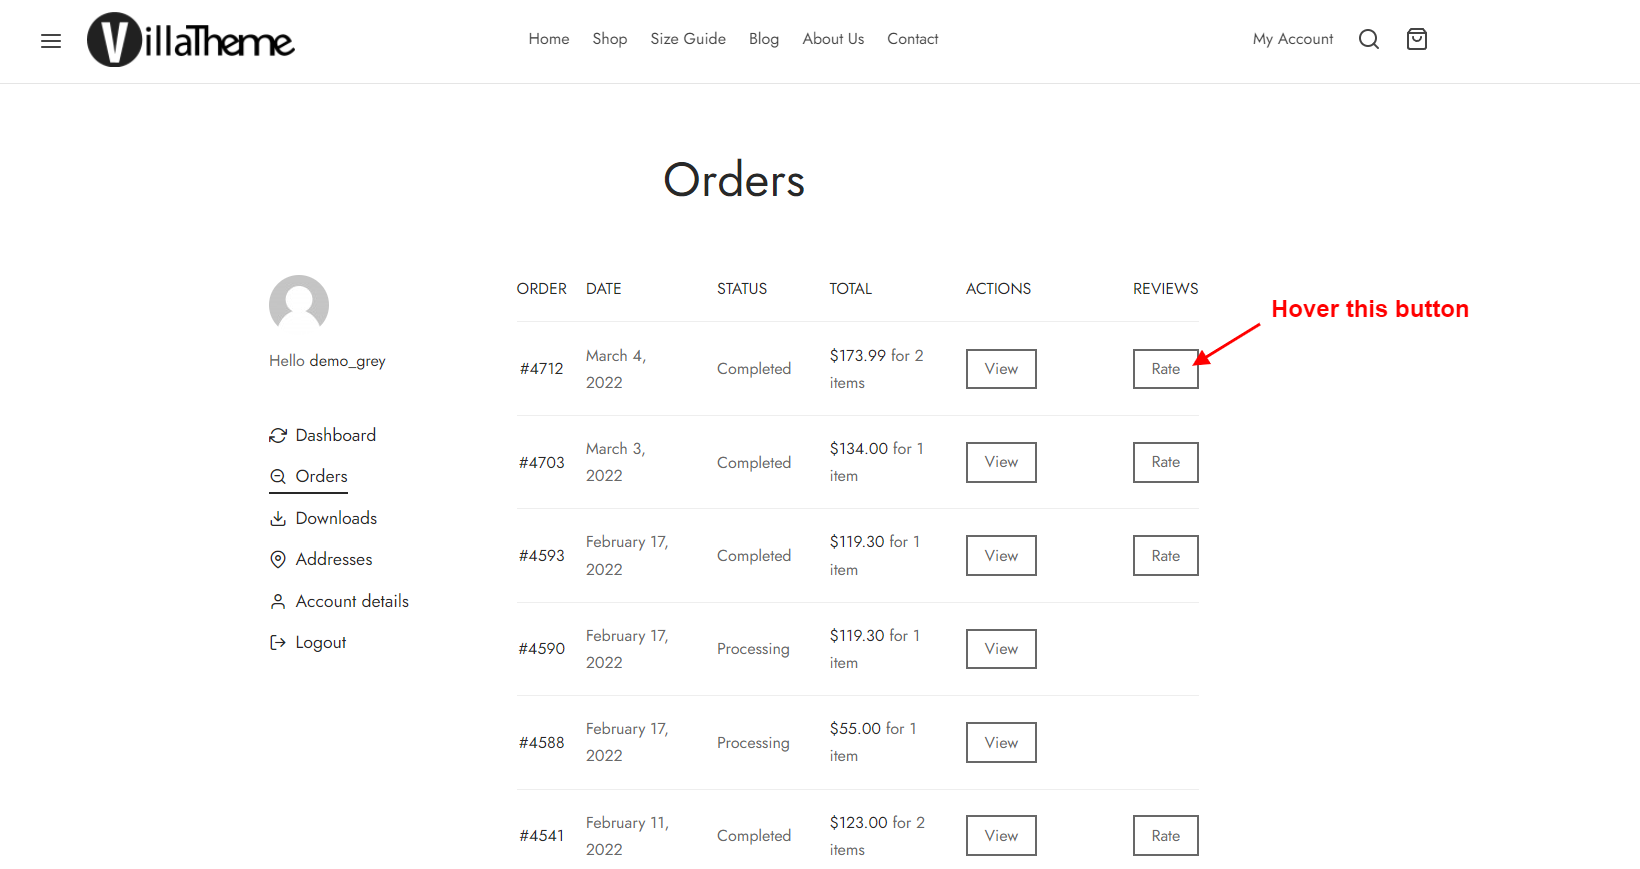
- Allow Reviewing Order on My account page
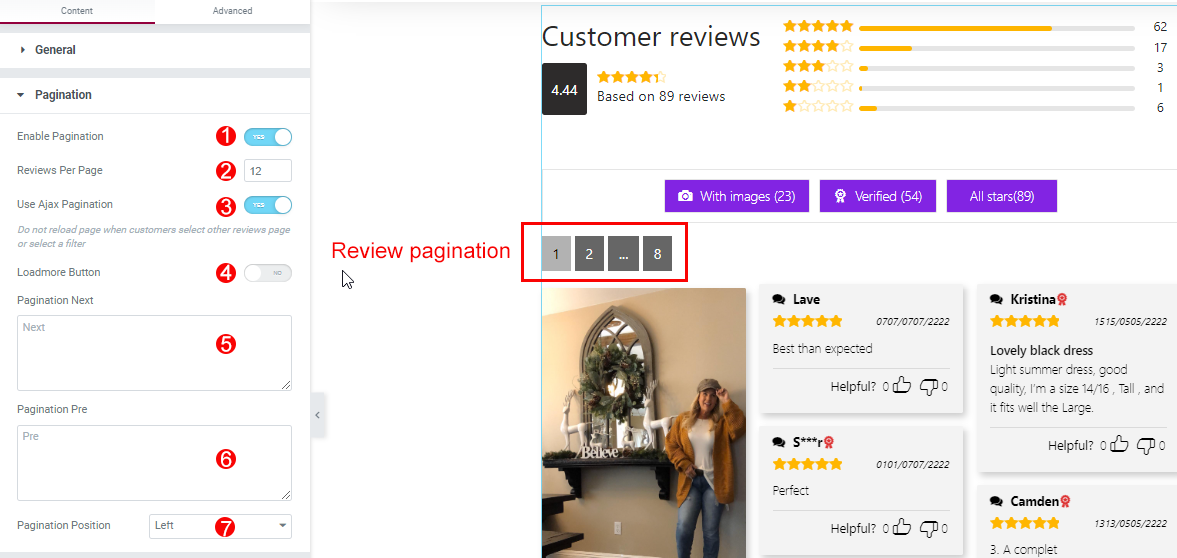
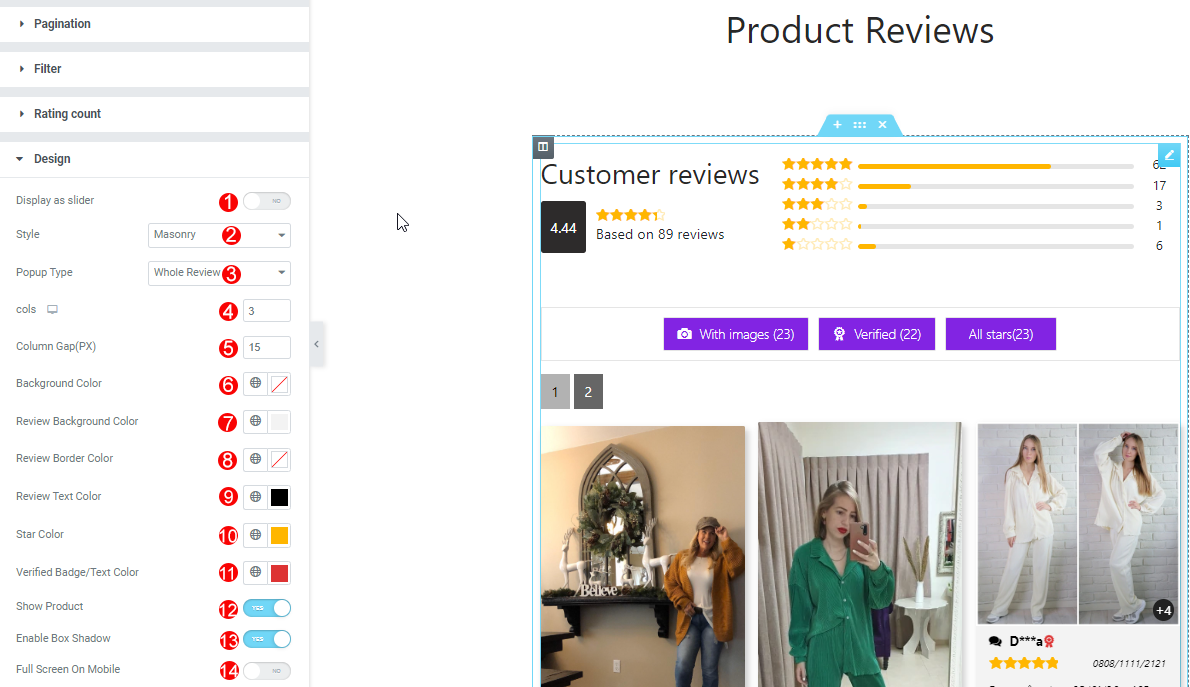
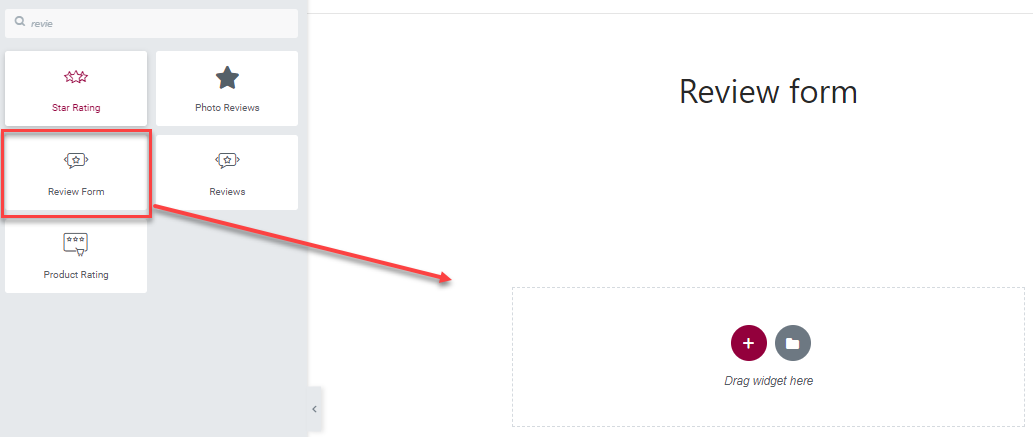
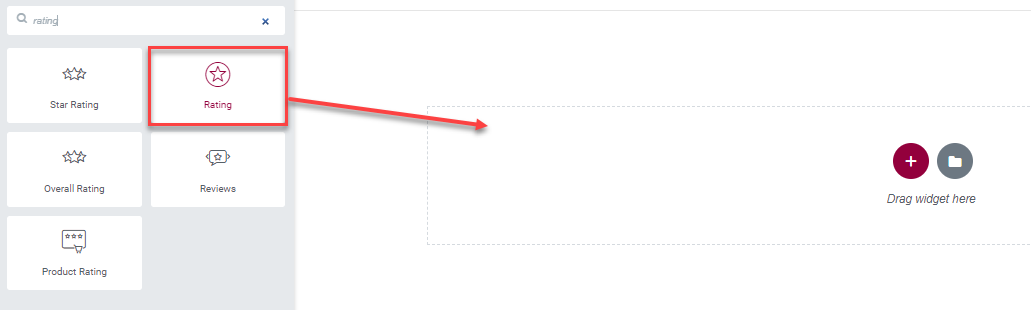
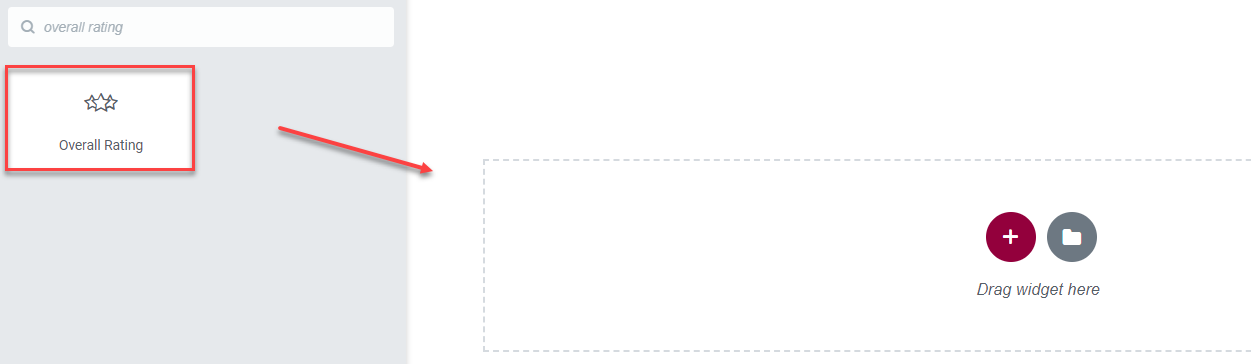
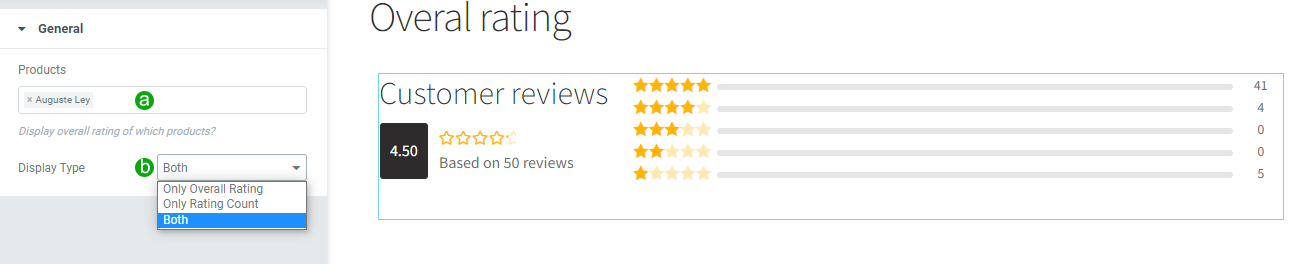
- Elementor Widgets
- Shortcodes
- COMPATIBILITY
- Override templates
- Extra Information
Copyright Villatheme 2015-2026