Copyright Villatheme 2015-2026
Created: 2016.06
Latest updated: 2026.06 – Updated version: 1.7.1
By: VillaTheme
Thank you for purchasing our plugin. If you have any questions that are beyond the scope of this documentation, please feel free to request support at our Support Forum. Thanks so much!
System minimum requirements:
Go to Plugin/Add New /Upload Plugin/Choose file/ select plugin file zip/ Install Now/Active Plugin
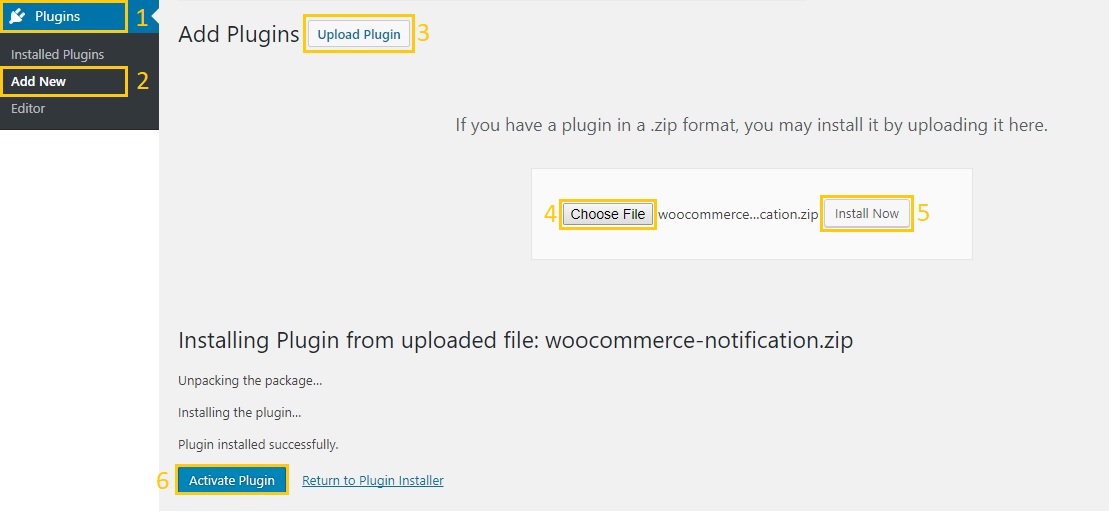
Done! Let’s start using the plugin.
Visit our video guide below to learn how to install and use the WooCommerce Notification plugin.
After successfully installing the plugin. Go to Dashboard/ Woo Notification to view the plugin back end.
Step 1: Enable the plugin on PC and mobile.
Go to Woo Notification > General.

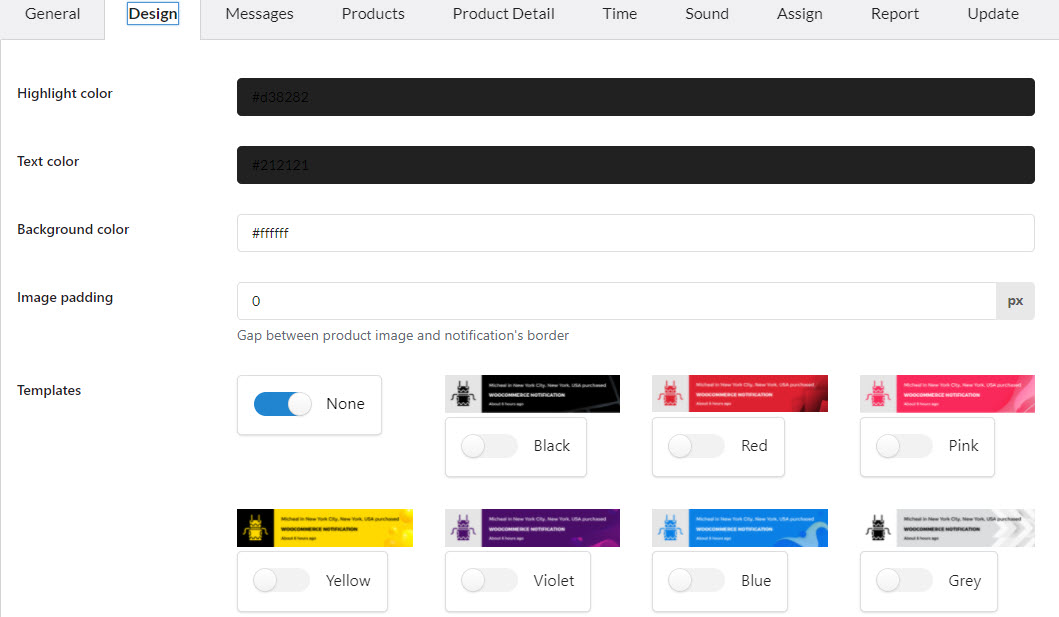
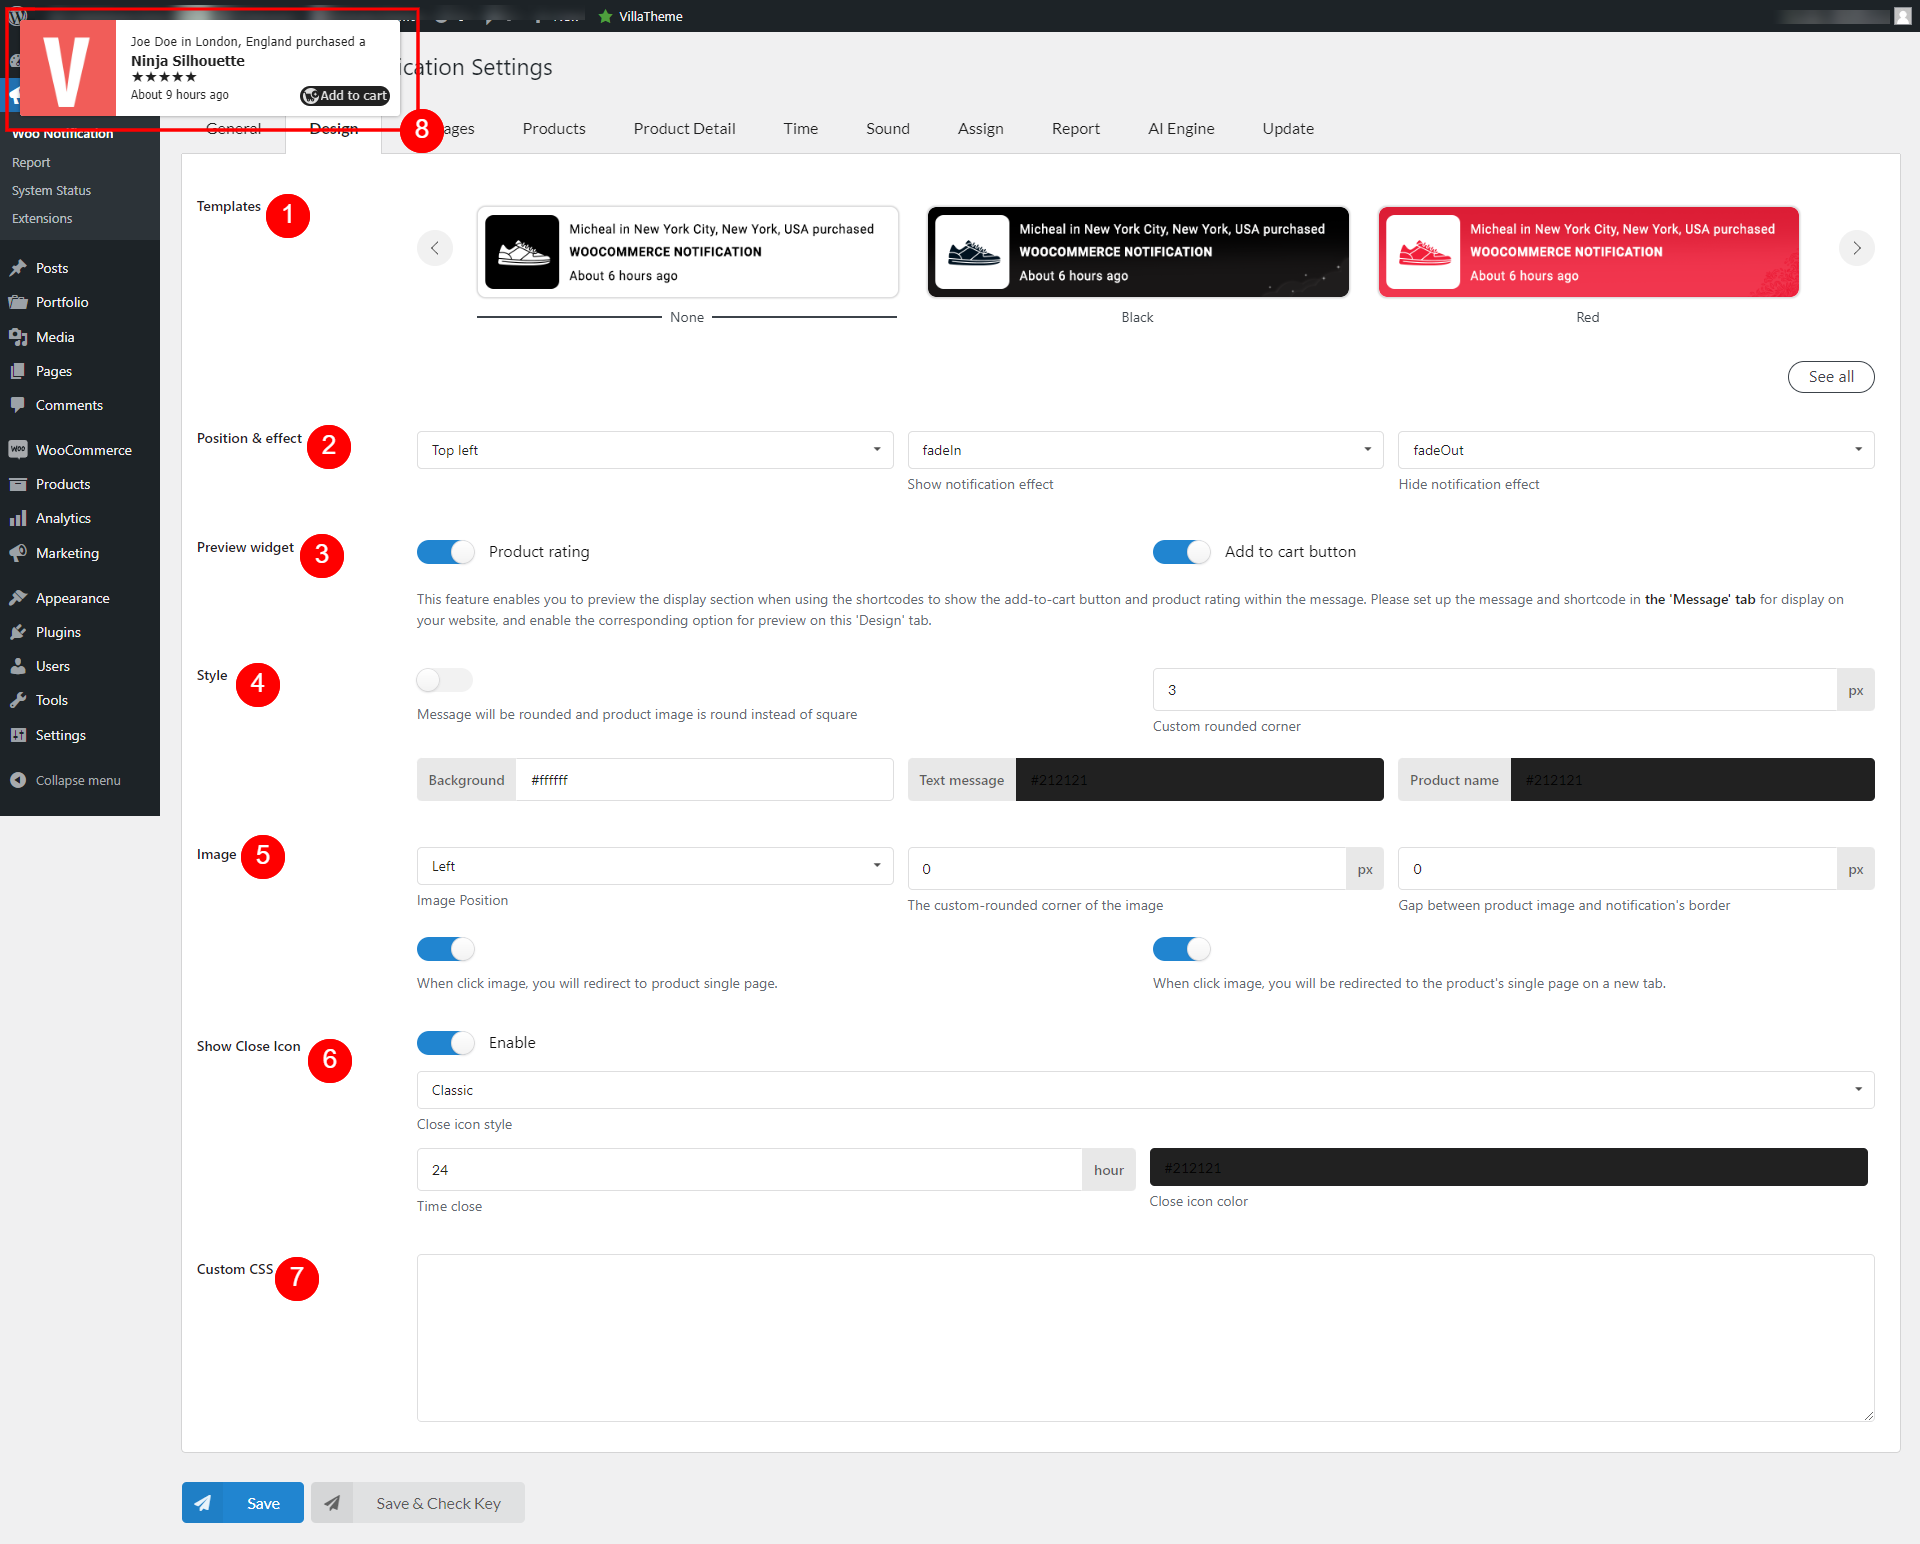
Step 2: Design popup notifications.
Go to the Design tab, you can customize how the notification looks on the front end. Go to the Design section below to configure.
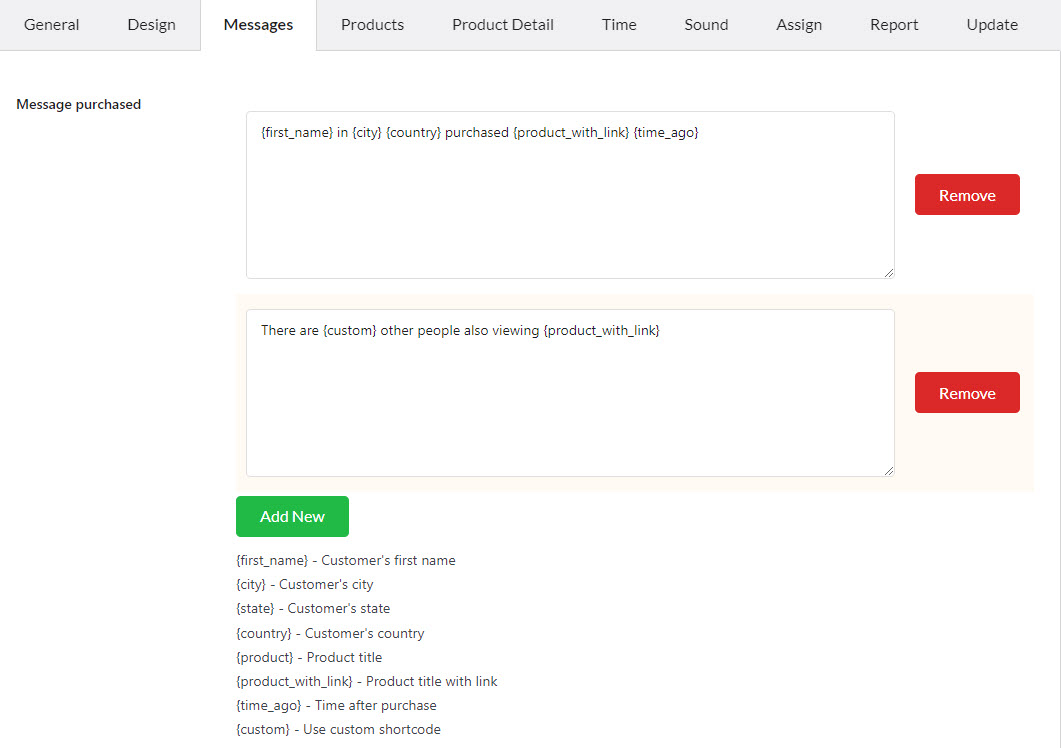
Step 3: Messages on the notifications.
In the Messages tab, you can add and configure as many WooCommerce Notification messages as you want. Each message will be displayed on a different single pop-up.
Using shortcode to create dynamic message contents. If your site sells worldwide, you can display the notifications in multiple languages using WPML or Polylang plugin.
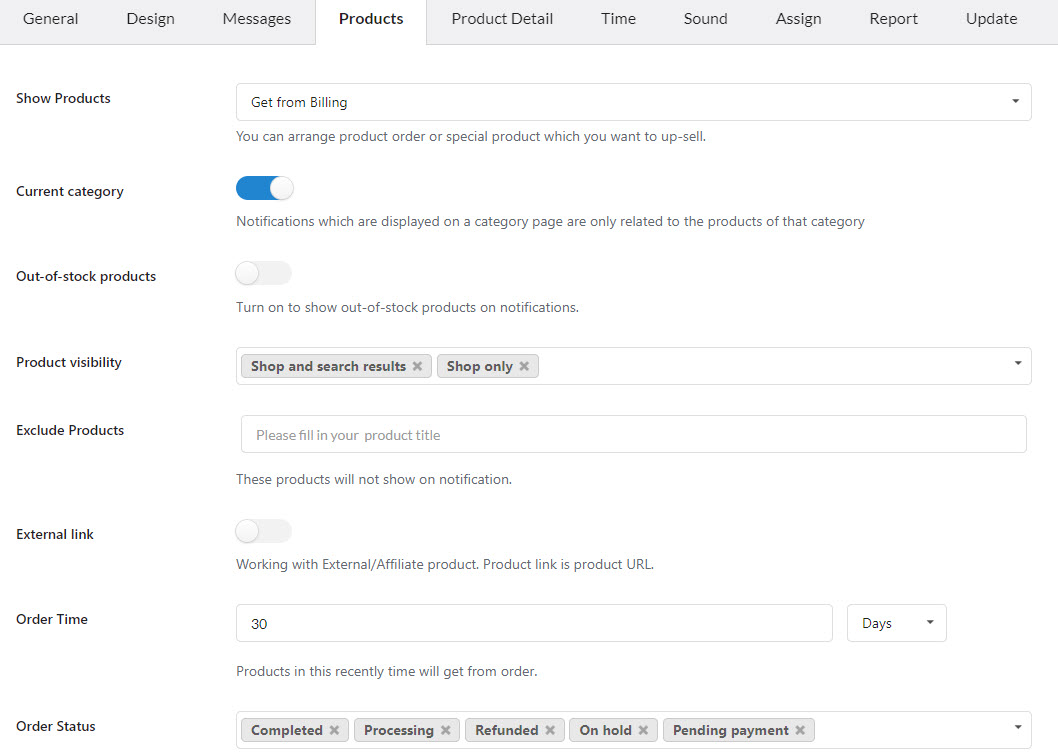
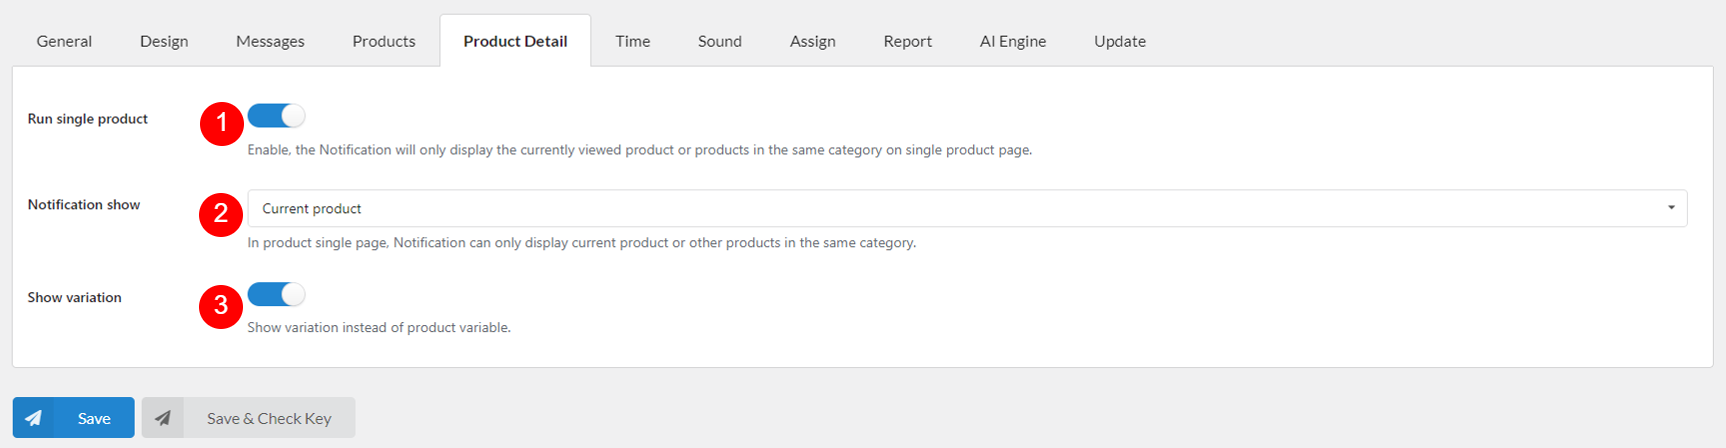
Step 4: Select to display types of the product on the front end.
Go to the Products and Product detail tabs, you can select to display on the popup notifications the information of the fake orders or real orders, configure rules to display target products on the notification to users who are visiting your site.
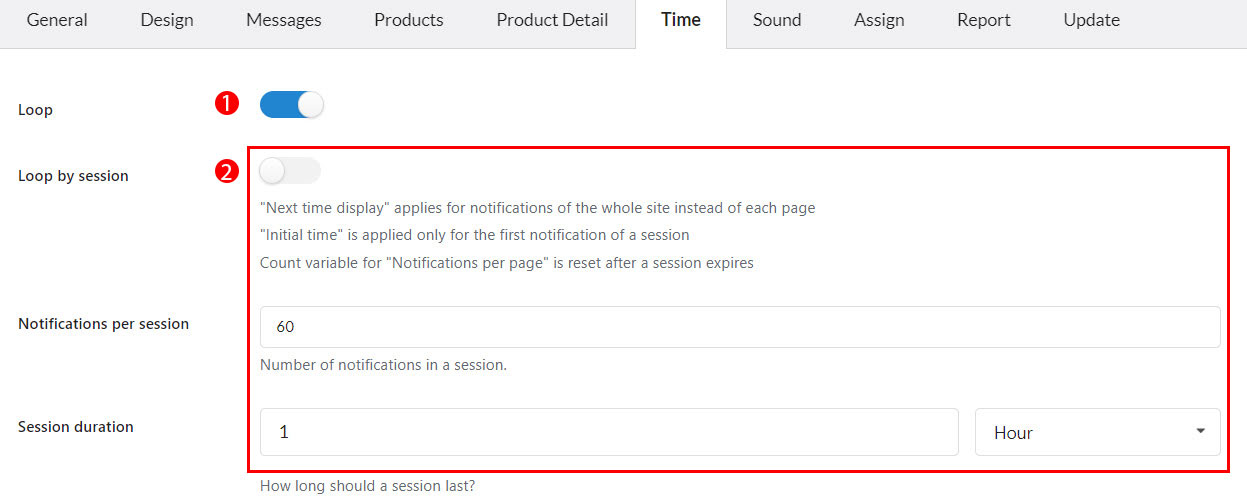
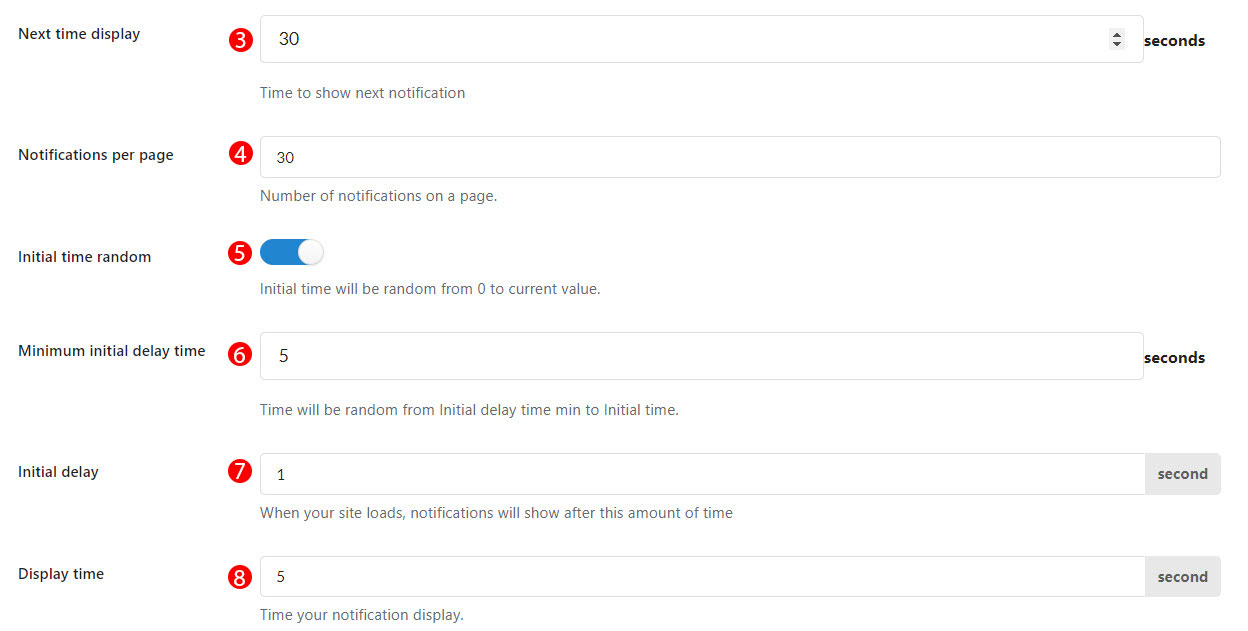
Step 5: Time rules for displaying popup notifications
Go to the Time tab to set up rules to display the popup notifications loop and randomly. This helps the popups appear naturally and trustly. Go to the Time section below to configure time settings.

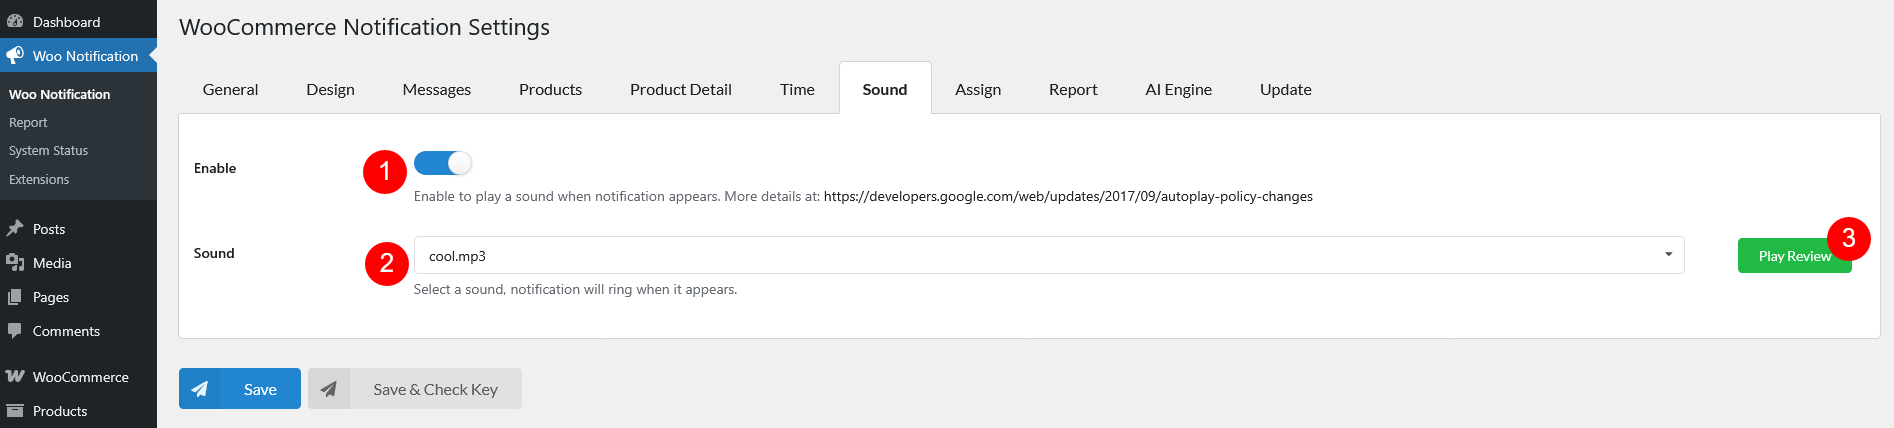
Step 6: Sound of notification to attract attention.
Go to the Sound tab,
Step 7: Display popup notifications on pages you want.
Go to the Assign tab, there are toggles that let you choose on which pages that the notification to be appeared. Using the conditional tags to master in popup displaying on particular pages.


1. Message purchased: Type in the message you want to display. You can use shortcodes to display necessary information.
{first_name} – Customer’s first name
{short_name} – Customer’s first name
{city} – Customer’s city
{state} – Customer’s state
{country} – Customer’s country
{product} – Product title
{product_with_rating} – Product with star rating
{product_with_atc} – Product with add to cart button
{product_with_rating_atc} – Product with rating and add to cart button
{product_with_link} – Product title with a link to the single product page
{product_with_link_rating} – Product with link and star rating
{product_with_link_atc} – Product with link and add to cart button
{product_with_link_rating_atc} – Product with link, star rating and add to cart button
{time_ago} – Time after purchase
{custom} – Use custom shortcode
2. Custom: Add a message and use the shortcode {custom} to display it
3. Min number: The shortcode {number} will get a random number between Min number and Max number
4. Max number: The shortcode {number} will get a random number between Min number and Max number
5. Flexible number: Make the value in the shortcode {number} change according to specific time in a day reasonably. For example, if it’s 2AM, there should not be lots of visitors on the website at that time, the value will be lower.
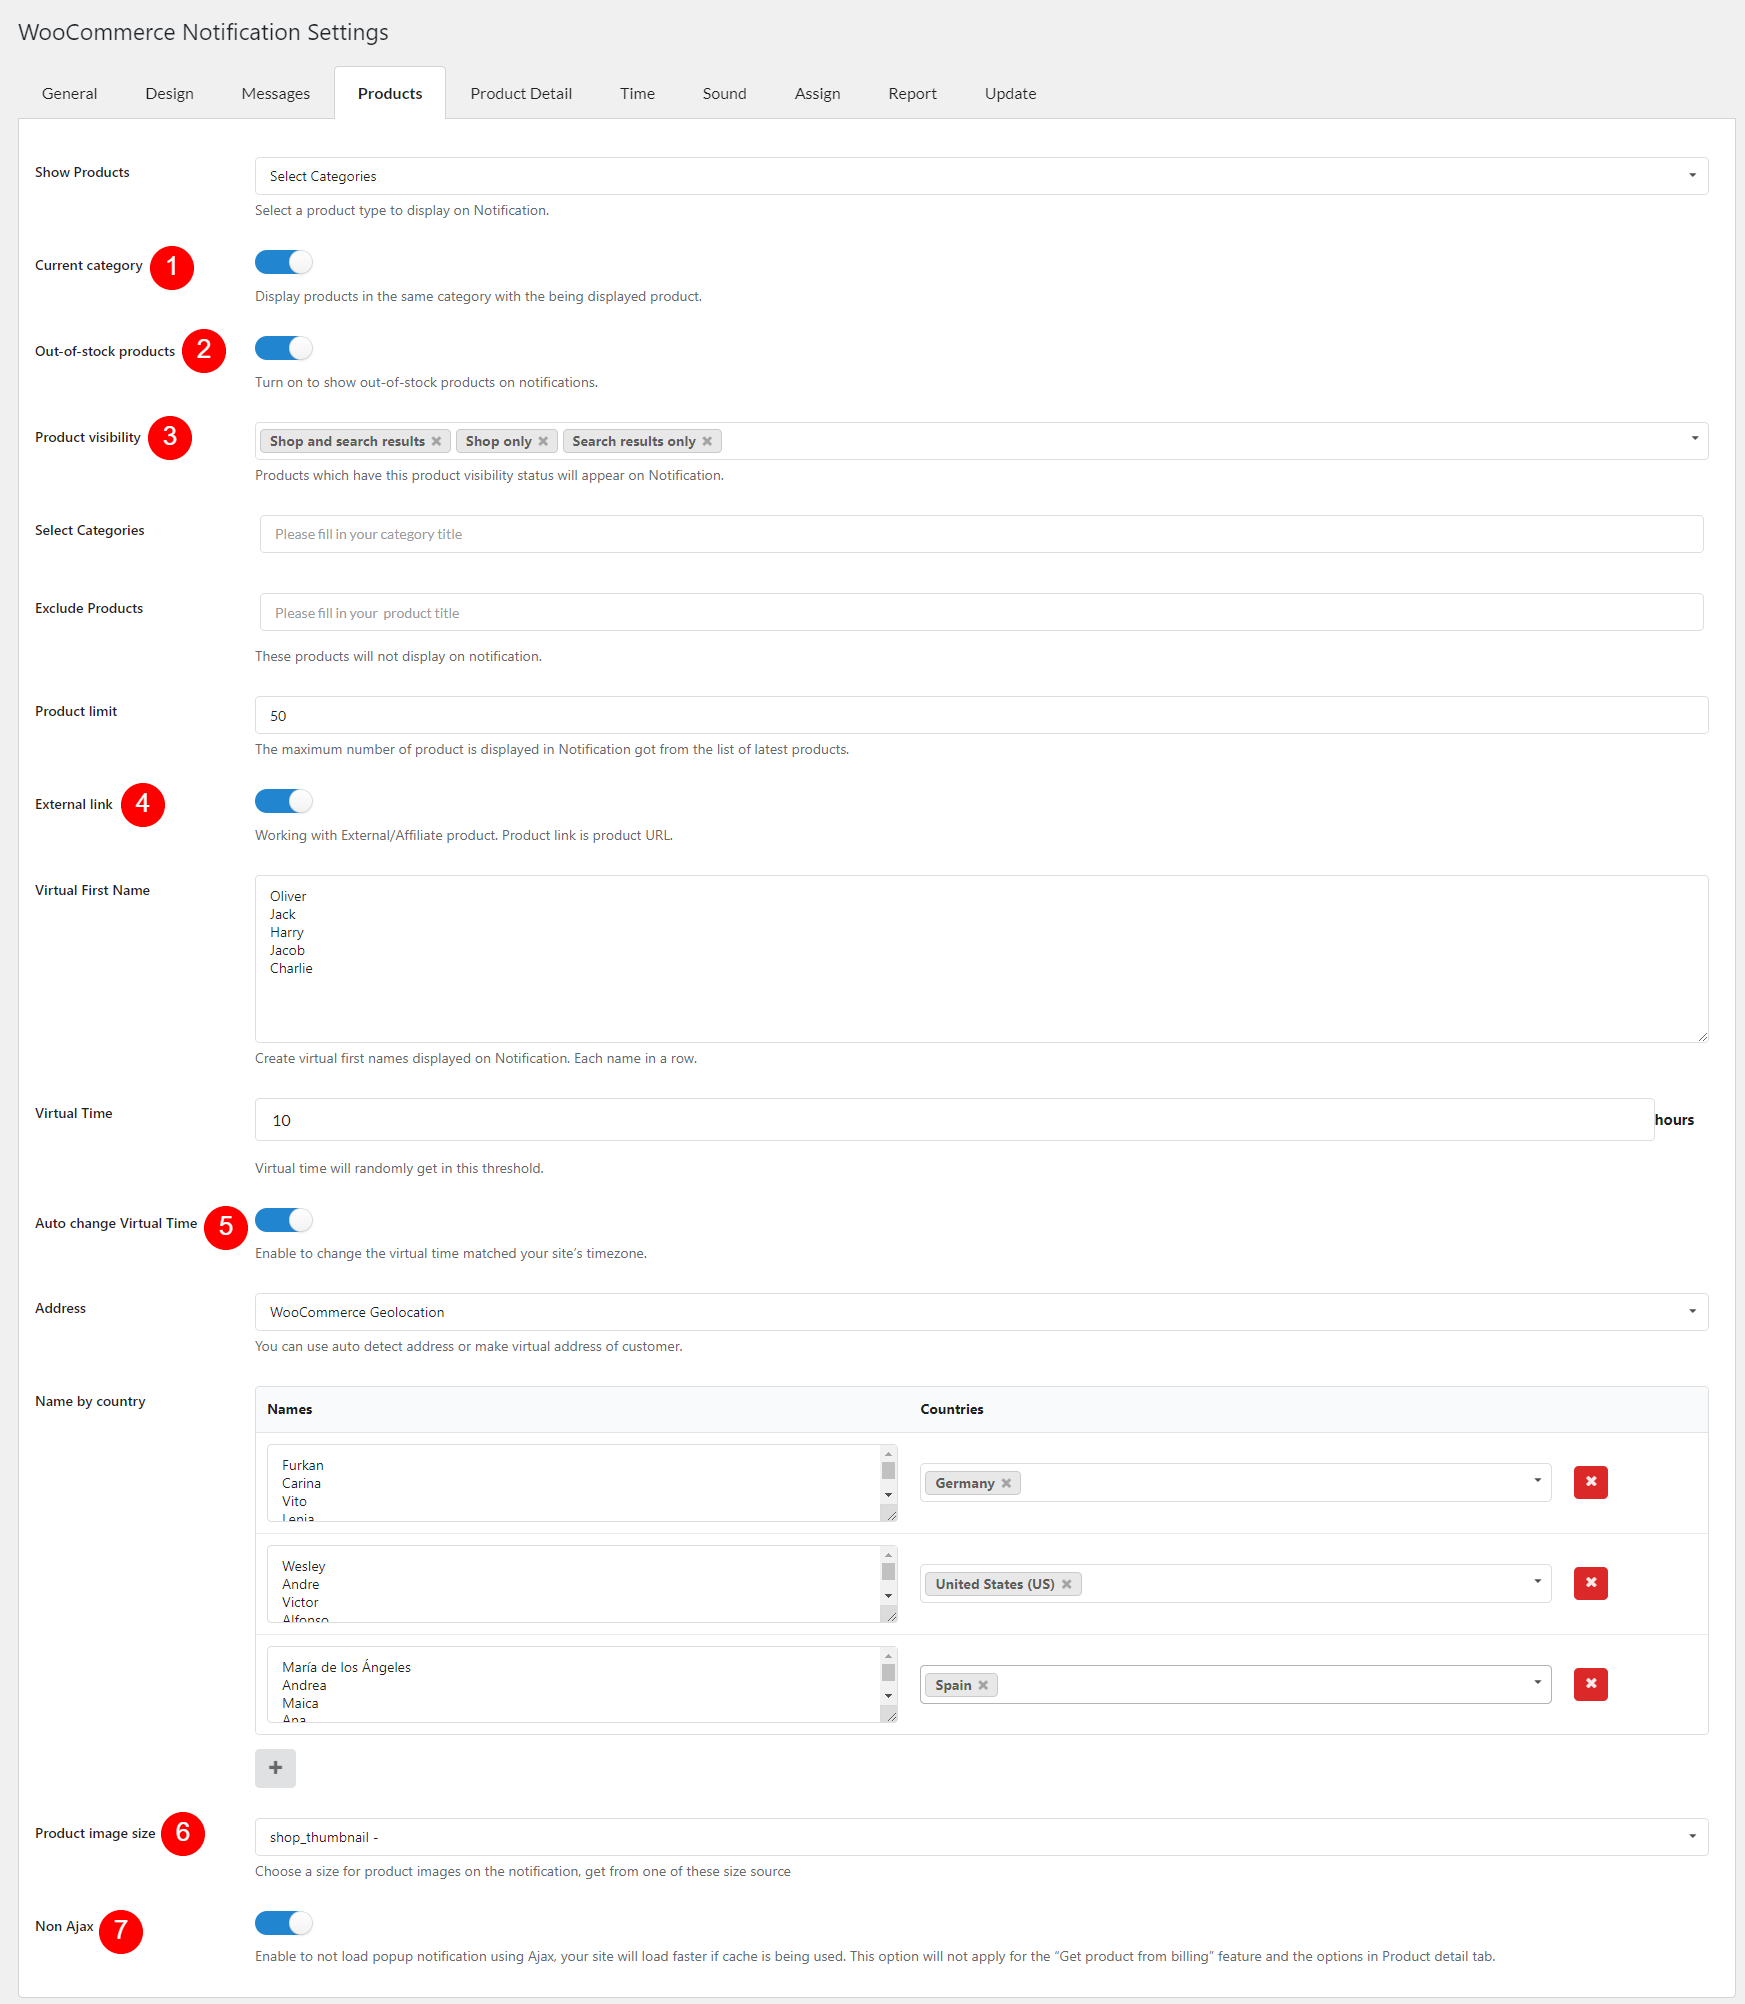
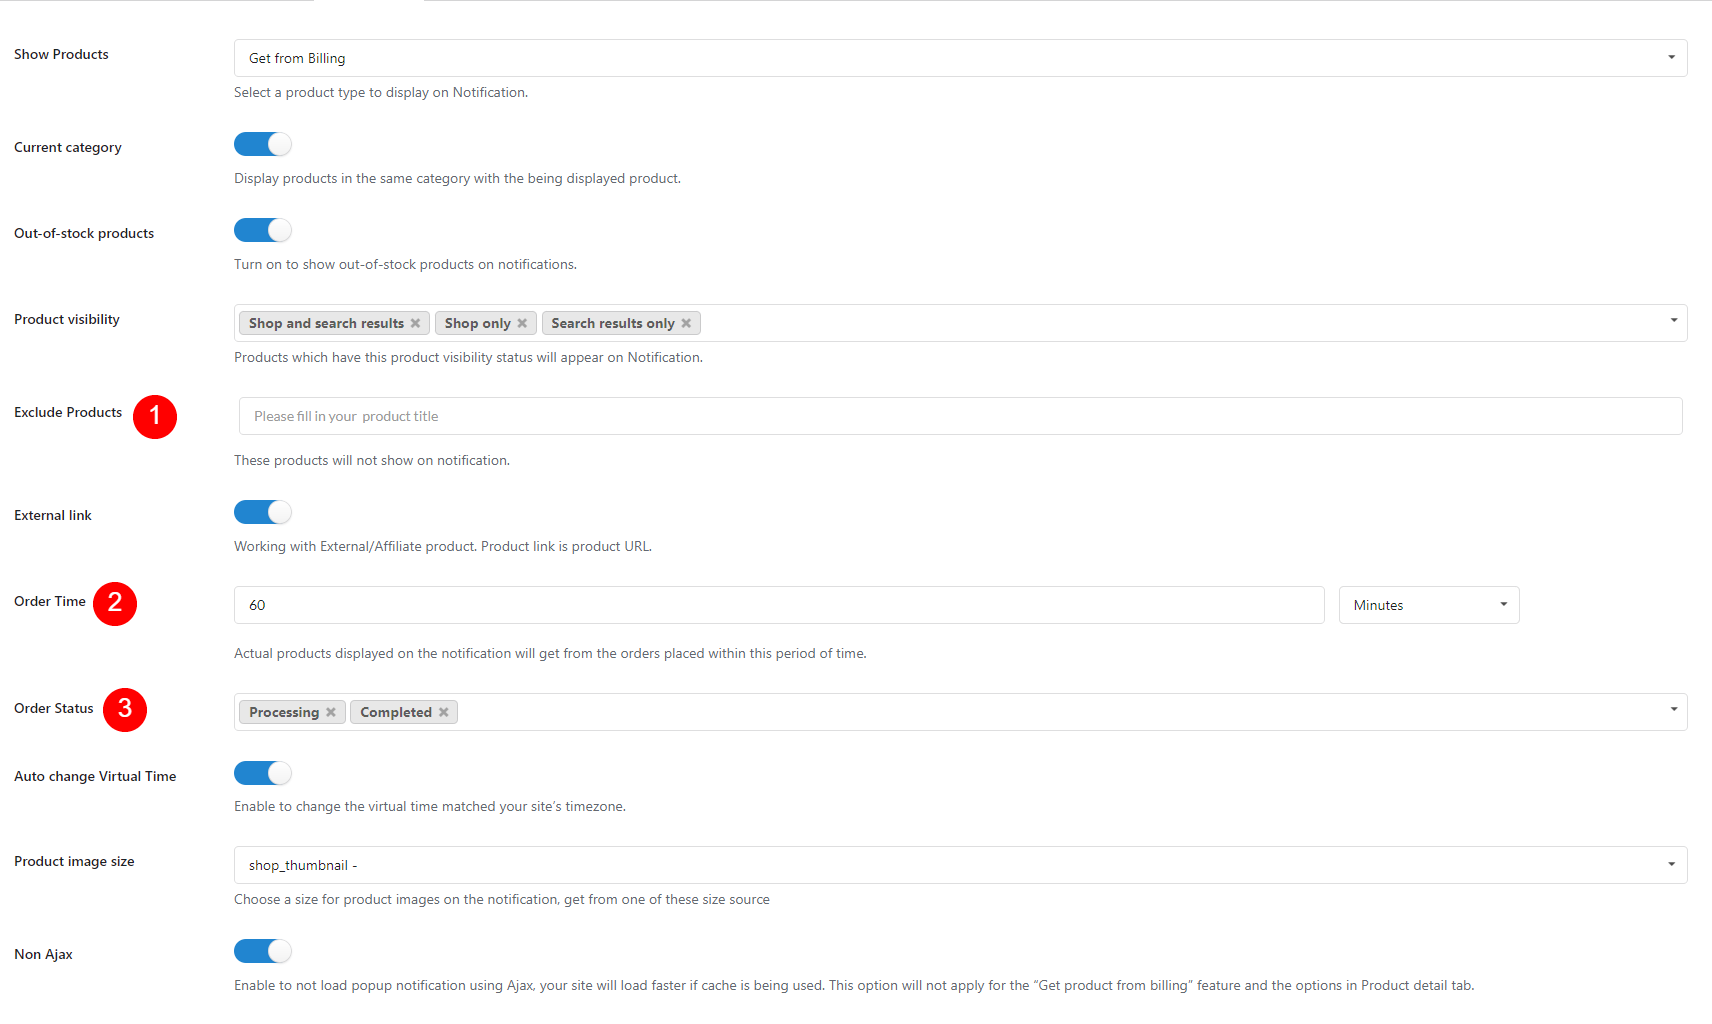
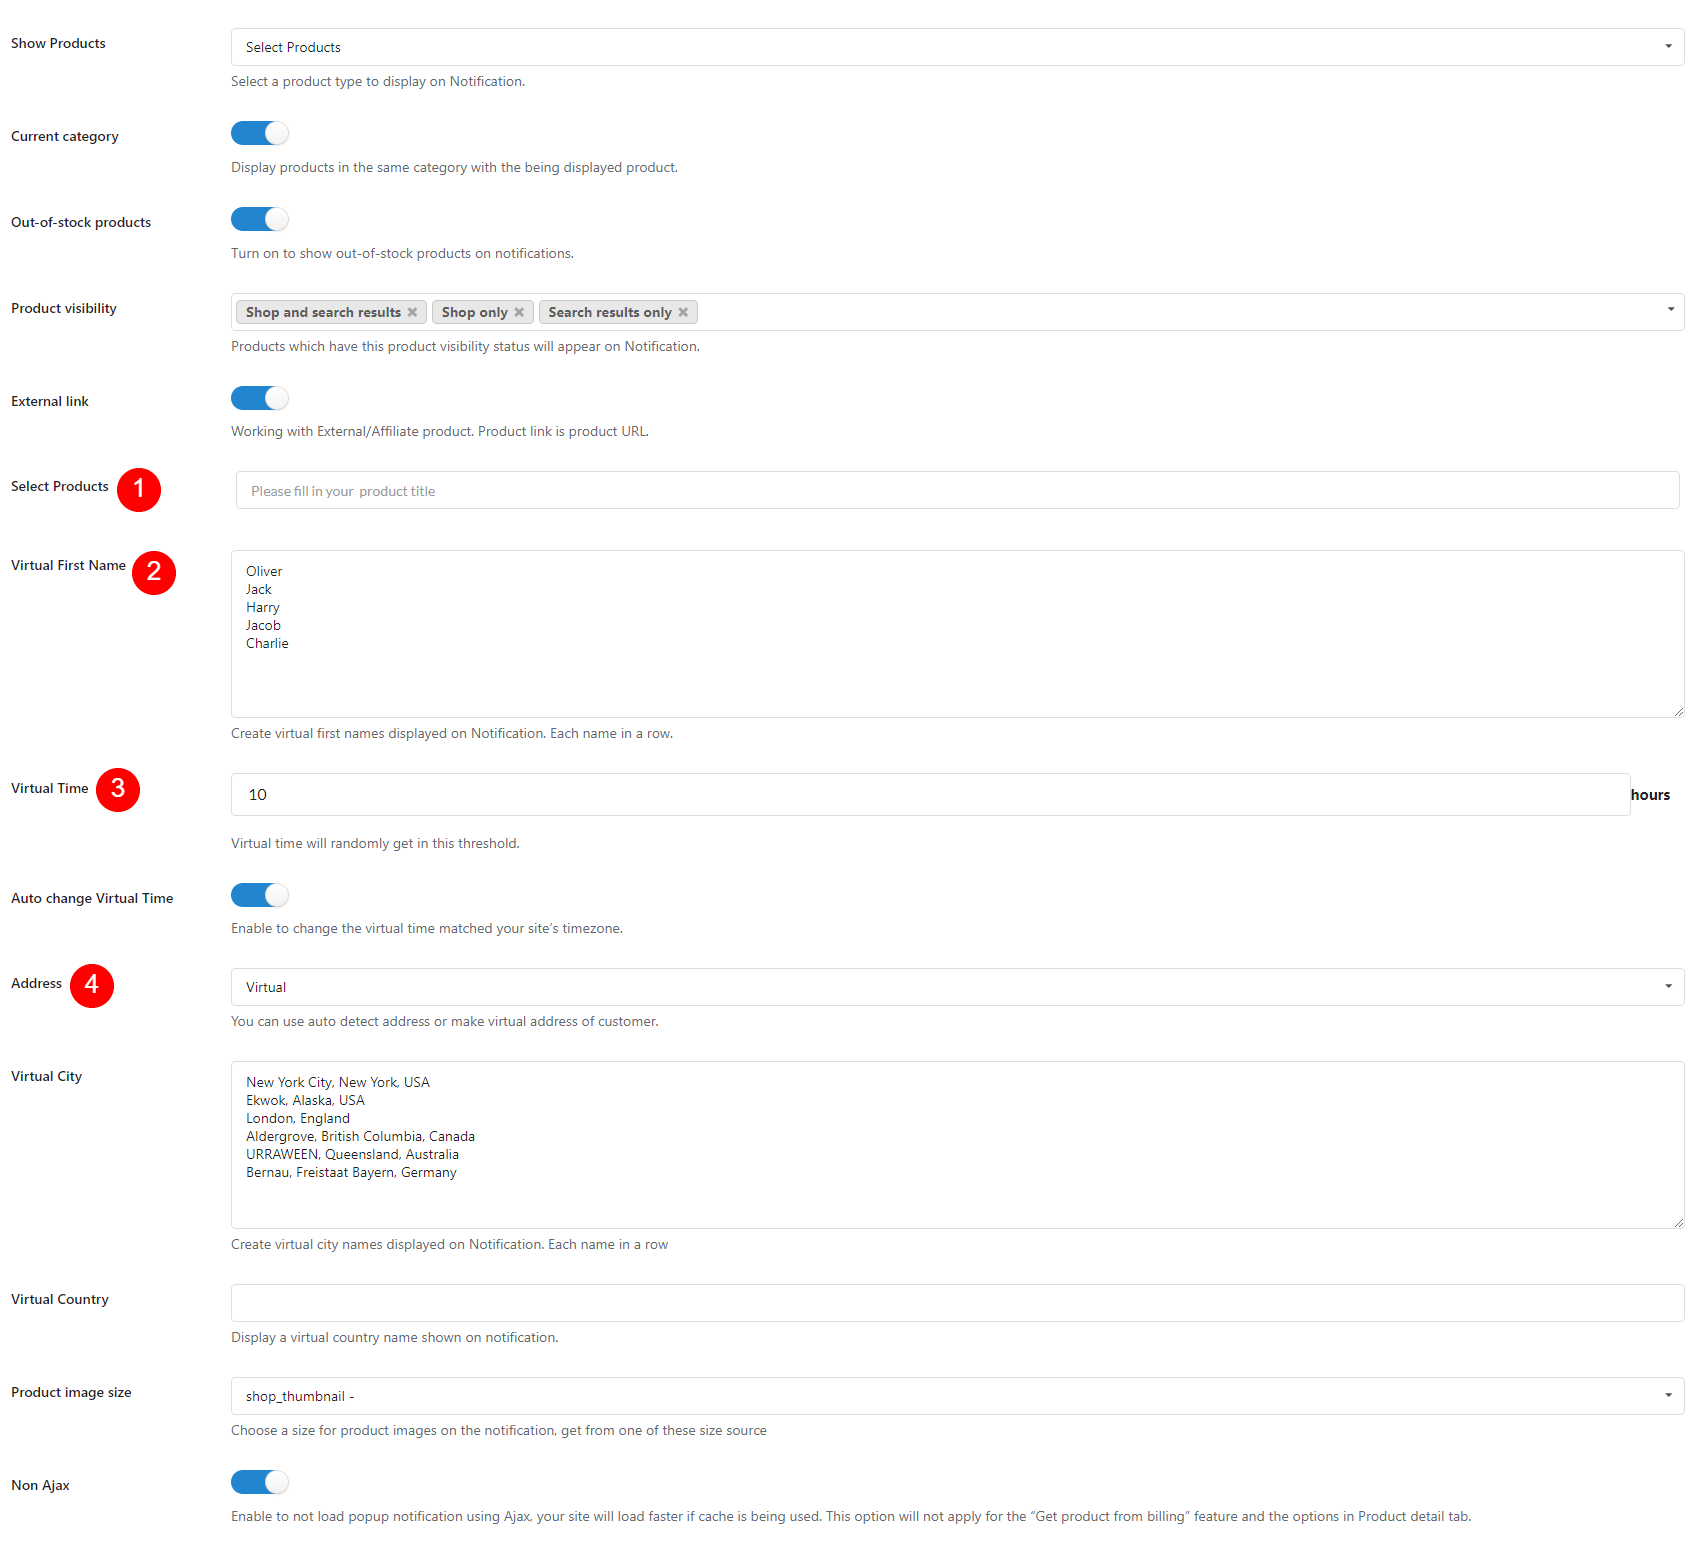
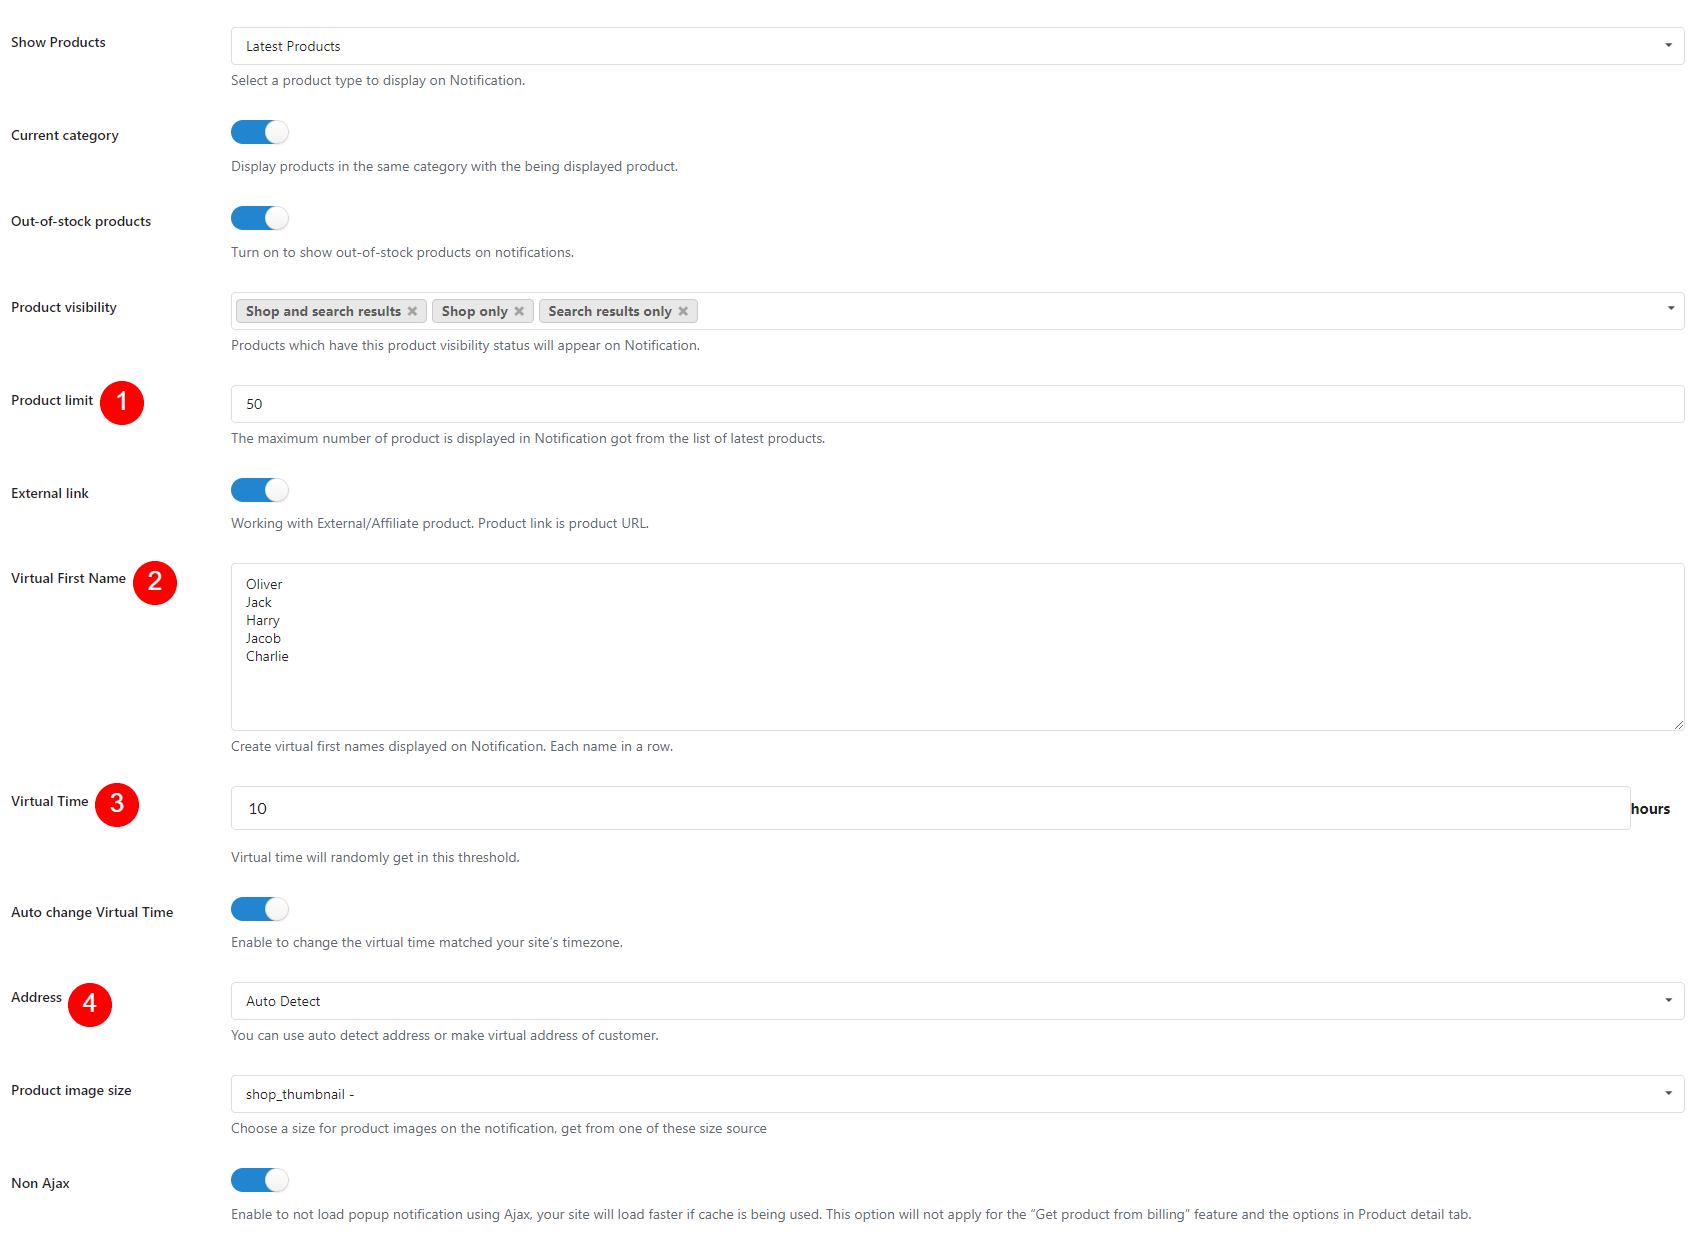
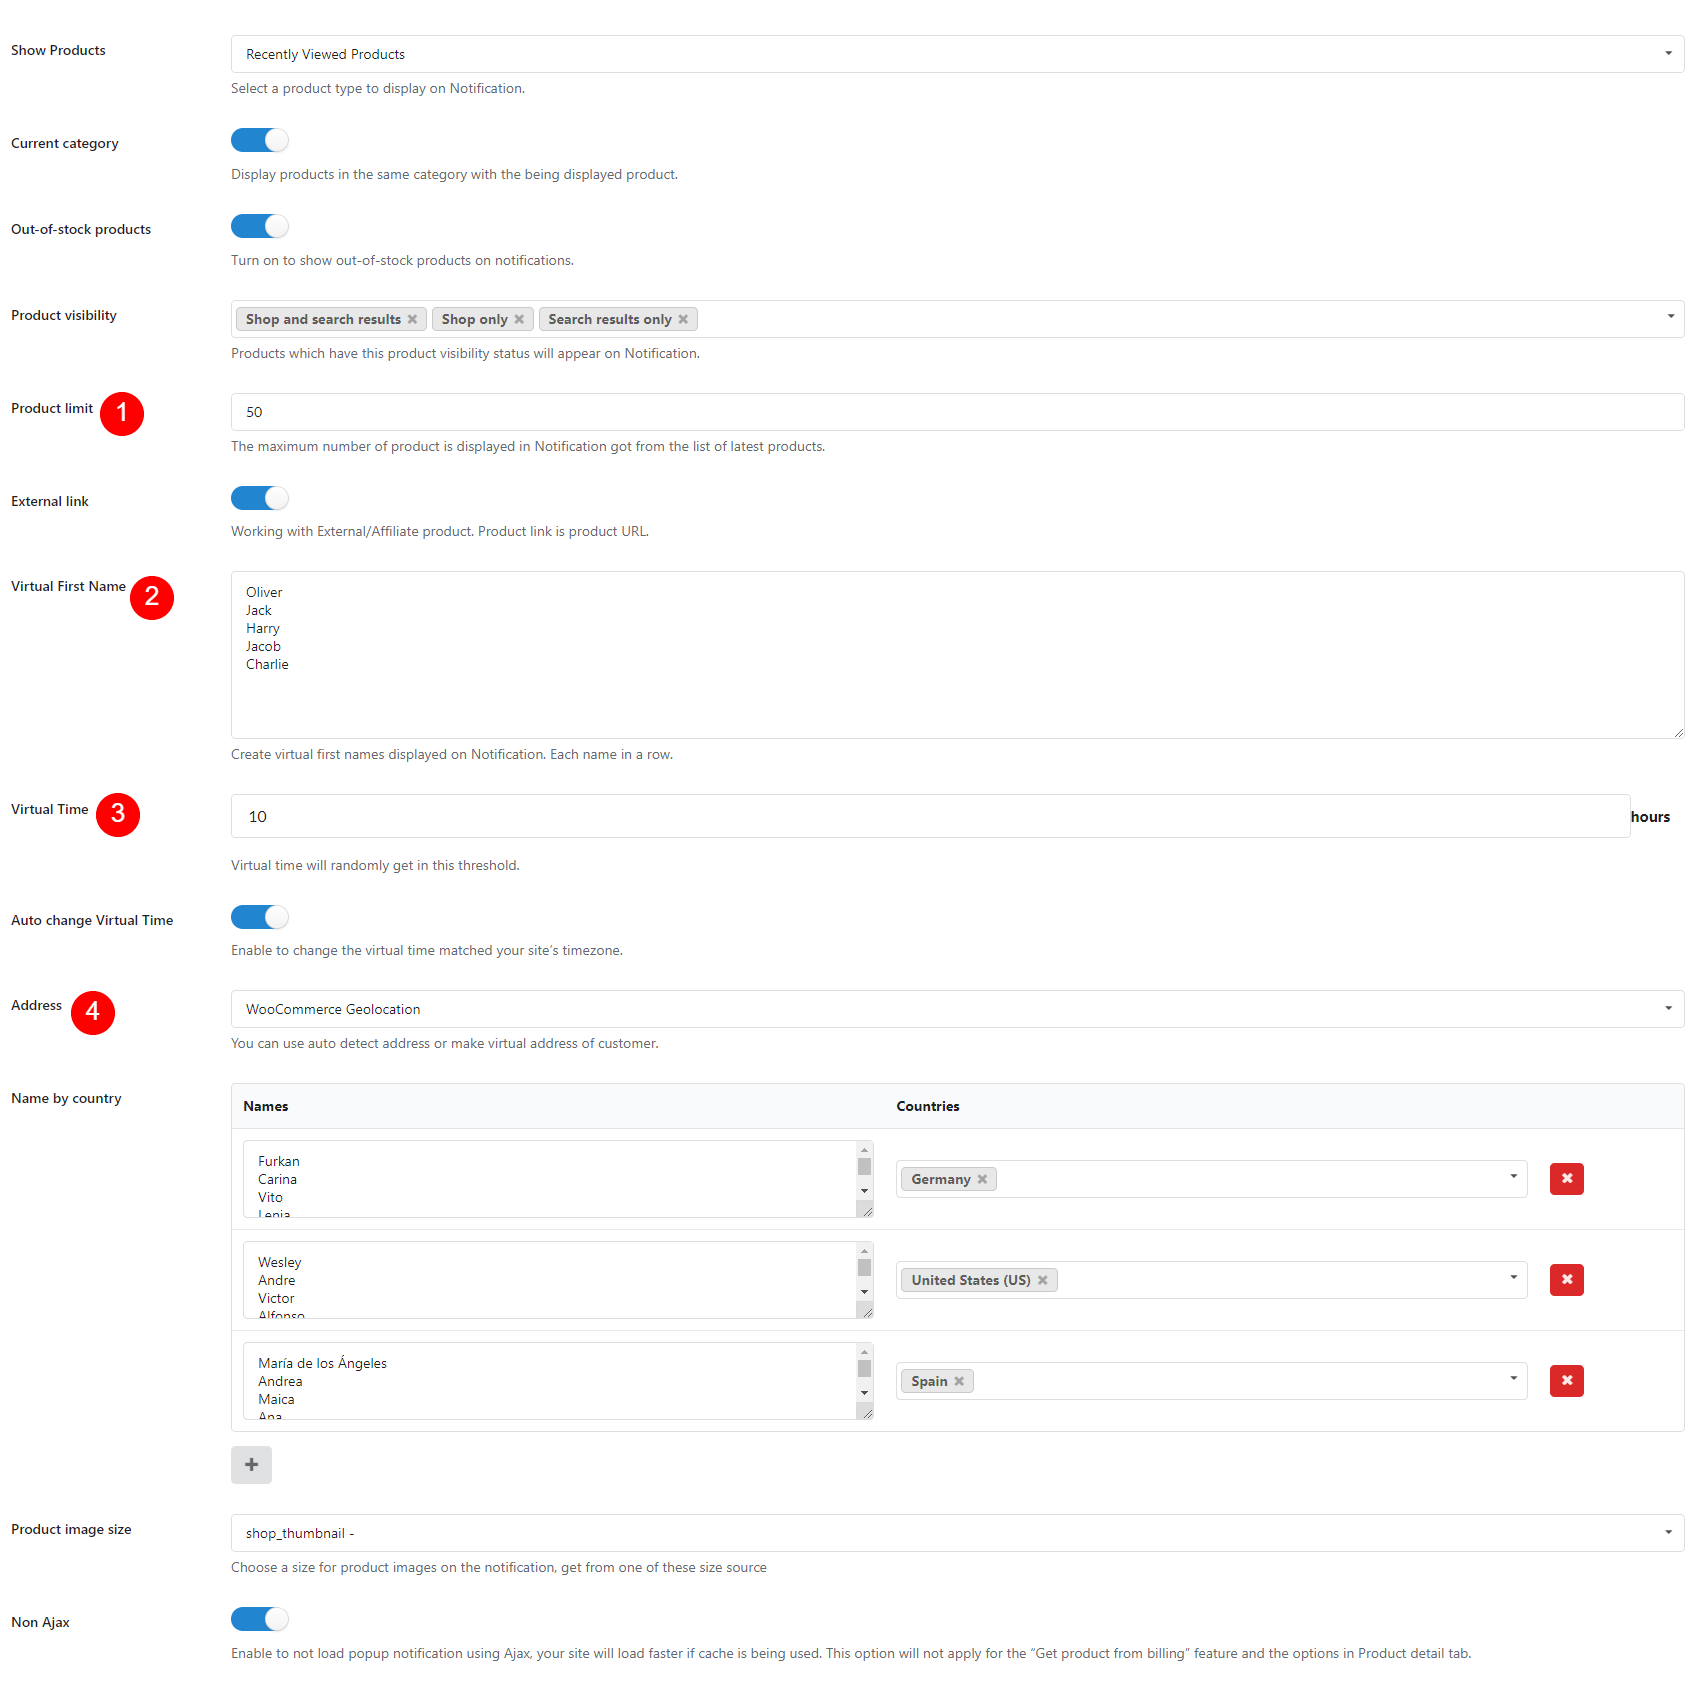
You can choose to display on the notification the information of fake orders or real orders.
First, select an option in “Show Products” dropdown. It’s to select a product type to display on Notification.
Each option here has their own settings and there are still general settings for all ones. Find them below:

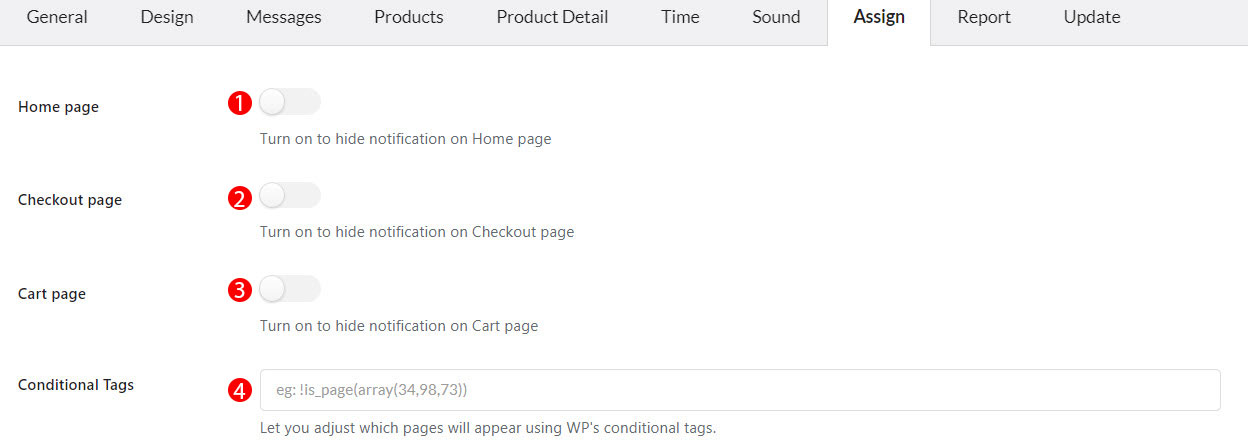
In the “Assign” tab
1. Enable Homepage to hide notifications on Homepage
2. Enable the Checkout page to hide notifications on the Checkout page
3. Enable Cart page to hide notification on the Cart page
4. Conditional Tags: to specify which pages to show the notification. You can use the Page’s ID, Title, or Slug.
Important note:
To handle WP’s Conditional Tags, this plugin uses eval() which is very dangerous because it allows the execution of arbitrary PHP code. Therefore, please only fill this field with proper conditional tags which are validated and/or provided by trusted developers.
Example:
is_page(‘About’)
is_page(50)
is_page( array(‘about’, ‘contact’) )
is_page( array(50, 75) )
If you enable Save Logs, then Logs will be saved.
History time is the time that history will be kept.

Save logs helps system stores information when visitors click on the notification. Then admin site could be a statistic of number clicks and analysis fluctuation sales. Report system allows to view statistic number clicks by date or by product name.
You can see reports at Dashboard/ Woo Notification/ Report
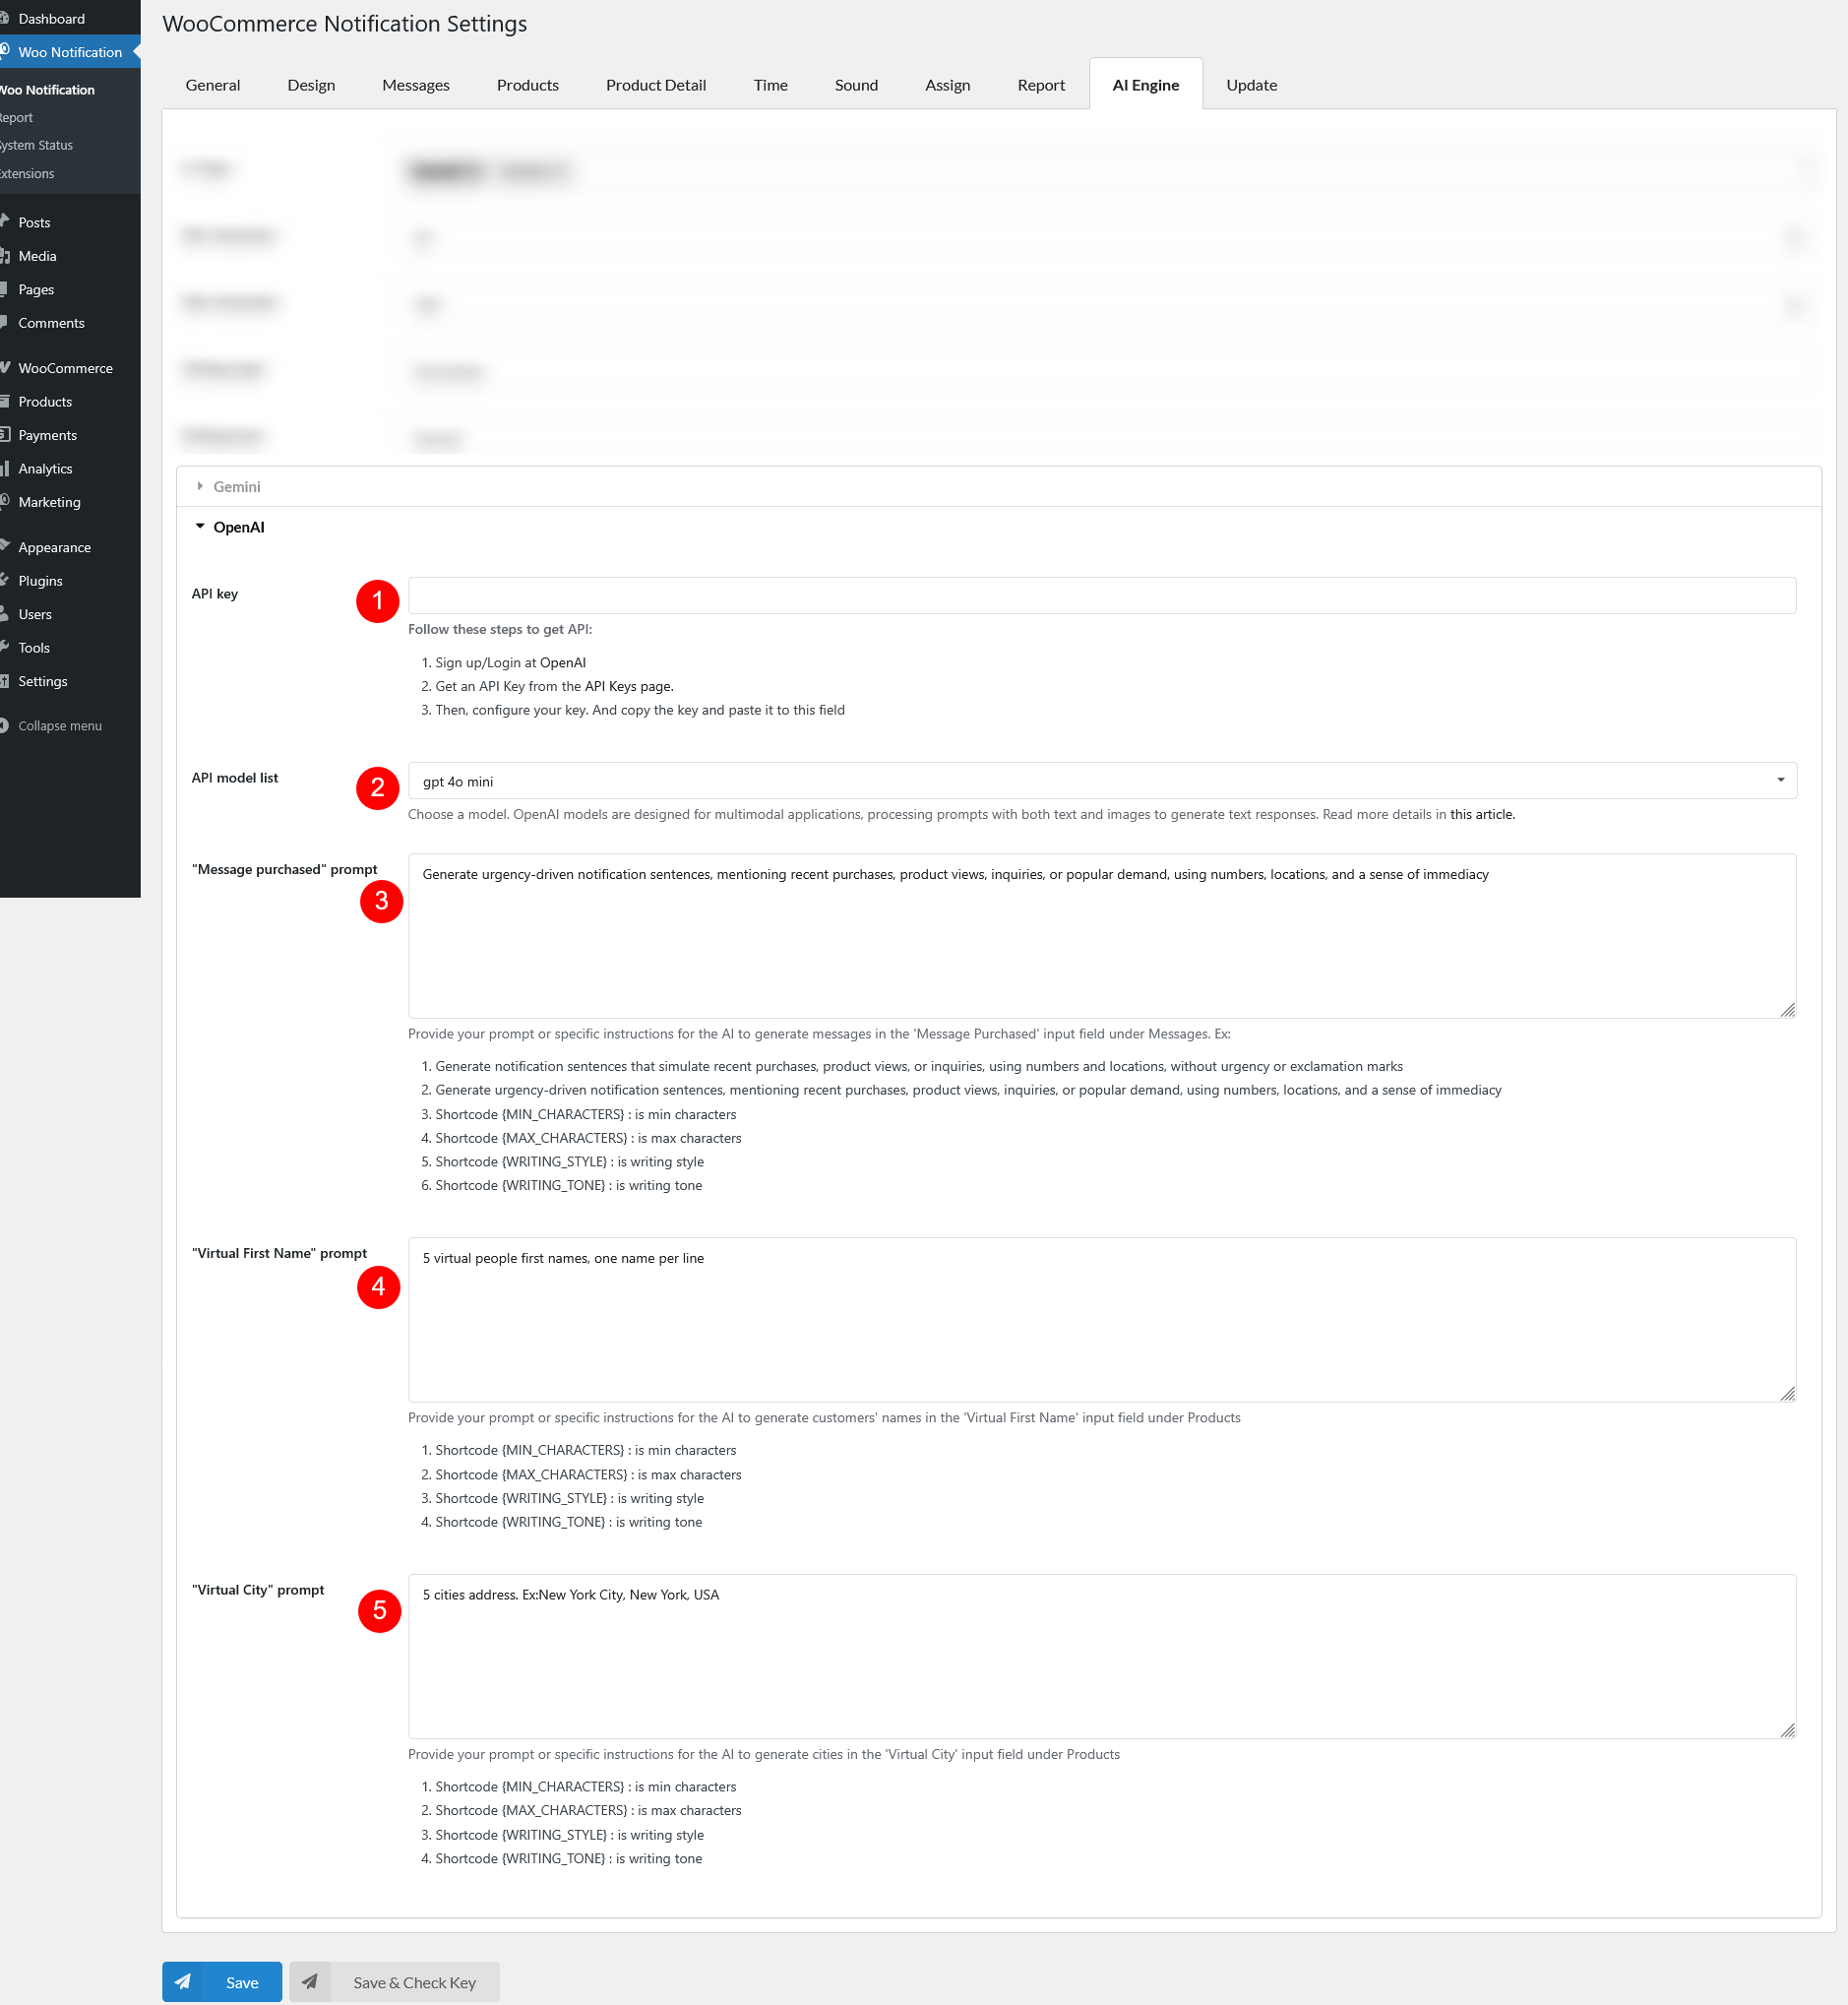
This settings help with automating the generation of personalized messages and virtual details like customers’ names and cities. Scroll down below to read more of each option and how to set up.
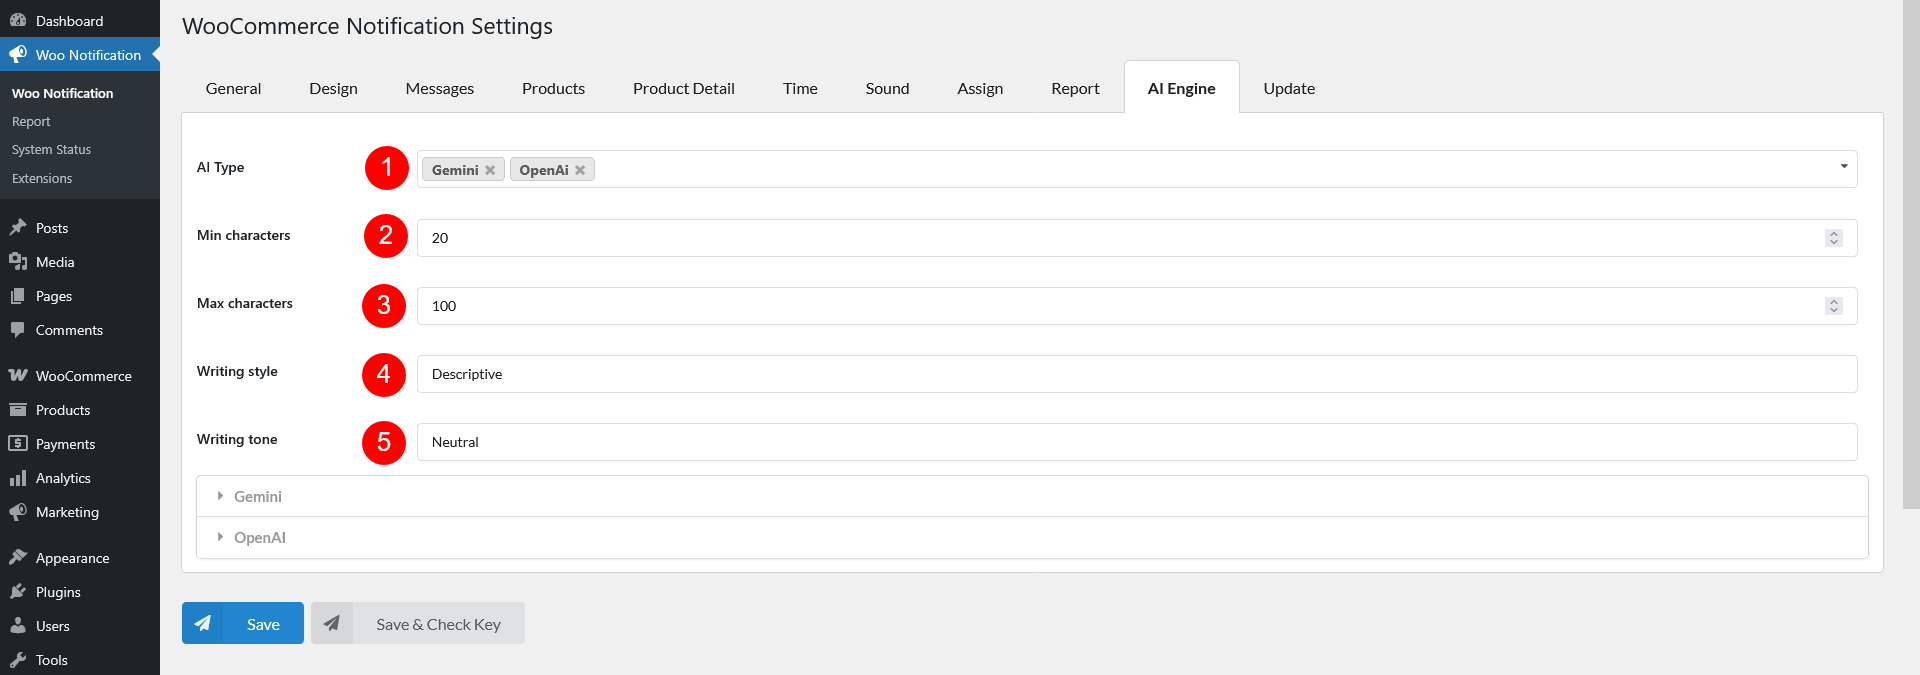
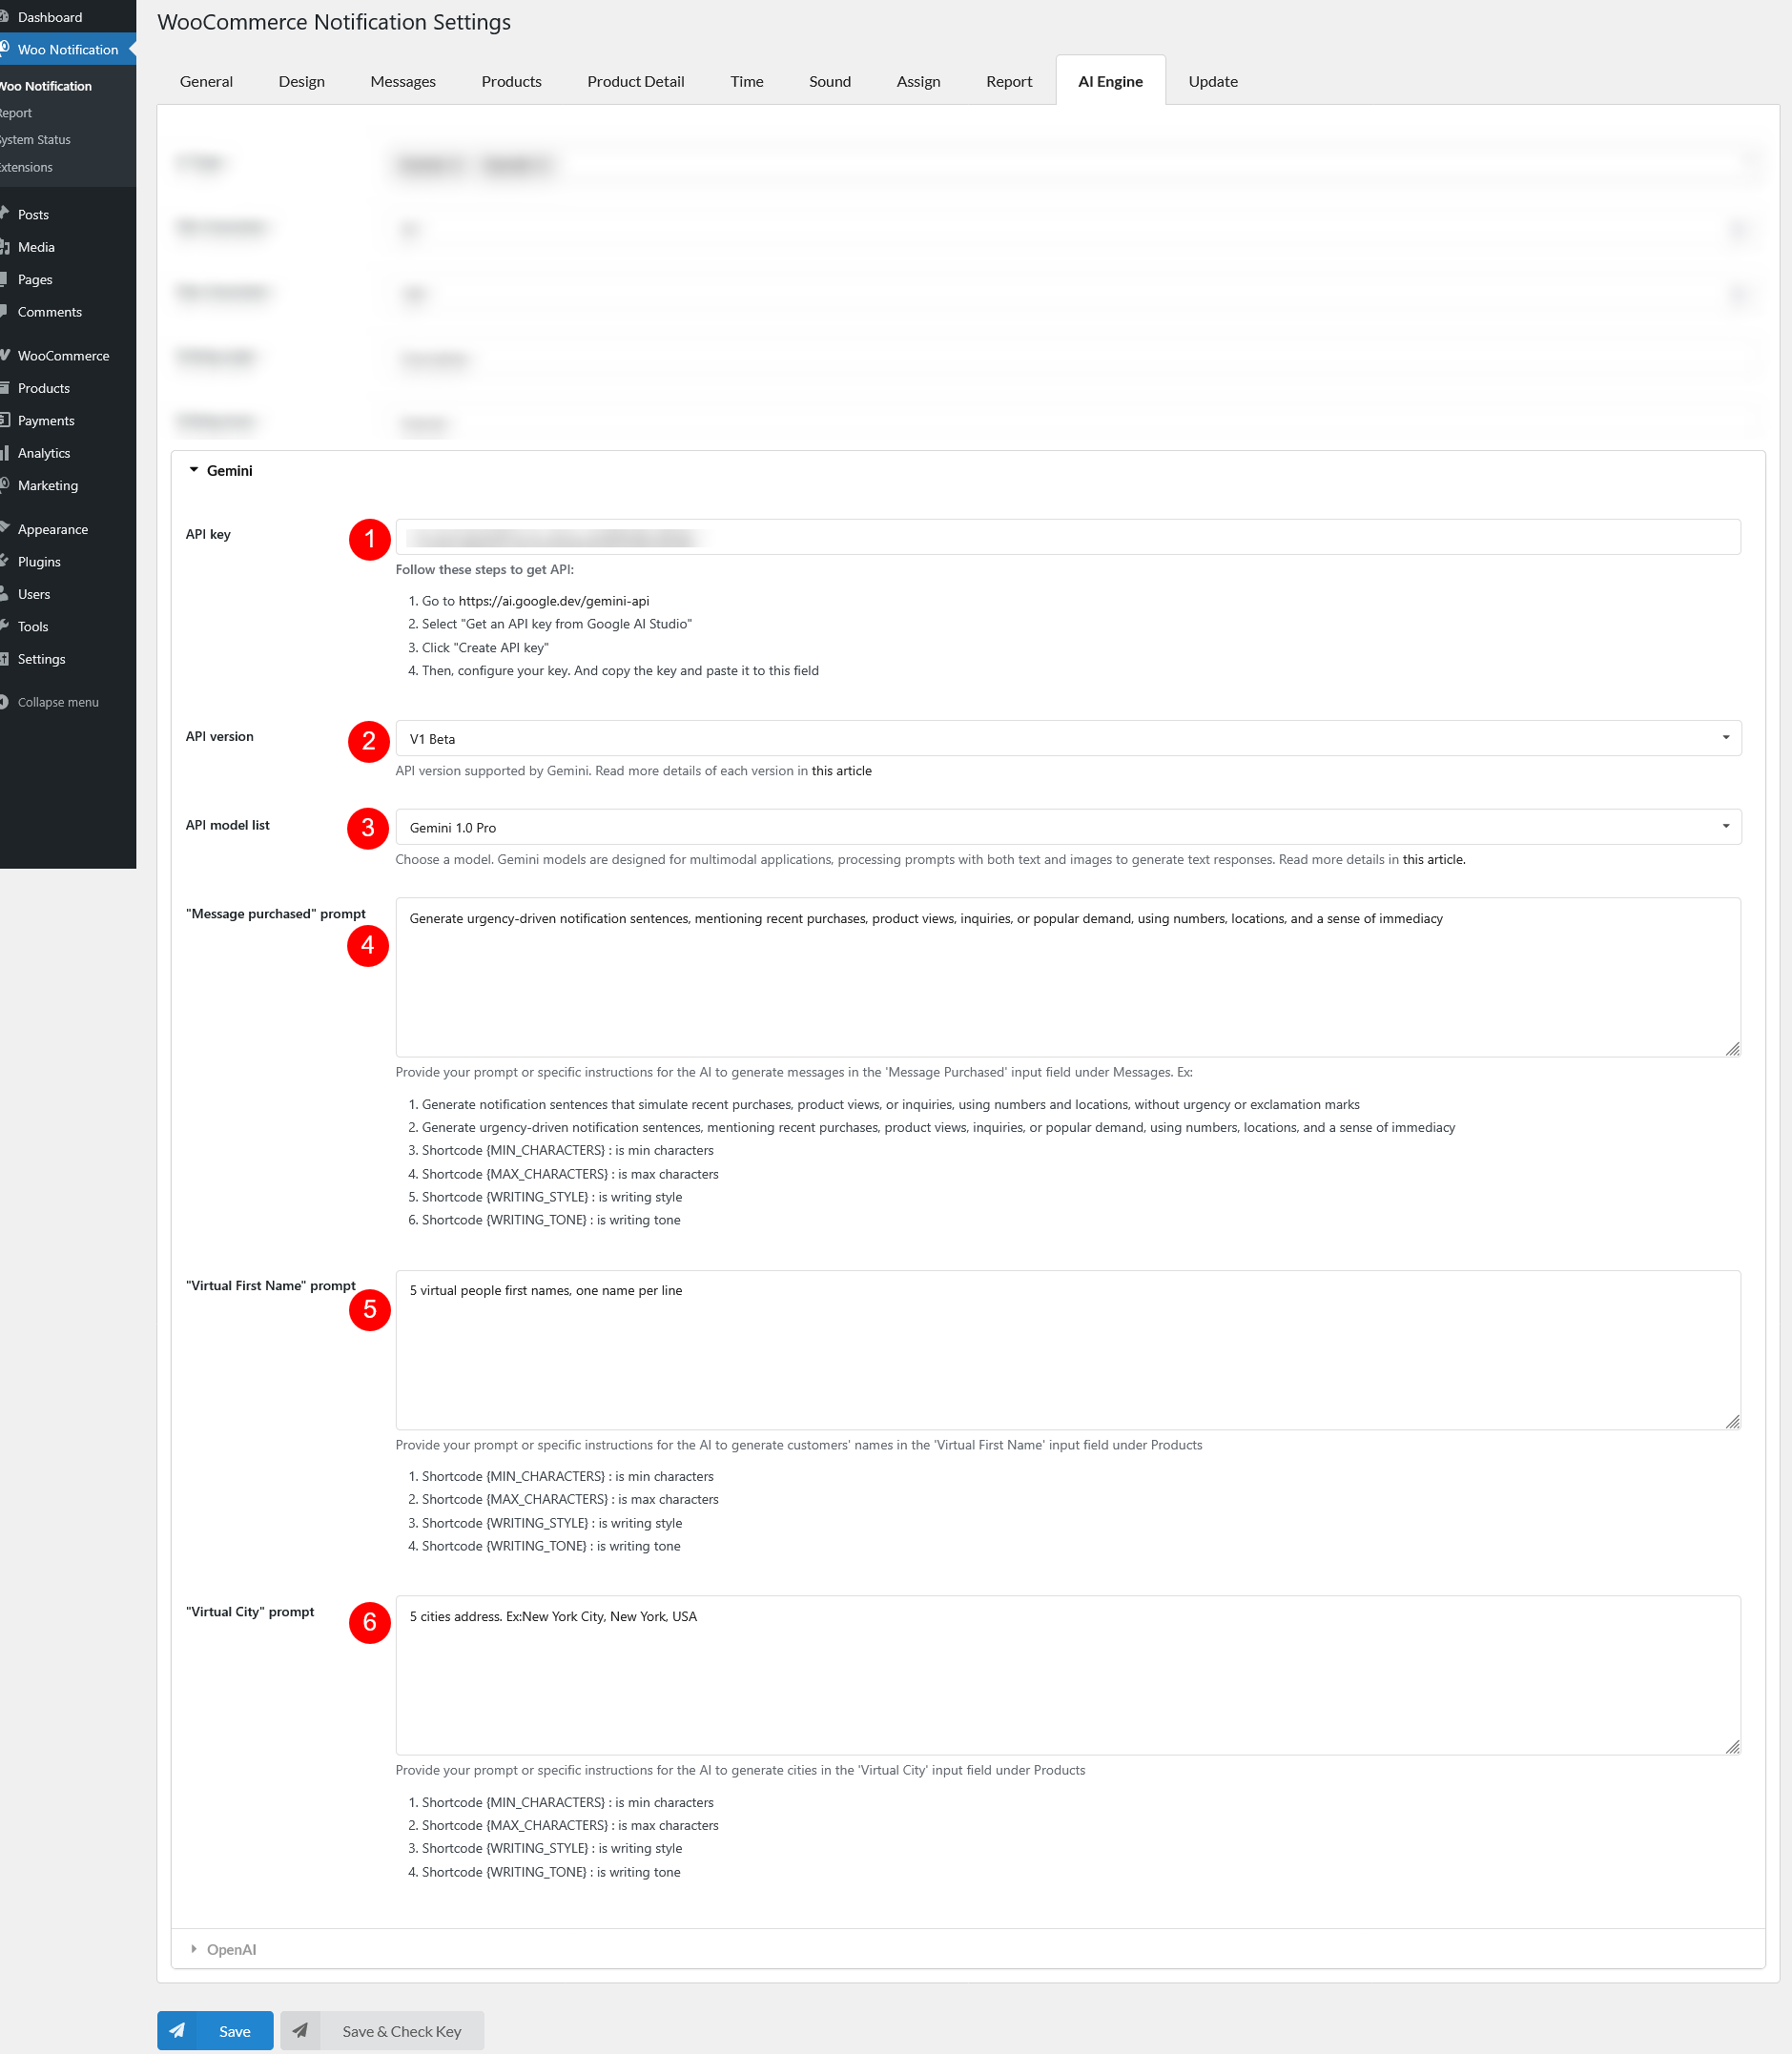
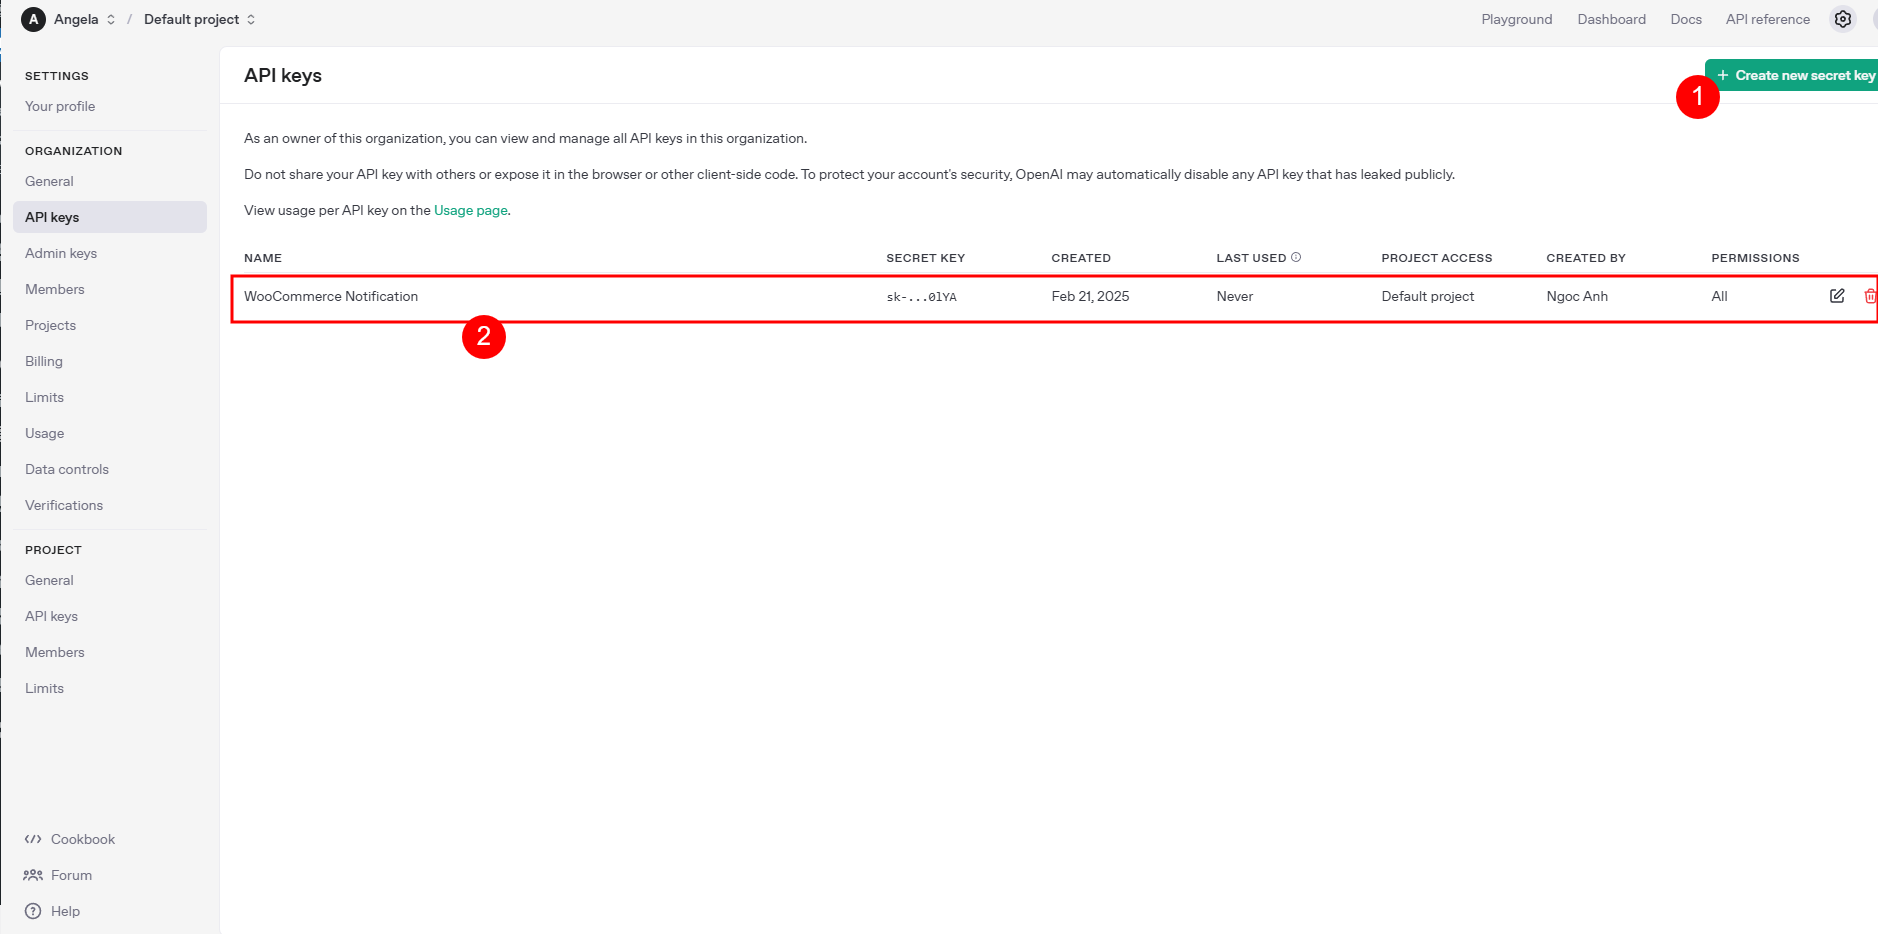
You need to add funds to your OpenAI API account to use their services. Simply having the API key won’t work unless you’ve paid for API access. (Note: This payment is for OpenAI, not our plugin)
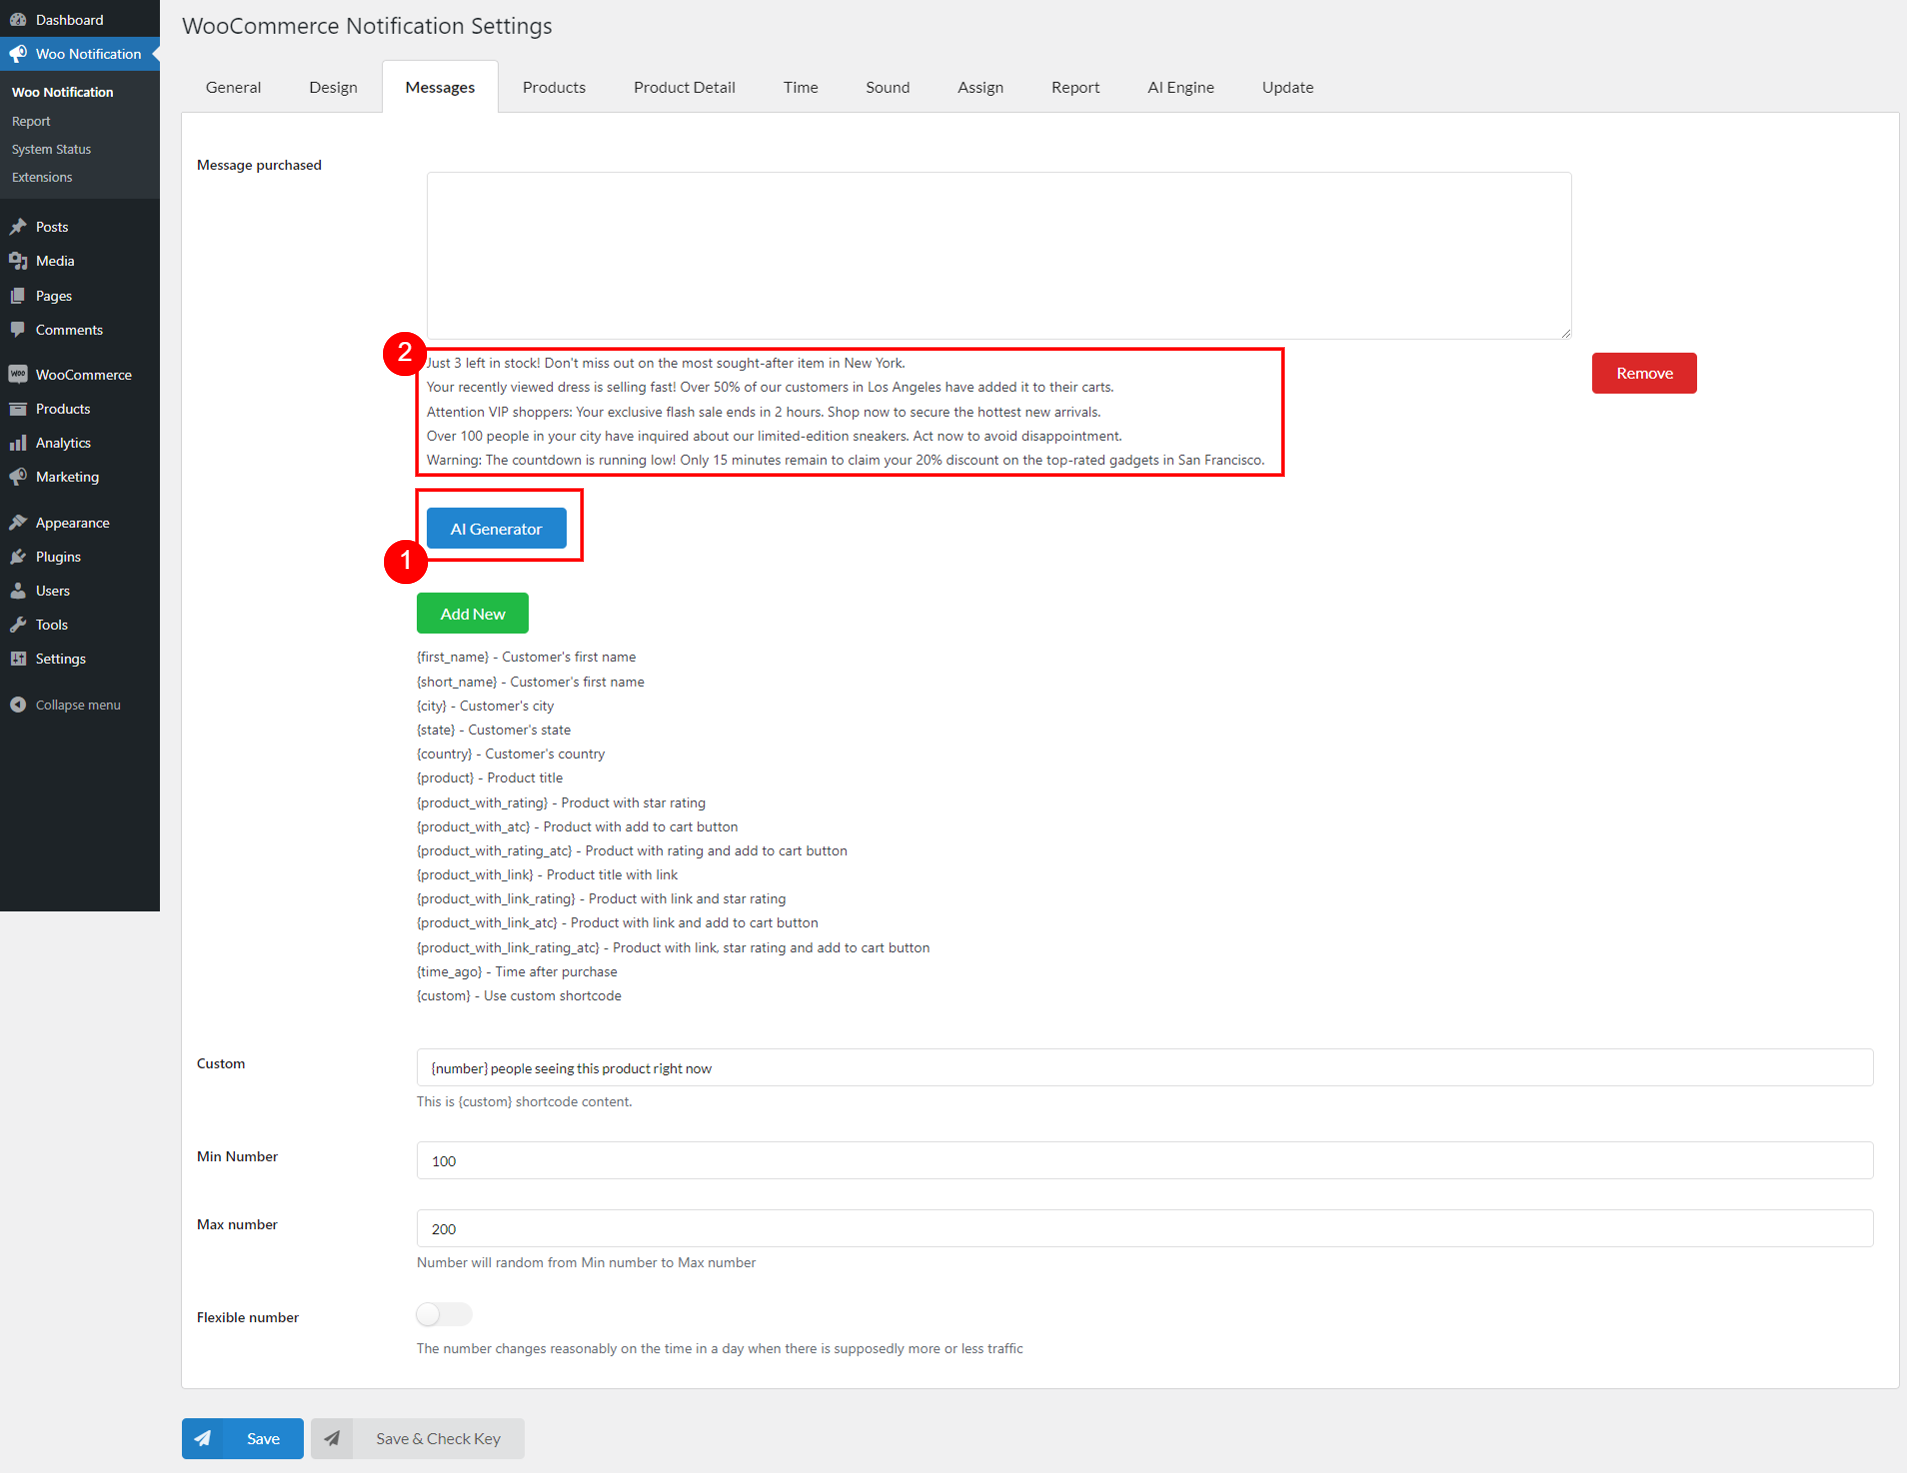
After properly configuring these settings, go back to Messages and Products setting pages to generate content. You will see a blue “AI Generator” button. Simply click on it.
For example, on Messages page: Click “AI Generator” in ![]() to get content in
to get content in ![]() generated
generated

Read this guide to know how to get your Auto Update Key