- Start
- FILE INCLUDES
- INTRODUCTION
- INSTALLATION
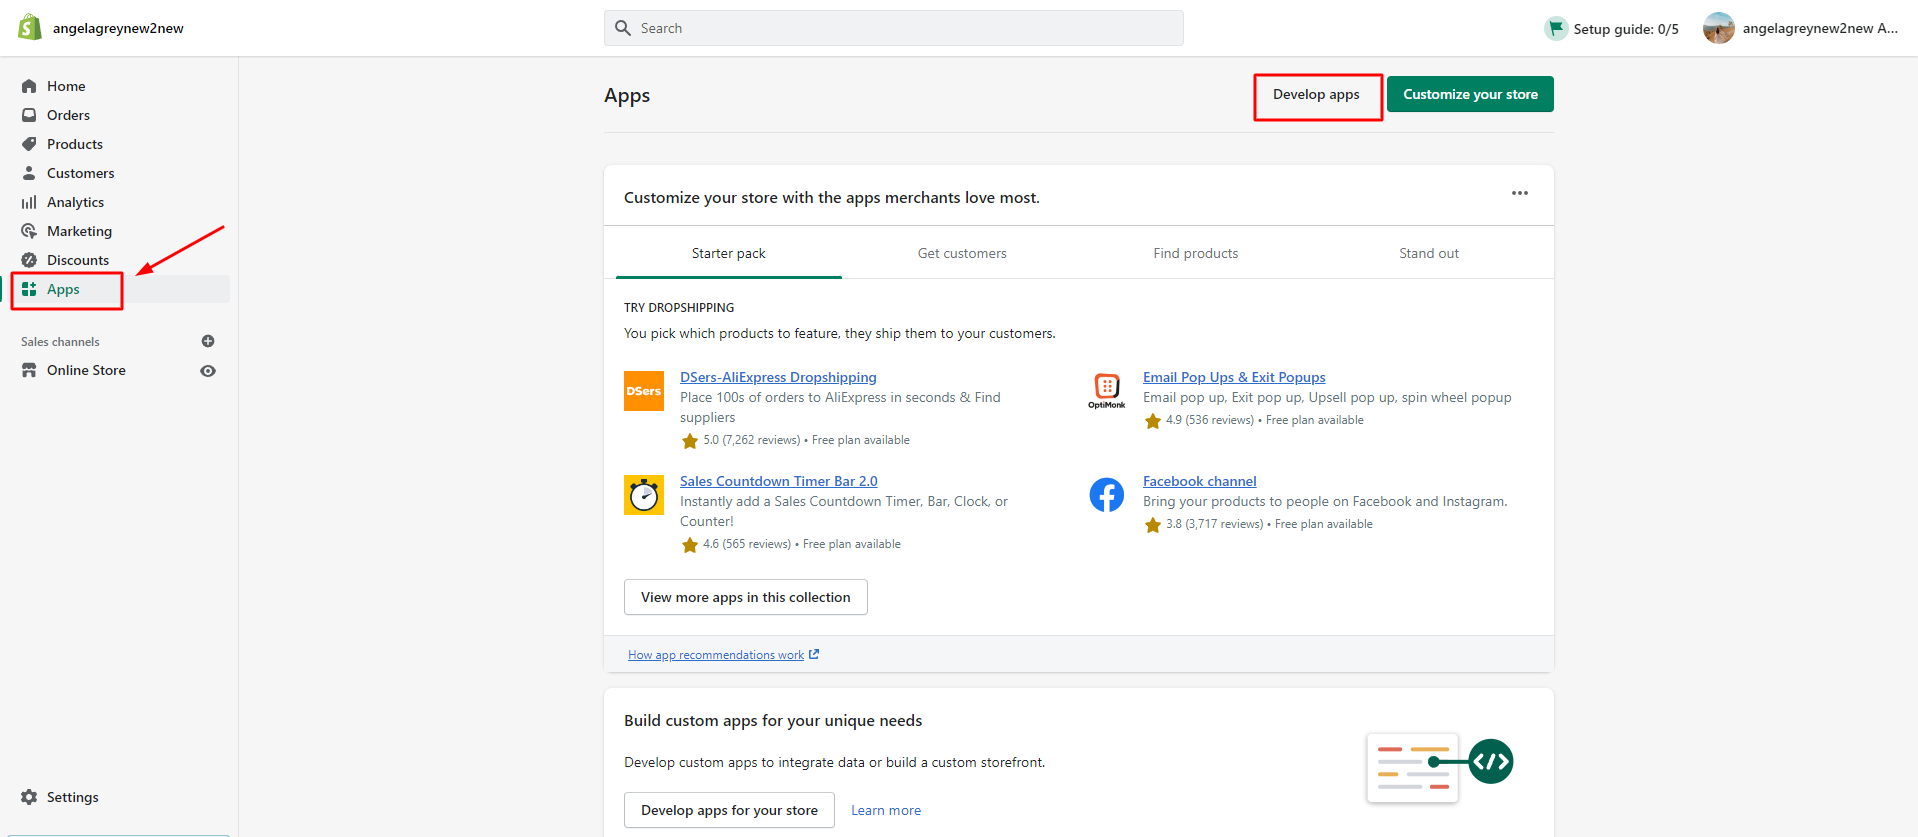
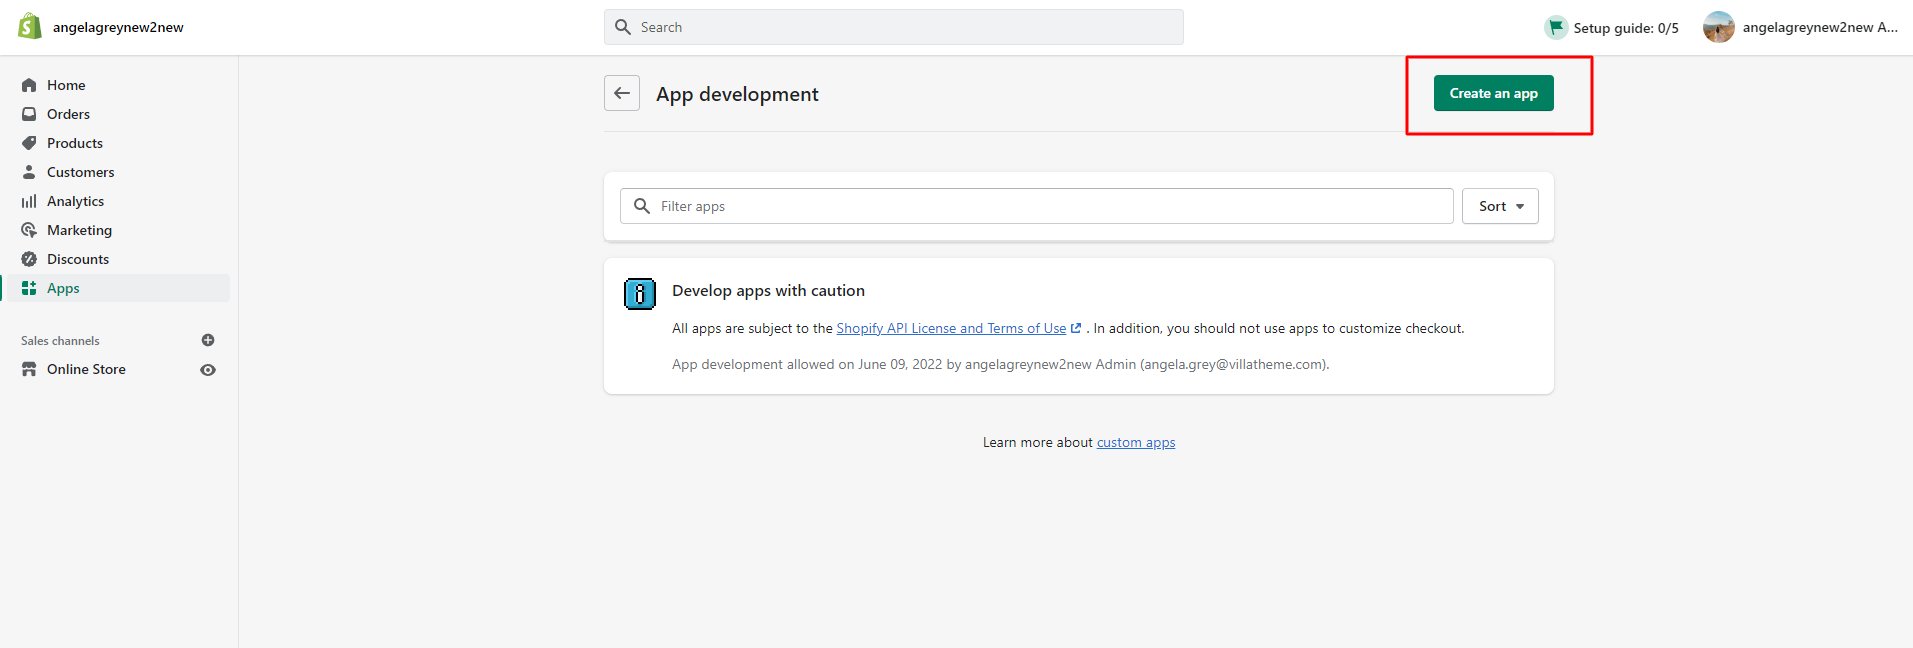
- HOW TO USE
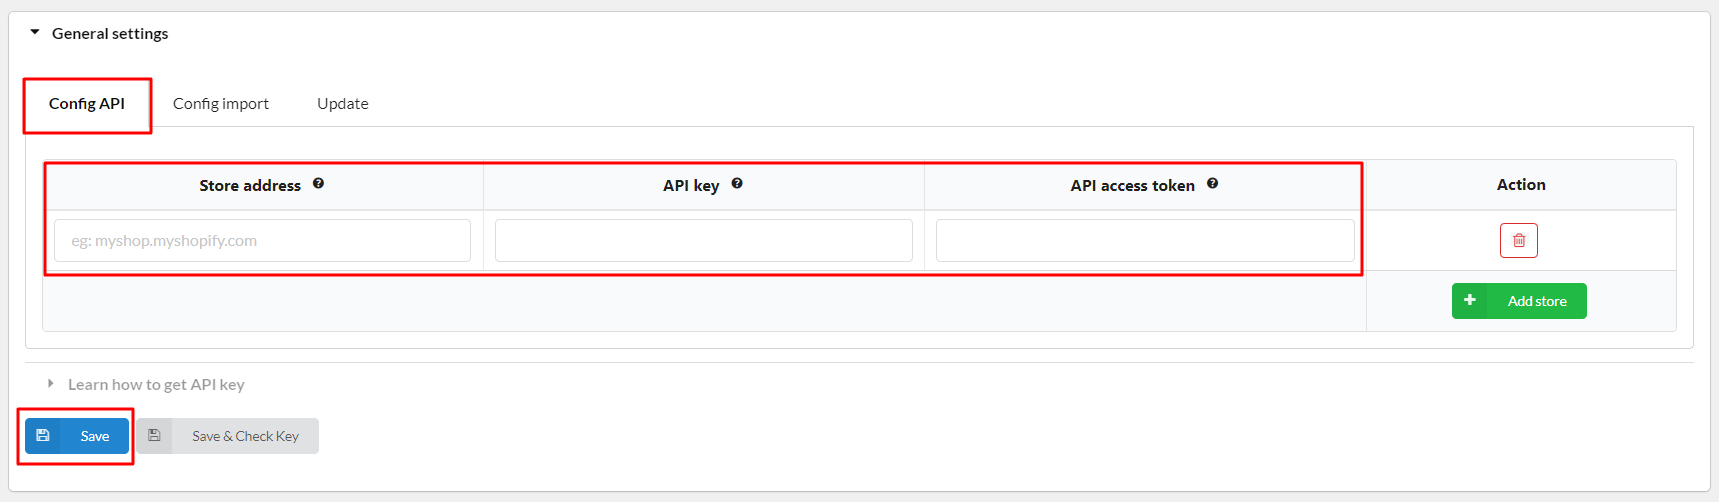
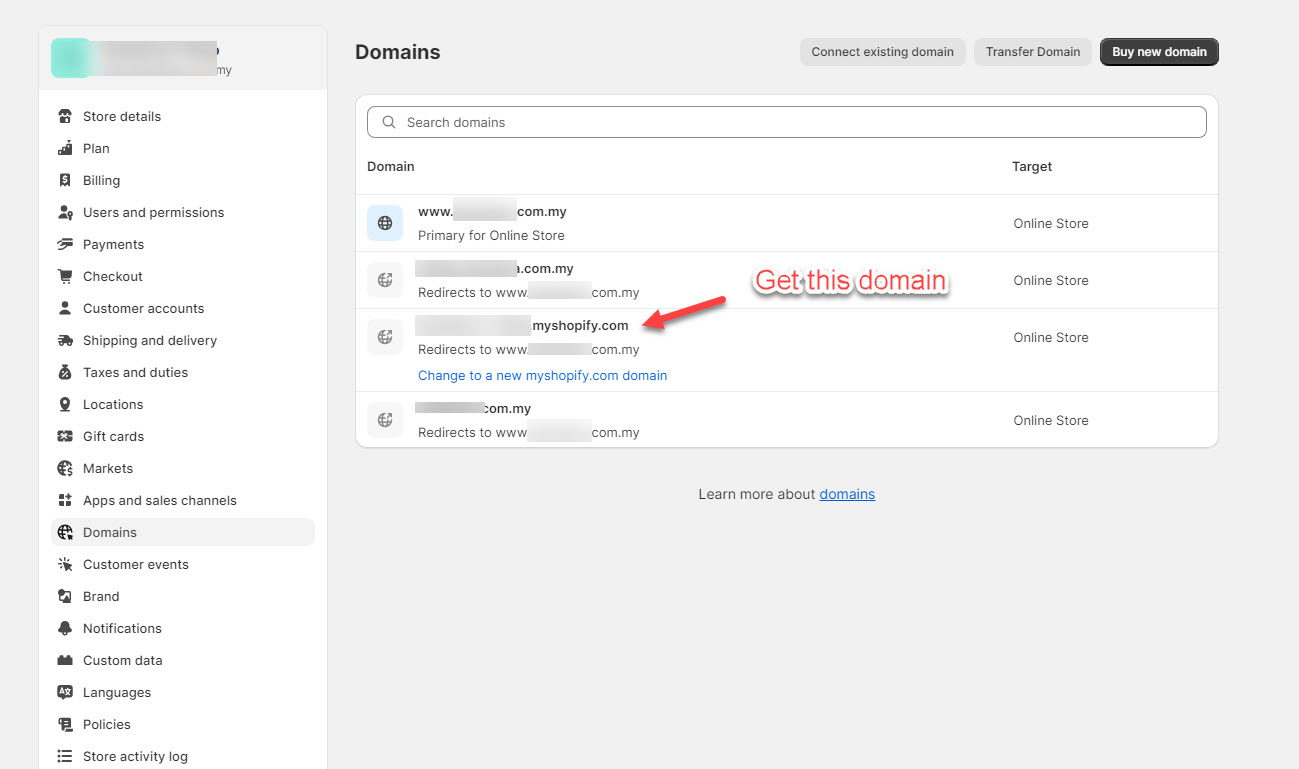
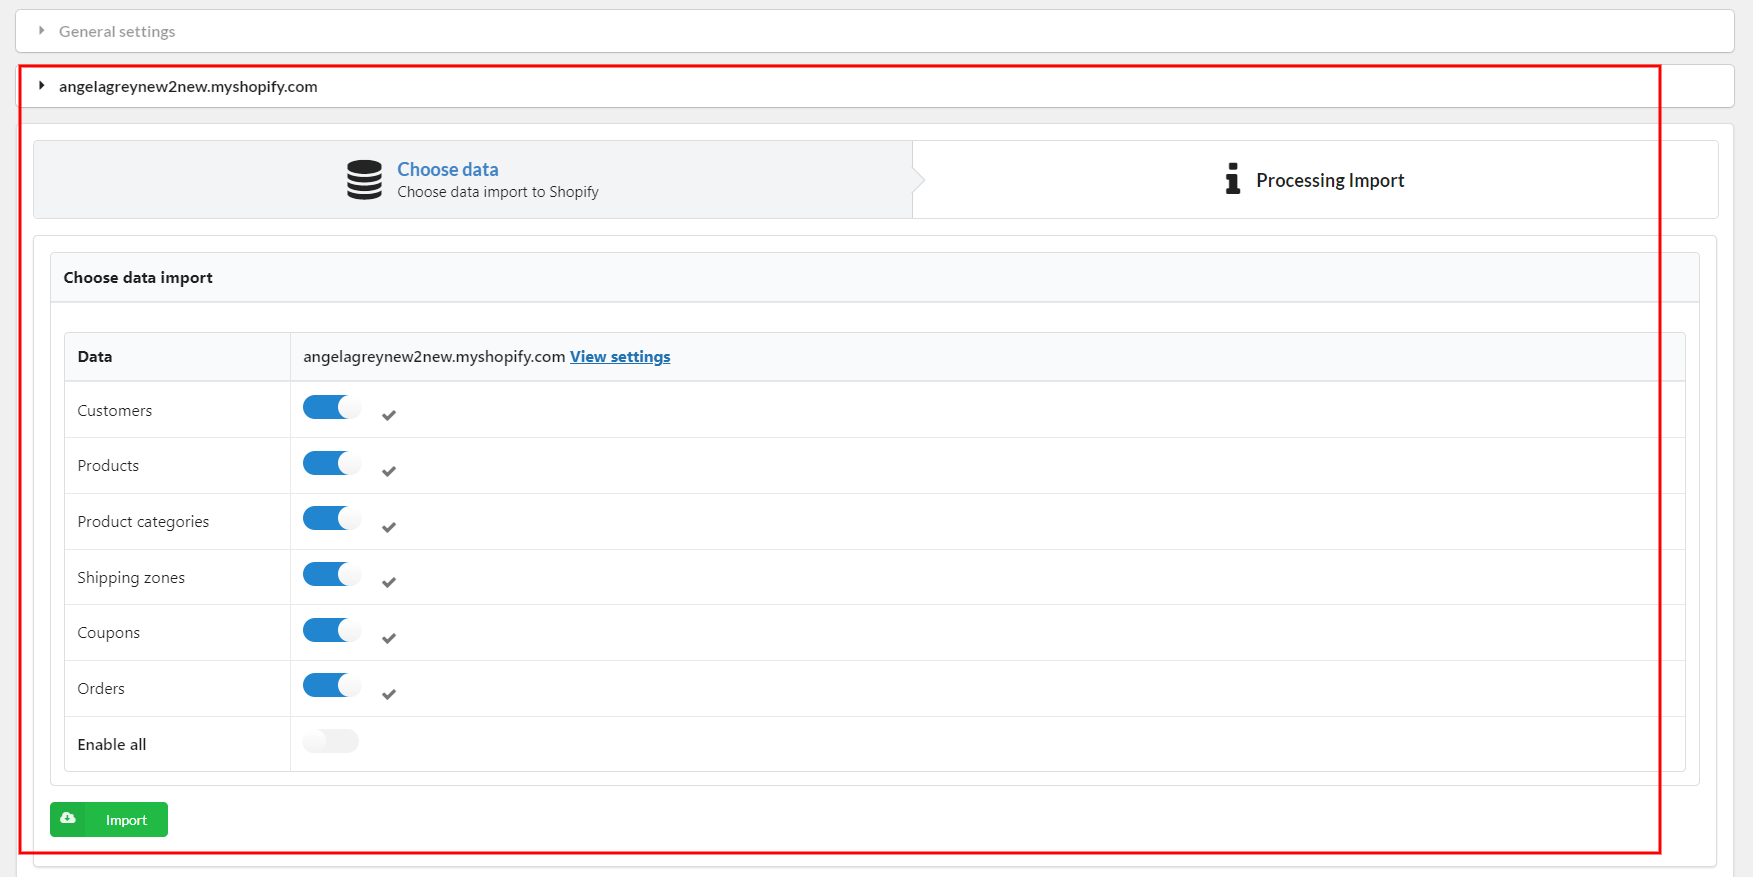
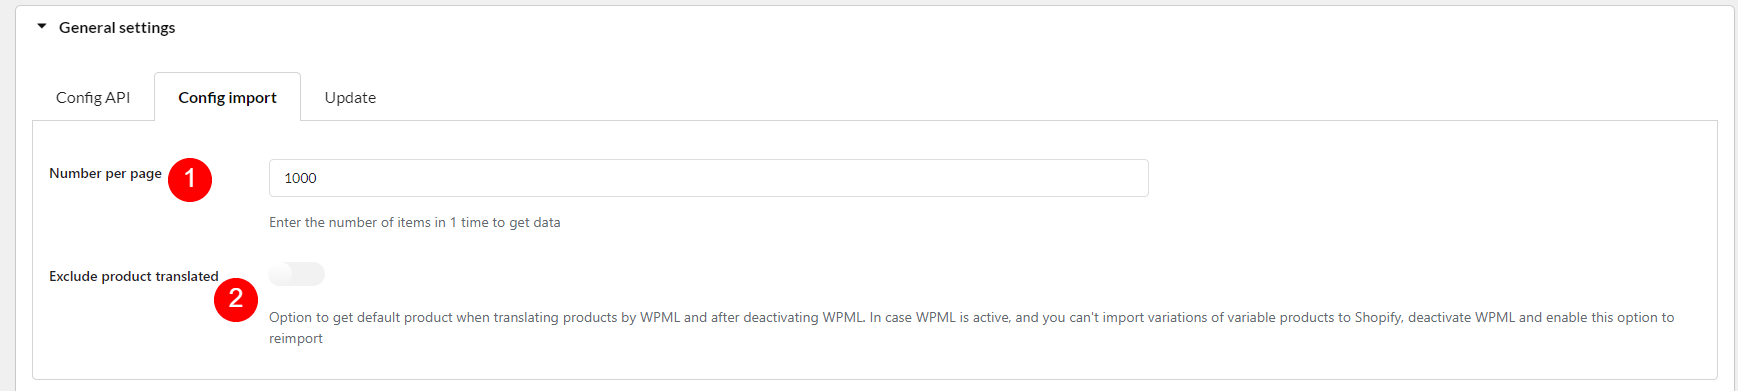
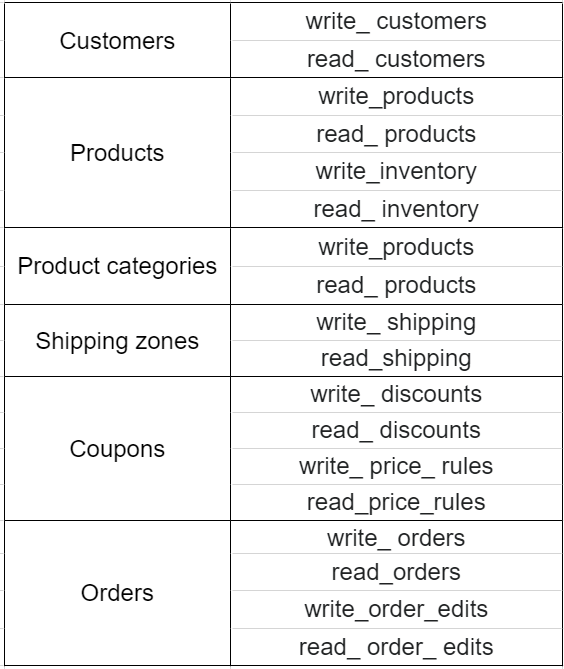
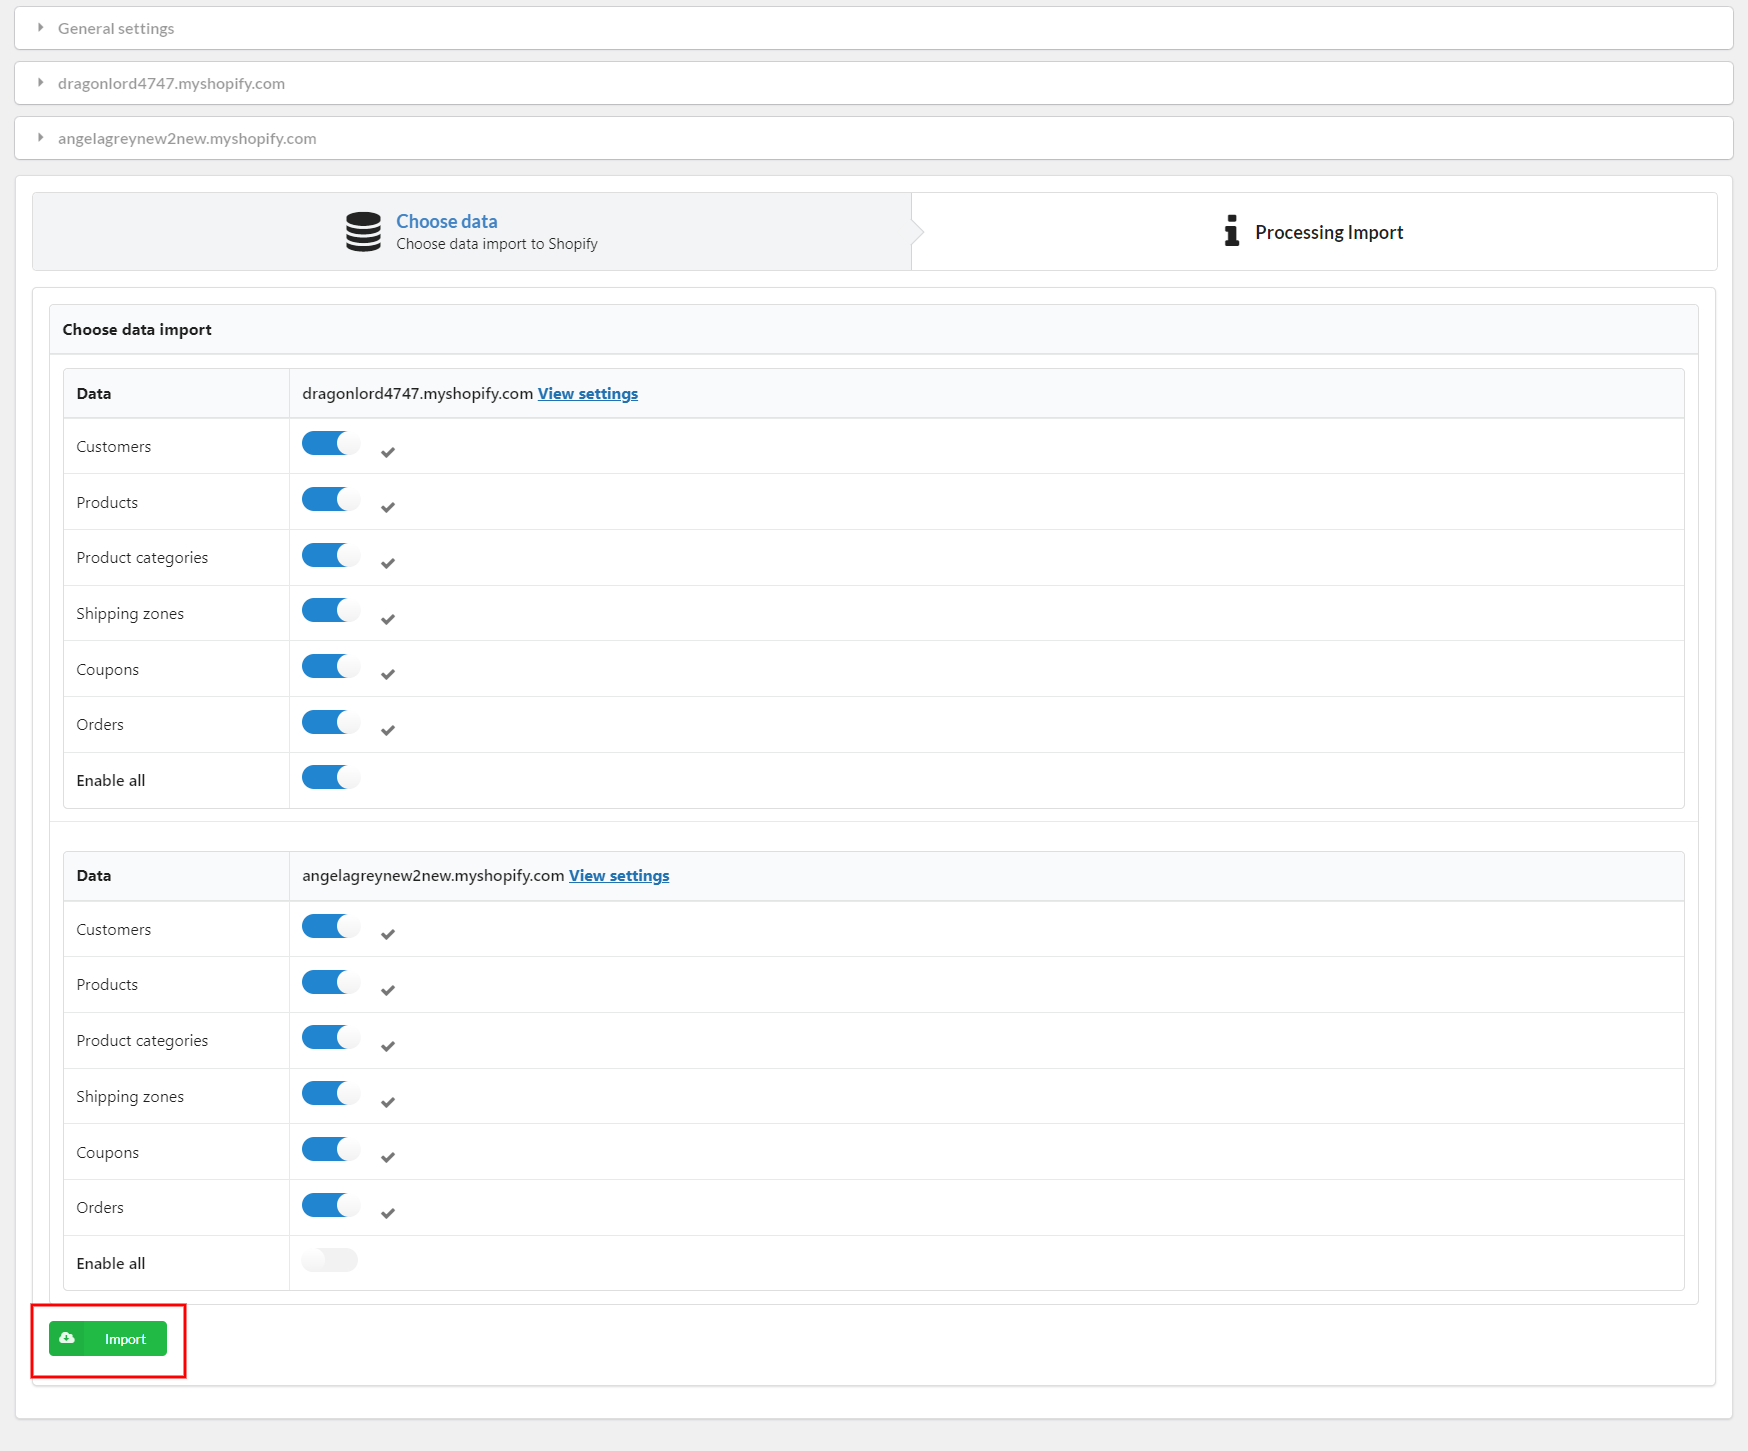
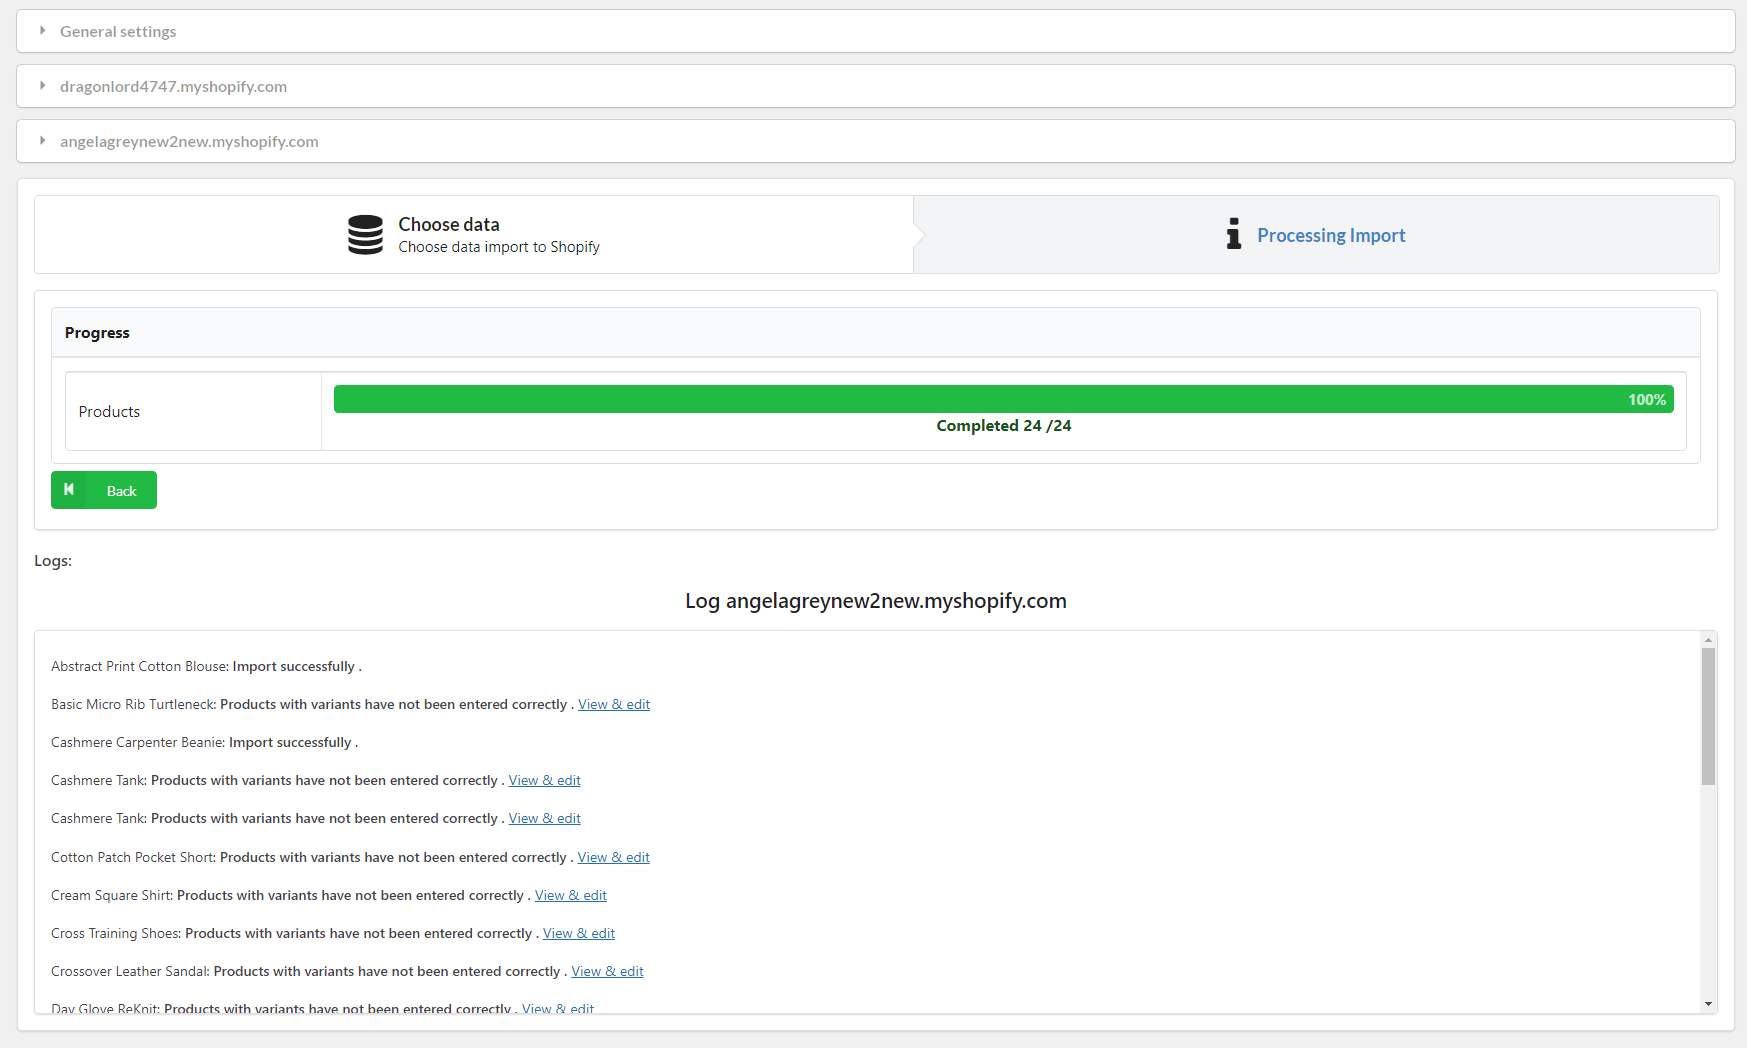
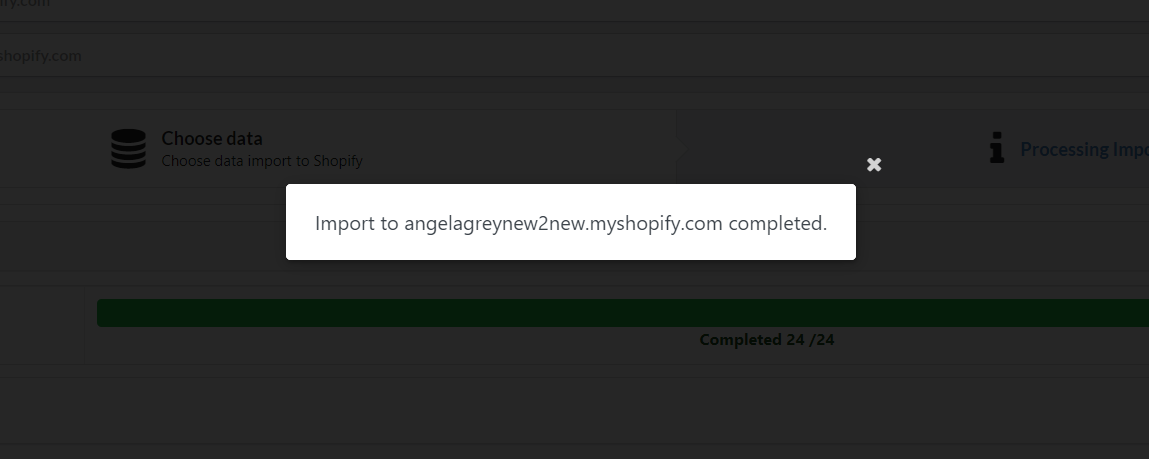
- HOW DOES IT WORK
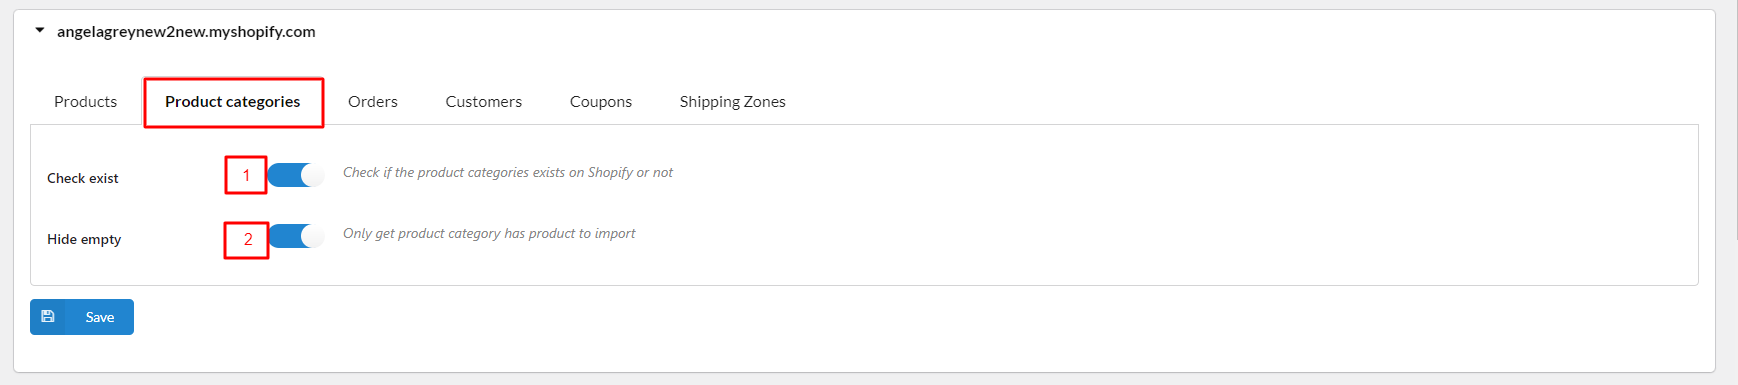
- Product Categories tab – Settings for category migration
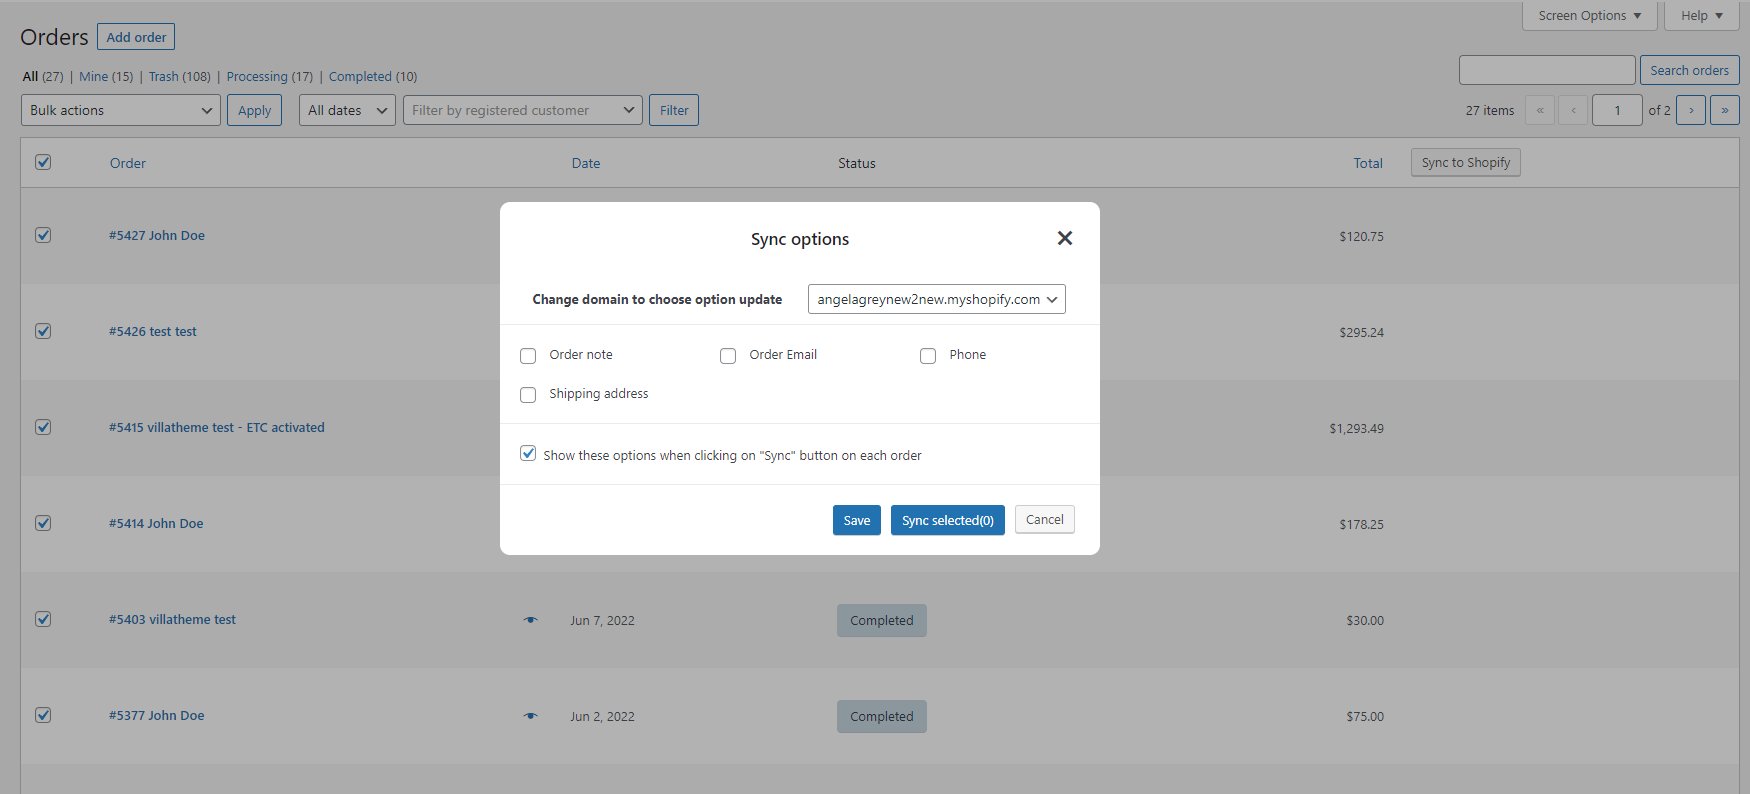
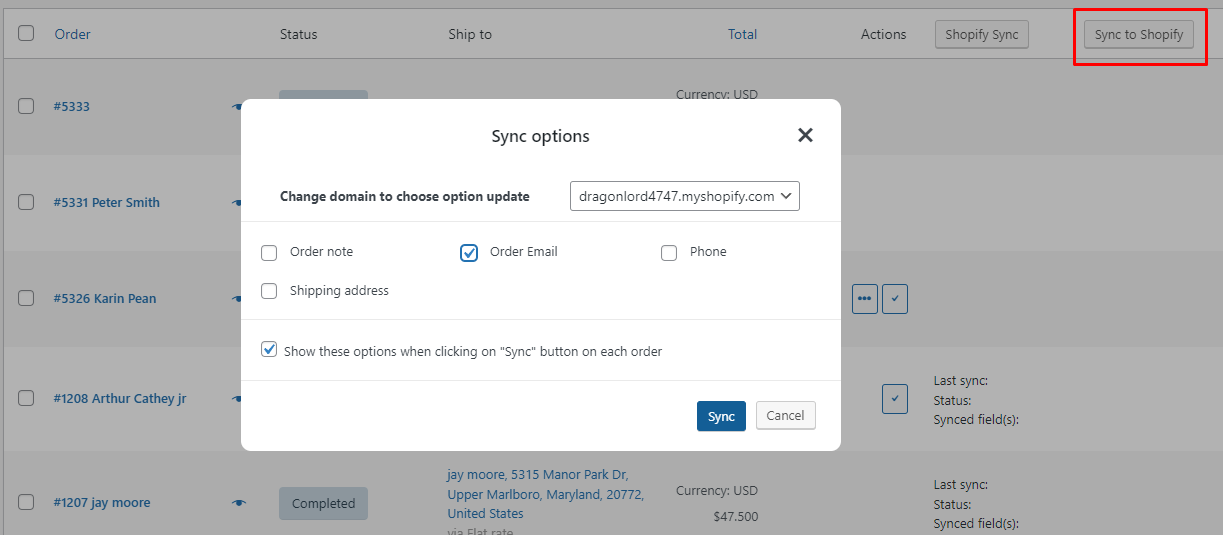
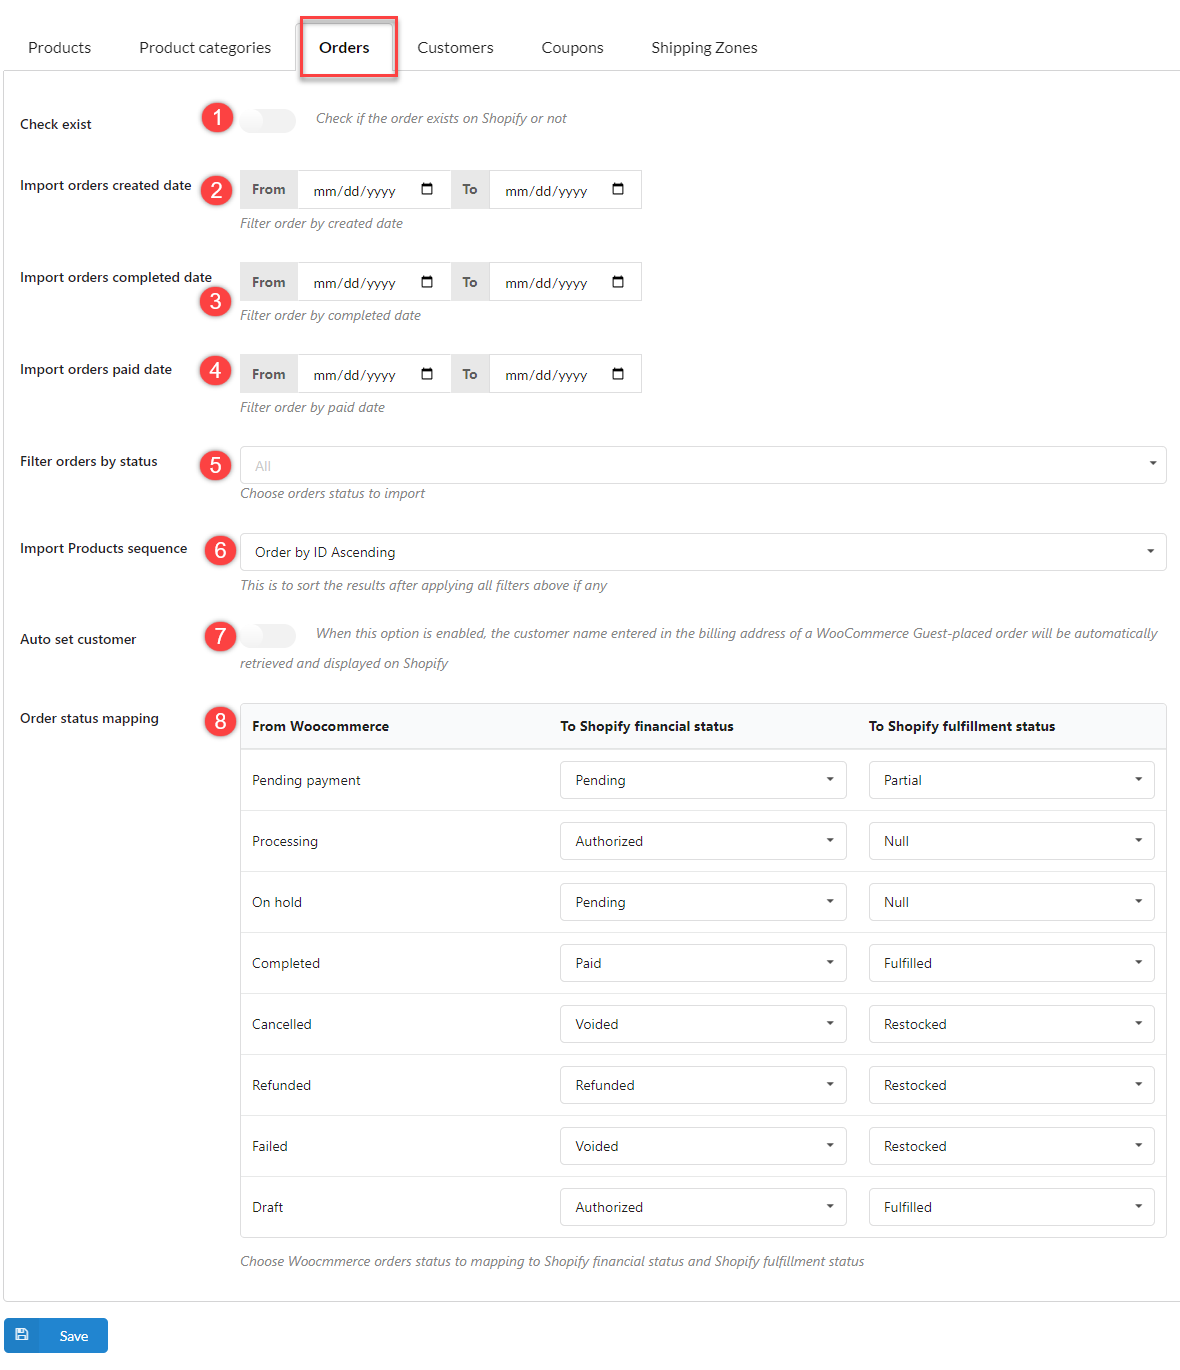
- Orders tab – Settings for order migration
- Customers tab – Settings for user migration
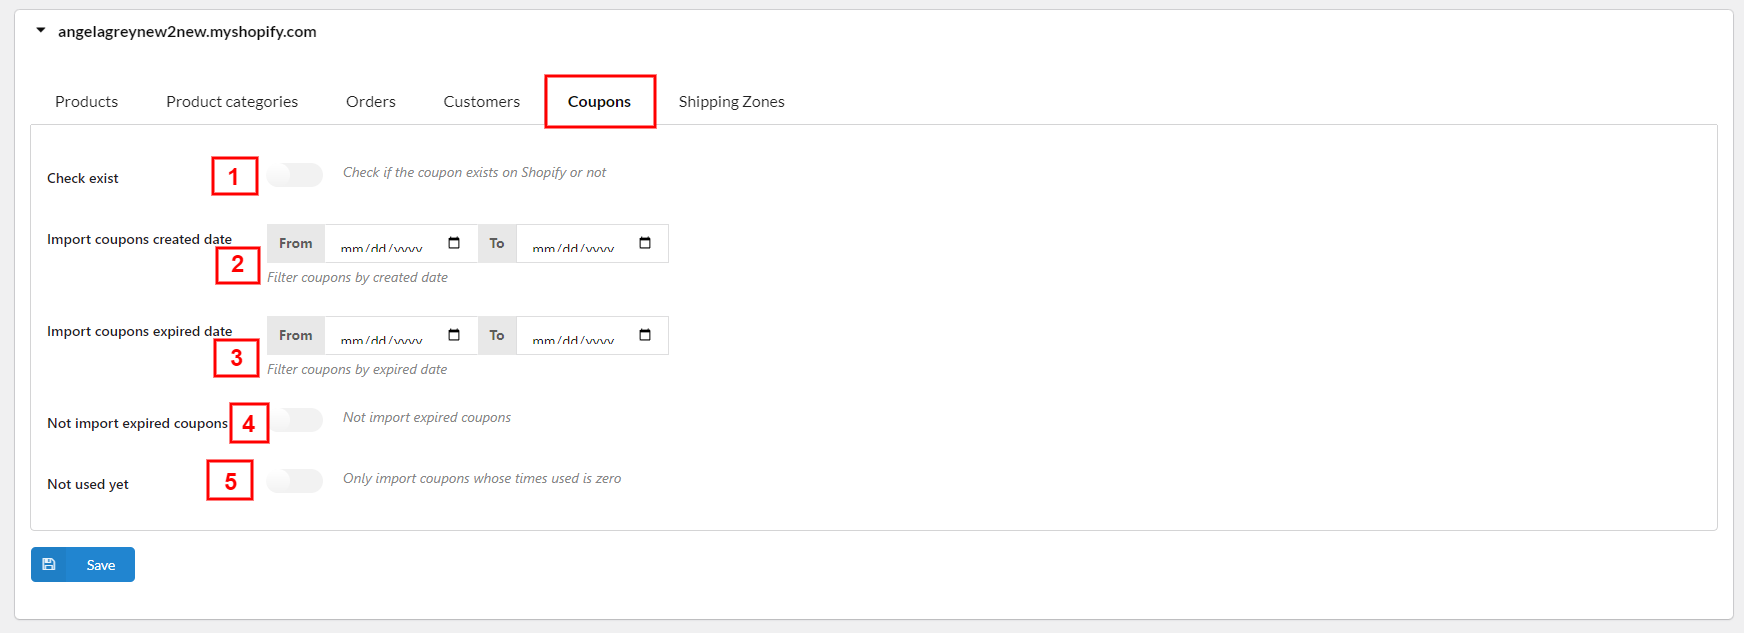
- Coupons tab – Settings for coupon migration
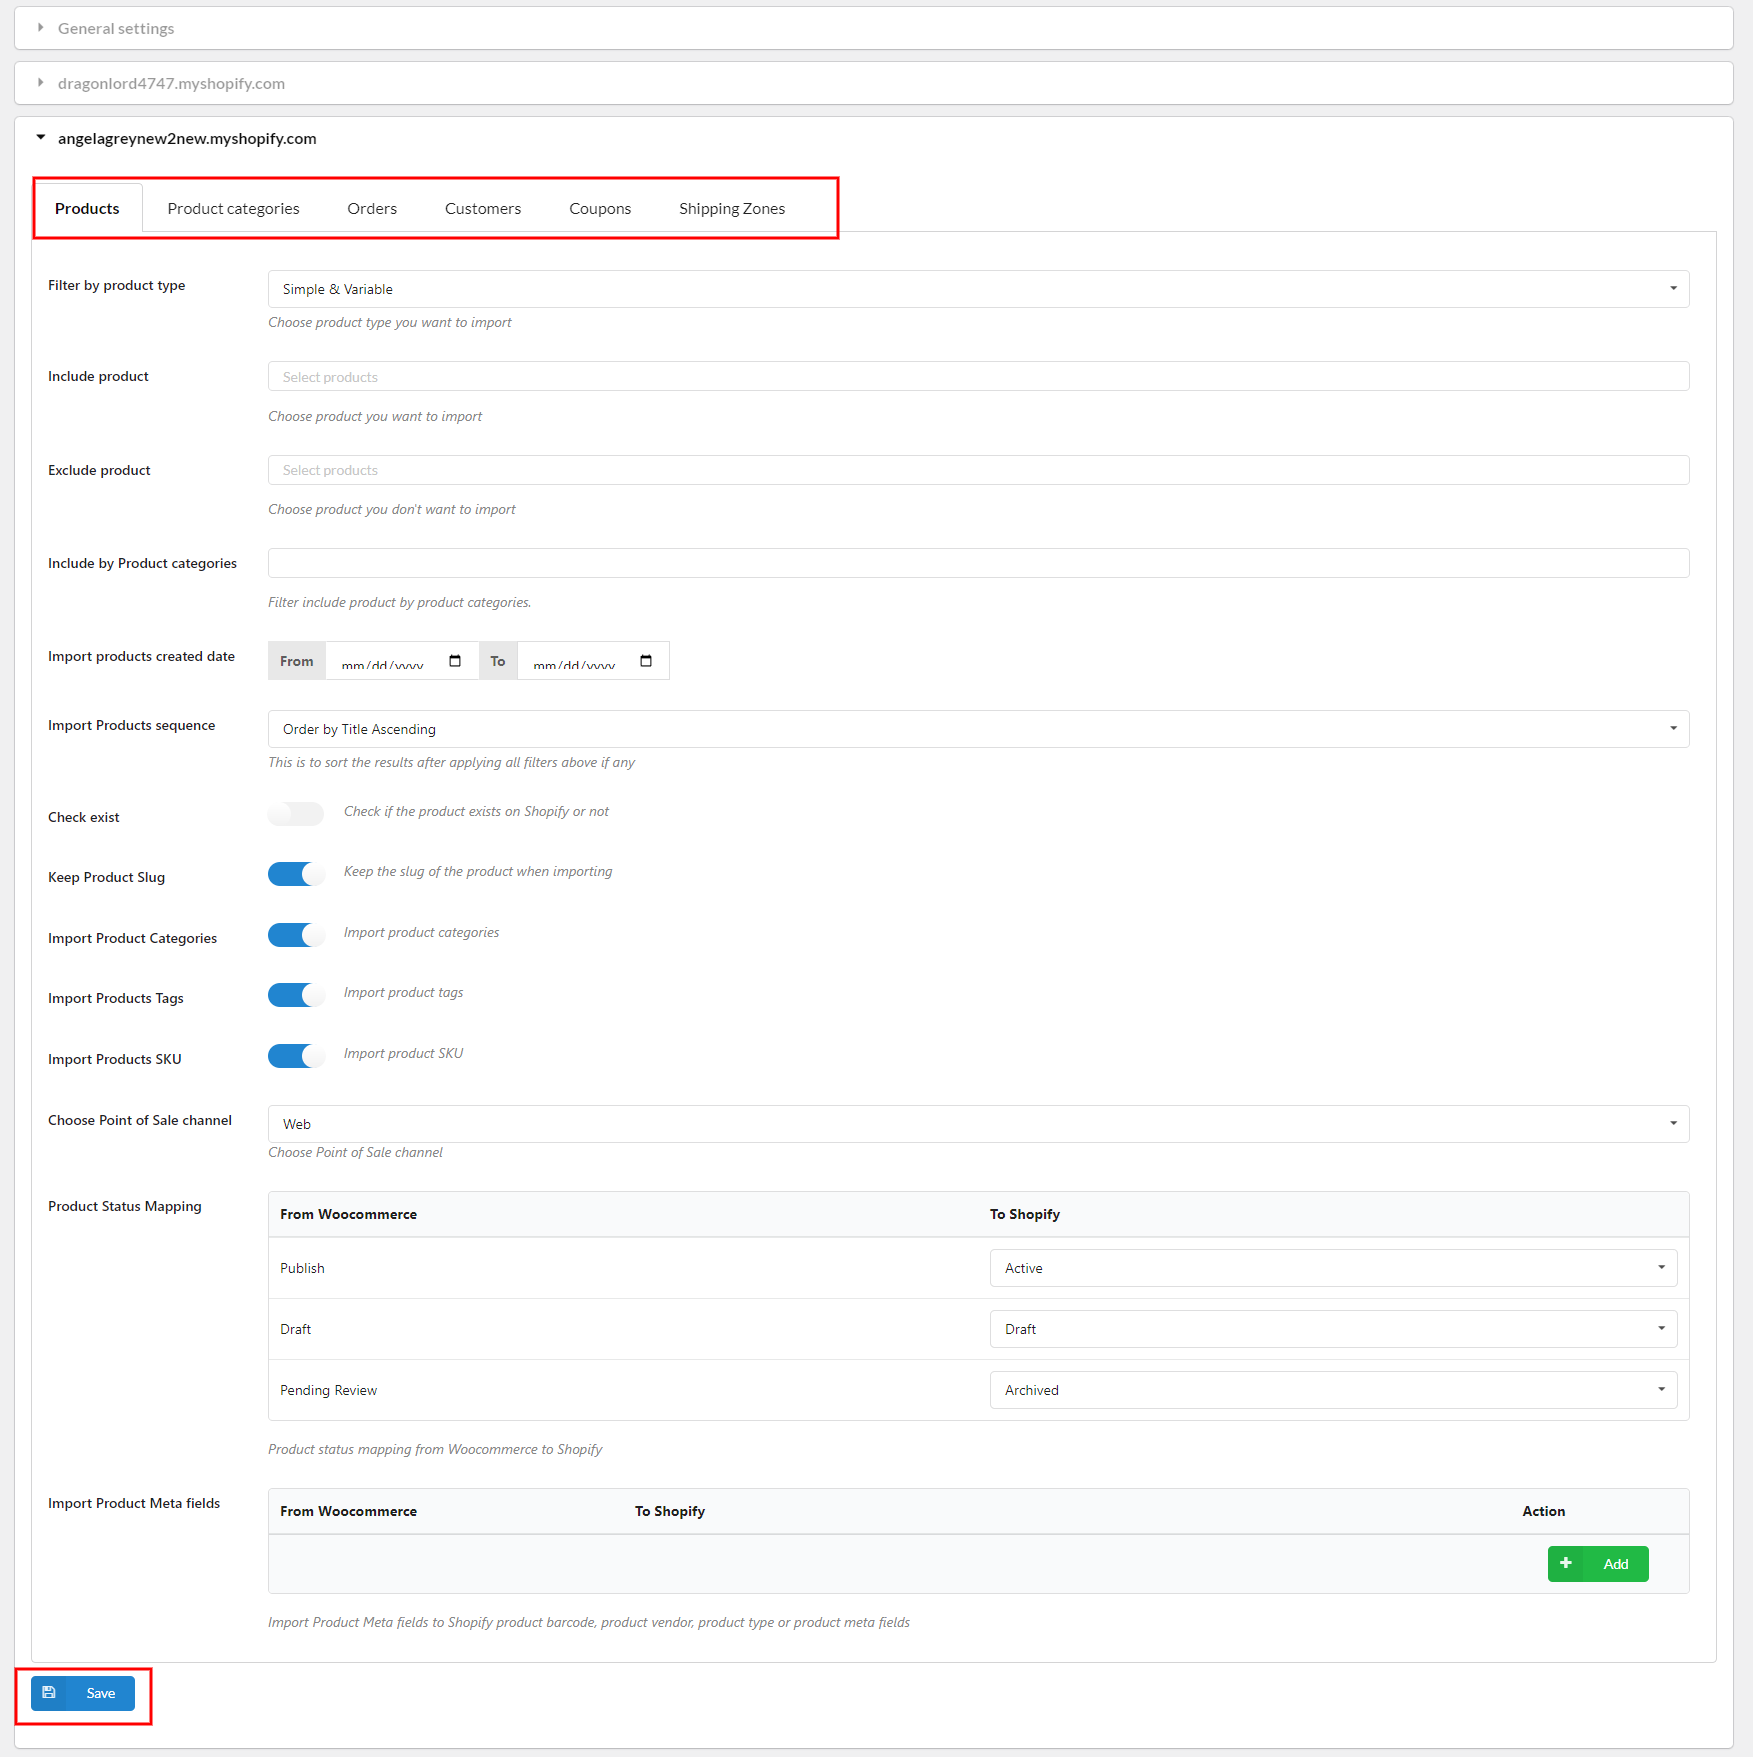
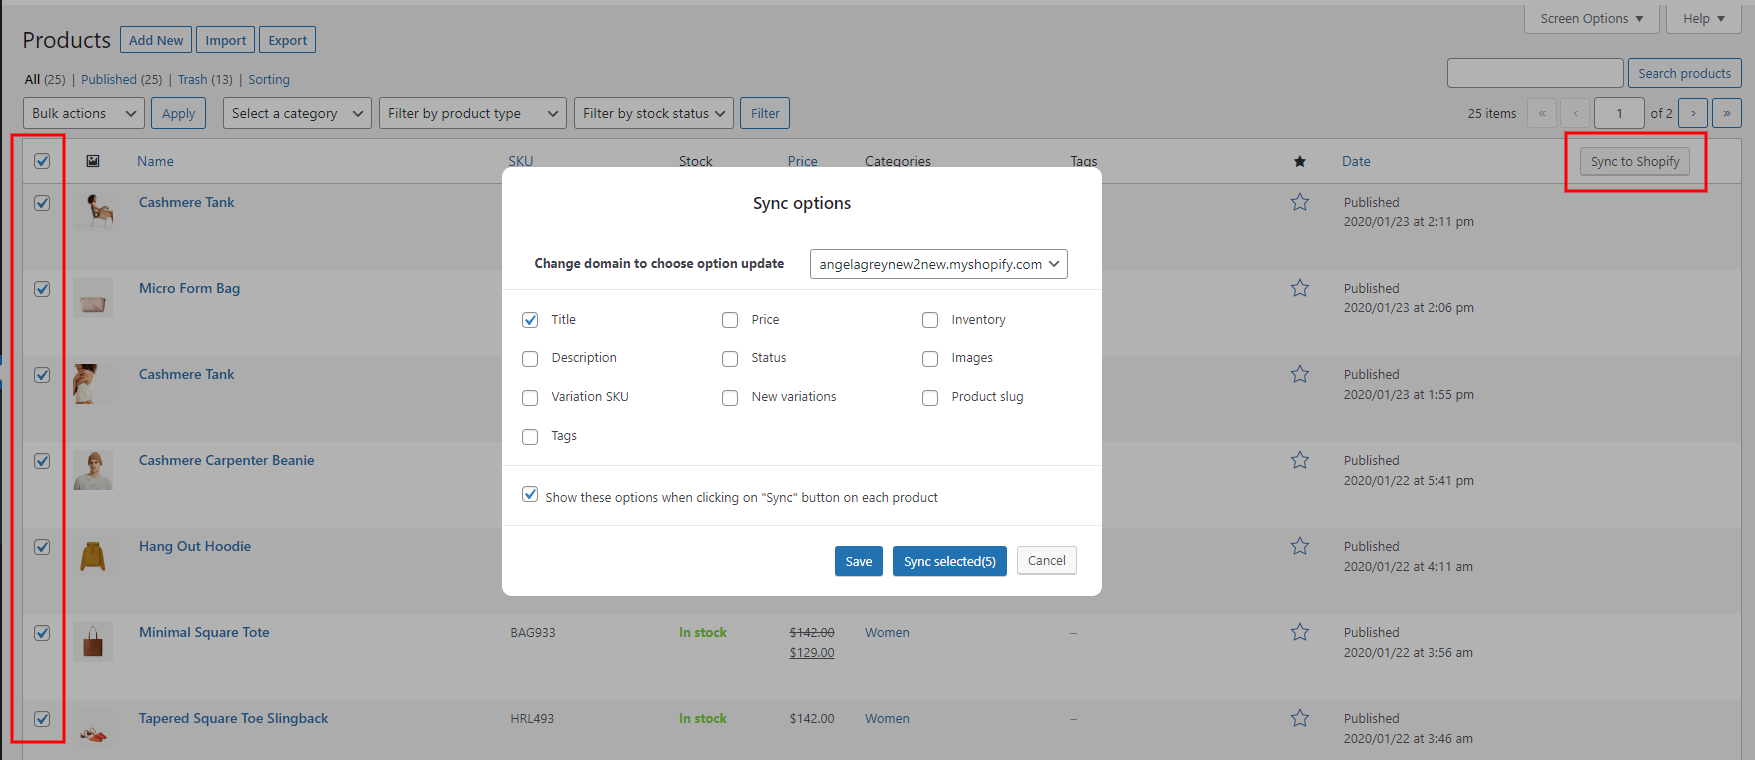
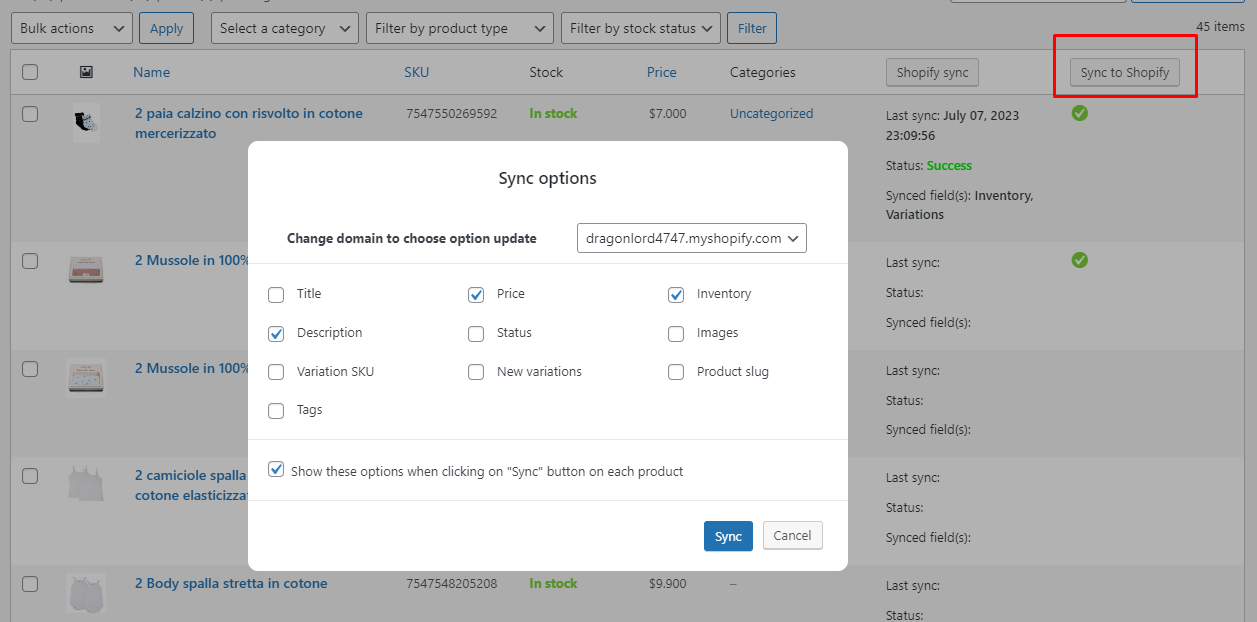
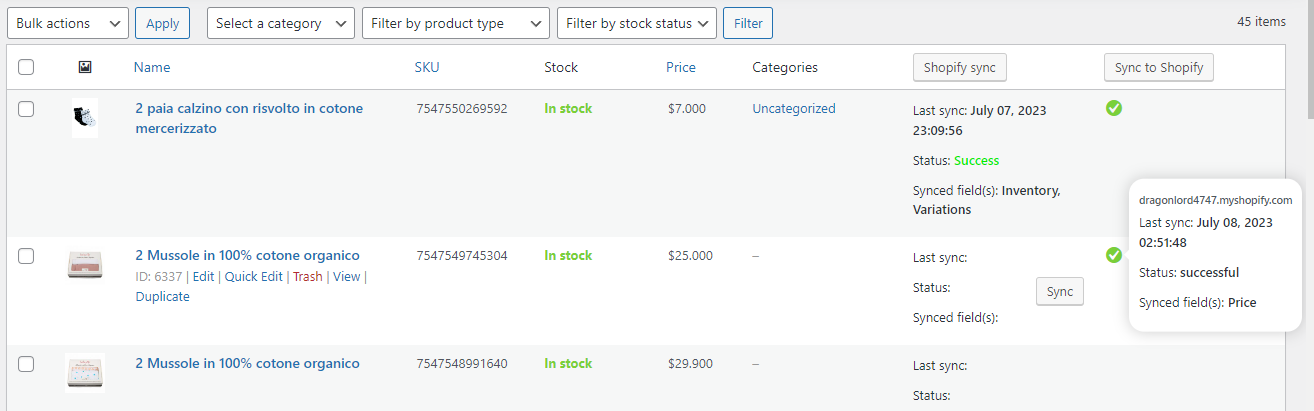
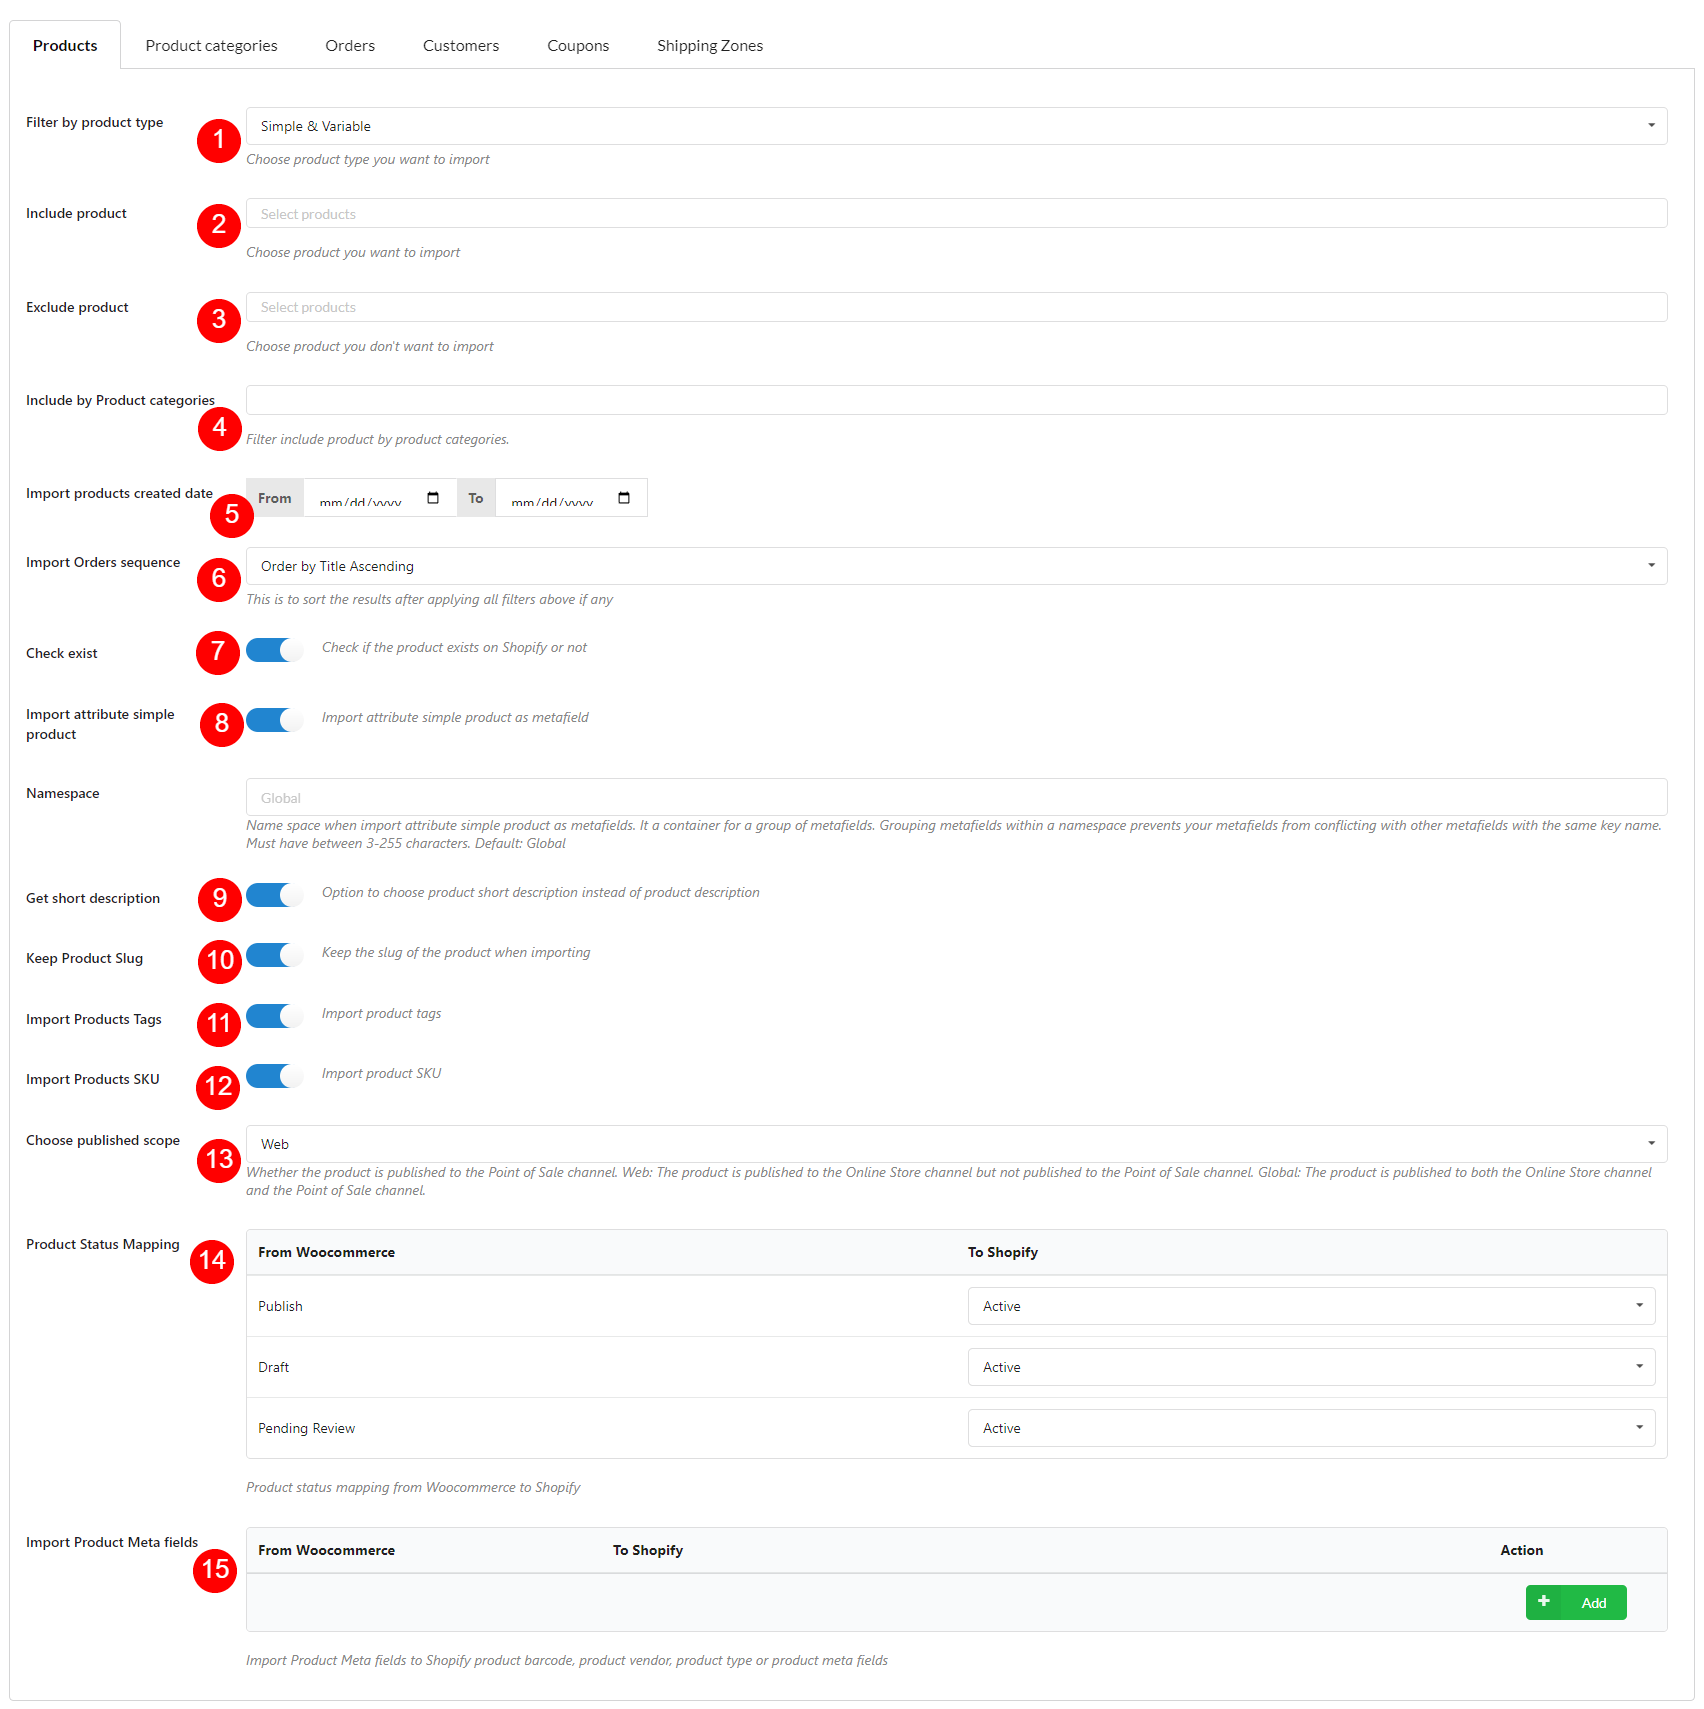
- Products tab – Settings for Products migration
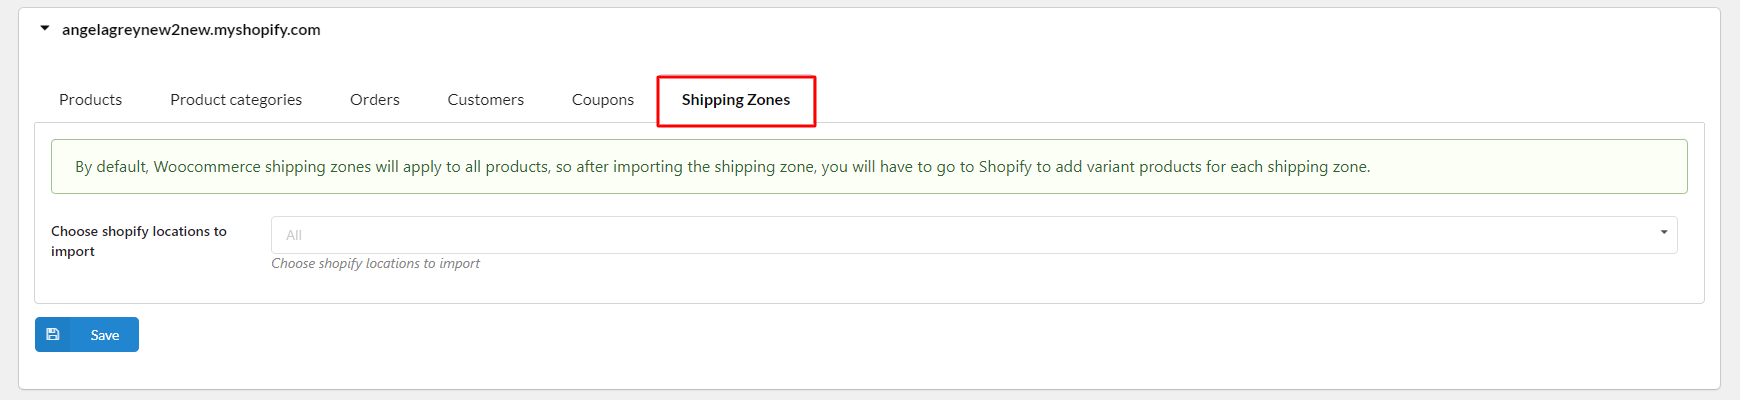
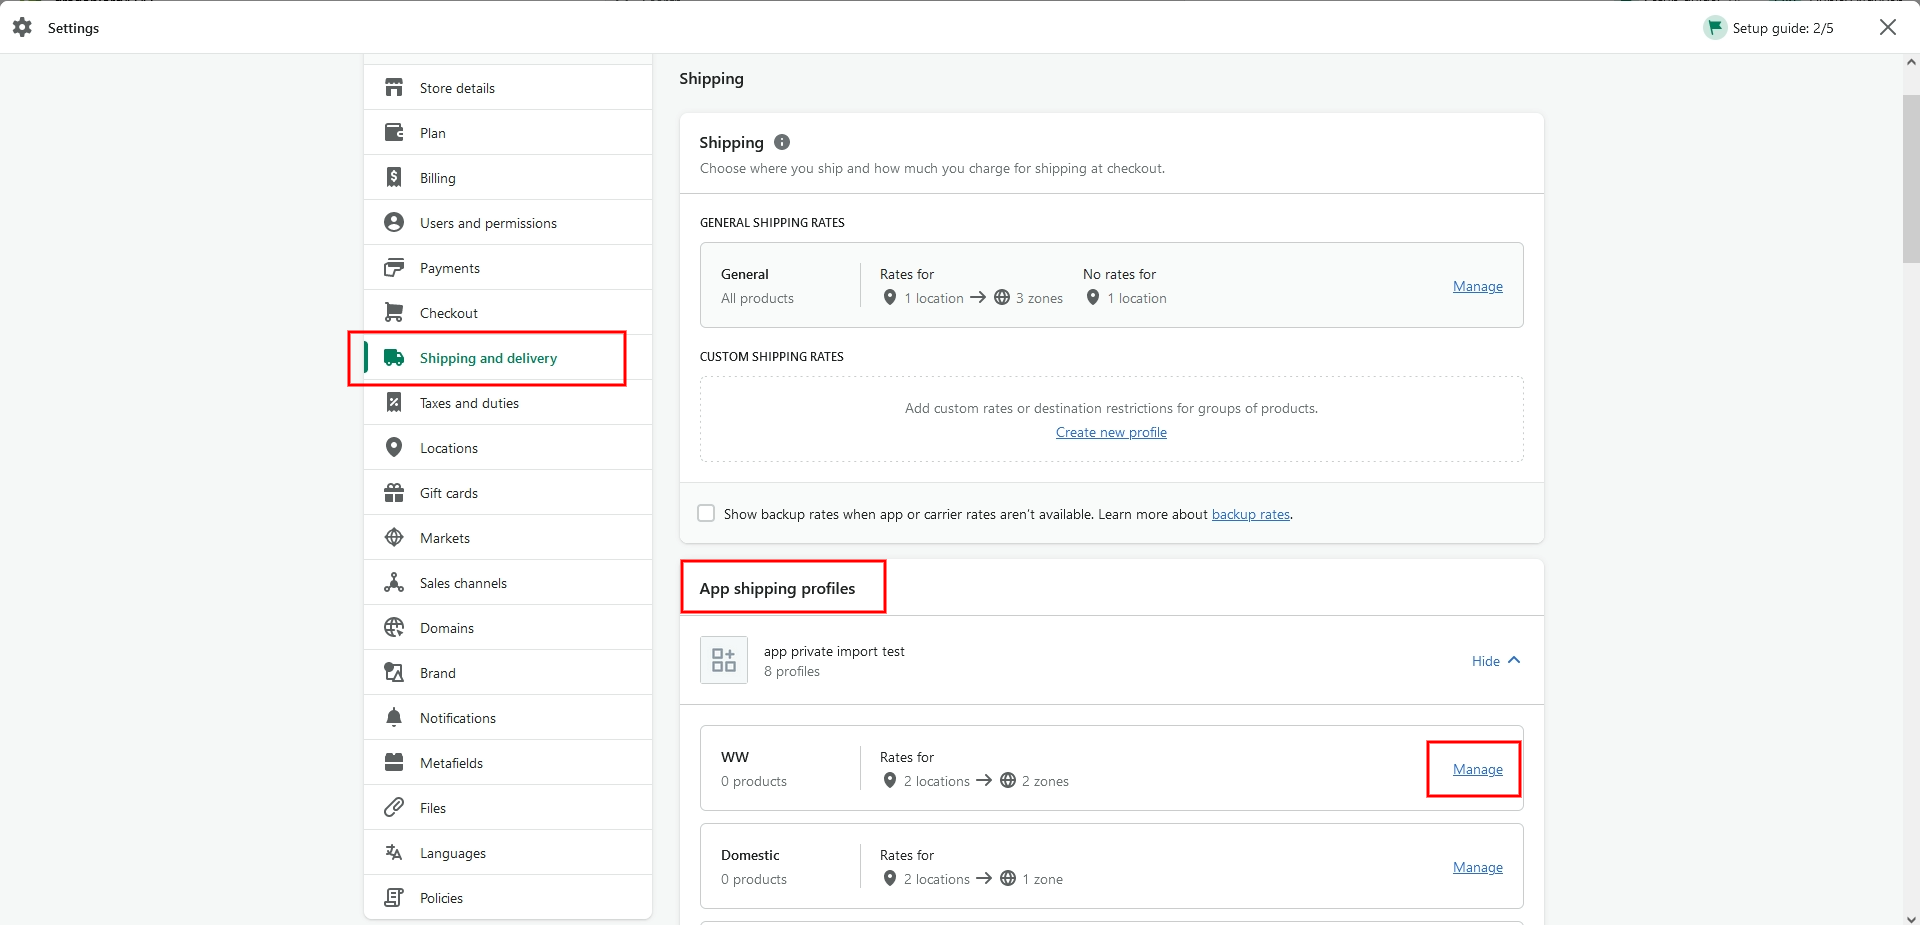
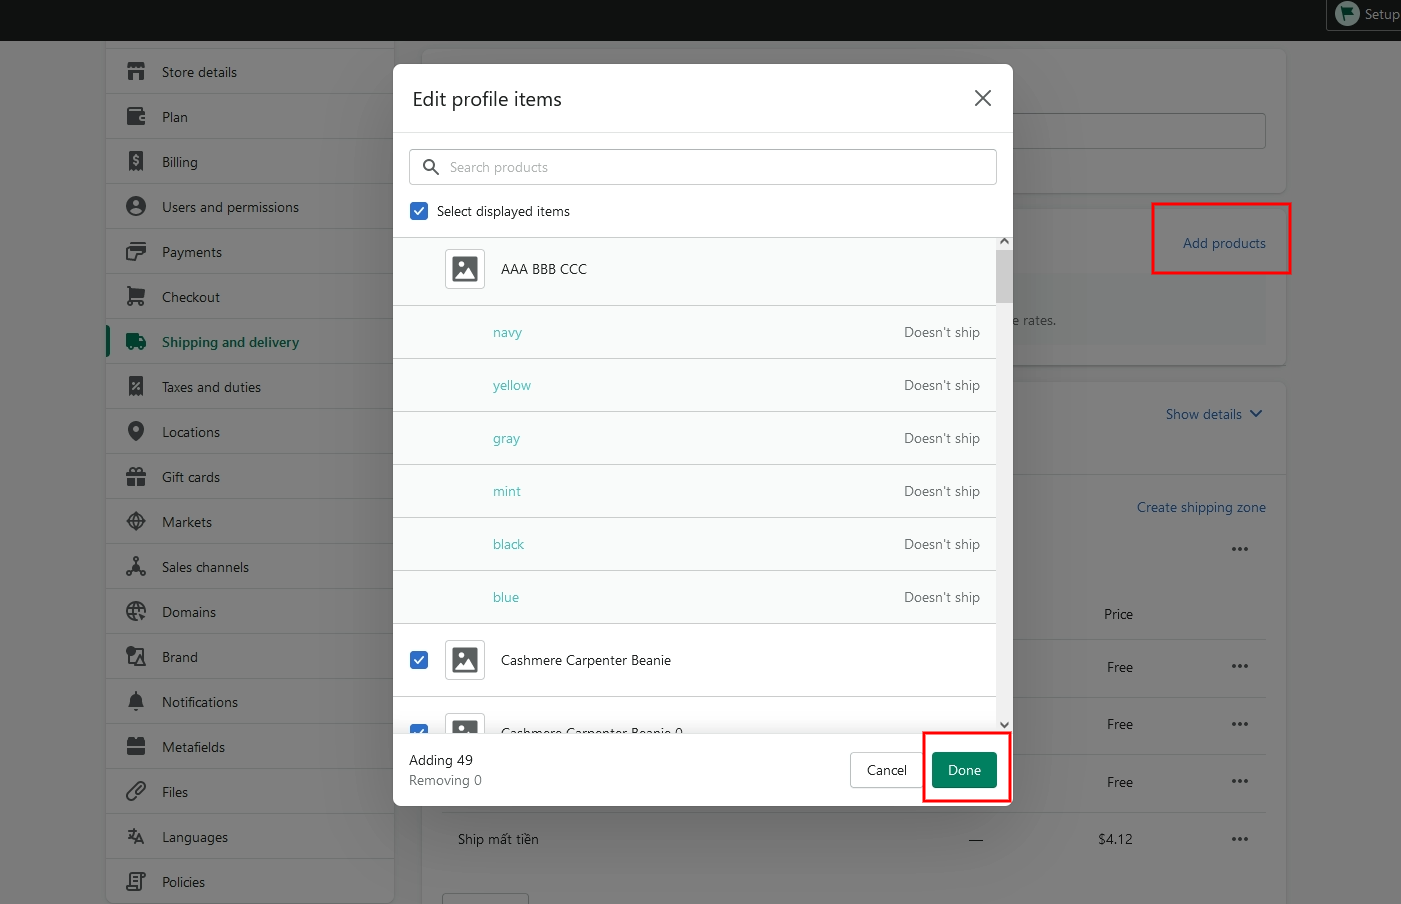
- Shipping Zones tab – Settings for shipping zone migration
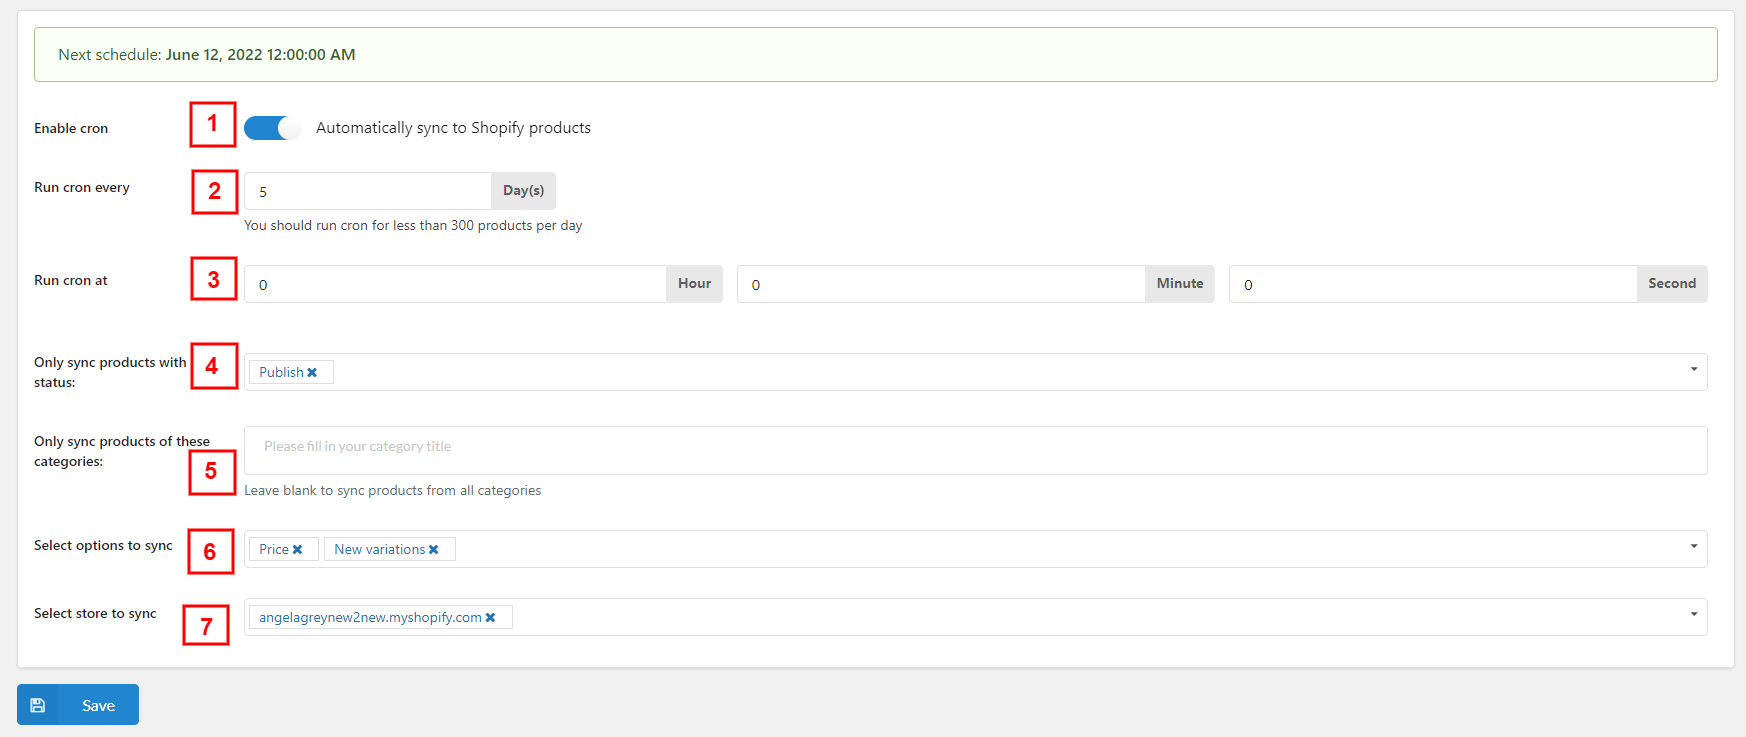
- Cron Products Sync
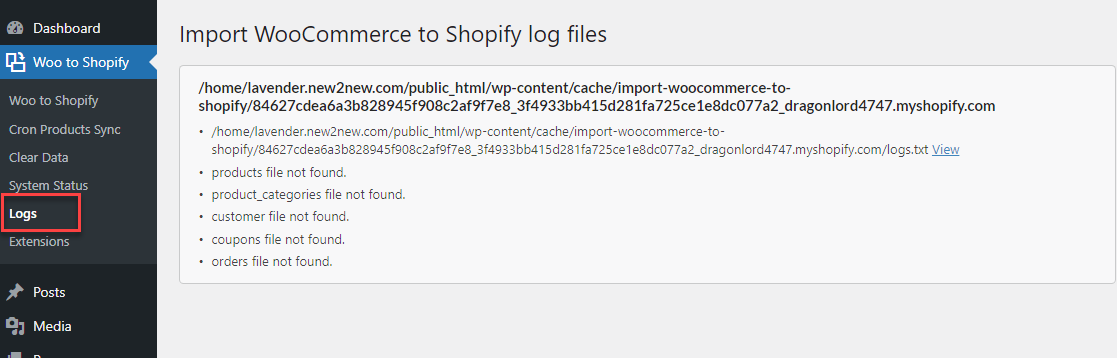
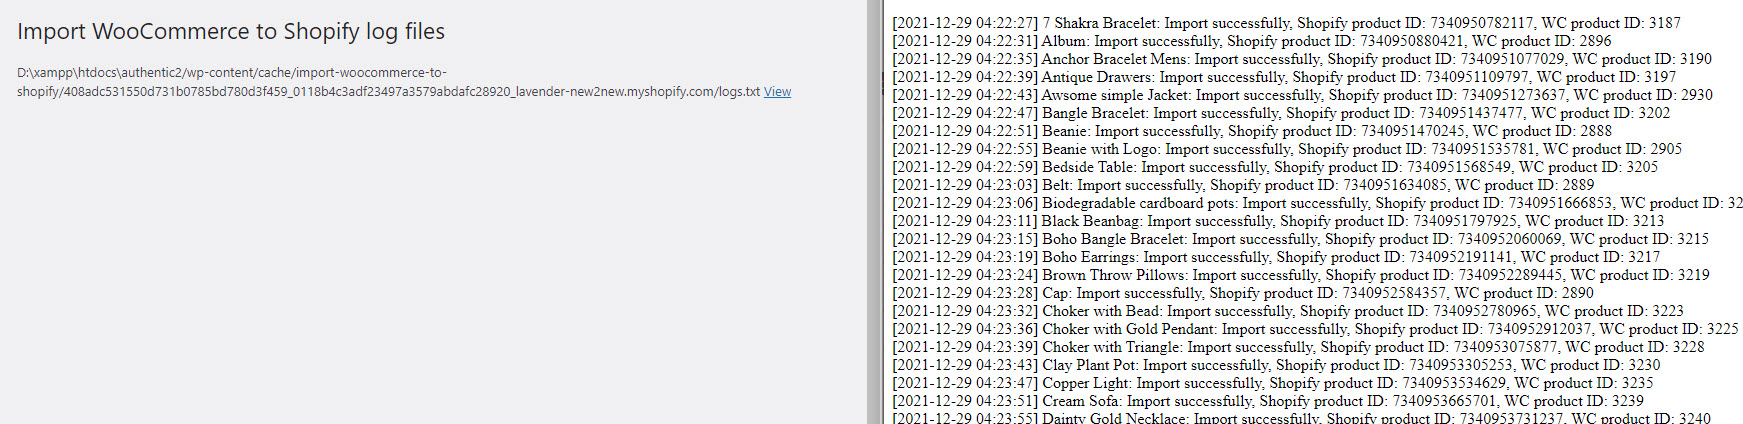
- Logs
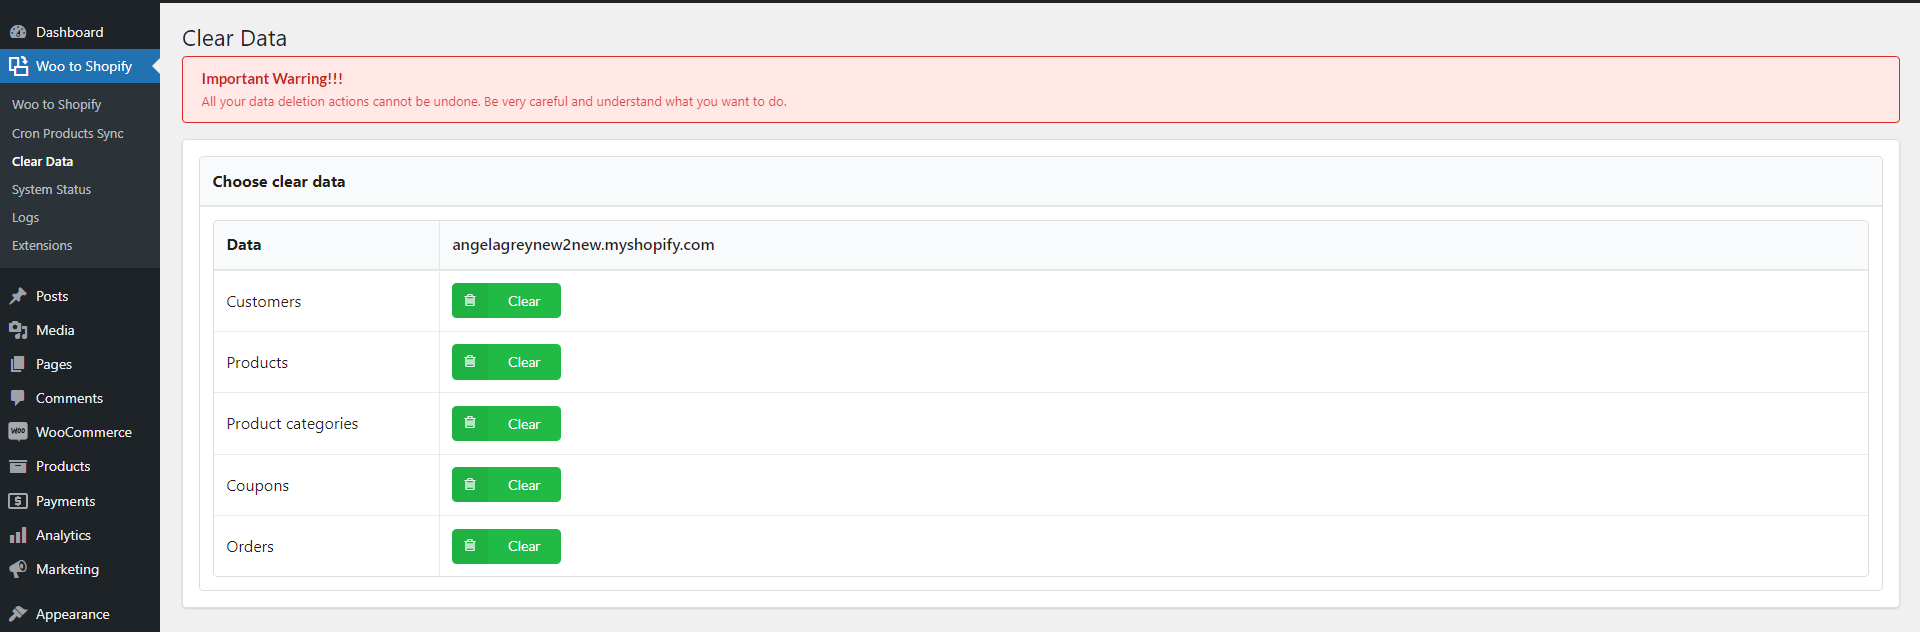
- Clear data
- Shortcode
- Compatibility
- Extra Information
Copyright Villatheme 2015-2024