VIMart – Minimal Market


Created date:

Updated date – Updated version

By: VillaTheme

Thank you for purchasing our theme. 🎉

If you have any questions that are beyond the scope of this documentation, please feel free to request support at our Support Forum. We’re always happy to help!

VIMart – Minimal Market is a modern and flexible WordPress theme designed for online stores. The theme comes with multiple pre-built presets and layout options, allowing users to create a variety of homepage designs easily. With the drag-and-drop homepage layout manager, you can customize and build unique homepages without any coding knowledge. VIMart also features an AJAX-powered shopping cart, providing a smooth and modern shopping experience for customers, while full compatibility with Elementor allows you to design attractive, dynamic, and highly customizable pages. Optimized for performance and fully responsive, VIMart ensures your online store looks great on all devices, making it a perfect choice for both beginners and experienced web creators who want to build a professional and visually appealing e-commerce website.


Benefits

  • Quick setup: Import ready-made demos or build from scratch with drag-and-drop editing.
  • Full customization: Control colors, typography, header, footer, and more through the live Customize.
  • Optimized for sales: Modern layouts and conversion-focused elements to showcase your products effectively.
  • Responsive and mobile-friendly: Looks great and performs smoothly across all devices.
  • Lightweight and minimal: Focuses on simplicity, speed, and user experience without unnecessary bloat.


Key Features

  • One-Click Demo Import: Instantly set up your store with pre-built demos – get a complete design in seconds.
  • Elementor Integration: Easily create and customize pages using the intuitive drag-and-drop builder.
  • Fully Responsive Design: Looks stunning and functions perfectly on all screen sizes and devices.
  • Live Customize Support: Adjust colors, fonts, layouts, and more – and preview changes instantly.
  • Flexible Header & Footer Builder: Personalize your layout to match your branding and navigation needs.
  • WooCommerce Optimized: Built specifically for online stores with smooth product pages, carts, and checkout flow.


Quick Start

Getting started with VIMart – Minimal Market is fast and simple. After installing and activating the theme:

  • Install the required plugins (WooCommerce, Elementor, and One Click Demo Import).
  • Import the demo content – or create your own setup if you prefer.

That’s all you need to start building your store! With just a few easy steps – or a single click using our built-in demo data – you’ll have a fully functional and beautifully designed online shop ready to go.


Watch this tutorial for a better view


Before installing VIMart, make sure your website meets the following requirements:

WordPress Environment

  • WordPress version: 5.8 or higher (latest version recommended)
  • PHP version: 7.4 or higher (PHP 8.x supported)
  • memory_limit = 512M
  • max_execution_time = 300
  • max_input_time = 300
  • post_max_size = 128M
  • upload_max_filesize = 128M
  • max_input_vars = 5000


From WordPress Dashboard:

  • Go to Appearance > Themes > Add New.
  • Click Upload Theme and choose the .zip file.
  • Click Install Now.


After installation, click Activate.


Recommended plugins:

  • WooCommerce: Powers your online store and product management
  • Elementor Website Builder: Lets you visually edit and design your pages
  • One Click Demo Import: Helps you quickly import the theme’s demo content

To install them quickly:

Go to your theme setup screen.


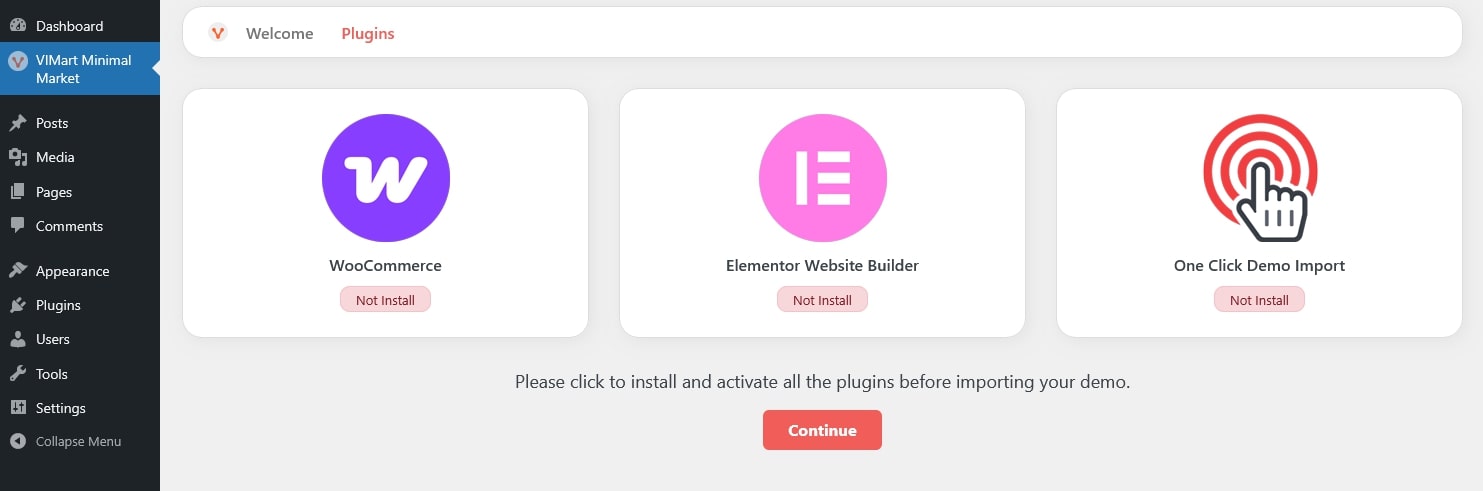
Click “Continue” on each prompt to install and activate all required and recommended plugins.


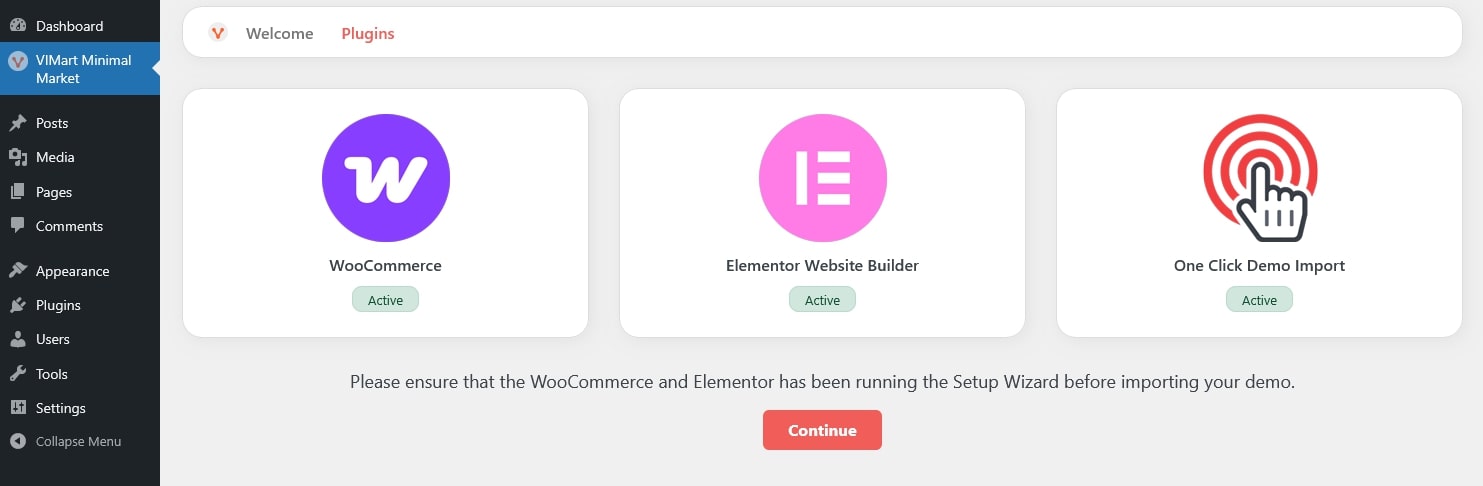
Once these plugins are active, you can proceed to import the demo content without issues.


Before importing the demo, make sure the necessary plugins are installed and activated.

  • WooCommerce
  • Elementor

You can import the demo in two ways:

Option 1: Import Predefined Demo

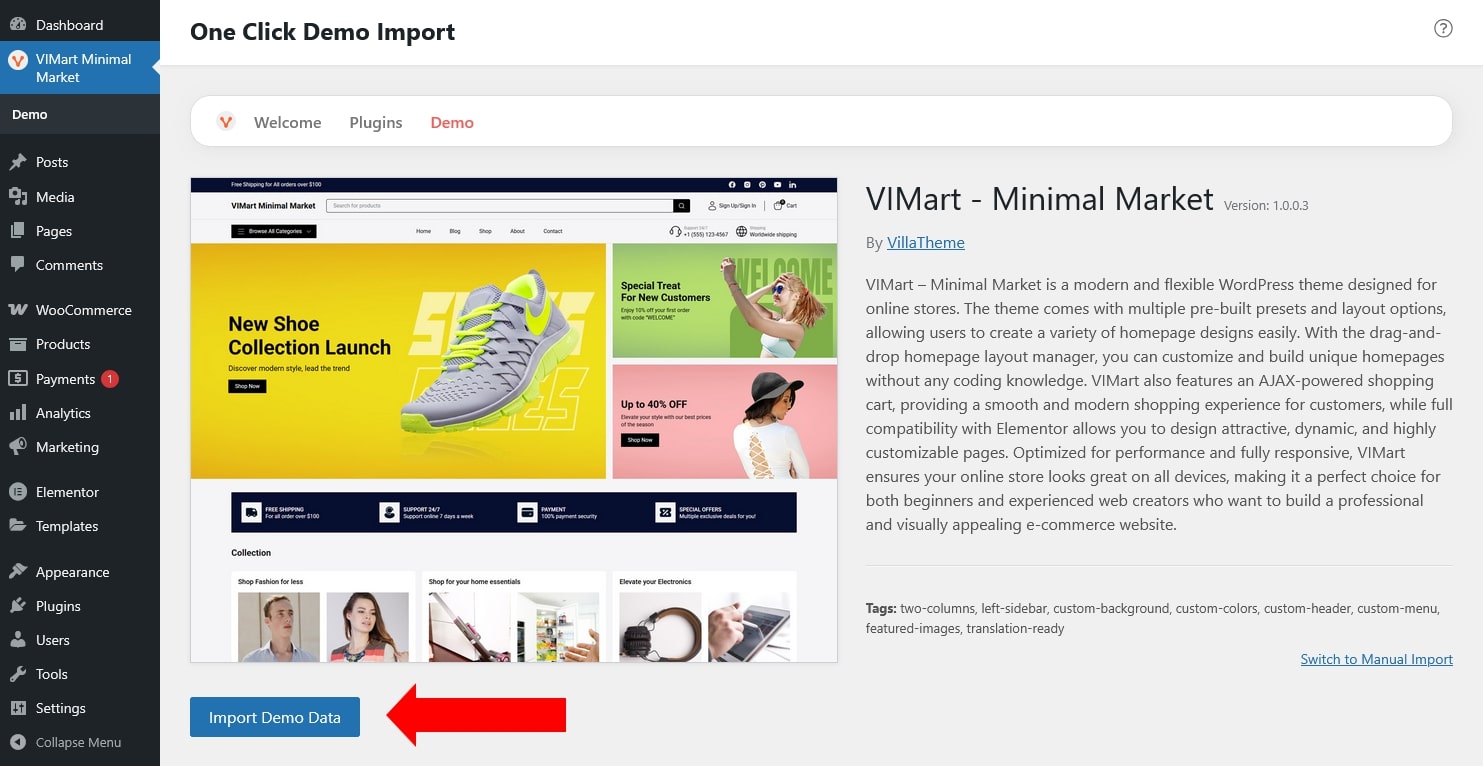
Use the One Click Demo Import plugin for a quick setup.

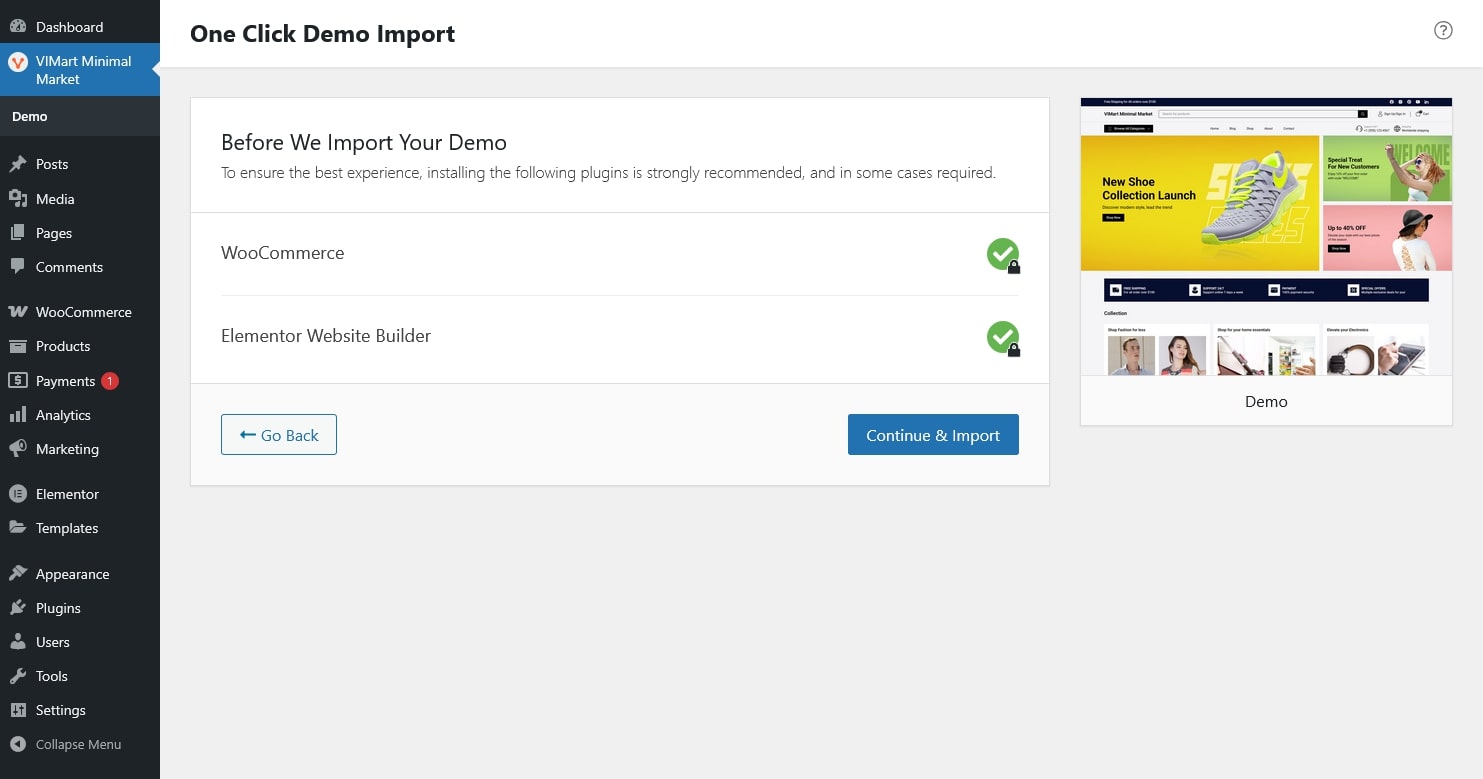
Go to Dashboard → VIMart Minimal Market → Demo.

Choose the predefined demo and click Import Demo Data.


Ensure required plugins are installed. If all done, click “Continue & Import”


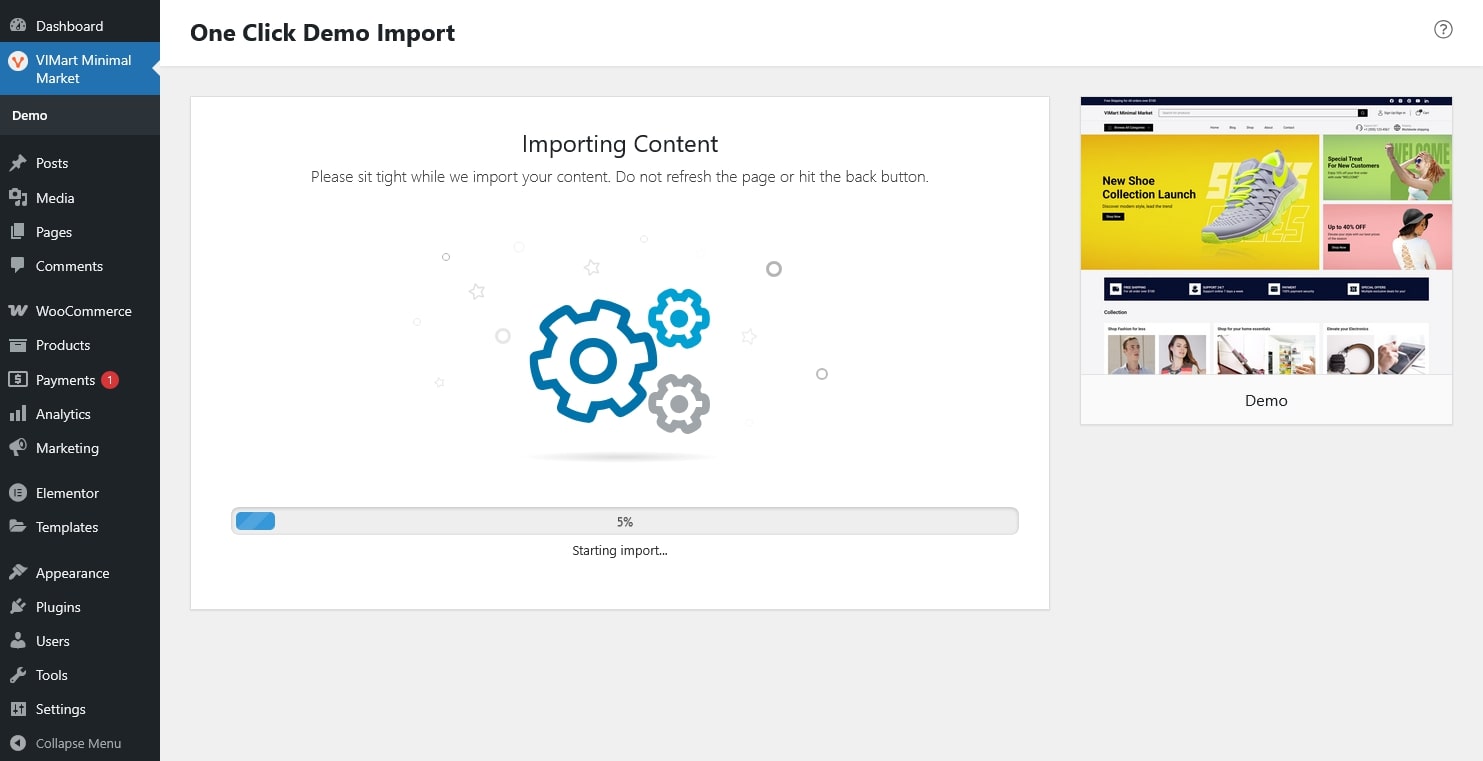
Wait for the process to complete, your site will look just like the demo.


Option 2: Import Manually

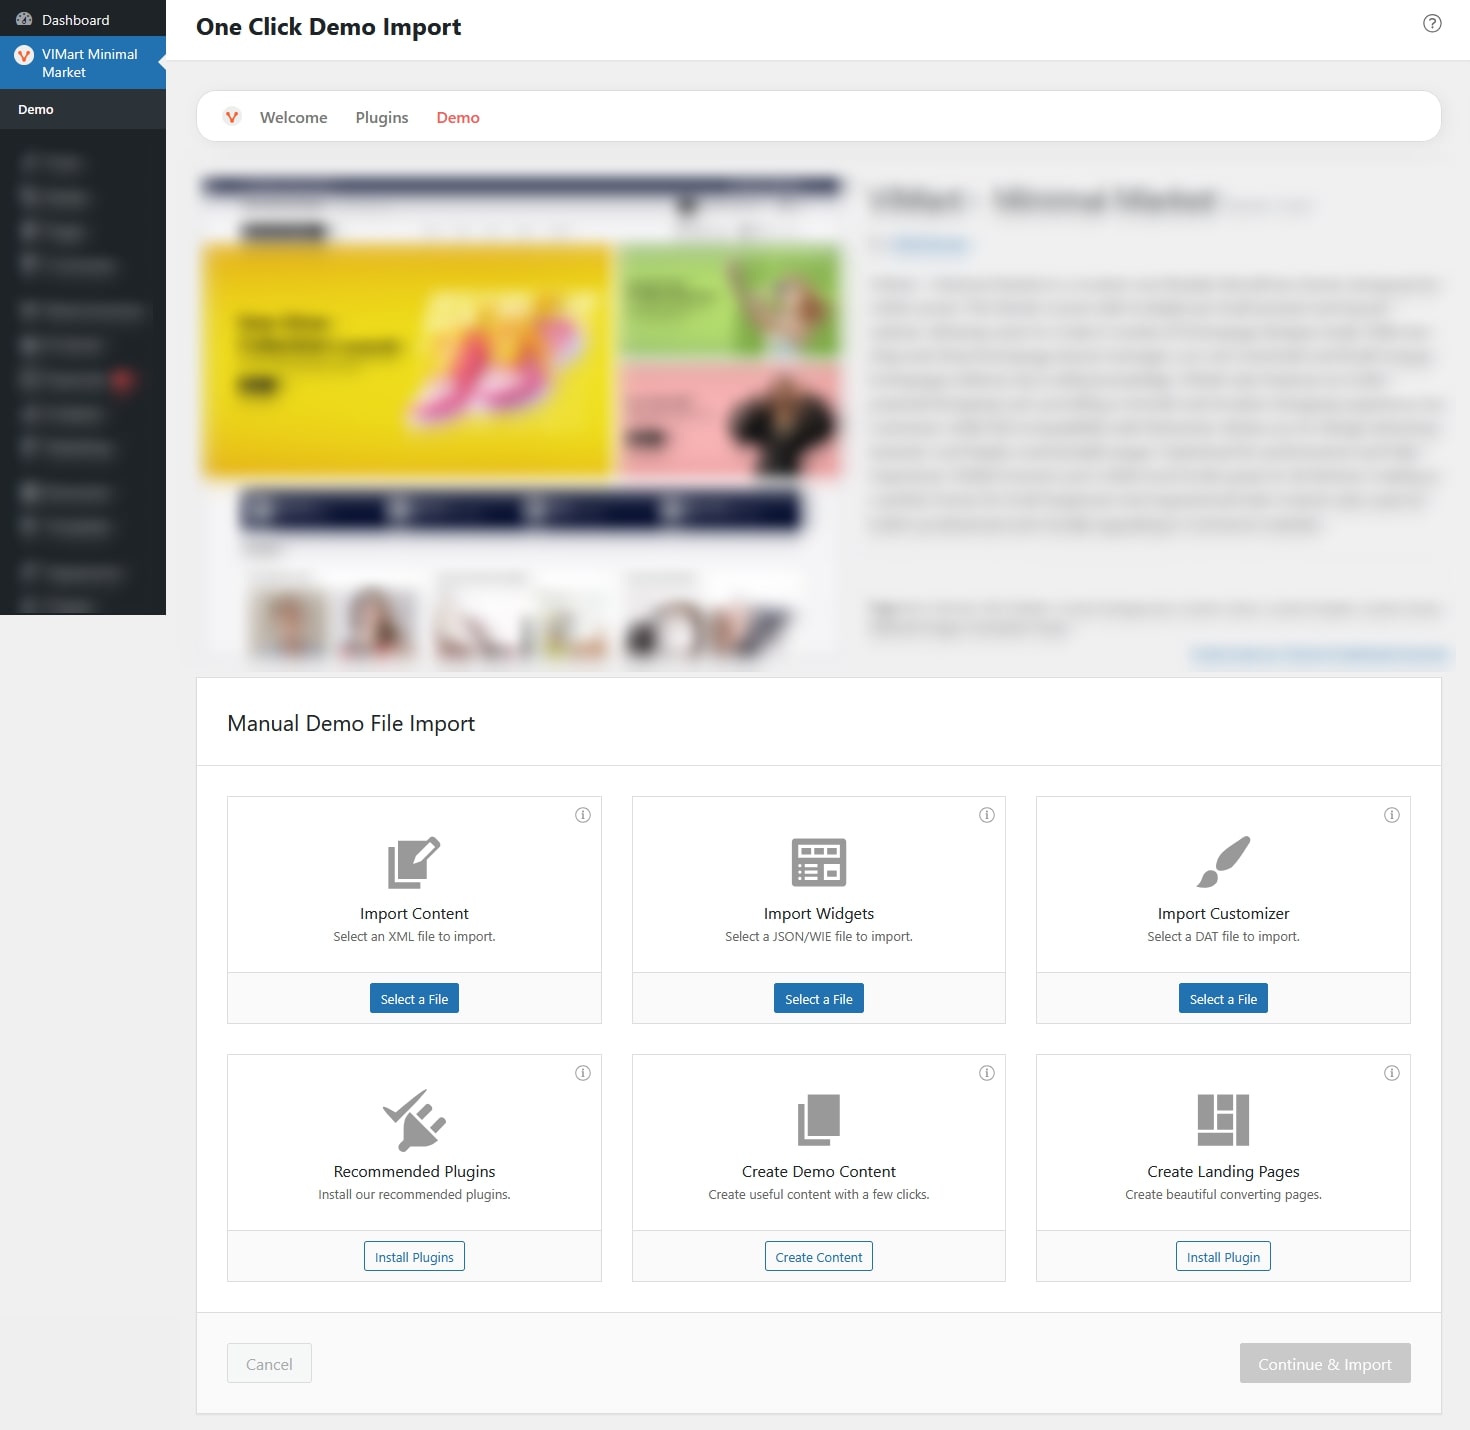
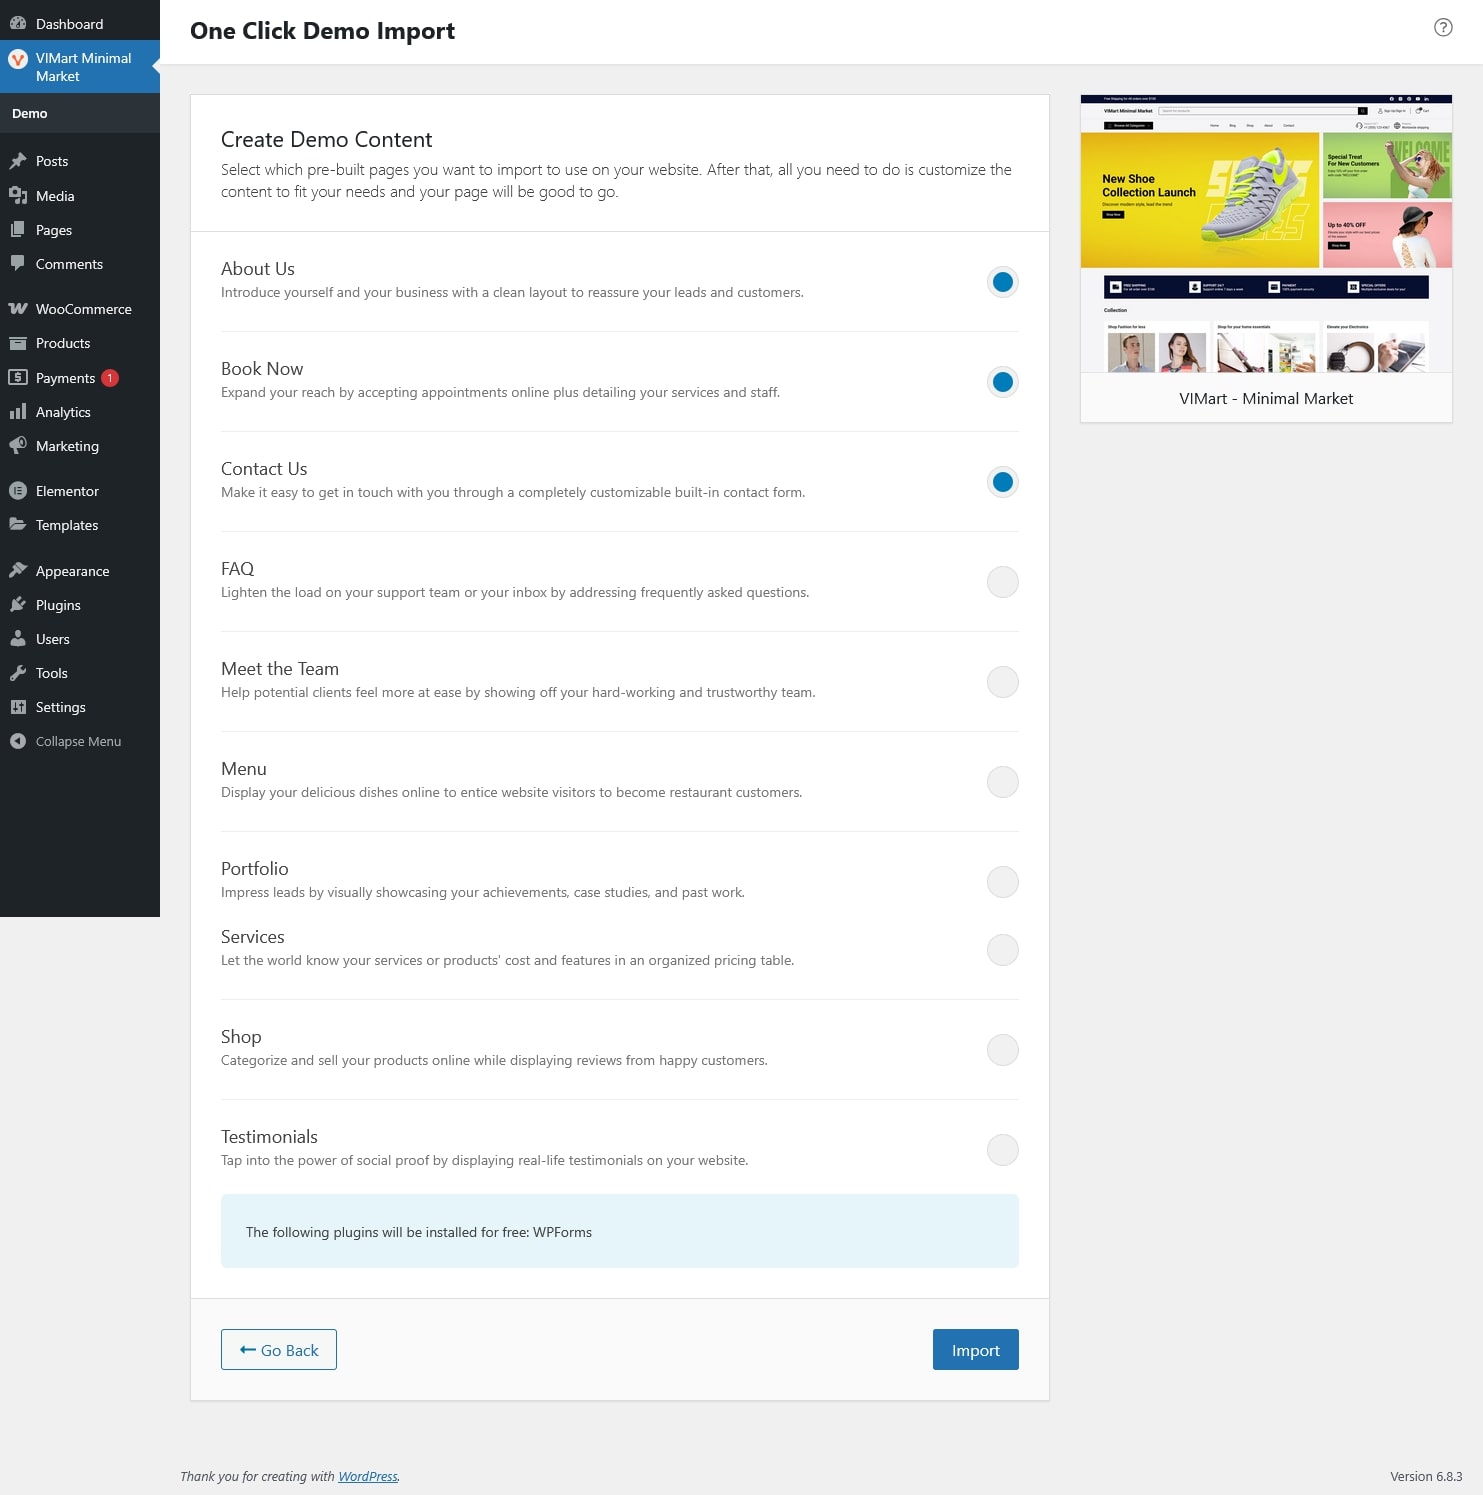
If you prefer to import the demo manually instead of using the one-click import, you can do it here. Each section below helps you bring in specific parts of the demo.


  1. Import Content
    • Upload the XML file that contains your demo content, pages, posts, products, and other basic data.
    • Click Select a File, choose the XML file from your theme package, and upload it.
  2. Import Widgets
    • Upload a JSON or WIE file to import demo widgets. These widgets include elements for your sidebar, footer, or other widget areas.
    • Click Select a File, choose the widget file, and upload.
  3. Import Customizer
    • Import your Customizer settings using a DAT file, includes theme colors, typography, logo, layout options, and more.
    • Click Select a File, upload the DAT file
  4. Recommended Plugins
    • Make sure all recommended plugins are installed and activated.
    • Click Install Plugins and the required ones (Elementor, WooCommerce, or One Click Demo Import) will be installed.
  5. Create Demo Content: Generate useful content. E.g.
  6. Create Landing Pages: By clicking the Install Plugin button in this last box, VIMart will install the SeedProd plugin and you’ll be able to create high converting landing pages.


After importing the demo, you can personalize your website design and layout through the Customizer. This section allows you to adjust global styles, layout, and elements to match your brand, all in real time with live preview.

You can access it via:

  • Dashboard → Appearance → Customize
  • Or directly through the Quick Settings panel in the theme options.

Along with the live preview, you can also click the edit (pen) icon directly on the preview screen to modify any visible section or widget.

Clicking the icon will automatically redirect you to that section’s settings inside the Customize – making it faster to locate and edit specific parts of your site.


Quick Settings

The Quick Settings panel provides fast access to the most commonly customized areas of your theme. Each item includes a Customize link that takes you directly to its respective section in the Customizer.

Available Options:

  • Logo: Upload your site logo or adjust its size and placement.
  • Typography: Choose fonts, sizes, and weights for headings, body text…
  • Main Color: Set your site’s main and background color palette
  • Social: Add links to your social media profiles. Empty the link input field to hide a social media from a widget
  • Header: Customize the header – promote text, socials, and additional header elements.
  • Footer: Adjust footer logo, copyright text,…
  • Blog/Post: Manage blog and post’s layout.
  • Shop/Product: Control how products are displayed on shop and single product pages.


To access more advanced design options, click Go to Customizer in the top right corner of the Quick Settings box.

This will open the full WordPress Customizer where you can configure additional details such as sidebar layouts, buttons, spacing, and responsive design.


Site Identity

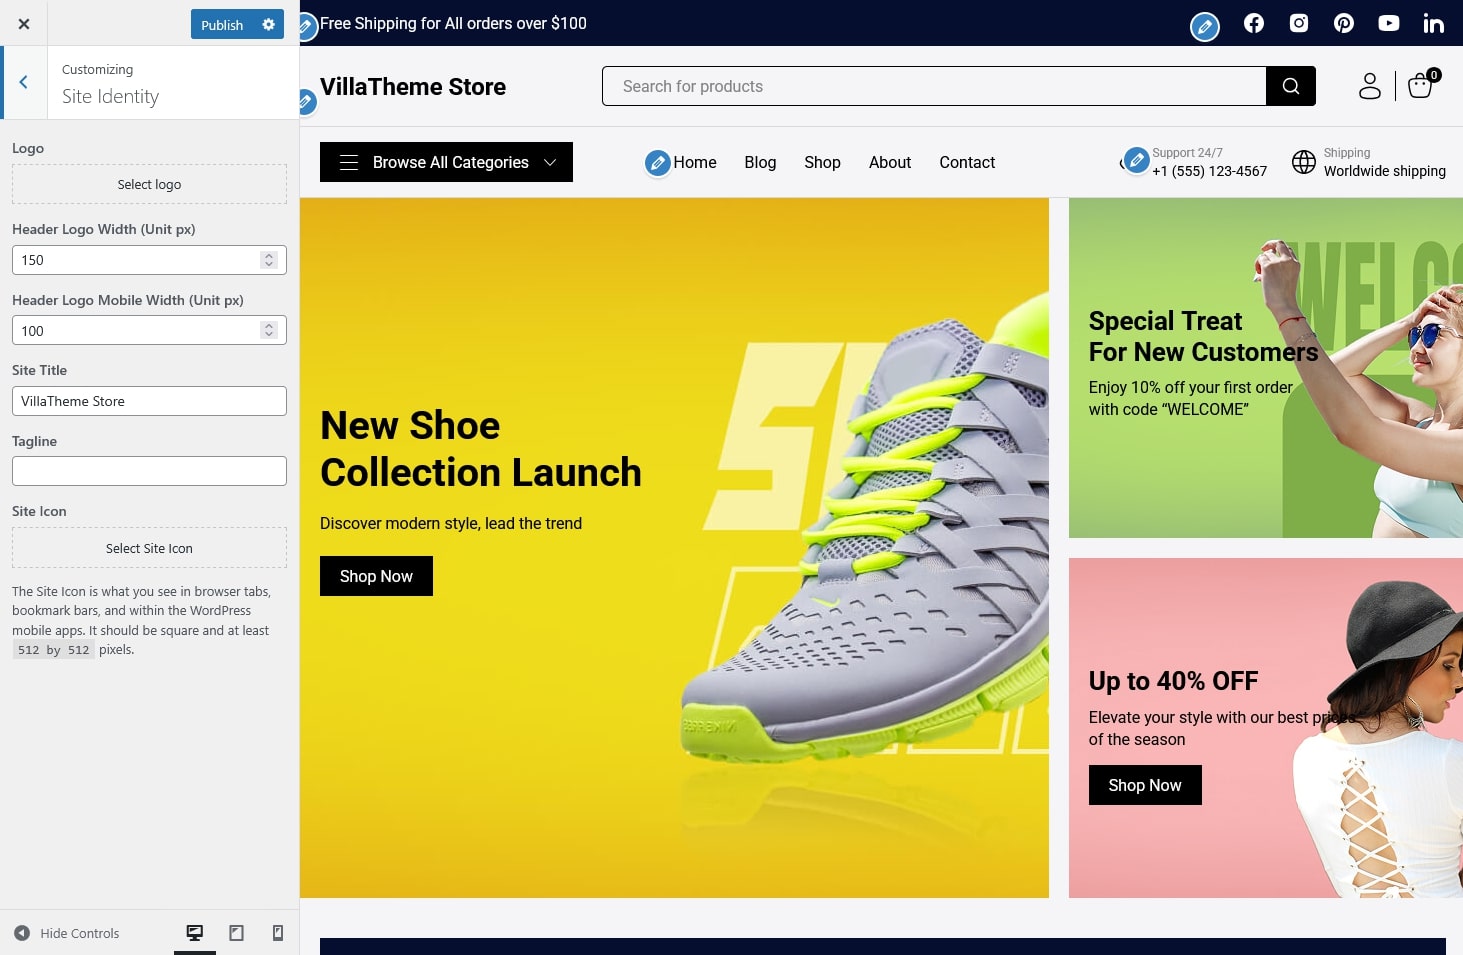
The Site Identity settings define your store’s key branding elements, including the logo, site title, tagline, and site icon.

You can access these options from Appearance → Customize → Site Identity.

  • Logo: Upload or change your website’s main logo. This logo will appear in your header
  • Header Logo Width (Unit px): Set the display width (in pixels) for your header logo on desktop devices. Adjust this to make your logo appear larger or smaller to fit your layout.
  • Header Logo Mobile Width (Unit px): Specify a custom width (in pixels) for your logo on mobile devices to ensure it displays properly on smaller screens.
  • Site Title: Enter your website’s title.
  • Tagline: Add a short description or slogan for your site. It often appears next to or below your site title, helping visitors understand your store at a glance.
  • Site Icon: Upload a Site Icon (also known as a favicon). The image should be square and at least 512×512 pixels for best display quality. This image appears in:
    • Browser tabs
    • Bookmark bars
    • WordPress mobile apps


Typography

The Typography settings let you control the font styling across your website, including the main body text and headings.

Access it from Appearance → Customize → Typography.

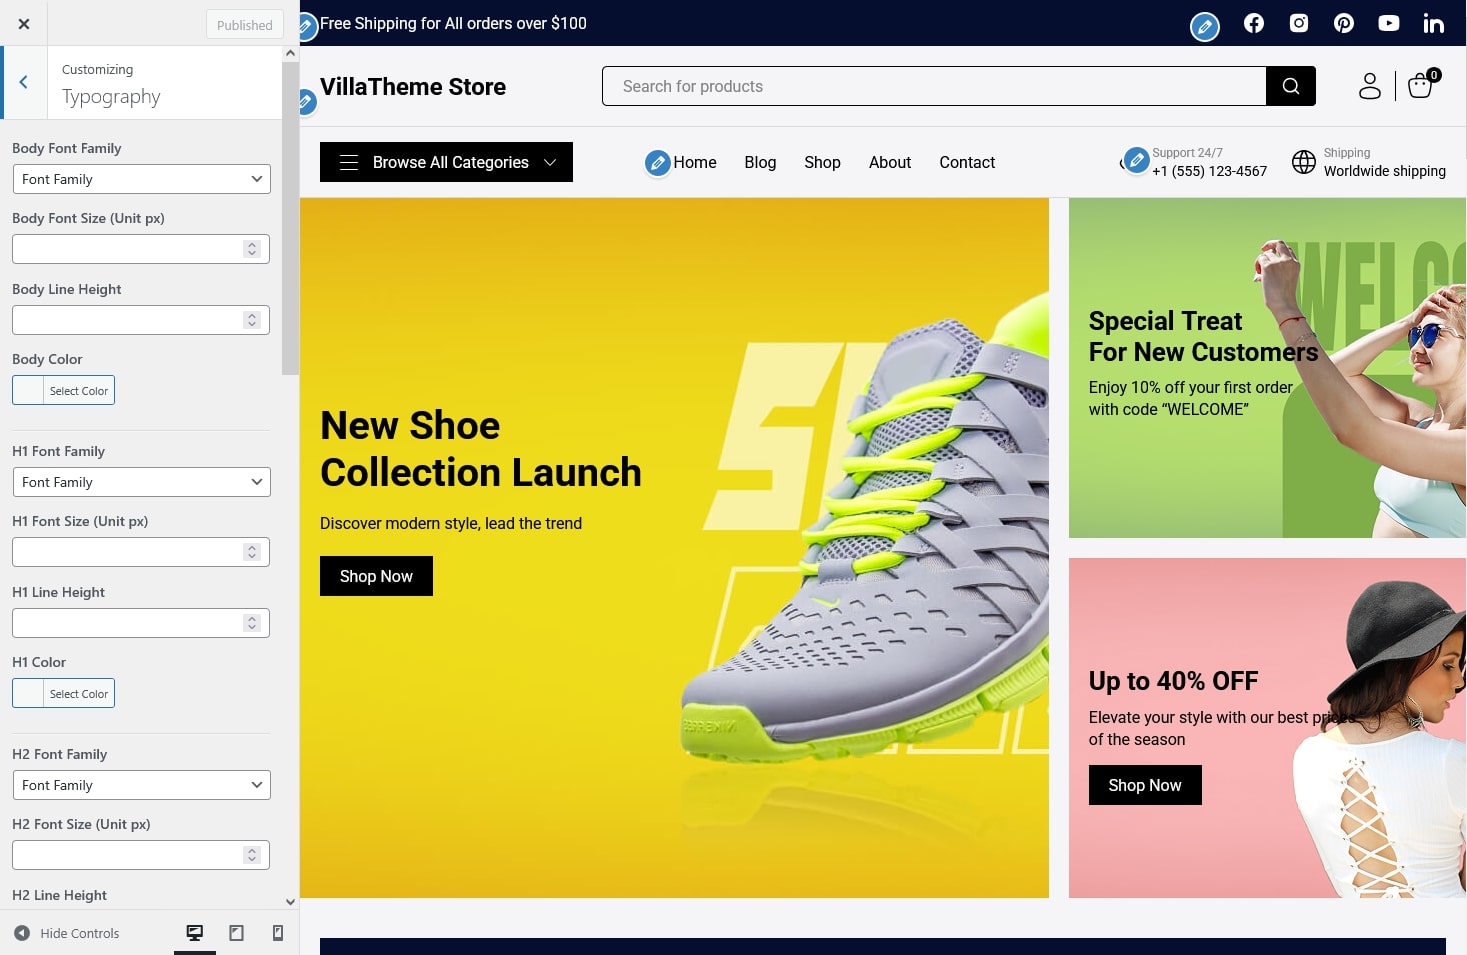
You can customize the following elements:

  • Body Text
    • Font Family: Choose a font for your website’s main text.
    • Font Size (px): Set the base font size for body content.
    • Line Height: Adjust the spacing between lines for better readability.
    • Body Color: Select the text color for the body content.
  • Headings (H1 – H6): For each heading level (H1 to H6), you can configure:
    • Font Family: Choose a font style for each heading level.
    • Font Size (px): Define the size for each heading.
    • Line Height: Control line spacing for titles or subtitles.
    • Color: Set the heading color to match your design style.


Colors

The Colors settings allow you to define your website’s main color scheme for a consistent and branded look across all pages.

You can access this from Appearance → Customize → Colors.


Social

The Social settings allow you to add links to your store’s social media profiles.

These links can be displayed in various areas of your theme such as the header, or footer

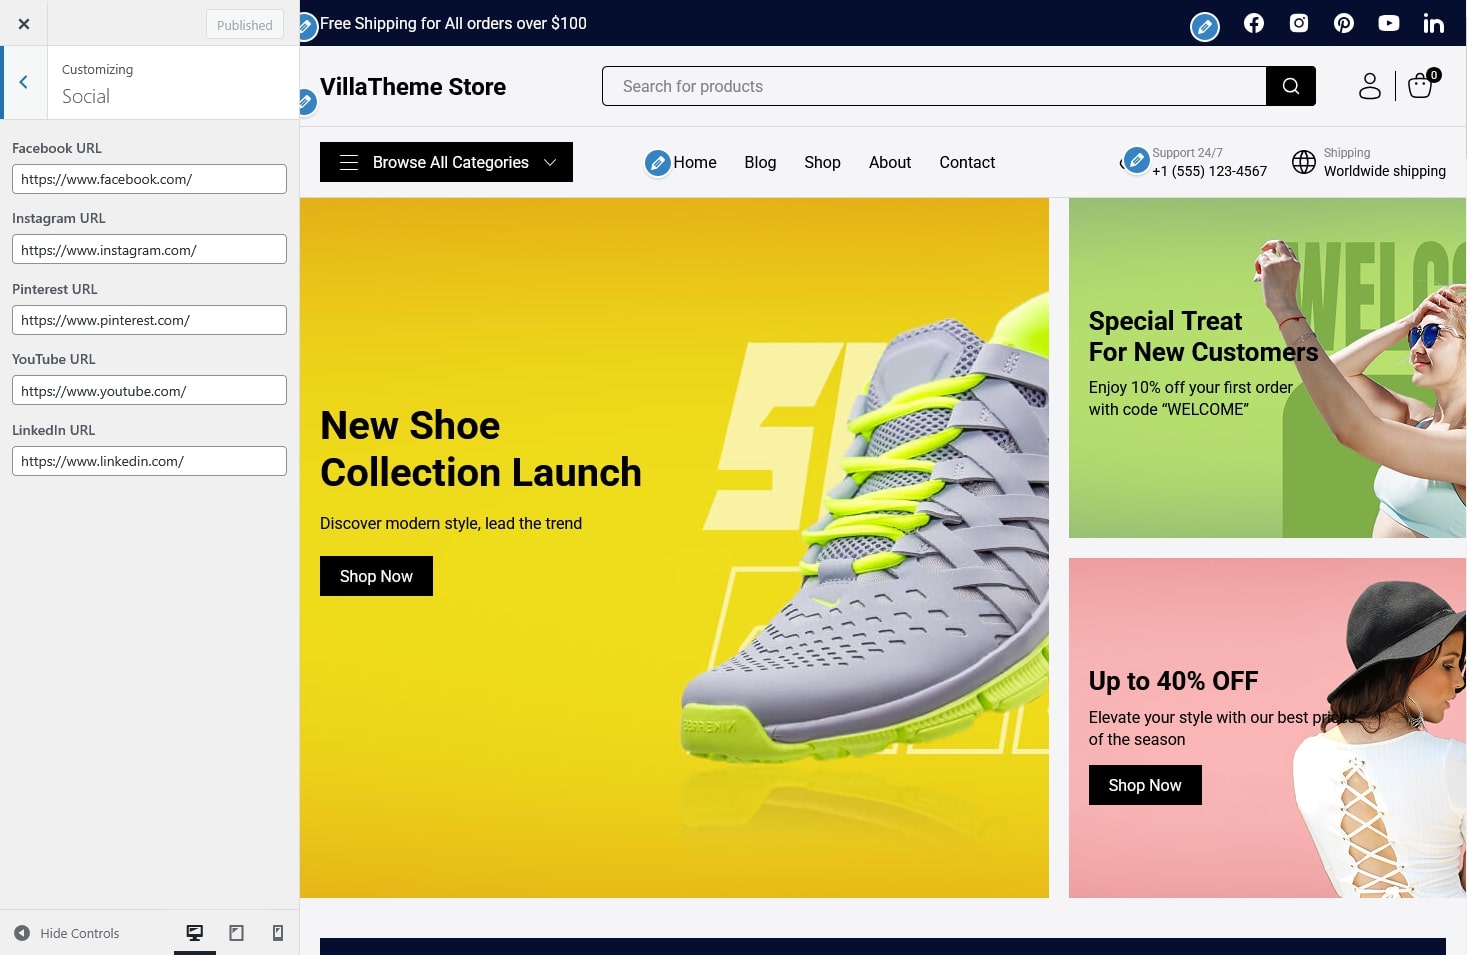
You can enter the URLs of your social media pages in the following fields:

  • Facebook
  • Instagram
  • Pinterest
  • YouTube
  • LinkedIn


Header

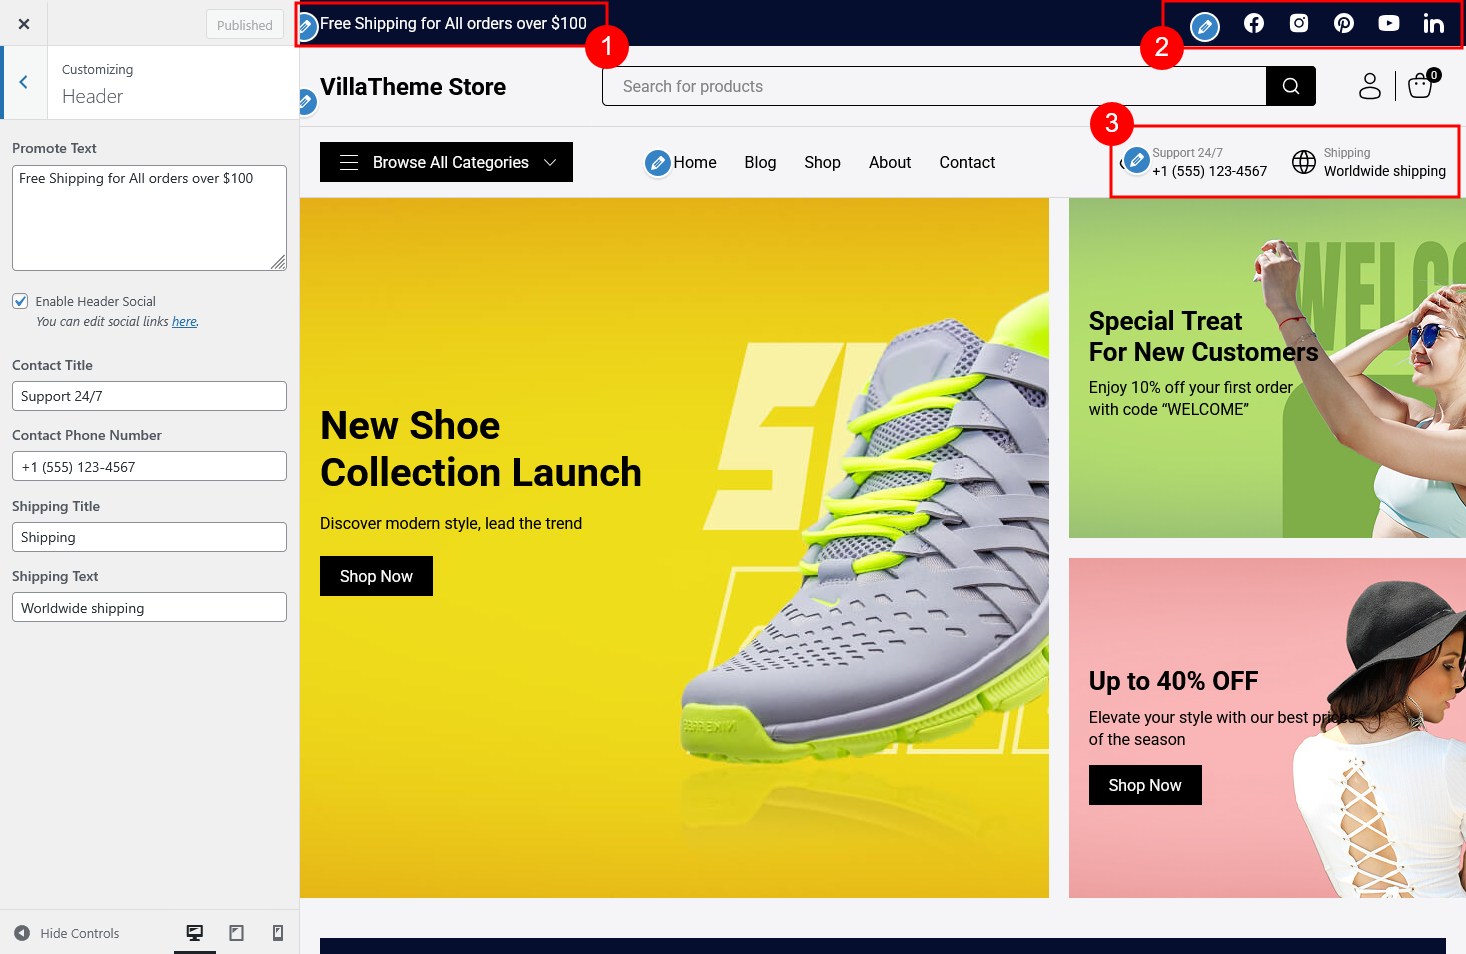
The Header section allows you to display key store information such as promotions, contact details. Options included:

  1. Promote Text
  2. Enable Header Social: Turn this option on to display your social media icons in the header. The icons will link to your social profiles . you can configure those links separately in the Social settings section of the Customizer.
  3. Extra Information Fields: Add additional details to help customers reach you or understand your store policies.
    • Contact Title
    • Contact Phone Number
    • Shipping Title
    • Shipping Text


Footer

The Footer section allows you to adjust your store’s bottom area, including your logo, slogan, social icons, copyright text, and additional widget areas.

You can access it through Appearance → Customize → Footer.


All edits are shown live in the preview so you can see exactly how the footer looks before publishing.

  • Logo: Upload your footer logo or replace the existing one.
  • Logo Width (Unit px): Set the logo width for desktop view.
  • Logo Mobile Width (Unit px): Set a smaller size for mobile view for better responsiveness.
  • Slogan: Add a short slogan or tagline beneath the logo, ideal for sharing your brand message or store motto. Example: “Discover modern style, lead the trend.”
  • Enable Footer Social: Enable this option to display social media icons in the footer. You can edit or add your social links in the Social settings section.
  • Copyright: Edit the copyright text displayed at the very bottom of your site. You can use the following shortcodes for dynamic content:
    • {current_year} – Displays the current year (e.g., 2025).
    • {site_title} – Displays your site’s title (e.g., “Villa Theme Store”).
  • Payment: Display or customize the payment method icon shown in the footer. You can upload your own image, replace existing one, or remove it entirely.

Extra Widget Footers

  • Add up to four extra widget areas in the footer. Each widget can display a custom menu or any content you choose – such as store information, quick links, support details, or policies.
  • Example setup:
    • Footer 1: About Store
    • Footer 2: Customer Service
    • Footer 3: Quick Links
    • Footer 4: Newsletter or Contact Info


Blog/Post

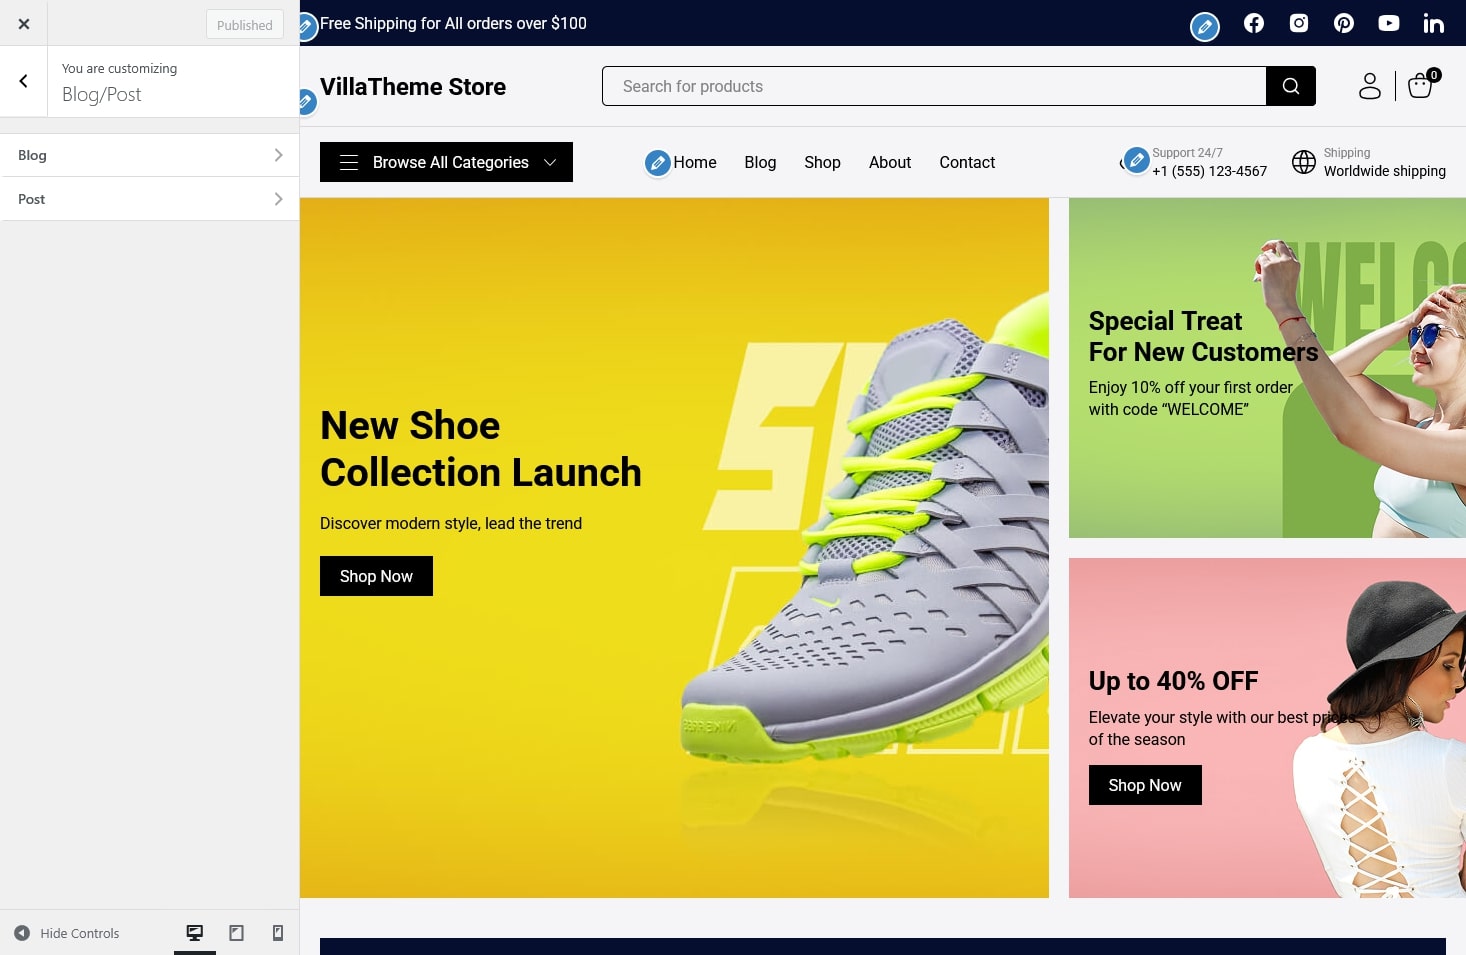
The Blog/Post settings control the layout and display options for both the Blog page (which lists your posts) and the Single Post page (individual articles). You can access these options from Appearance → Customize → Blog/Post.


Blog

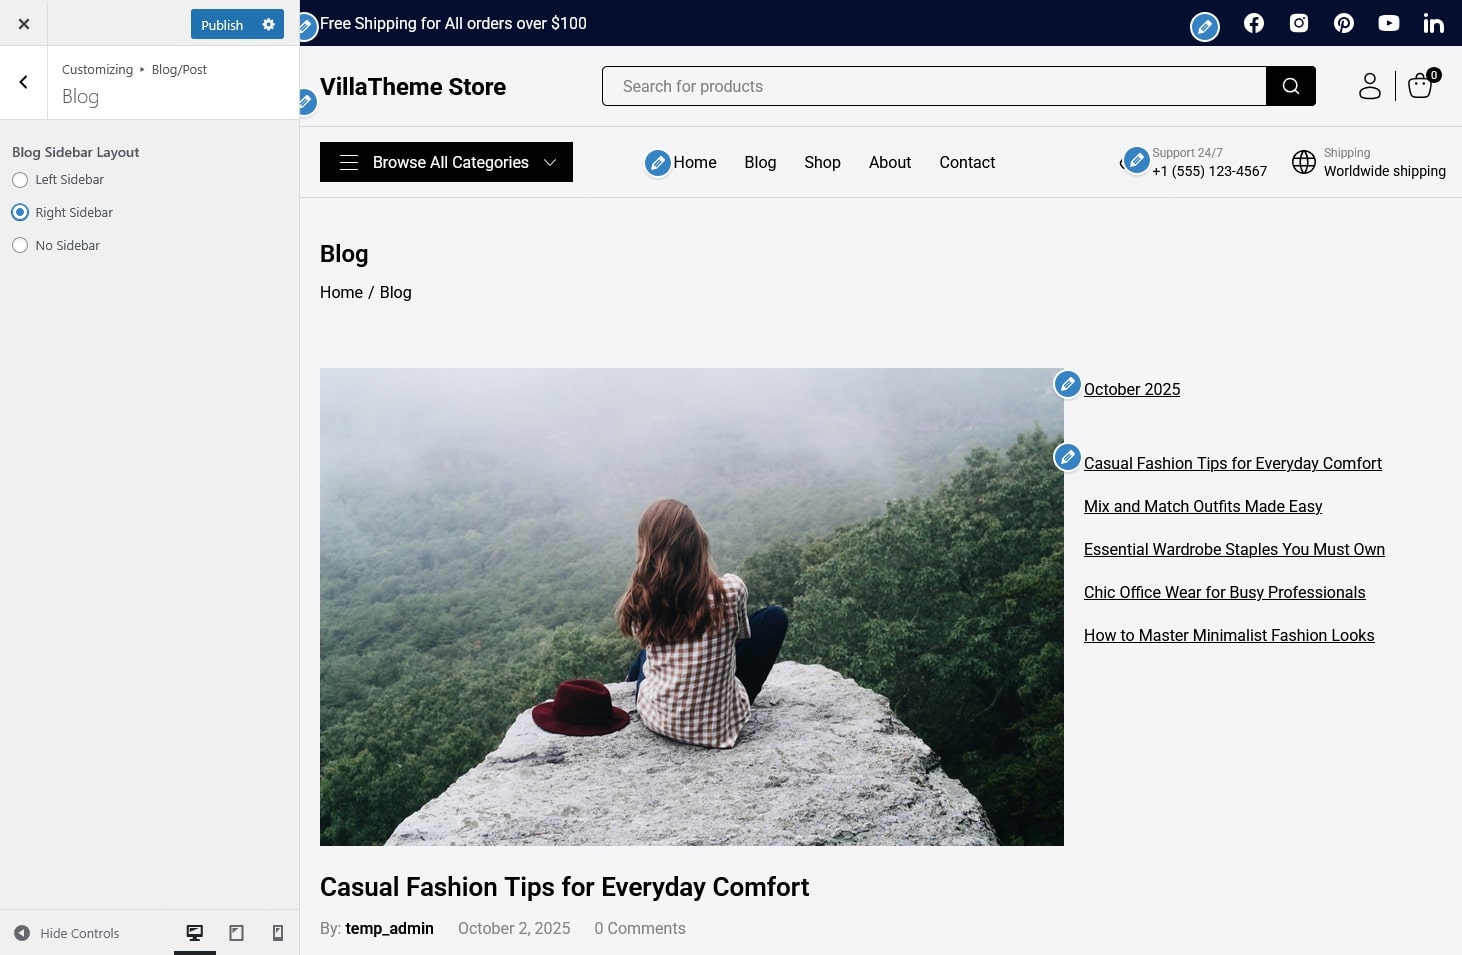
These settings define how your main blog listing page looks.


Blog Sidebar Layout: Choose where to display the sidebar or post widget area on the blog page.

Right Sidebar: Display widgets on the right side of the blog list.


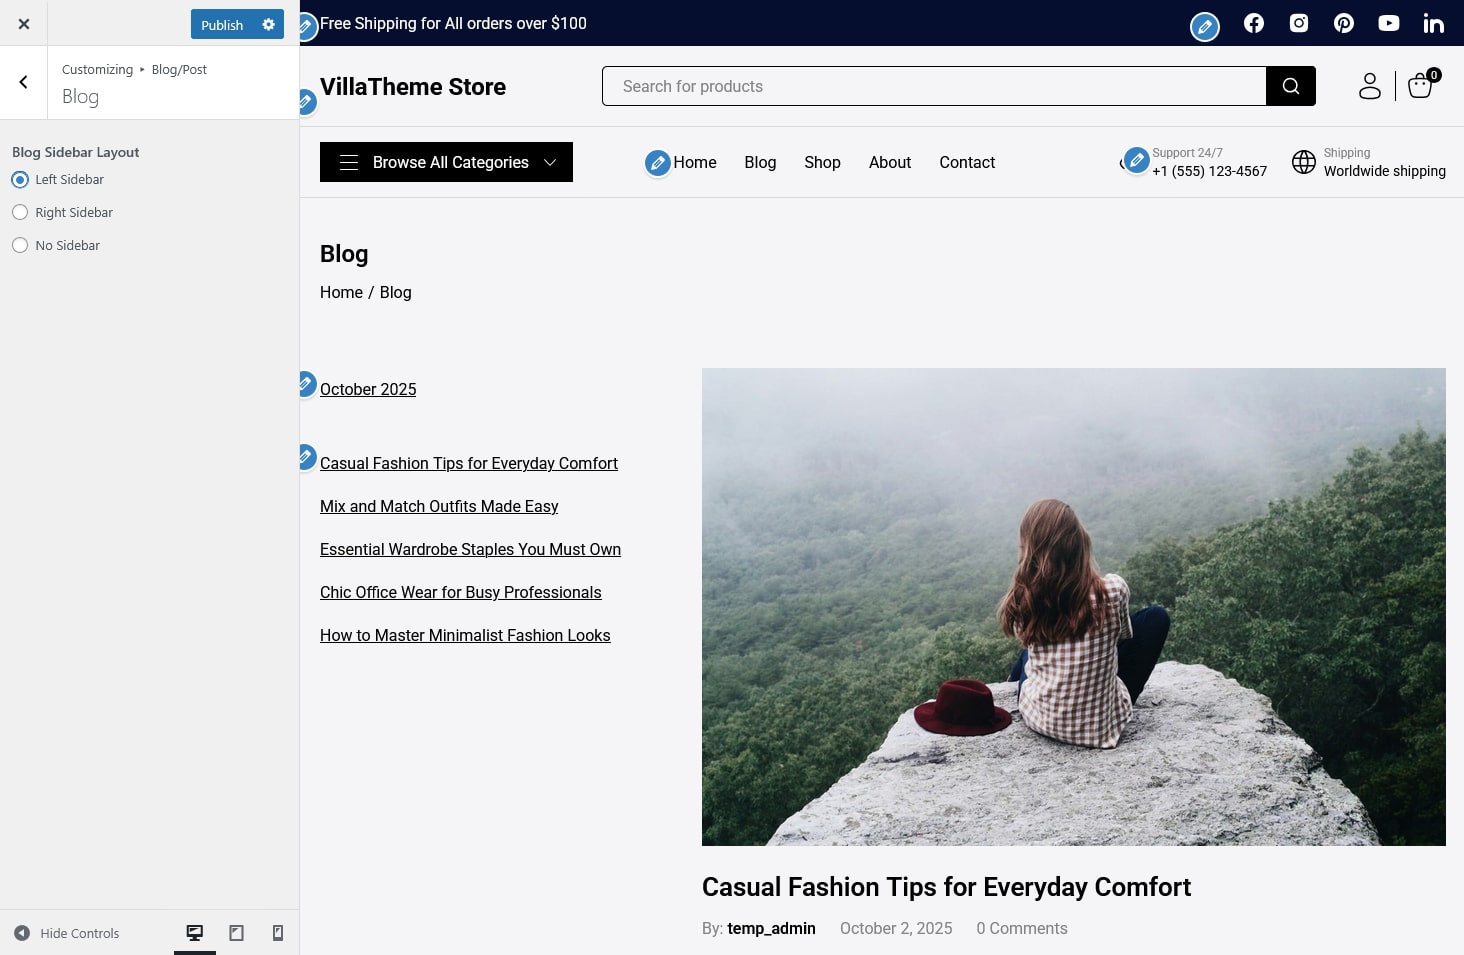
Left Sidebar: Display widgets on the left side.


No Sidebar: Show a full-width blog layout without widgets.

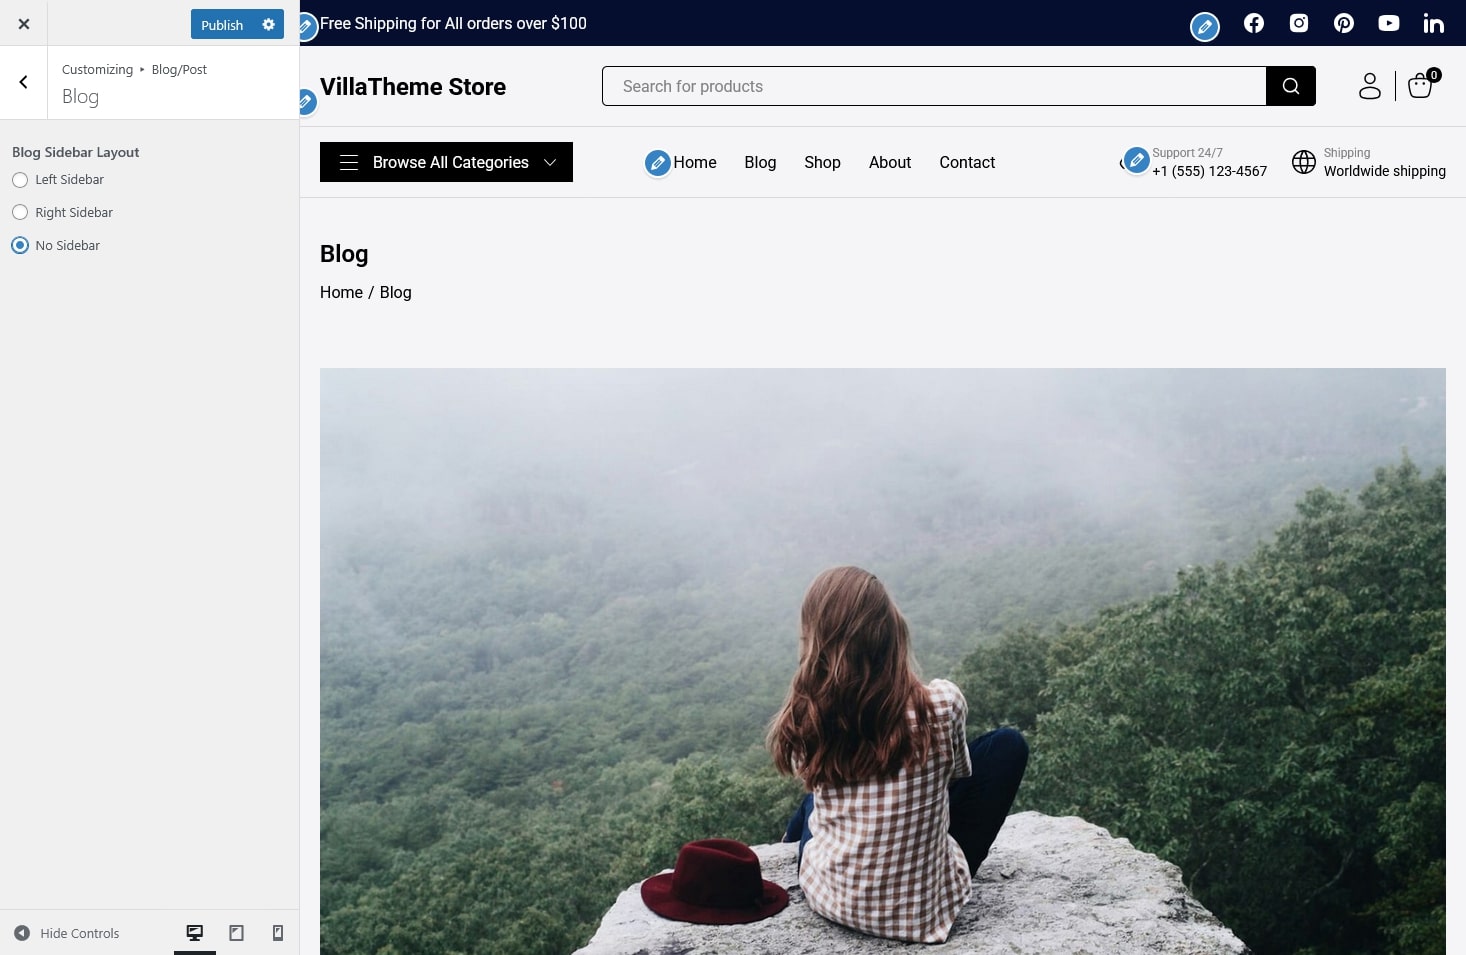
Use this to create a clean, minimal look or a more informative layout with recent posts, categories, or ads.


Post

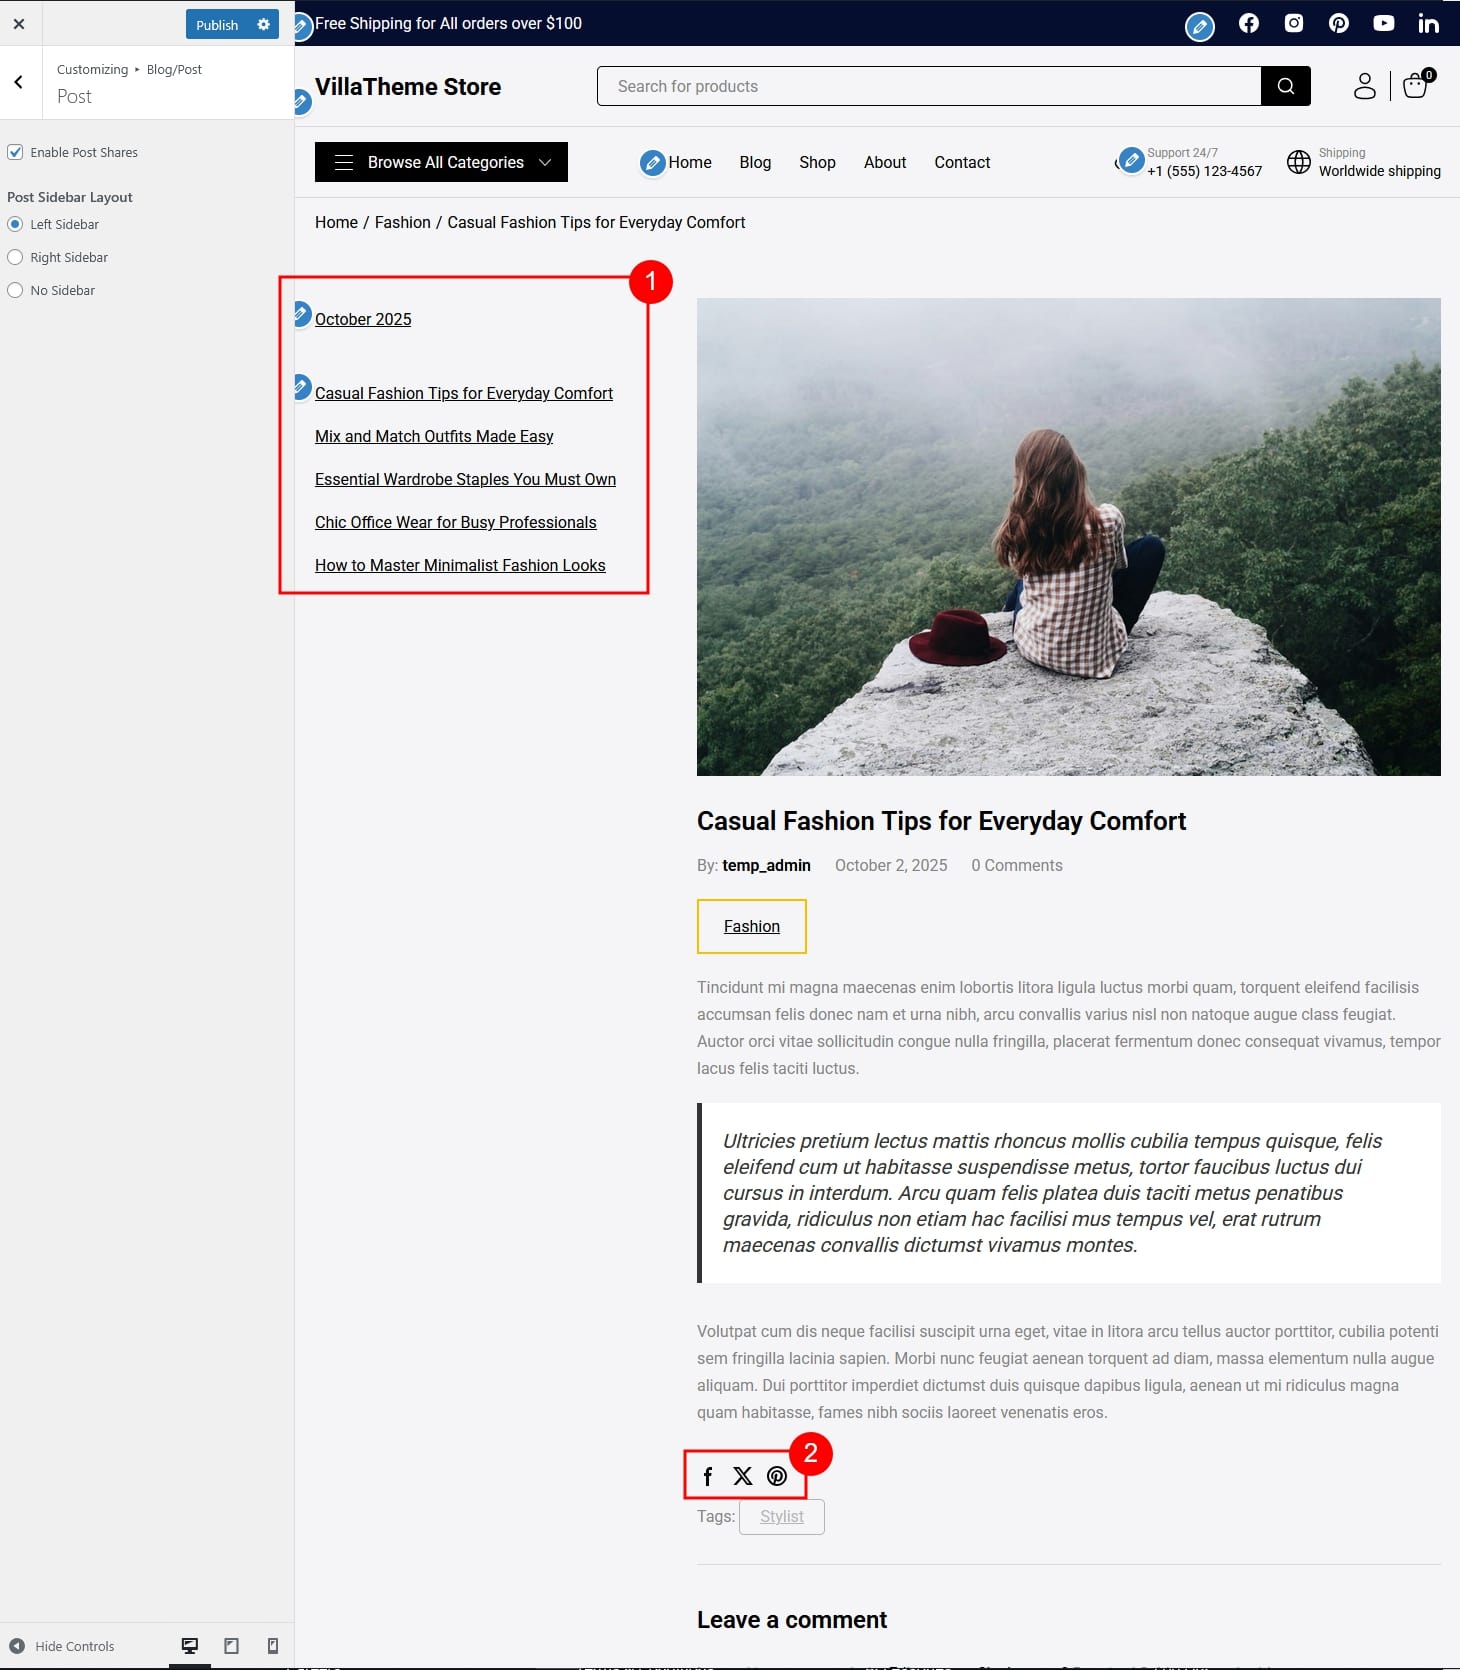
These settings control the layout and functionality of individual blog posts.

  1. Enable Post Share: Turn this on to display social sharing buttons, allowing visitors to share your articles on platforms like Facebook, X…
  2. Post Sidebar Layout: Choose where the sidebar appears on individual post pages – Right, Left, or None – just like on the blog page.


Shop/Product

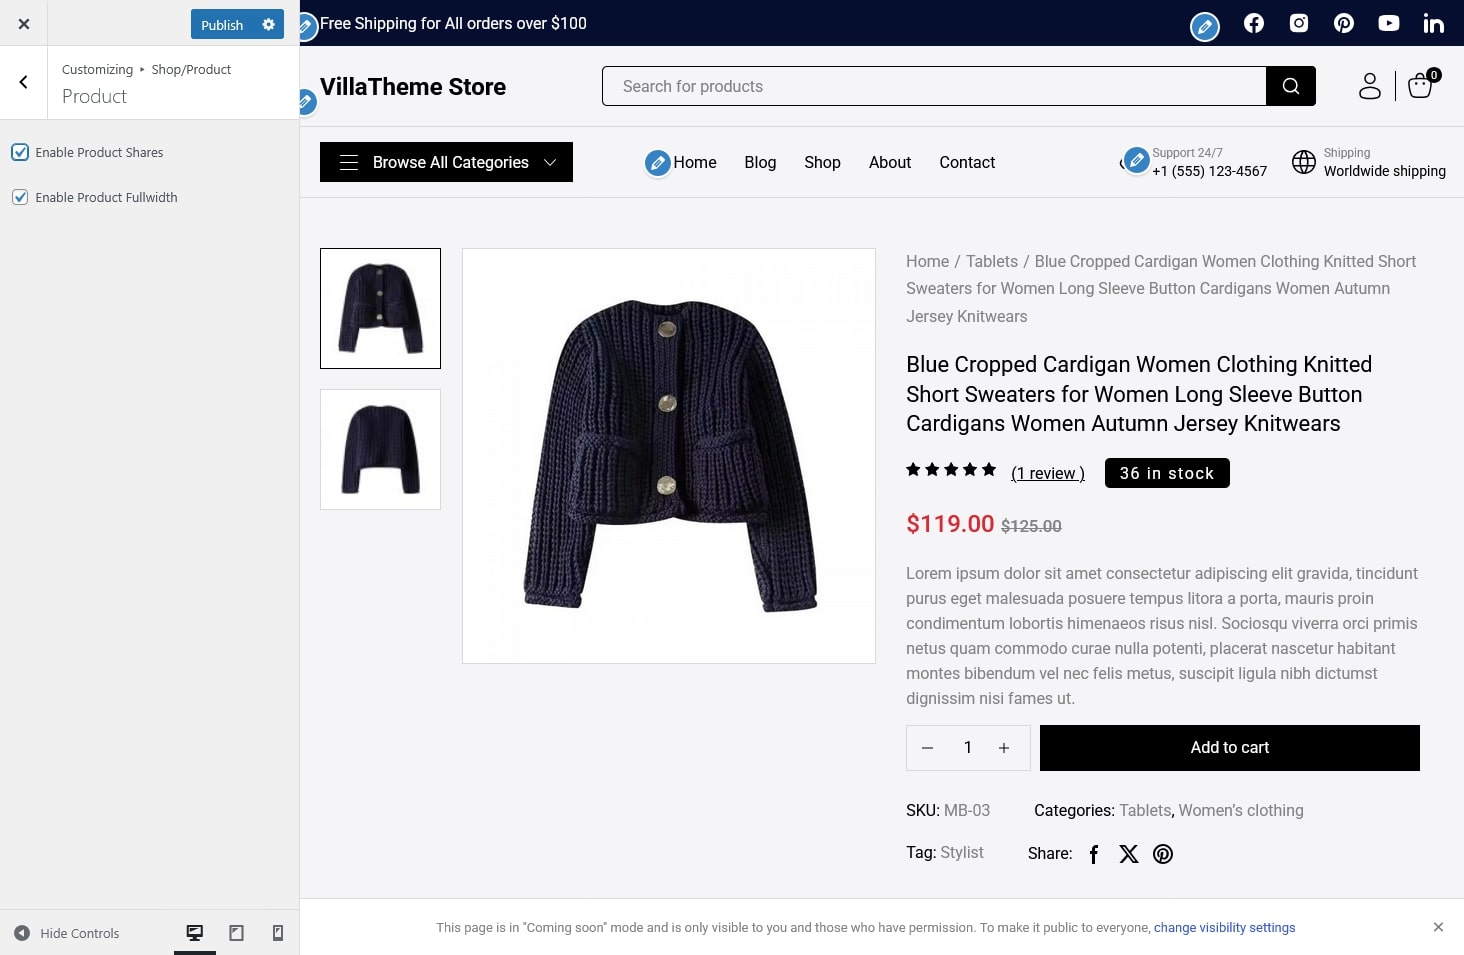
The Shop/Product settings let you control how your store pages and single product pages appear to customers.

You can access these settings from Appearance → Customize → Shop/Product.


Shop

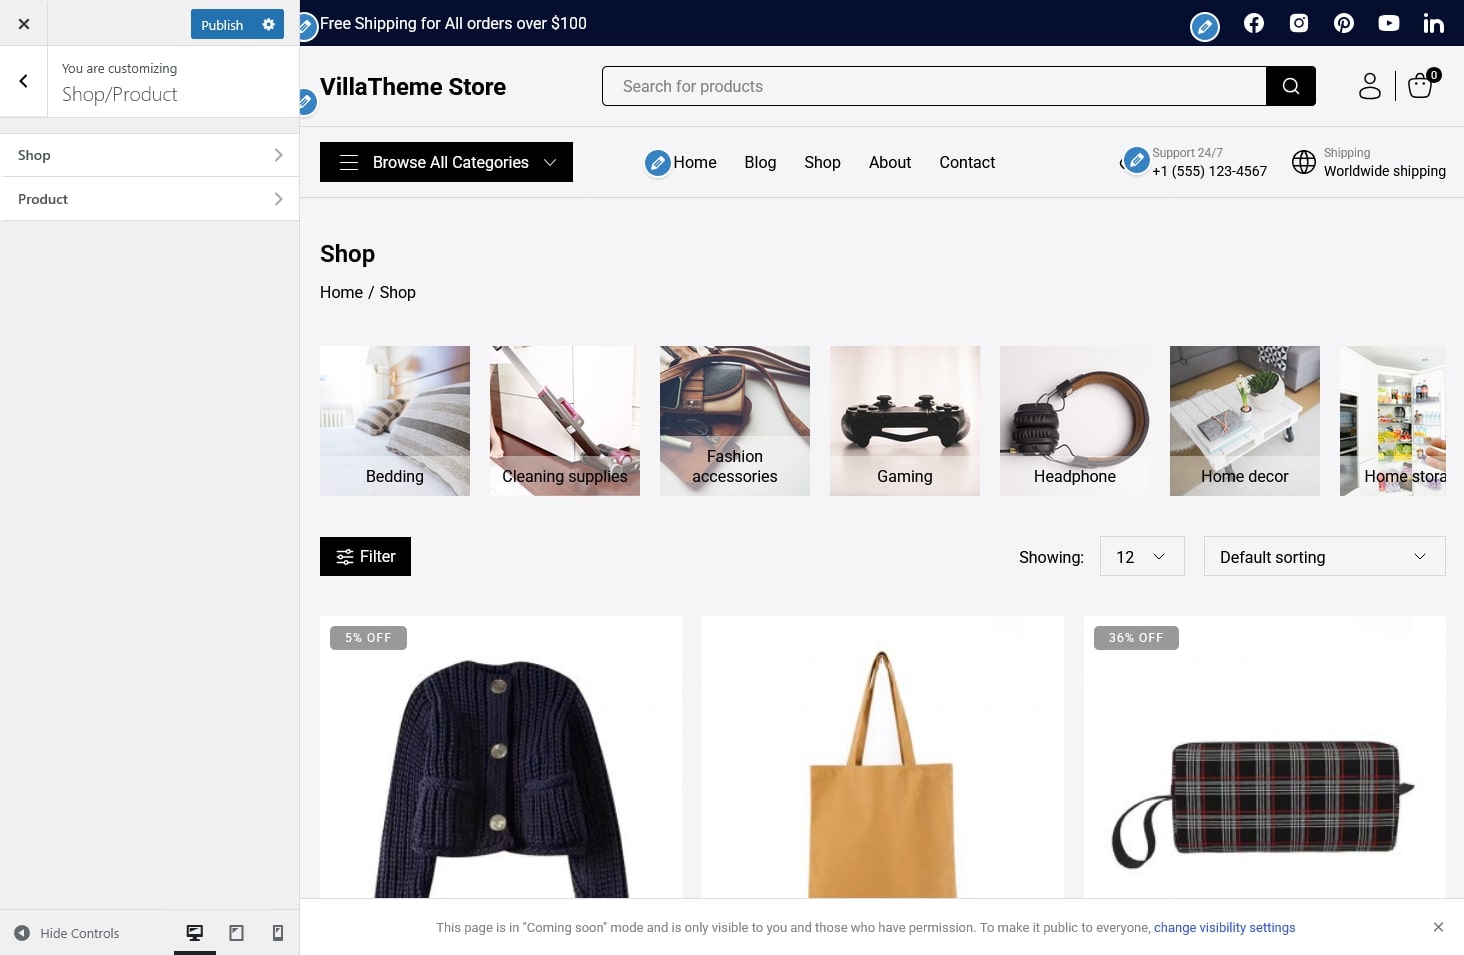
These options determine how products are displayed on the main shop page.

  • Products Newness (Days): Define how many days a product is considered “new”. Products published within this range will display a New badge on the shop page.
  • Number Of Products On Shop Page: Paginate the Shop page by setting how many products are shown per page in your product listing.
  • Enable Shop Fullwidth: Check this checkbox to expand your shop layout to full screen width, giving more space for product display and a modern, open layout.


Product

Control how your individual product pages are presented.

  • Enable Product Shares: Show social share buttons so visitors can easily share your product on platforms like Facebook, X, or Pinterest.
  • Enable Product Fullwidth: Display the product details section in full width for a cleaner and more immersive viewing experience


Extra Information


Thank you for your attention!

If you have any question, please create a topic at our FORUM, we will support within 24 hours.