In the Design tab, you can configure how the free shipping bar, progress bar display on the front end.
Go to Woo Free Shipping Bar > Design.
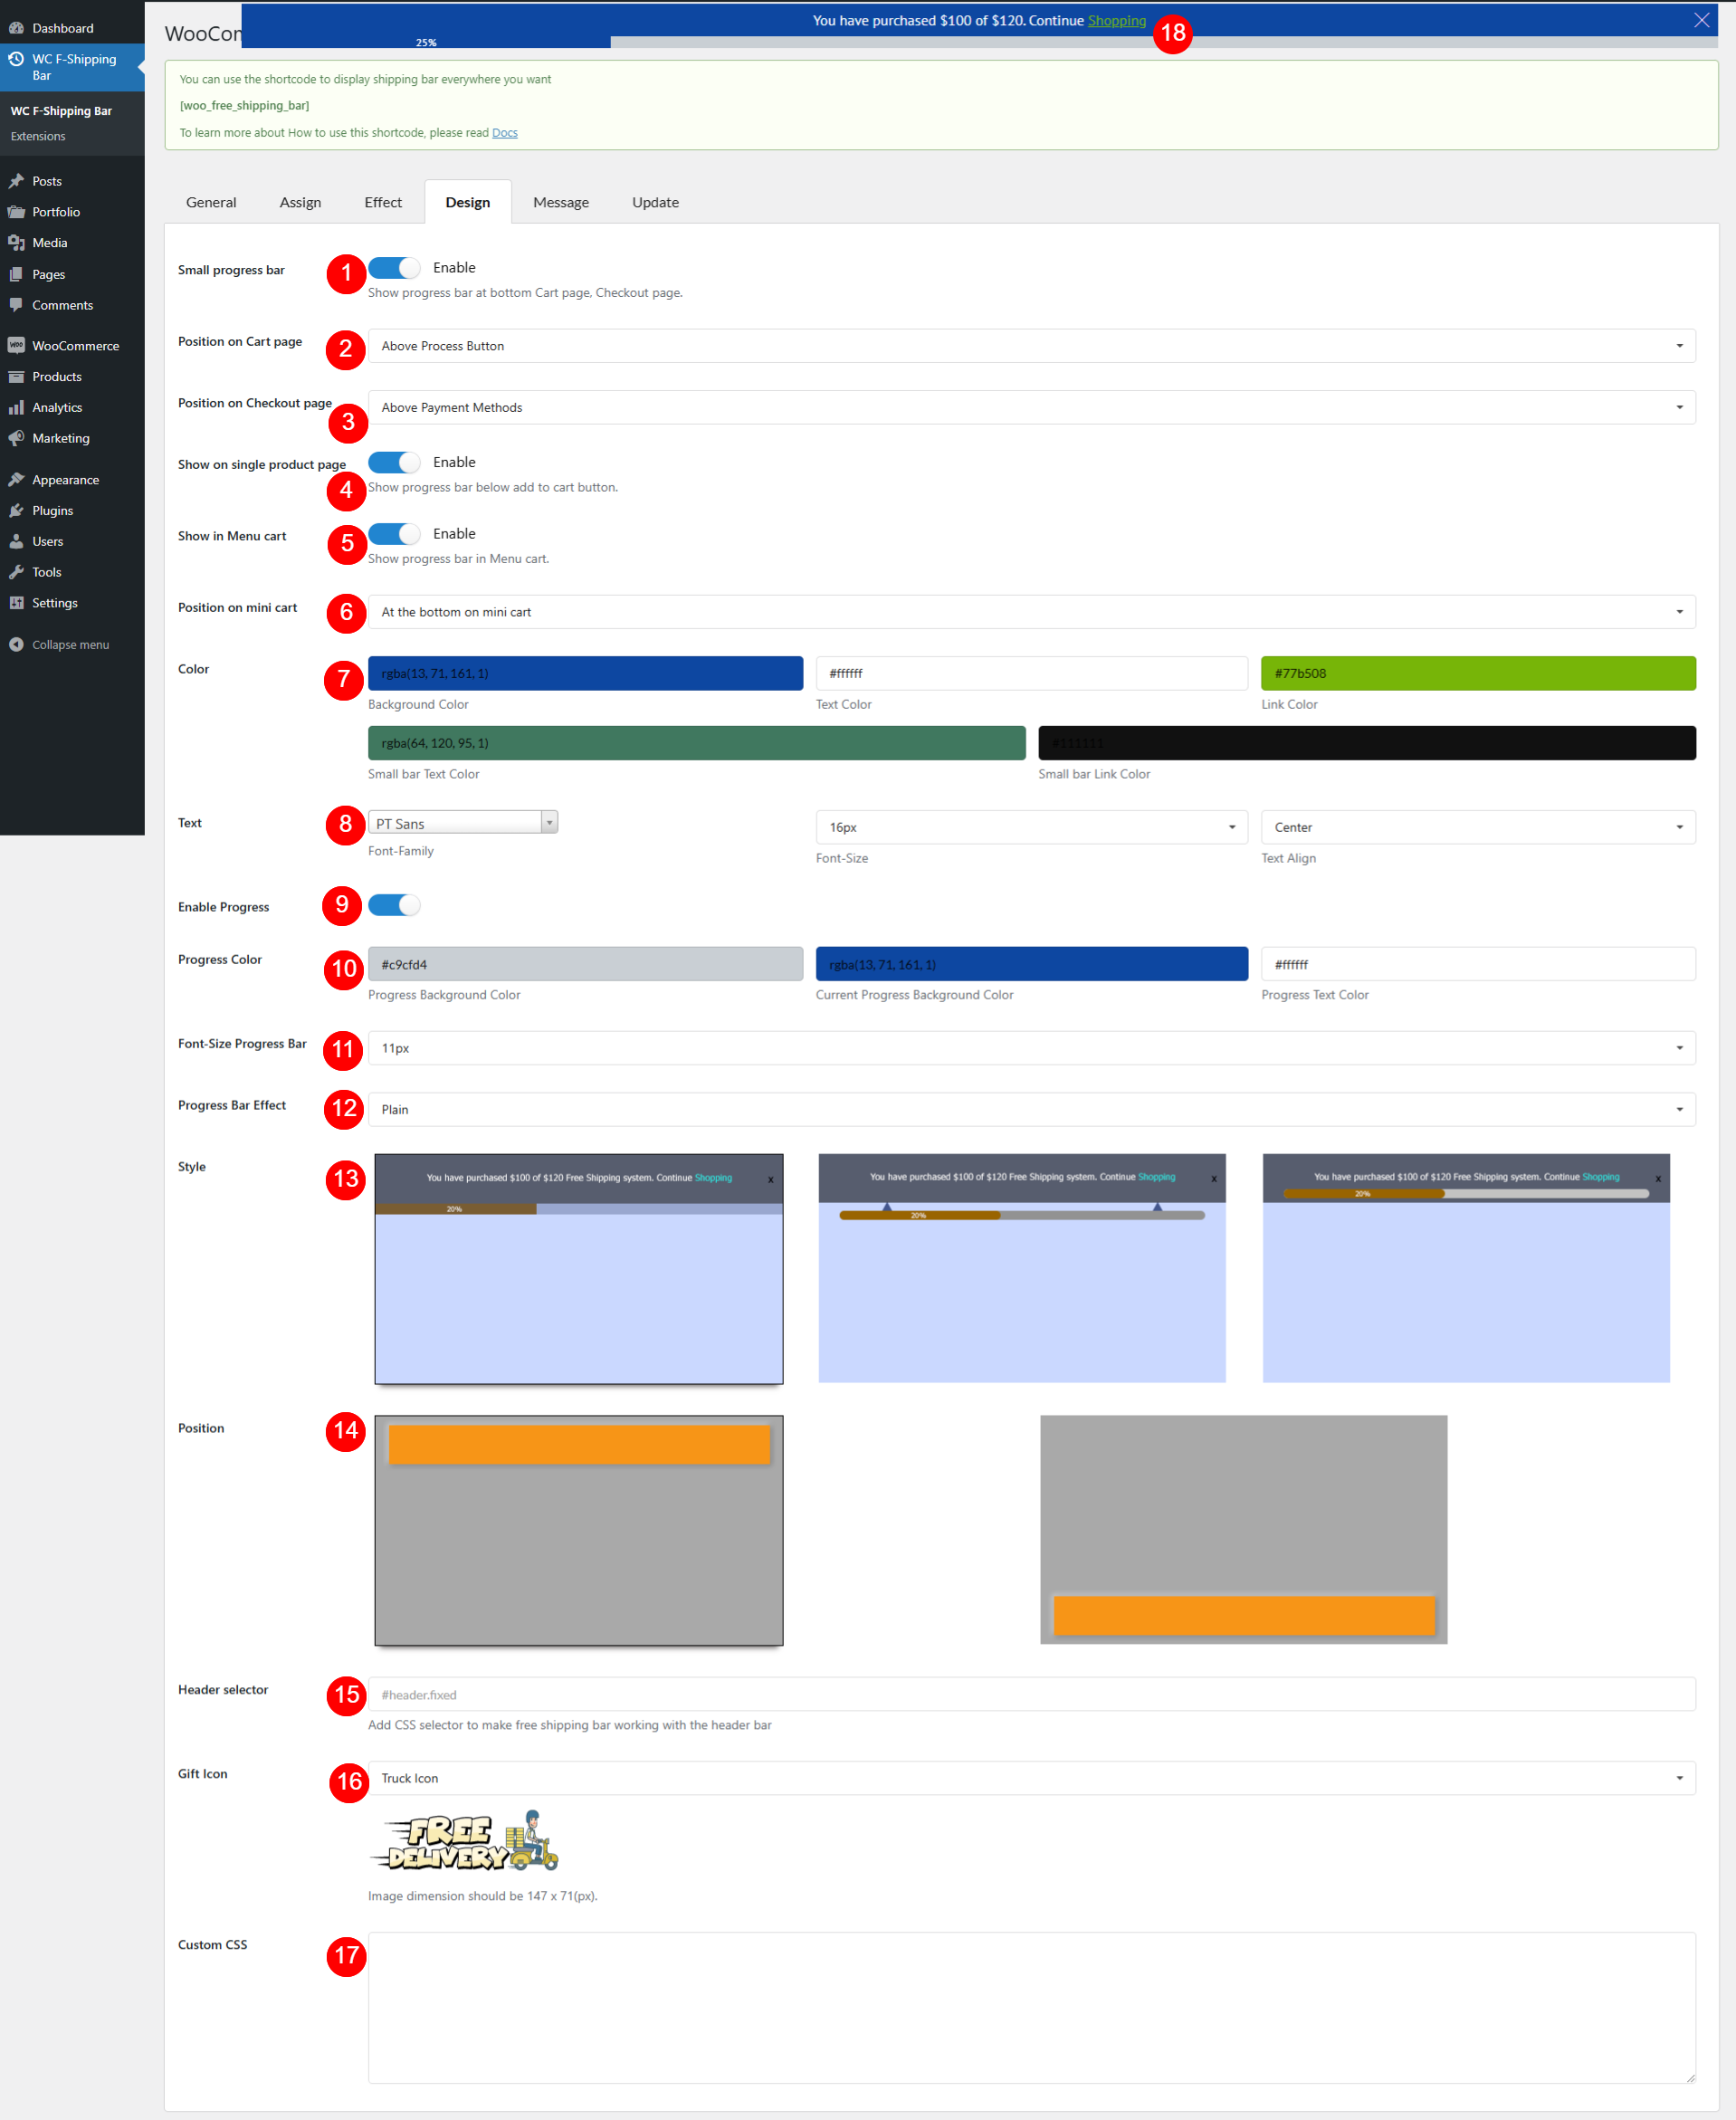
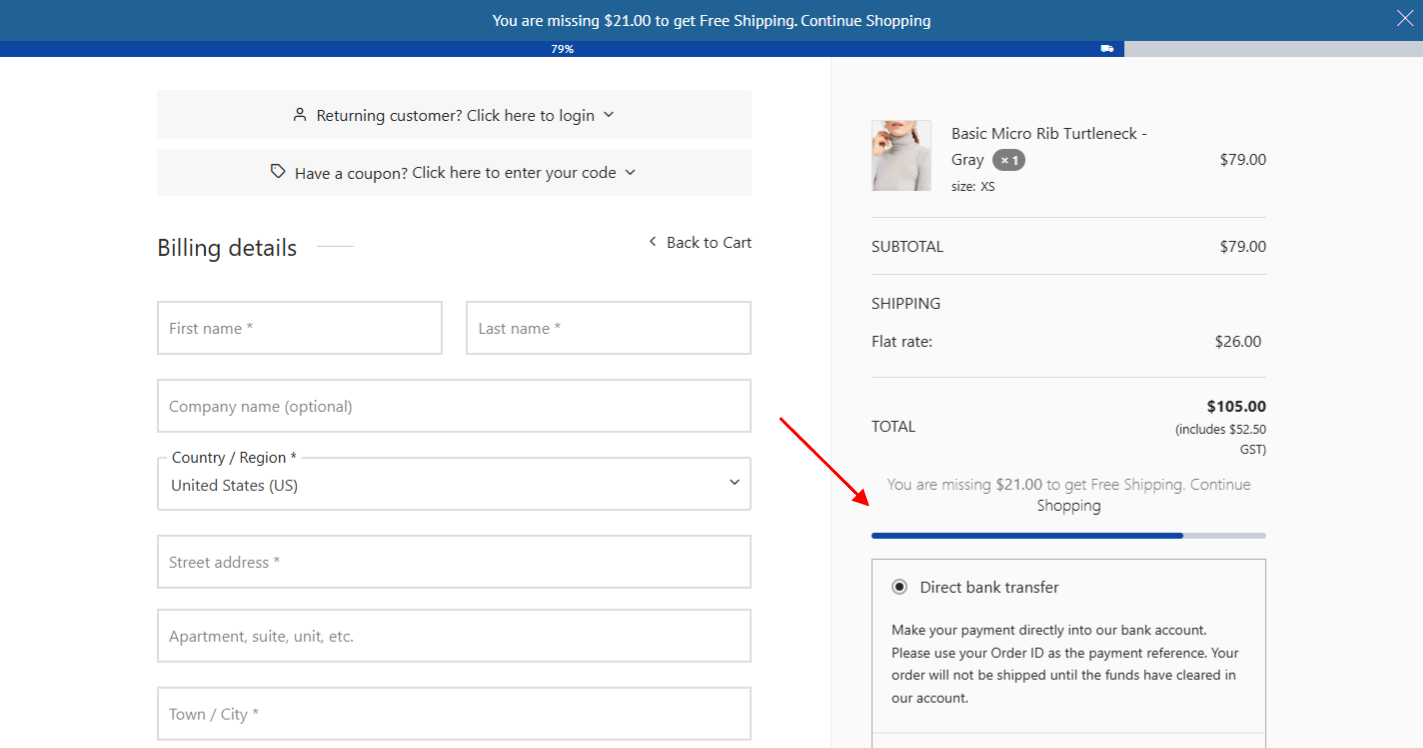
- Small Progress bar: Show a mini progress bar at the bottom of Cart/Checkout page. This bar and main free shipping bar can be visible at the same time. E.g.
- Position on Cart page: Select position for the bar on Cart page
- Position on Checkout page: Select position for the bar on Checkout page
- Show on single product page: Enable to show the bar on single product page below “Add to cart” button
- Show in Menu cart: Enable to display the progress bar on the menu cart on the front end.
- Position on mini cart: There are 2 positions you can choose to display the progress bar on the mini cart: at the top or at the bottom
- Color: Adjust Background Color, Text Color, Link Color, Small progress bar Text Color, and Small bar Link Color. See the change in Preview (18)
- Text: Set up the font size, font family and text alignment. See the change in Preview (18)
- Enable Progress: The progress bar is tied with the shipping bar to reflect the purchasing process to reach free shipping, enable this option if you want to use this feature
- Progress Color: Adjust Background Color (default background), Current Background Color (how far the customer reaches to get free shipping), and Text Color
- Font-Size Progress Bar: Font size of the text above
- Progress Bar Effect: Select progress bar effect
- Style: Select a position of the progress bar with 3 styles available
- Position: Select to display the progress bar on the top or at the bottom
- Header selector: Specify the CSS selector for the for the free shipping bar
- Gift Icon: Use an icon to open the free shipping bar. If “Custom Image” is selected, add your own image in the 15.a below
- Custom Icon: Add your own image and make it the gift icon
- Preview: Any changes in design like color, font size, font family, text alignment… will reflect here