Under Dashboard >> Countdown Timer, you can configure to display the Sales Countdown Timer on WooCommerce pages.
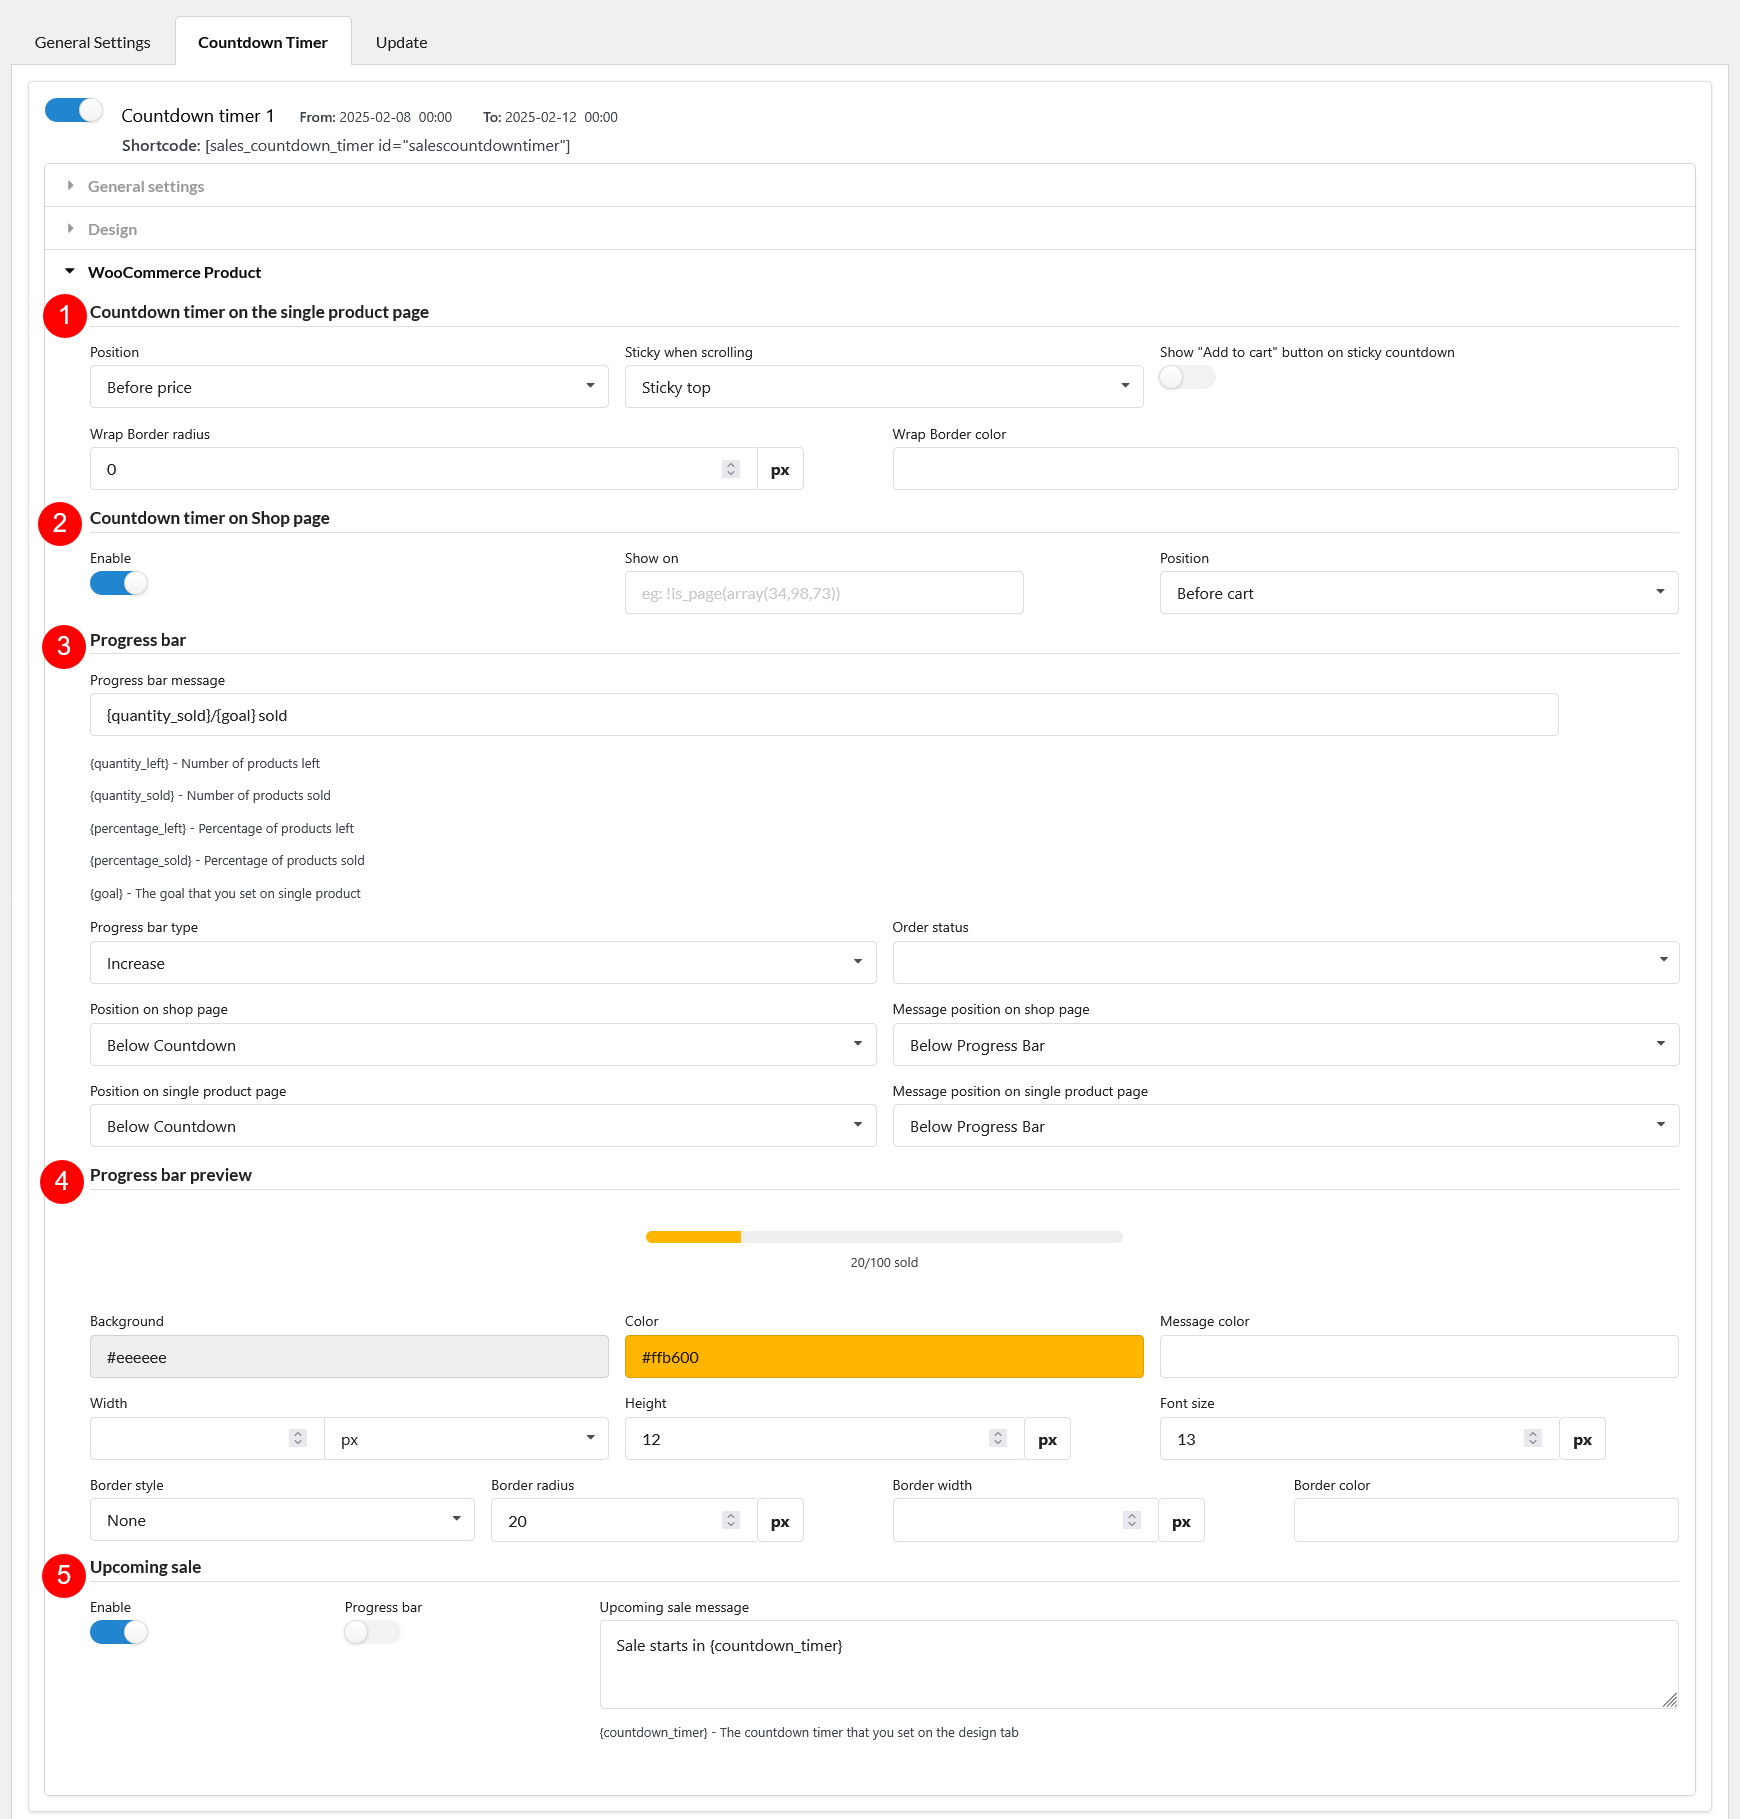
- Countdown timer on the single product page: Enable or disable the countdown timer display on individual product pages.
- Position: Choose where the countdown timer appears on the single product page
- Before price
- After price
- Before sale flash
- After sale flash
- Before cart
- After cart
- Product image
- Sticky when scrolling: Keeps the countdown timer visible and fixed on the screen as customers scroll down the page.
- None
- Sticky top
- Sticky bottom
- Show “Add to cart” button on sticky countdown: Display the “Add to Cart” button along with the sticky countdown for easier purchasing
- Wrap Border radius: Sets how rounded the outer corners of the countdown timer container are
- Wrap Border color: Choose the color of the border surrounding the countdown timer container
- Position: Choose where the countdown timer appears on the single product page
- Countdown timer on Shop page: Enable or disable the countdown timer display on the main shop or archive pages.
- Enable: Turn the countdown timer on or off for the shop page.
- Show on: Use WordPress conditional tags to control which product listings display the countdown timer.
- Position: Select where the countdown timer appears within each product card on the shop page.
- Before price
- After price
- Before sale flash
- After sale flash
- Before cart
- After cart
- Product image
- Progress bar: Show a visual progress bar along with the countdown to indicate the promotion’s status or urgency.
- Progress bar message: Text message displayed above or near the progress bar to give context. Supported placeholders are:
- {quantity_left} – Number of products left
- {quantity_sold} – Number of products sold
- {percentage_left} – Percentage of products left
- {percentage_sold} – Percentage of products sold
- {goal} – The goal that you set on single product
- Progress bar type: Choose whether the progress bar increases or decreases over time or based on quantity sold.
- Order status: Specify which order statuses will count towards the progress bar (e.g., completed, processing).
- Position on shop page: Choose the location of the progress bar on the shop page
- Below Countdown
- Above Countdown
- Message position on shop page: Choose where the progress bar message appears on the shop page
- Above Progress Bar
- Below Progress Bar
- Left Progress Bar
- In Progress Bar
- Right Progress Bar
- Position on single product page: Decide where the progress bar appears on the single product page.
- Above Countdown
- Below Countdown
- Left Countdown
- Right Countdown
- Message position on single product page: Set the position of the progress bar message on the product detail page.
- Above Progress Bar
- Below Progress Bar
- Left Progress Bar
- Right Progress Bar
- In Progress Bar
- Progress bar message: Text message displayed above or near the progress bar to give context. Supported placeholders are:
- Progress bar preview: Displays a live preview of the progress bar. Any changes made to the progress bar settings will be reflected here instantly.
- Background: Choose the background color of the progress bar track (the empty portion).
- Color: Select the fill color of the progress bar (the active portion that progresses).
- Message color: Set the text color of the message displayed with the progress bar.
- Width: Adjust the width of the progress bar.
- Height: Adjust the height of the progress bar.
- Font size: Set the font size of the progress bar message.
- Border style: Choose a style for the border
- None
- Dotted
- Dashed
- Solid
- Double
- Groove
- Border radius: Set the curve of the progress bar’s corners.
- Border width: Define the thickness of the progress bar border.
- Border color: Choose the color for the progress bar’s border.
- Upcoming sale: Settings for showing a countdown to future sales.
- Enable: Turn on/off the countdown for upcoming sales.
- Progress bar: Show a progress bar – settings above
- Upcoming sale message: Customize the message for upcoming sales. You can use the {countdown_timer} shortcode to dynamically display the remaining time (e.g., “Sale starts in {countdown_timer}”).