After successfully installing the plugin. Go to Dashboard/ Woo Notification to view the plugin back end.
Step 1: Enable the plugin on PC and mobile.
Go to Woo Notification > General.
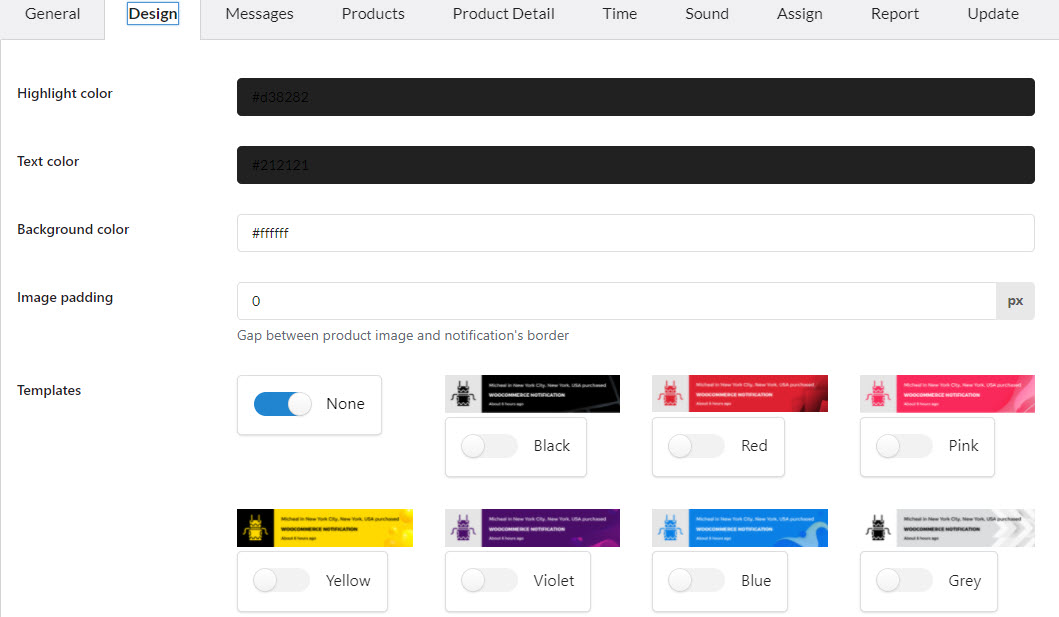
Step 2: Design popup notifications.
Go to the Design tab, you can customize how the notification looks on the front end. Go to the Design section below to configure.
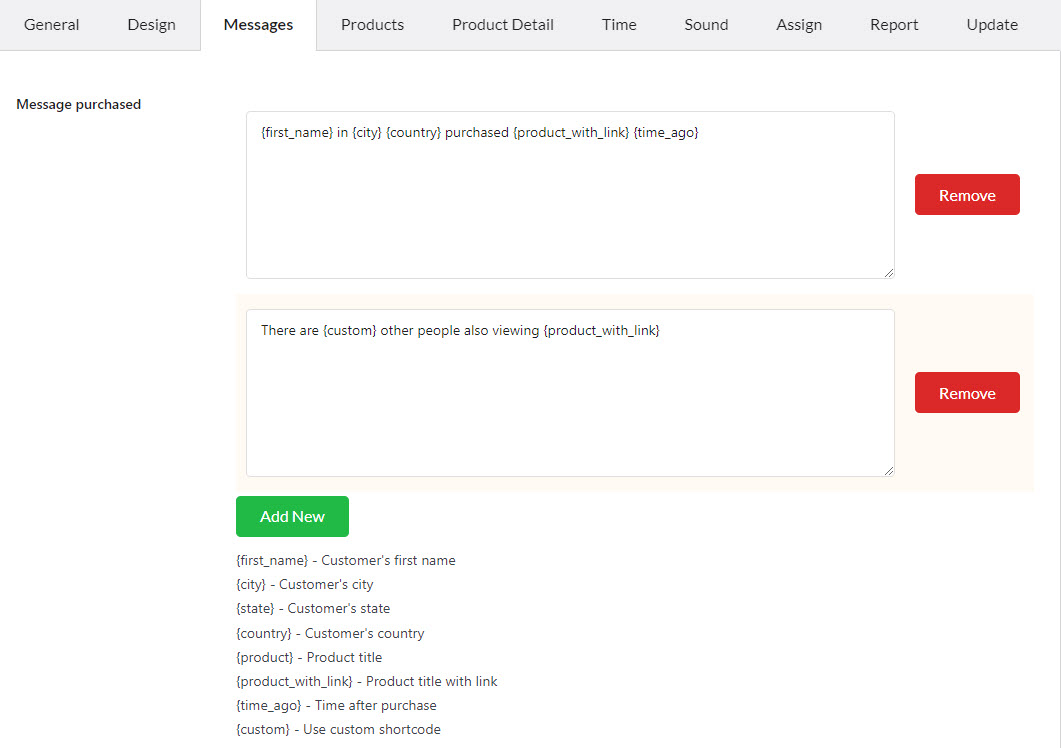
Step 3: Messages on the notifications.
In the Messages tab, you can add and configure as many WooCommerce Notification messages as you want. Each message will be displayed on a different single pop-up.
Using shortcode to create dynamic message contents. If your site sells worldwide, you can display the notifications in multiple languages using WPML or Polylang plugin.
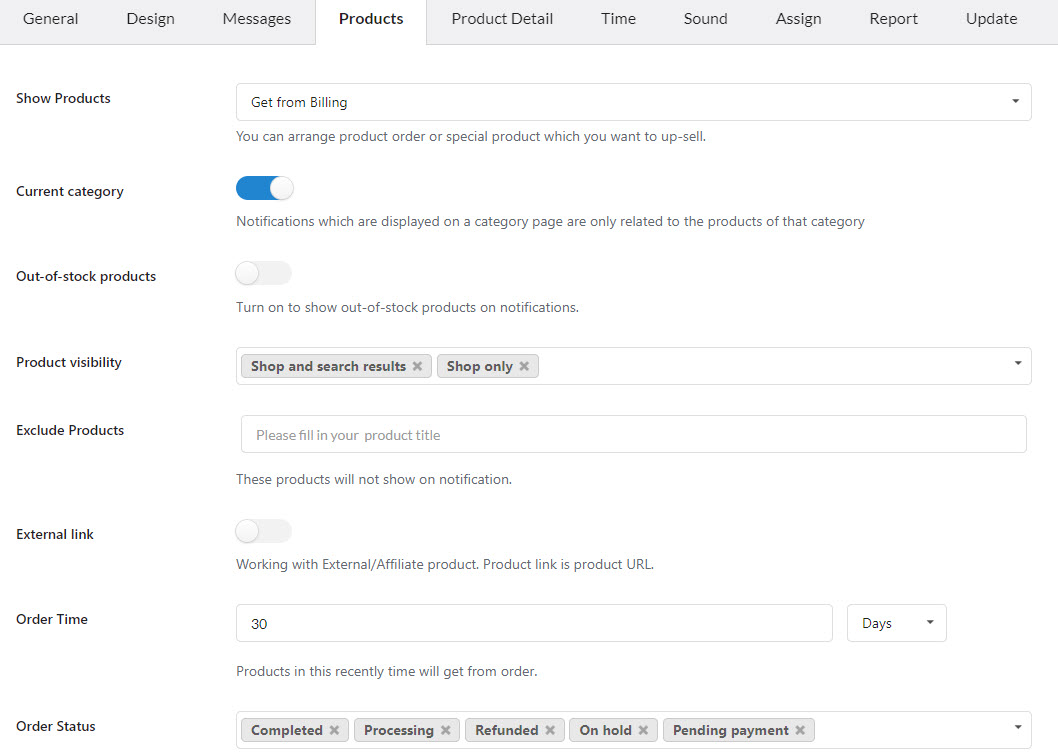
Step 4: Select to display types of the product on the front end.
Go to the Products and Product detail tabs, you can select to display on the popup notifications the information of the fake orders or real orders, configure rules to display target products on the notification to users who are visiting your site.
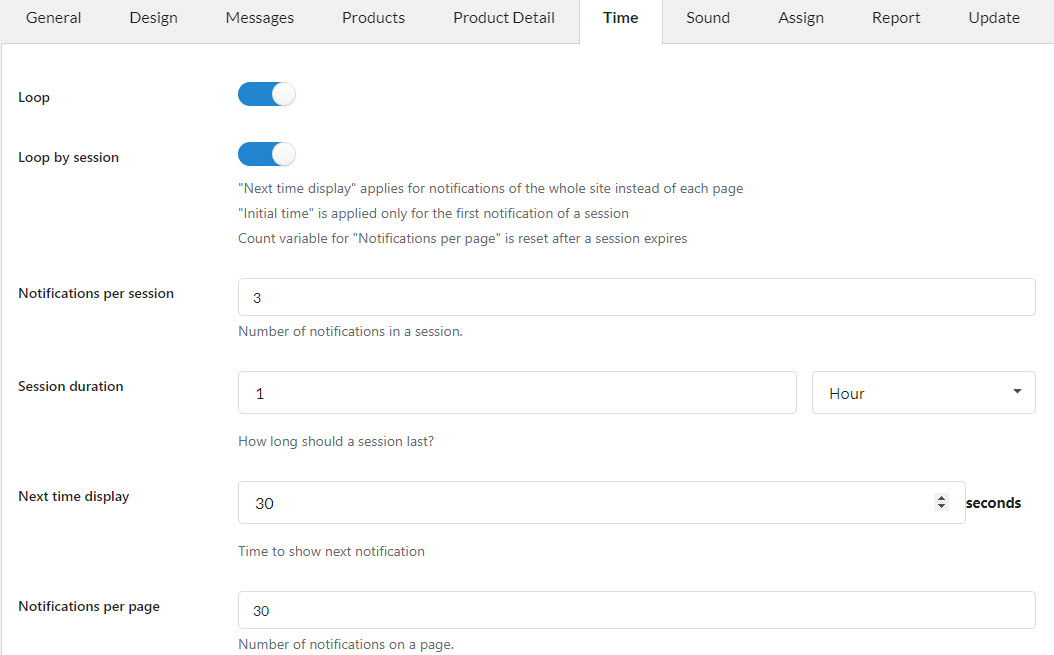
Step 5: Time rules for displaying popup notifications
Go to the Time tab to set up rules to display the popup notifications loop and randomly. This helps the popups appear naturally and trustly. Go to the Time section below to configure time settings.
Step 6: Sound of notification to attract attention.
Go to the Sound tab,
Step 7: Display popup notifications on pages you want.
Go to the Assign tab, there are toggles that let you choose on which pages that the notification to be appeared. Using the conditional tags to master in popup displaying on particular pages.


