A. REVIEW FORM SETTINGS
1. How the Review form looks like.
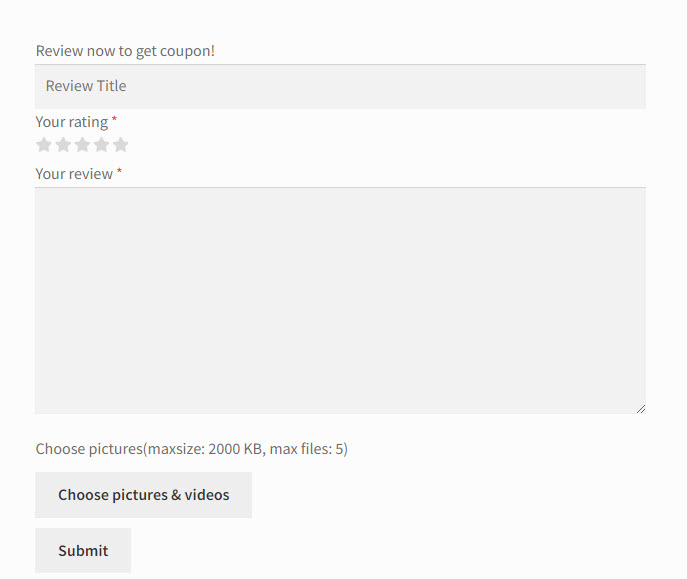
Customers leave their reviews on the review form normally including the Review title; Rating; Review content; Attach images or videos, then click on the Submit button to post the review. The photo below is what the review form looks like:
2. Settings of the Review form.
You can configure the review form in the Reviews tab and Optional Fields tabs in the plugin back end.
a. In the Review tab, you can manage the Review form settings with these options below:
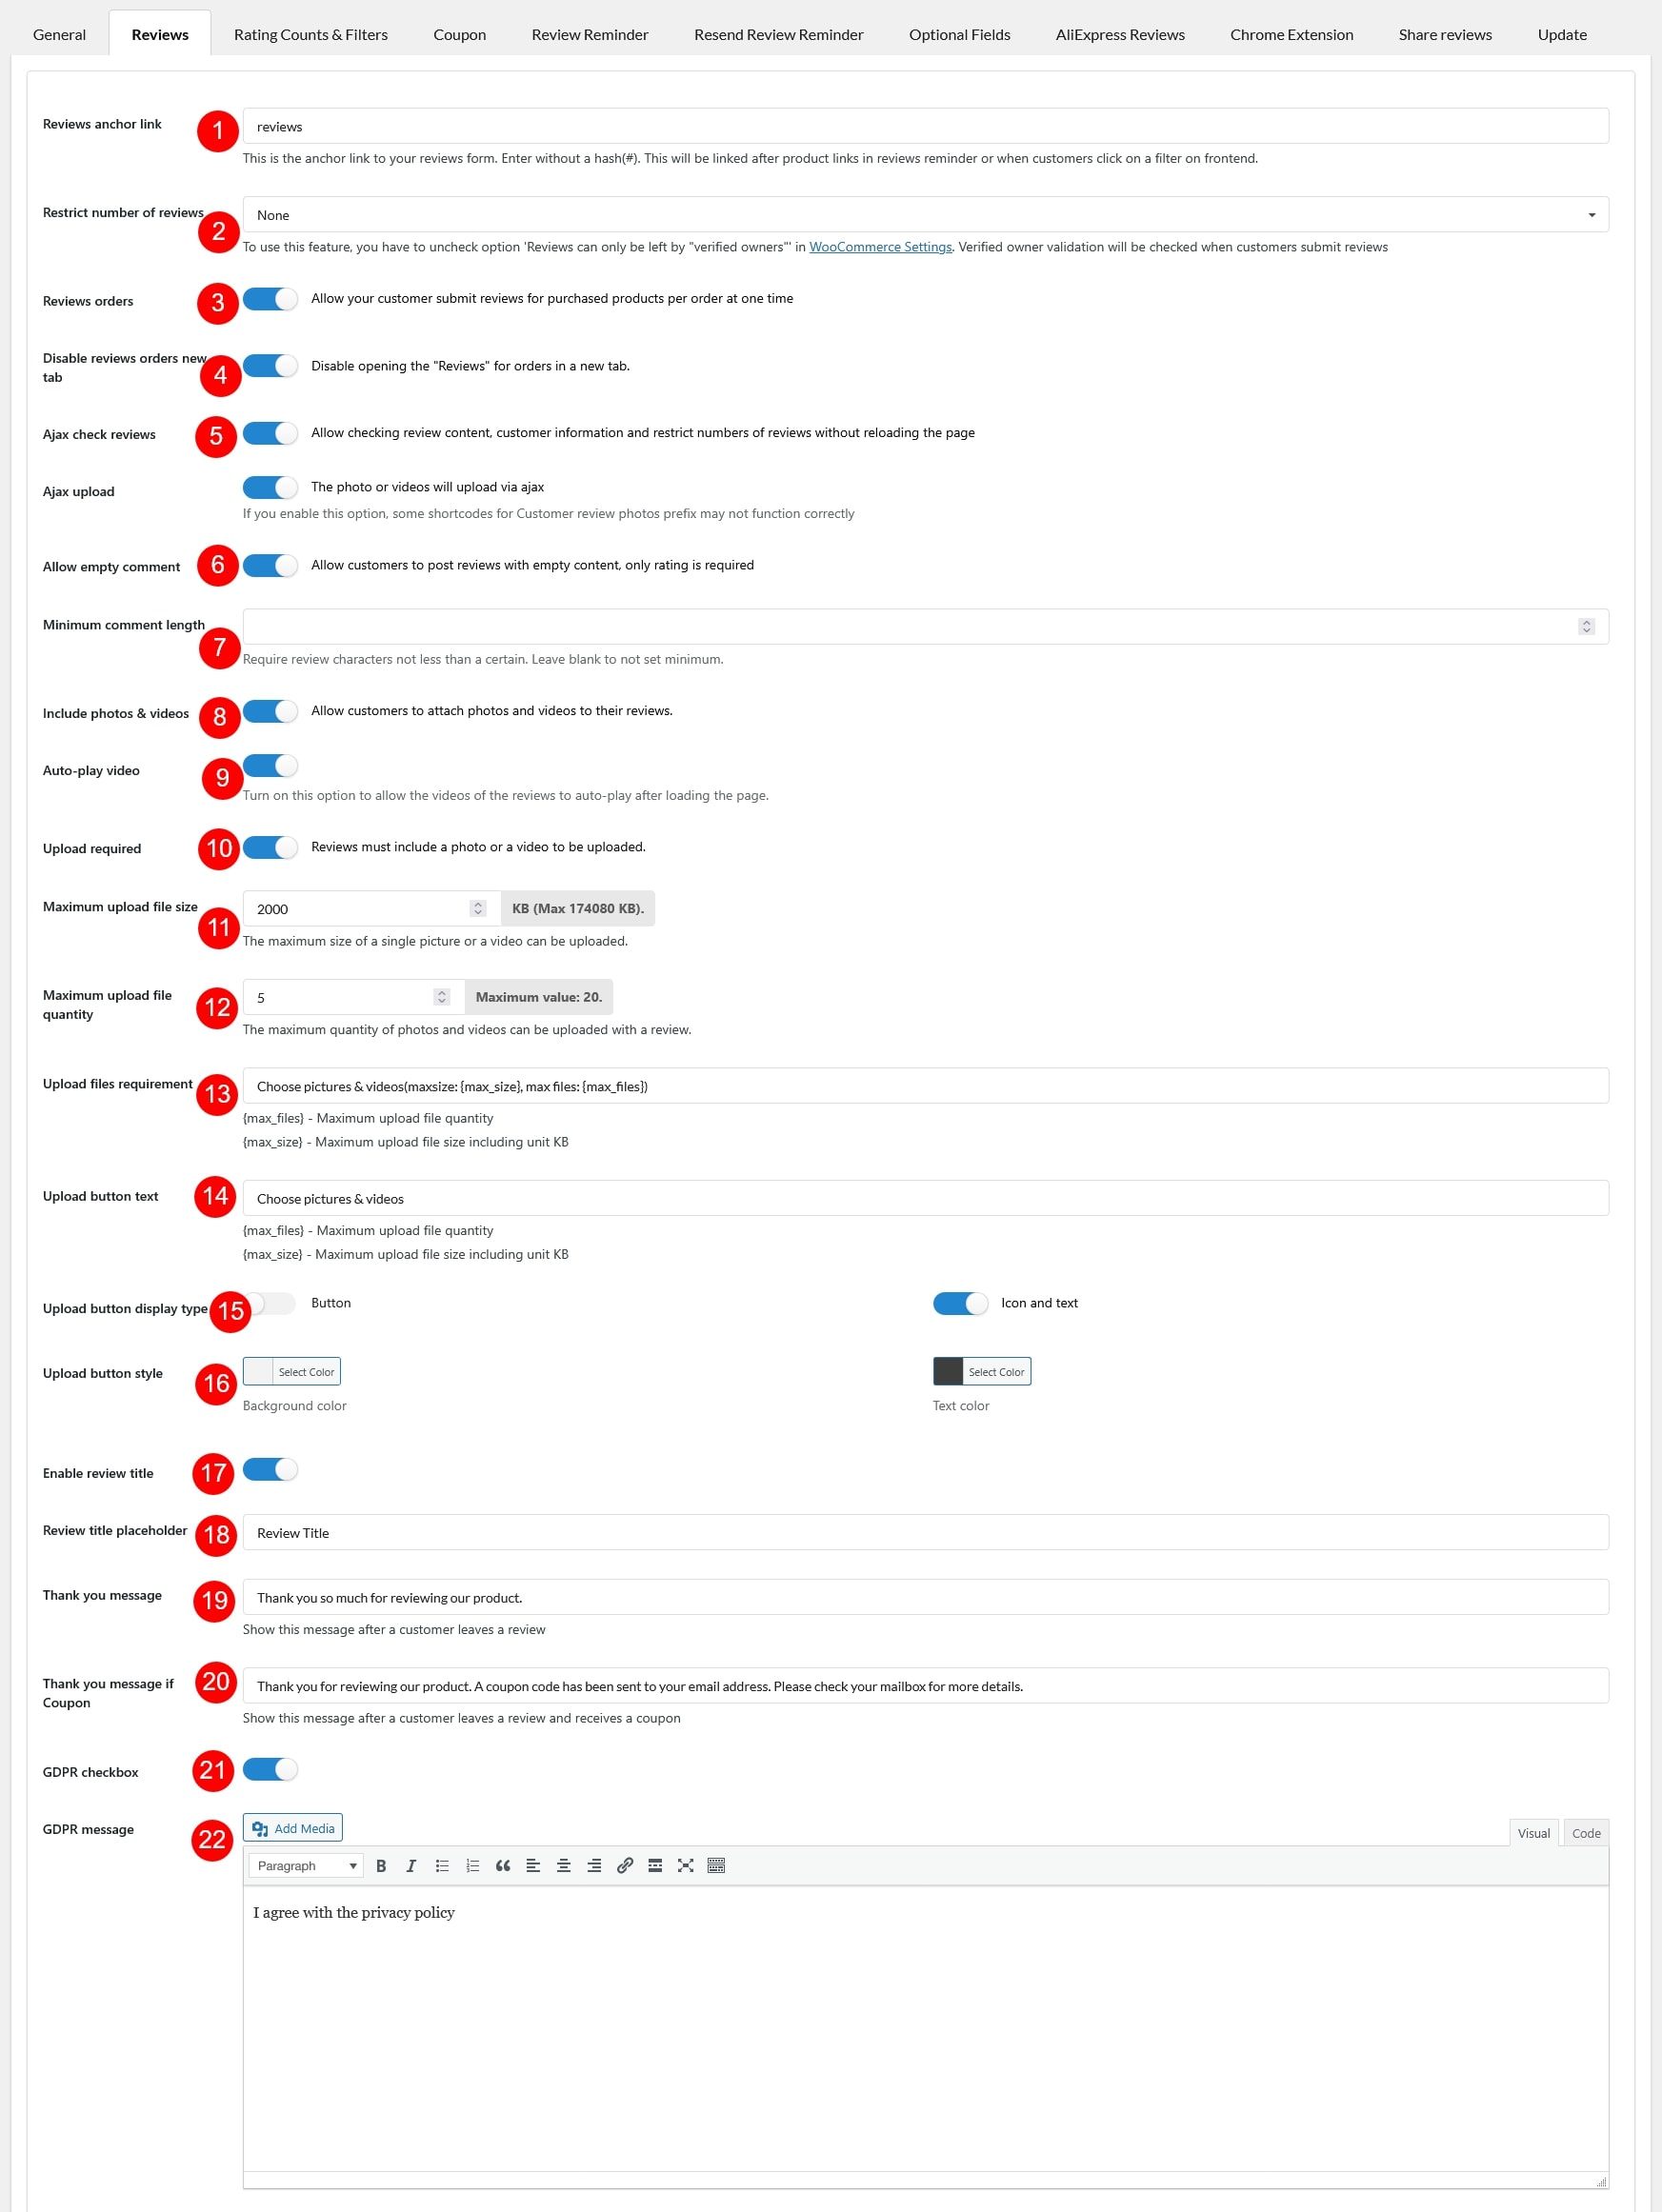
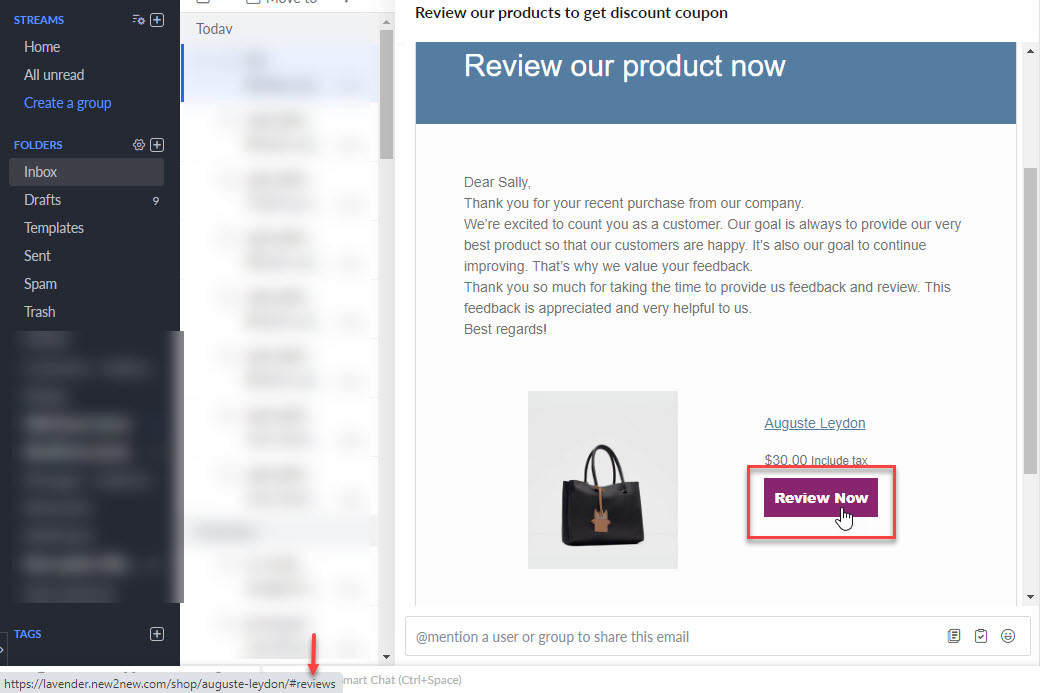
1. Review anchor link: The anchor link redirects to the review form to leave a review when the customers click on one of the 2 positions:
-
- In the review reminder email: Click on the Review now button.
- On a review filter on the front end.
 |
|---|
| Click on the Review now button to direct to the review form |
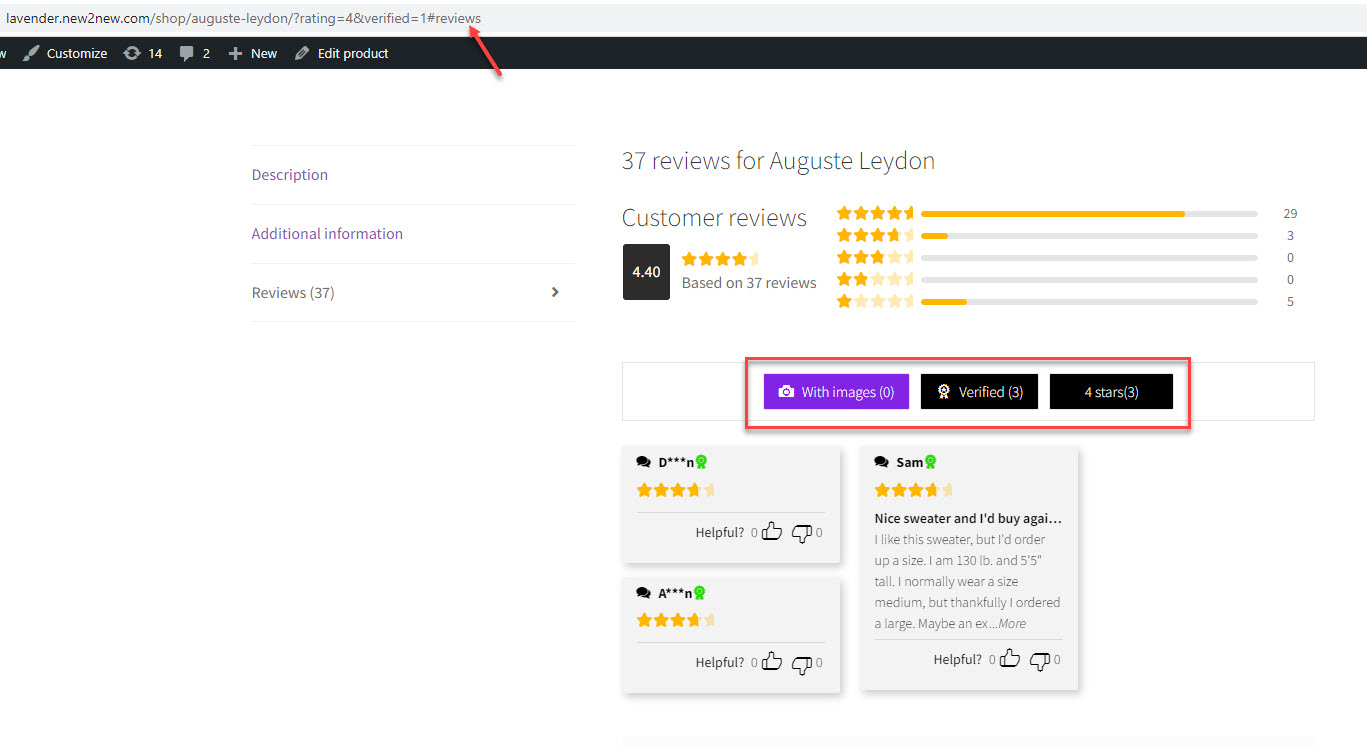 |
| Click on the filters to link to the review form |
2. Restrict the number of reviews: Normally, reviews can just be posted by the customers who purchased the product, or in another word, they are verified customers. However, with the Restrict number of reviews, the admin can change how many reviews a customer/user can post.
- None: Customers and users are not limited in how many reviews they can post.
- One review no matter whether the customer bought that product or not: No matter whether the customers bought or not a product, they have 0ne chance to post a review.
- One review and verified owner required (the customer must have bought that product): Only when customers who purchased the product, they are allowed to post one review.
- By number of times the customer bought that product: Allow customers to post reviews in accordance with the times they bought a product.
* Note: To use this feature, you have to uncheck option ‘Reviews can only be left by “verified owners”‘ in WooCommerce Settings. Verified owner validation will be checked when customers submit reviews.
3. Reviews orders: If the order has multiple line items to review, enable this option to allow your customers to submit reviews for all the order items in that order at one time. The option to leave reviews in bulk is available in the customer’s My Account page >> Orders (visit this documentation). Simply click the “Rate” button associated with the order they wish to leave reviews and they’ll be redirected to.
4. Disable reviews orders new tab:Enable this option to prevent the Rate button from opening a new browser tab when leaving a review under My Account > Orders.
5. Ajax check reviews: Allow checking review content, customer information and restrict number of reviews without loading the page.
- Ajax upload: Enable this option to make the page not reload after uploading media to review
6. Allow empty comment: Allow customers to post reviews with empty content, only rating is required.
7. Minimum comment length: Require the review characters not less than a certain. Leave blank to not set minimum.
8. Include photos & videos: Allow customers to attach photos and videos to their reviews
9. Auto-play video: Enable to automatically play review videos
10. Upload required: Reviews must include a photo or a video to be uploaded
11. Maximum upload file size: The maximum size of a single picture or a video can be uploaded
12. Maximum photo quantity: The maximum number of upload files can be posted with a review.
13. Upload images requirement: This text note is displayed on the review form to warn the customer about the maximum photo quantity and maximum photo size they can upload.
14. Upload button text: You can change the submit review text on the review form in this field.
15. Upload button display type: There’re 2 styles
- Button

- Text and Icon
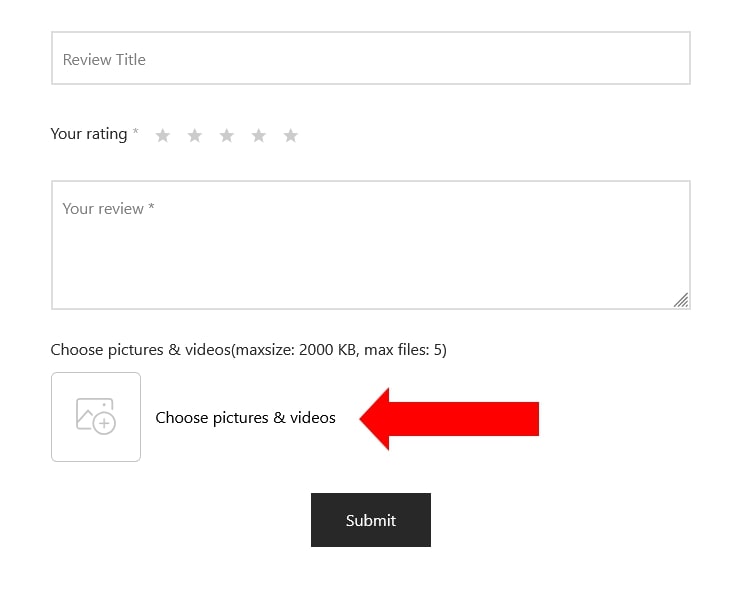
16. Upload button style: Design the submit review button, choose the background color and text color you want.
17. Enable review title: This option helps show or hide the title of the review form.
18. Review title Placeholder: Add the text of placeholder on the review title.
19. Thank you message: This message will show when the review is uploaded successfully
20. Thank you message if Coupon: If a customer leaves a review and receive a coupon for it, this message will show.
21. GDPR checkbox: Enable the GDPR checkbox with this option.
22. GDPR message: Add the content for the GDPR message
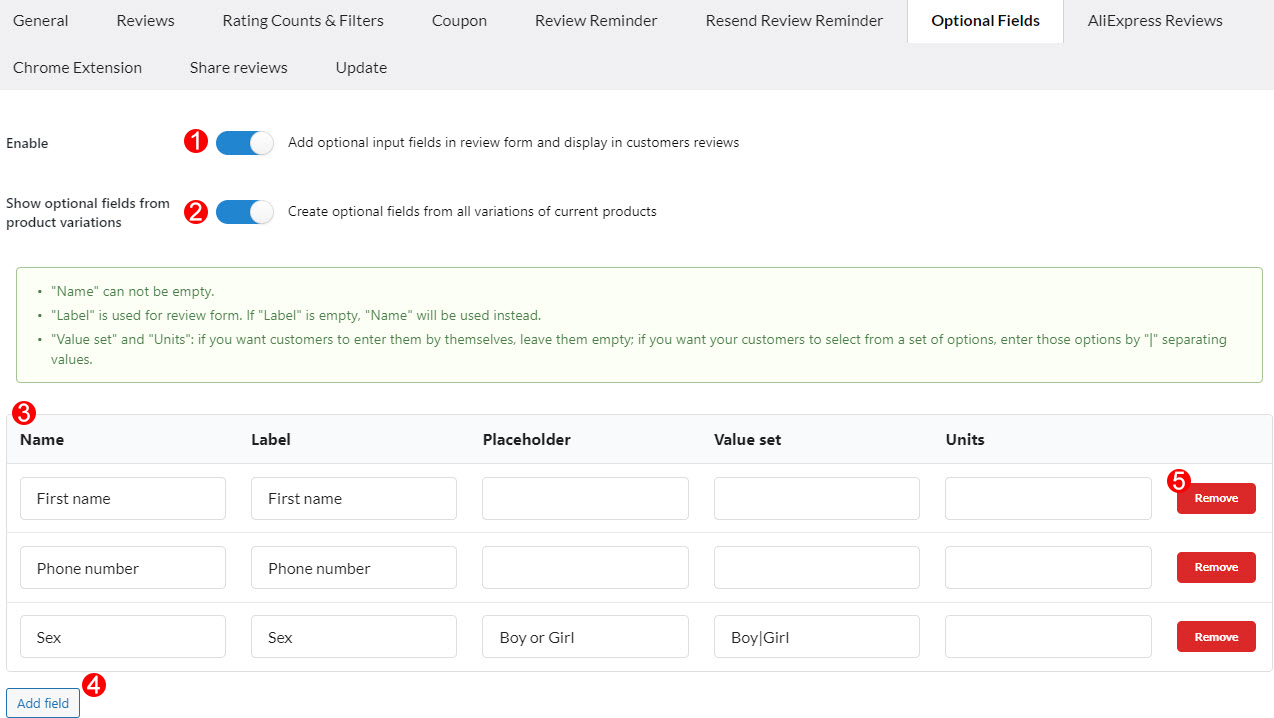
b. In the Optional Fields tab, you can create and add/remove custom fields to the review form.
- Enable: Enable if you want to add more the optional fields in the review form.
- Show optional fields from product variations: With this option, you can create the variations optional fields of the current variable product.
- Optional fields:
- Name: Enter the optional field name.
- Label: The label of the optional field, this label will be displayed on the front-end.
- Placeholder: Add the text of the placeholder
- Value set: Enter the values of this field. Customers can select between these values when they leave a review.
- Units: This option is for the products which have a measurement system. For example cm, kg…
- Add new fields.
- Remove fields.
B. DESIGN REVIEWS
In the Reviews tab, the options below help to customize how reviews look on the front end.
a. General settings
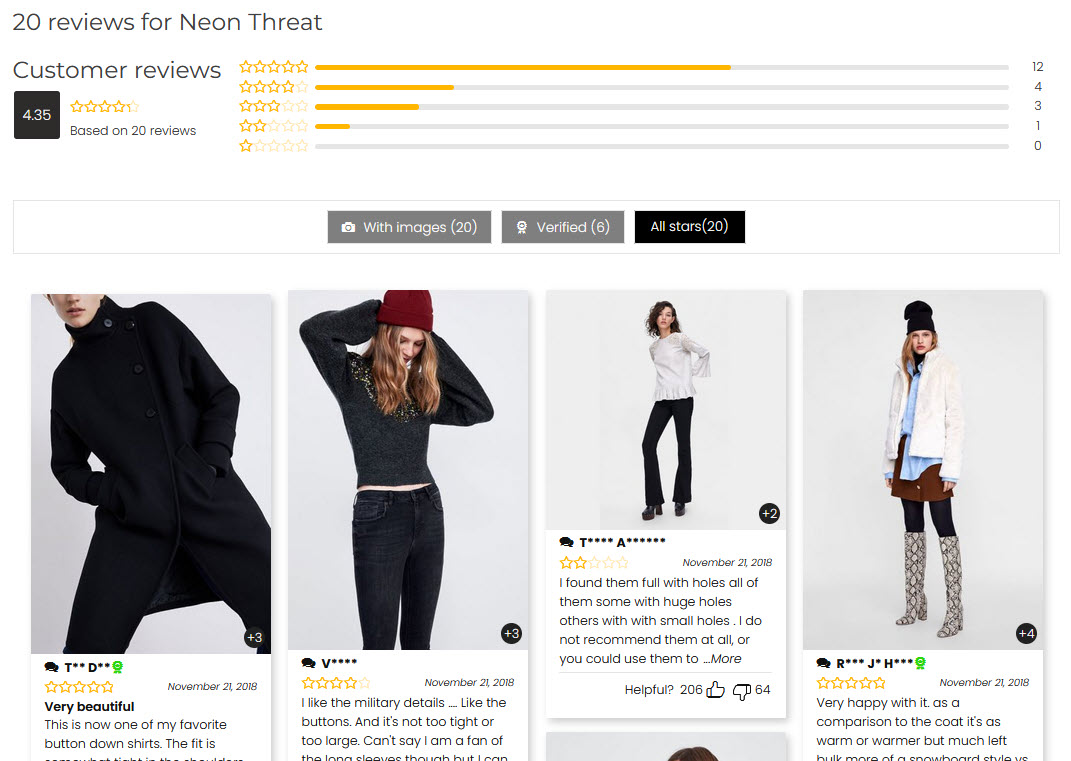
- Sort review by: You can sort to display reviews in order: Newest first; Oldest first; Or Vote up high to low
- Update comment meta to use sort reviews by the vote count option: Vote can be changed over time, so click update to recalculate the vote volume if you choose sorting review with the Vote up high to low option.
- Sort review tab first: The Review tab is displayed under the Description and Additional Information tab by default. Enable this option to display the review tab first.
- Rating star color: Change the color of the rating star.
- Hide name: You can hide name of the commentators. There are 3 options:
- None: Not hide the commentator name.
- Only display first letter of each word in author’name.Eg:”Woo Photo Reviews”becomes”W**P****R******”
- Display full first name and initial for surname.Eg:”Photo Reviews”becomes”PhotoR”
- Display full of the last name and initial for the first name. Eg: “Woo Photo Reviews” become “W.Reviews”
- Display the first [X] characters of the reviewer’s name. Eg: “Woo Photo Reviews” becomes “Woo Photo********”
- X input: This option is available if Hide name is Display the first [X] characters of the reviewer’s name. Eg: “Woo Photo Reviews” becomes “Woo Photo********”. Specify the X value for it.
- Verified owner: Mark the commentators as the verified owners. You can color for the text and the badge icon, when using “Text” or “Badge”, but you can’t customize color when using “Default” option.
b. Image caption
- Show image caption: enable the image caption option, allows your customers to post a caption with each review picture.
- Image caption text color: change the image caption text on front-end.
- Image caption background color: change the caption background color.
- Image caption font size(px): select the caption text font-size.
c. Helpful button
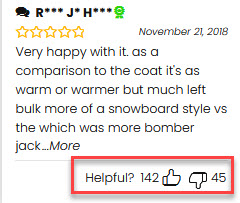
- Helpful buttons: enable to display the helpful button on each review.
- Helpful buttons title: change the text of the helpful button title on front-end.
d. Front-end design
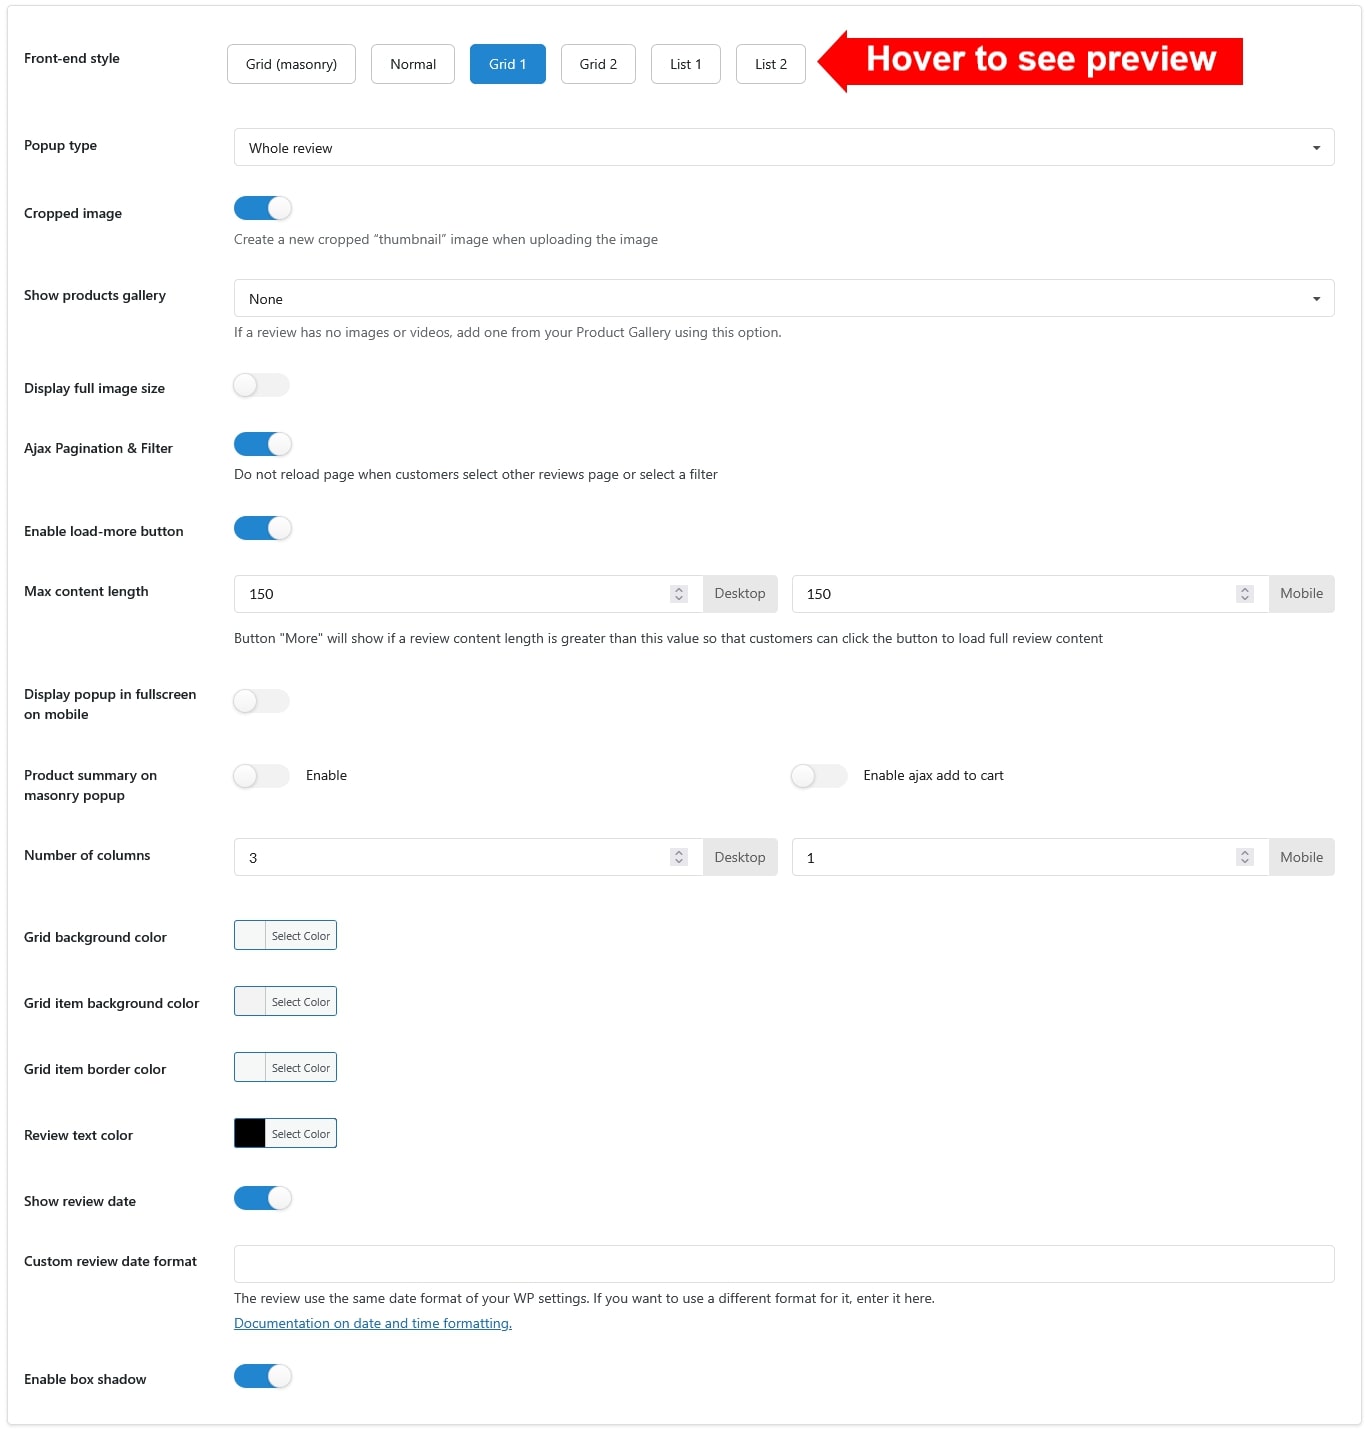
Each style in “Front-end style” has their own settings. We list all available options below
- Front-end style: Select the front-end style. Each style has their own settings. Hover over the style option to see its preview
- Grid (masonry)
- Normal
- Grid 1
- Grid 2
- List 1
- List 2
- Popup type: There are three styles you can select to let the images appear when the customer clicks on the review images:
- Whole review: Display full review content when clicking on this review image.
- Only image: Zoom out just this review image.
- Off: Not zoom the review image.
- Cropped image: You can create a new cropped “thumbnail” image when uploading the image.
- Show products gallery: If a review doesn’t include images or videos, you can display product images from your gallery instead.
- None: Don’t show any gallery images
- Show one random image of the Product Gallery
- Only show first image of the Product Gallery
- Display full image size: Enable to display the photo of reviews with full size.
- Ajax Pagination & Filter: Enable this option to not reload the whole page when customers click next review pages or filters.
- Enable load-more button: By using this feature, the Load more button will appear, and when clicked, more reviews will be displayed.
- Max content-length: Set the maximum length for a review content, if a review content length is greater than this value so that customers can click the button “More” to load full review
- content.
- Display popup in fullscreen on mobile: Enable to show the review popup fully on the mobile.
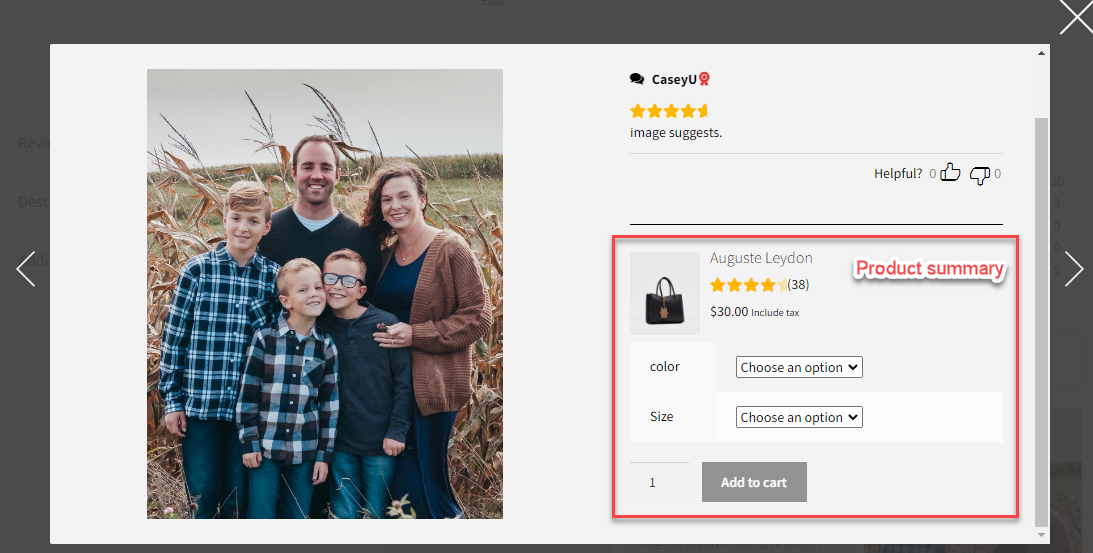
- Display product summary on masonry popup: Display the product information on the review pop-up when choosing the Whole review popup style.
- Number of columns:
-
- Number of columns on PC: Select how many columns of reviews you want to display with the Grid (Mansory) style on PC
- Number of columns on Mobile: Select how many columns of reviews you want to display with the Grid (Mansory) style on mobile.
-
- Grid background color: select the background color of the review module.
- Grid item background color: select the background color of the item color.
- Grid item border color: select the border color of the item color.
- Review text color: change the review text color.
- Show review date: Select if you want to display the review date.
- Custom review date format: Select the review date format.
- Enable box shadow: Enable this option to create the box-shadow effect when a review is selected.
- Image popup: When customers click on the review image in the normal style, you can choose the image appears under below thumbnails or lightbox
- Reviews container: Leave this field blank if ajax load more reviews works properly. If nothing happens when you click on button load more, product review template have been customized on your site. Just find the specific class or id of the closest container-the closest element(usually an “ul” or “ol” element) that wraps all reviews. Use dot(.) if it’s a class name and use hash(#) if it’s an id.
e. Custom CSS: Allows you to enter CSS code to change the plugin front-end as you want
