With FEWC – WooCommerce Extra Checkout Fields, you can quickly add and manage custom fields with some simple manipulations:
- Add new fields: Click on the Add New Field button to add more custom fields
- Drag and drop
 among fields to reorder the custom fields in a section
 - Edit custom fields: Click on the
 icon to edit each field, then the popup field detail will expand
 - Show/hide custom fields: Click on the
 icon to show/hide fields
 - Design custom fields: There is a design section in each detail field for designing
- Assign to appear: There is a metadata section to save the custom fields to new user meta data or order meta data and assign the custom fields to appear on the admin email, customer email, order detail page and thank you page.
- Duplicate custom fields: Click on the
 icon to create a new same custom field
 - Delete custom fields: Click on the
 icon to remove a custom field
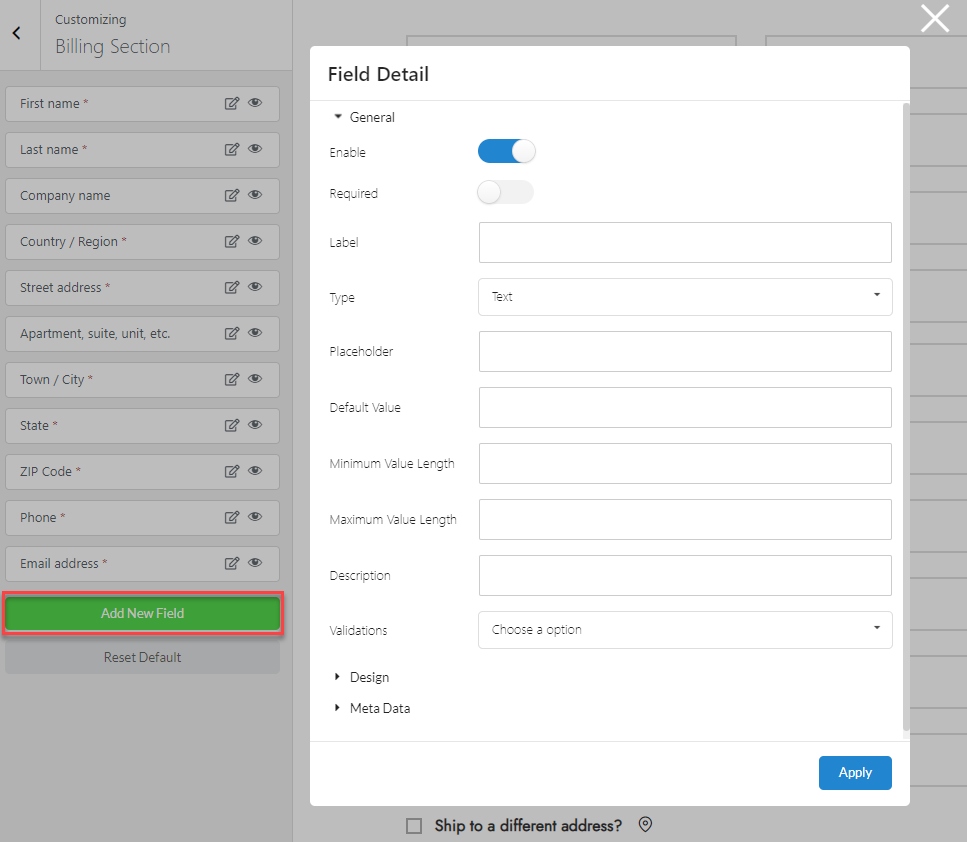
Click on the Add New Field button to create a new custom checkout field, the popup field detail will appear. There will be 3 main parts to define and customize the custom field which are:
- General:
- Enable: To display or hide this field on the checkout page
- Required: Enable if adding information in this field is mandatory
- Label: Edit the field label
- Type: Select the type of the field, there are different input types to choose from, they can be: Text, Email, Phone, Number, Textarea, Checkbox, Checkbox group, Select, Radio, Datetime local, Time, Date, Week, Month, Password, Hidden, Url, Html/paragraph. It is determined by the input type which specific information will be included in the detail field in the general section.
- Placeholder: Enter the example value to demonstrate to customers about this field
- Default value: The value which you entered or selected and will appear on the checkout field. If the customer wants to change, he has to enter or select another value
- Description: Explain what the field is
- Design
- Class
- Label class
- Input class
- Meta Data
- Save as
- Meta key name
- Display in