When you visit a WooCommerce POS page, you can see a global POS page interface will be presented with the following functional areas.
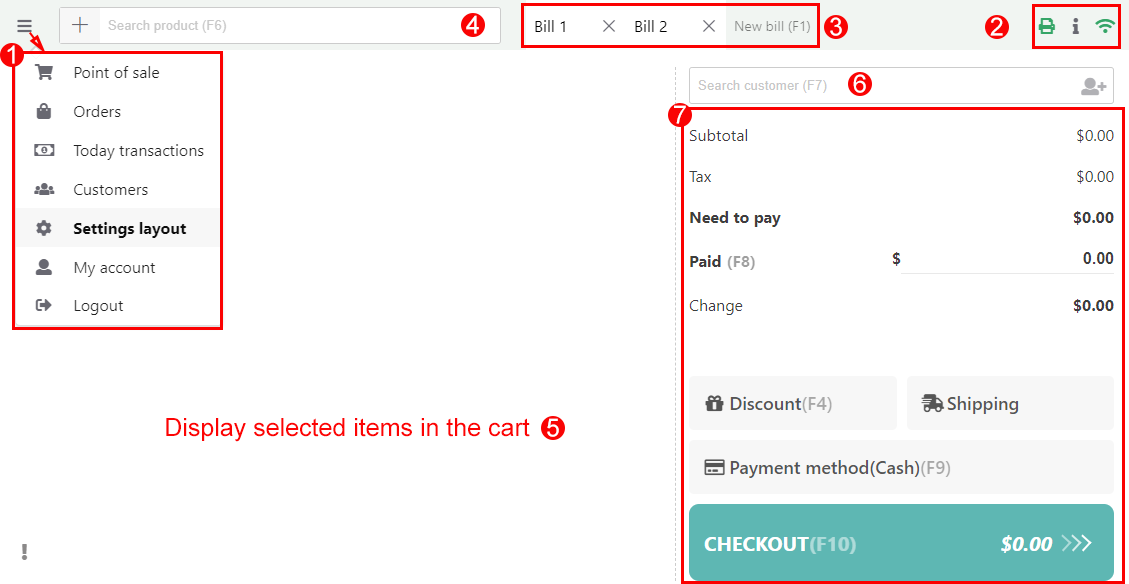
1. Menu: Click on the ![]() button to go to menus on the POS page. The menus include Point of Sale, Orders, Today transaction, Customers, My account, Logout.
button to go to menus on the POS page. The menus include Point of Sale, Orders, Today transaction, Customers, My account, Logout.
2. Shortcut buttons.
 Auto-print receipt after checkout
 Keyboard shortcuts: Keyboard shortcuts are keys or combinations of keys that provide an alternative way to do something on the POS page that you’d typically do with a mouse. Hovering the Keyboard shortcut icon at the top right corner of the POS page, you can see the keyboard shortcut annotation list.
- F1: Add a new bill
- F2: Add custom product
- F3: Add new customer
- F4: Add discount
- F6: Search for product
- F7: Search customer
- F8: Focus on customer paid
- F9: Choose payment method
- F10: Checkout and Print
- ESC: Close anything
 Increase the number of products
 Decrease the number of products
 Support Progressive Web Apps. When switching between online and office mode, change the color of the connection. Green represents online, and yellow represents offline.
3. Bill tab: The cashier can proceed multiple bills for multiple customers at once. The shortcut F1 to add new bills.
4. Add and search products
There are some ways to add products to the cart, the cashier can add custom products or existed products.
- Add a product by Barcode Scanner or search by the product’s name, SKU or barcode. The shortcut F6 to search for products quickly.
- Enter product names directly on the search box to add products to the cart.
- The cashier can add new custom products to the cart if these products are not available in the inventory just by clicking the
 button next to the product search box (shortcut F2 to add a custom product). The cashier can add the name, price, and quantity of the custom product. Go to WebPOS > Products to configure: Allow the cashier to add custom product to the cart

5. Display and adjust the selected items in the cart
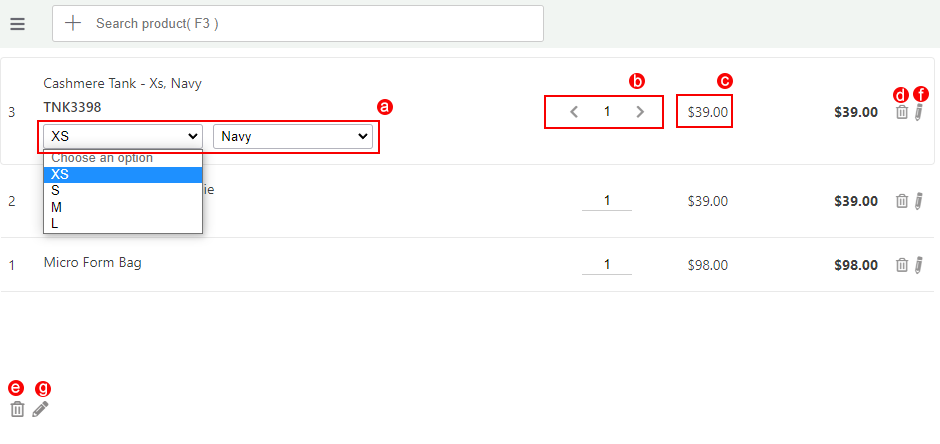
After adding products to the cart. The selected products will be displayed in this area. The cashier can adjust the cart items including:
a. Change among variations of variable products on the cart: Switch among variations of the selected variable products on the cart. Go to the WebPOS > Products to configure: Allow the cashier to update variation the cart.
b. Adjust product quantity to add to the cart: The cashier can increase, decrease the number of item quantities in the cart.
c. Change the item price directly: The cashier can change the price of each item if she is allowed. Go to the WebPOS > Products to configure: Allow the cashier to change the product price
d. Remove item: The cashier can remove each item out of the cart.
e. Remove all products: The cashier can remove all items out of the cart.
f. Add/ remove item notes: The cashier can add and remove a note in each product item.
g. Add/remove order notes: The cashier can add and remove a note for each order.
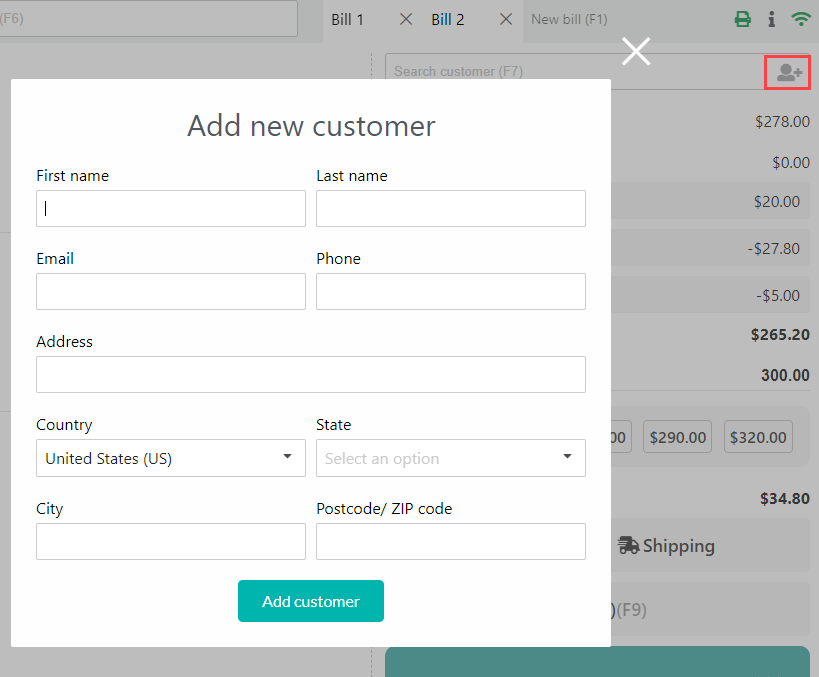
6. Add new users and search existing customers.
- Enter customer information to find an existing customer on the search box to assign for the order, press F7 for a quick customer search. The cashier can search by the customer name, email, phone number.
- Click on the
 button if a customer is new. The cashier can create the new customer and add new customer information (Include: First name; Last name; Emails; Phone; Address; Country; State; City; Postcode/Zip code.) You can control which fields are required and which are optional when adding a new customer, go to Settings > Customers > Mandatory fields to control.
7. Discount, shipping, payment method, order total, and checkout.
This area displays the discount, shipping, payment method, order total, and checkout for the order on the WooCommerce POS page.
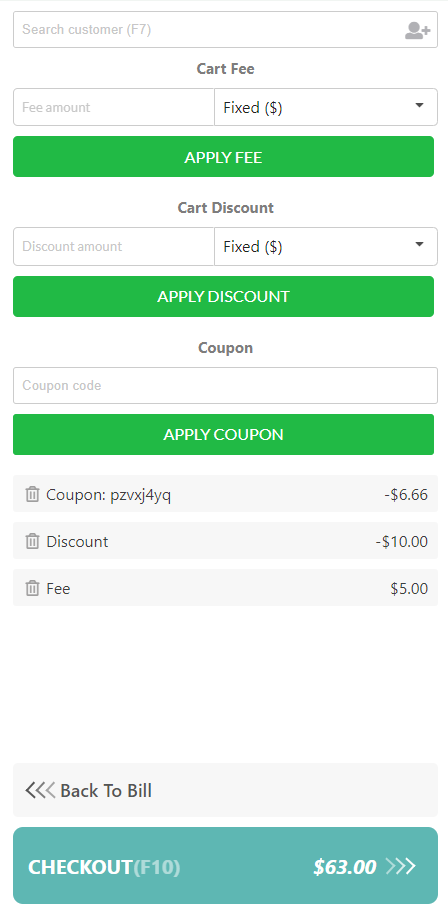
7.1. Cart discount and coupon.
The cashier can apply/remove discounts for POS orders.
- Click on the Discount button or the shortcut F4 to apply discounts or add fee.
- There are 2 types of discount: Cart discount (percentage or fixed amount), and WooCommerce existing coupon.
- Add Cart Fee with percentage or fixed value
- The maximum number of coupon that can be applied per order can be limited in WebPOS > Orders: Maximum applied coupon.
7.2. Shipping
Shipping method on POS is used in some cases when incurring shipping costs such as customers request the shop to ship; the shop delivers directly and takes charge, or the shop contacts a third shipping company to deliver and take charge.
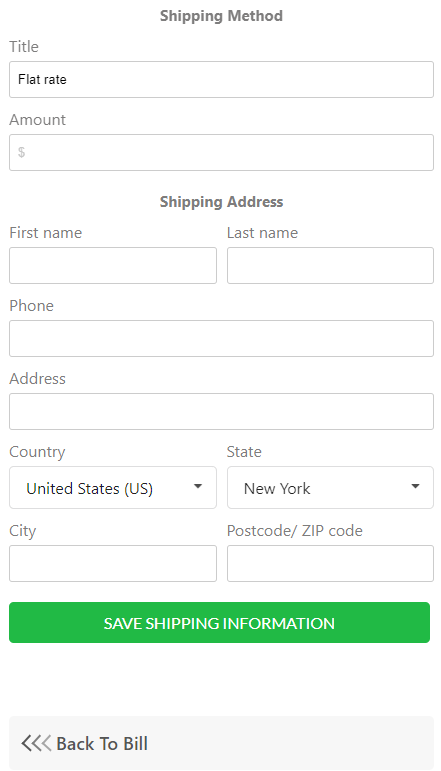
- Shipping method: The cashier will enter the name of shipping method and shipping cost.
- Shipping address: Enter the shipping address and save.
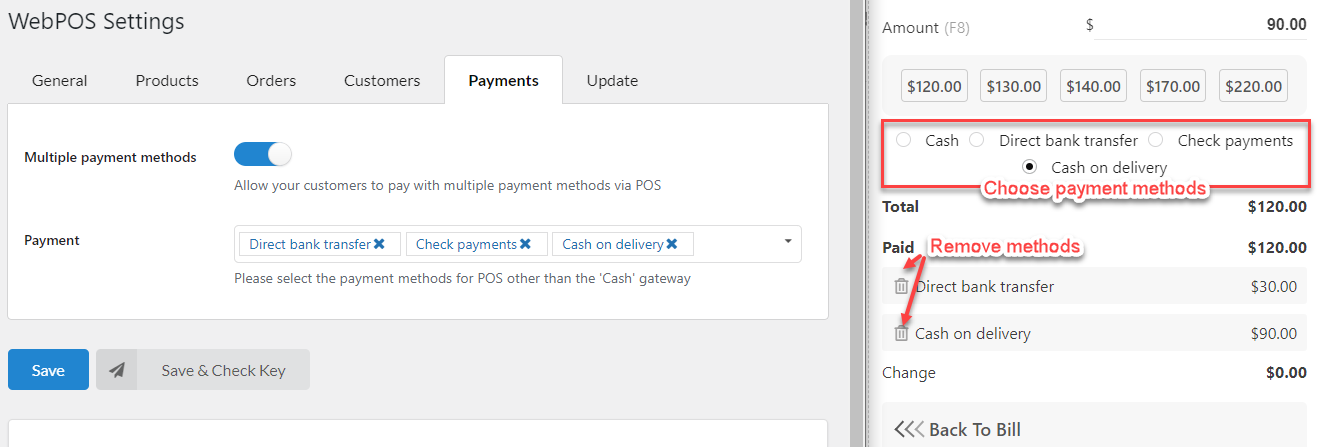
7.3. Payment methods.
You have the option of paying with one or more payment methods. Note: Cash always display as a default payment gateway.
- Allow paying in one payment method.
- Disable the Multiple payment methods option.
- Customer will pay by one of the available payment methods set in the Payment fields in the back end
 |
 |
- Allow paying in more than one payment methods
- Enable the Multiple payment methods option.
- Allow customers to pay in more than one payment method in the same order.
 |
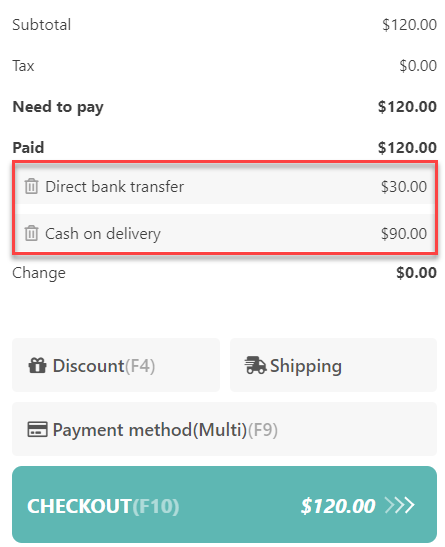 |
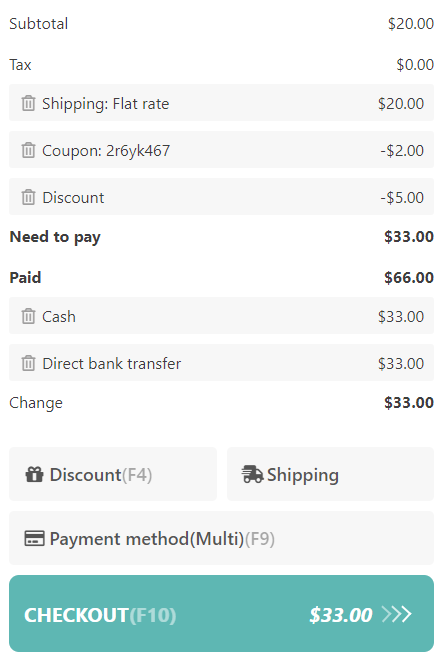
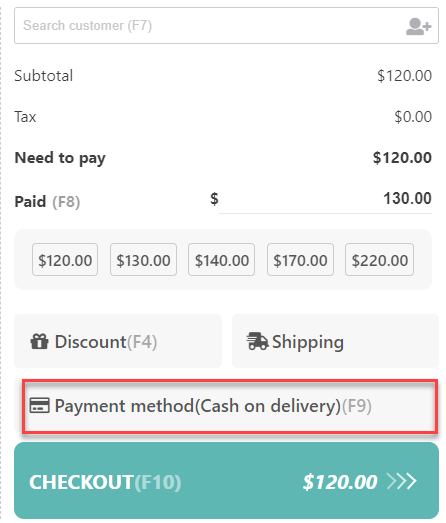
7.4. Order details and checkout
The order detail will be displayed on the right side of the WooCommerce POS page and let the cashier know about the order information including the subtotal, tax, shipping method, discounts, need to pay, paid, change and payment method of the POS order. Then click on the Checkout button or the shortcut F10 to check out the order and print the order’s receipt.