POS for Restaurant/Cafe tutorial video
The plugin includes a dedicated Restaurant Point of Sale (POS) feature designed to facilitate seamless order management in restaurant settings. First, you simply need to add your food as WooCommerce products and let’s get started.
- Enable POS for Restaurant/Cafe and setup settings
- Access Kitchen View
- Order process on POS page
- Send order to kitchen
- Auto sync item status in 2 screens
1. Enable POS for Restaurant/Cafe and configure setup:
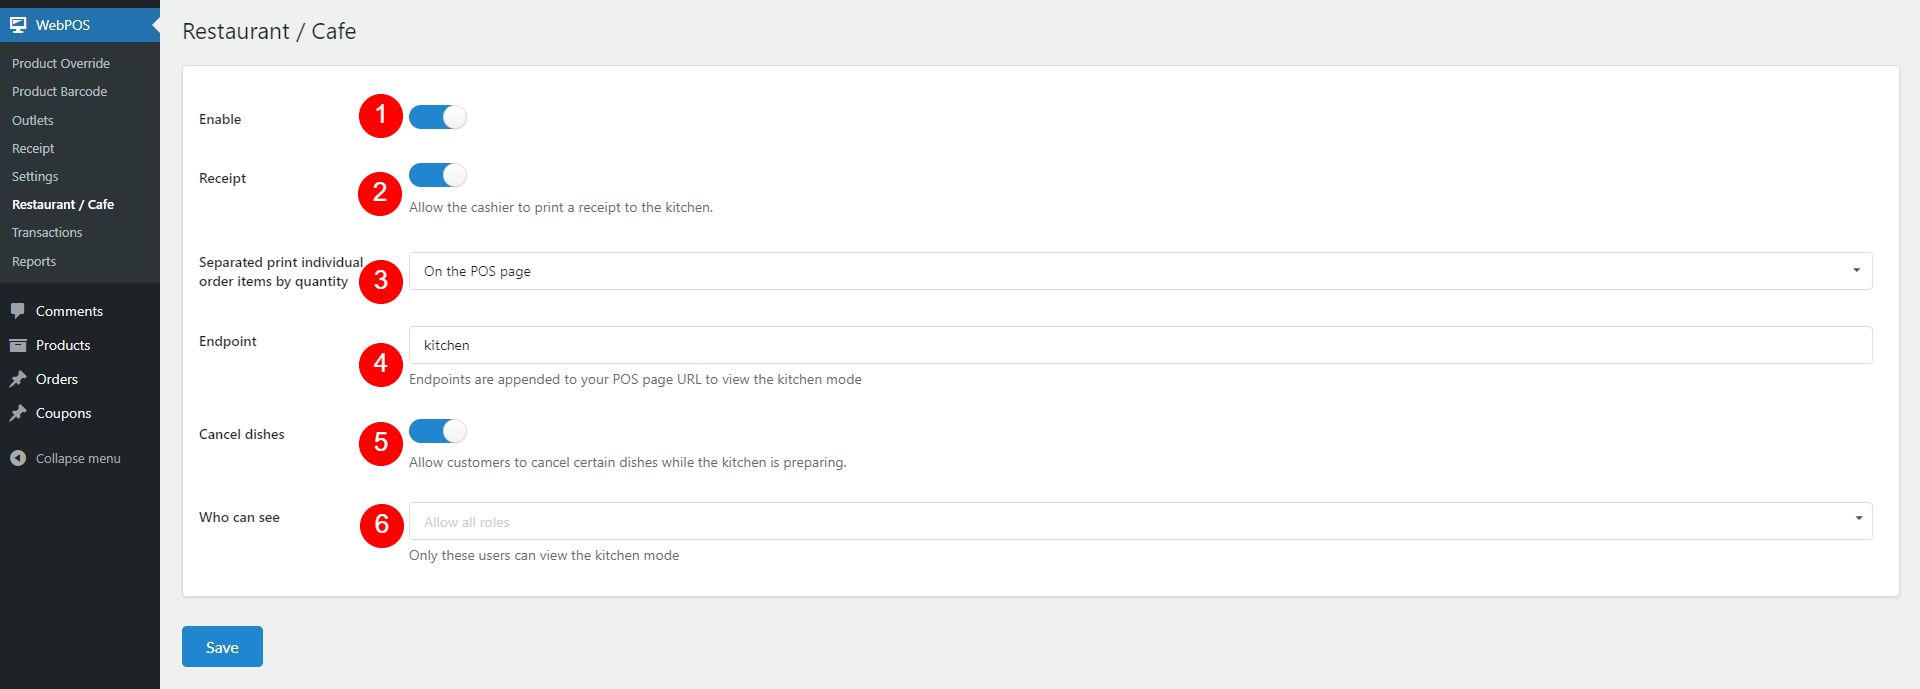
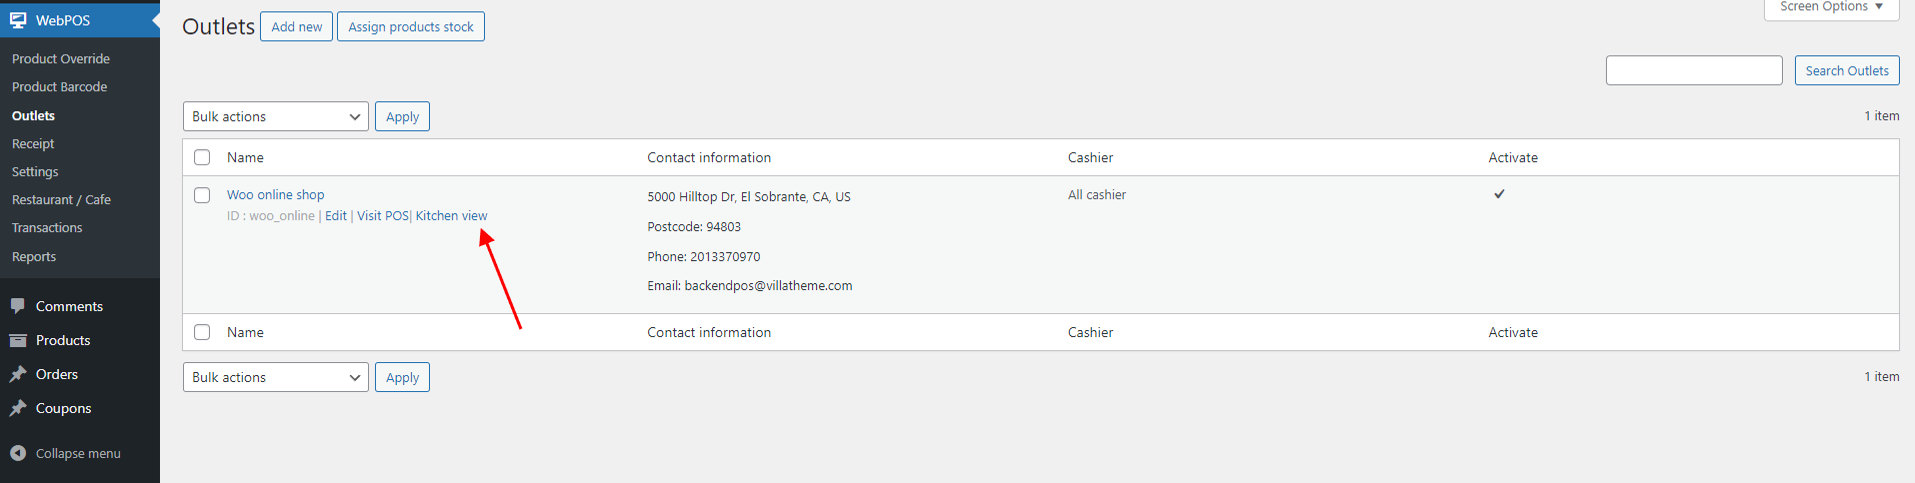
- Enable: Enable POS for restaurant/cafe. When you enable this option, there will be a shortcut “Kitchen view” under each outlet in Outlets page when hovering.
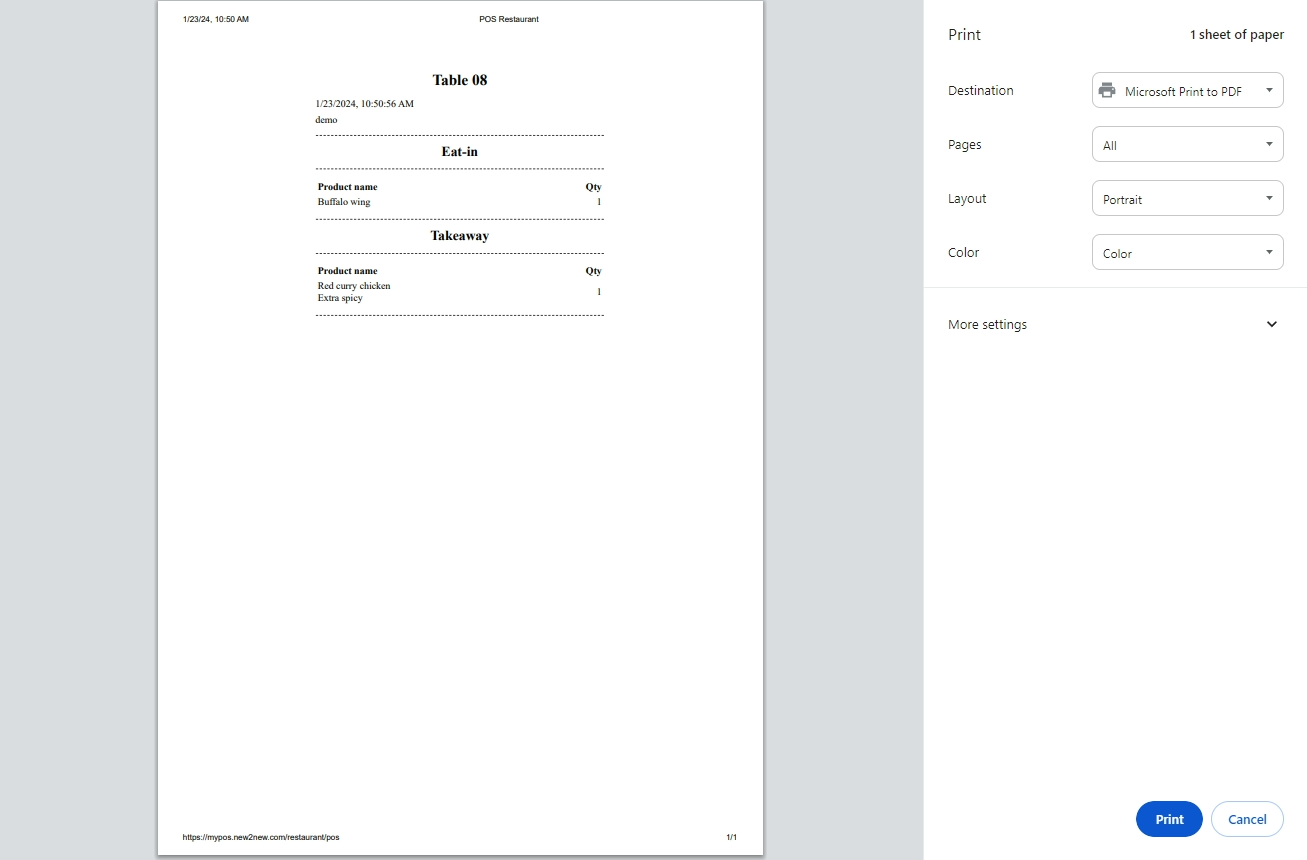
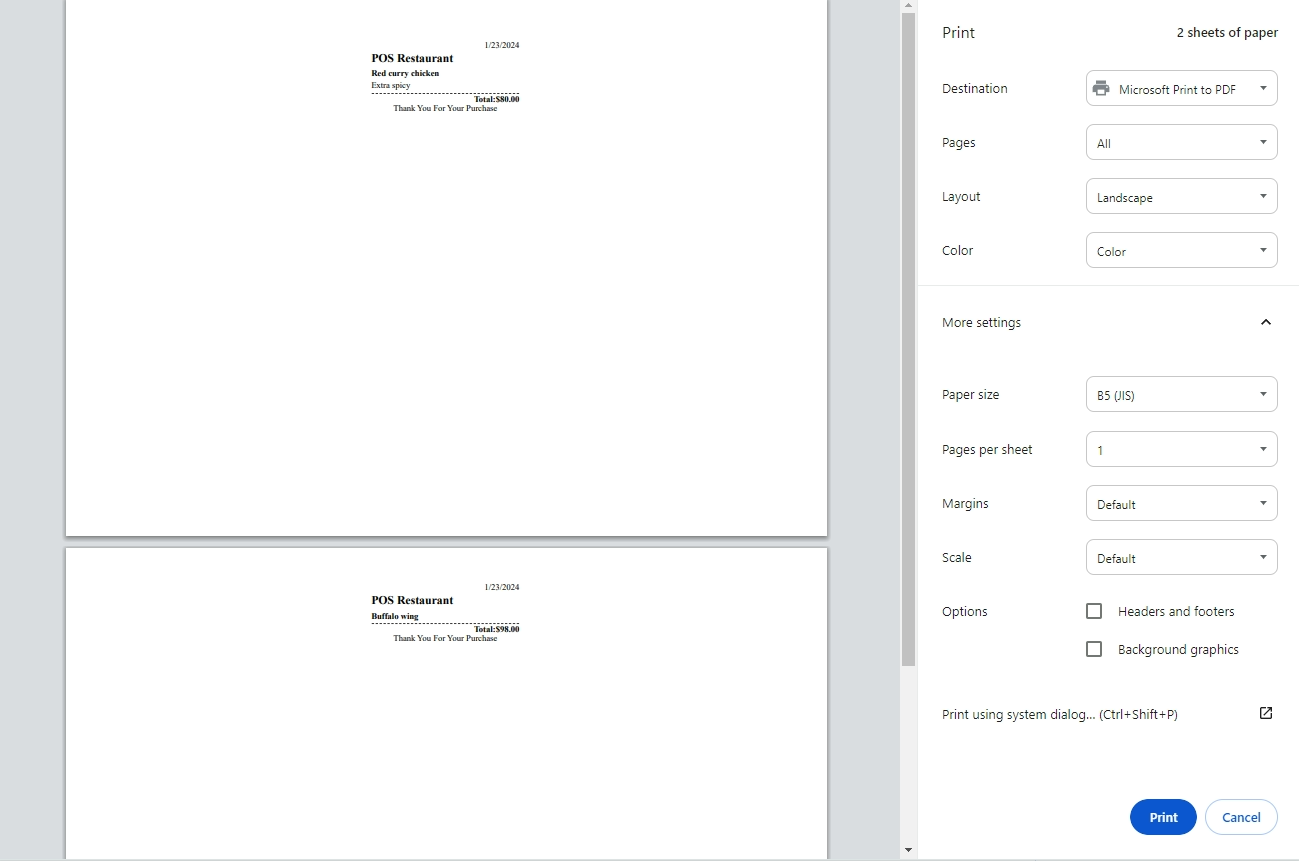
- Receipt: Cashier can print receipt to the kitchen using the Kitchen Bill button as below
- Separated print individual order items by quantity:
- Not print
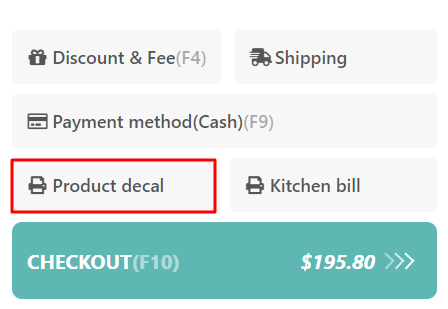
- On the POS page: There’s button “Product decal” on the POS page to print
- On the kitchen mode: When chef clicks “Wait to serve” on Kitchen View, Product Decal is printed
- Endpoint: Kitchen view page endpoint
- Cancel dishes: After the order is sent to the kitchen and being prepared, the Trashbin symbol of the associated item is still visible, allowing customer to cancel that item if they change their mind.
- Who can see: Users with selected role(s) can access the Kitchen view
2. Access Kitchen View
To access the Kitchen View page, you must:
After completing the setup, hover over the outlet name to see the option that redirects to ‘Kitchen View’
3. At the POS page, the waiting staff selects and adds items to the order.
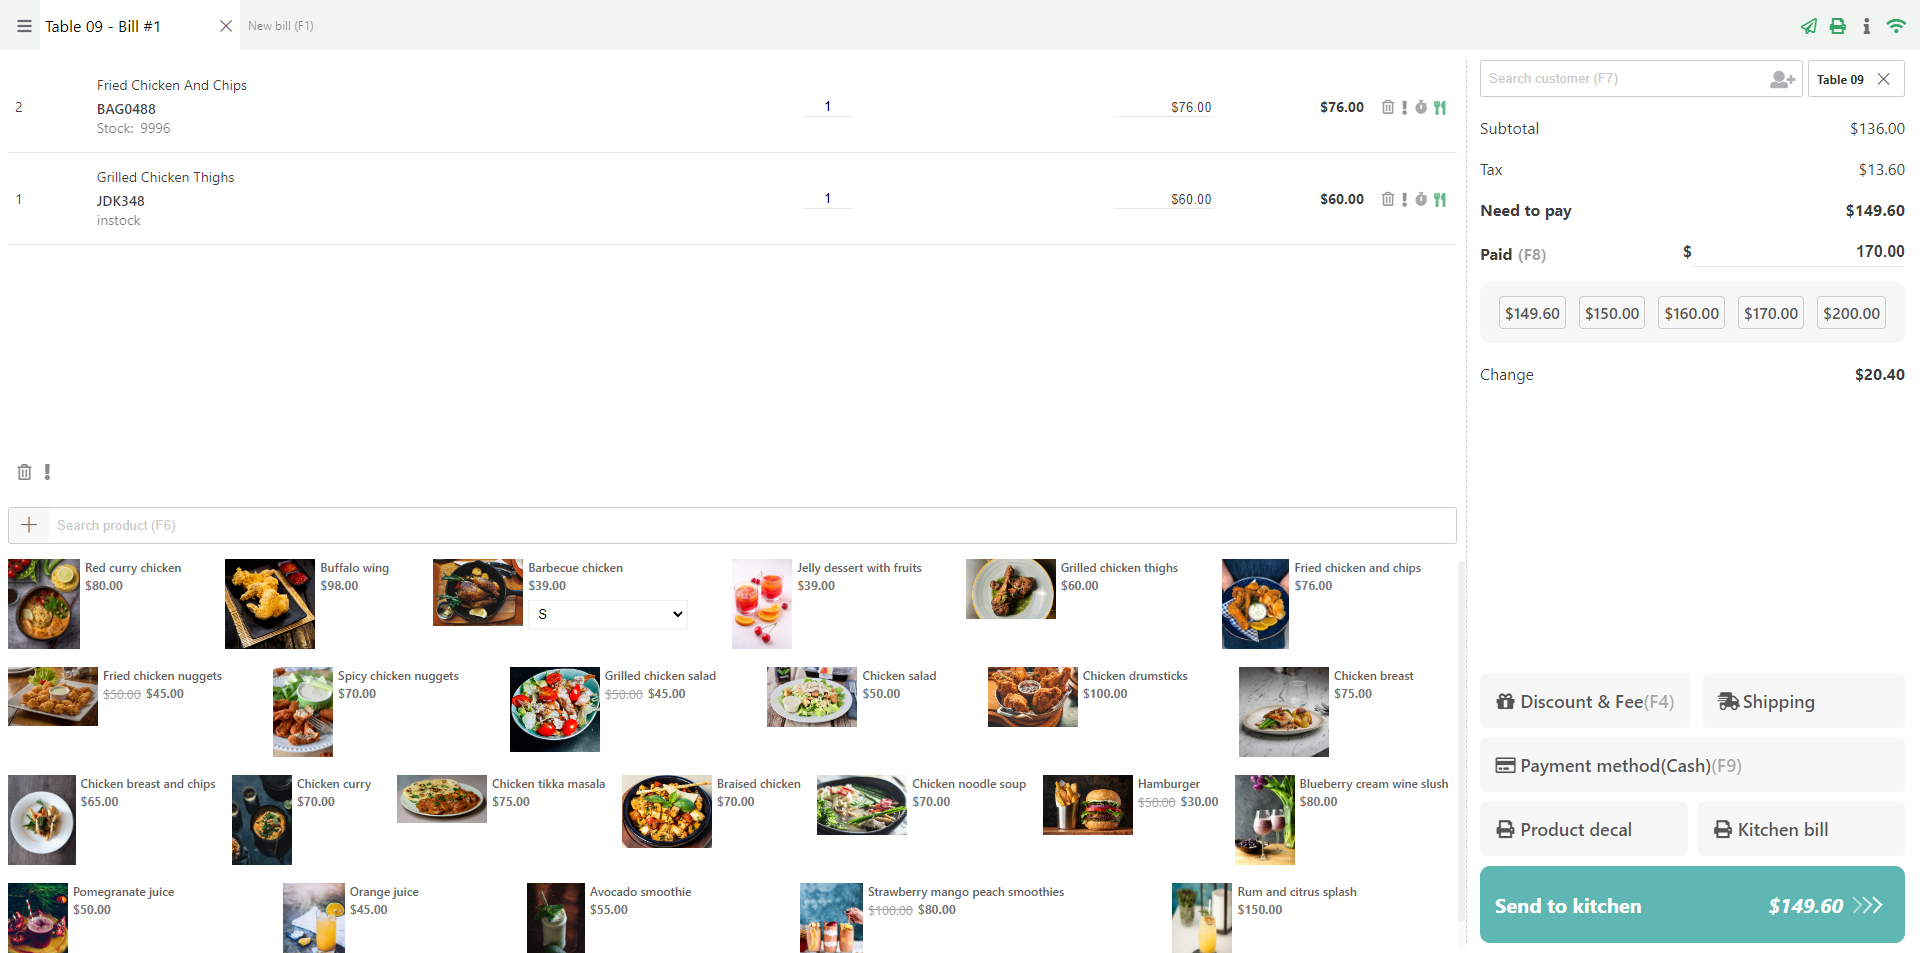
In this step, waiting staff marks it as “Eat-in” (green kitchen utensils) or “Takeaway” (red utensils)
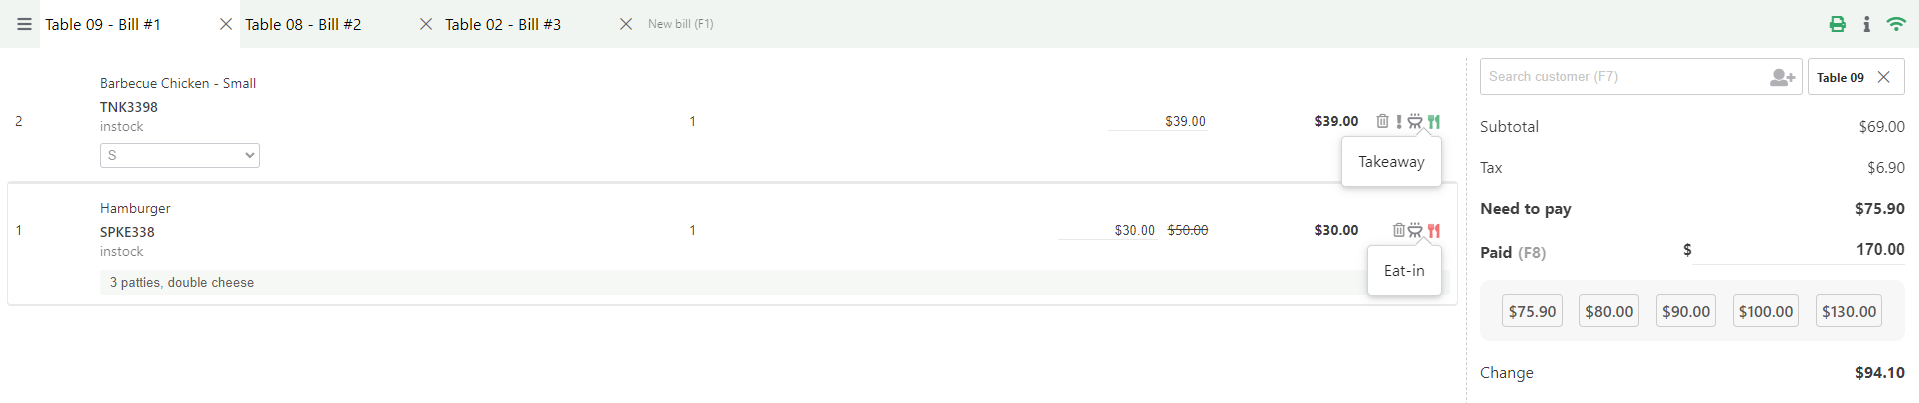
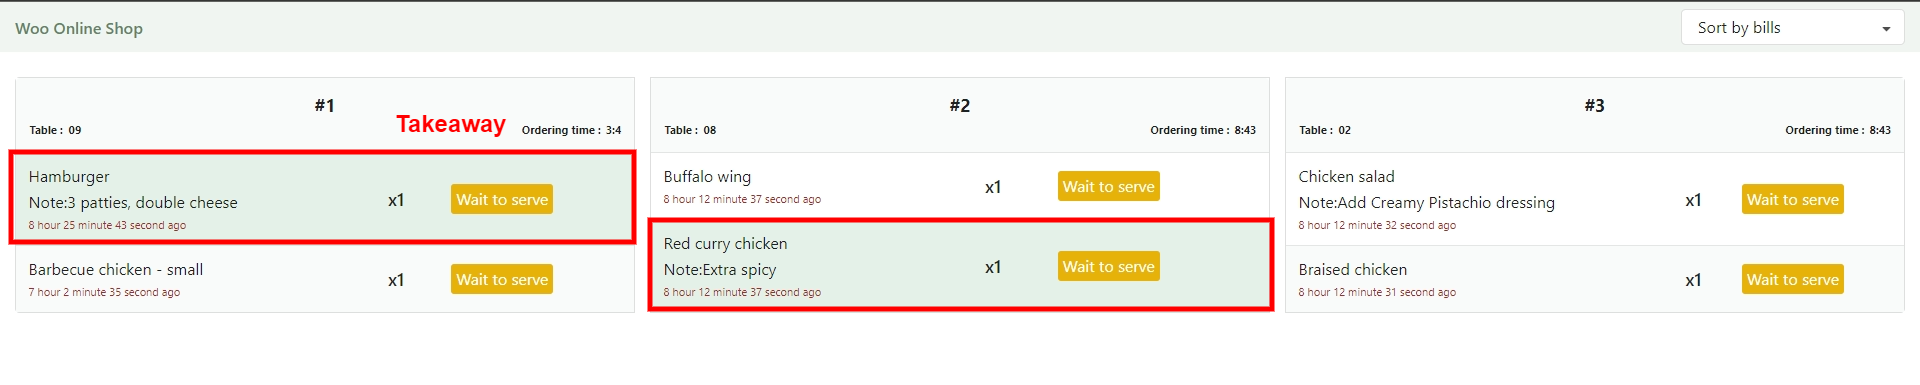
* In Kitchen view, the takeaway item is marked with different background
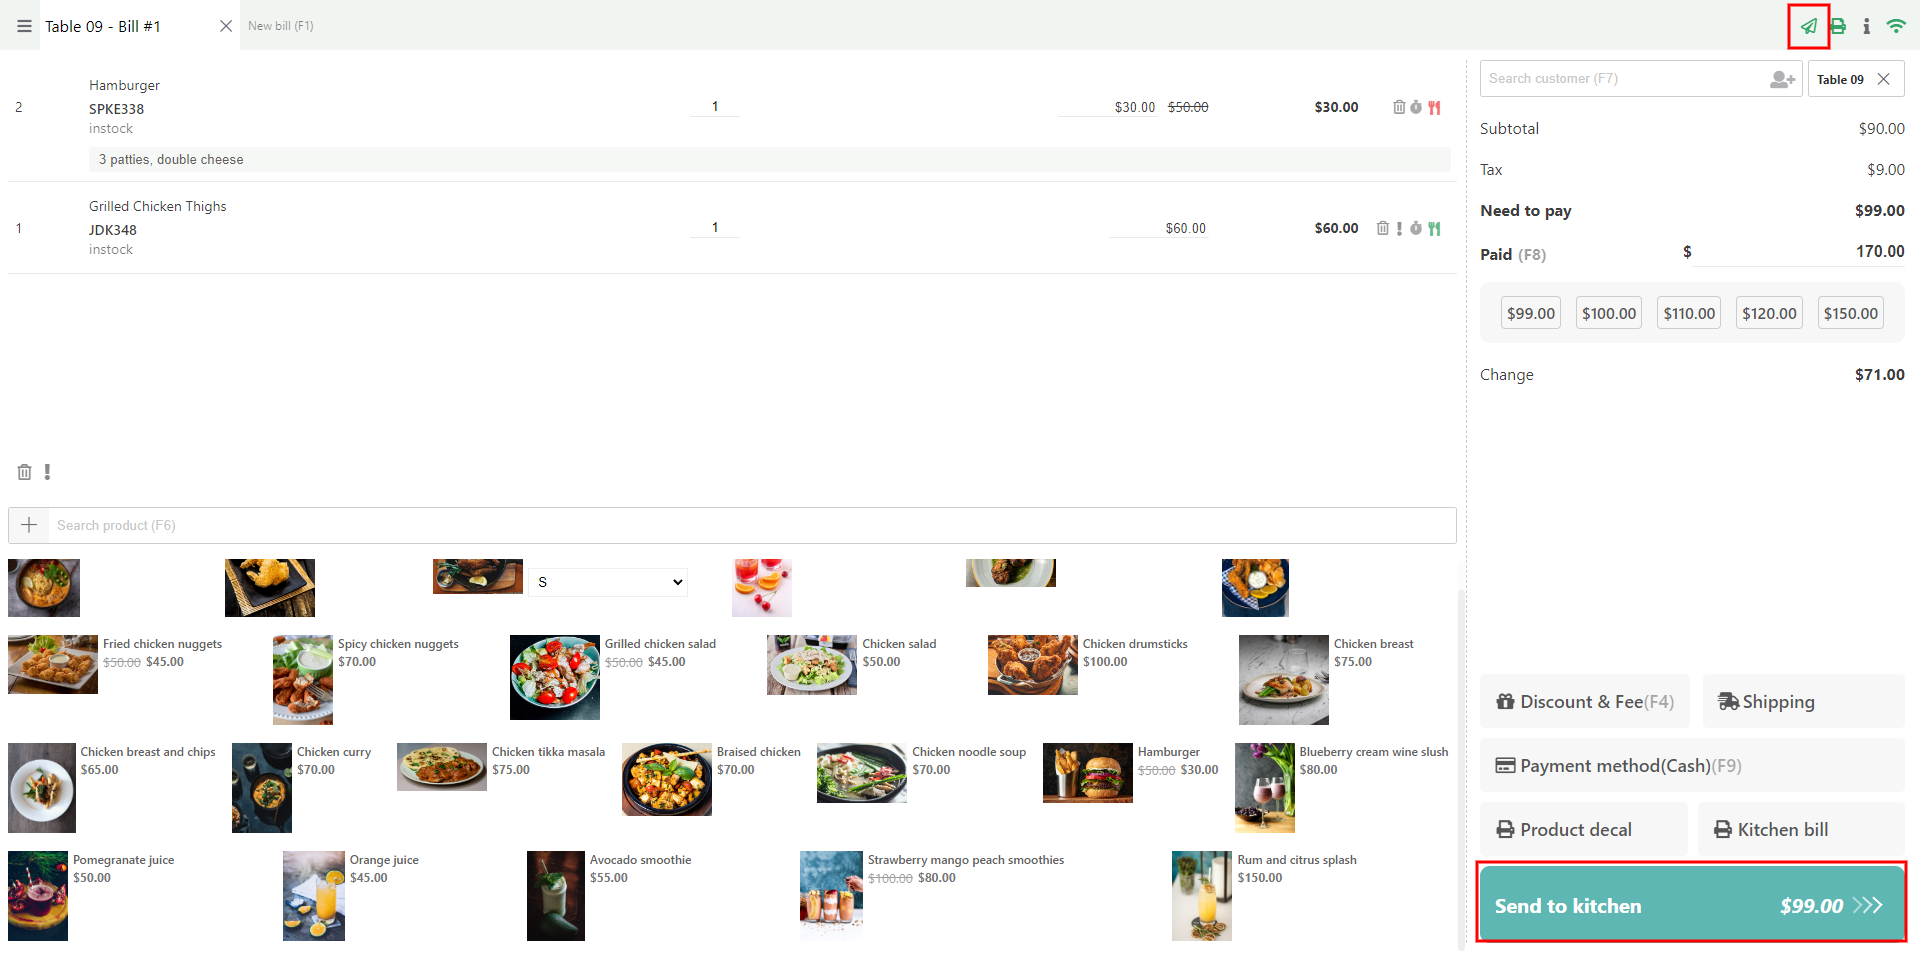
4. Send the order to the kitchen
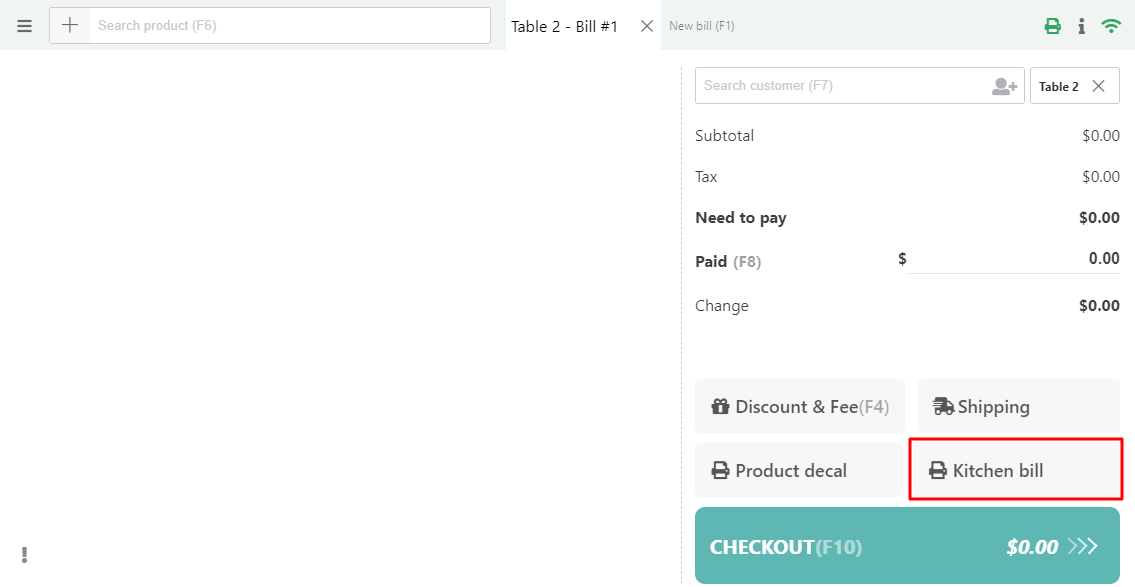
4.1. Send to kitchen by Kitchen bill
If the Kitchen view is disabled (no endpoint set), waiting staff can send the order to the kitchen by using “Kitchen bill” option (Receipt enabled).
4.2. Send the order to the Kitchen view.
The chefs have access to the Kitchen view. After customer is happy with their order, waiting staff sends it to the kitchen using “Send to kitchen” buttons on top or bottom of the POS page as followings:
The kitchen gets the order, and chefs can see it on their Kitchen view. No need for them to refresh the page—it updates automatically.
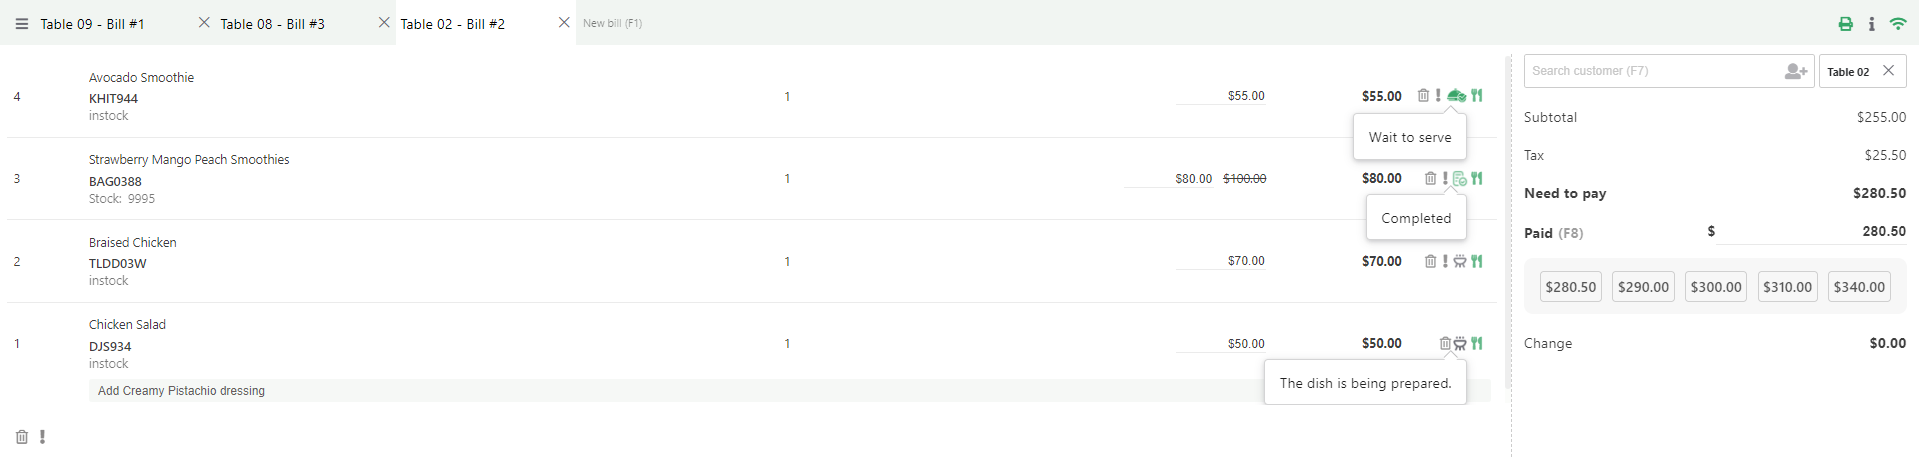
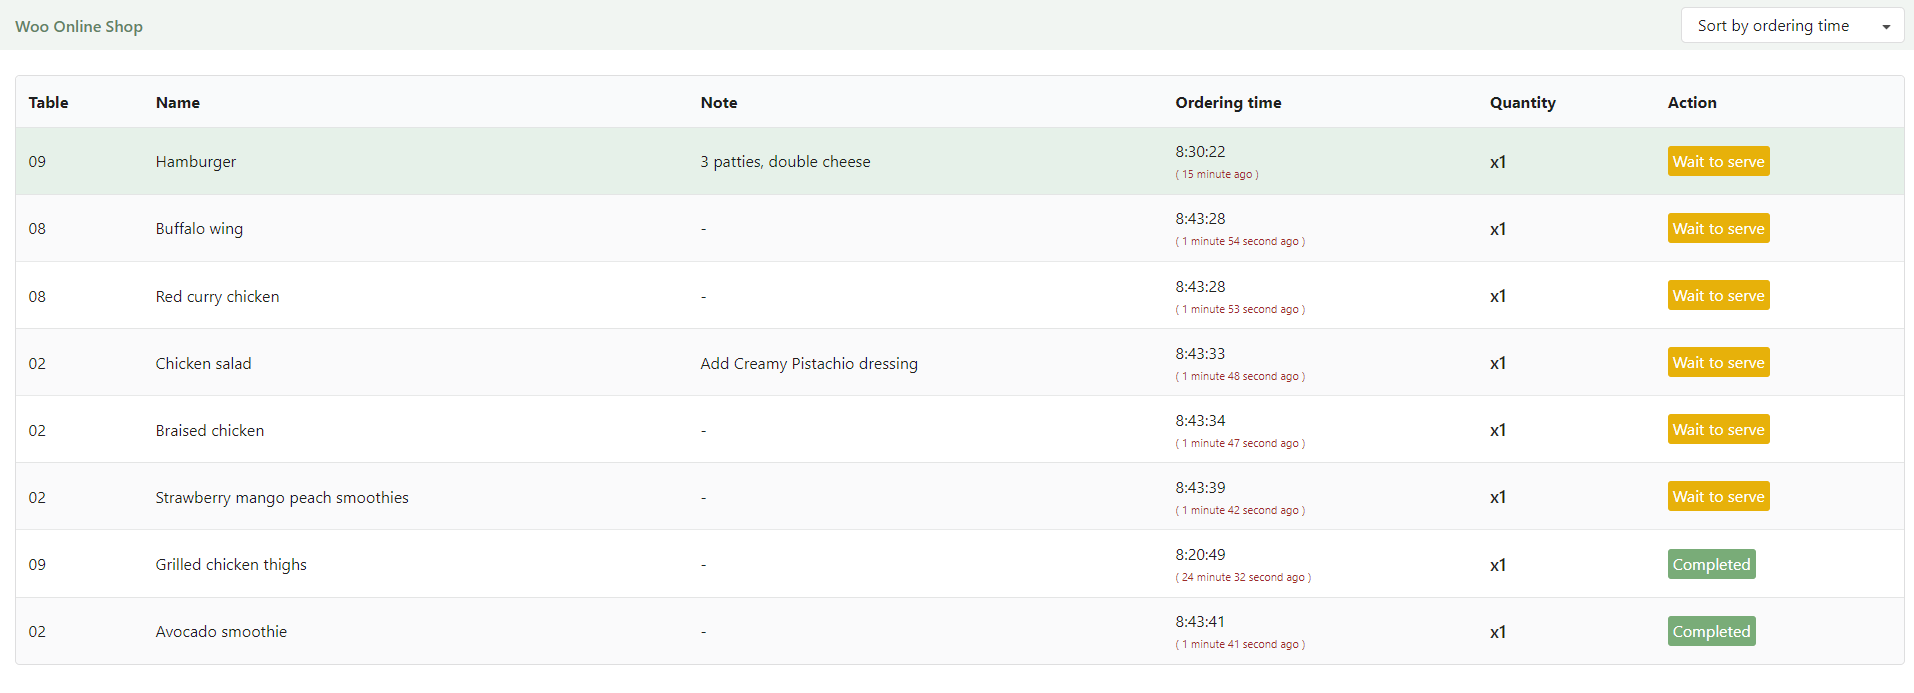
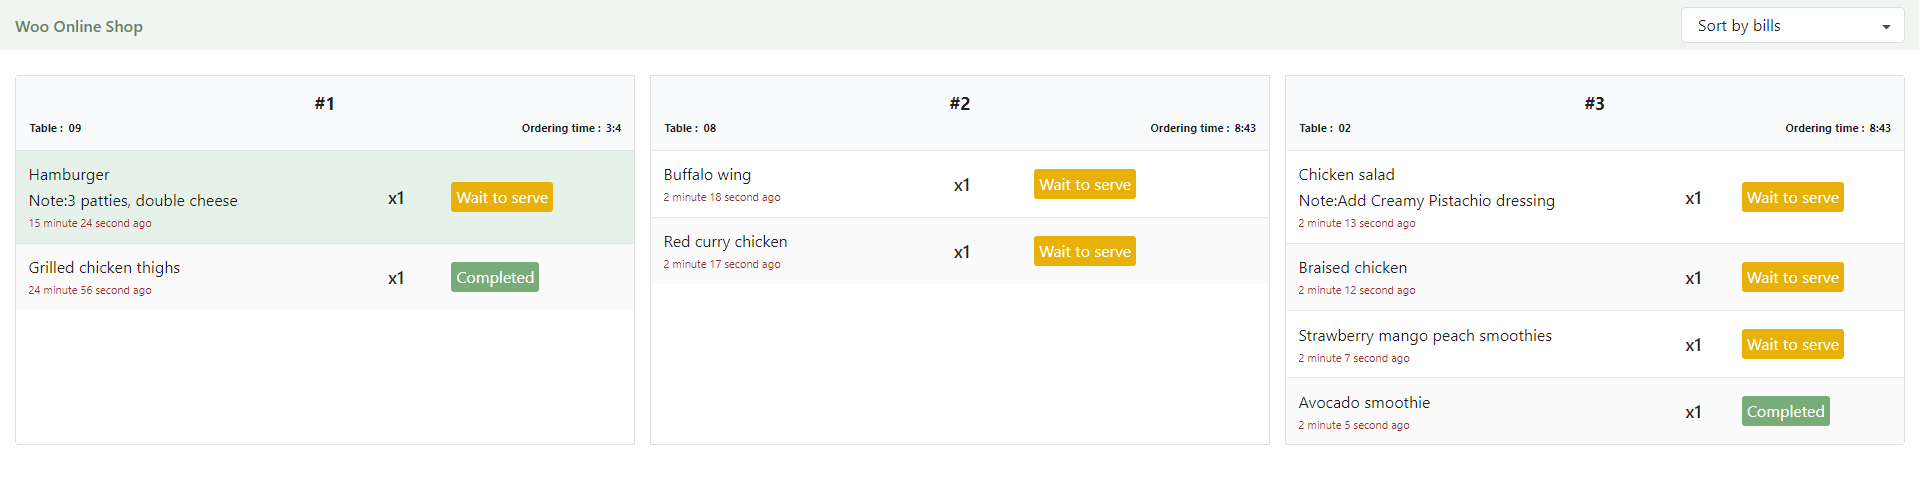
Item Status:
- This dish is being prepared: Normally, the food is marked as “This dish is being prepared” which means it’s in the queue for processing.
- Wait to Serve: Chefs can also mark items as “Wait to Serve” if the food is done prepared and ready to serve.
- Completed: When the item is picked by waiting staff and brought to the customer, they hit “Completed,” and the food disappears from the Kitchen view, notifying the waiting staff the new status on the POS page
There’re 2 ways for the chefs to view the orders on the Kitchen view:
* Sort by ordering time
*Sort by bills
5. Auto sync item status in 2 screens – POS page and Kitchen view: Once the food is ready, it goes back to the waiting staff.
On the POS page, waiting staff gets orders updating without refreshing the page. Read details about each order item status here.