When you have many outlets, let’s create them in the WebPOS > Outlets in the backend. The following instructions will guide you on how to sell on many POS outlets.
A – Choose an outlet: After creating your outlets, go to the front end POS page, the cashier will be asked which outlet they will sell at, and choose one.

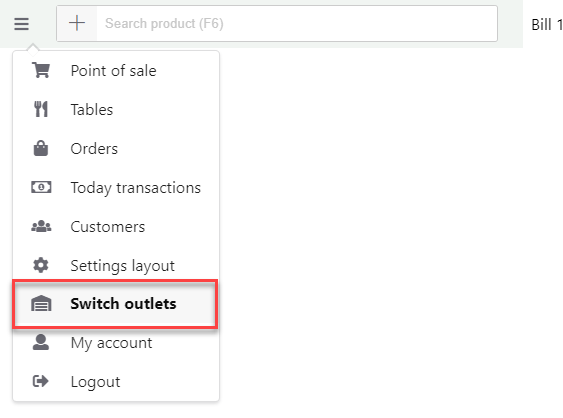
Once the cashier would need to change among outlets, they can go to the Switch outlets Menu, and change.
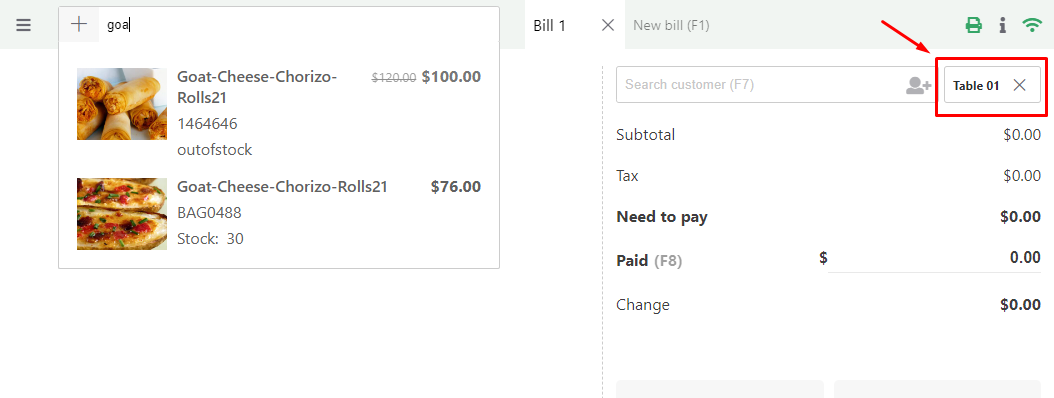
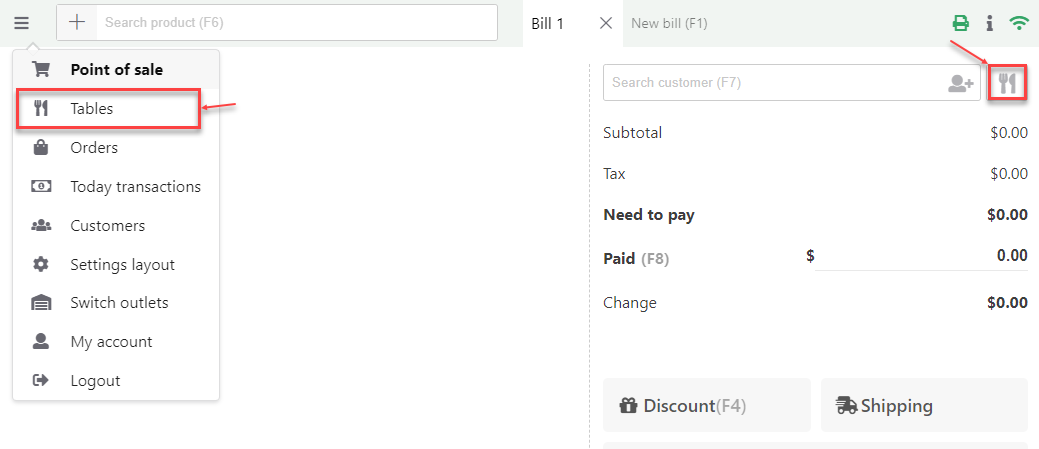
B – Access tables: With the restaurants/cafes, the cashier can manage tables on the front end in the Tables Menu or click on the ![]() icon
icon
C – Manage tables:
– The number of tables: will be determined by the number of tables you created in the WebPOS > Outlets > Tables in the backend.
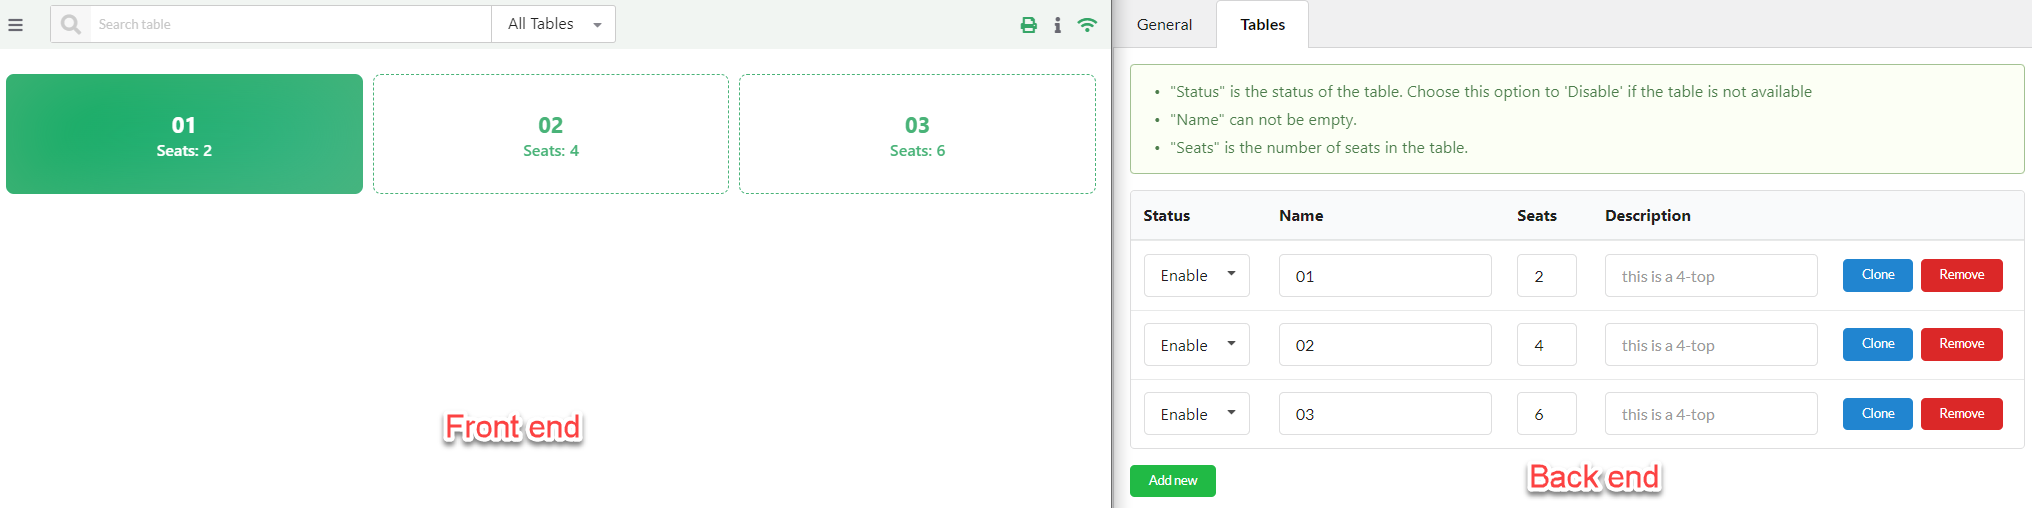
– Table statuses: The table statuses can be: Available, Busy, Disable, and they will be distinshed by the color, the cashier can filter the table status.

- Available tables: Ready to serve customers
- Busy tables: Already served the customers
- Disable tables: The tables are not available (Set in the back end)
– Order for a table: The cashier will click on a table to order food/drink for that table.