In this section, we’ll learn how to:
- Install HANDMADE chrome extension
- Connect your domain(s) to HANDMADE chrome extension
- Enable/Disable domains for importation
Install the HANDMADE Chrome Extension
This process is quick and easy. Follow the steps below to get started:
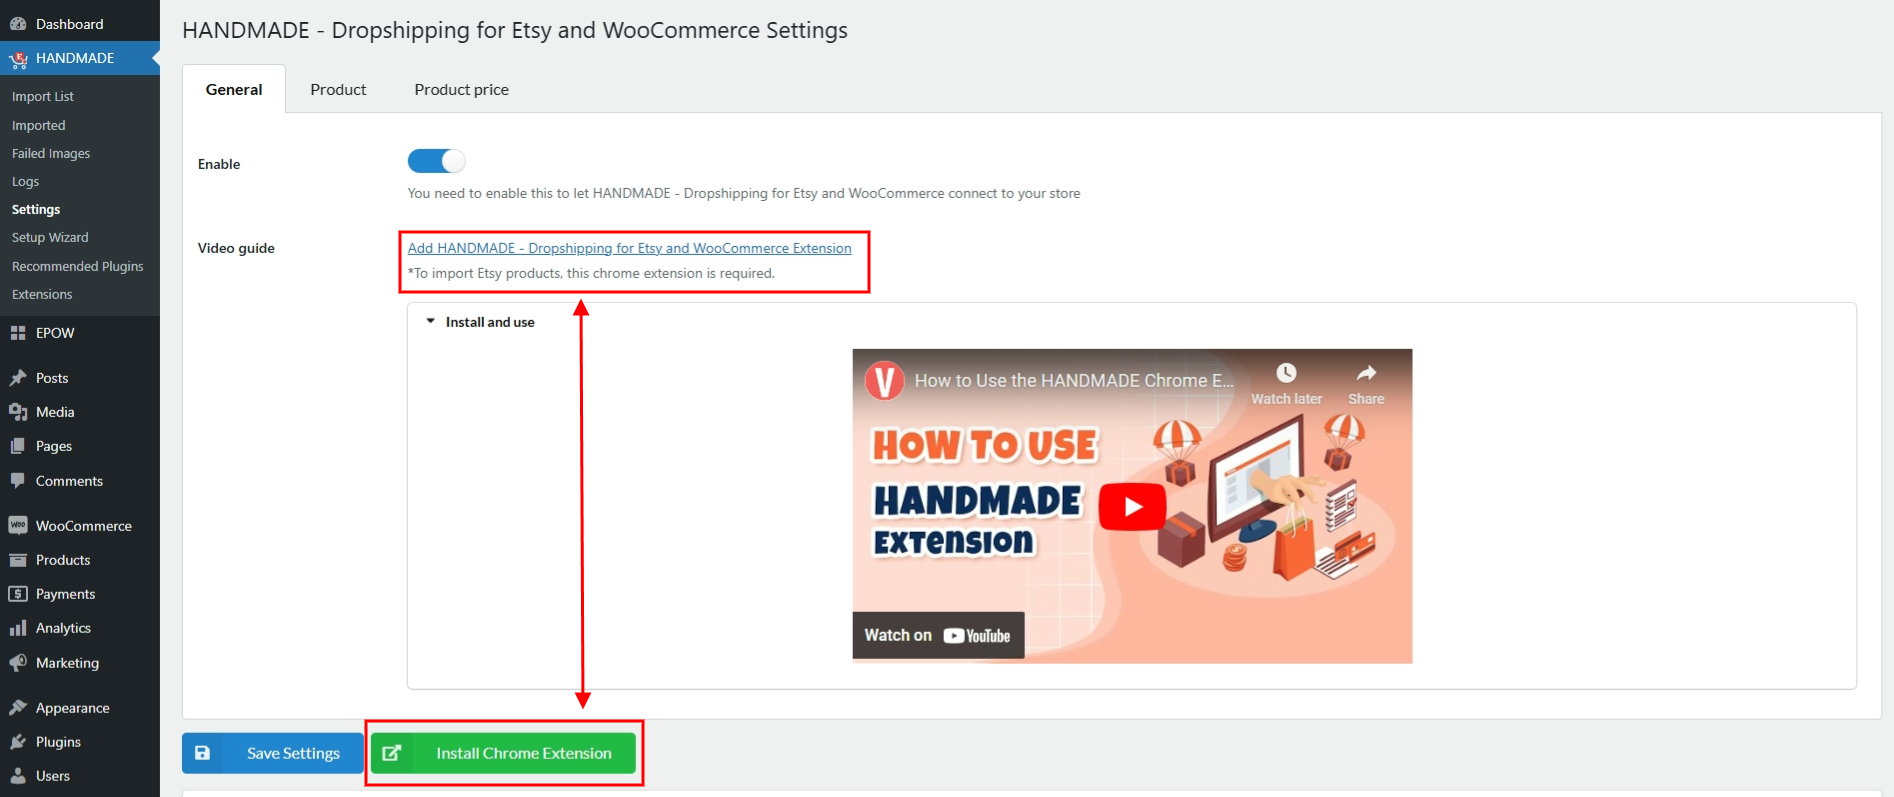
- Install via Plugin Settings
- Go to the General Settings page in your HANDMADE plugin dashboard.
- Click the Install Chrome Extension button, or the link next to Video guide. This will redirect you to the HANDMADE Chrome Extension page in the Chrome Web Store.
- On the extension page, click the Add to Chrome button.
- Confirm by clicking Add extension in the pop-up prompt.
After installing the extension using either method, ensure it is enabled
Connecting Domains to the HANDMADE Chrome Extension
With the HANDMADE Chrome Extension, you can connect as many domains as you need, including subdomains if you’re using WordPress’s multisite (network) feature. There’re 2 ways to connect your domain(s):
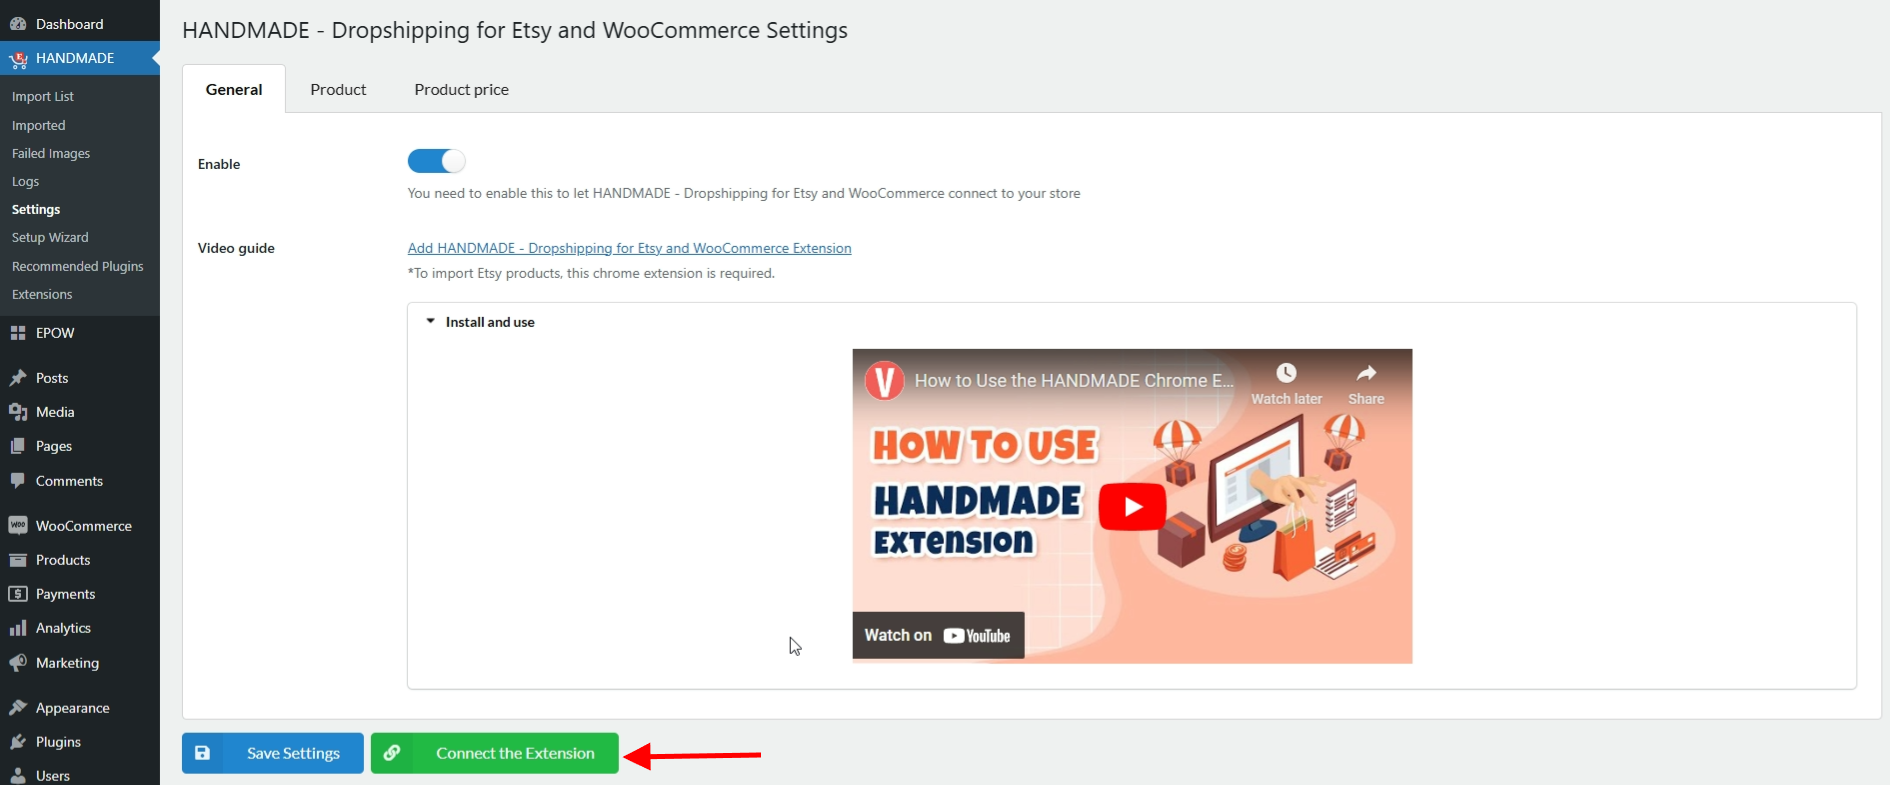
- Use the Connect Chrome Extension button under General settings: This button is available after you have the chrome extension installed and activated
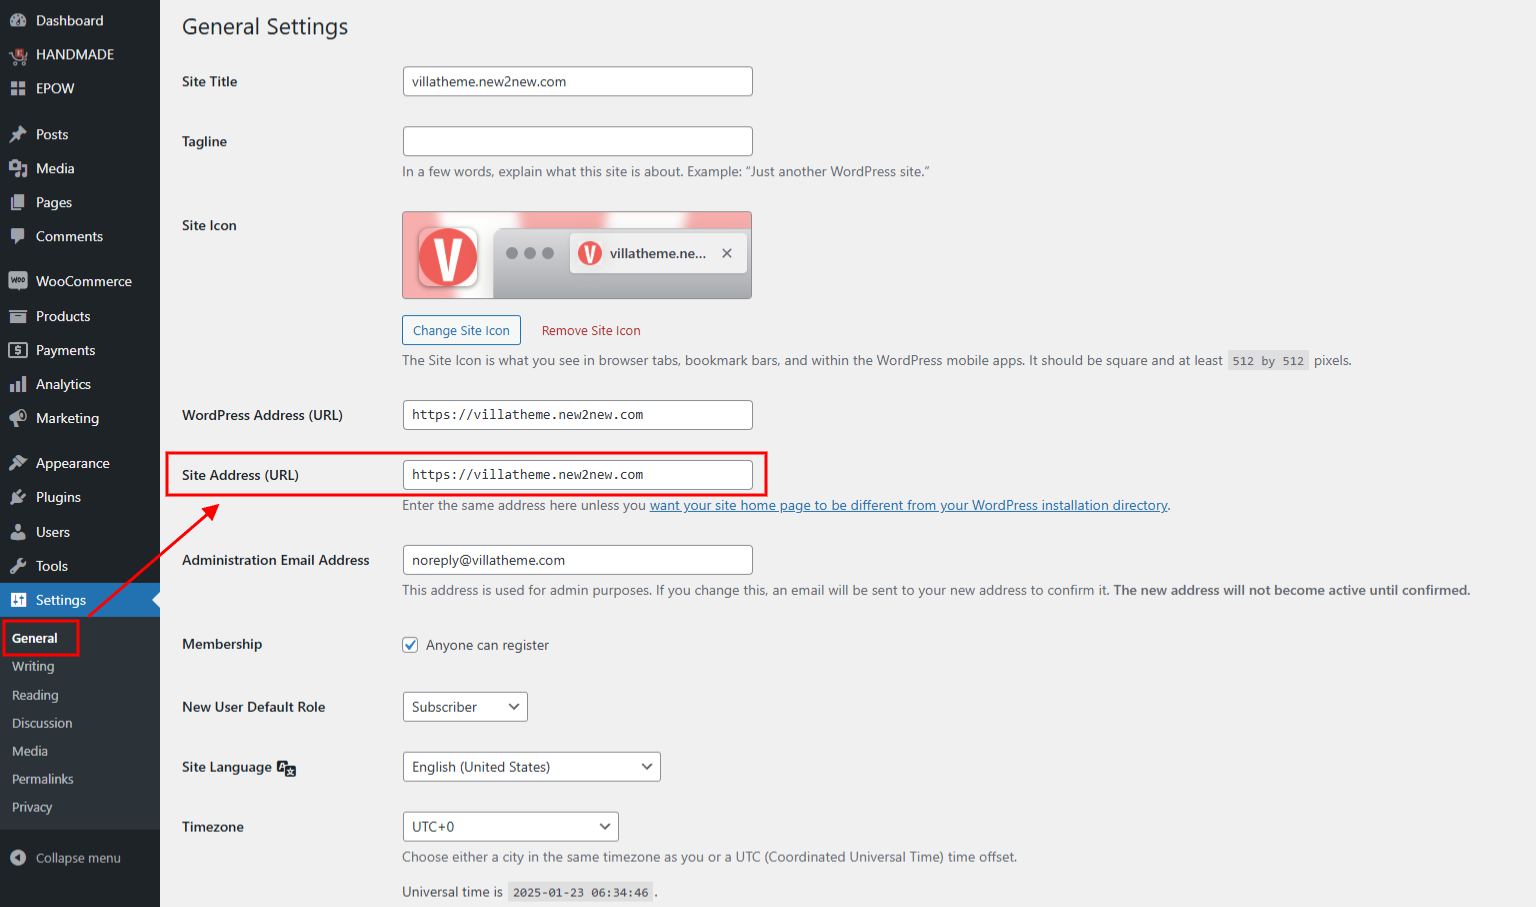
- Get the domain URL manually:
- Single site domain: You can get your correct site URL in WordPress settings >> General
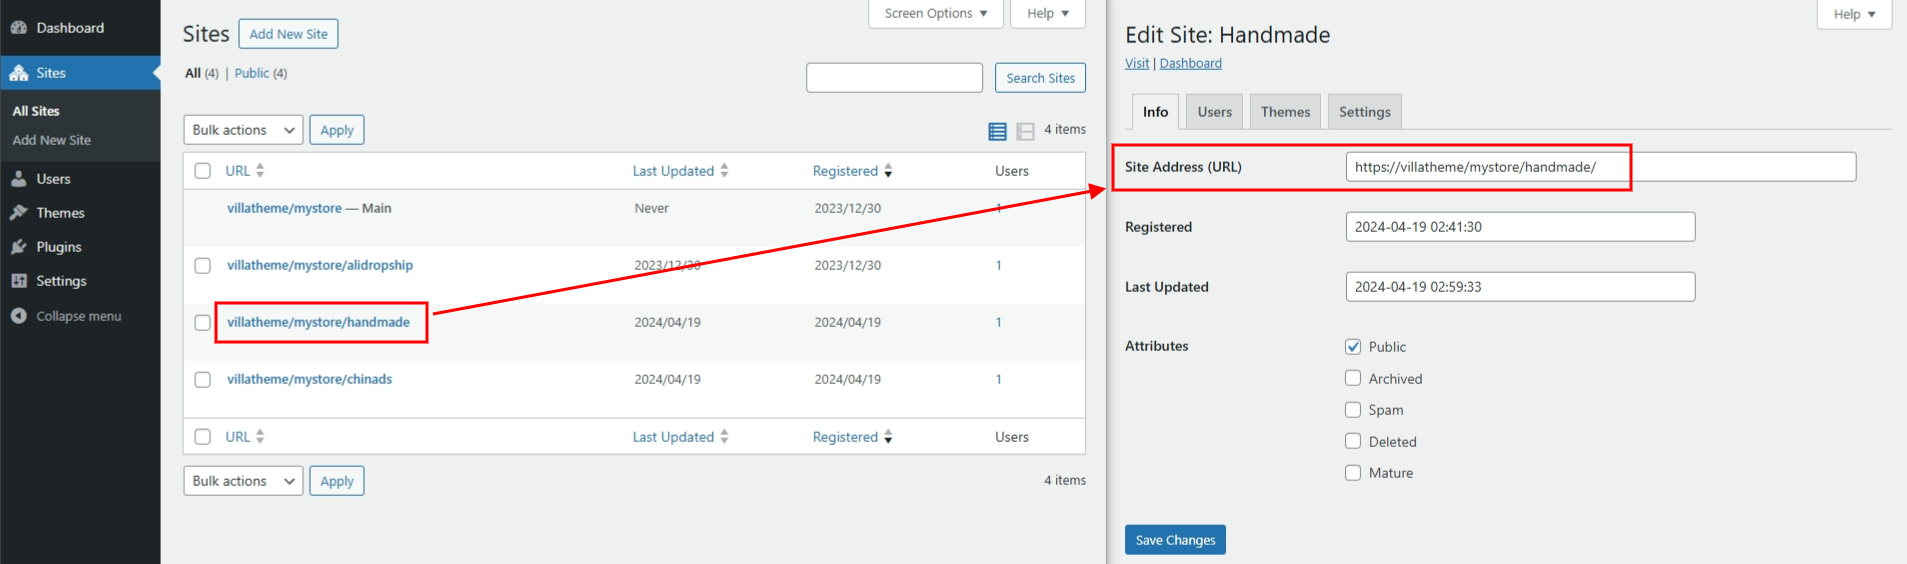
- Multisite domain: You can get the URL of your subdomain, like this:
- Single site domain: You can get your correct site URL in WordPress settings >> General
You can connect as many domains or subdomains as needed. The extension will allow you to switch between them and import products to the correct store.
Enable or Disable Domains for Importation
You can control which connected domains are enabled or disabled for product importation. This feature is useful for managing multiple stores or subdomains and ensuring imports go to the correct WooCommerce site.
Step 1: Open the HANDMADE Chrome Extension. Click on the HANDMADE Chrome Extension icon in your browser toolbar.
Step 2: Enable/Disable
- Locate the domain you want to enable or disable in the list of connected domains.
- Check or uncheck the Enable checkbox associated
- Checked/Enabled: Allows the extension to import products to this domain.
- Unchecked/Disabled: Prevents the extension from importing products to this domain.
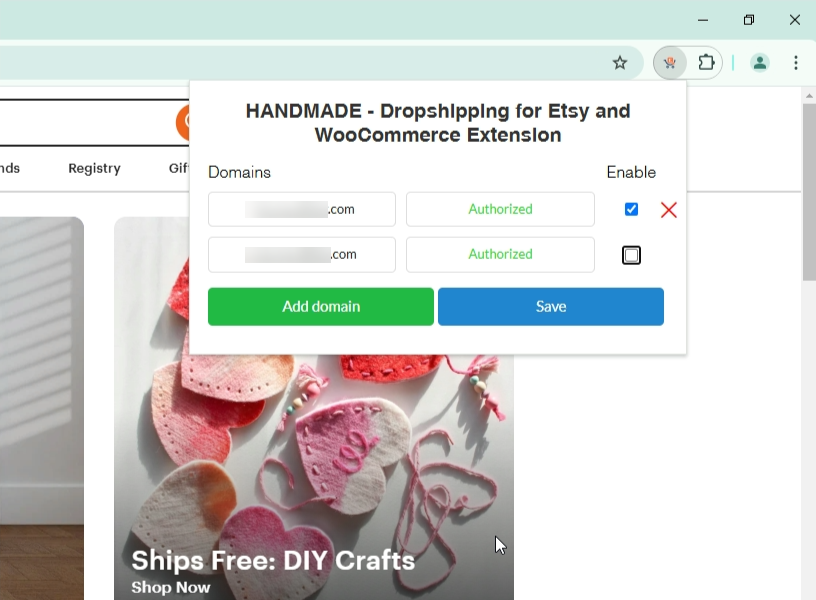
Step 3: Save Changes
Once you’ve adjusted the domain statuses, ensure you click the Save button within the extension to confirm your settings.
Watch this short tutorial for a better view