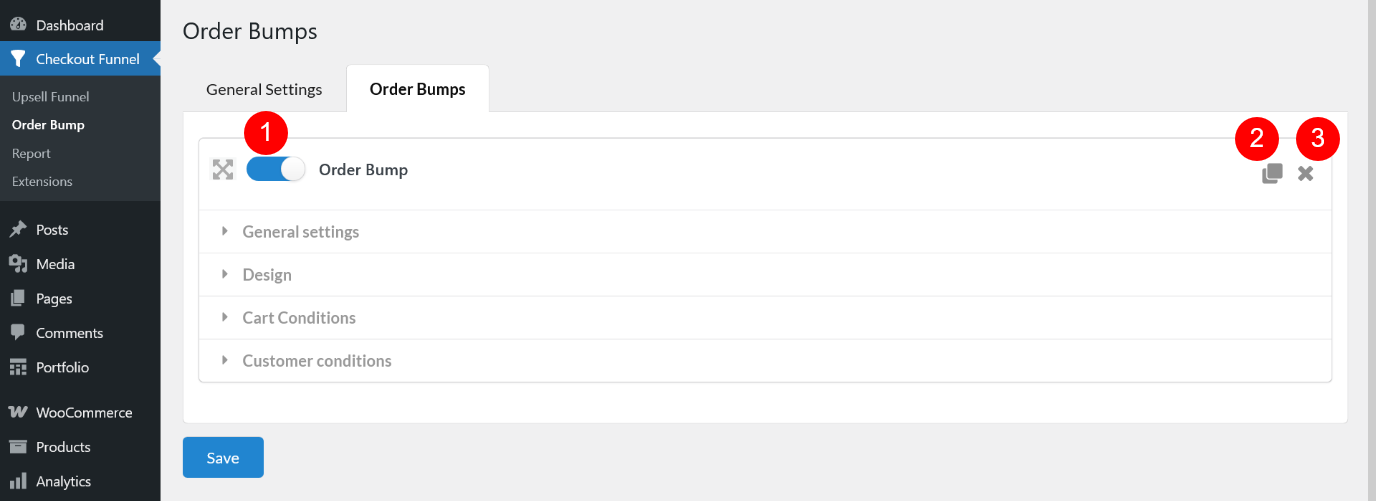
- Enable the specific Order Bumps. You can create many order Bumps with different rules and designs, enable it to make the plugin run the order bump you choose.
- Duplicate the Order Bumps.
- Remove the Order Bumps.
General settings
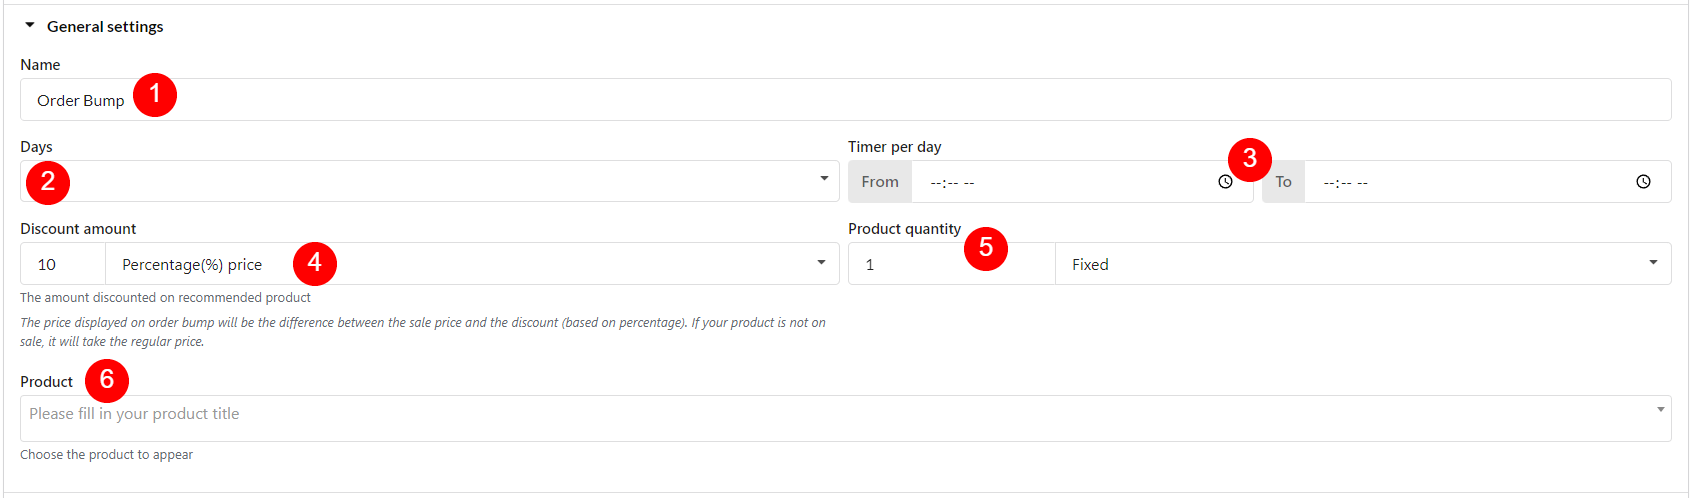
1. Name: Create a name for the Order Bumps.
2. Days: Choose the days in the week to display the Order Bumps to the Customers.
3. Timer per day: Set timer to show Order Bump per day.
4. Discount amount: Choose the type and the number for the discount amount applied on the Upsell Funnel.
- None: The order bump item has no discount, sold with its initial price
- Percentage (%) regular price: The discounted price is calculated by subtracting this percentage amount from the regular price.
- Fixed($) regular price: The discounted price is calculated by subtracting this fixed amount from the regular price.
- Percentage (%) price: The discounted price is calculated by subtracting this percentage amount from the sale price. If the product has no sale price, use regular price instead.
- Fixed($) price: The discounted price is calculated by subtracting this fixed amount from the sale price. If the product has no sale price, use regular price instead.
- New fixed($) price: Set a specific price for the order bump, no calculation.
5. Product quantity: Set up the number of products, which customers can buy each time on order bump.
- Fixed: Customer must buy the exact quantity set up in “Product quantity”, they’re unable to change this quantity on their end if they decides to buy order bump
- Max quantity that customers can buy: They can adjust quantity of order bumps they can buy, but no higher than the value set in here.
6. Products: Choose the product to display on the Order Bumps.
Design
These settings allow you to customize the design and appearance of your Order Bump offers at checkout, helping them look professional and engaging.
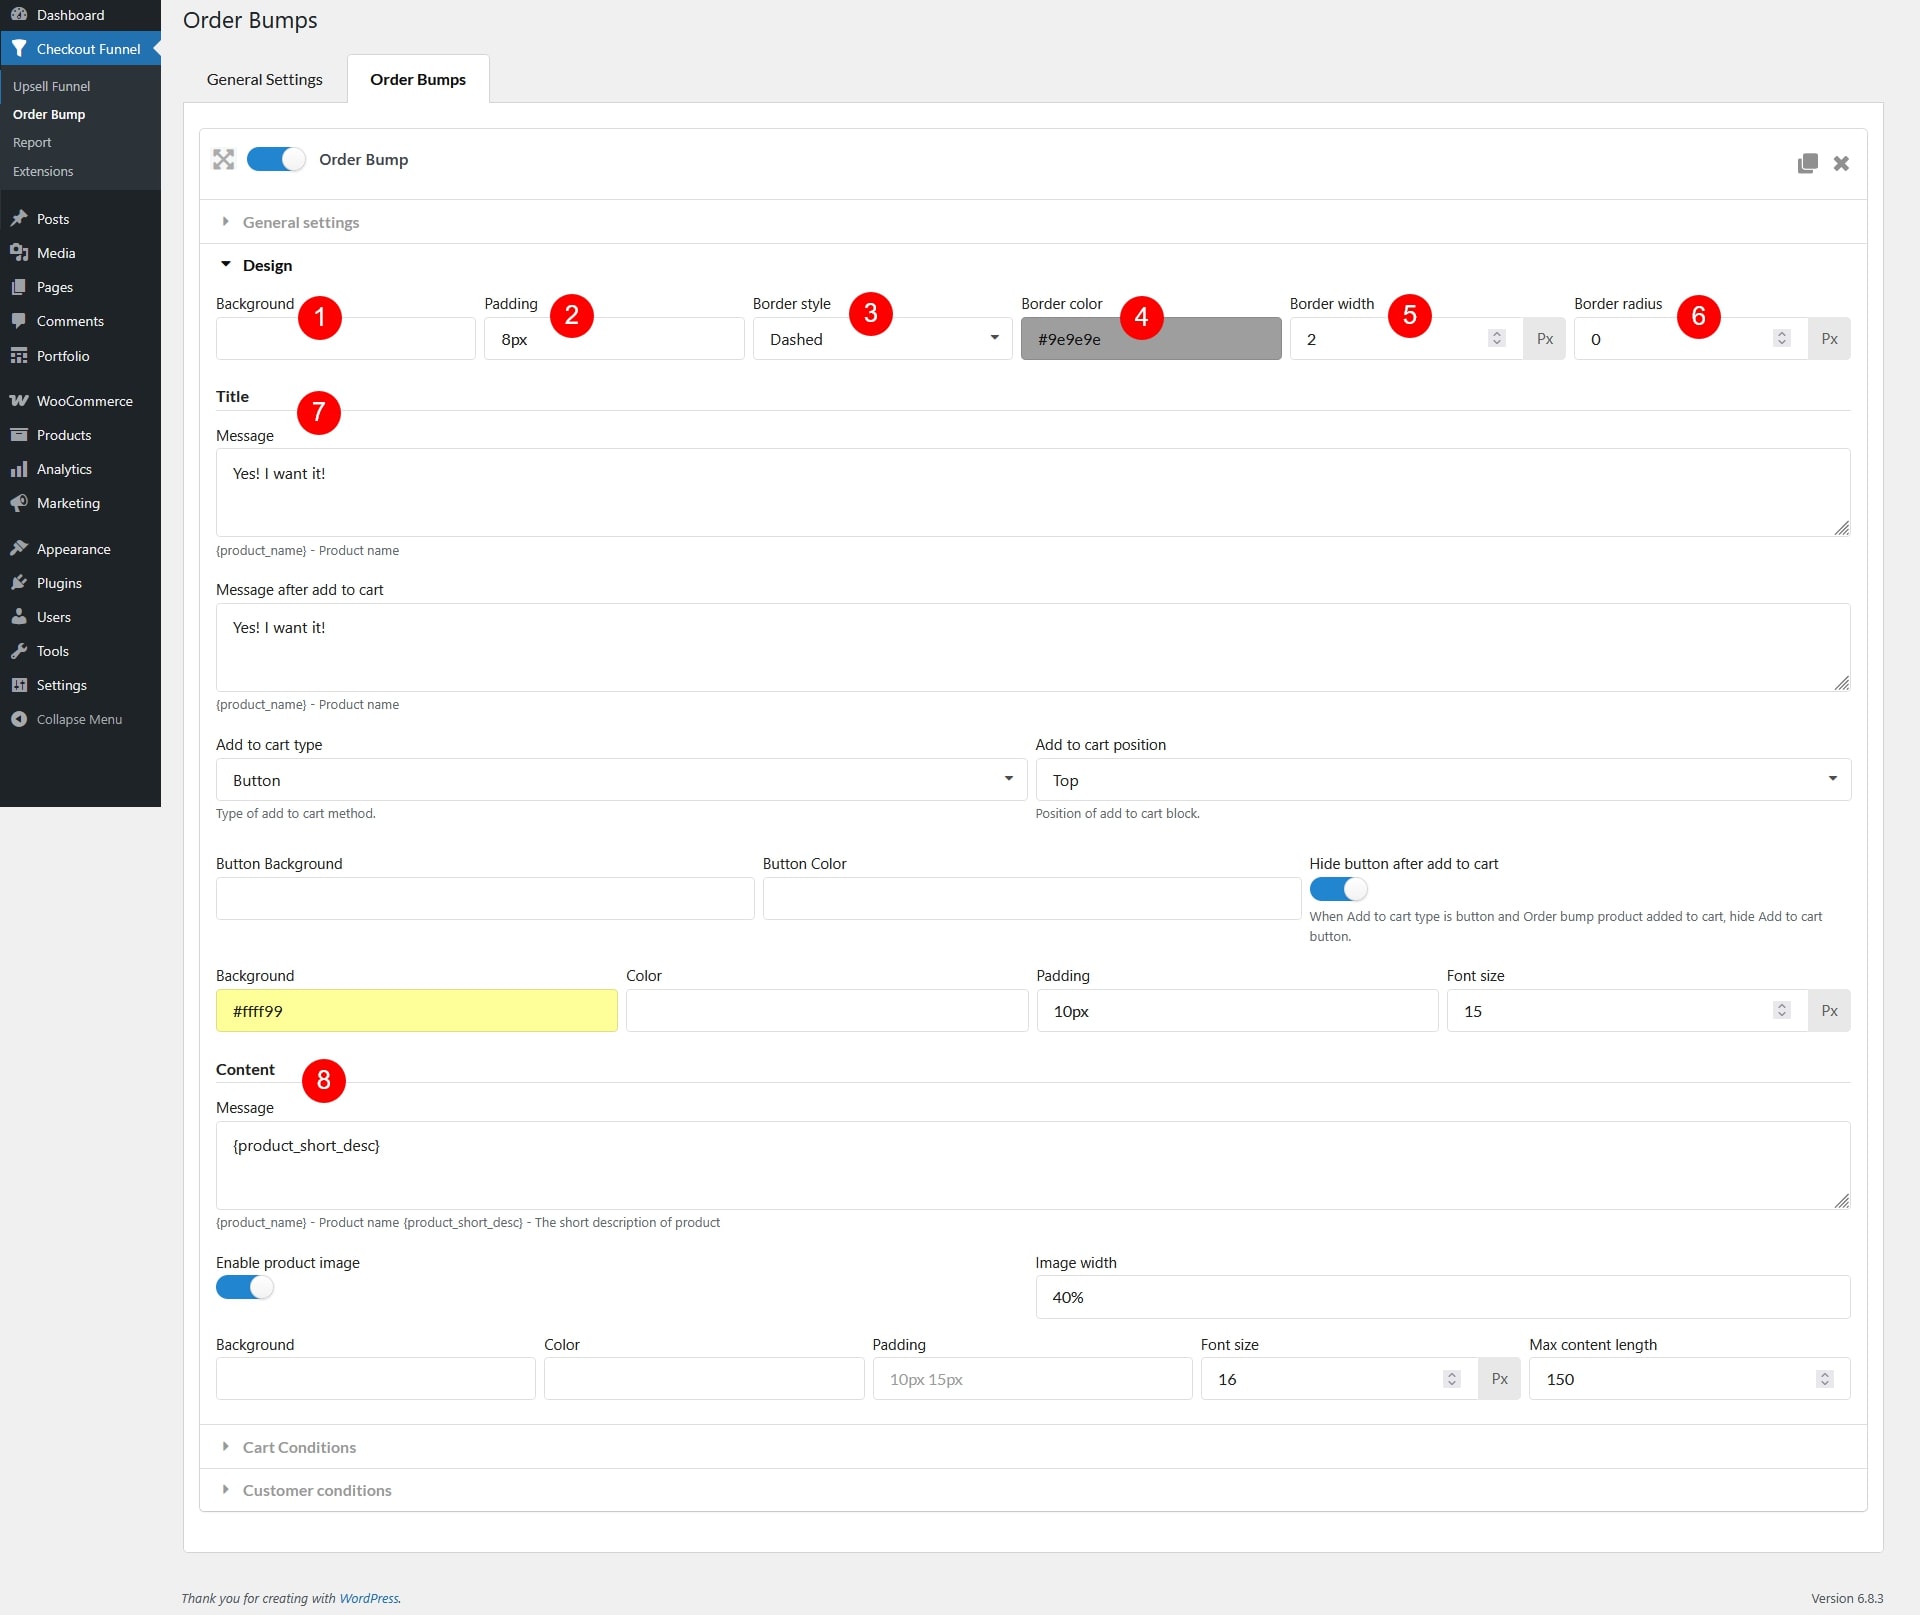
1. Background: Set the background color for the entire Order Bump box, make your offer stand out or blend with your checkout page, depending on your design preferences.
2. Padding: Define the space inside the Order Bump box. Adjusting padding gives your content room to breathe and ensures everything is visually balanced.
3. Border style: Choose how the border around your Order Bump appears. Available styles include:
- None: No border
- Solid: A single solid line
- Dashed: A line made of dashes
- Dotted: A line made of dots
- Double: Two solid lines
4. Border color: Set the color of the border surrounding the Order Bump box. You can match it with your brand colors or use a contrasting color to draw more attention.
5. Border width: Control how thick the border is. A thinner border keeps it minimal, while a thicker one makes the bump box more prominent.
6. Border radius: Adjust the roundness of the corners on the Order Bump box. Higher values make the corners more curved, giving a softer, modern look.
7. Title
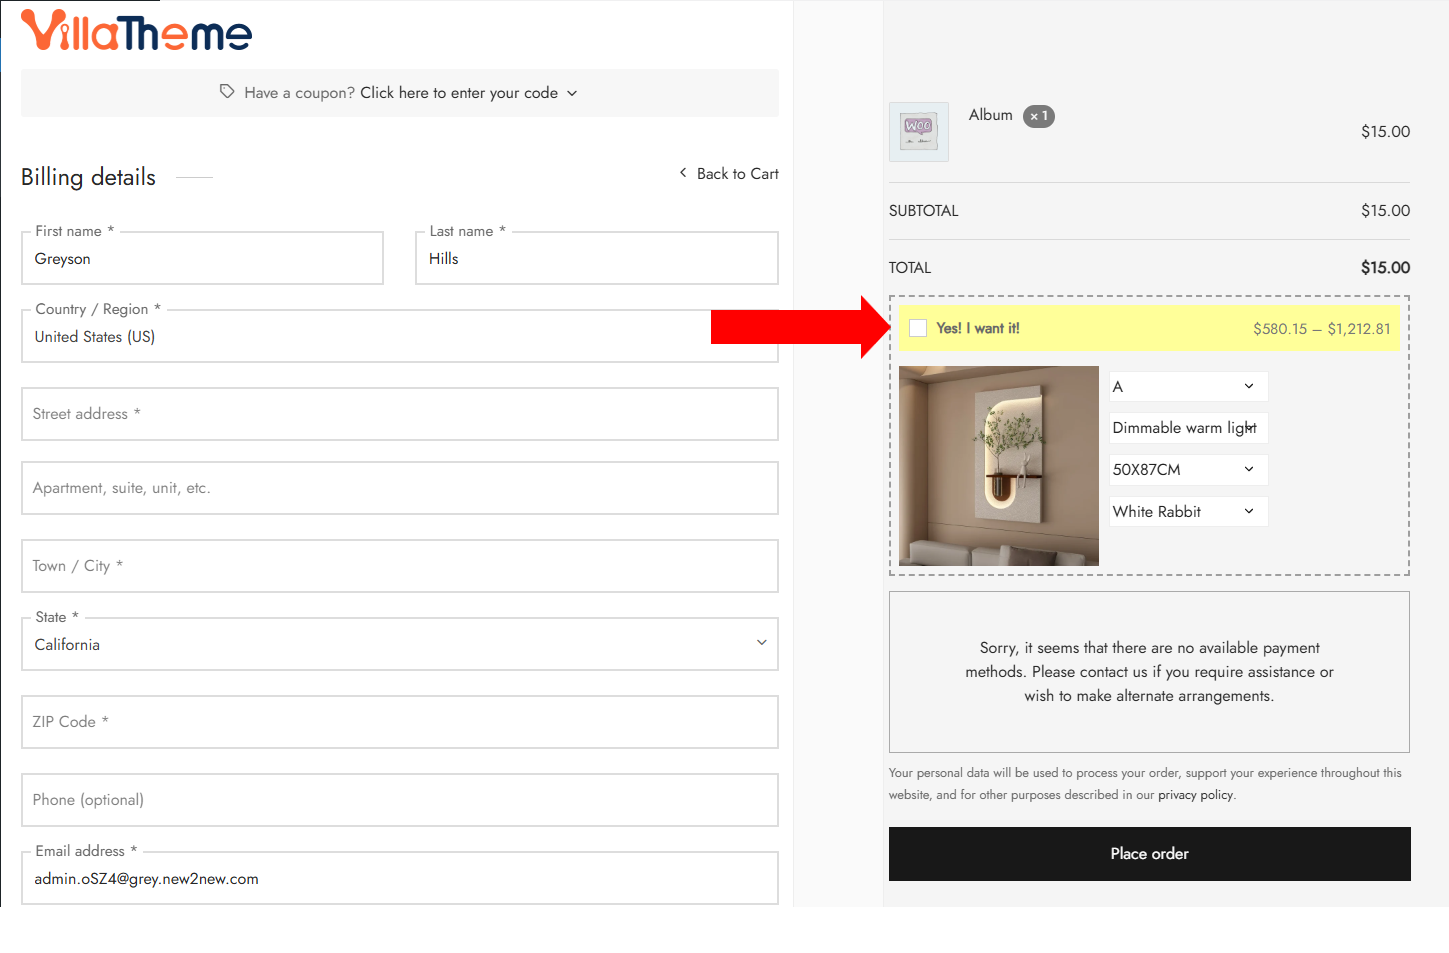
- Message: This is the main message or title shown at the top of the Order Bump. Customize it to draw attention (e.g., “You might also like…”).
- Message after add to cart: Once the bump product is added to the cart, you can change the message to confirm success or suggest another product.
- Add to cart type: Choose how users add the bump product:
- Button: A clickable “Add to Cart” button
- Checkbox: A checkbox to select the product
- Button: A clickable “Add to Cart” button
- Add to cart position: Choose where the “Add to Cart” section appears within the Order Bump box. You can place it at the top or bottom of the entire Order Bump block
- Button Background: Customize the Add to cart button’s background color for branding or contrast.
- Button Color: Set the color of the text inside Add to cart the button.
- Hide button after add to cart: If enabled, the Add to Cart button will disappear after the bump product is added
- Background: Set the background color specifically for the title.
- Color: Choose the text color for the message in the title section.
- Padding: Adjust the space inside the title/message box.
- Font Size: Control the text size for the message. Make it bold and clear, or subtle and minimal.
8. Content
- Message: This is the main body of the Order Bump content. You can use shortcodes to dynamically insert product information here.
- {product_name} – Product name
- {product_short_desc} – The short description of product
- Enable product image: Toggle this to show or hide the product image in the Order Bump box.
- Image width: Set the width of the product image for the Order Bump. You can use a percentage (e.g., 40%) to control how large the image appears relative to the rest of the content
- Background: Set the background color for the content area.
- Color: Set the text color used within the content section.
- Padding: Define spacing inside the content box to control layout and readability.
- Font size: Customize the size of the text in the content area.
- Max content length: Set a limit for how long the content text should be. Useful if you want to keep the design compact and avoid long descriptions.
Cart Conditions
Use these settings to show or hide Order Bumps based on what’s in the cart, who the customer is, or how they’re checking out. Each condition helps you target the right customers with the right offers. Below is the categorized list of Cart Condition options
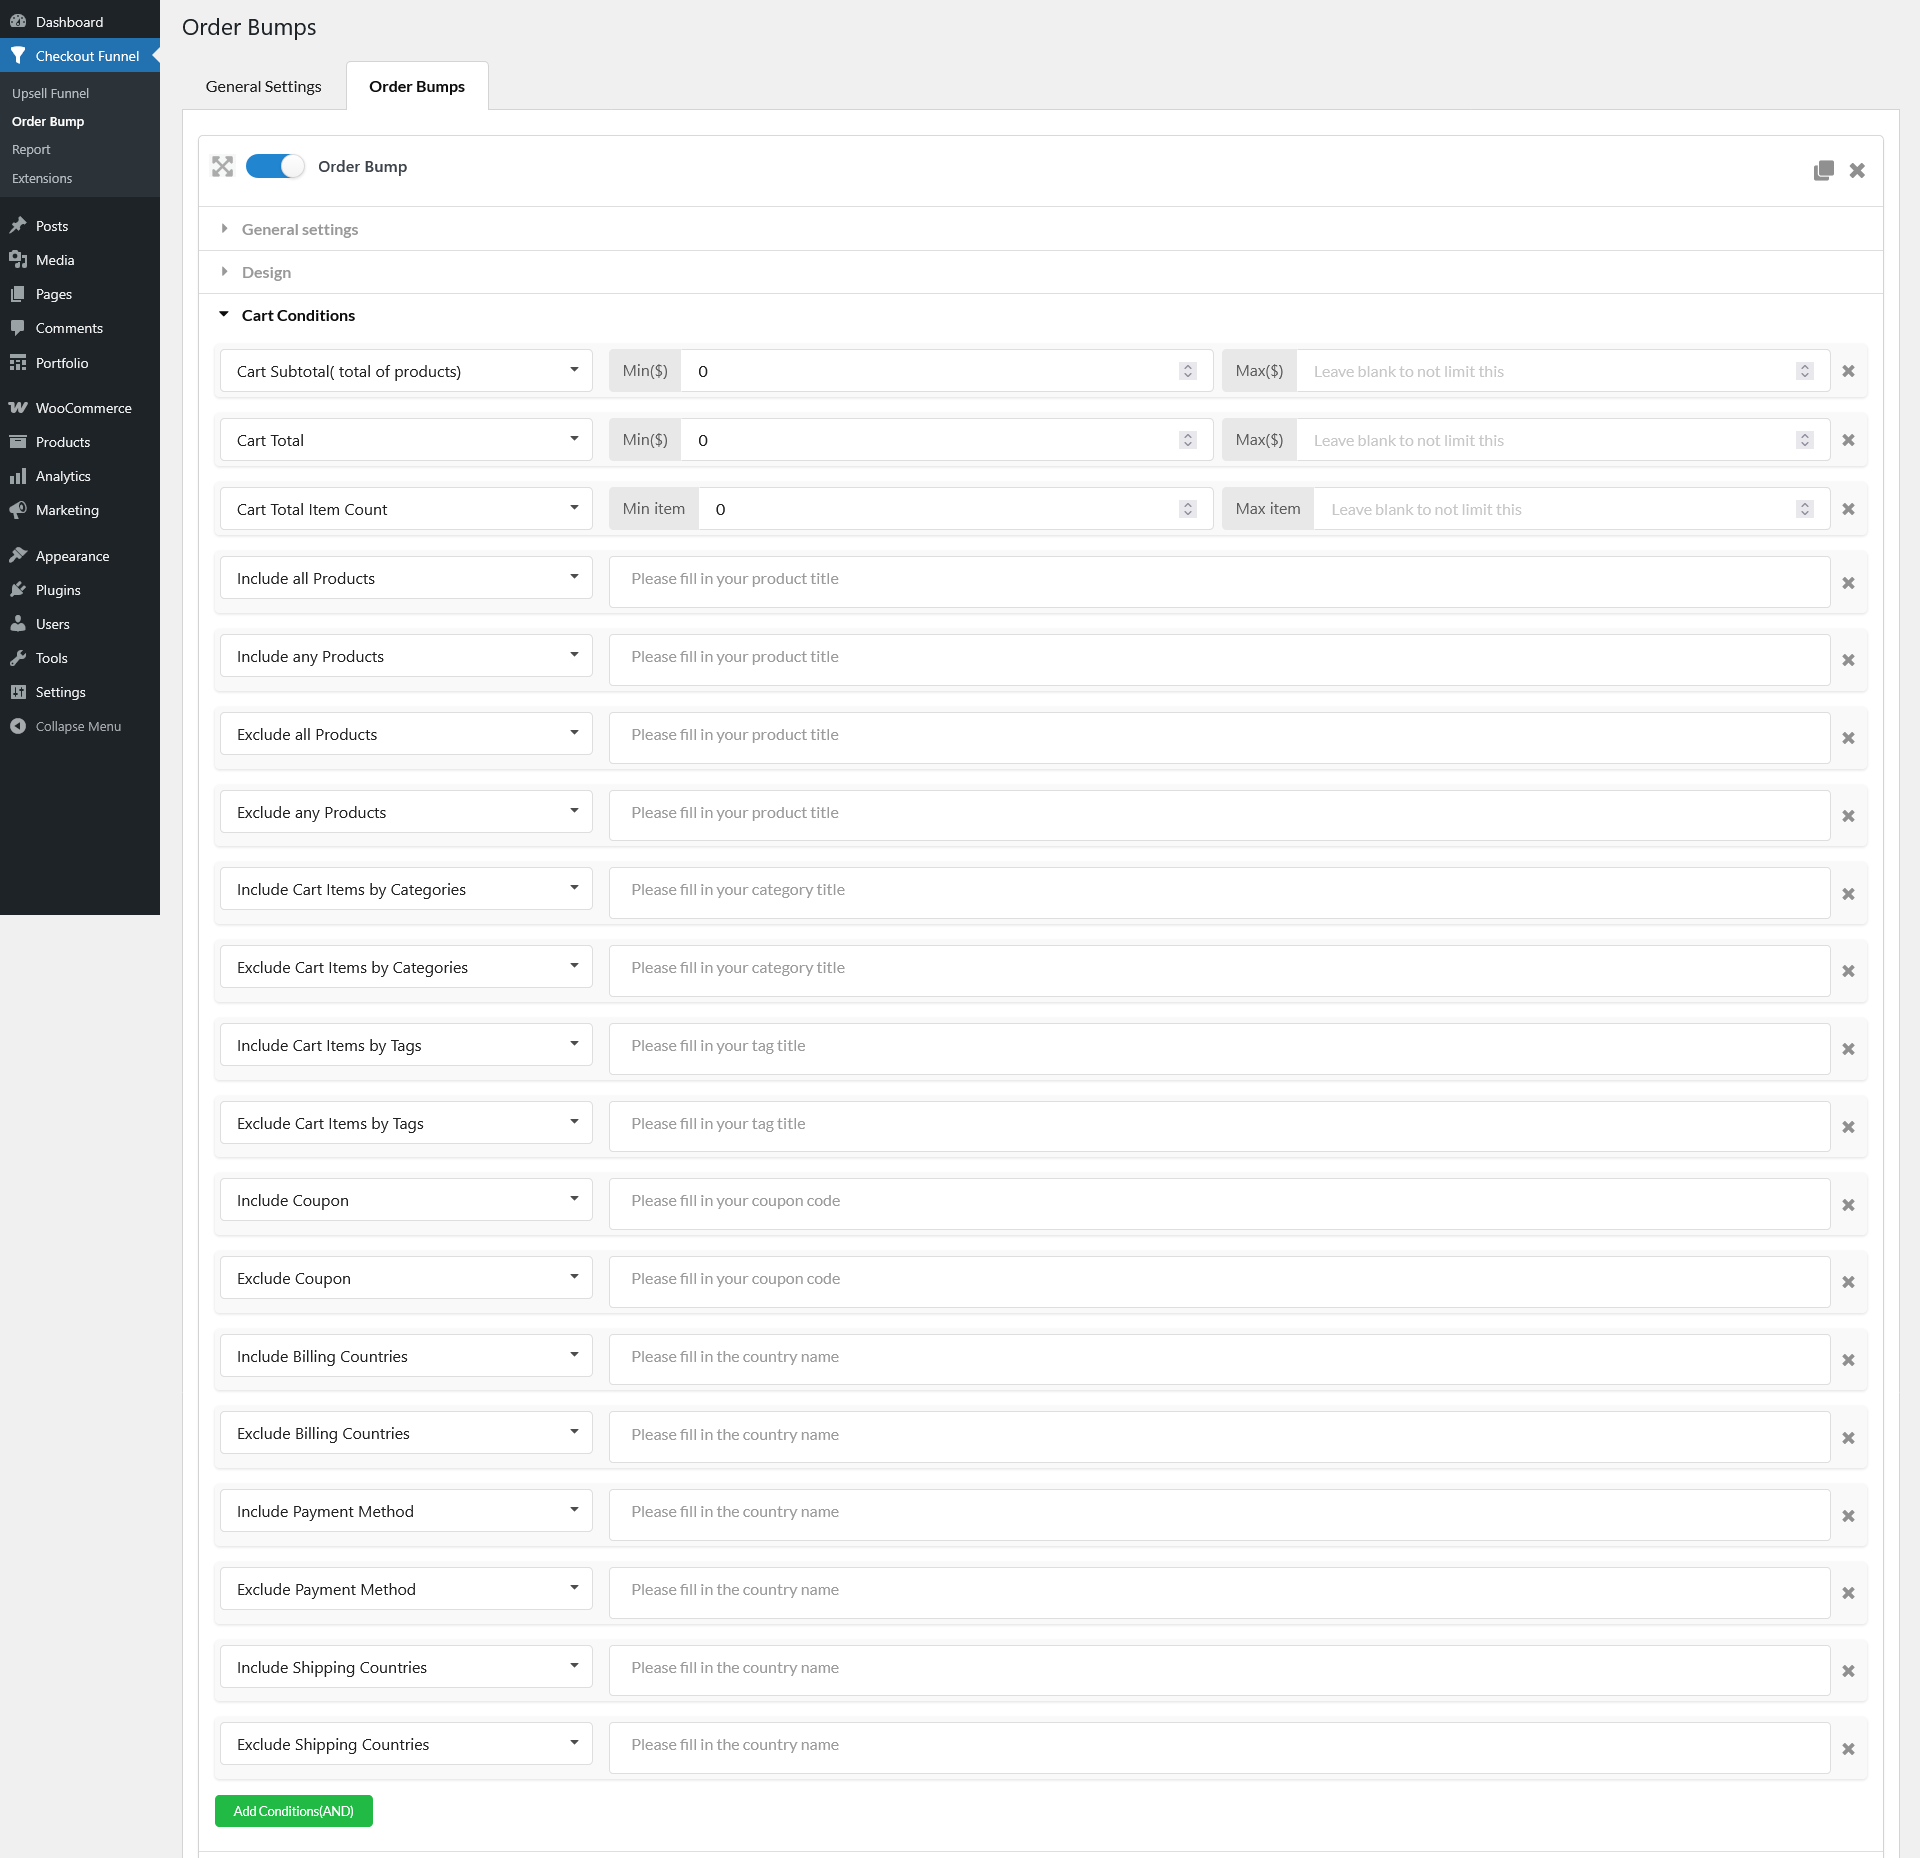
1. Cart Total: Conditions based on cart price or quantity
- Cart Subtotal (total of products): Set the range for the Cart Subtotal and Cart Total chosen to display the Order Bumps. The Order Bumps will be not shown with the carts having the Subtotal or Total be not in these ranges.
- Cart Total: Set the range for the Cart Total chosen to display the Order Bumps. The Order Bumps will be not shown with the carts having the Subtotal or Total be not in these ranges.
- Cart Total Item Count: Trigger when the number of items in the cart meets a condition.
2. Cart Item: Conditions based on the products or categories in the cart
- Include all Products: Only show the Order Bump if all specified products are present in the cart
- Include any Products: Show the bump if at least one of the specified products is in the cart
- Exclude all Products: Do not show the Order Bump if all specified products are in the cart
- Exclude any Products: Do not show the bump if any one of the specified products is in the cart
- Include Cart Items by Categories: Only show the bump if the cart contains products from specific categories
- Exclude Cart Items by Categories: Hide the bump if the cart contains products from specific categories
- Include Cart Items by Tags: Trigger the bump when products with specific tags are in the cart
- Exclude Cart Items by Tags: Prevent the bump from appearing if any products with specific tags are in the cart
3. Applied Coupon: Conditions based on coupons added to the cart
- Include Coupon: Show the Order Bump only if a specific coupon has been applied to the cart
- Exclude Coupon: Hide the bump if a specific coupon is applied.
4. Billing Address: Conditions based on the customer’s billing information
- Include Billing Countries: Show the Order Bump only to customers from selected billing countries
- Exclude Billing Countries: Hide the bump from customers whose billing country matches the ones you exclude
5. Payment Method: Conditions based on the selected payment option
- Include Payment Method: Show the Order Bump only if the customer chooses one of the selected payment methods
- Exclude Payment Method: Hide the bump if a specific payment method is selected
6. Shipping Address: Conditions based on the customer’s shipping destination
- Include Shipping Countries: Only show the bump if the shipping destination matches selected countries
- Exclude Shipping Countries: Prevent the bump from showing if the customer ships to certain countries
Customer conditions
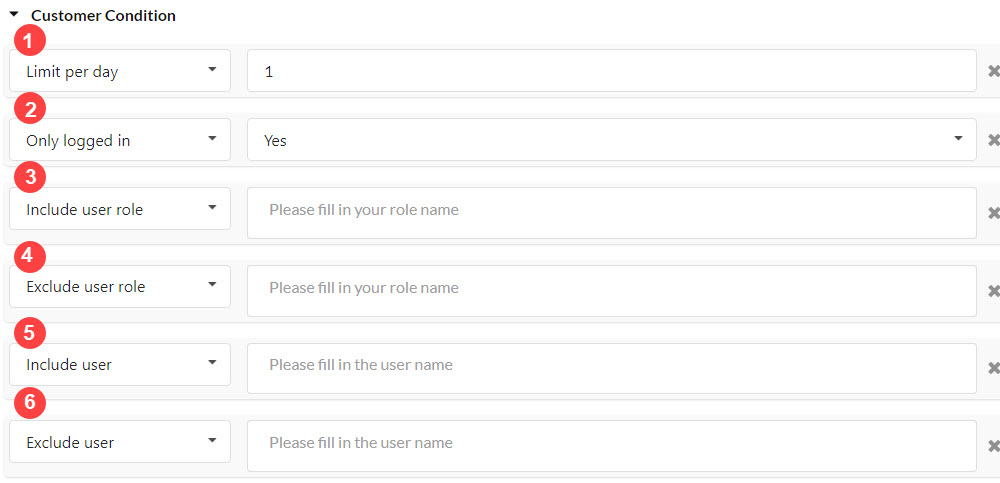
1. Limit per day: Set the limitation per day for the customers to see the Order Bumps.
2. Only logged: Set up for only the customers who log in to see the Order Bumps or not.
3. Include user role: Set up for the specific user roles to see the Order Bumps.
4. Exclude user role: Set up for the specific user roles not to see the Order Bumps.
5. Include user: Set up for the specific users to see the Order Bumps.
6. Exclude user: Set up for the specific users to not see Order Bumps.