Webhook API allows you to get notifications for when the tracking is updated and it triggers an update of one of your trigger settings.
A. How to configure the webhook of 17Track
A webhook is not part of the 17TRACK API. It’s an interface created by you in the form of a URL to receive the tracking status pushed by the 17TRACK Tracking API.
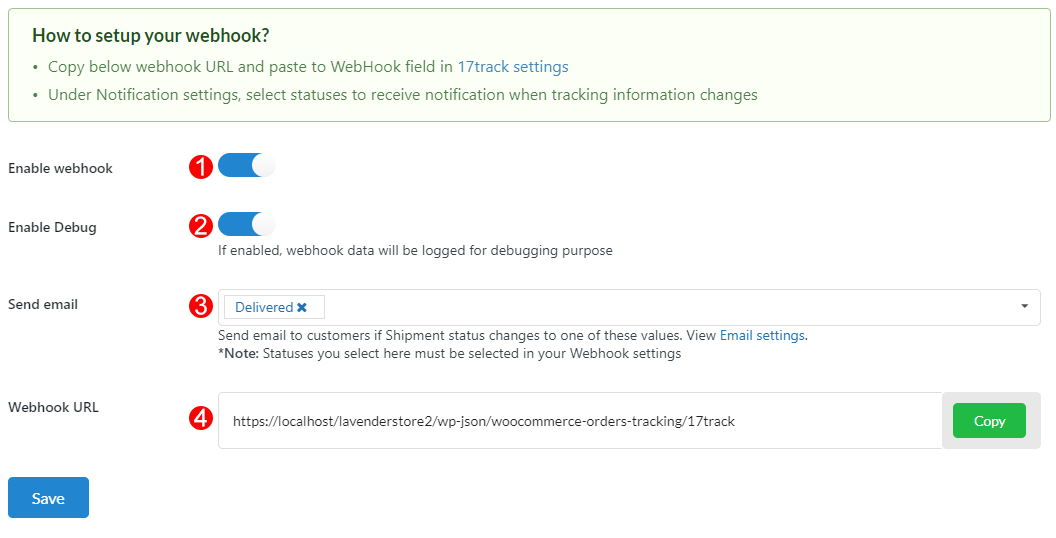
1. Enable webhook: Turn this option on to use this feature of 17Track
2. Enable debug: Data from webhooks will be logged for debugging purposes if enabled.
3. Send Email: Select the statuses that you want to be notified of.
4. Webhook URL: Copy Webhook URL and paste it to Webhook URL field – Webhook settings in your 17Track account.
* Follow the guide below and save all configurations.
Step 1: Copy the Webhook URL in number (4)
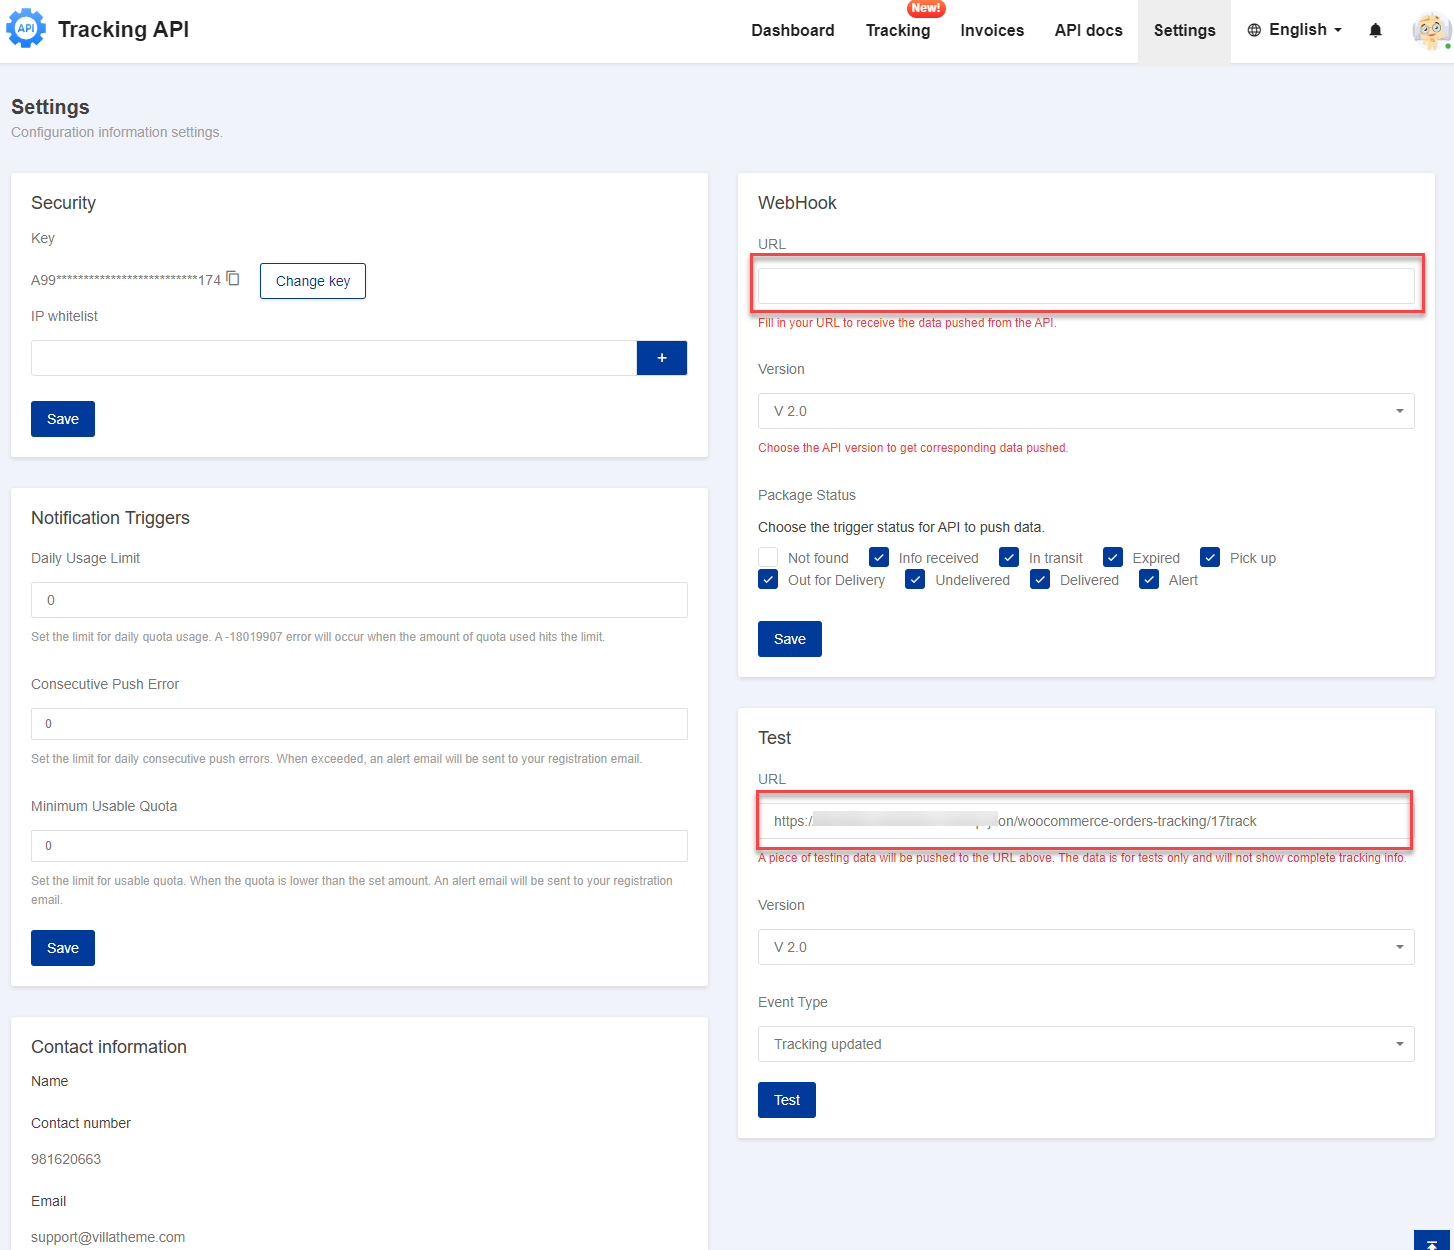
Step 2: Log in to your 17Track account. Go to Settings and paste the URL above as the image below.
Step 3: Choose a version, recommend the lastest V 2.0
Step 4: Under Notification settings, select statuses to receive a notification when tracking information changes.
Step 5 (Optional): Do a quick test and see if it works.
Go to the [WebHook test] section on the left, paste your Webhook URL to the input box and click on the [Test] button. If a notification in green pops up saying “Operation Done”, then it works.
Step 6: Check webhook logs
Go to Orders Tracking > Logs, select Webhooks, date, and view the log.
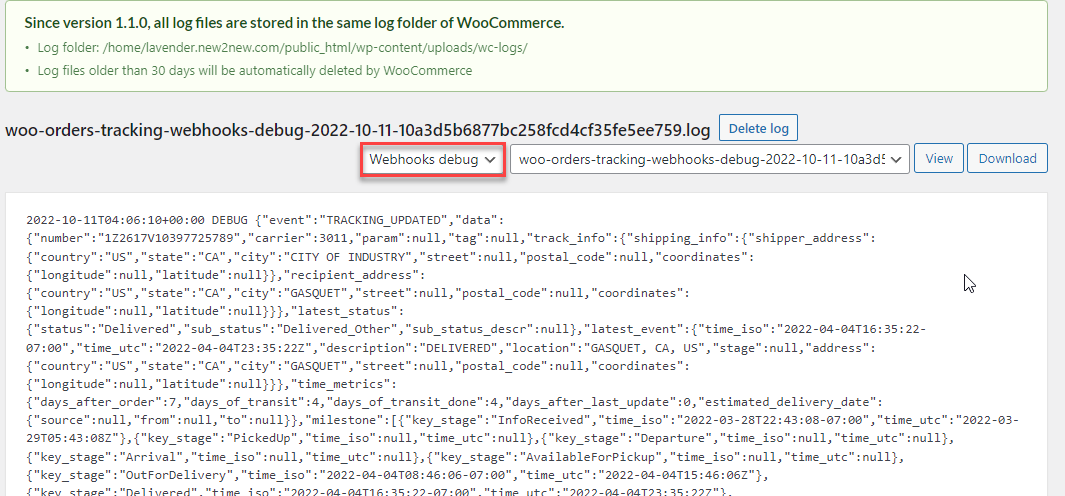
Step 7 (If needed): Check webhook debug. Check the log debug to see if there is a problem.
Go to Orders Tracking > Logs, select Webhook debug, date, and view the log.
B. How to configure the webhook of TrackingMore
When you select TrackingMore as your tracking service, the webhook section will trigger the webhook setting of TrackingMore.
1. Enable webhook: Turn on to use this feature of TrackingMore
2. Enable debug: Data from webhooks will be logged for debugging purposes if enabled.
3. TrackingMore Email: Enter the address you registered in TrackingMore.
4. Send Email: Select the statuses that you want to be notified of.
*Note: Statuses you select here must be selected in your Webhook settings
5. Webhook URL: Copy Webhook URL and paste it to Webhook URL field of your Webhook Notification Settings.
* Follow the guide below and save all configurations.
Step 1: Go to https://my.trackingmore.com/webhook setting.php
Step 2: Copy Webhook URL in the plugin (4) and paste it to the Webhook URL field of your Webhook Notification Settings
C. How to configure the webhook of EasyPost
When you select EasyPost as your tracking service, the webhook section will trigger the webhook setting of EasyPost.
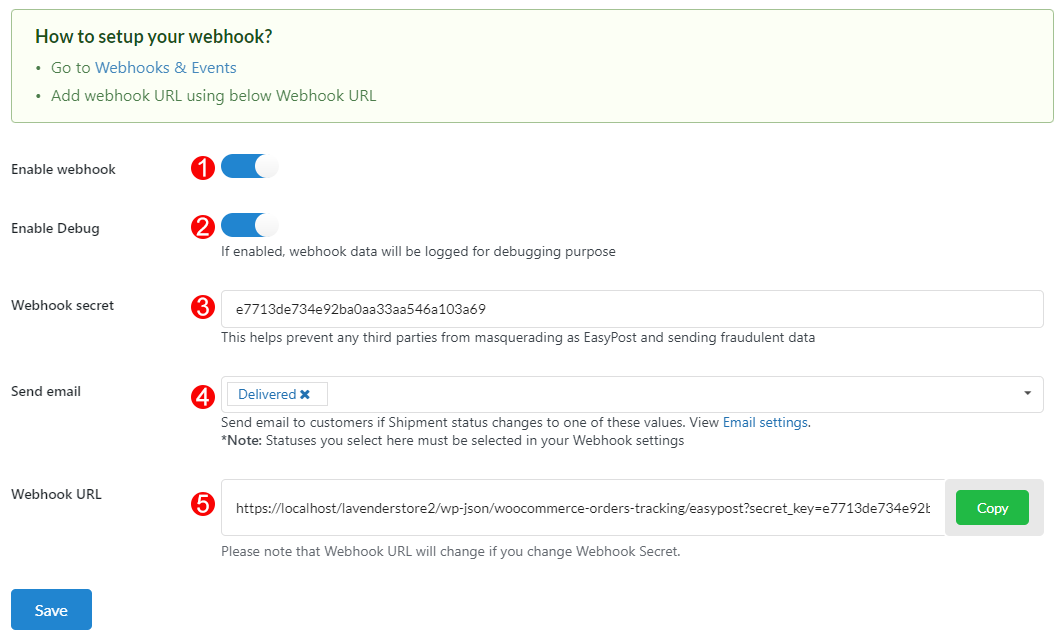
1. Enable webhook: Turn on to use this feature of EasyPost
2. Enable debug: Data from webhooks will be logged for debugging purposes if enabled.
3. Webhook secret: This helps prevent any third parties from masquerading as EasyPost and sending fraudulent data
4. Send email: Select the statuses that you want to be notified of.
5. Webhook URL: Add webhook URL using this Webhook URL
* Follow the guide below:
Step 1: Go to Webhooks & Events
Step 2: Click on the Add Webhook button, copy Webhook URL in the plugin (4) and paste it to the Webhook URL field and create the webhook.
D. How to configure the webhook of AfterShip
When you select AfterShip as your tracking service, the webhook section will trigger the webhook setting of AfterShip.
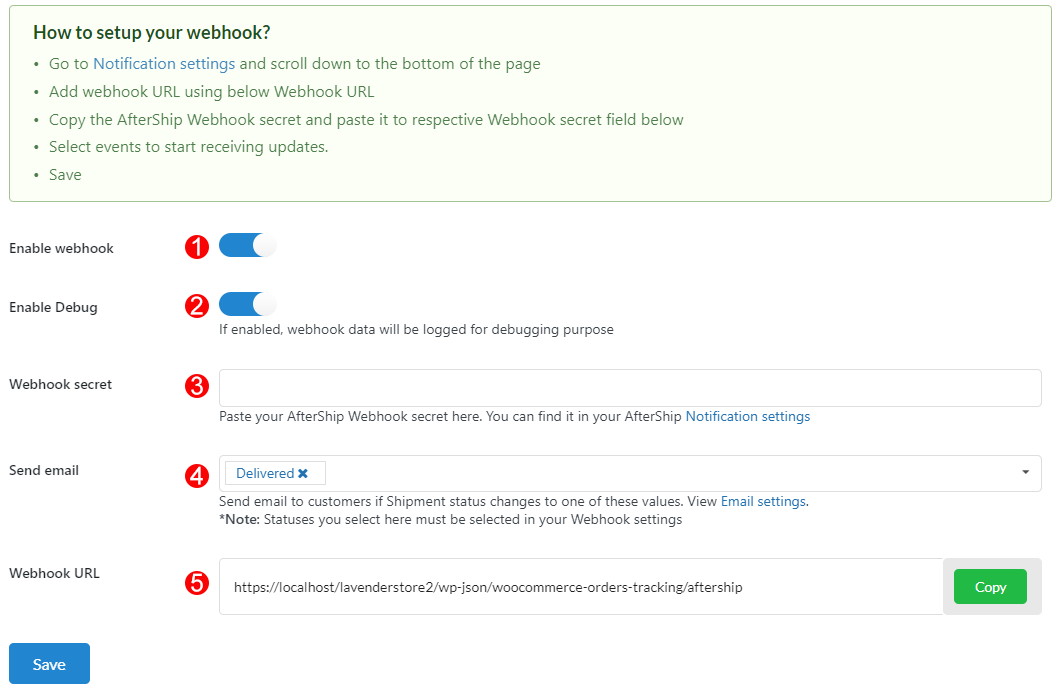
1. Enable webhook: Turn on to use this feature of AfterShip
2. Enable debug: Data from webhooks will be logged for debugging purposes if enabled.
3. Webhook secret: This helps prevent any third parties from masquerading as AfterShip and sending fraudulent data
* You can find the Webhook secret in your AfterShip Notification settings
4. Send email: Select the statuses that you want to be notified of.
5. Webhook URL: Copy Webhook URL and paste it to Webhook URL field
* Follow the guide below:
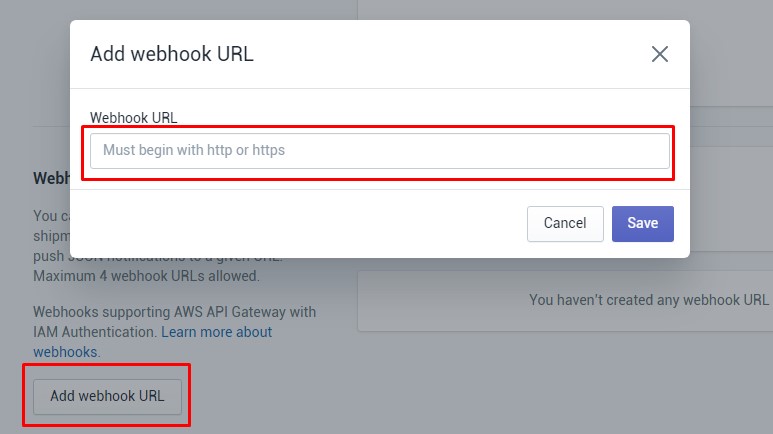
Step 1: Go to Notification settings and scroll down to the bottom of the page
Step 2: Click on the Add Webhook button, copy Webhook URL in the plugin (4) and paste it to the Webhook URL field and save.
