Create and manage different statuses for support tickets. These statuses provide clear visibility into the progress and current state of each ticket.
After creating your status, assign specific status to events in “Ticket status” section under General tab.
On the Status list:
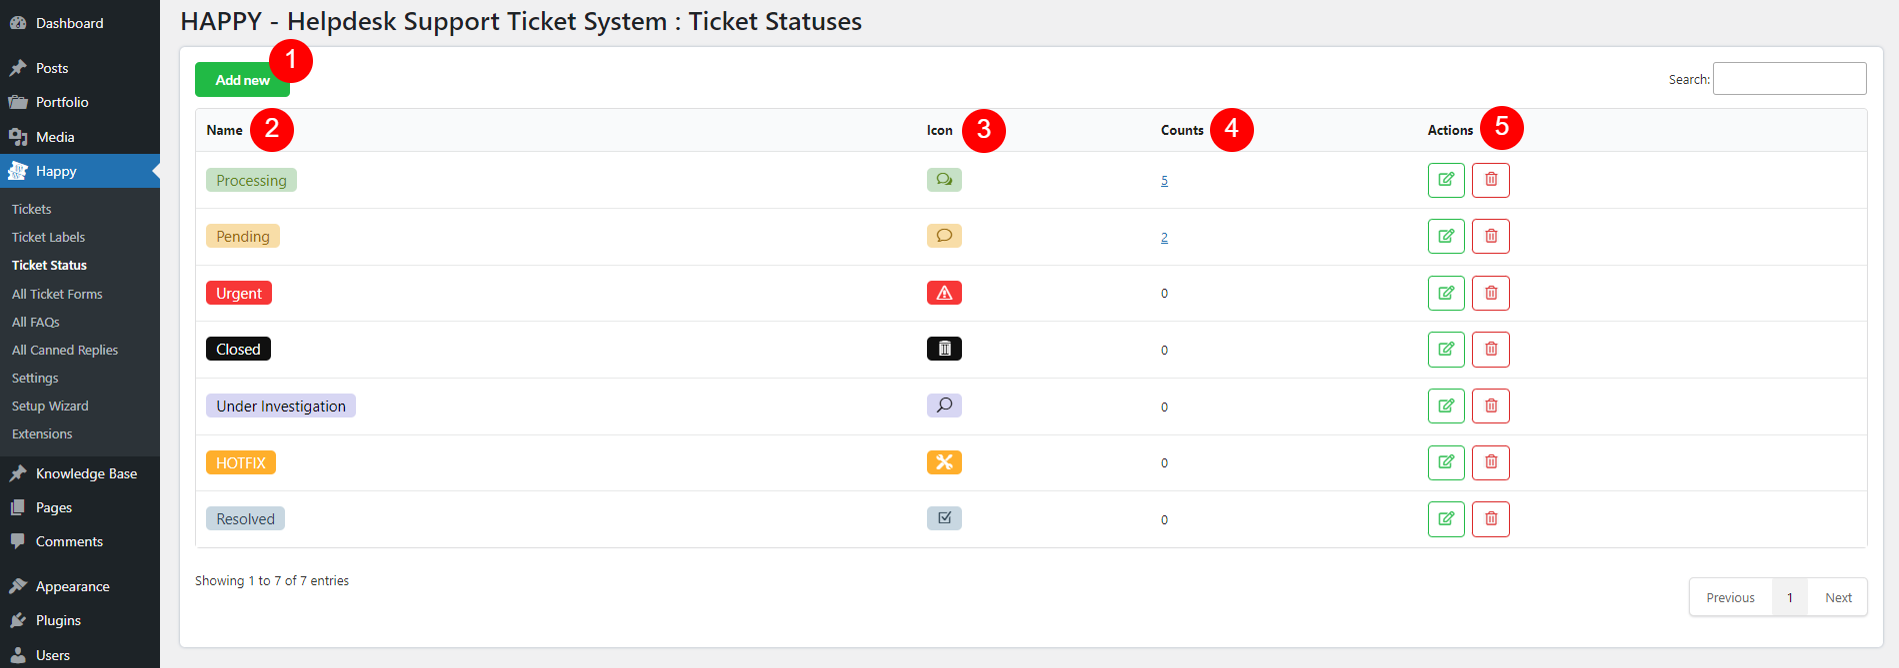
- Add new: Create a new ticket status with the following options
- Name: This status name will show up on frontend.
- Icon: Choose an icon to visually represent the status. This icon will replace the status name on the front end.
- Counts: Ticket counts – Determine how many tickets this status is included in. Click the number to see those tickets.
- Actions: Specify any actions associated with this status
 Edit status
 Remove status
When you click the green Edit button under “Action” column. A popup for status settings appears, allowing you to customize the settings for each ticket status to ensure they align with your support workflow:
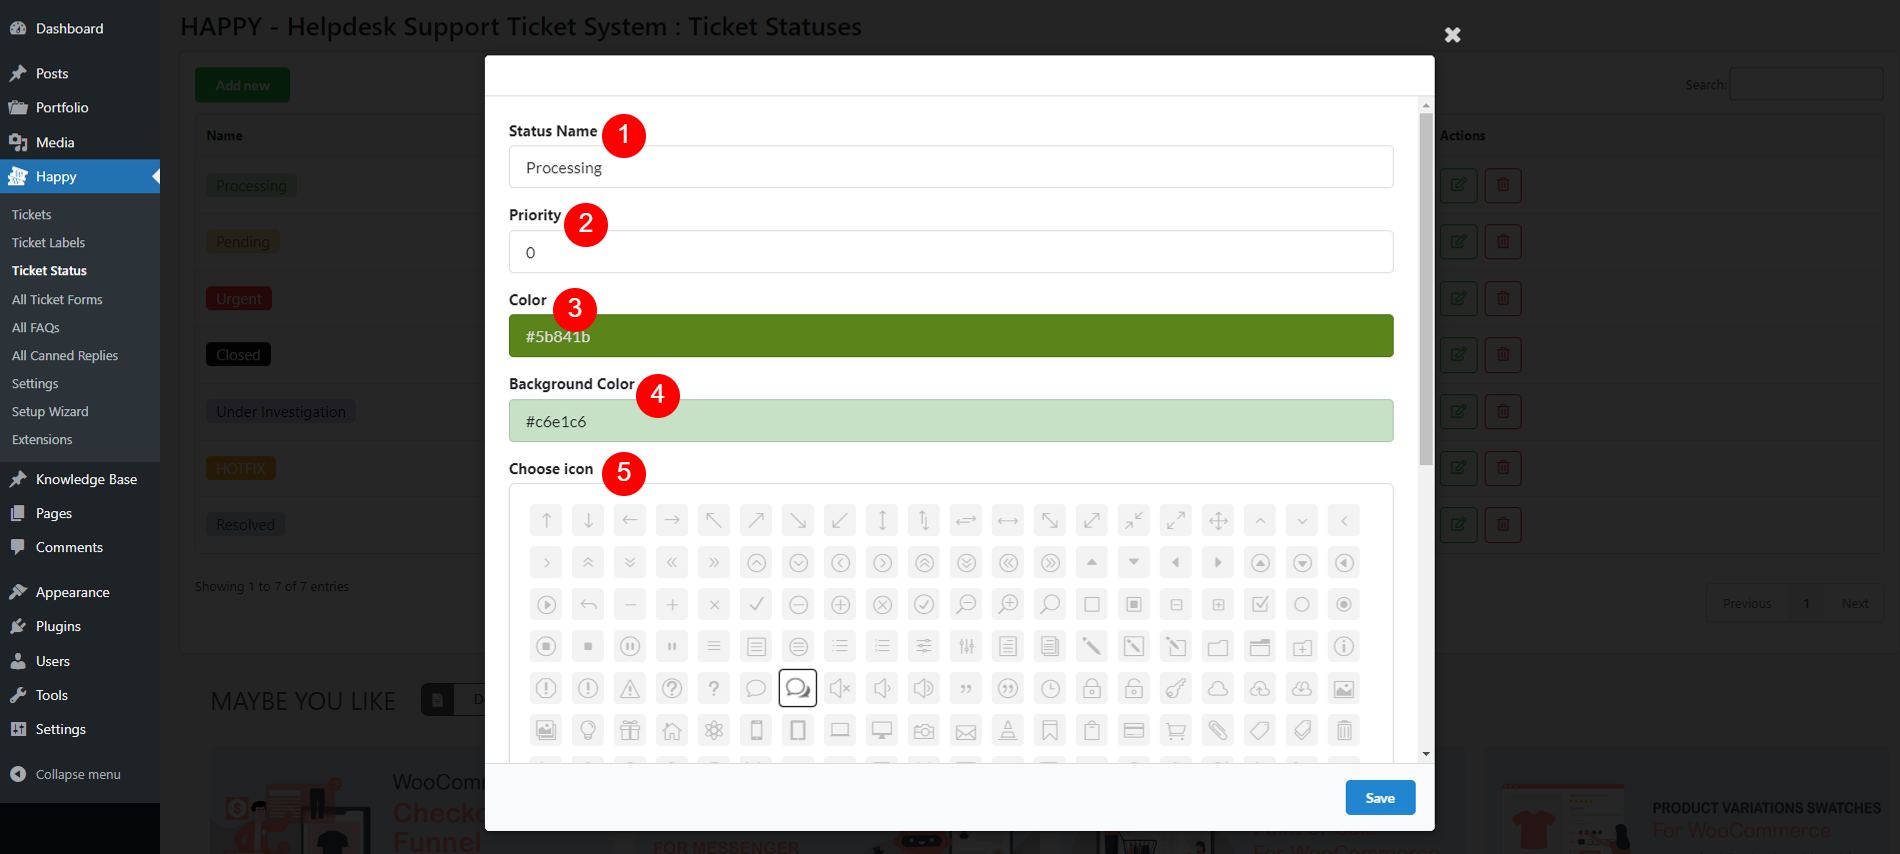
- Status Name: Define the name of the status.
- Priority: Set the priority level for this status. This is to reorganize the status list.
- Color: Choose a color for the status label and status icon
- Background Color: Select a background color for the status label and status icon.
- Choose icon: Pick an icon to represent the status. If a status has an icon, the icon will replace the status name on the front end.