Go to Dashboard >> Happy >> Ticket Labels
This feature allows you to organize support tickets into different tags. This helps in managing and prioritizing tickets more effectively, ensuring that they are routed to the appropriate support staff and handled efficiently.
Ticket labels list
This is the page where the Support Manager can see all the available ticket labels, take an overview, change their position or visit a list of tickets with specific label assigned.
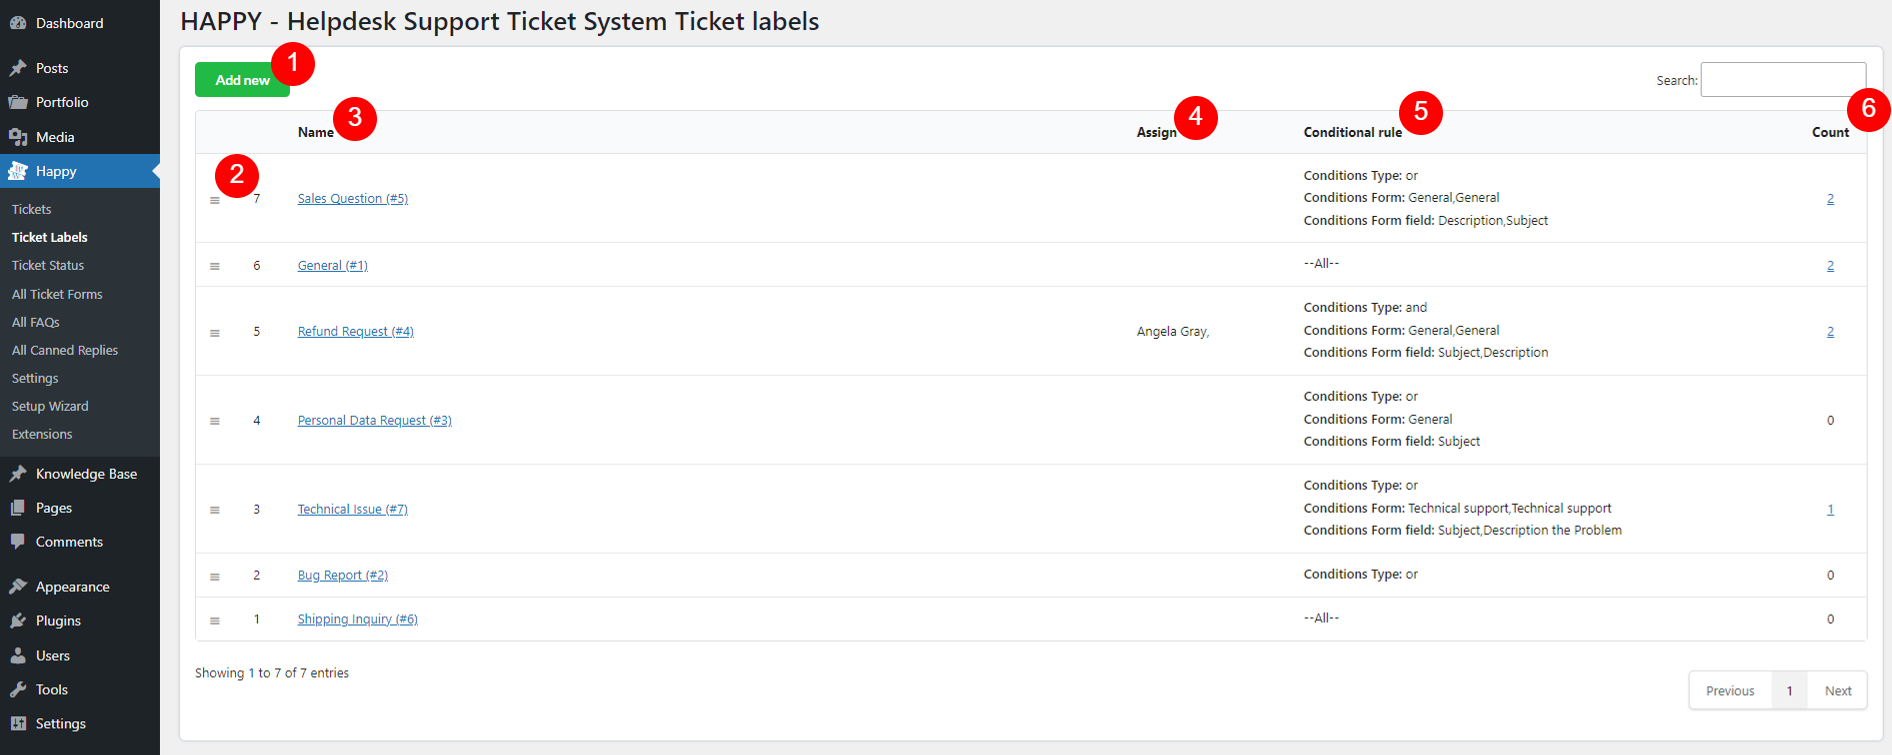
- Add new: Click this button to create new ticket label
- No.: The value under this column is changed when you hover over the
 icon to drag and drop to change the position of the label.
 - Name: Label name – Click the name to go to the label editing page
- Assign: This reflects the Assign Supporter settings inside the ticket label editing page
- Conditional rule: This reflects the Condition Type and Conditions settings inside the ticket label editing page
- Count: Ticket counts – Shows the number of tickets assigned to each label. Click the number to see the list of those tickets
Ticket label editing page
This page is to configure a specific label.
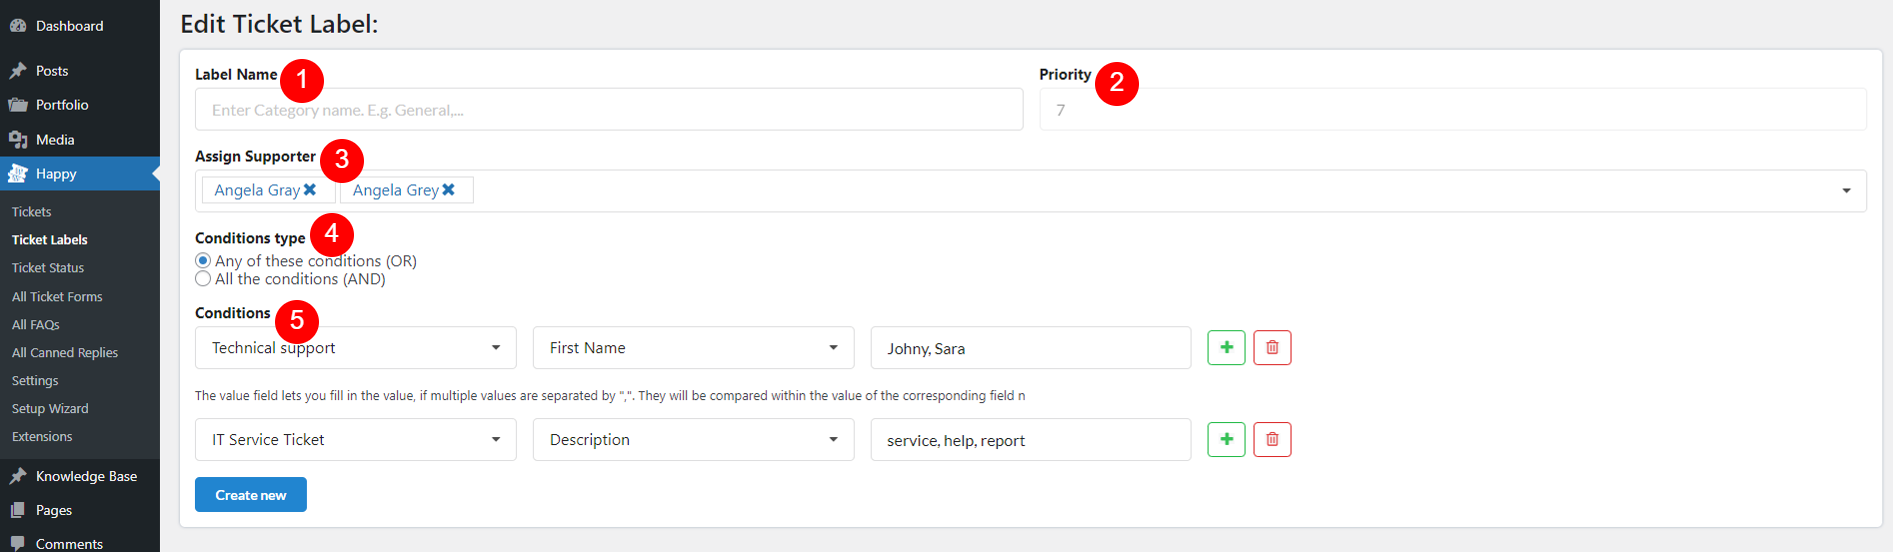
- Label Name: Enter name for the label
- Priority: This value can only be changed when you drag and drop the label to change the position from the Label list
- Assign Supporter: Assigned supporters are notified via email when a ticket with this label is created. And the supporter can only see tickets that are assigned to them
Note: If no assignee, this label is assigned to all supporters. And email notifications will be sent to all of them. - Conditions type: Define rules that determine how tickets are assigned to this label. You can set multiple rules based on keywords in the ticket subject or content, or customer details. The rules can be configured using And or Or logic:
- And: All conditions specified must be met for a ticket to be assigned this label.
- Or: Any one of the specified conditions must be met for a ticket to be assigned this label.
- Conditions: Set specific criteria that tickets must meet to be assigned a particular label automatically
- Ticket Form: Select the ticket form to which the condition applies.
- Form Field: Choose the specific field within the selected ticket form that will be evaluated. This can include fields such as subject, description, or other fields.
- Value in the form field: Specify the value that the form field must contain for the condition to be met. This can be a specific word, phrase, number, or any relevant value based on the field type. Leave empty for all values, no exclusions.
- Action:
 Add new condition: Click this button to create a new condition. You can define multiple conditions to refine how tickets are labeled.
 Remove the condition: Click this button to delete an existing condition. This allows you to update or simplify your condition rules.