Control the text of the “Compare” button (on Single Product page)

- Text: Add the text to the button when add the item to the compared list
- Compared text: Add the text to the button when the item is added to the compared list
- Design: Redirect admin to the page where admin can design the comparison table
Then start customizing thoroughly the appearance and the content of the Comparison table
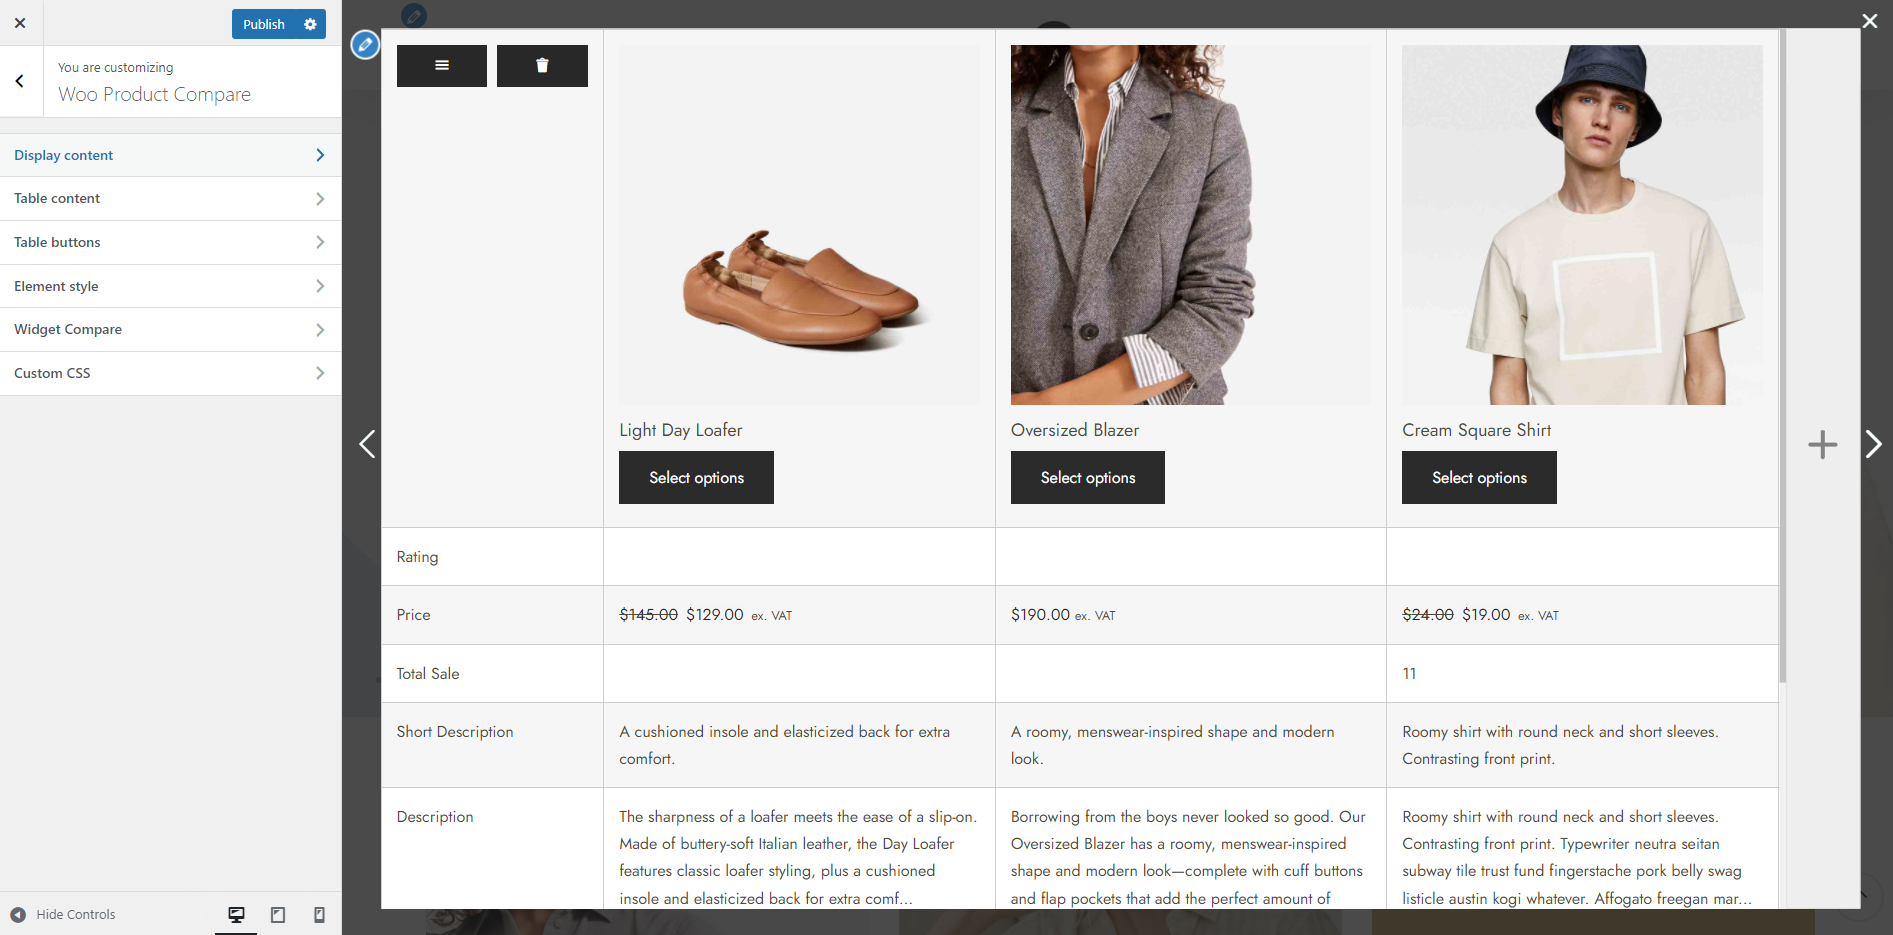
DISPLAY CONTENT
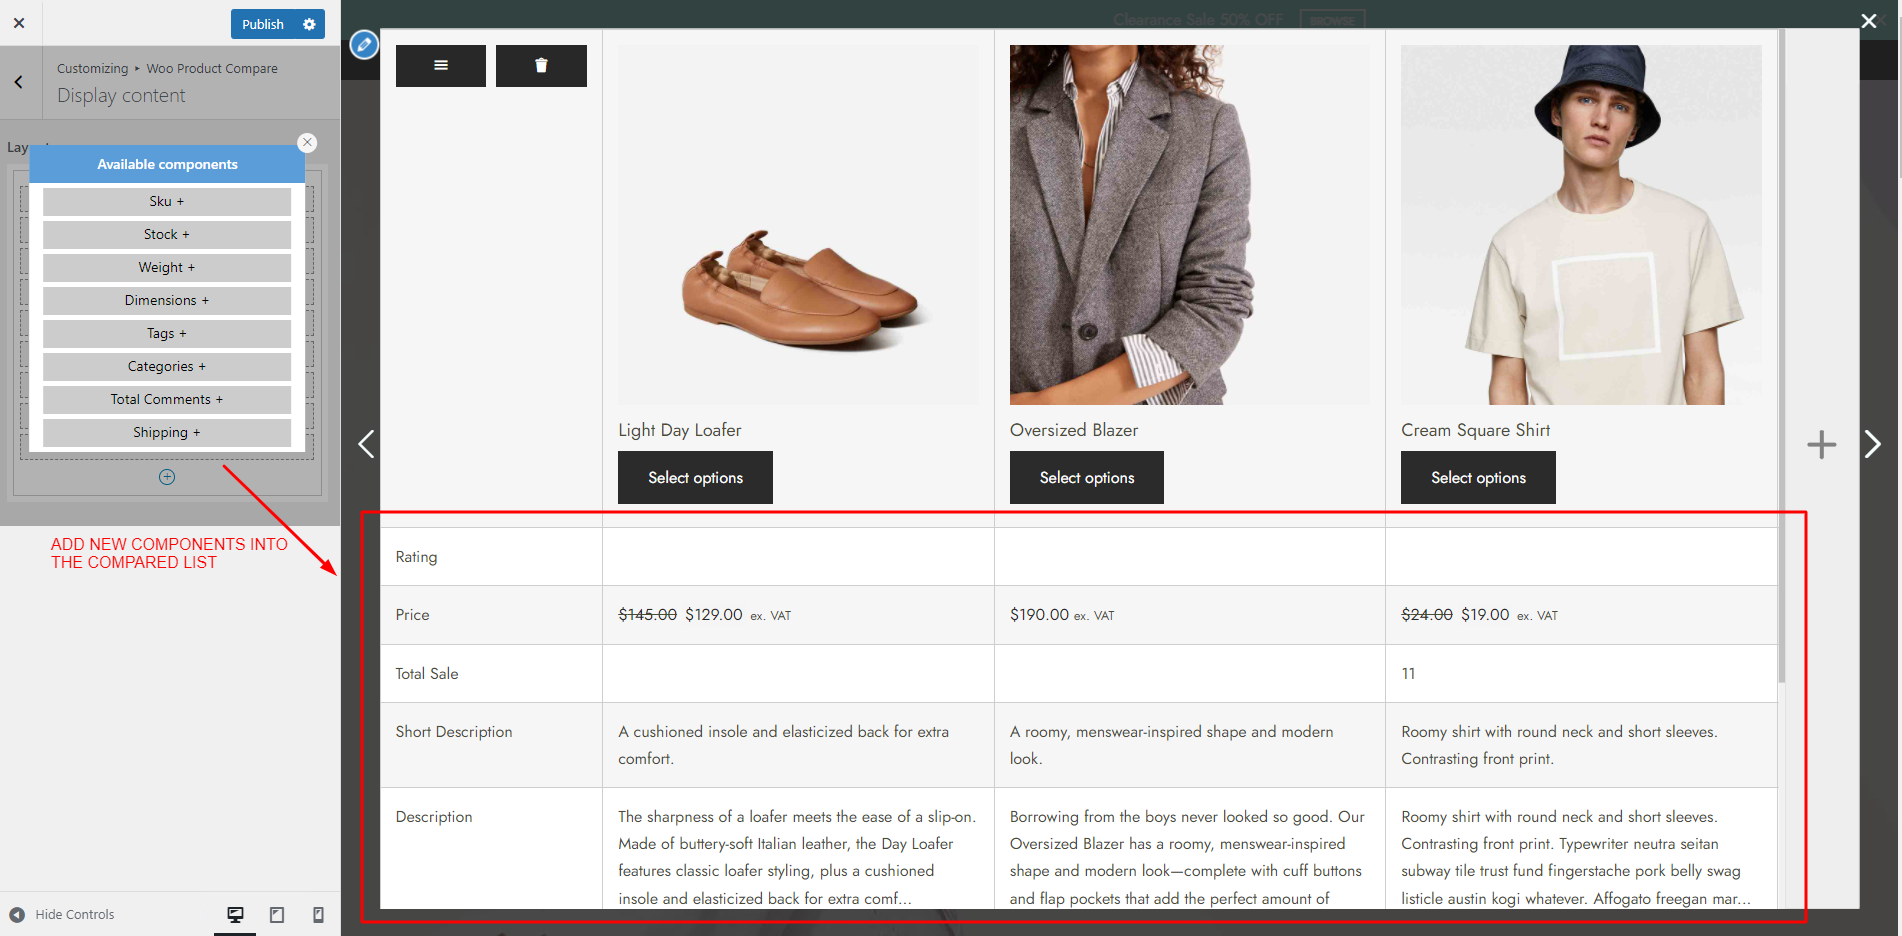
Here the admin can add the components to the comparison table, allow customers to compare products using these values and information in these components
Click the plus symbol and start adding components you want to the comparison table and control which information customers can use to compare products.
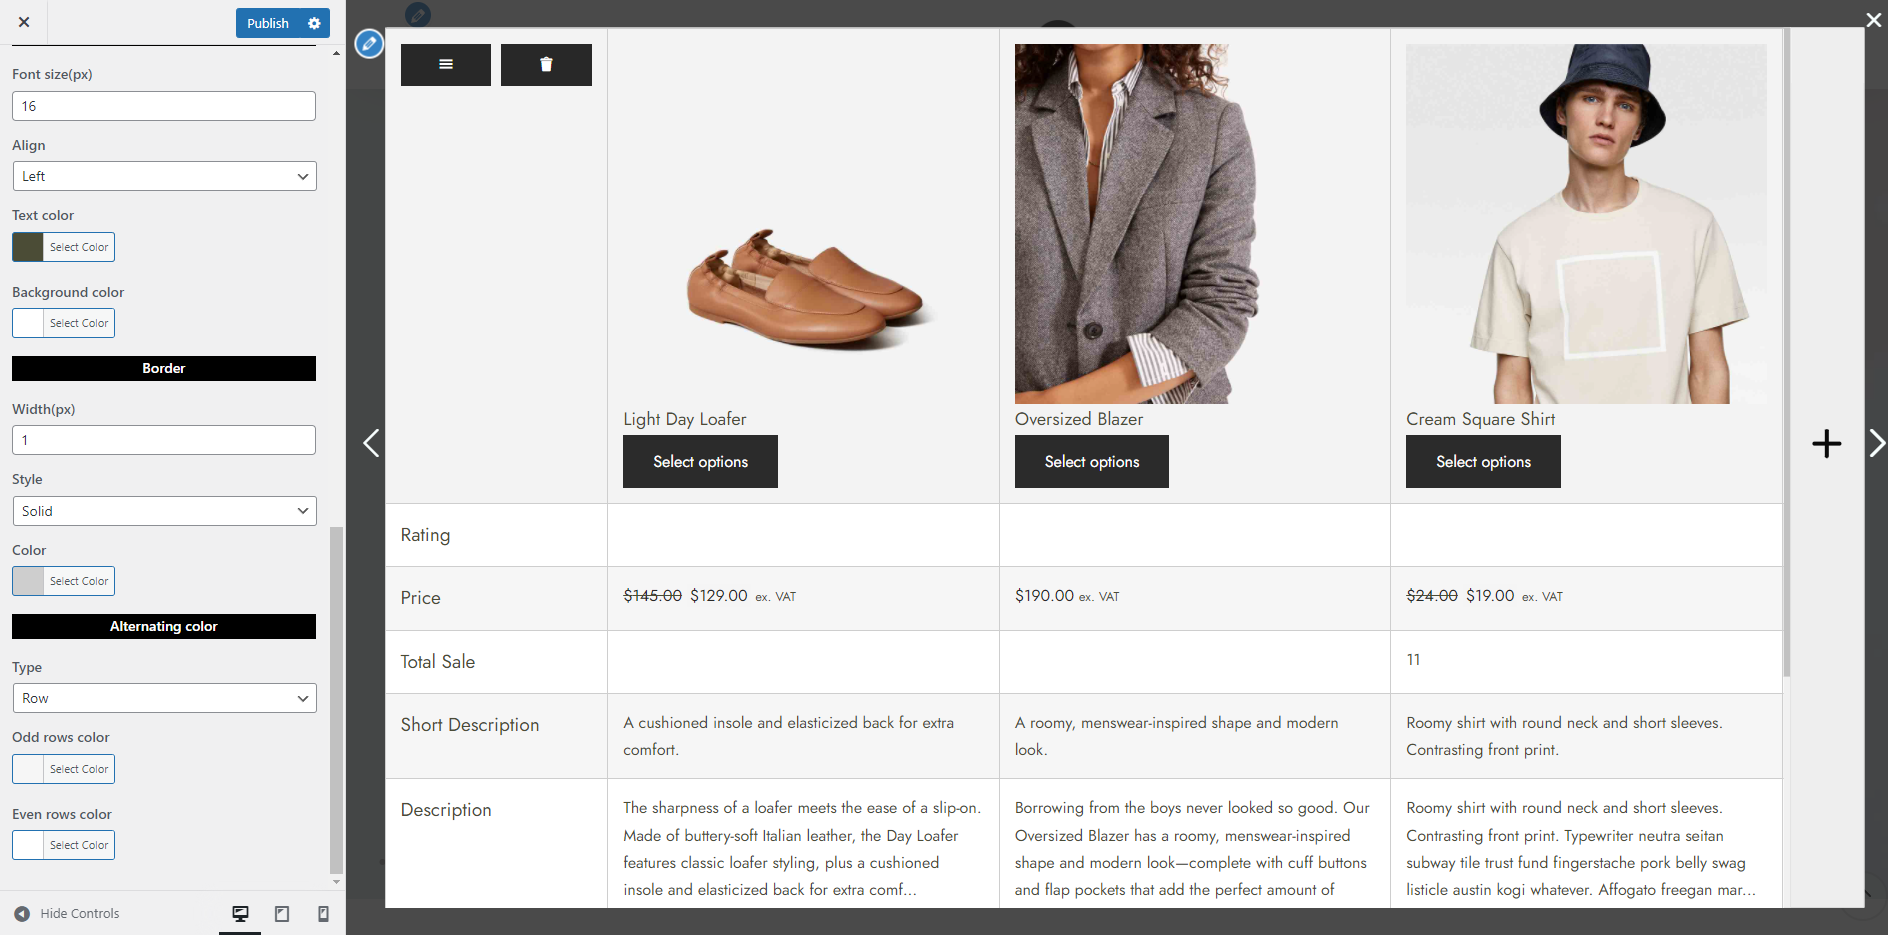
TABLE CONTENT
TABLE HEADER
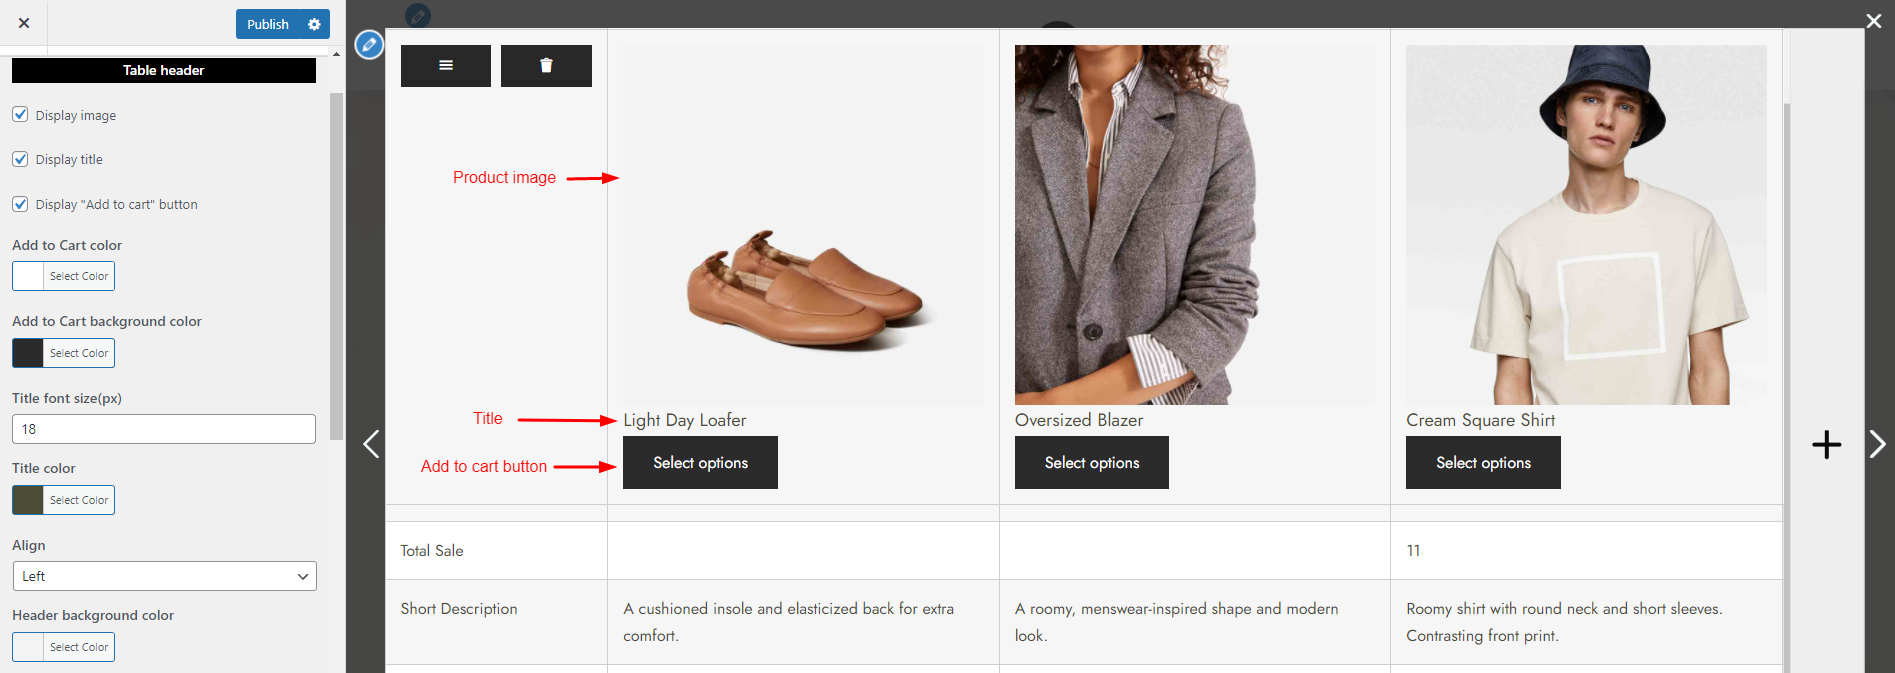
- Display image: Tick the checkbox to show product images
- Display title: Tick the checkbox to show product titles
- Display “Add to cart” button: Tick the checkbox to show “Add to cart” button
- Add to Cart color: Set the color for the text inside the “Add to cart” button
- Add to Cart background color: Set the color for the background of the “Add to cart” button
- Title font size: Control the size of the product titles
- Title color: Set the color for the product titles
- Align: Selec the alignment for the product titles and the “Add to cart” button
- Header background color: Set the background color for the whole header area
FIELD HEADER and CONTENT
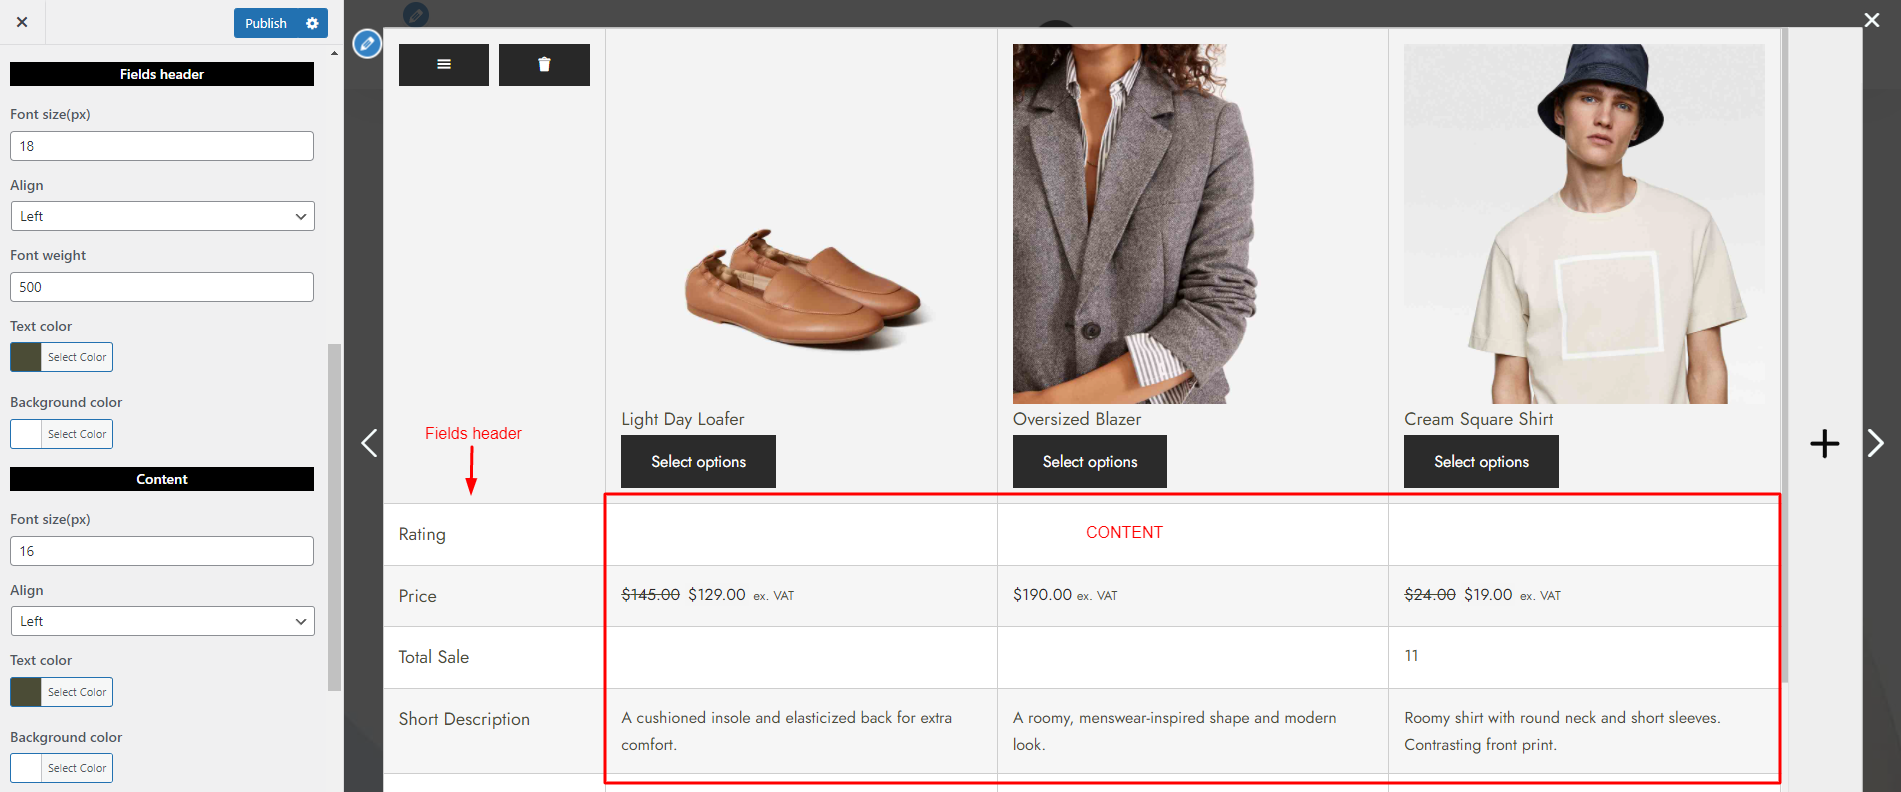
- Field header
- Font size: Change the size of the text inside the fields head: Rating, Price, Total Sale,…
- Align: Select the alignment for the text
- Font weight: Set the font weight for the text
- Text color: Set the color for the text
- Background color: Set the color for the whole background of the fields header
- Content
- Font size: Manage the size of the text inside the content of the comparison table
- Align: Choose the alignment you want for the content
- Text color: Set the color for all the text in the content
- Background color: Select the color you want for the background
BORDER and ALTERNATING COLOR
- Border
- Width: Set the width of the border for the comparison table
- Style: Manage the type of border set above
- Color: Choose a color for the border of the table
- Alternating color
- Type: Choose a type for alternating color – None (no alternating color); Row; or Column
- Odd row color (available with Row only): Set the color for the odd row
- Even row color (available with Row only): Set the color for the even row
TABLE BUTTON
CLEAR BUTTON and SETTING BUTTON
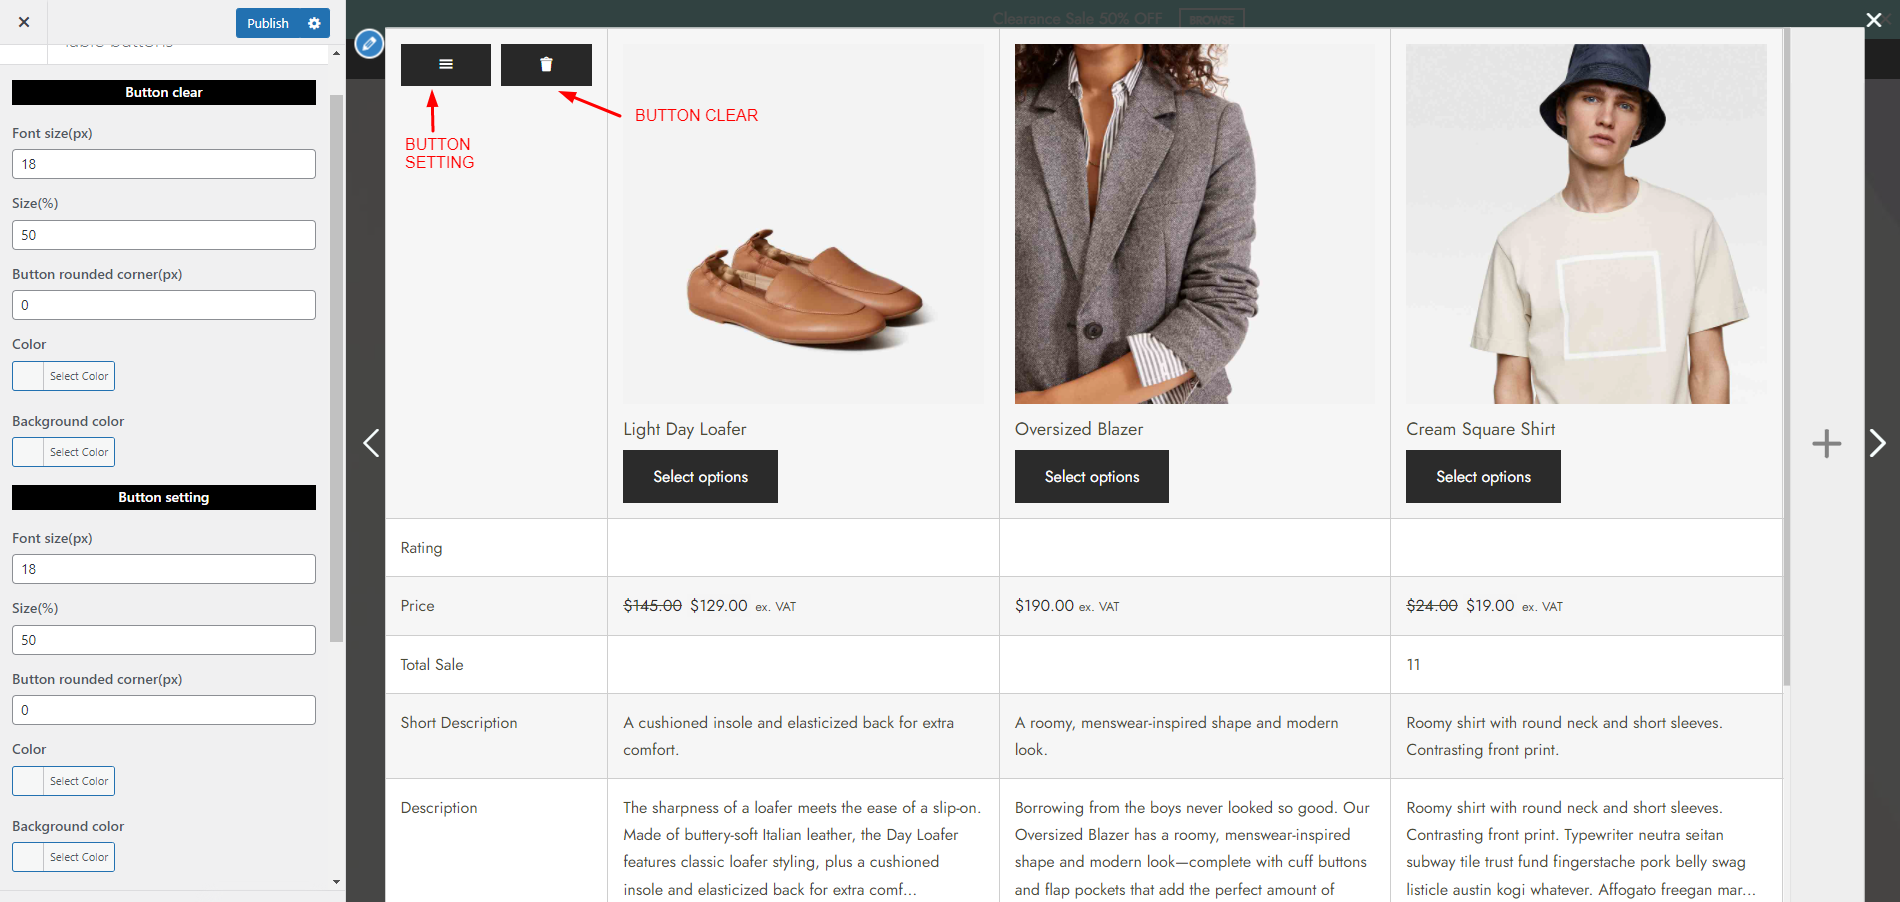
- Clear button
- Font size: Control the size of the button vertically
- Size: Control the size of the clear button horizontally
- Button rounded corner: Make the sharp corners more rounded
- Color: Set the color for the trashbin symbol
- Background color: Set the background color for the whole button
- Setting button
- Font size: Control the size of the button vertically
- Size: Control the size of the clear button horizontally
- Button rounded corner: Make the sharp corners more rounded
- Color: Set the color for the trashbin symbol
- Background color: Set the background color for the whole button
SEARCH FIELD
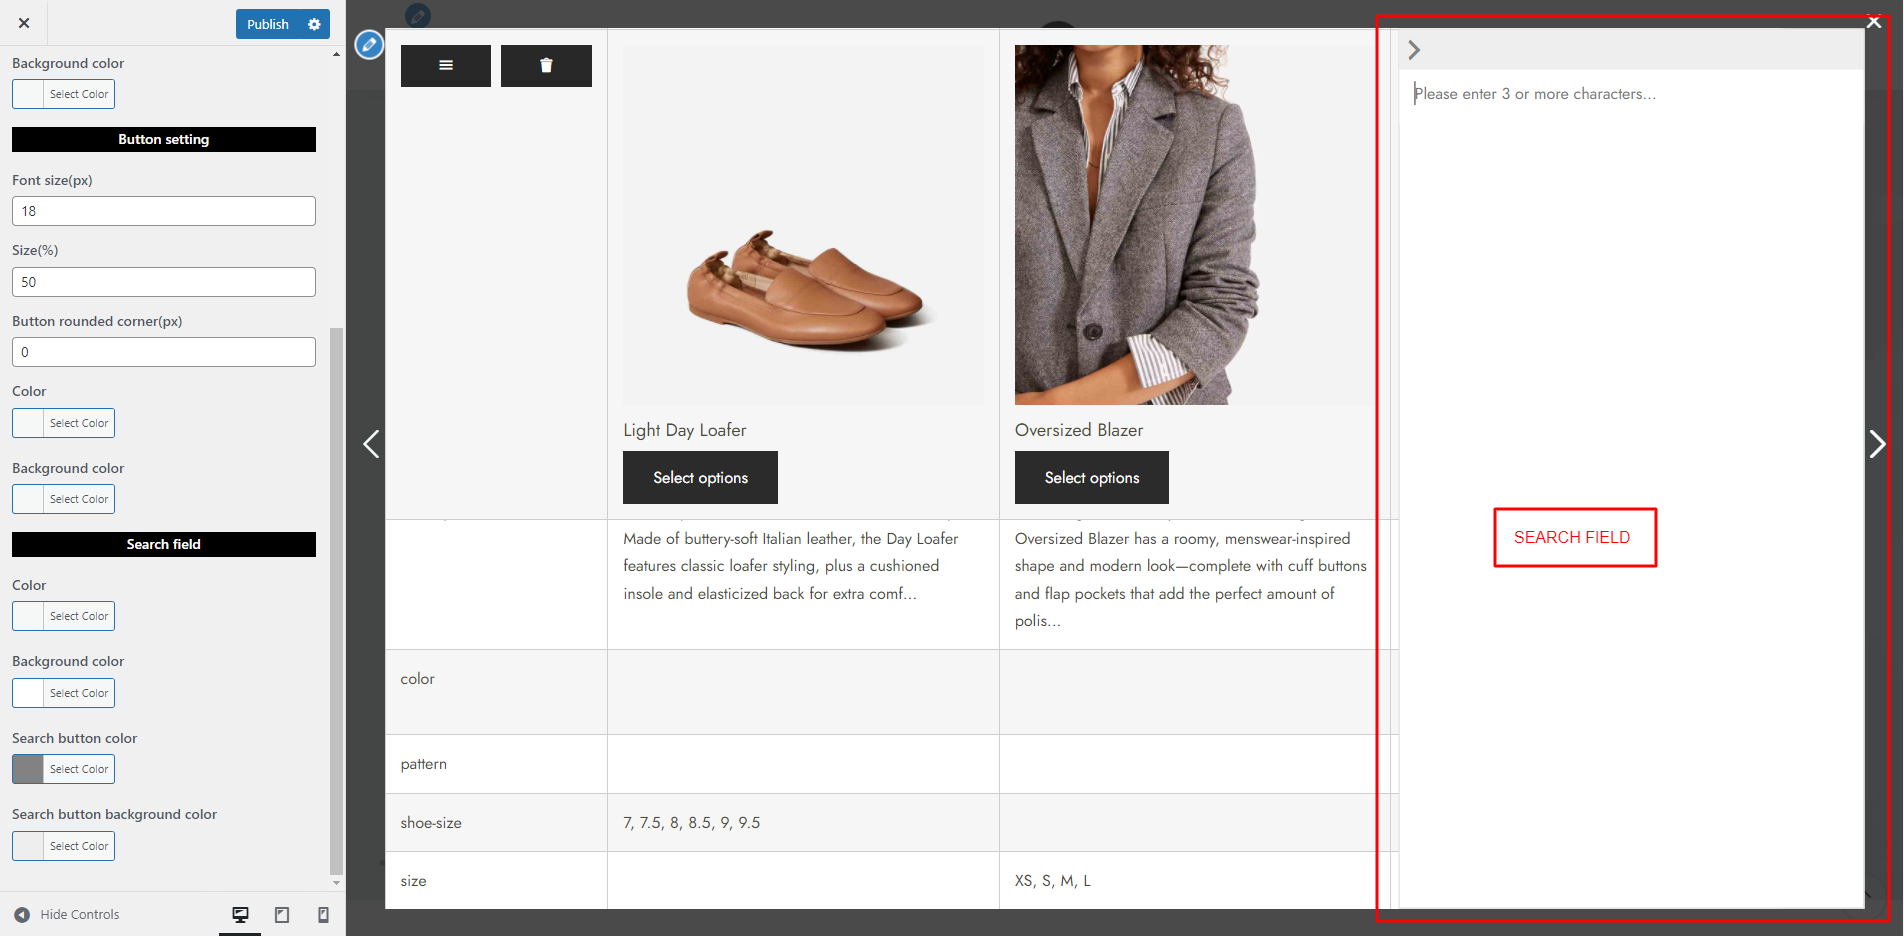
Click the plus symbol on the right of the comparison table and the search field appears
- Color: Set the color for the text when users add to search for products to add into the comparison table
- Background color: Set the background color for the whole search field below the arrow symbol
- Search button color: Set the color for the search button (the arrow symbol)
- Search button background color: Set the color for the whole background of the search button
ELEMENT STYLE
BUTTON ON SINGLE PRODUCT
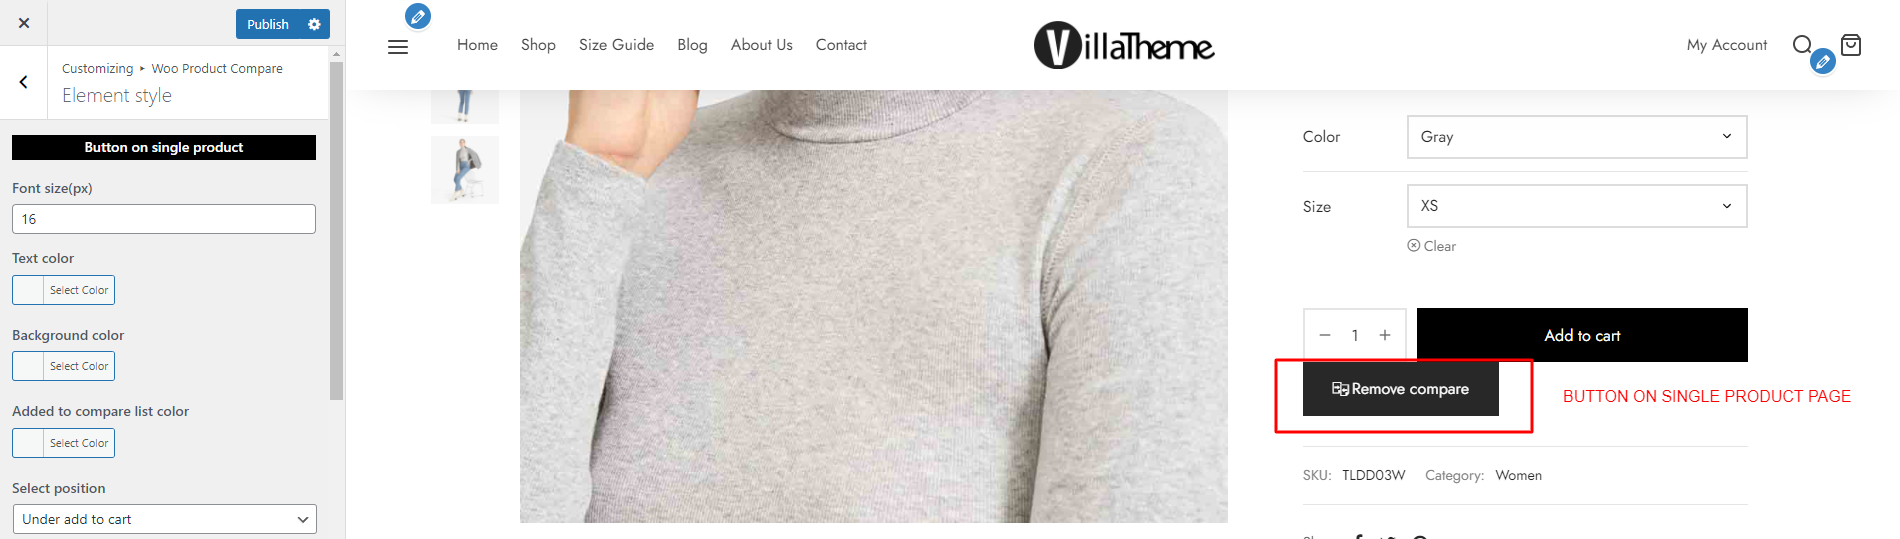
- Font size: Manage the size of the text inside the button
- Text color: Choose a color for the text
- Background color: Set the color for the background
- Added to compare list color: After the item is added to the compared list, the button color will be changed to the color admin sets in this option
- Select position: Select a position you want to put the button.
BUTTON ON LIST PRODUCT and COMPARE ICON

- Button on list product: The “Compare” button shows up on the Shop page
- Font size: Control the size of the button on the Shop page
- Color: Set the color for the button on the Shop page
- Added to compare list color: Set the color for the button when the product is added to the compared list
- Select position: Choose a position for the button on the Shop page
- Only display on hover image: Tick the checkbox to make the icon shows up only when the product image is hovered
- Compare icon: Choose a icon for the “Compare” button
FLOATING ICON
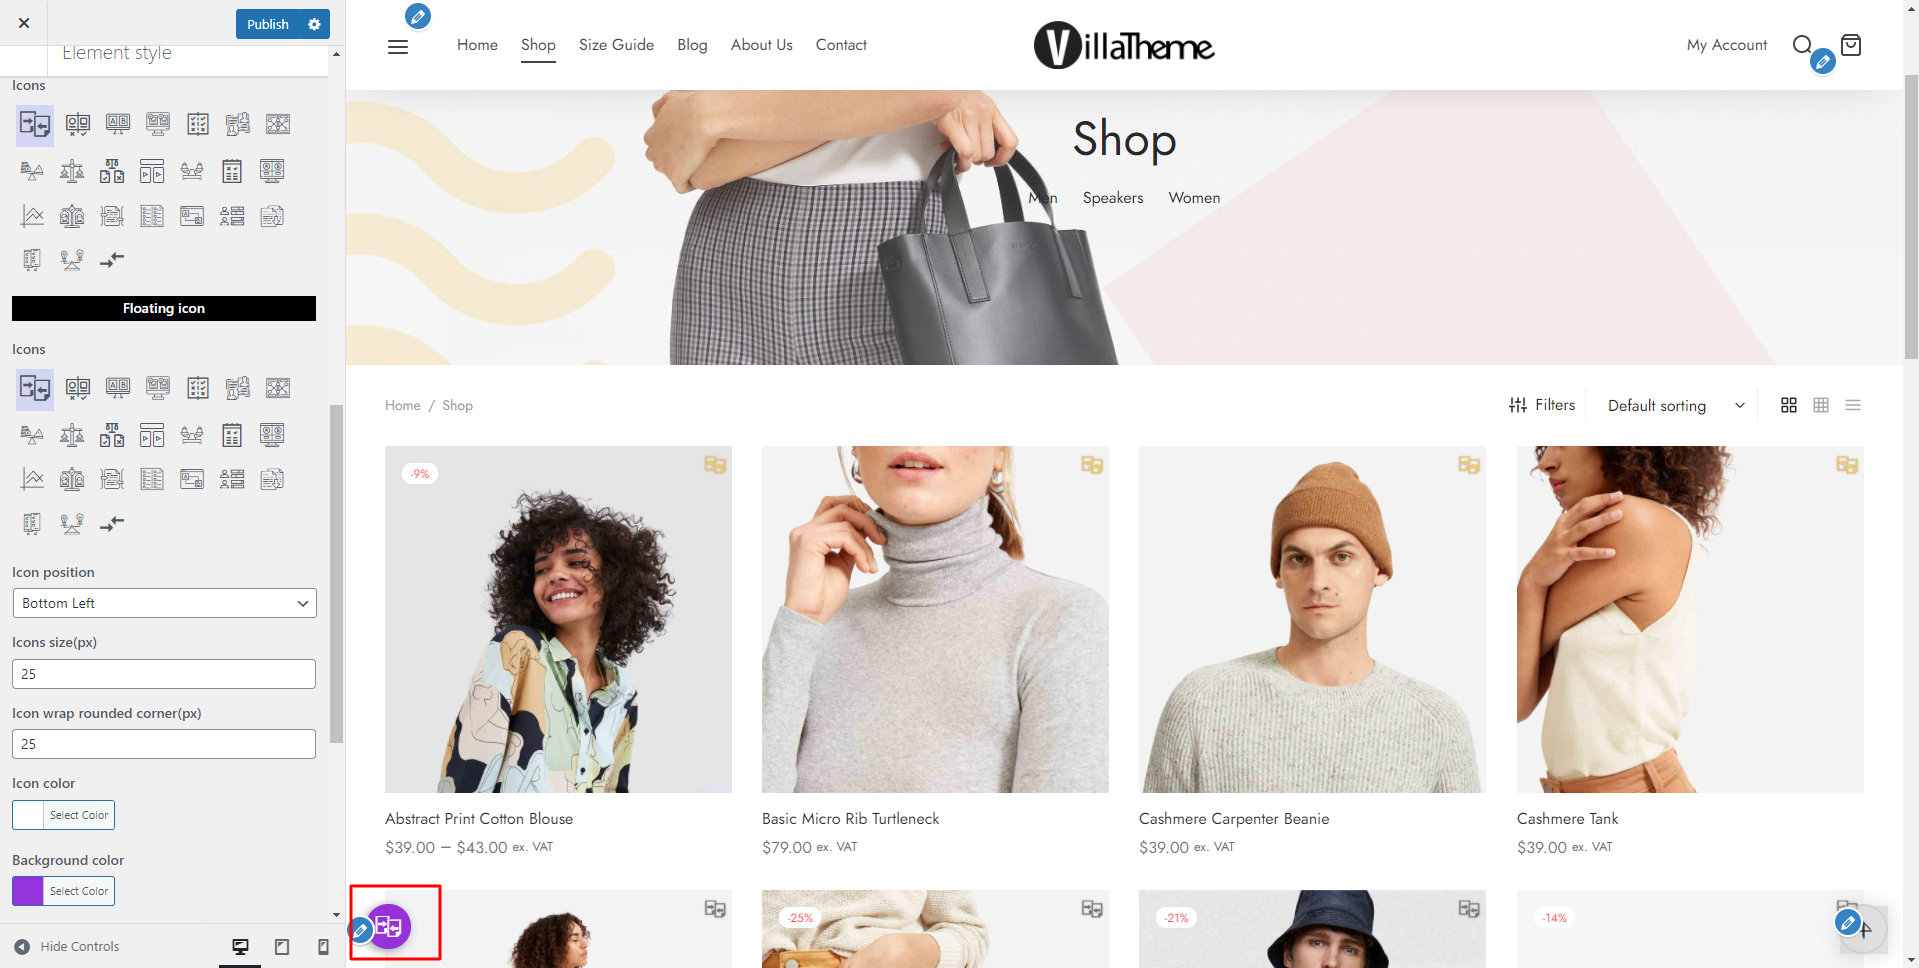
- Icons: Choose a sample for the floating icon
- Icon position: Manage the position you want to put the floating icon
- Icons size: Control the size of the floating icon
- Icon wrap rounded corner: Make the sharp corners of the icon more rouned
- Icon color: Set the color for the icon
- Background color: Set the background color for the icon
SIDEBAR
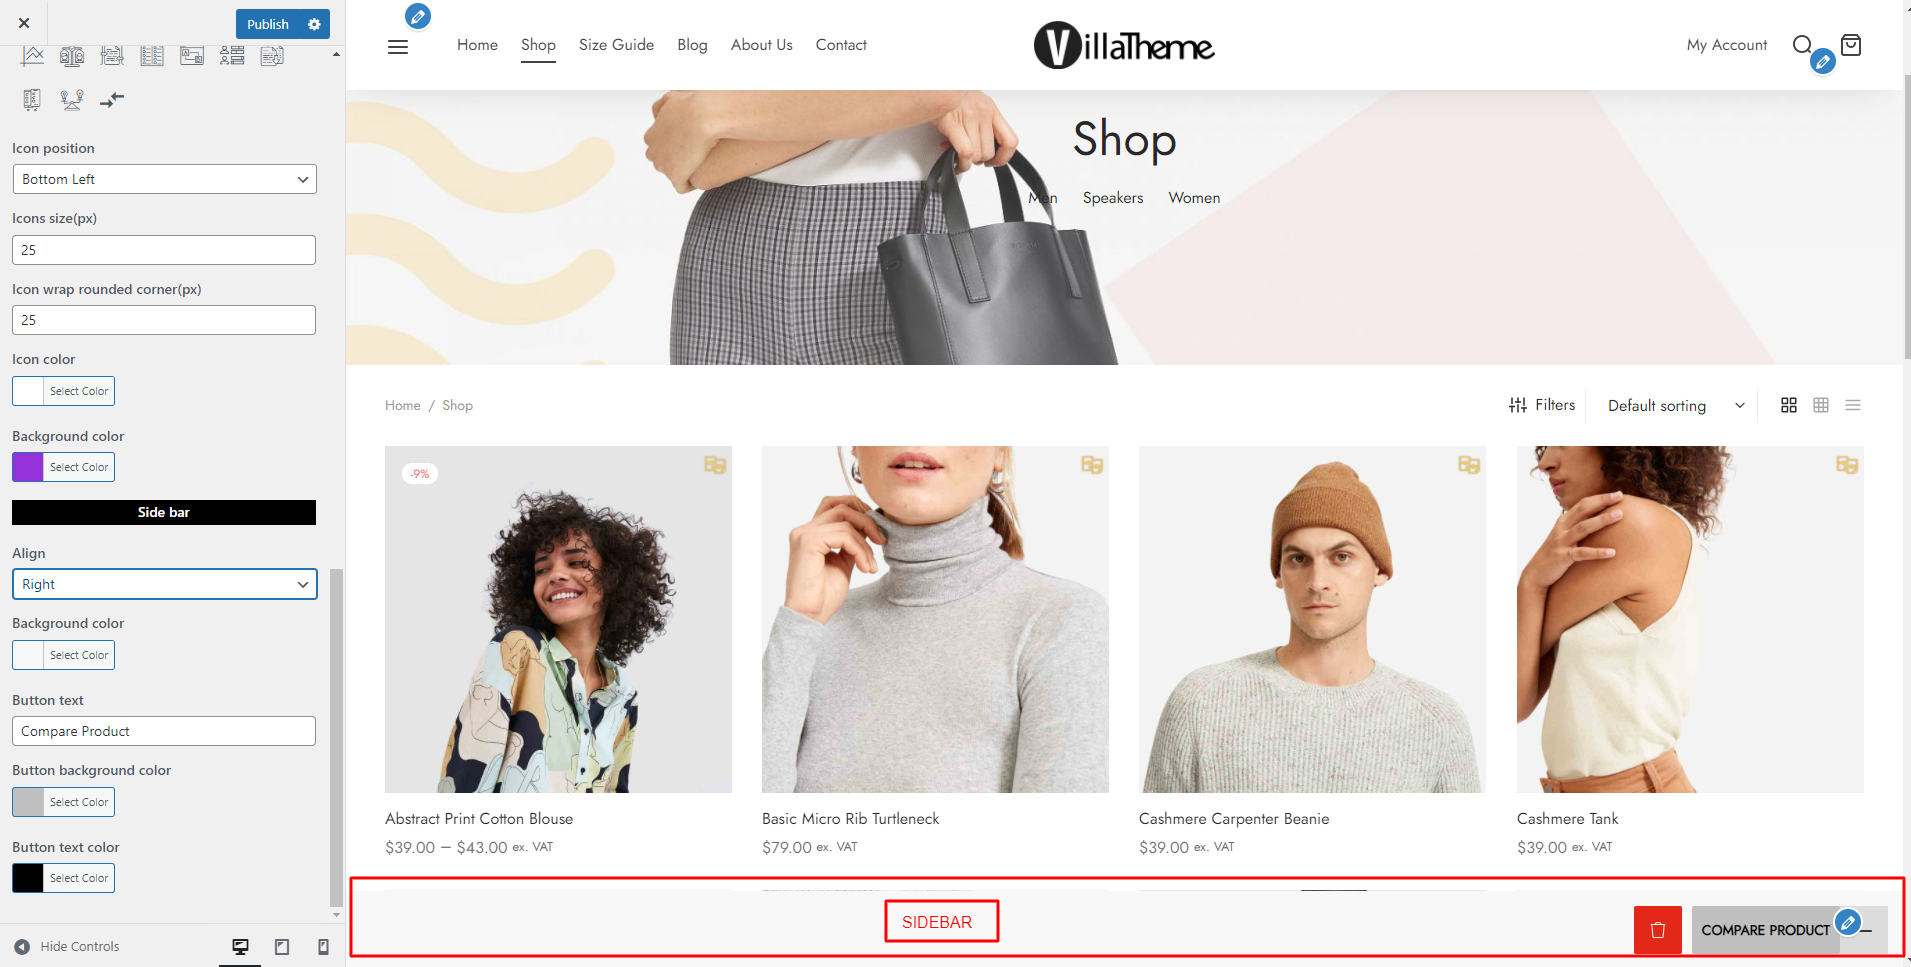
- Align: Set an alignment for the sidebar icon (the plus symbol)
- Background color: Set the background color for the sidebar
- Button text: Set the text for the button
- Button background color: Set the color for the button background
- Button text color: Set the text color for the button
WIDGET COMPARE
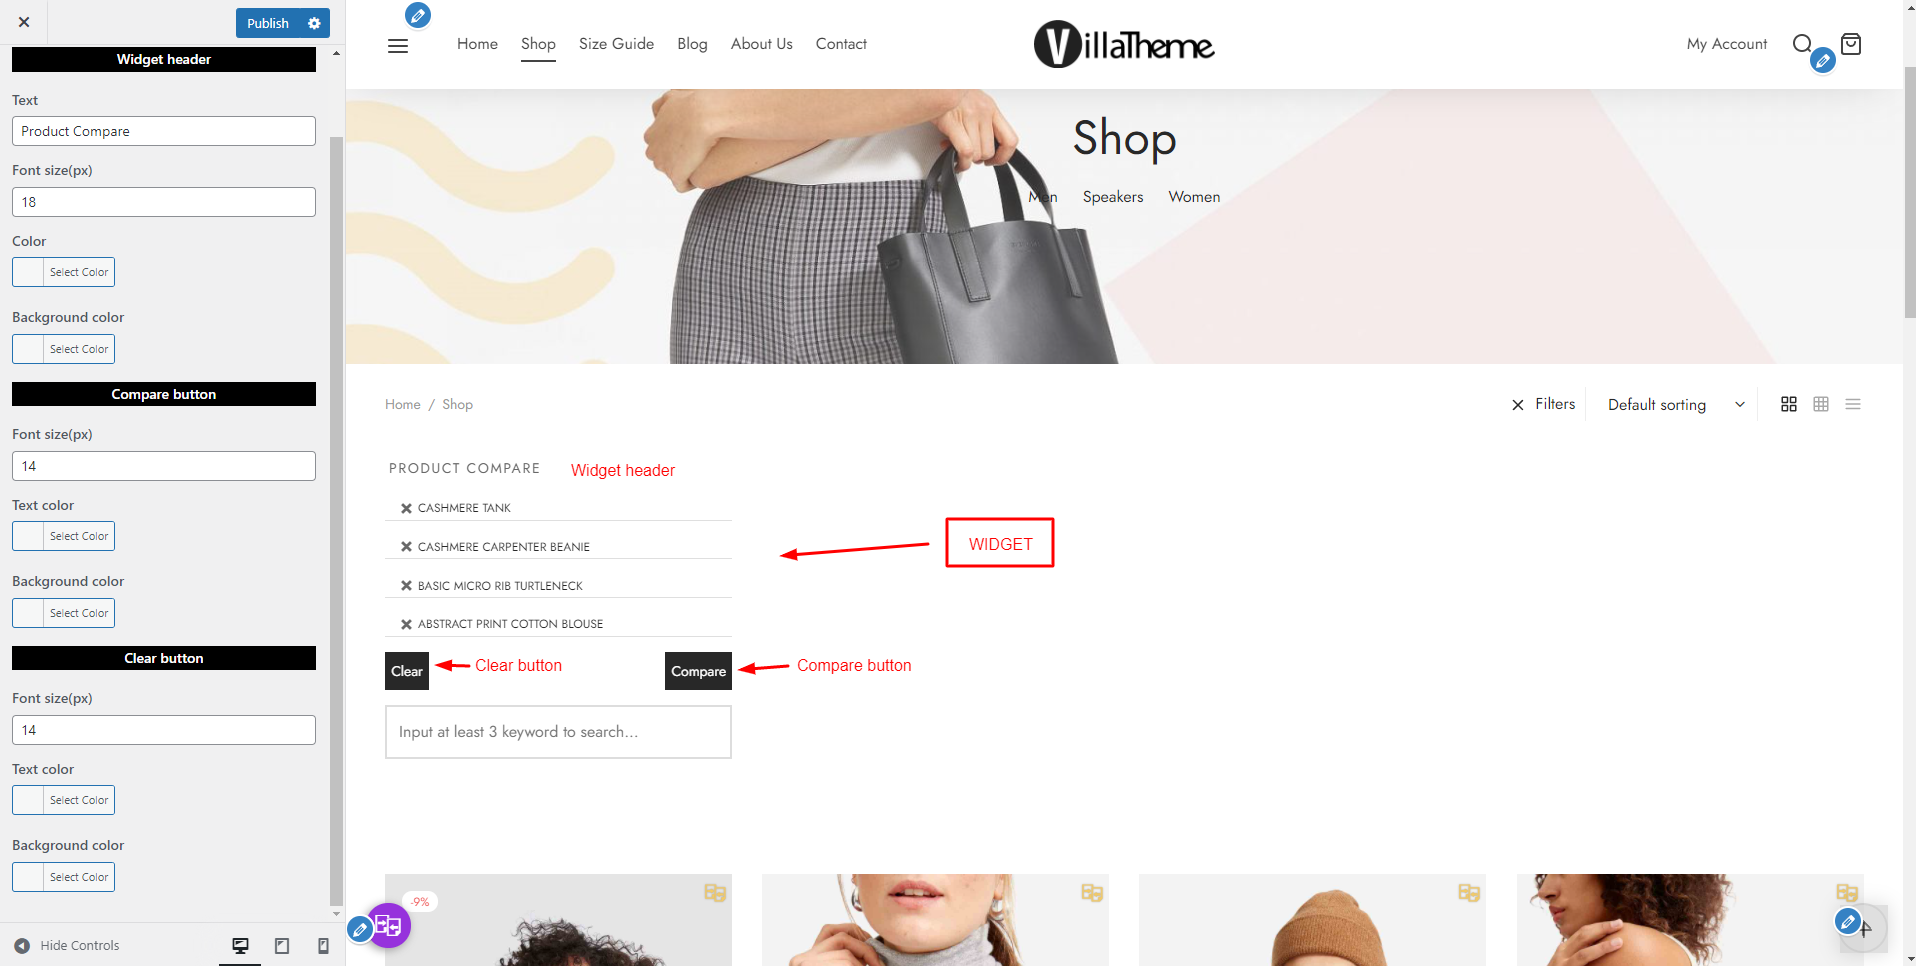
- Widget header
- Text: Change the text shown on the header of the widget
- Font size: Set the font size for the text above
- Color: Manage the color for the text of the widget header
- Background color: Choose a color for the background of the widget header
- Compare button
- Font size: Manage the size for the “Compare” button
- Text color: Set the color for the text inside the button
- Background color: Set the color for the button background
- Clear button
- Font size: Manage the size for the “Clear” button
- Text color: Set the color for the text inside the button
- Background color: Set the color for the button background