To create a comparison table, select products you want to compare
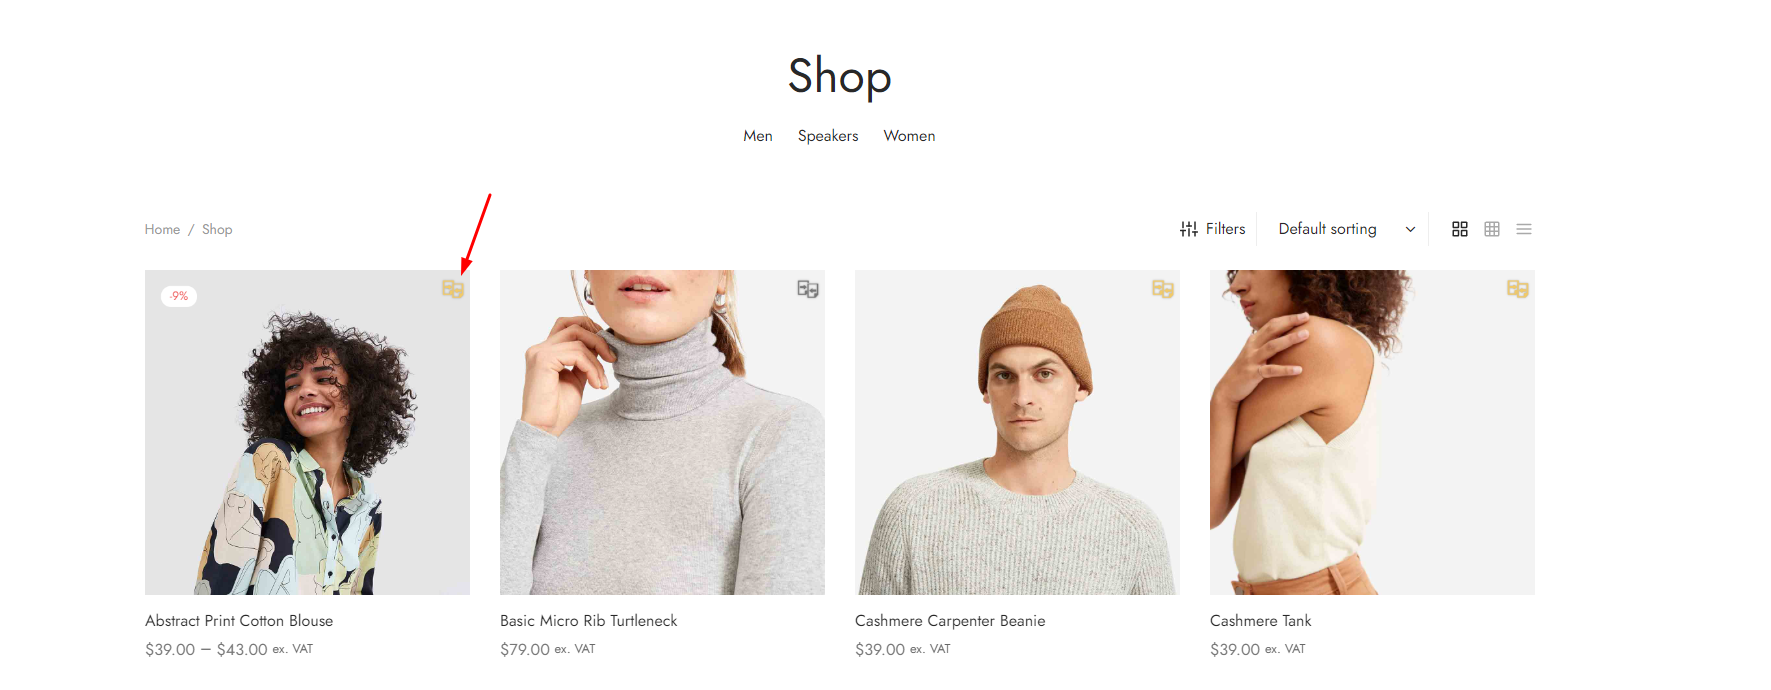
- The compare button on the product image
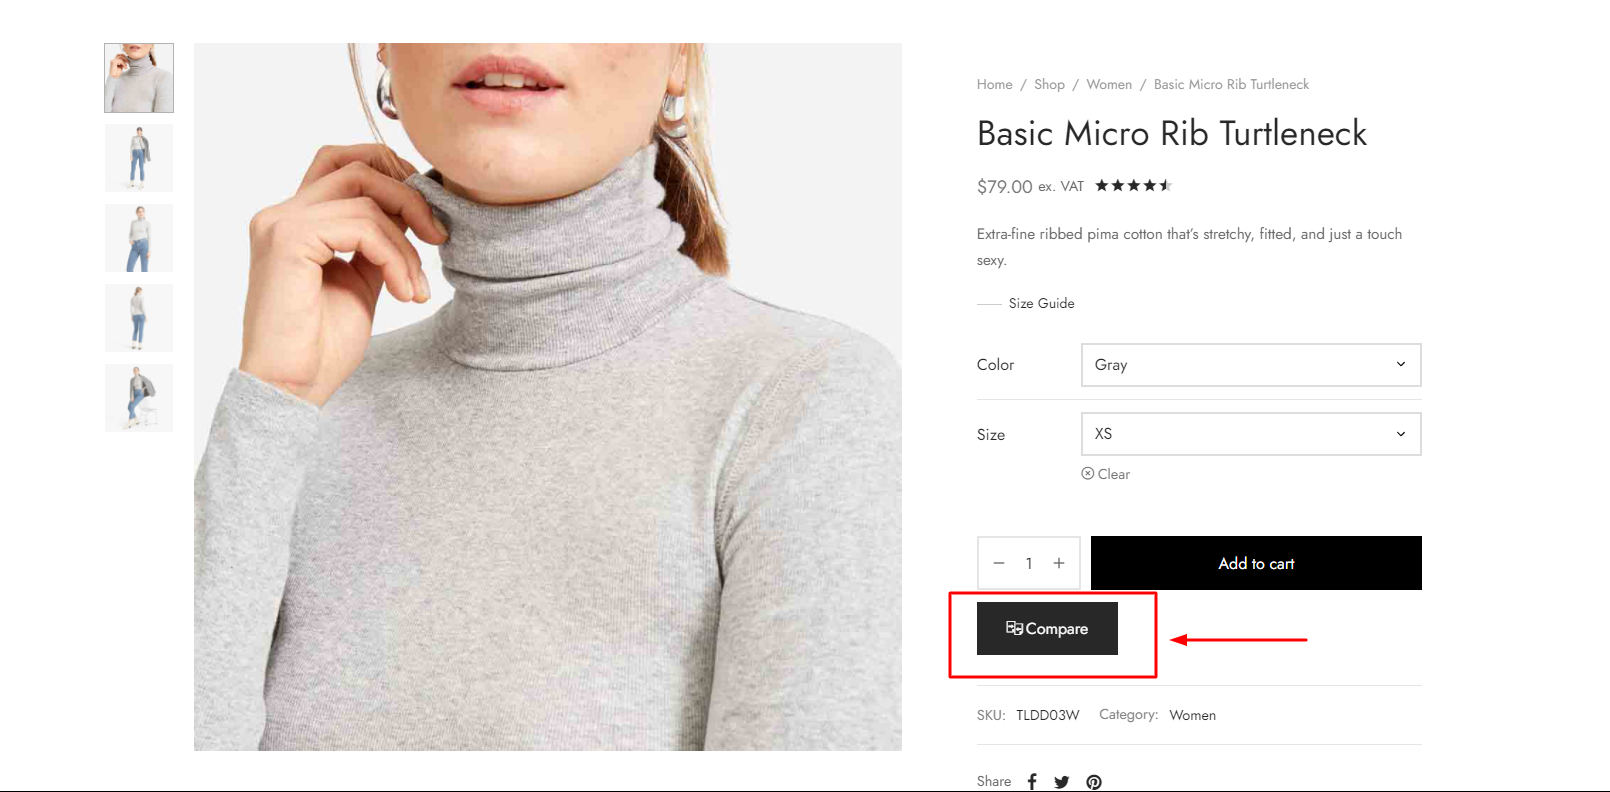
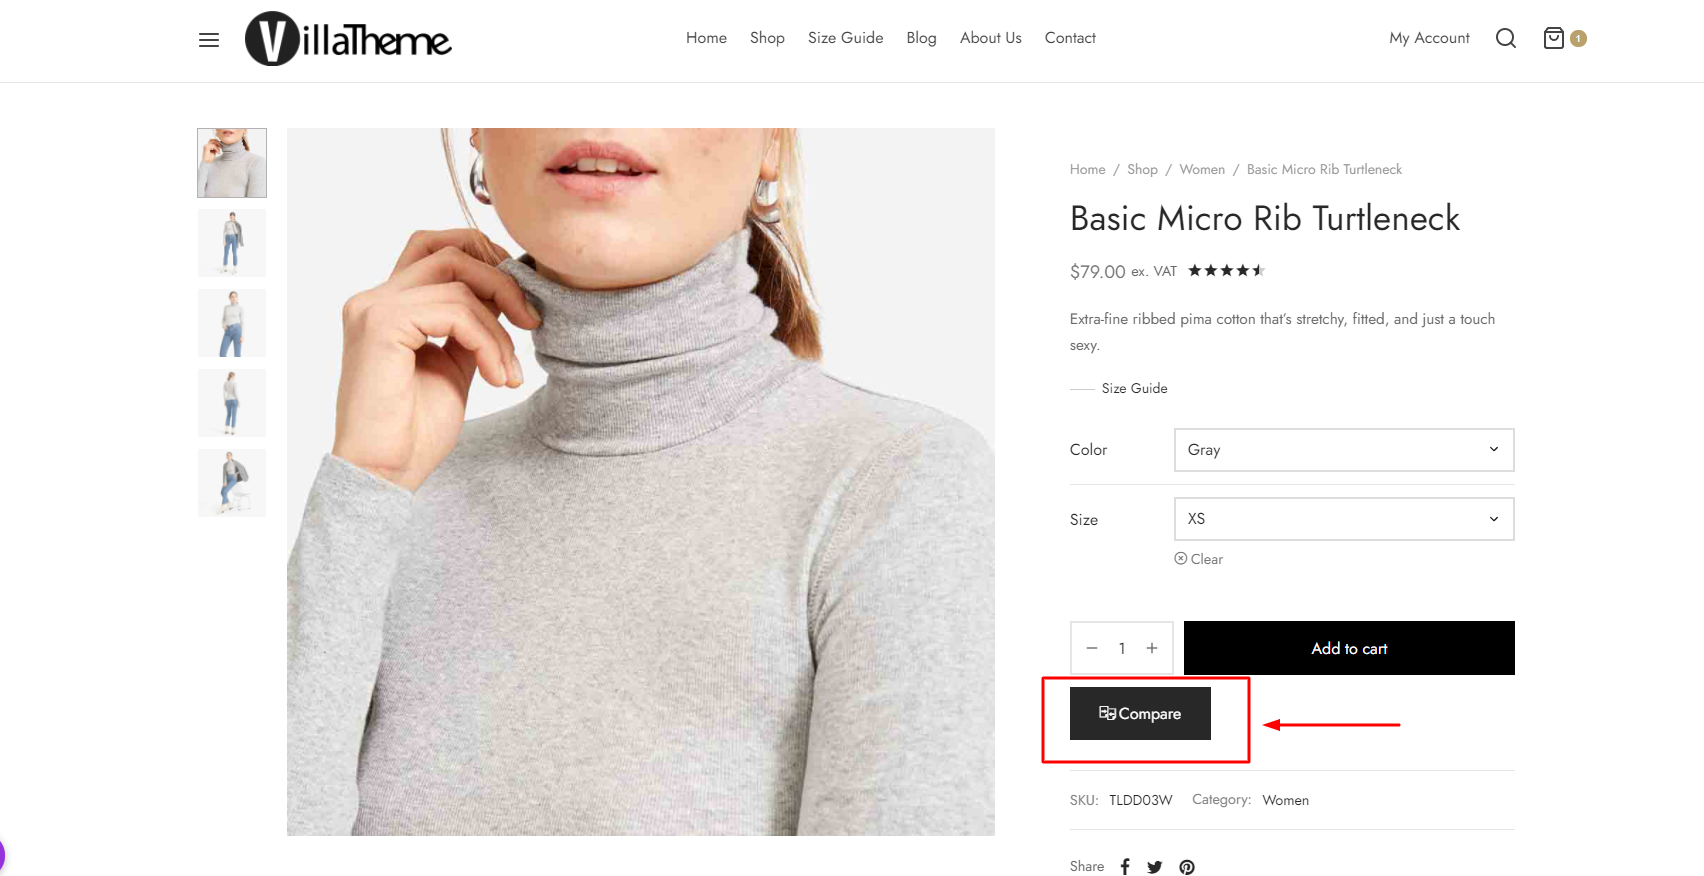
- The compare button on the single product page
After adding products to the compared list, the comparison table is created. You can go to the comparison table with:
- The “Open compare” button on the product image leads you to the comparison page: Click the icon after add the item to the list to go the the comparison page
- The popup icon: Comparison table shows in popup
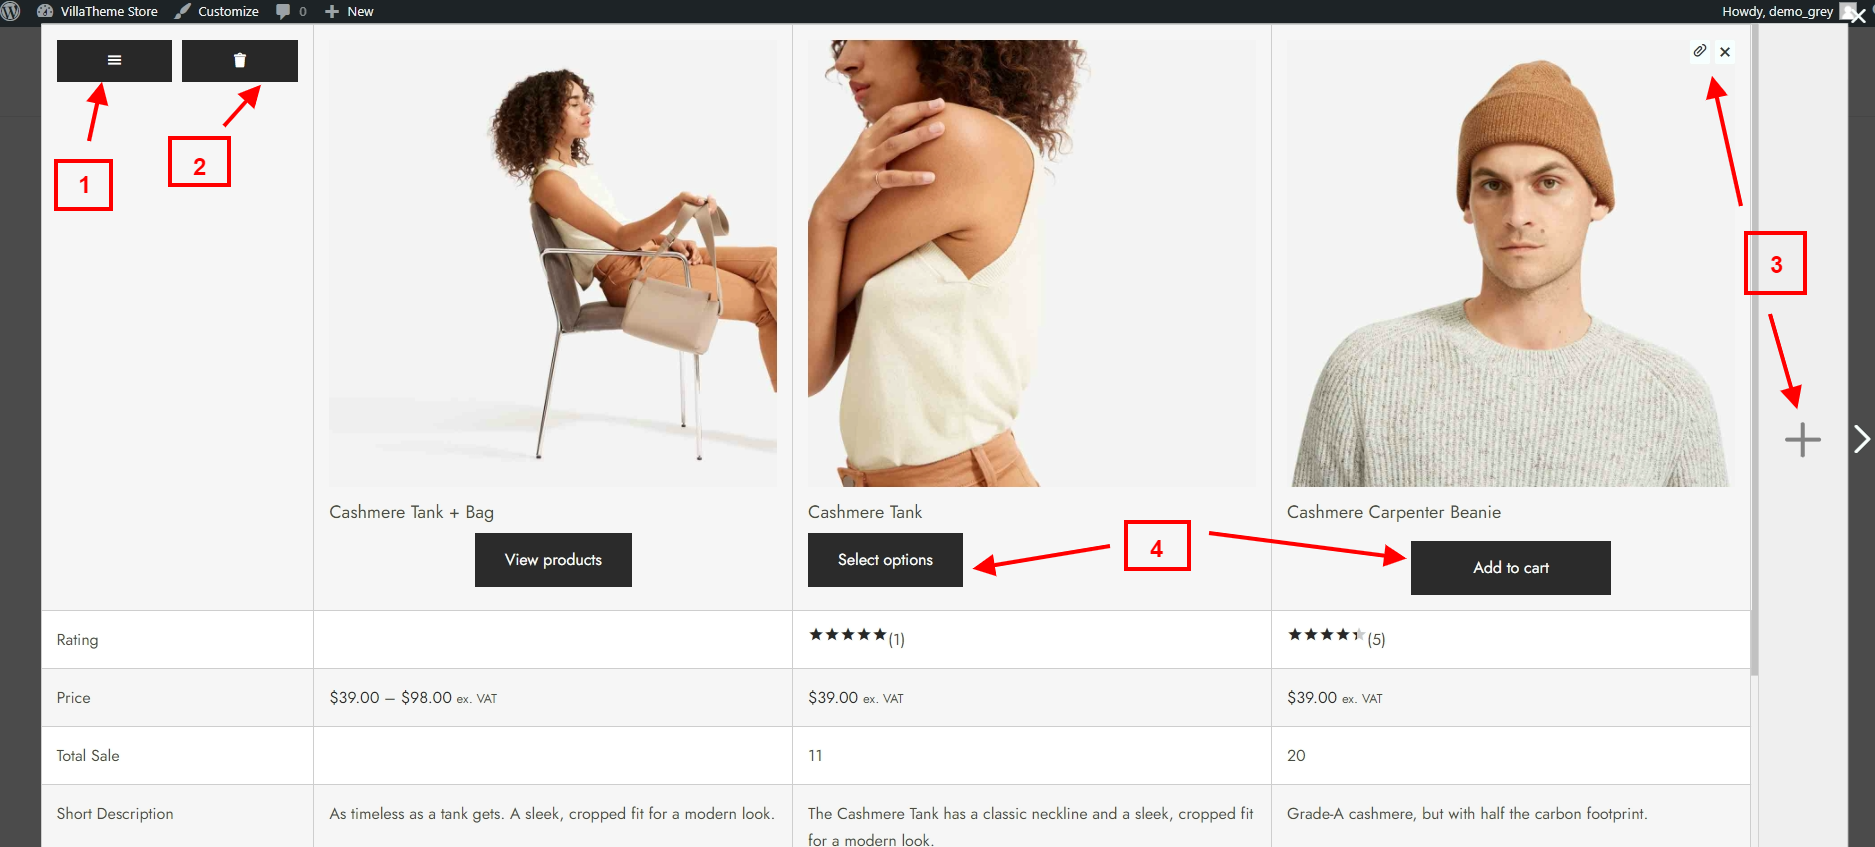
- Use the sidebar to go to the comparison page: The sidebar button (the plus symbol) is normally located in the corner of the page. With this, you can remove items, and go to the comparison page with the “COMPARE PRODUCT” button
- The “Open compare” button on the single product page leads you to the comparison page: When users click “Compare” and add the item to the list successfully, now the second click will redirect them to the page where the comparison table is located.

That’s pretty much it. Now start to compare product to find out which one match your expectation.
- Use the Settings button (3-line symbol): to shows and hide the aspects you use to compare the items, as well as freeze the important aspects
- Use the Clear button (trash bin symbol): to remove all items in the compared list
- Pin the important items in the list, add items by the search field, remove the unnecessary items.
- Add the items to cart with “Add to cart” button, with variable products, you can choose the variants before adding to cart