Import Shopify Product data via CSV file
Step 1: Select the file
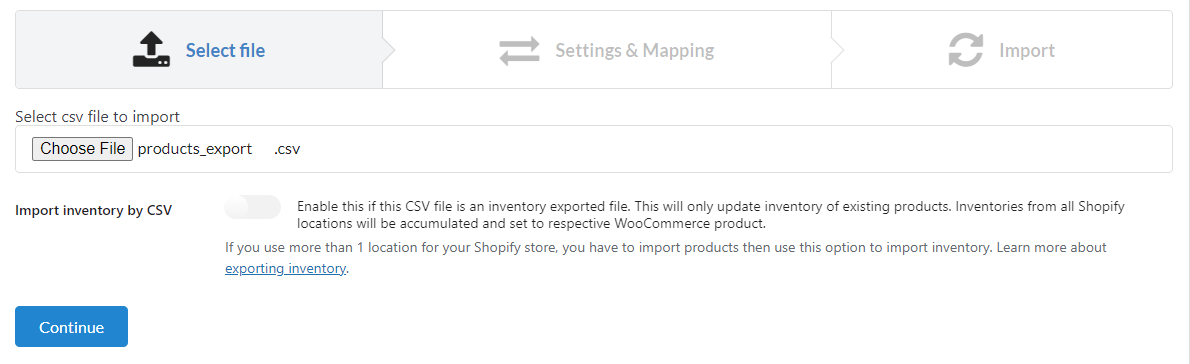
The plugin allows you to import products using CSV files. To use this option, you need a valid Shopify product CSV file. You can export this file from your Shopify store.
Then in your WooCommerce store, go to Dashboard/ Shopify to Woo/ Import CSV, and update the CSV product data file.
Important note: Import inventory by CSV – Enable this if this CSV file is an inventory exported file. This will only update the inventory of existing products. Inventories from all Shopify locations will be accumulated and set to respective WooCommerce products.
If you use more than 1 location for your Shopify store, you have to import products and then use this option to import inventory. Learn more about exporting inventory
Follow the below guide to import Shopify inventory via CSV if your Shopify store has more than 1 location.
Click “Continue”
Step 2: Settings and Mapping
Then in the next step, mapping fields from Shopify to WooCommerce. And configure settings with options like import directly.
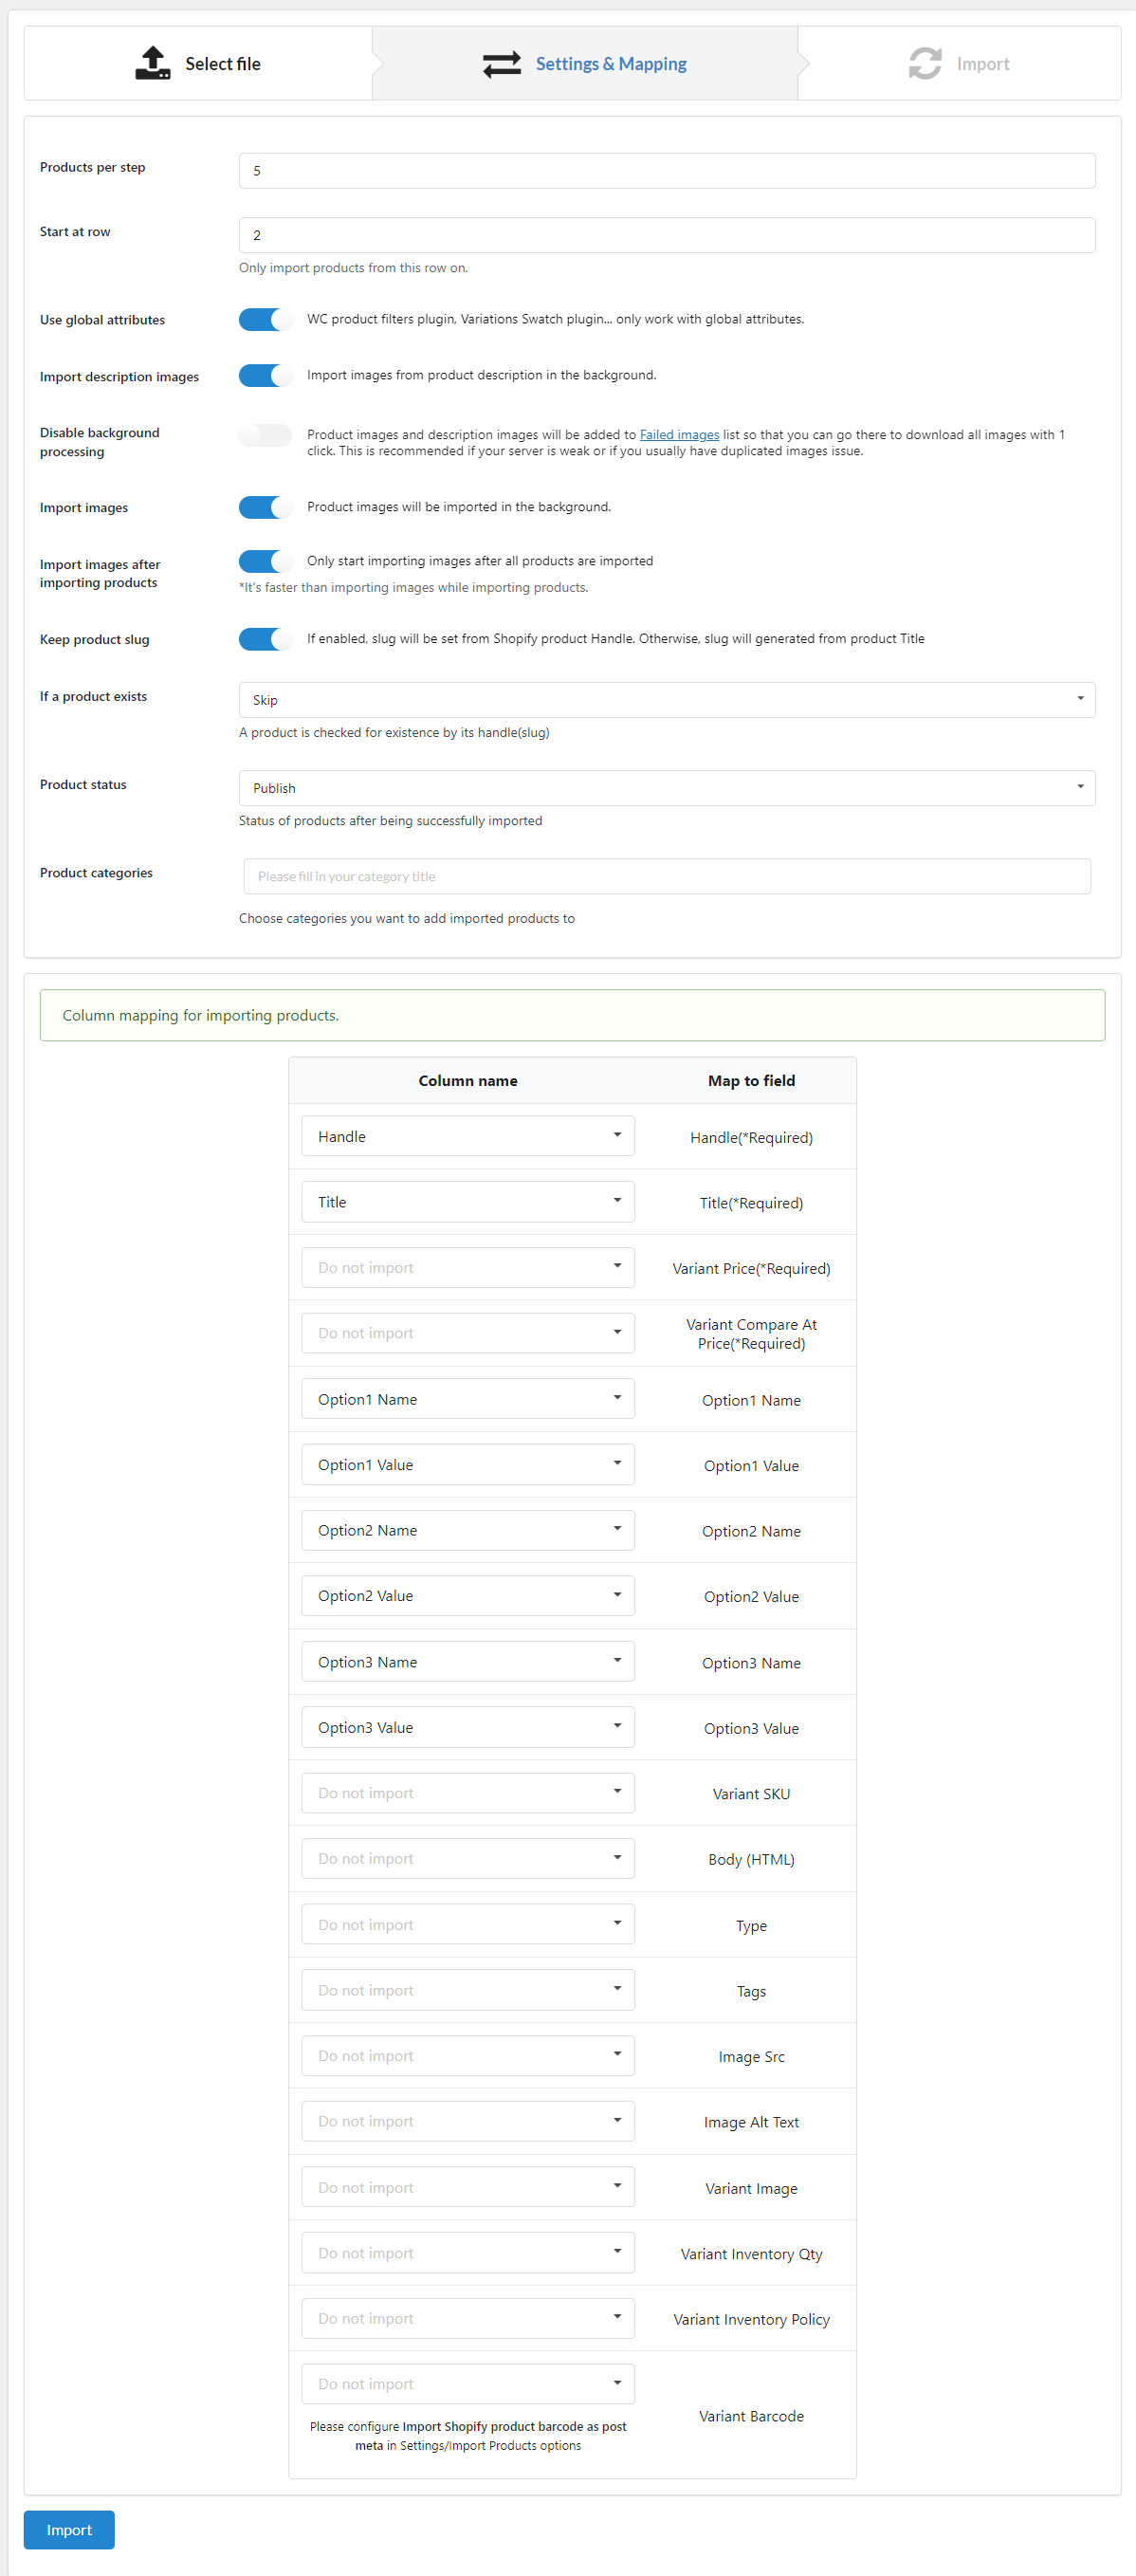
- Product per step: Configure the number of products per import request. It’s advisable to set a lower number of products per import request, especially when dealing with large amounts of product data,
- Start at row: Start import at a certain row.
- Use global attributes: Enable if you want to transfer the variations of the imported variable products to global attributes if they are custom attributes
- Import description images:
- Disable background processing: Images can be imported in the background, but it may take time. If disable the background processing, images will be saved in the Failed images section, then go there to import images. This is recommended when dealing with a large amount of imported product data.
- Import images: Enable or disable importing product images in the product data
- Import images after importing products: Enable this option if you want to start importing images after all products are completely imported.
- Keep product slug: If enabled, the slug will be set from the Shopify product Handle. Otherwise, a slug will generated from the product Title.
- If a product exists: if a product already exists, it will be skipped, imported normally, or updated. Updating an existing product will take more time compared to the other two cases.
- Product Status: Choose the status of products after being successfully imported.
- Product categories: Choose categories you want to add imported products to
- Column mapping for importing products.
Step 3: Import
Then click Import and wait for the products to be imported.

Import Shopify Inventory via CSV file
Step 1: Select the file

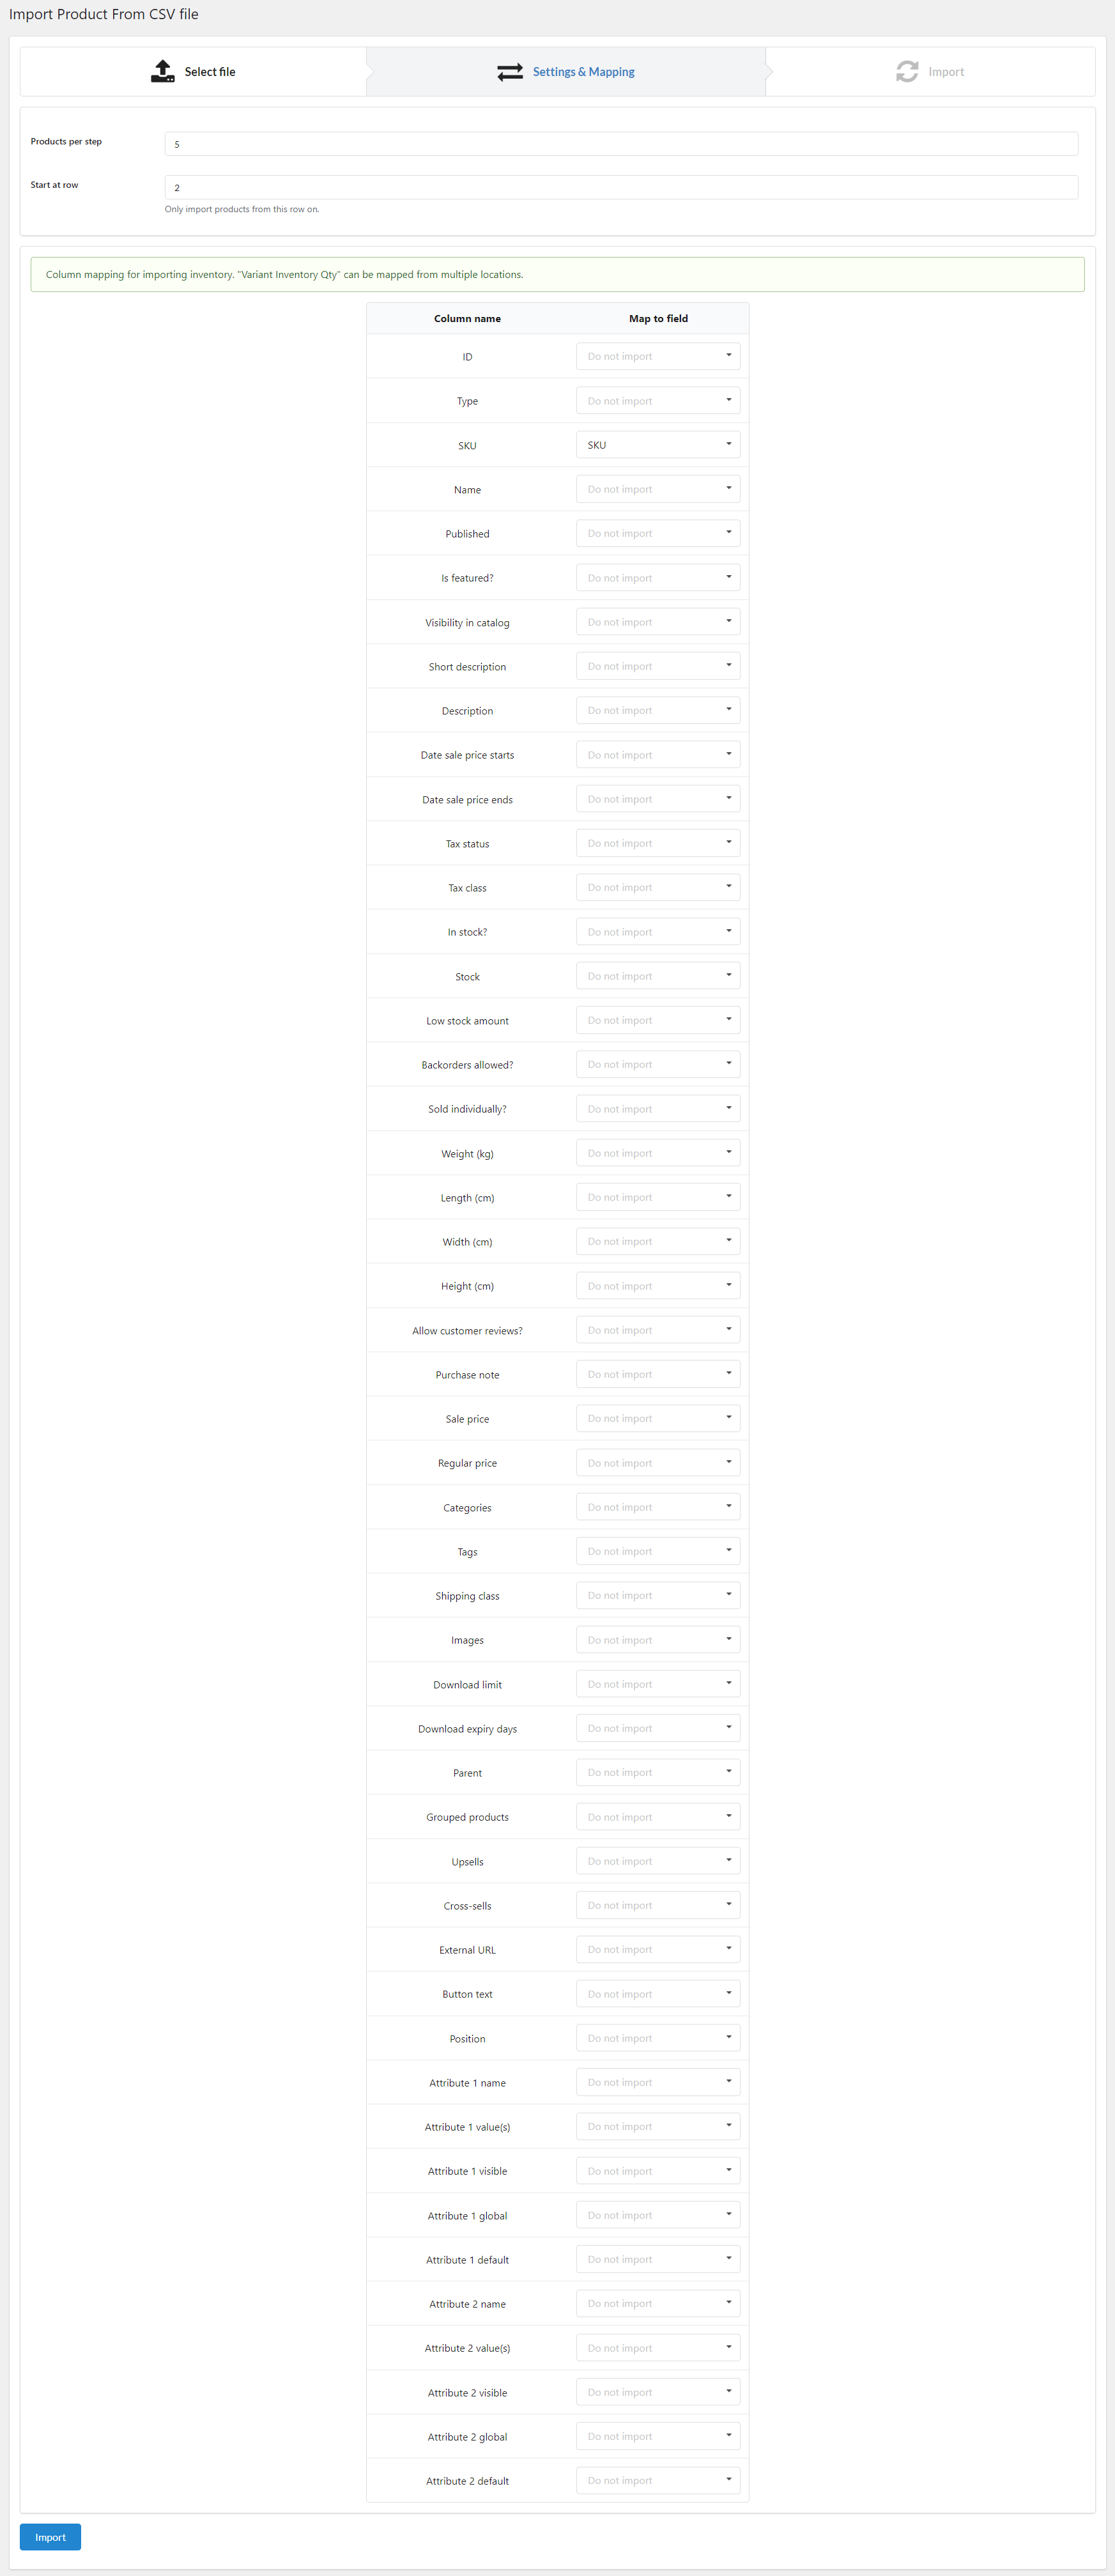
Select the Shopify inventory file to import. Enable the “Import inventory by CSV” option.
Step 2: Settings and Mapping
Adjust products imported per each step, select to import from the specific row in the file, and configure the mapping options
Step 3: Import
Then click Import and wait for the products to be imported.