- Start
- FILE INCLUDES
- Instruction
- Installation
- How to Use
- How does it work
- COMPATIBILITY
- Override templates
- Extra Information
Copyright Villatheme 2015-2026
Created: 04/2017
Latest updated: 05/2026 – Updated version: 2.3.8
By: VillaTheme
Thank you for purchasing our plugin. If you have any questions that are beyond the scope of this documentation, please feel free to request support at our Support Forum. Thanks so much!
System Requires:
Download Plugin:
Go to Plugin/ Add New/ Upload Plugin/ Choose file/ select the plugin zip file/ click “Install Now”/ click “Active plugin”.
Done! Let’s start using the plugin.

Video install and set up WooCommerce Product Builder
After installing and activating the plugin, create your first product builder page.
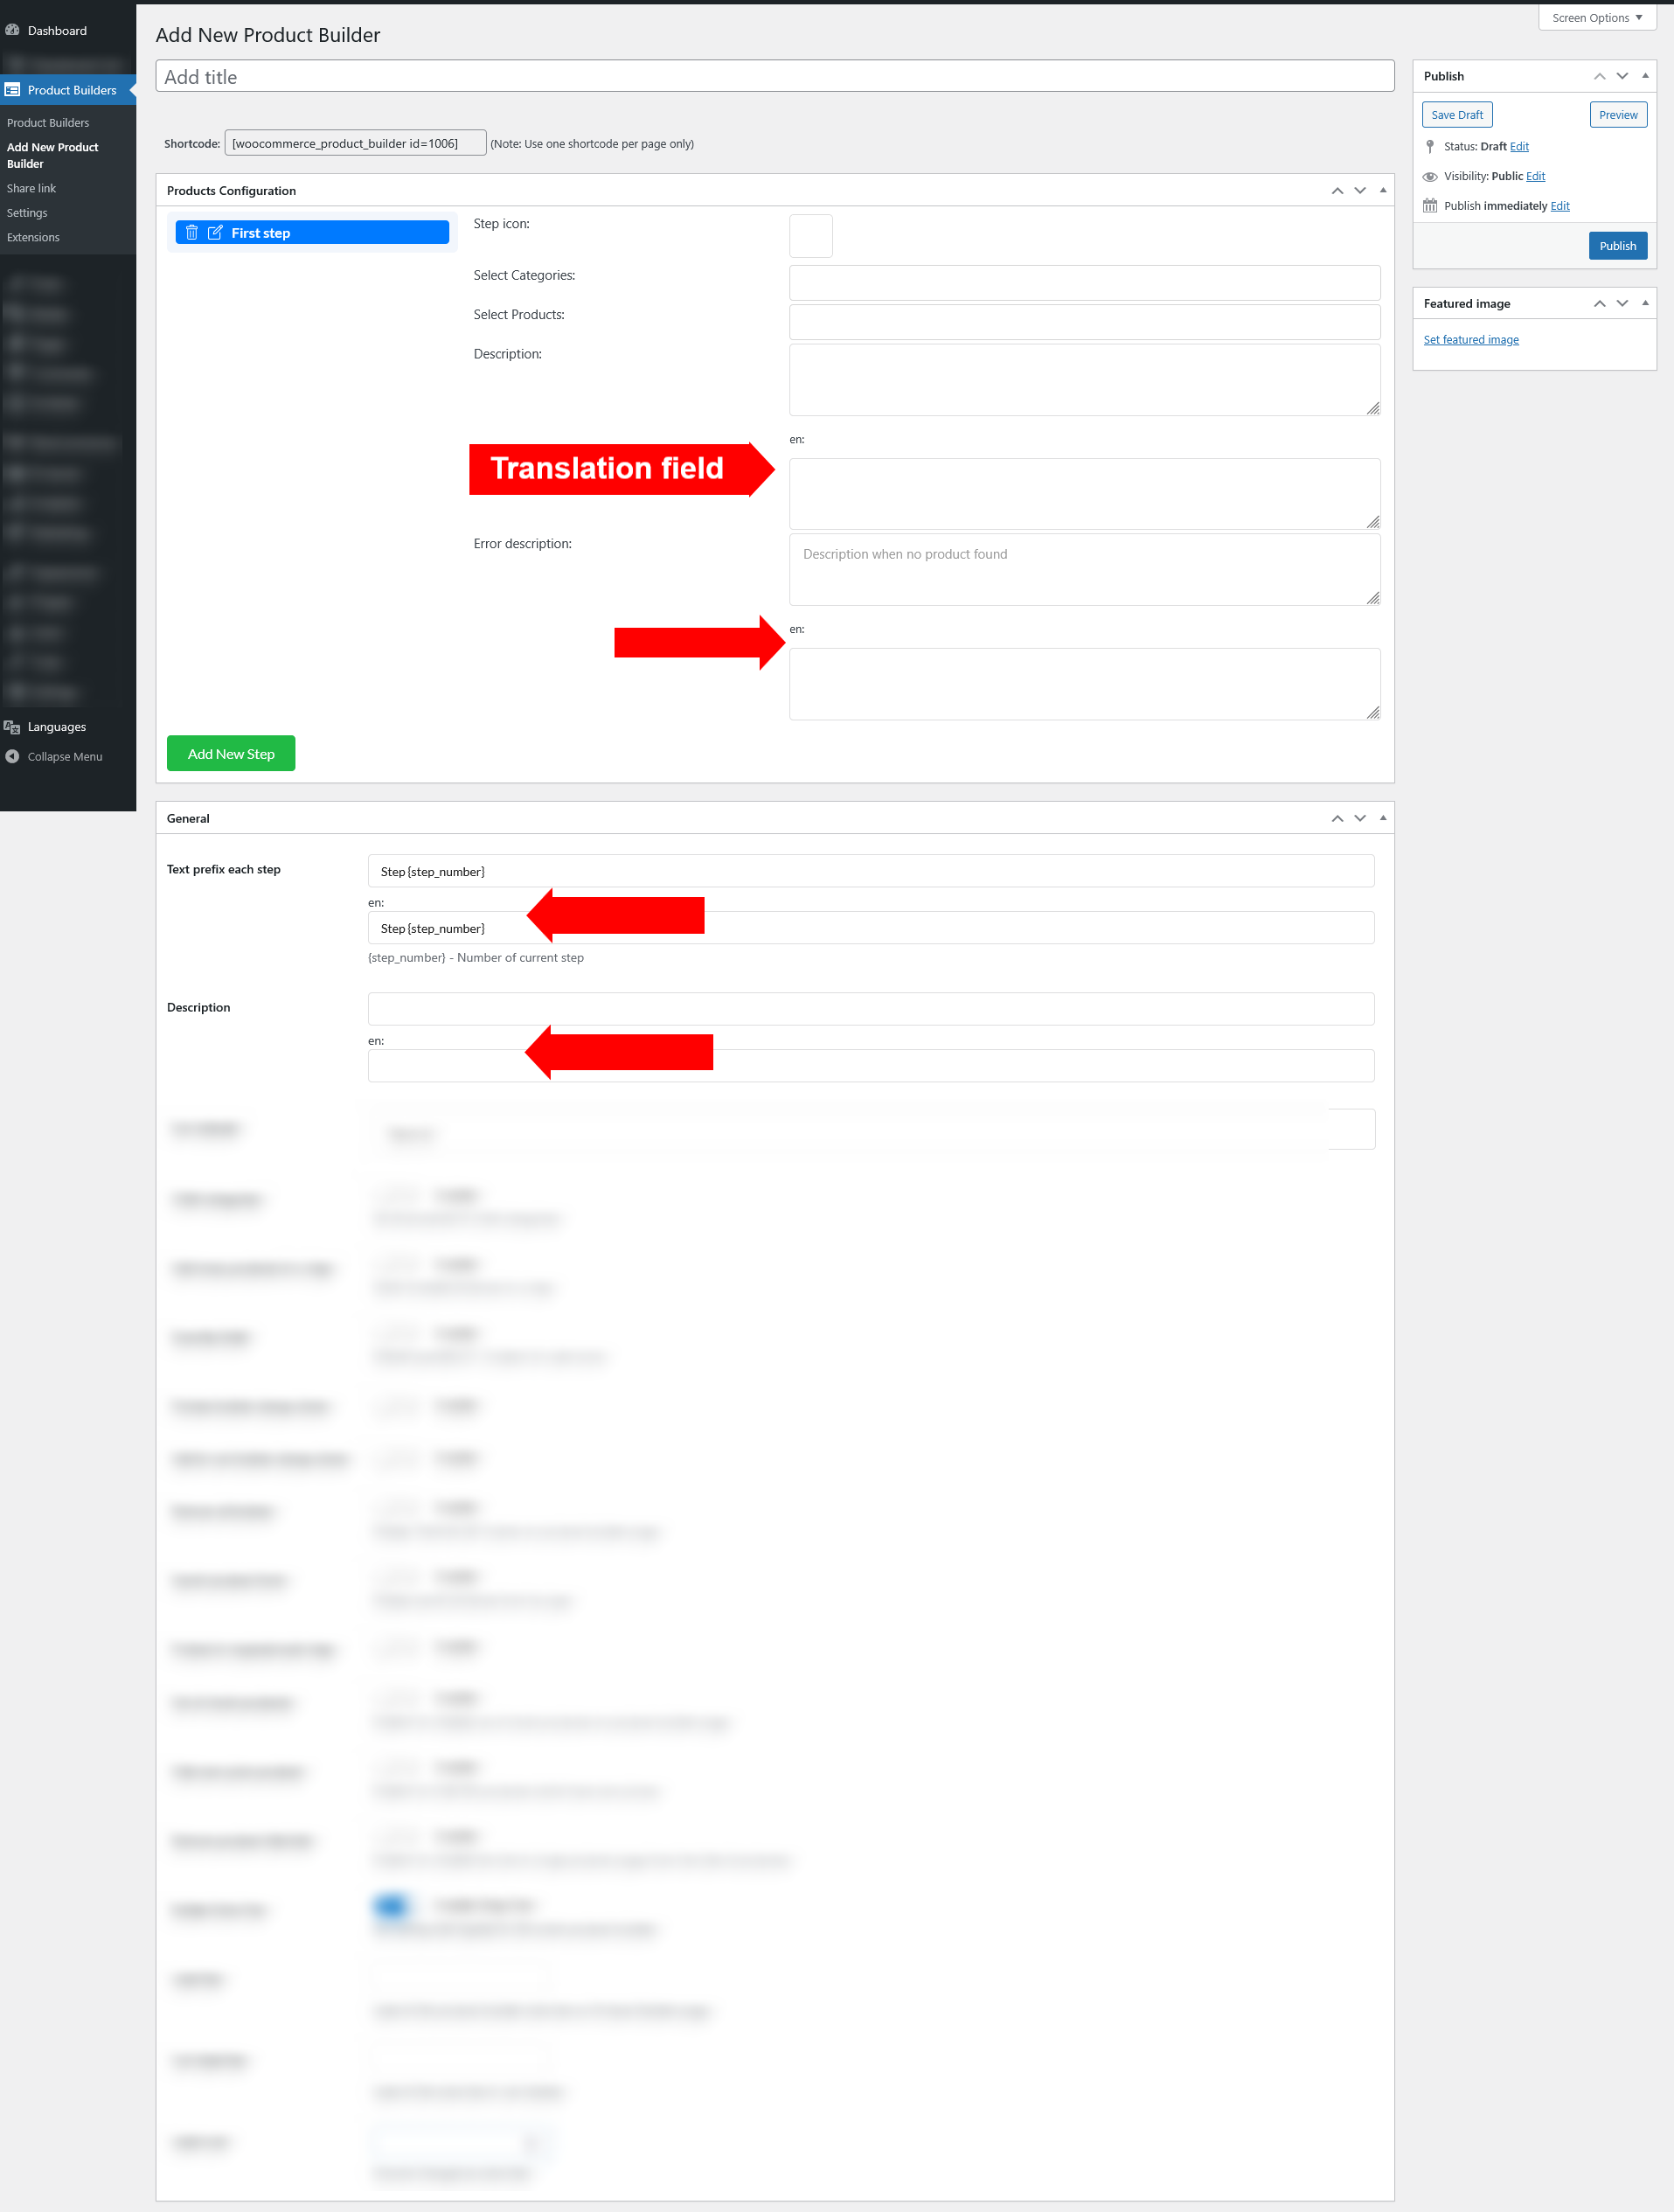
This section displays the steps you’ve created along with their individual settings.
Learn all the options for one step within step settings in this documentation

Learn about this section and all of its options in this documentation
See this guide and configure the plugin as per your needs.
Paginate the products in a steps with “Product per page” option
As for the Depend feature – See this guide for details and specific steps

Learn how to add and use attribute filters in this guide.
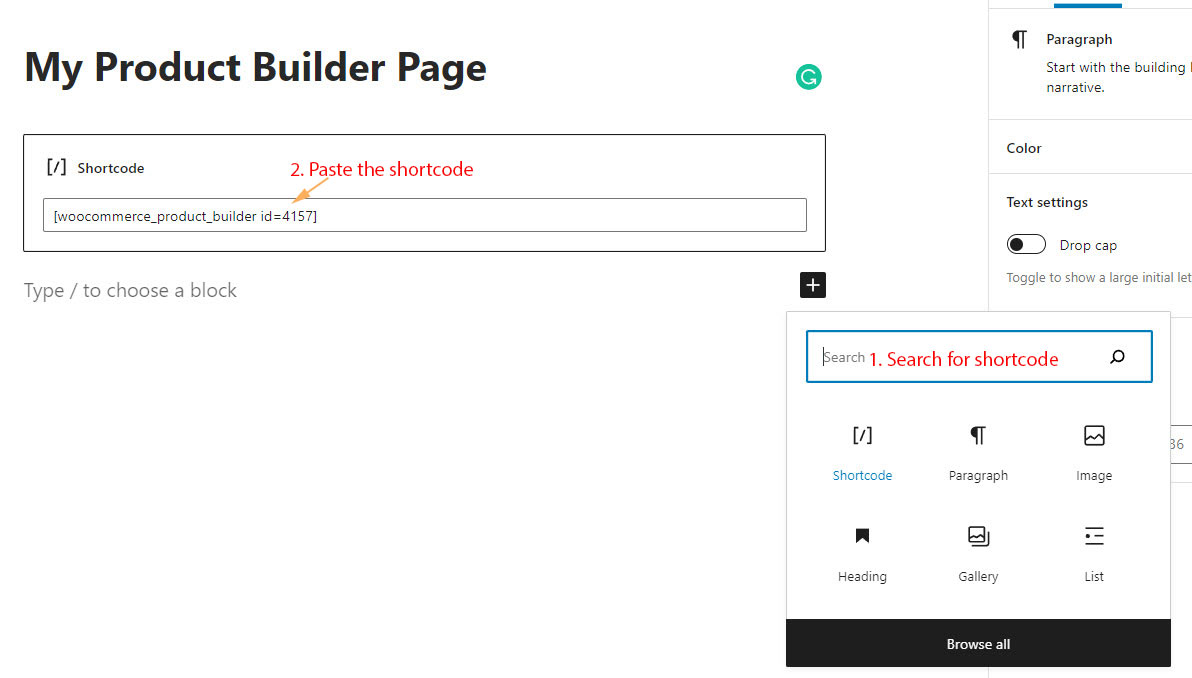
After you’re happy with the product builder page, use the generated shortcode to show it on front end.

Guide steps:
1. Copy the shortcode
2. Go to Pages > Add new product builder page.
3. Name for the page, add shortcode there and save.


You have two options to edit the URL:
1. Edit the Slug: If you want to change the last part of the URL (e.g., “configure-your-pc” in this example: http://mystore/productbuilder/woo_product_builder/configure-your-pc), you can easily edit it here in the Permalink field and modify the slug as needed

2. Edit the Base URL
To change the base URL (e.g., “woo_product_builder” in the same link), follow these steps:

Depend feature is configured under “Products” section inside a product builder back end page.
The “Depend” feature in WooCommerce Product Builder helps you connect products across different steps based on shared attributes (note: this works with product attributes, not custom attributes).
Step 1: Enable Depend feature
Step 2: The step you see on the left panel (under “STEP” column) is the current step. Under the Depending On field, select which previous steps this step should depend on. Each step in your product builder can be linked to one or more previous steps using this field. A step can depend on multiple earlier steps, but only those that come before it. For example, Step 4 can depend on Step 1, Step 2, and Step 3, but it cannot depend on Step 5 or any later steps.
Step 3: Choose the attribute
Here’s how it works:
Let’s say you’re creating a PC Builder with multiple steps for selecting components.
Now, you want to ensure that the memory standard options in Step 4 are compatible with the motherboard chosen in Step 1 and the RAM selected in Step 2.
In this case:
Using the “Depending On” field, you can set Step 4 to depend on Step 1 and Step 2, ensuring customers only see compatible memory standard for their selected components.

Attribute Widgets helps customers to search product by attributes on front-end.

To display attribute widgets on front-end, go to Dashboard/ Appearance/ Widgets and look for WC Product Builder Filters. Drag and drop these widgets into WC Product Builder Sidebar. Take note that you may need to add the widget WC Product Builder Attribute Filter many times because each attribute will cost a widget.

In each widget settings, you can edit the widget title and click on the Attribute to select an attribute slug.
Create new products builder pages, edit existing product builder pages in the list.
Go to Dashboard > Product Builders. You can Add new/ Remove product builder pages here.
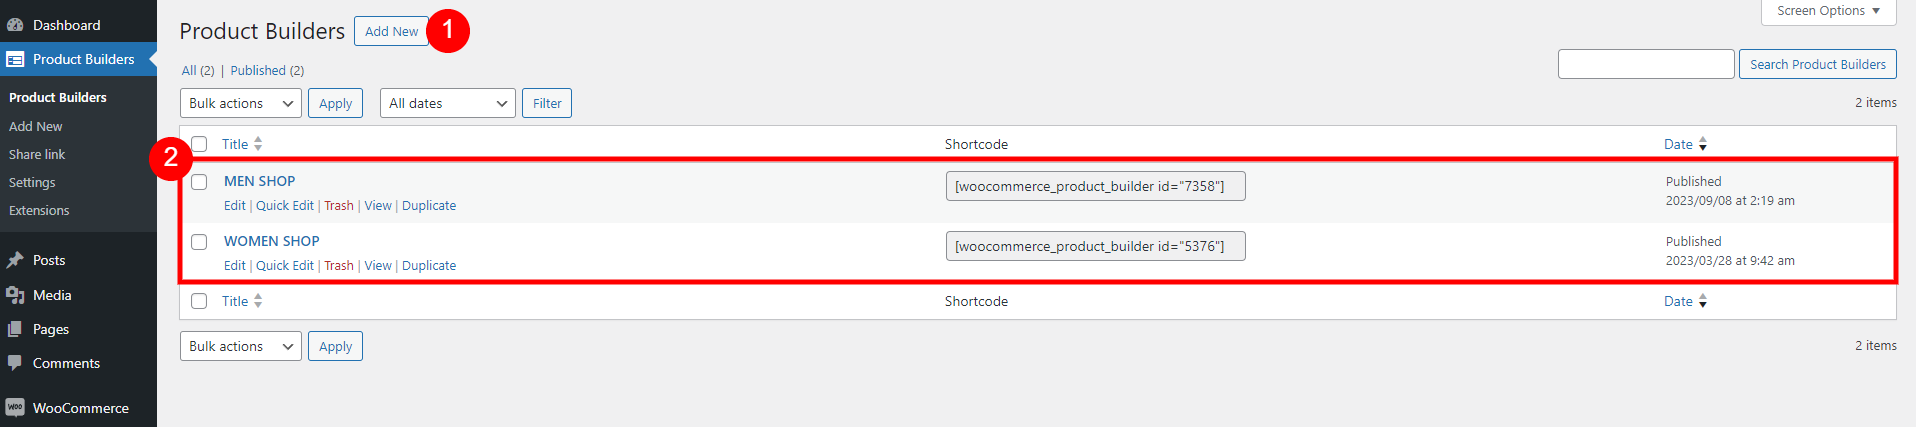
1. Add new: Click to add a new product builder page.
2. Existing product builder page: The product builder pages which are generated on your site.
Sections are movable and collapsible
This section displays the steps you’ve created along with their individual settings. The left panel lists all the created steps. In this panel:
And scroll down to learn all the options for one step


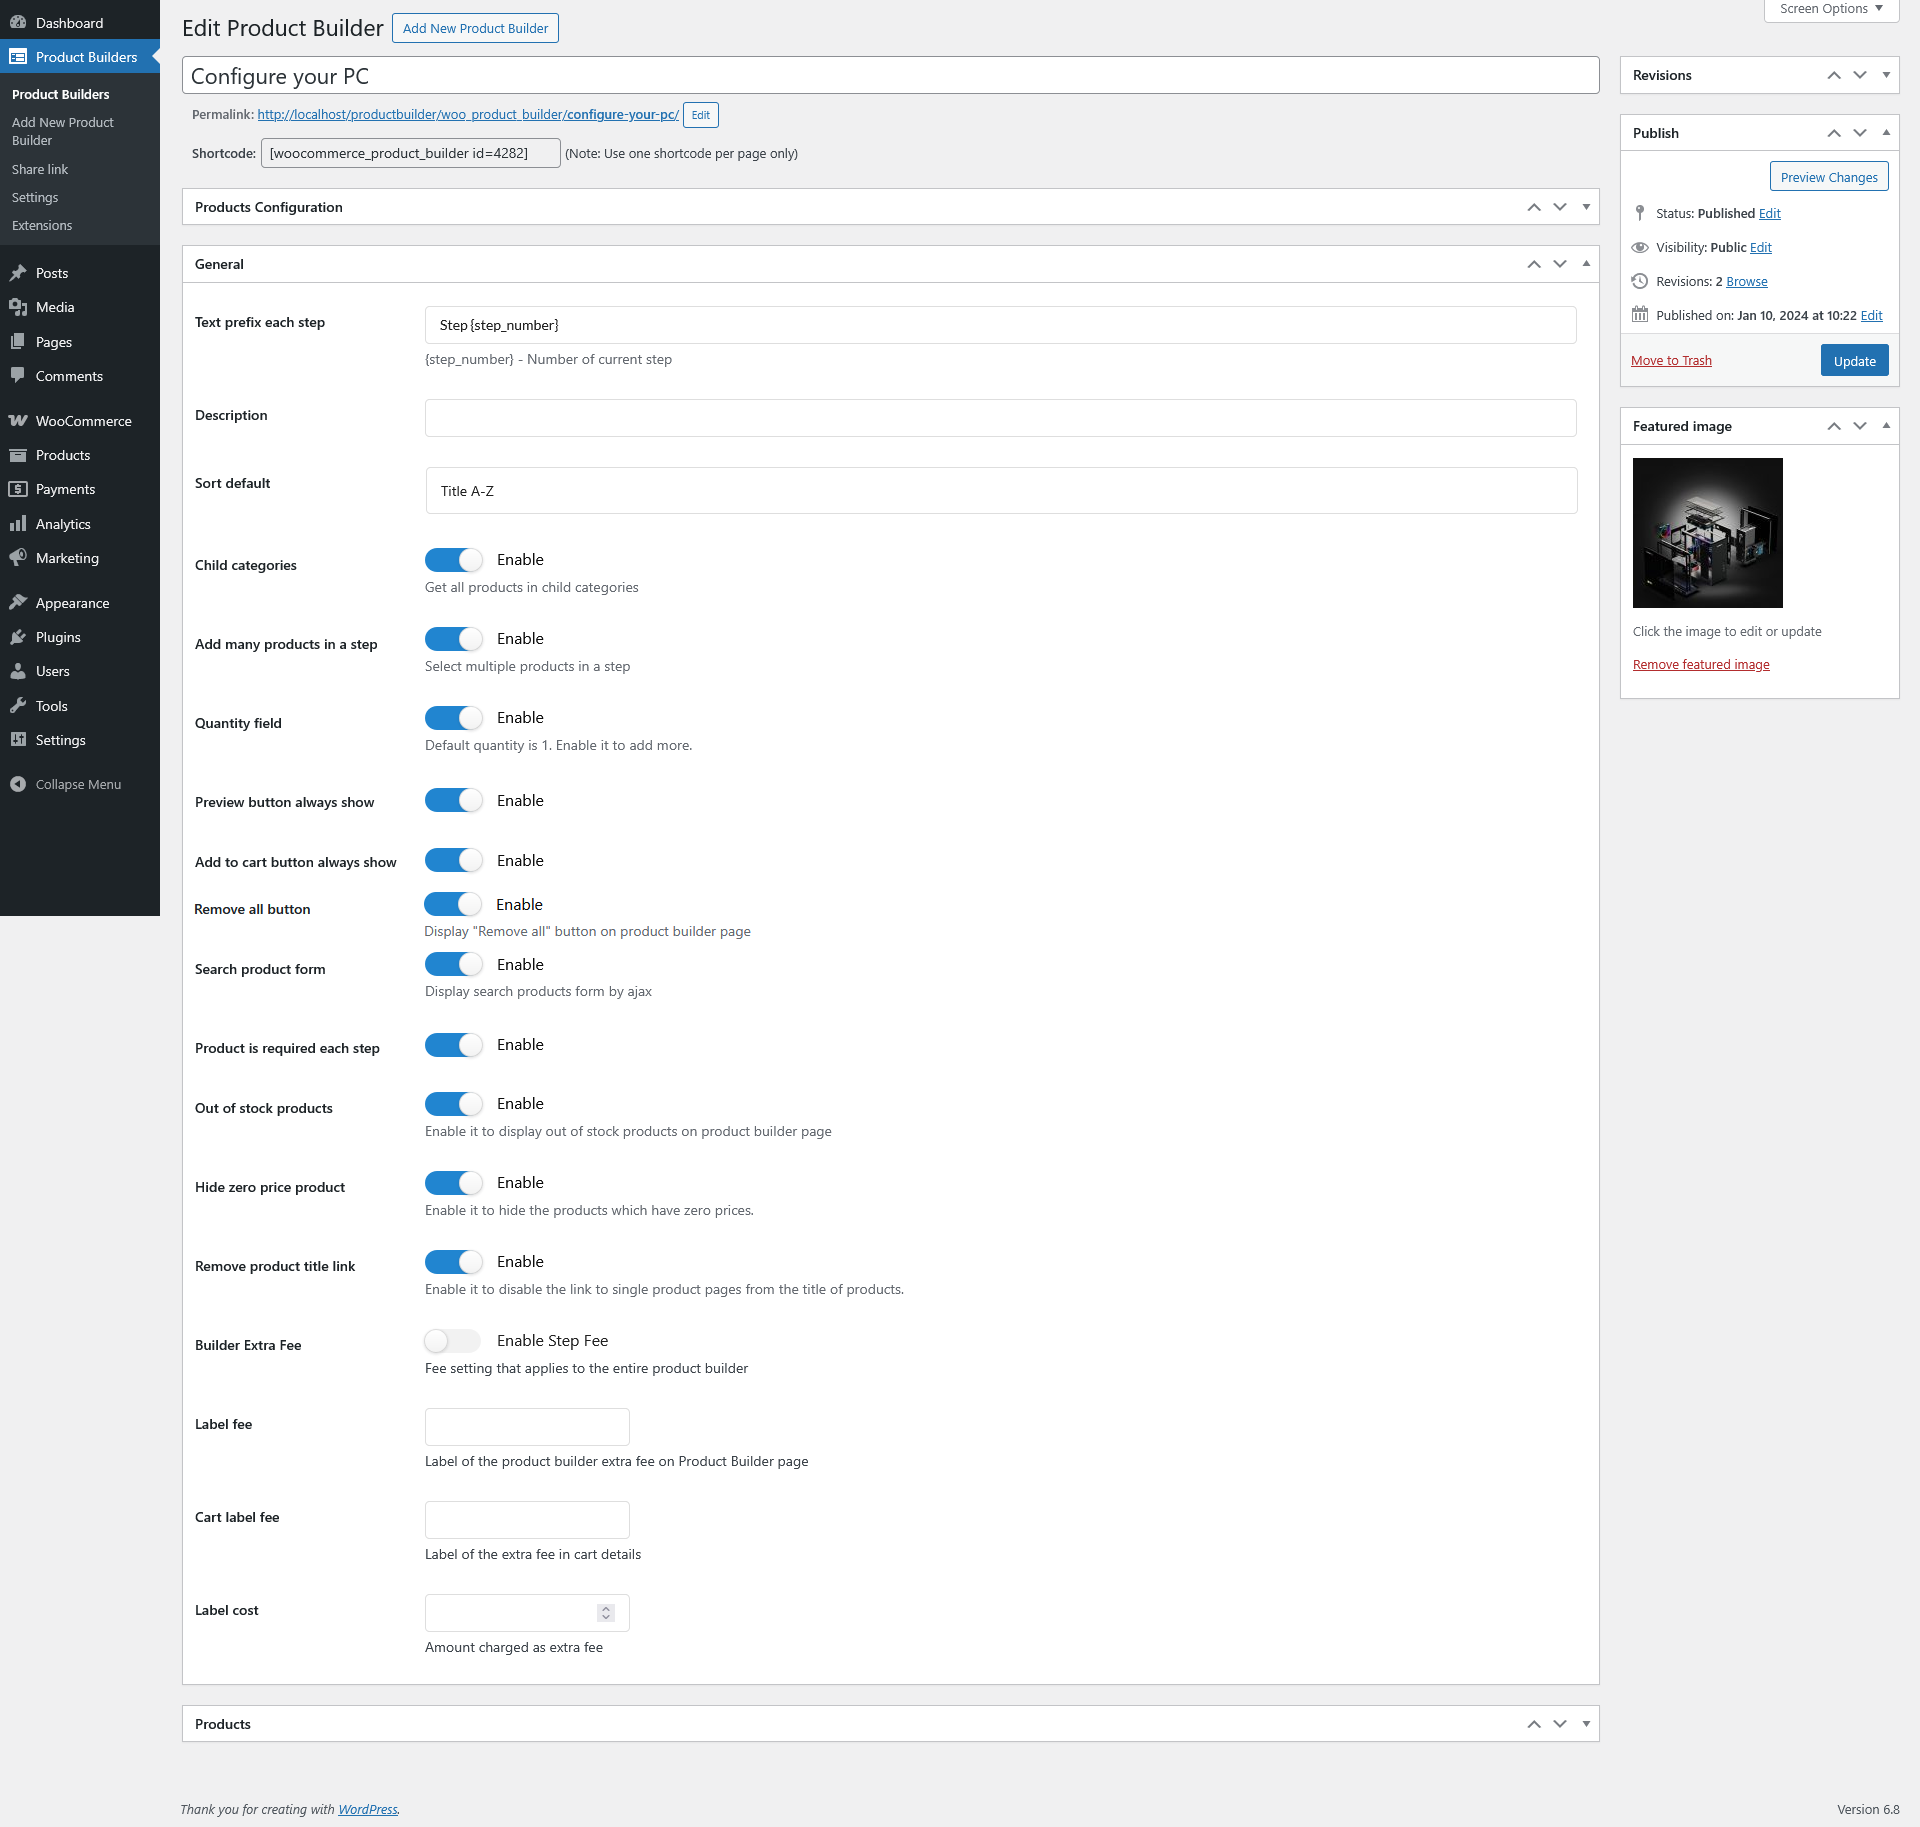
Options within this section are applied to all steps inside the current product builder.
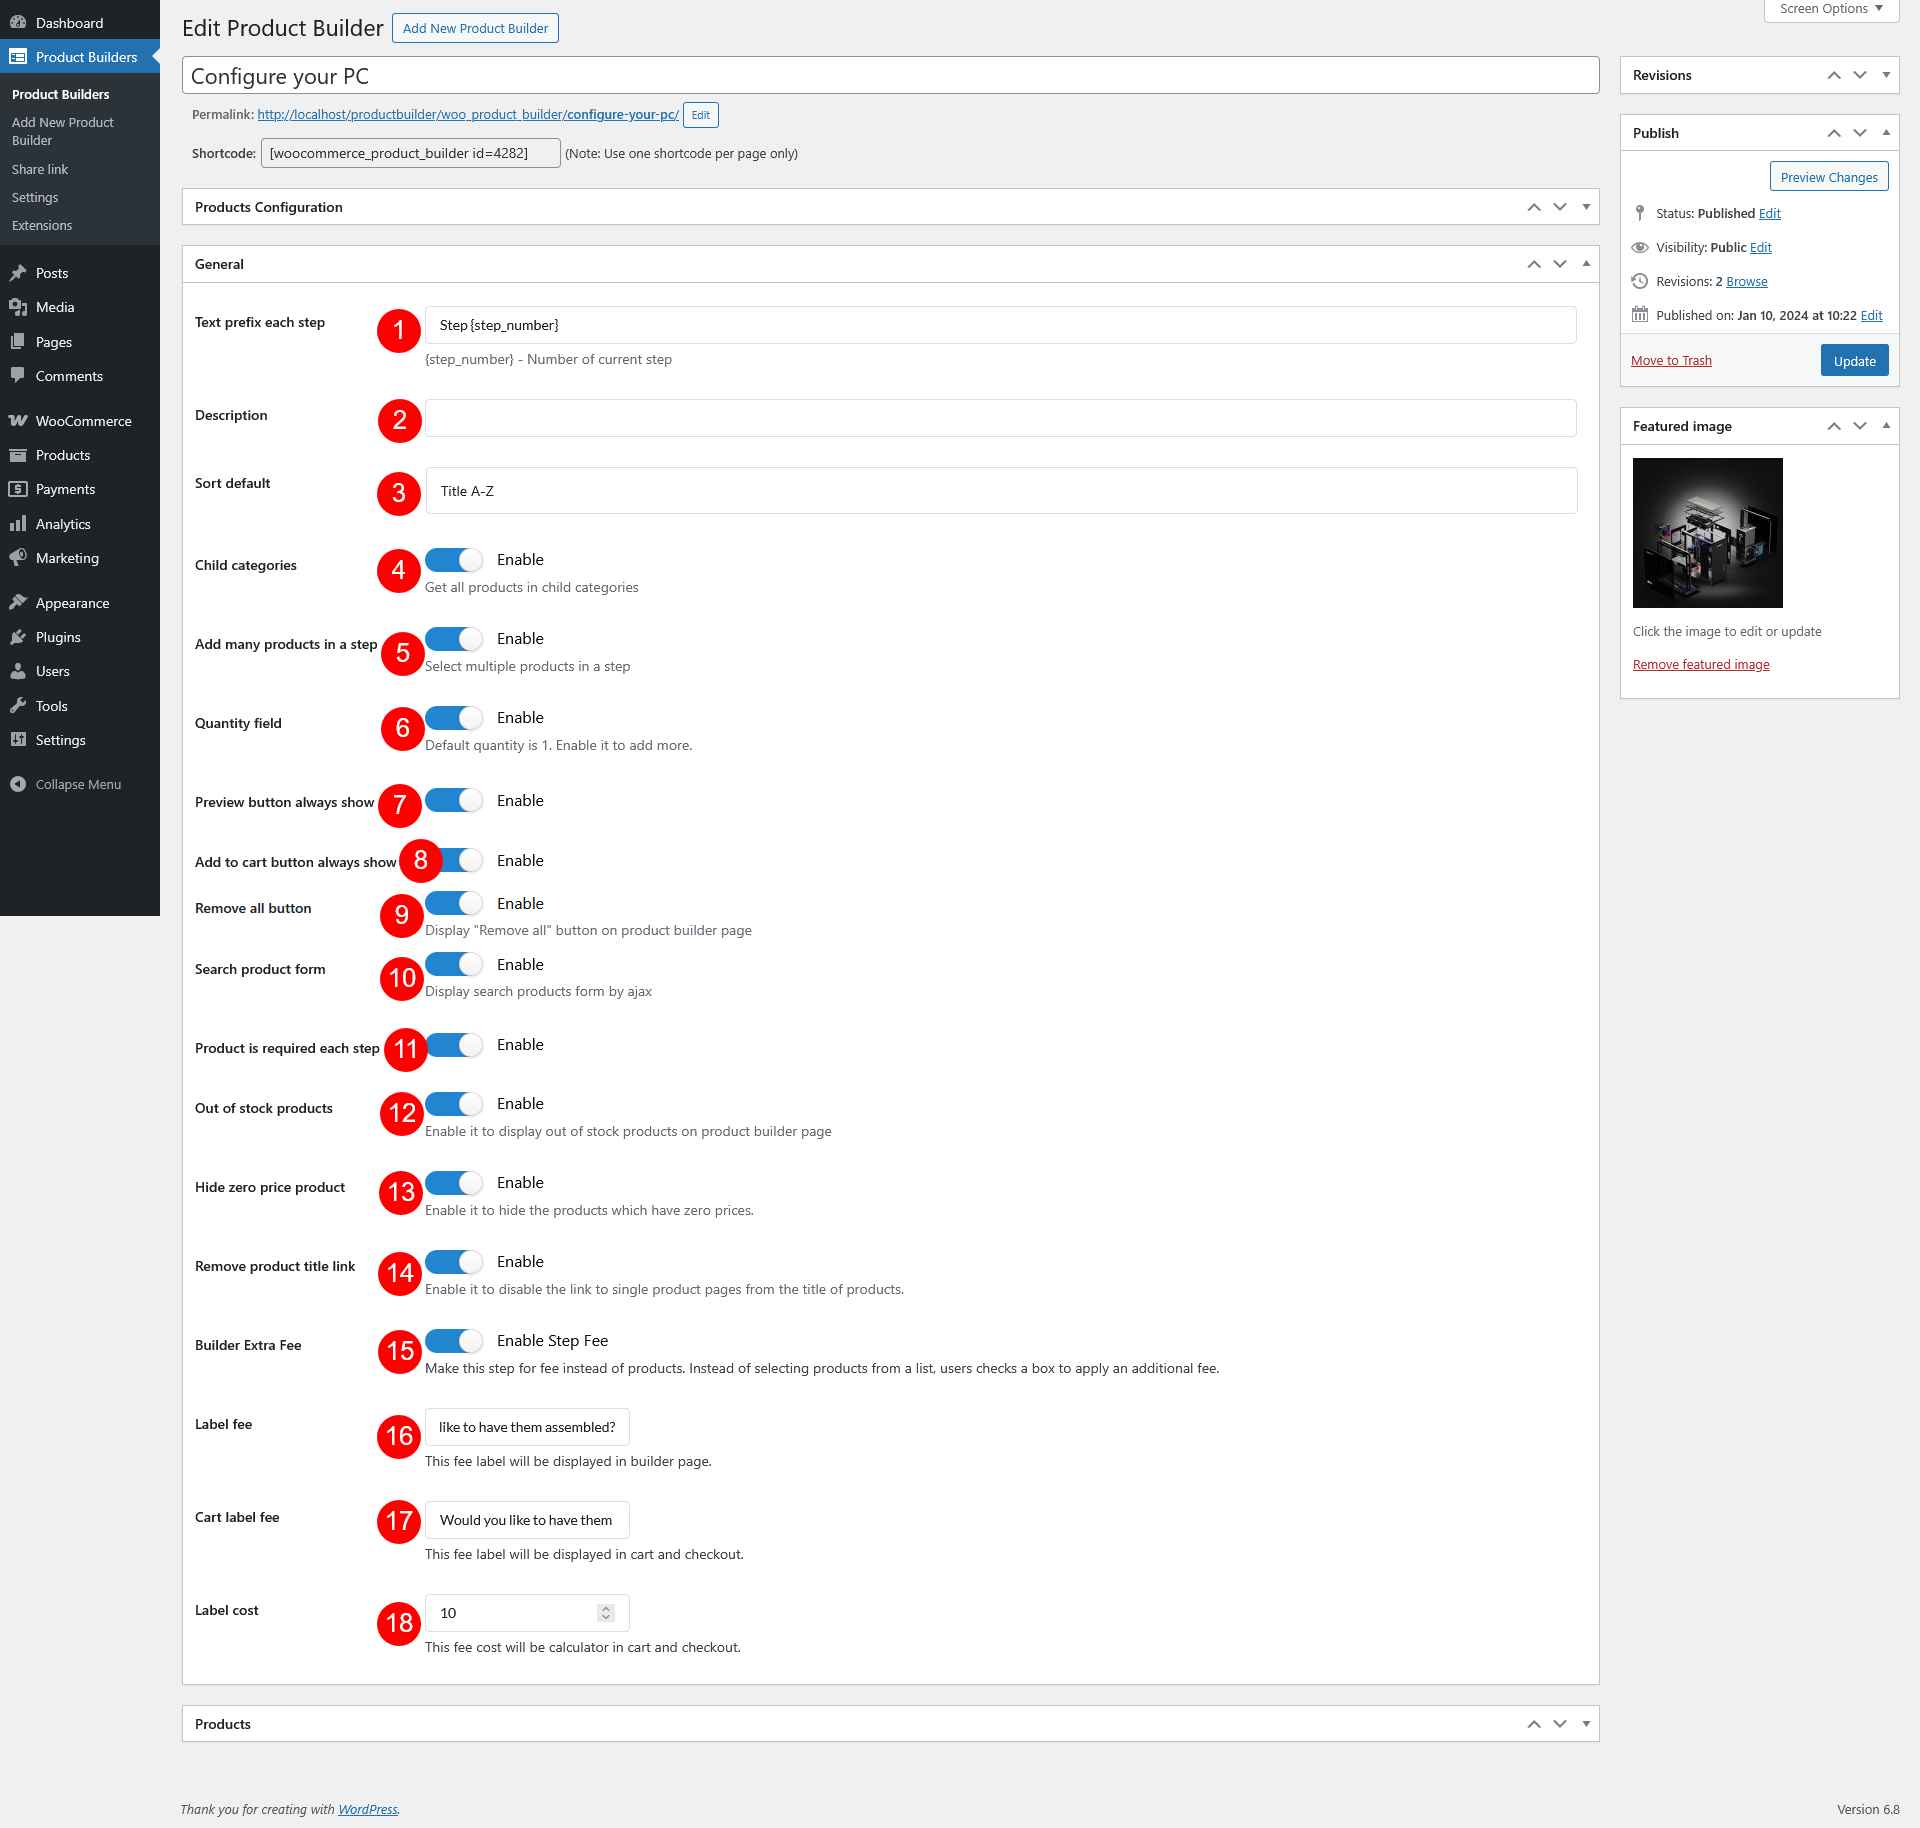
Settings for pagination and Depend feature

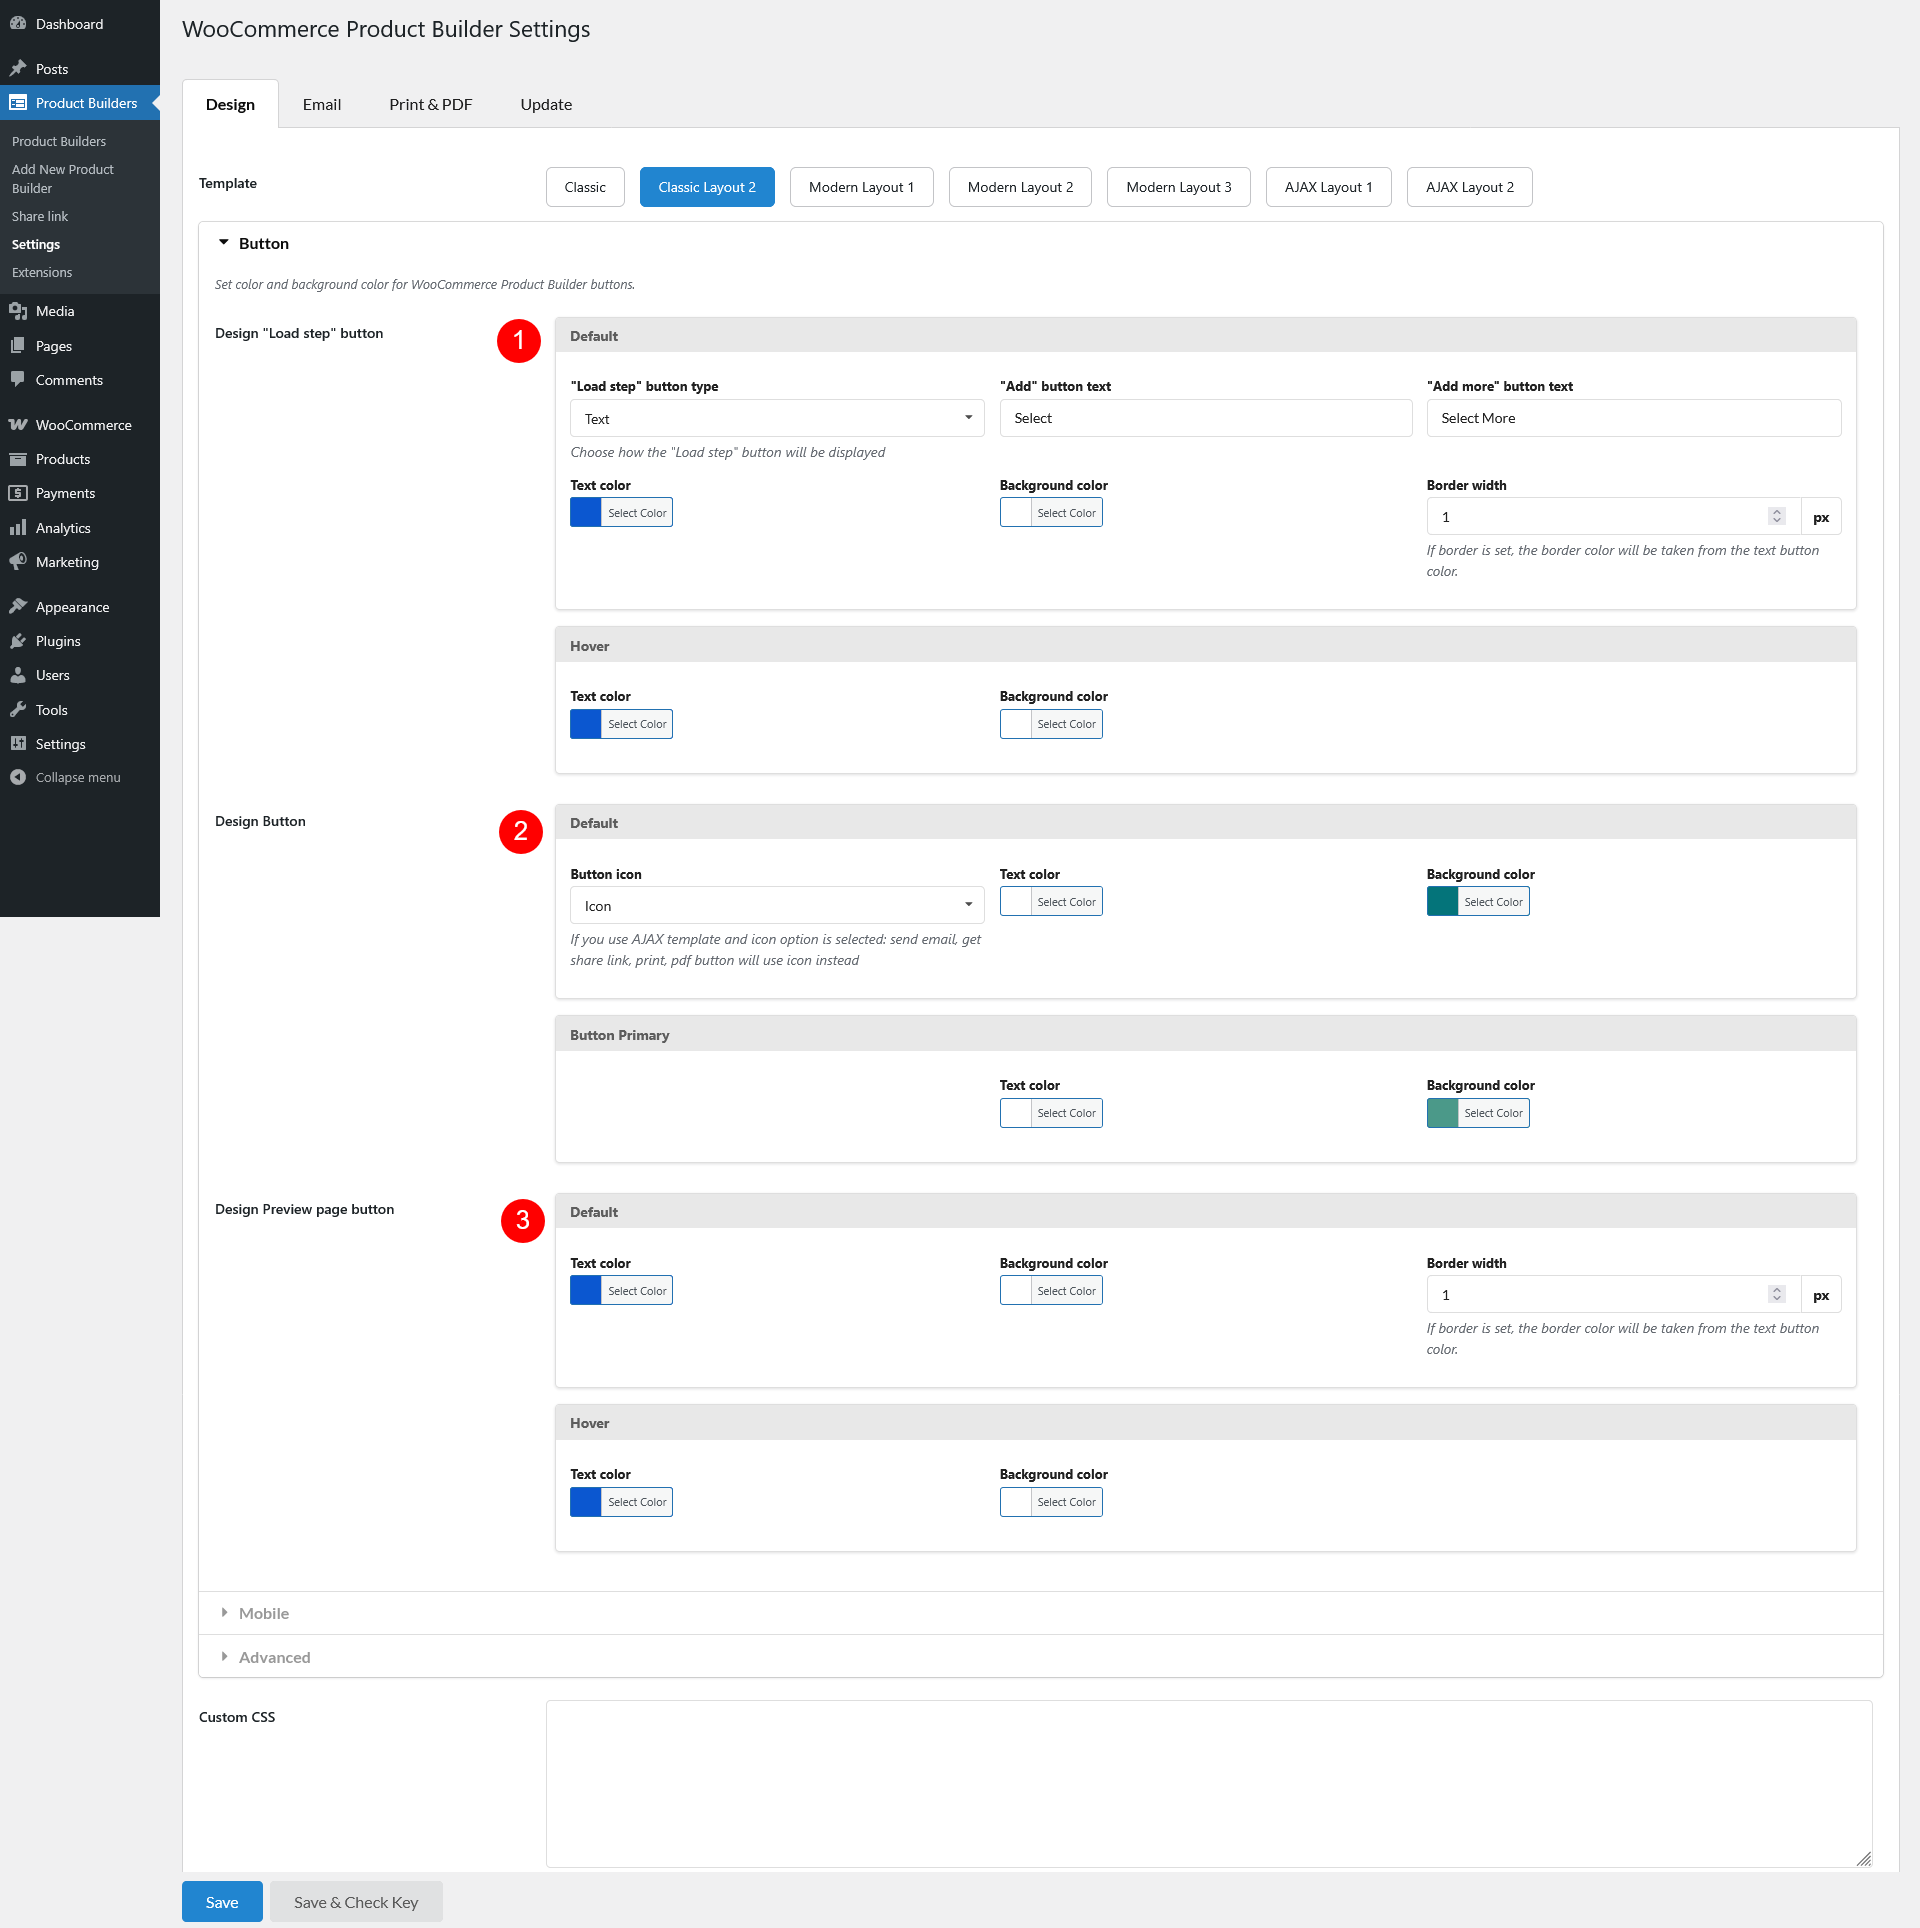
Go to Dashboard >> Product Builders >> Settings >> Design
In the Design tab, you can choose the product builder templates, customize the button on the product builder page, customize on mobile mode, and other advanced features.
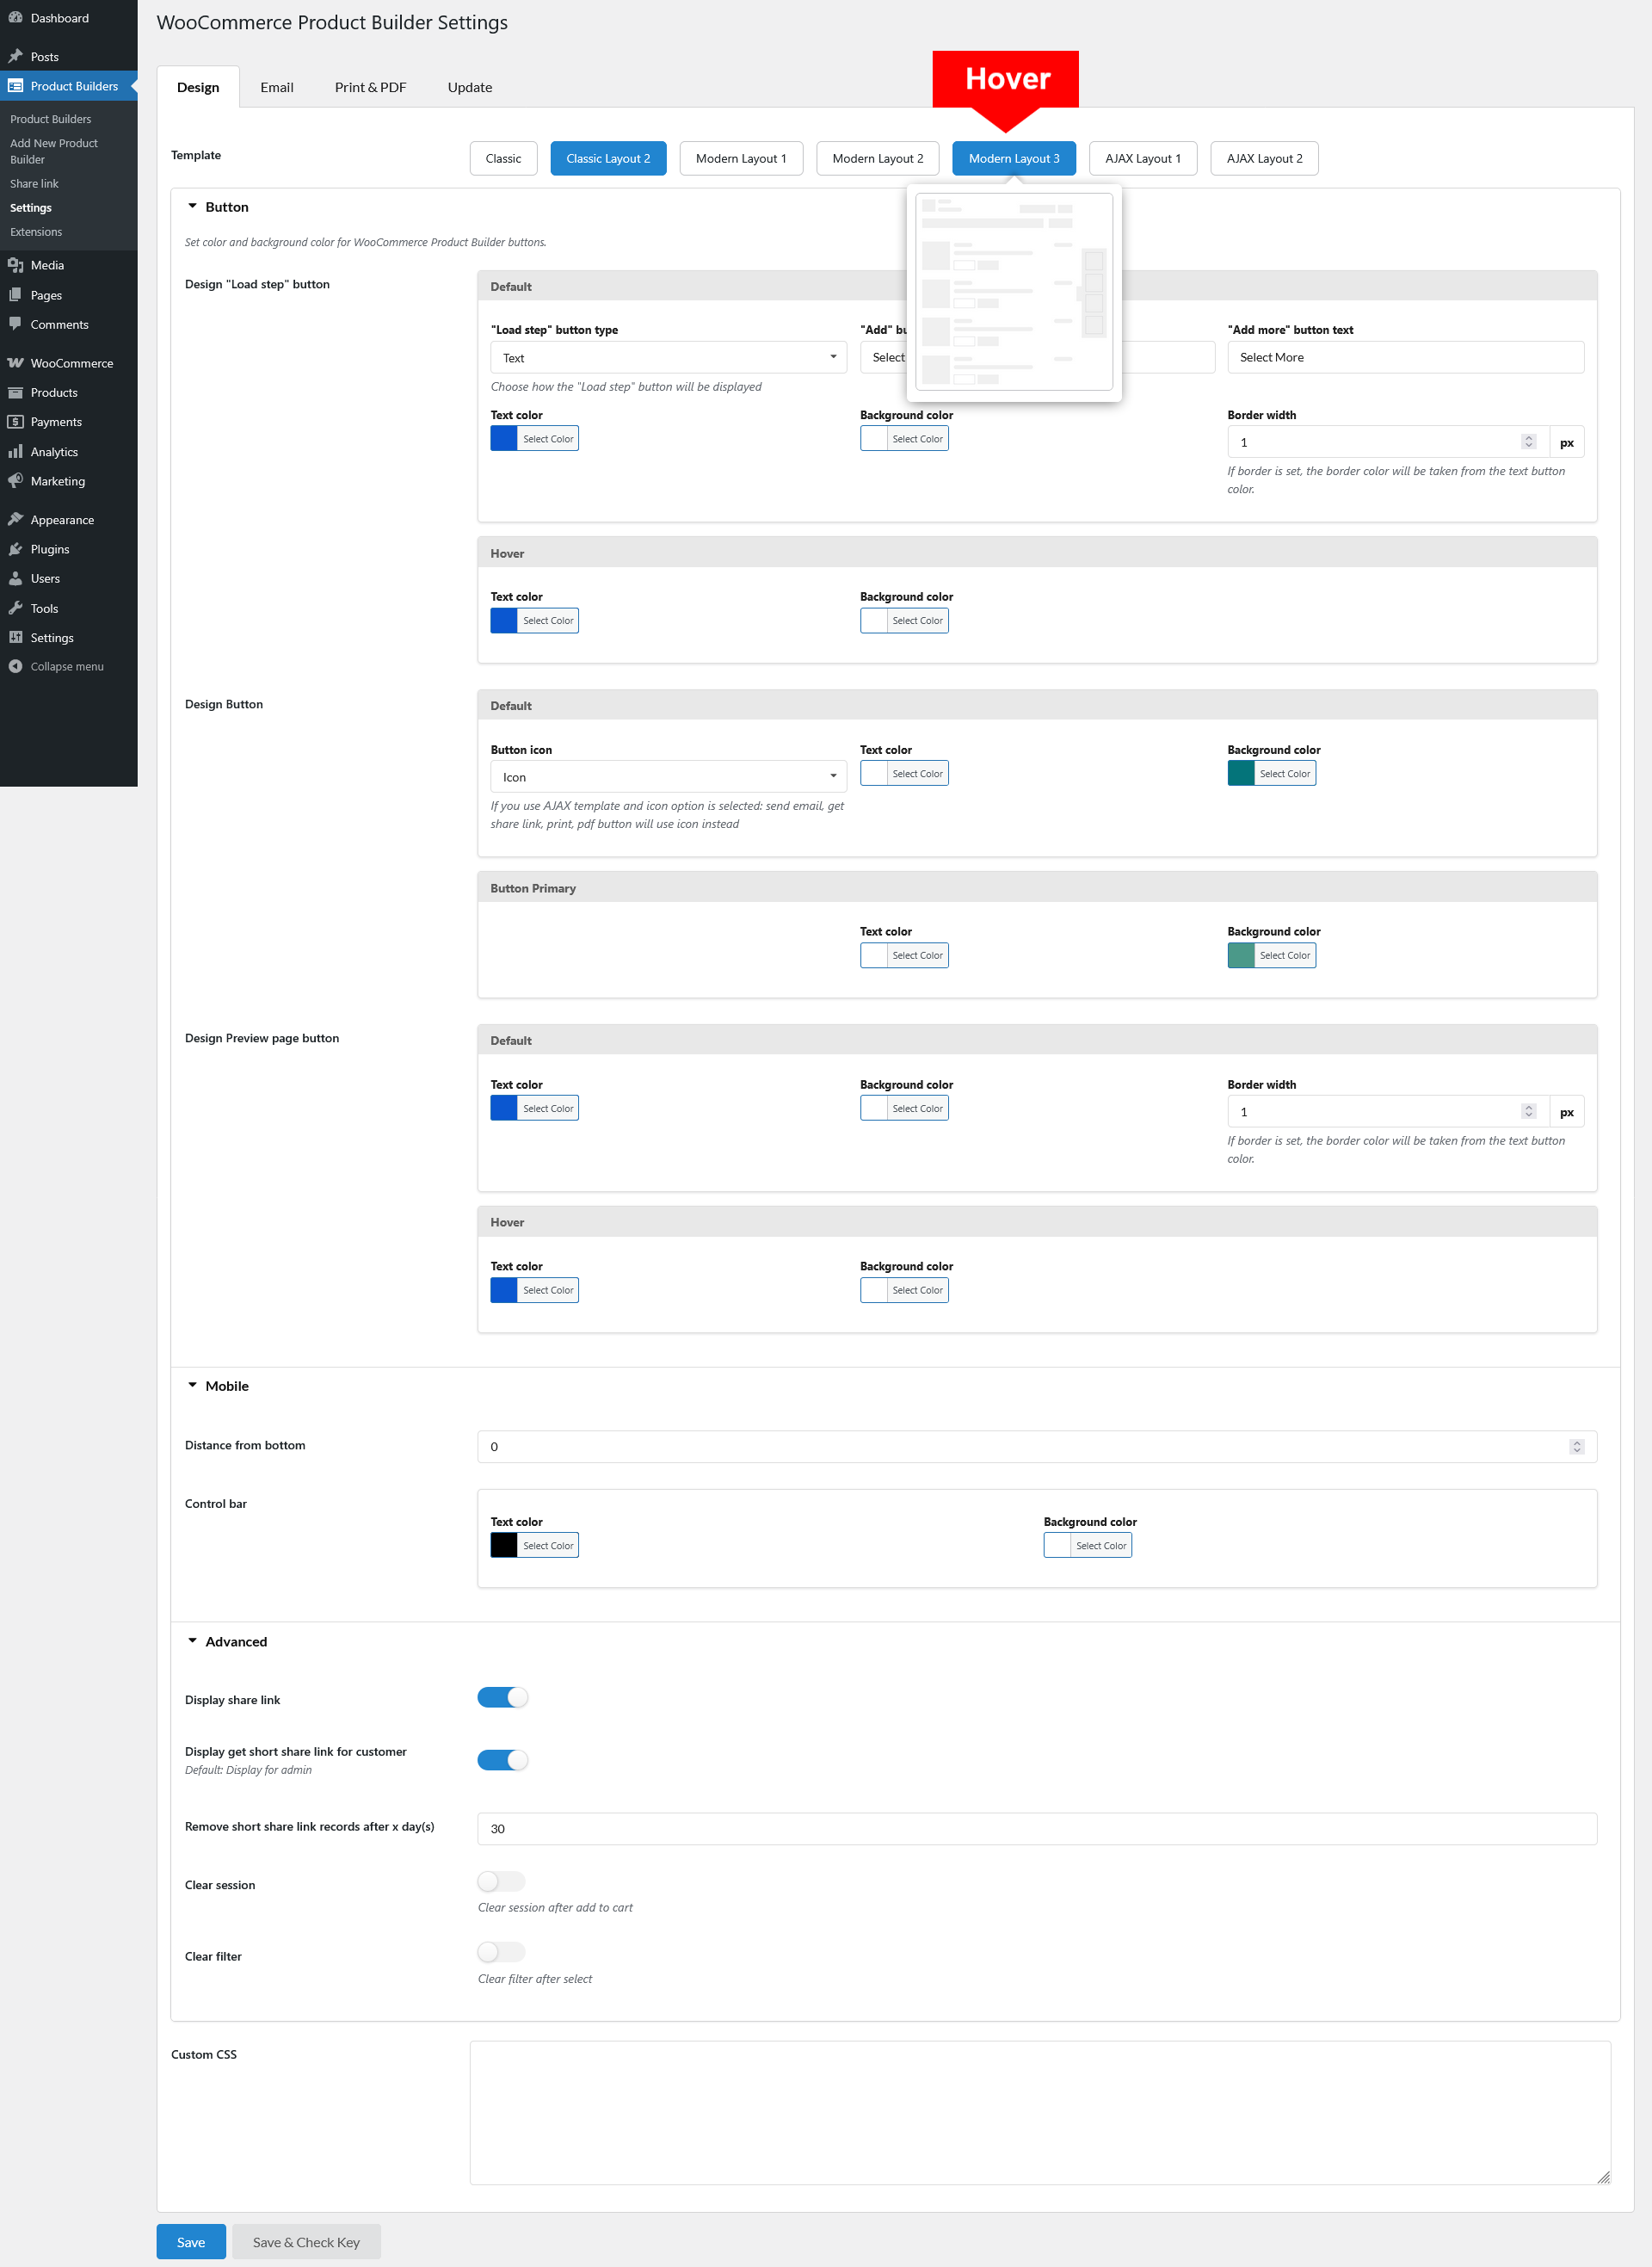
Choose from 7 available templates to define how your product builder appears on the frontend. Refer to our documentation for a detailed preview of each template and their differences.
Hover the template you want to see its preview

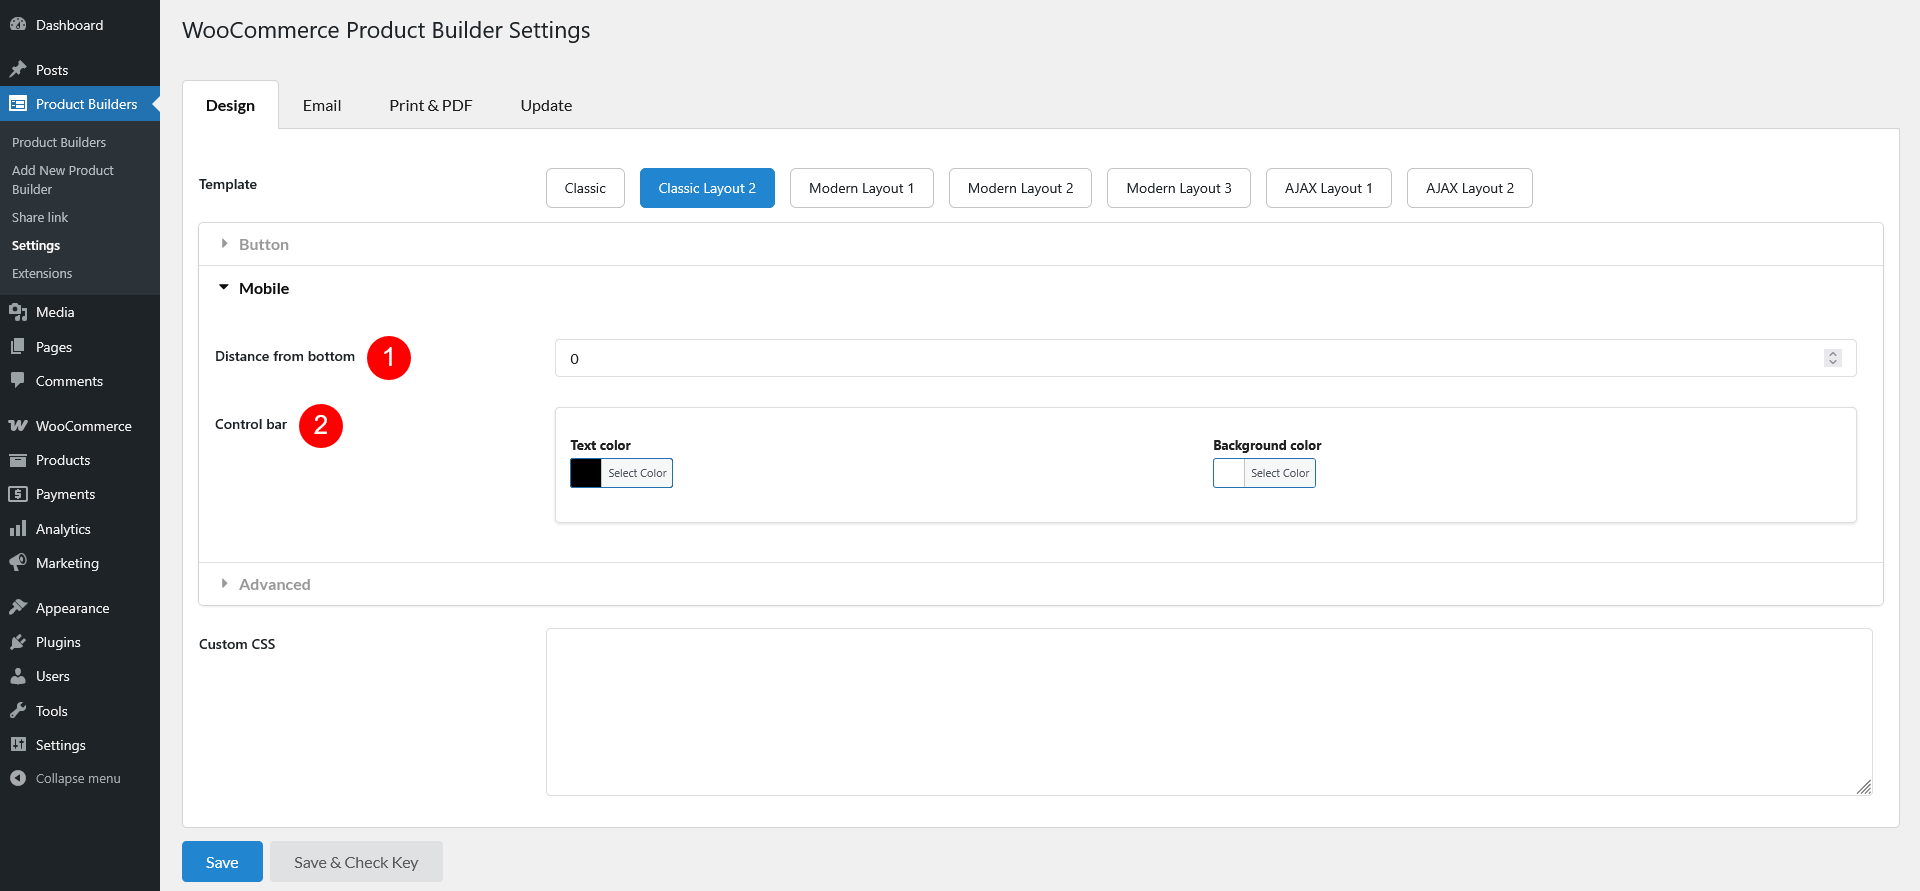
Optimize the product builder for mobile users.

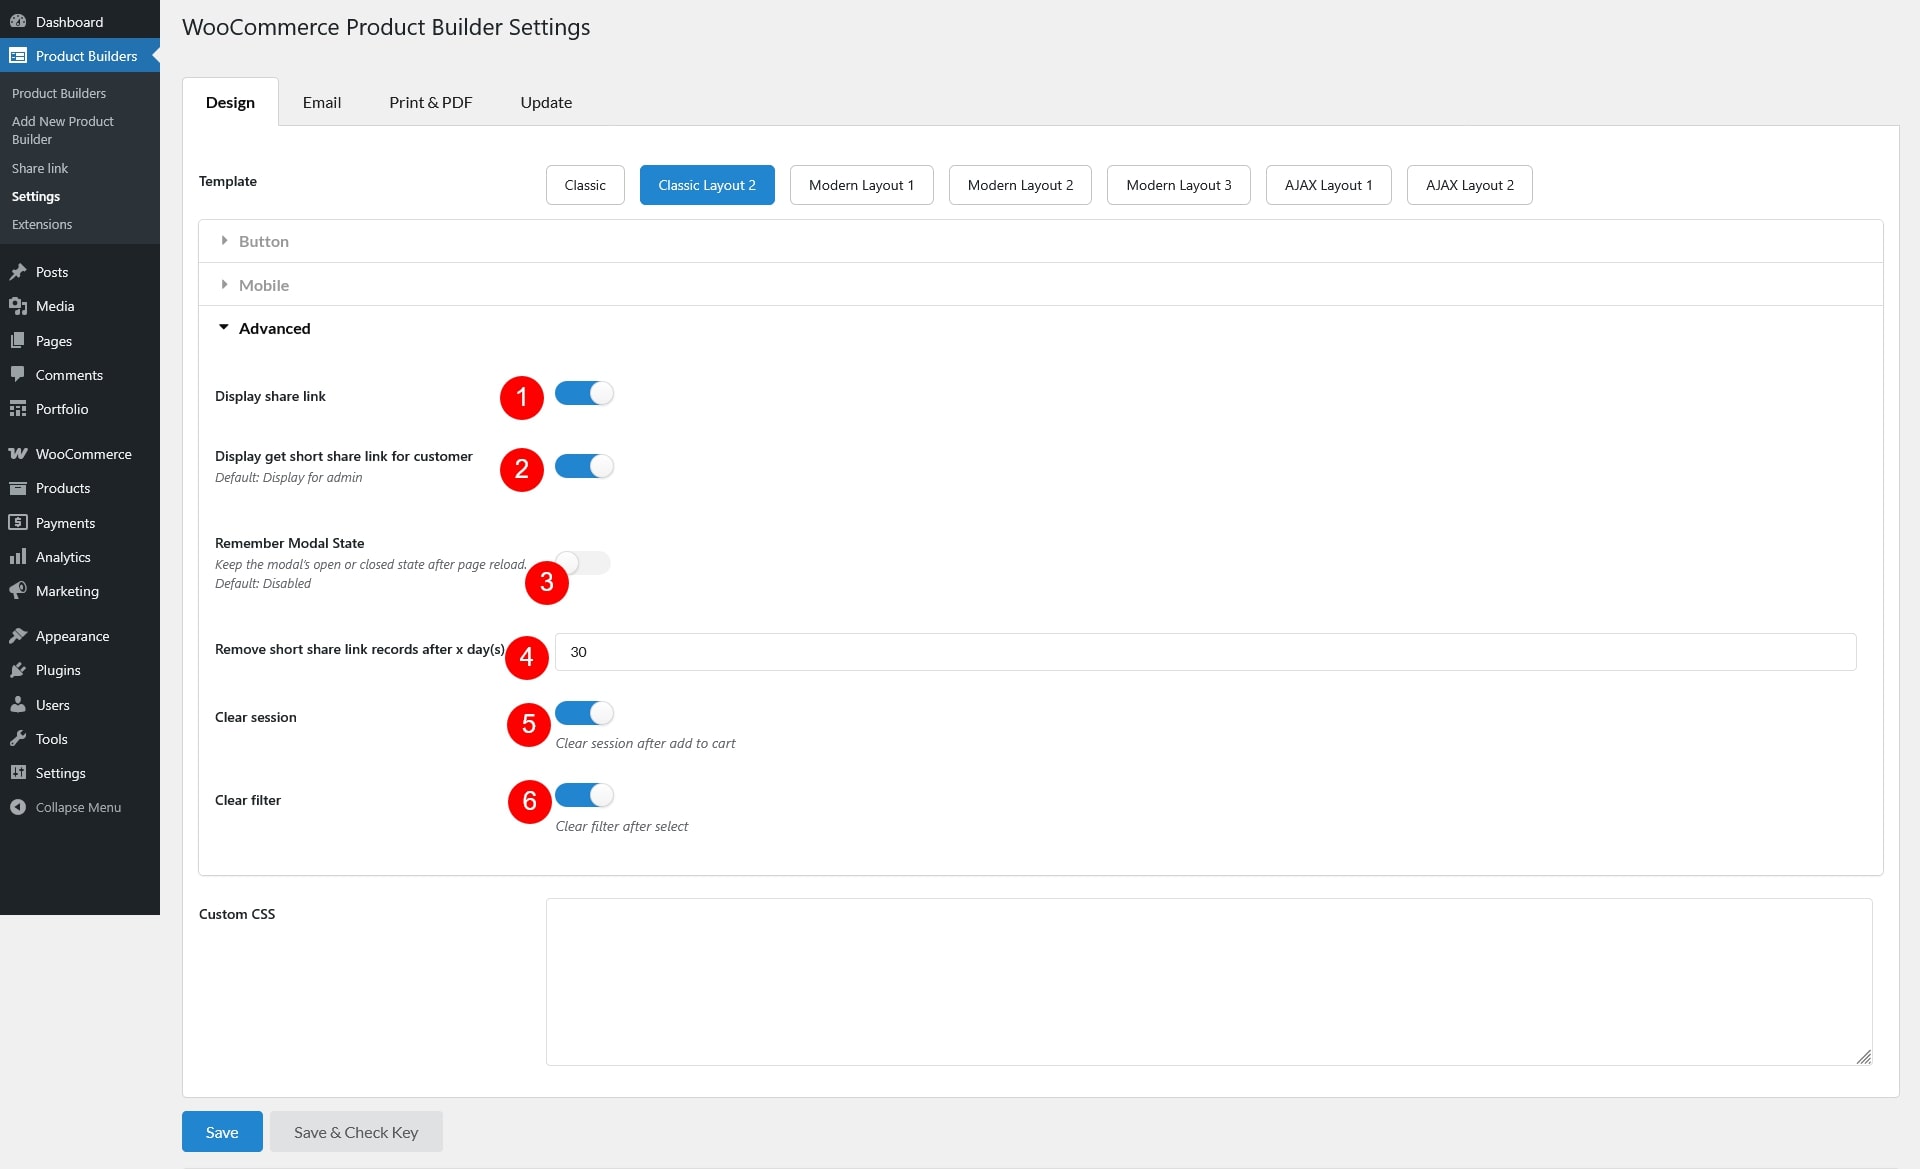
For developers and advanced users, apply custom CSS to further style and modify the product builder according to your needs.

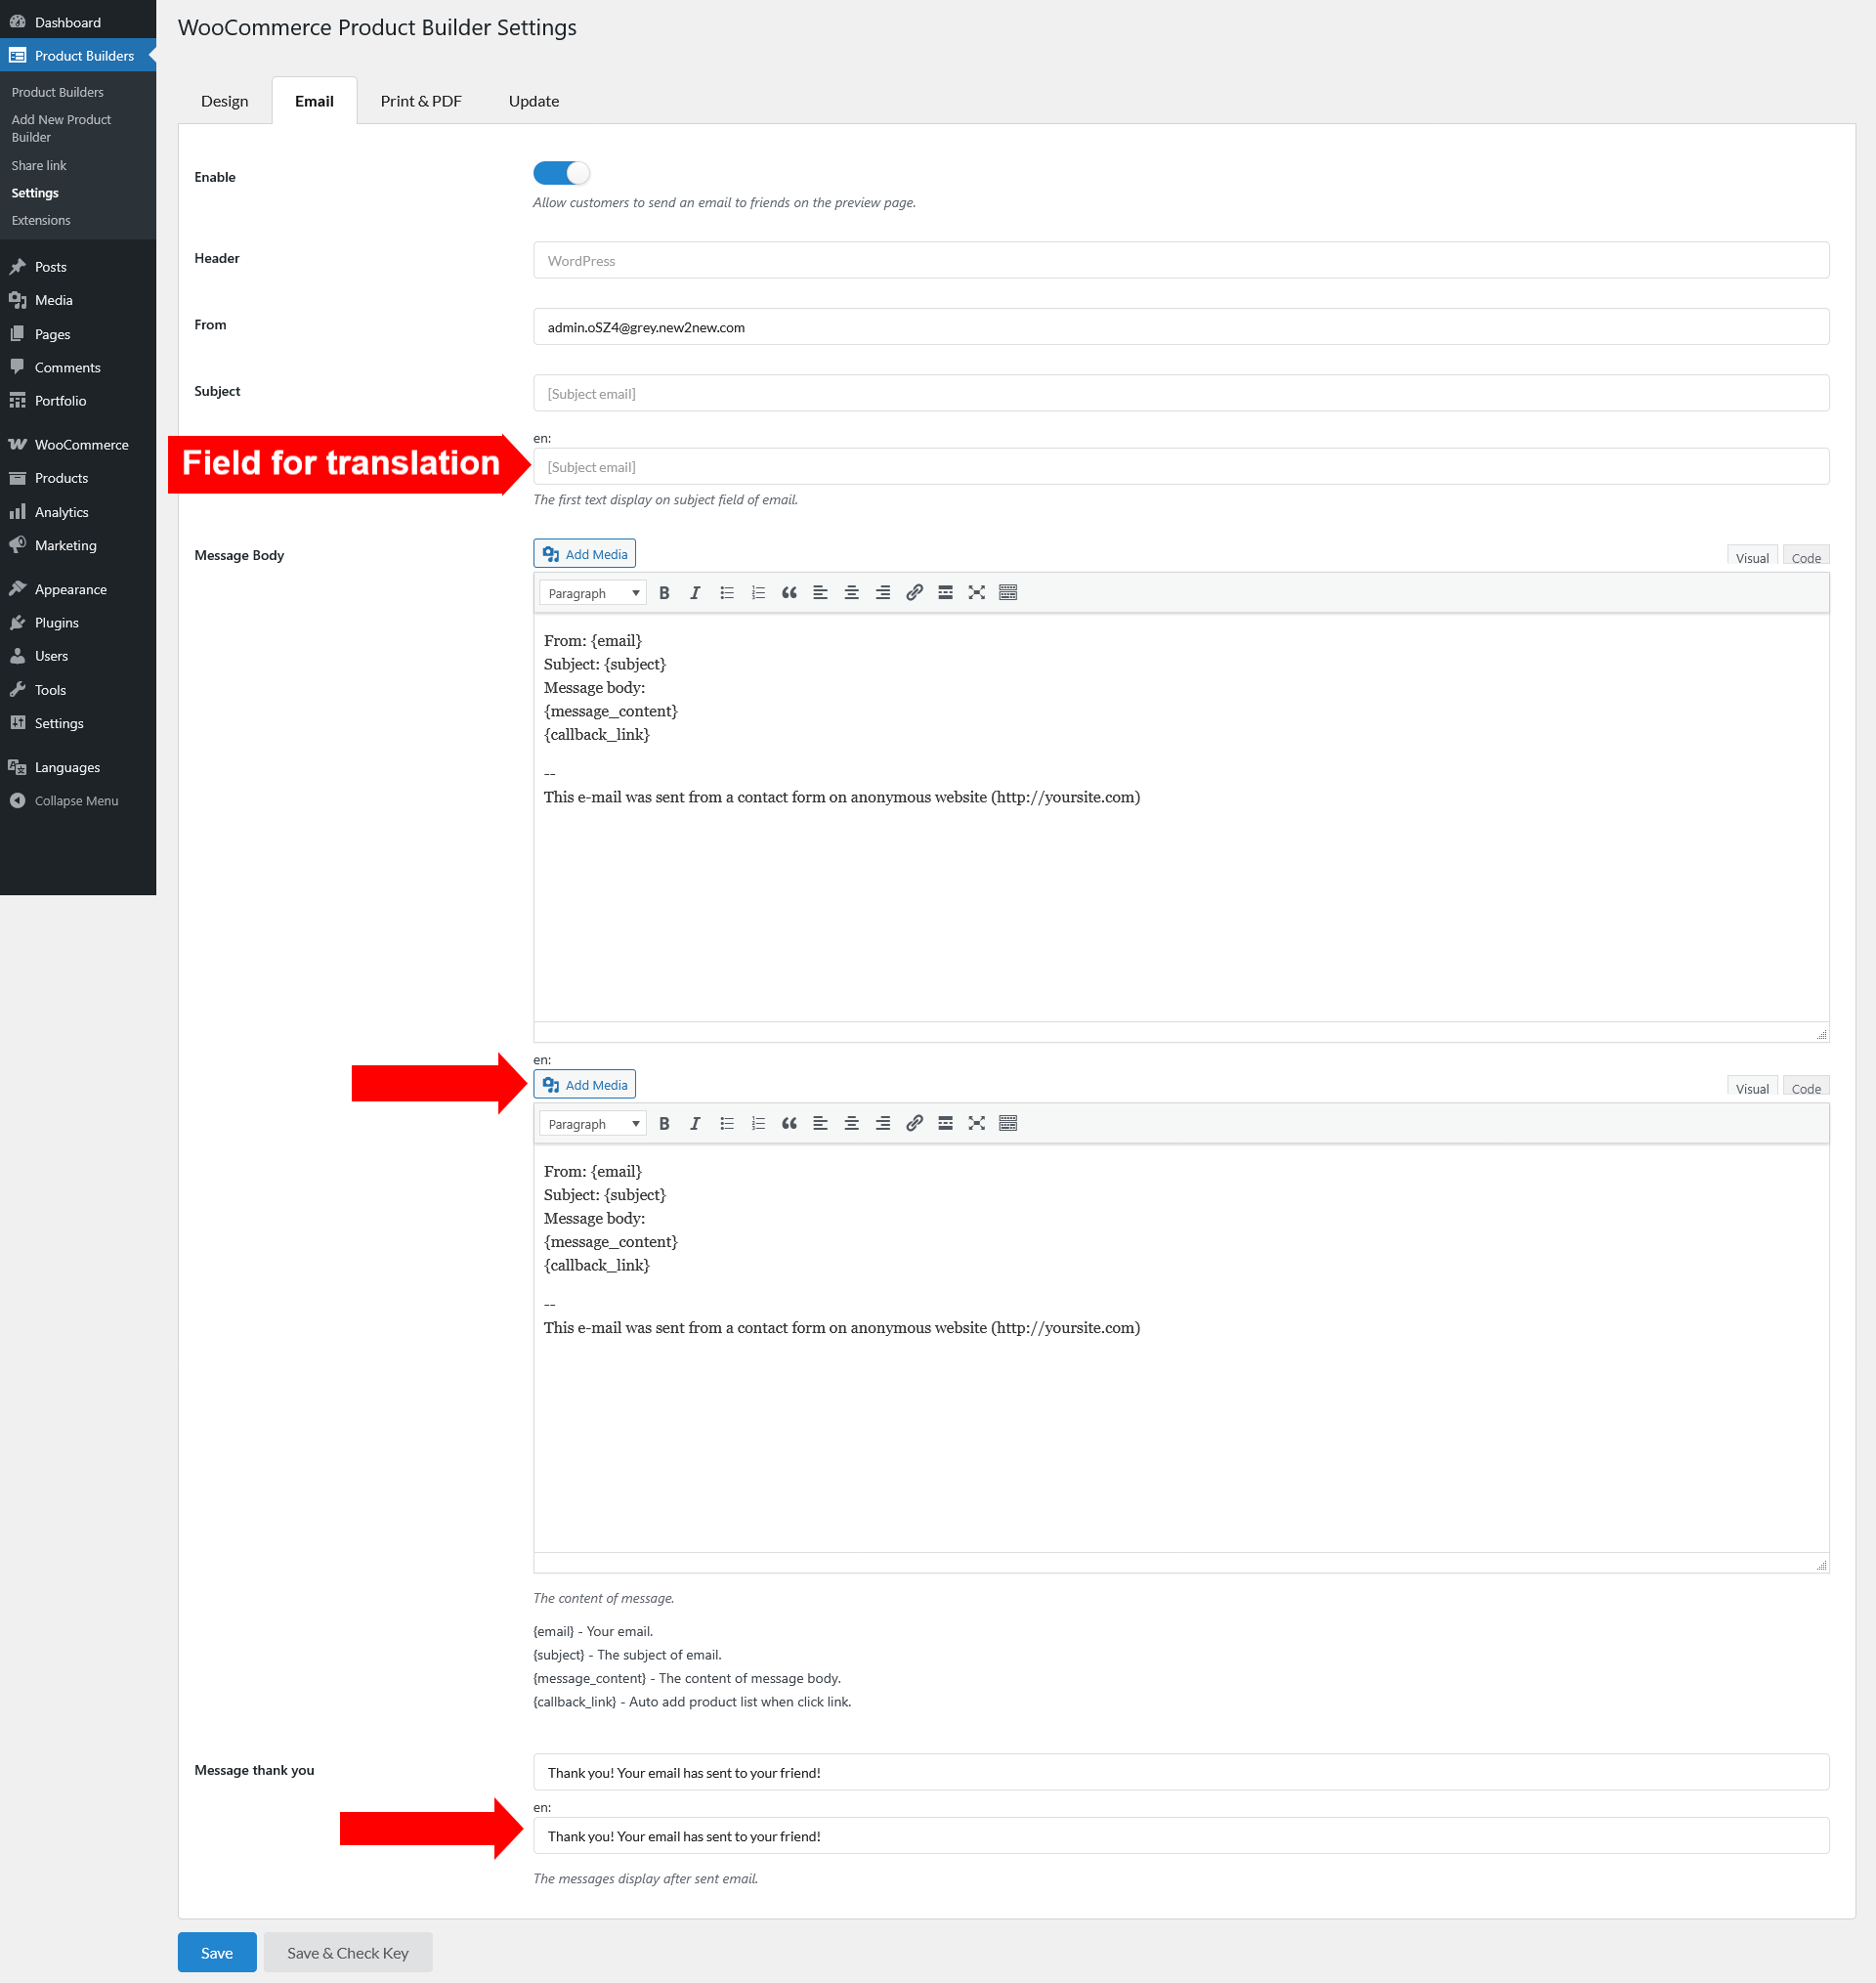
1. Enable: to show the email button on the preview page, click that button to send an email including the selected products.
2. Header: Add the default header.
3. From Enter certain address the email sends from.
4. Subject: Enter the subject of the email.
5. Body Message: Add the content of the message, you can use a shortcode to write the email content.
6. Message thank you: The messages display after sending email.
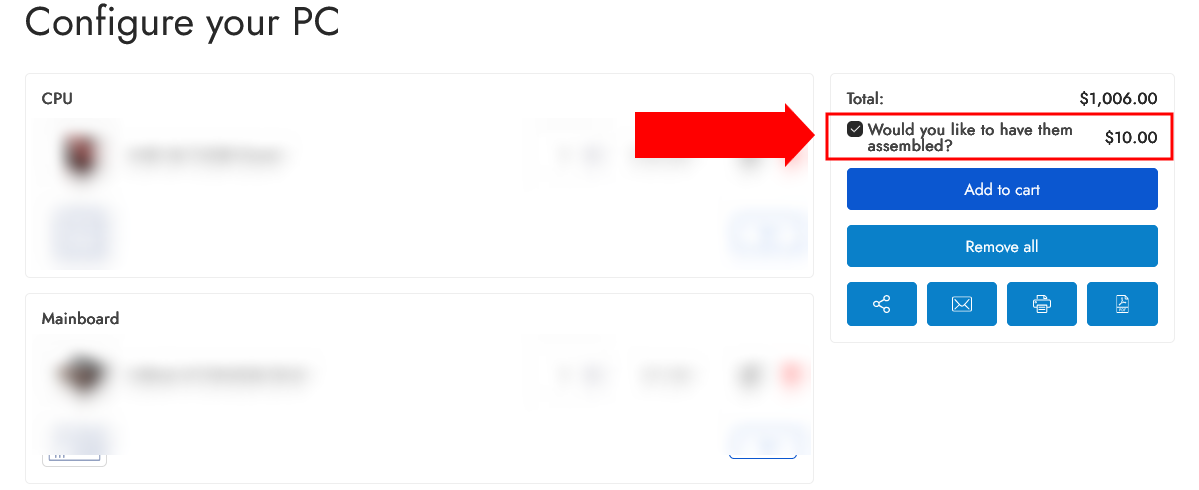
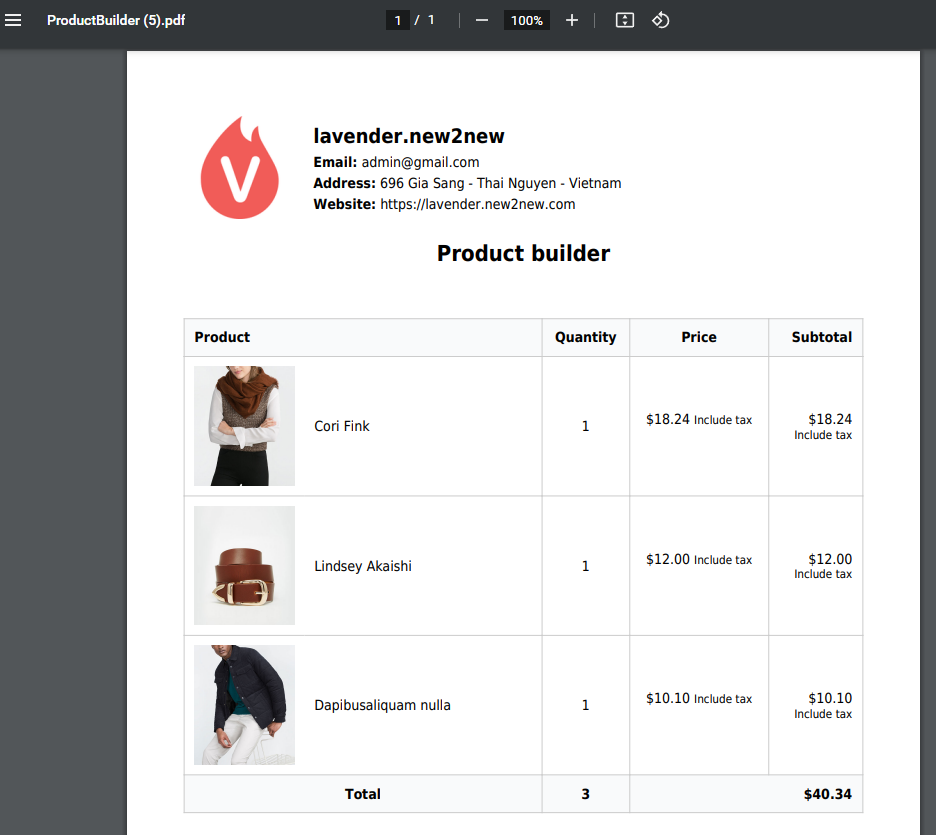
After assembling a set of component products, you can export the selected product list to a PDF file and print it on the preview page.

Scroll down to learn all options inside this setting page.

| Plugin | Author |
|---|---|
| Elementor | Elementor |
| WPML | OnTheGoSystems |
| Polylang | Frédéric Demarle |
| Woodmart | XTEMOS |
For compatibility with multilingual plugins such as WPML or Polylang, provide translations for each related field to display the correct text on the frontend