- Start
- FILE INCLUDES
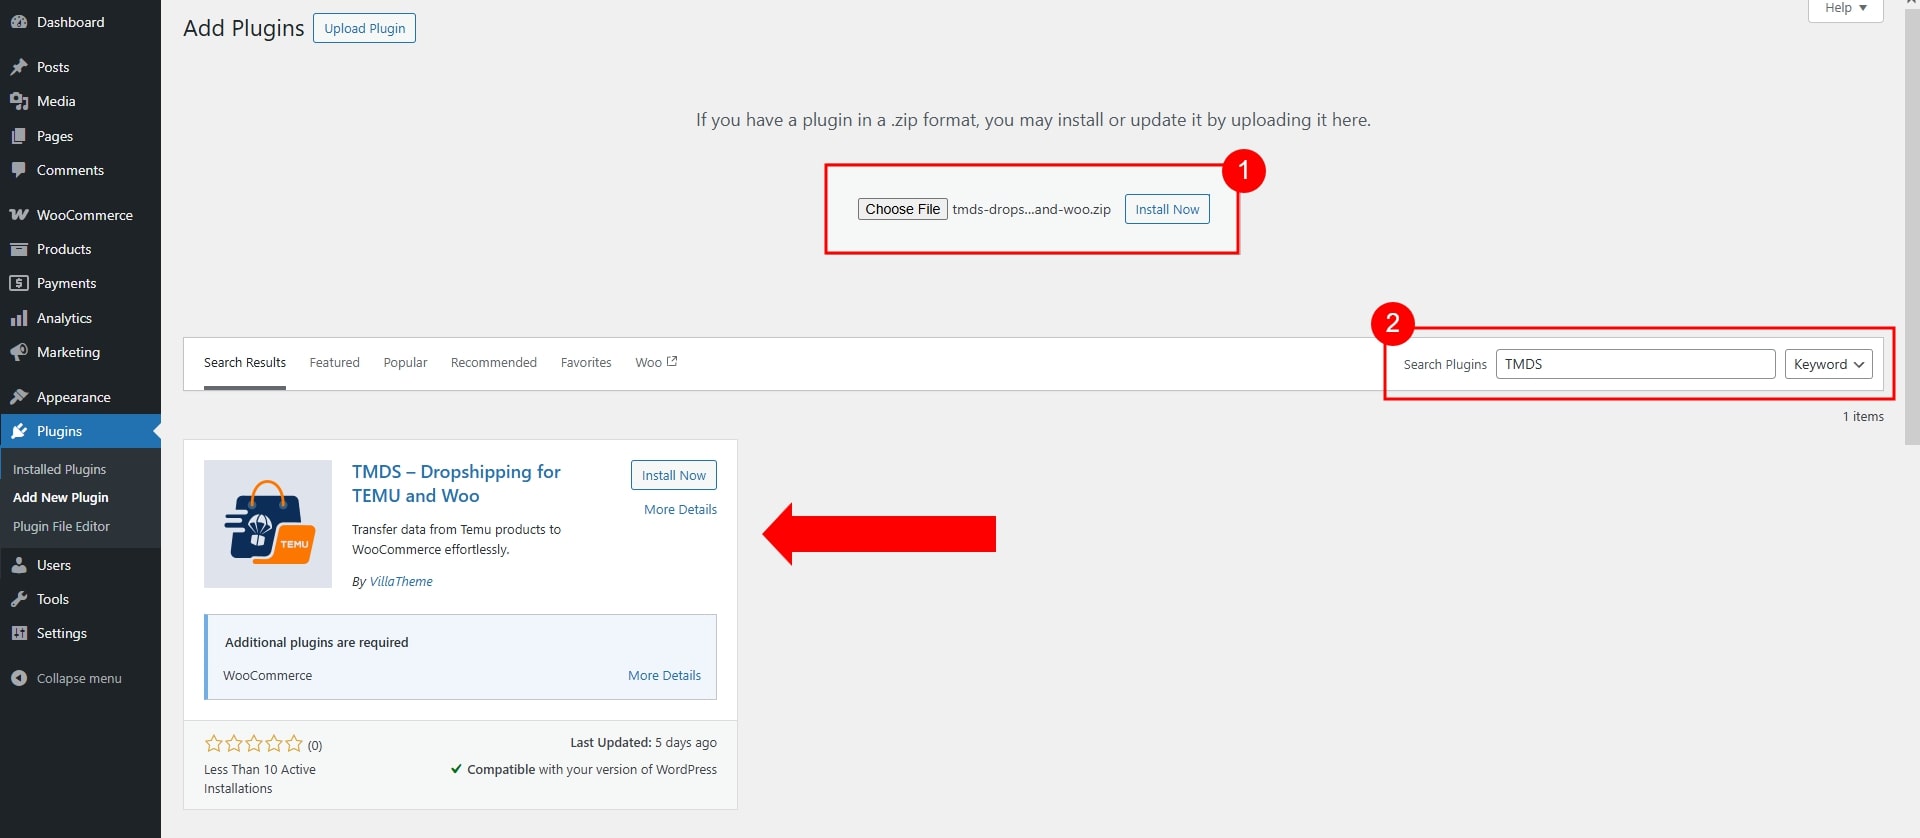
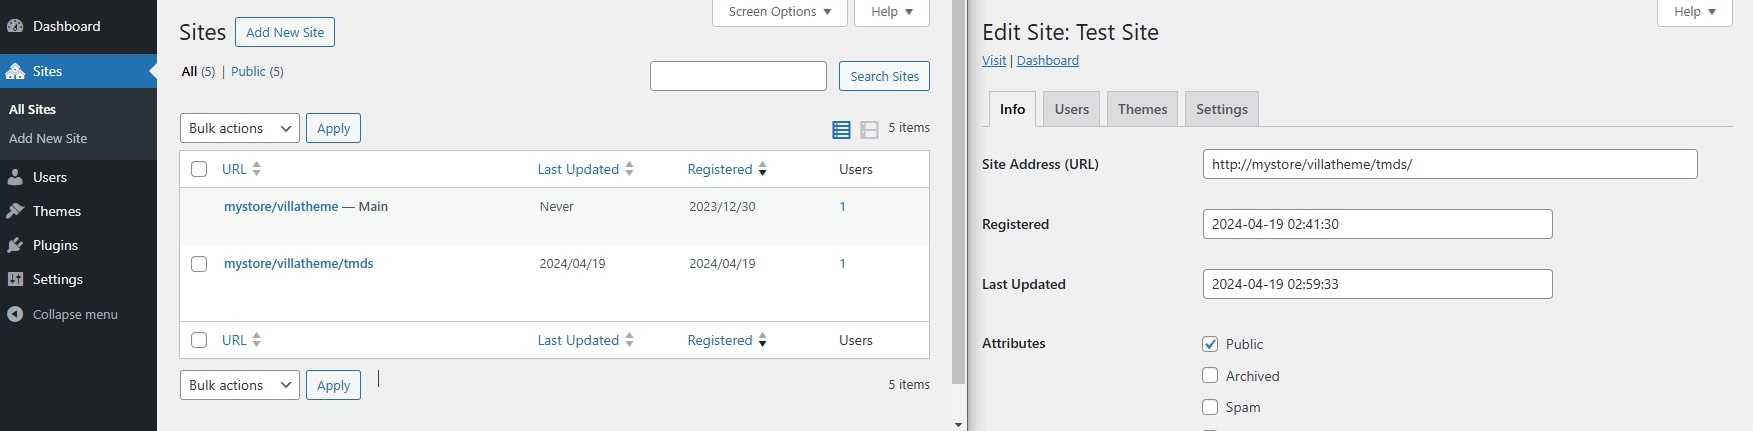
- Installation
- Introduction
- How to use
- How does it work
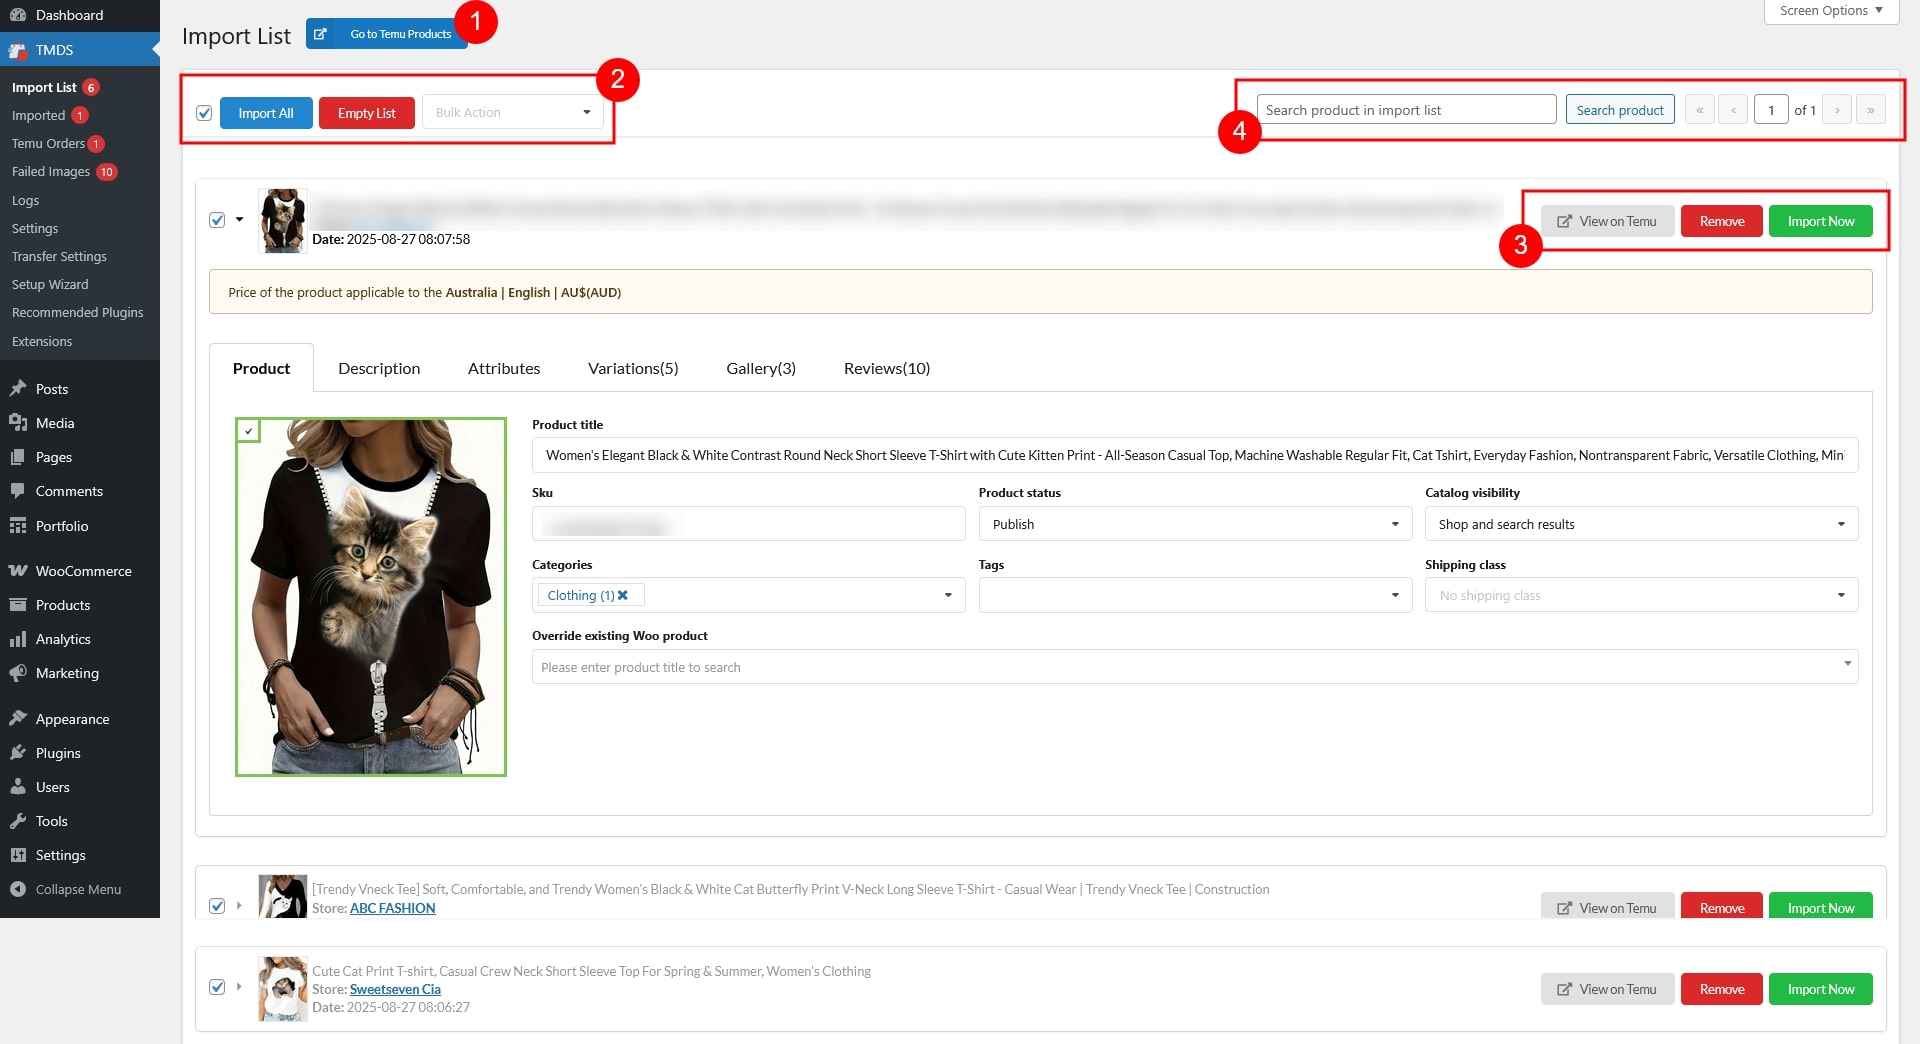
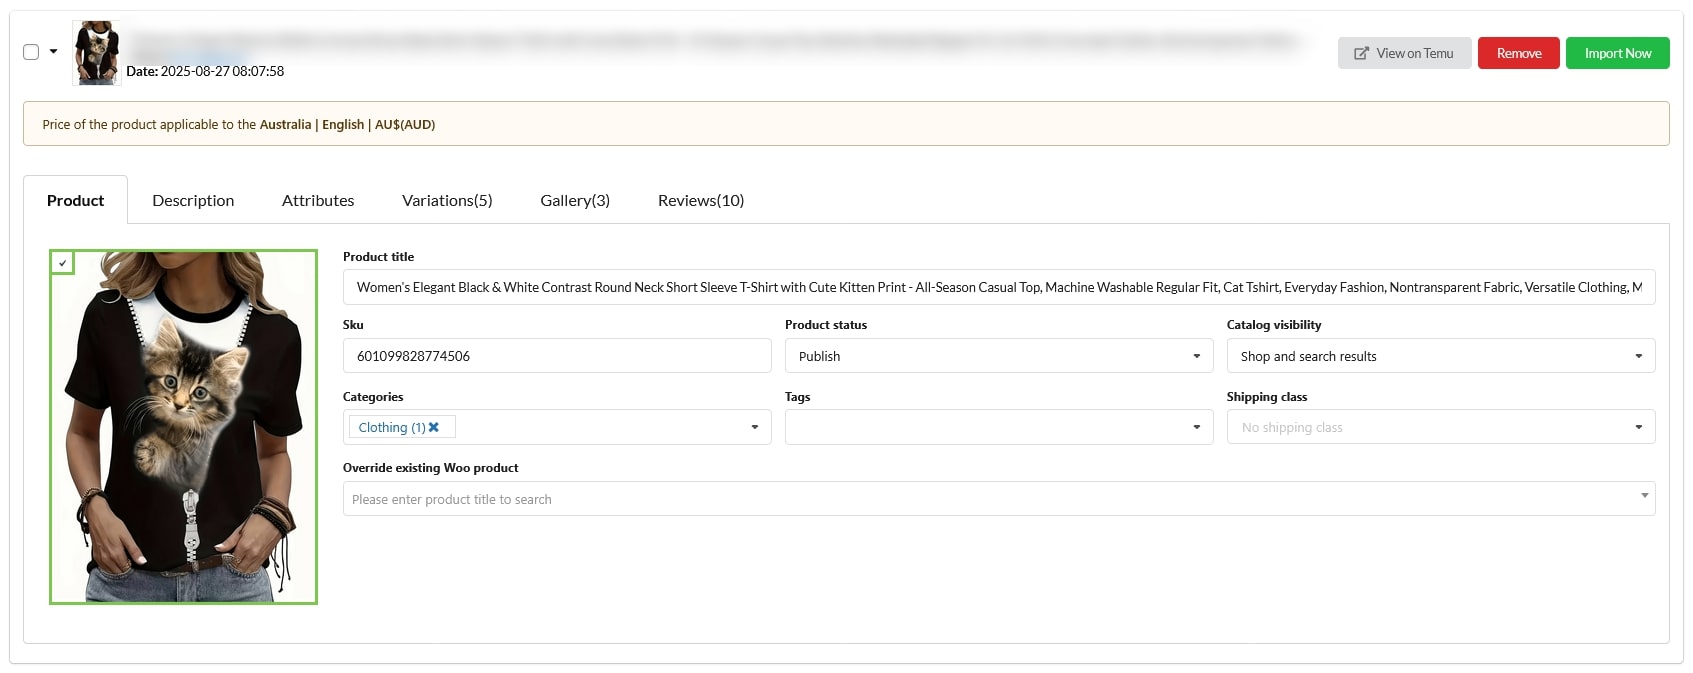
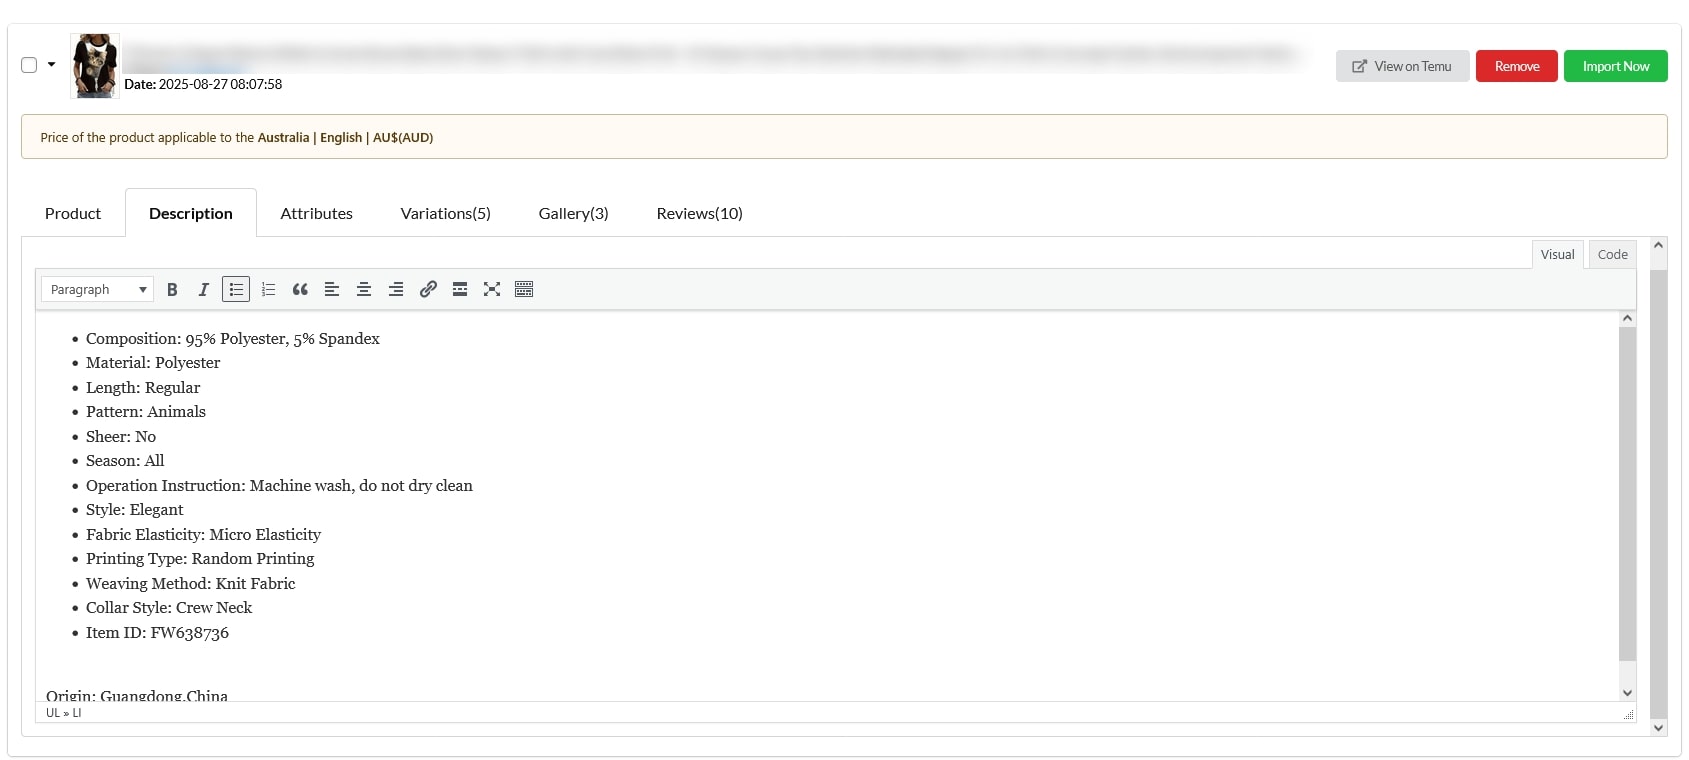
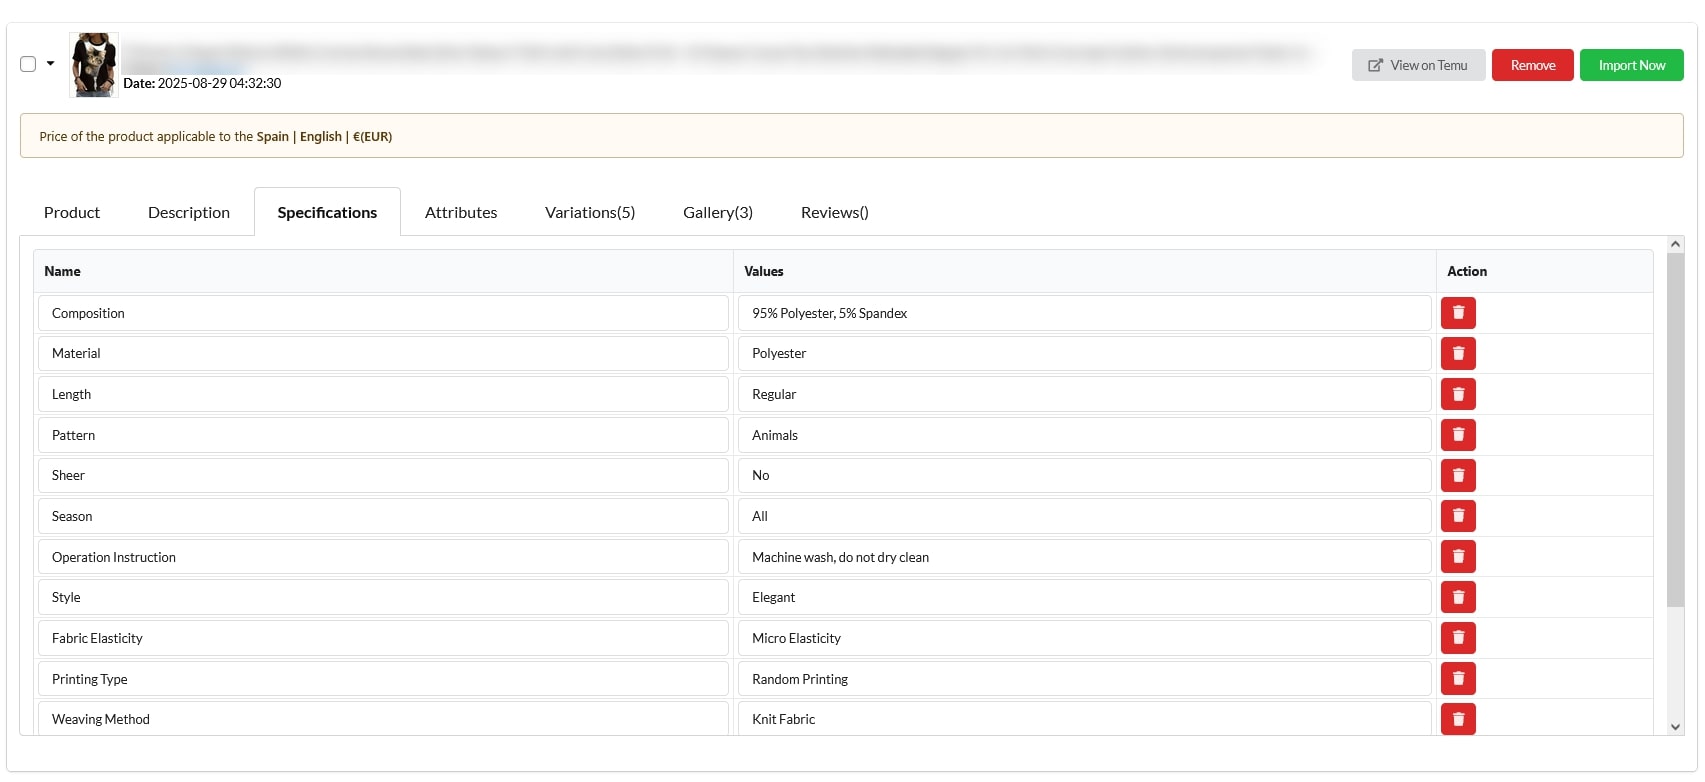
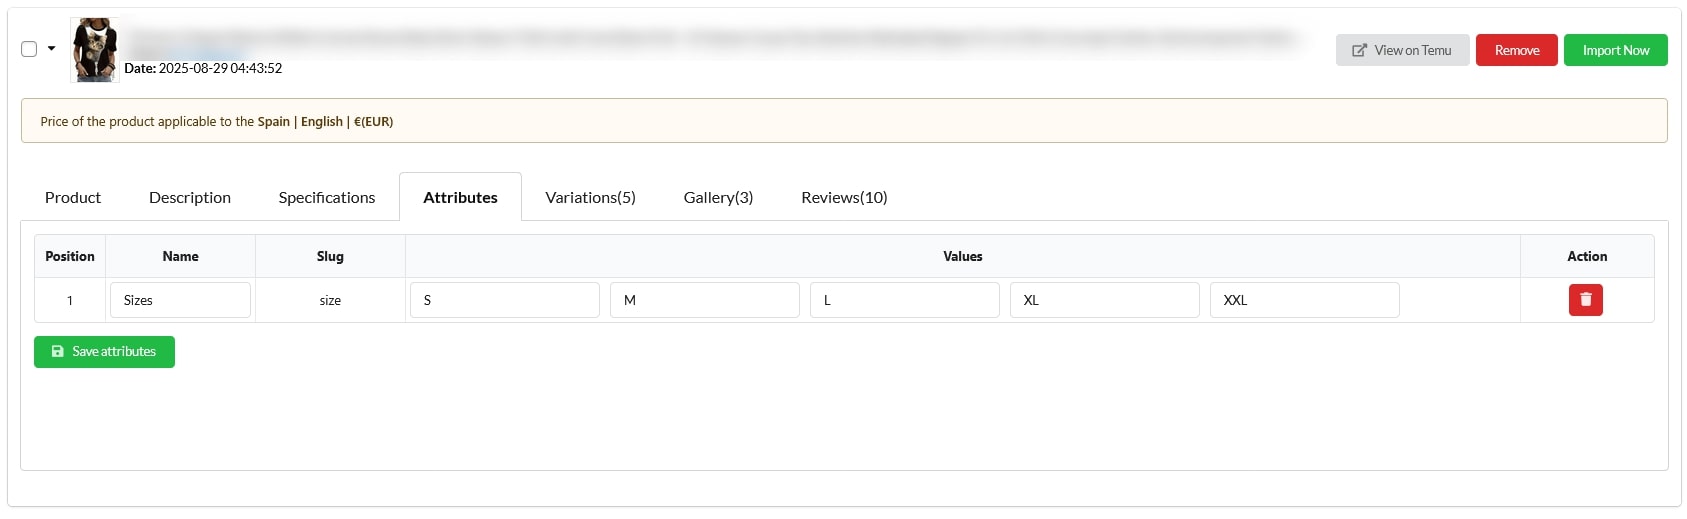
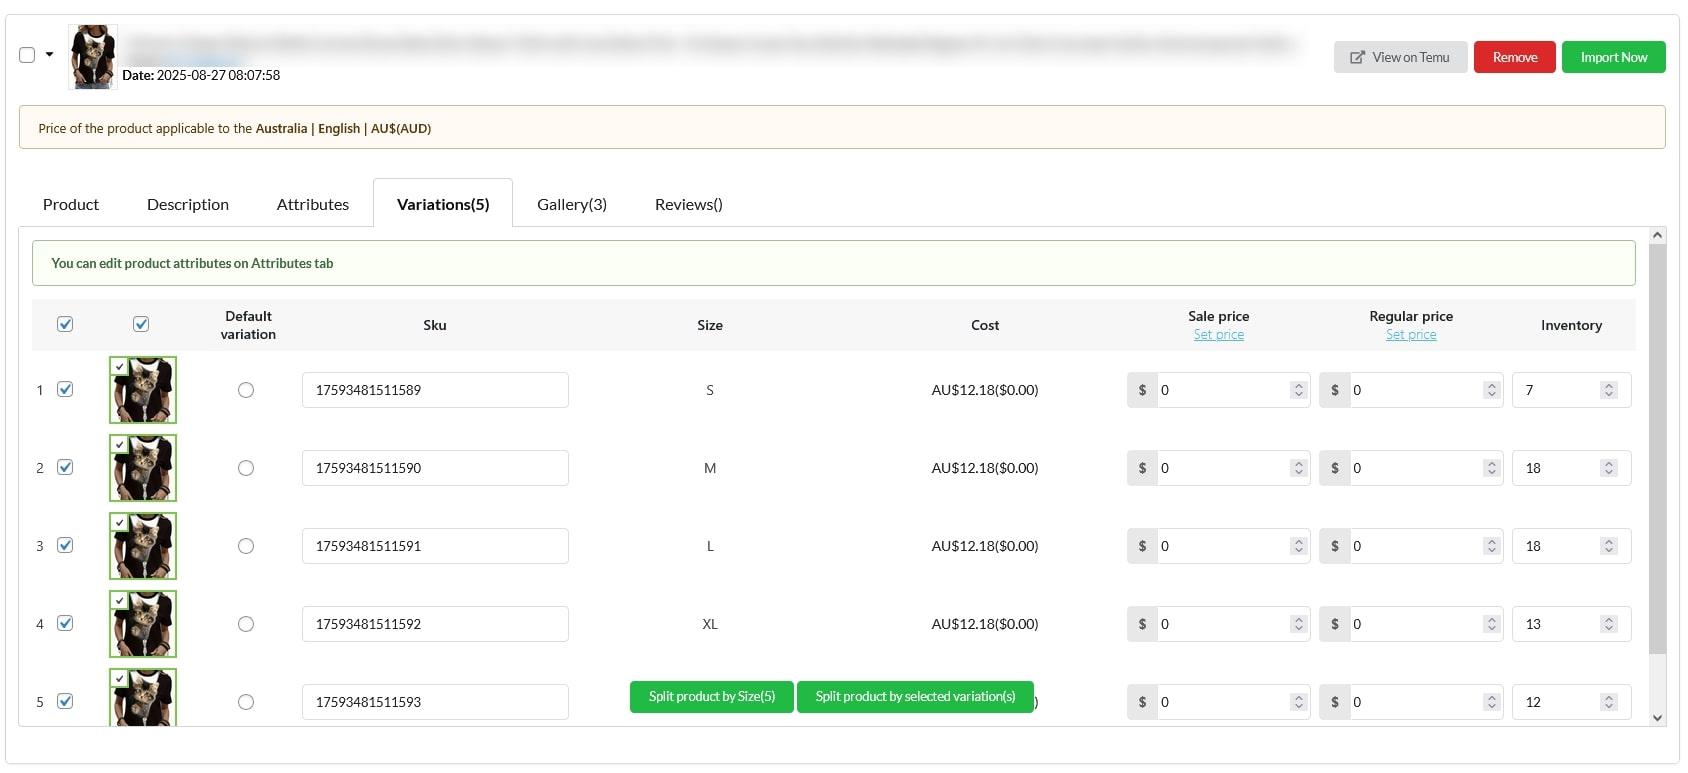
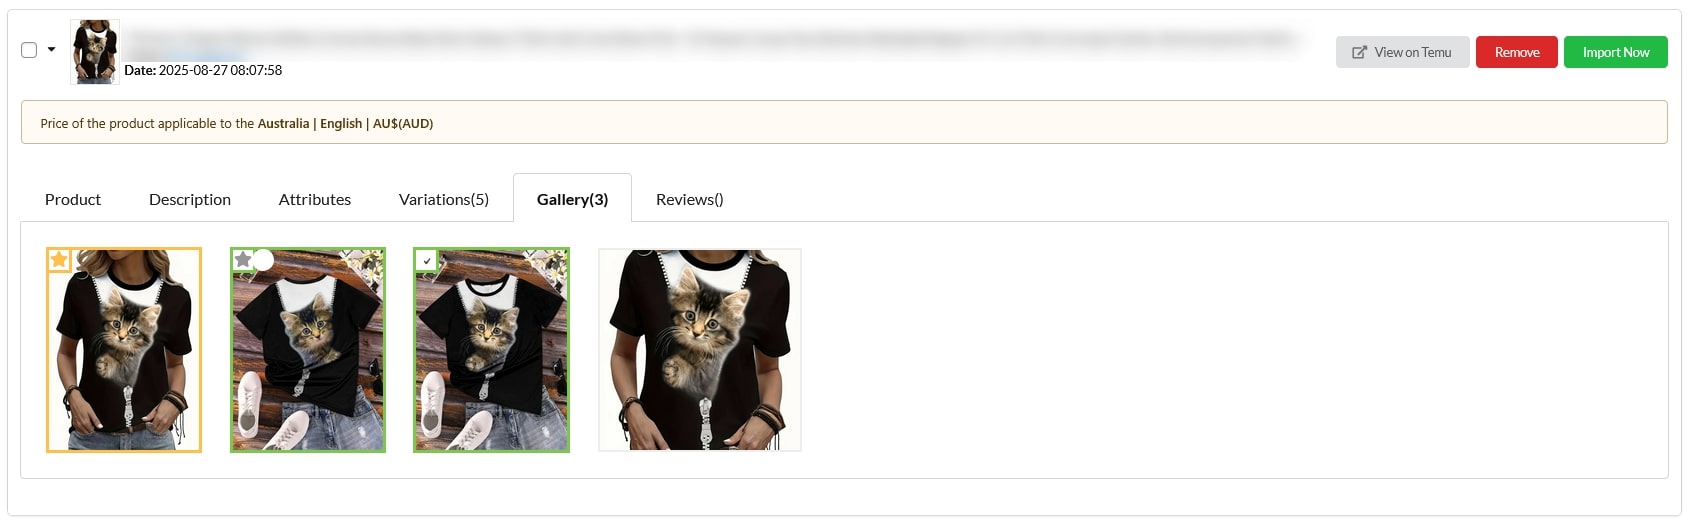
- Import List
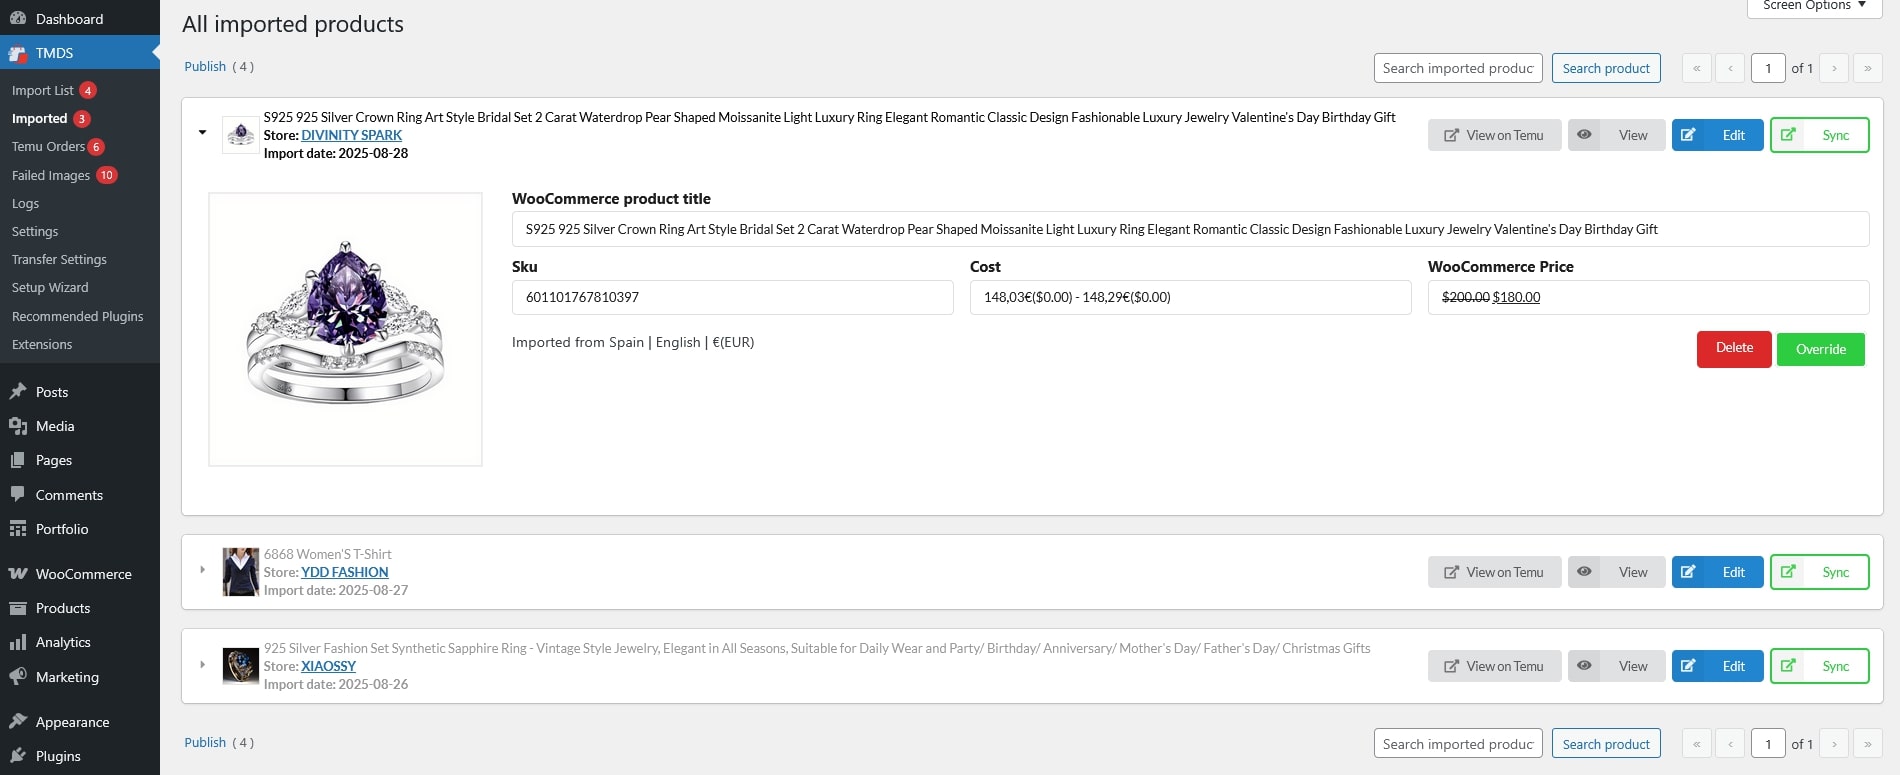
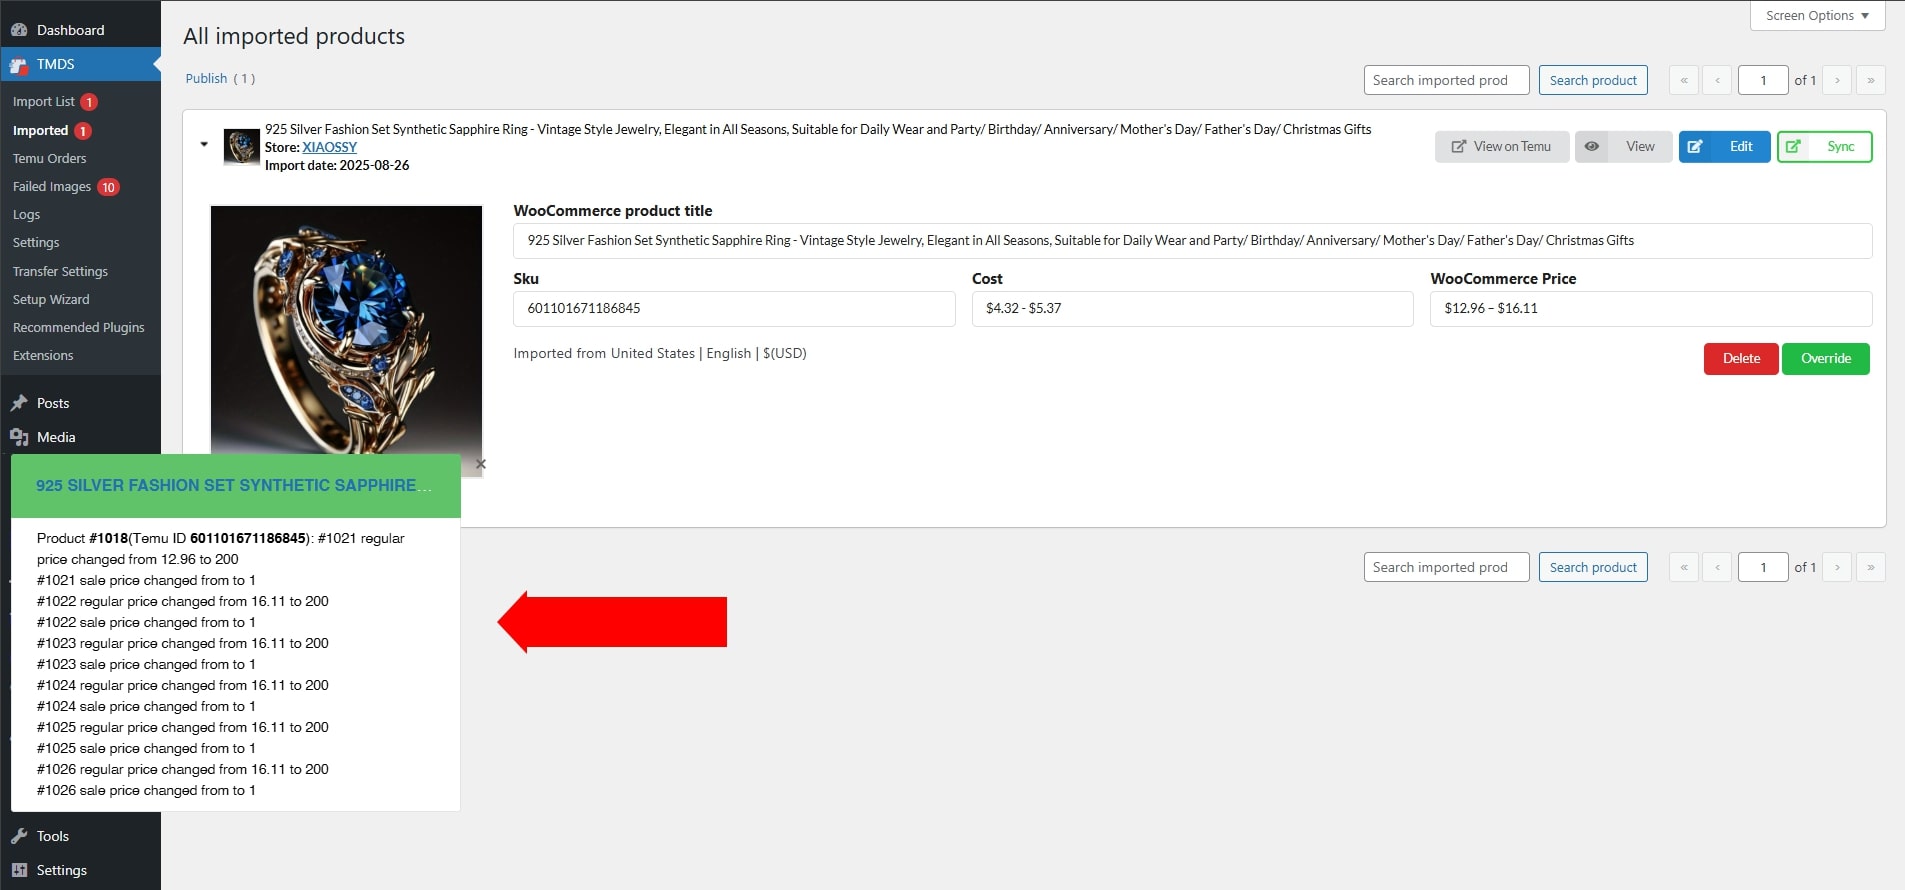
- Imported
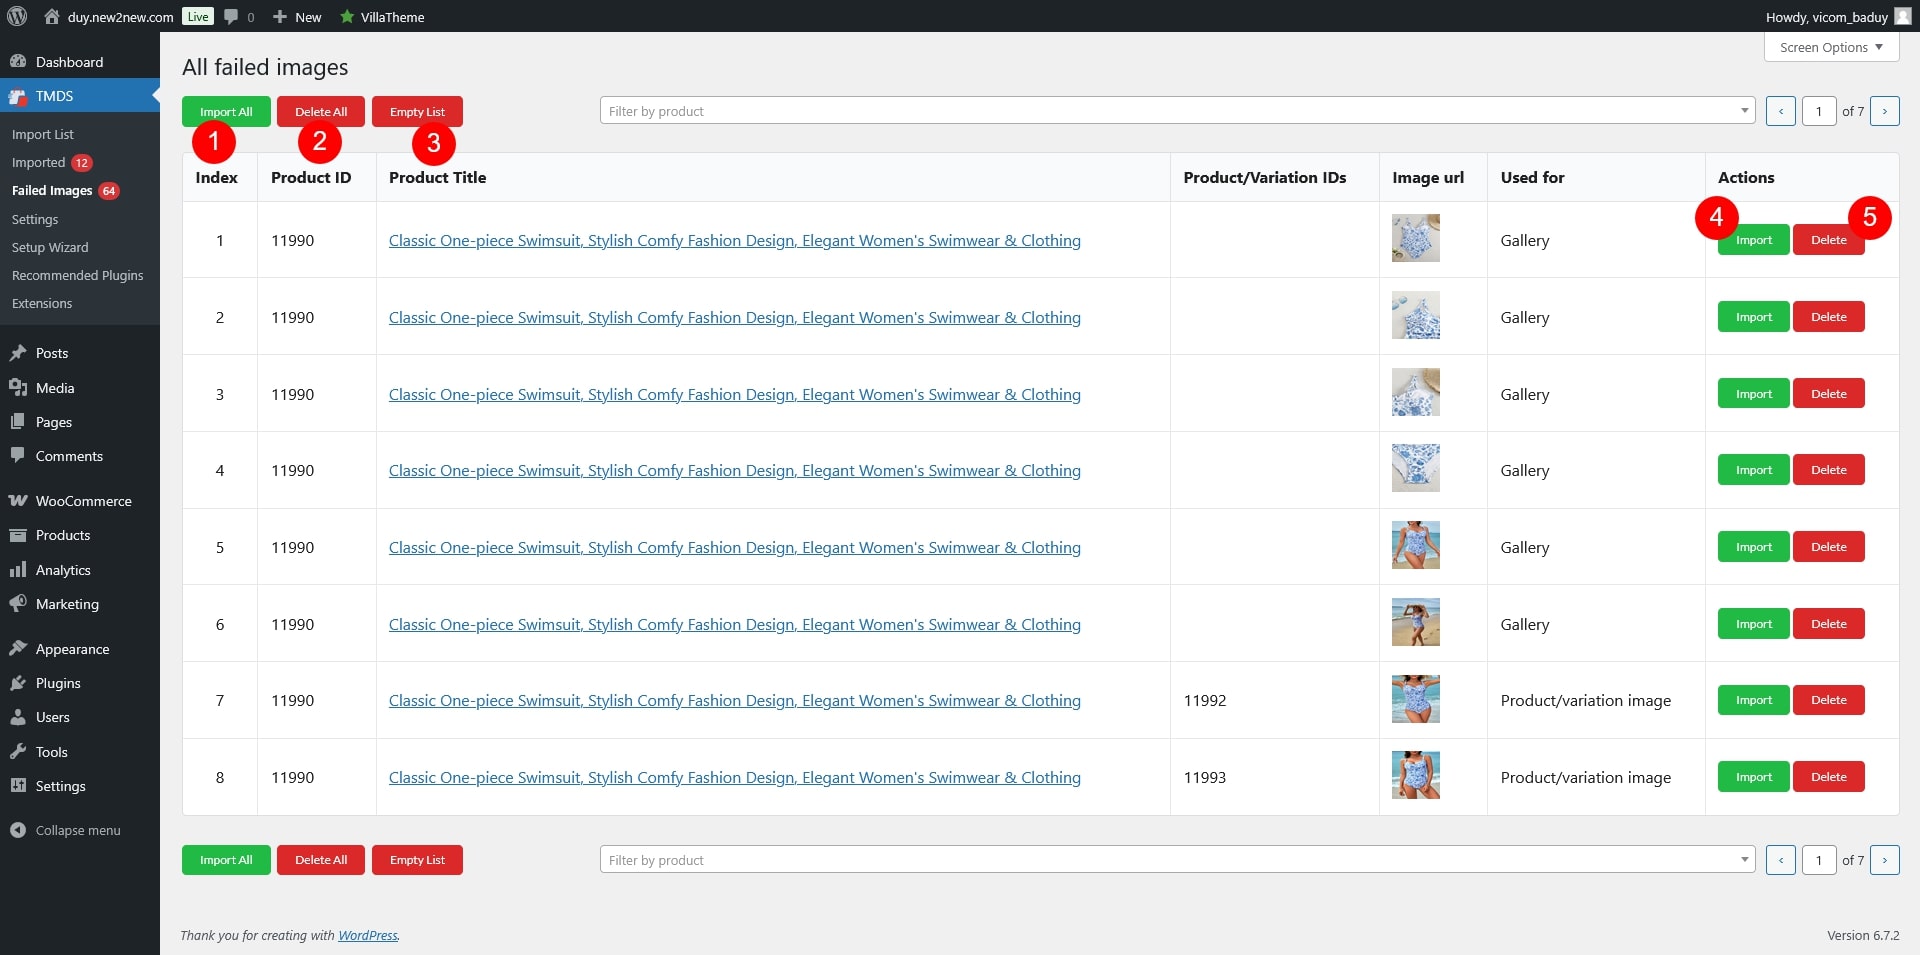
- Failed Images
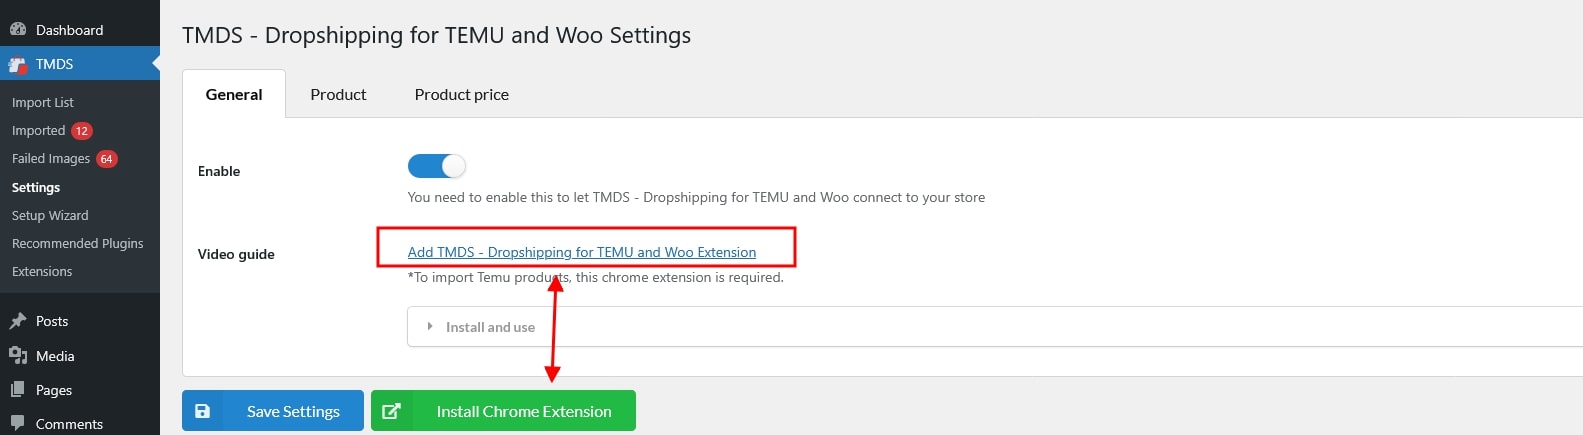
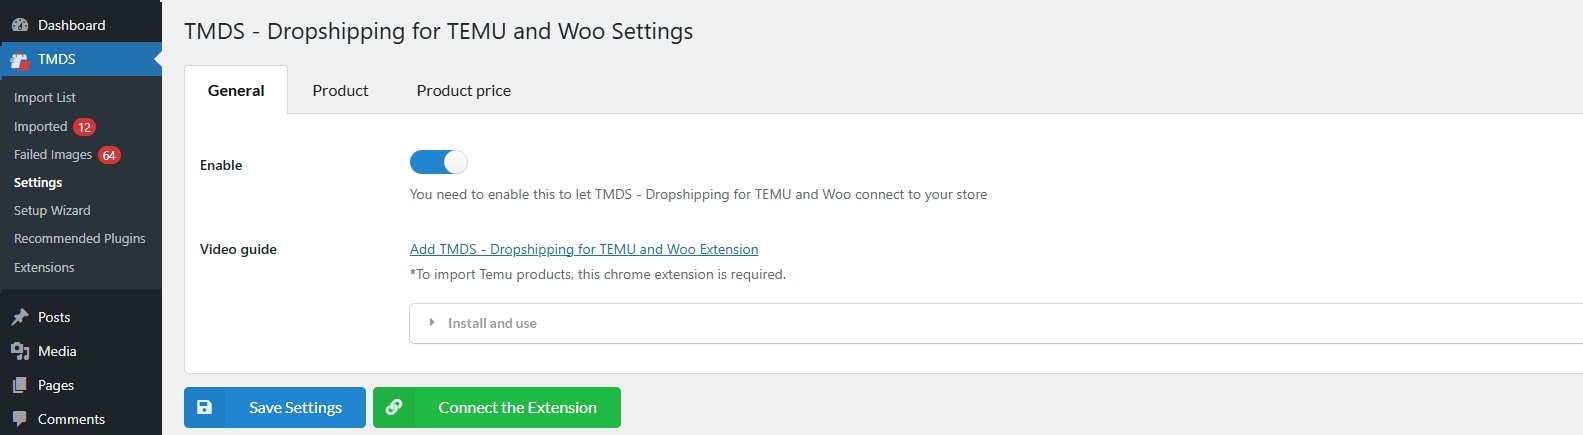
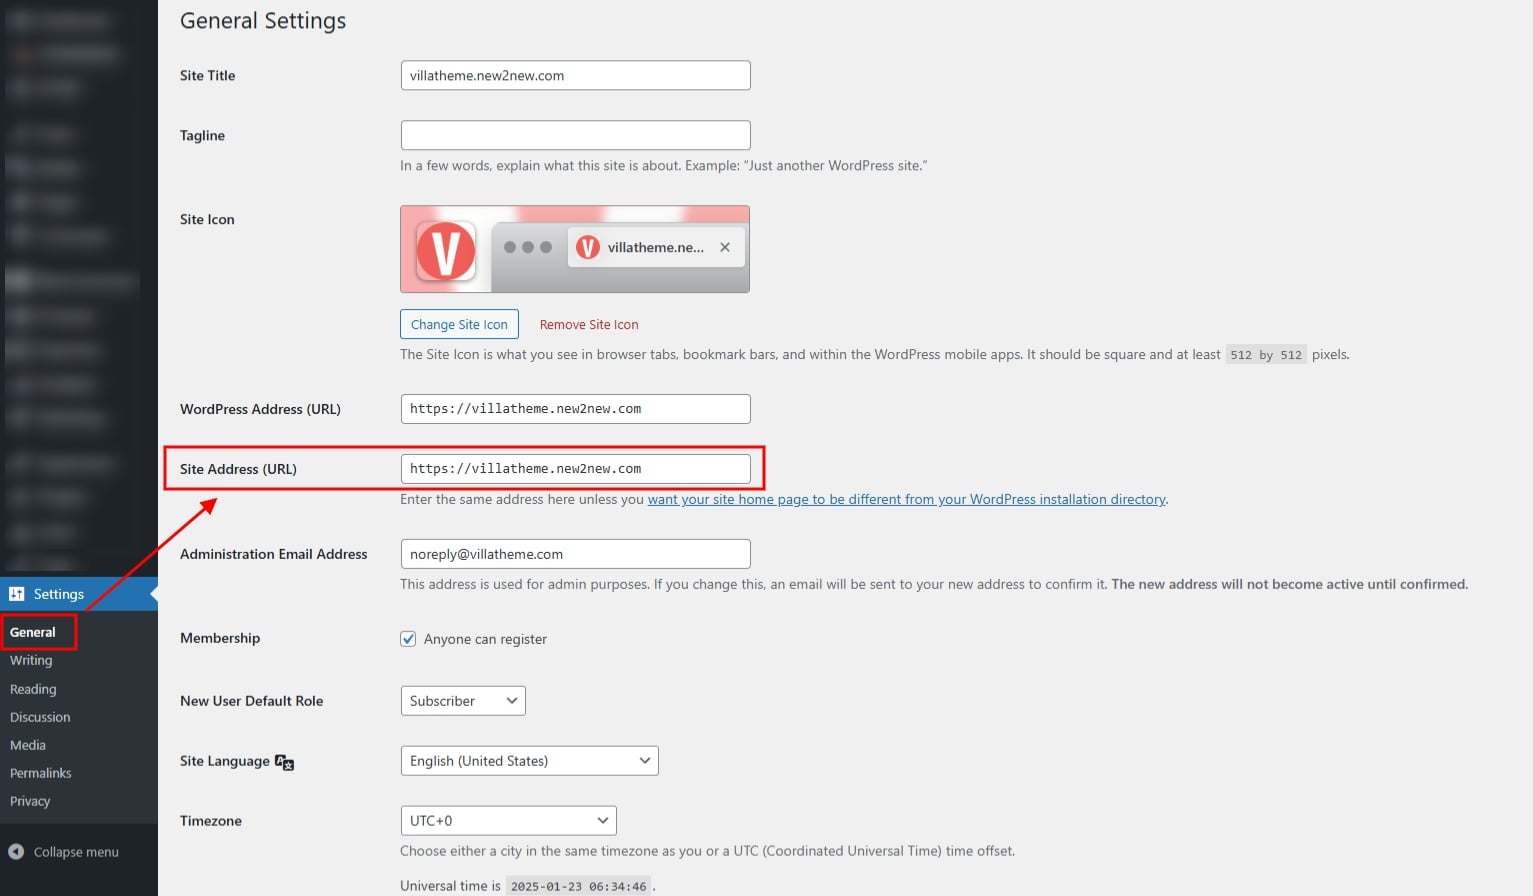
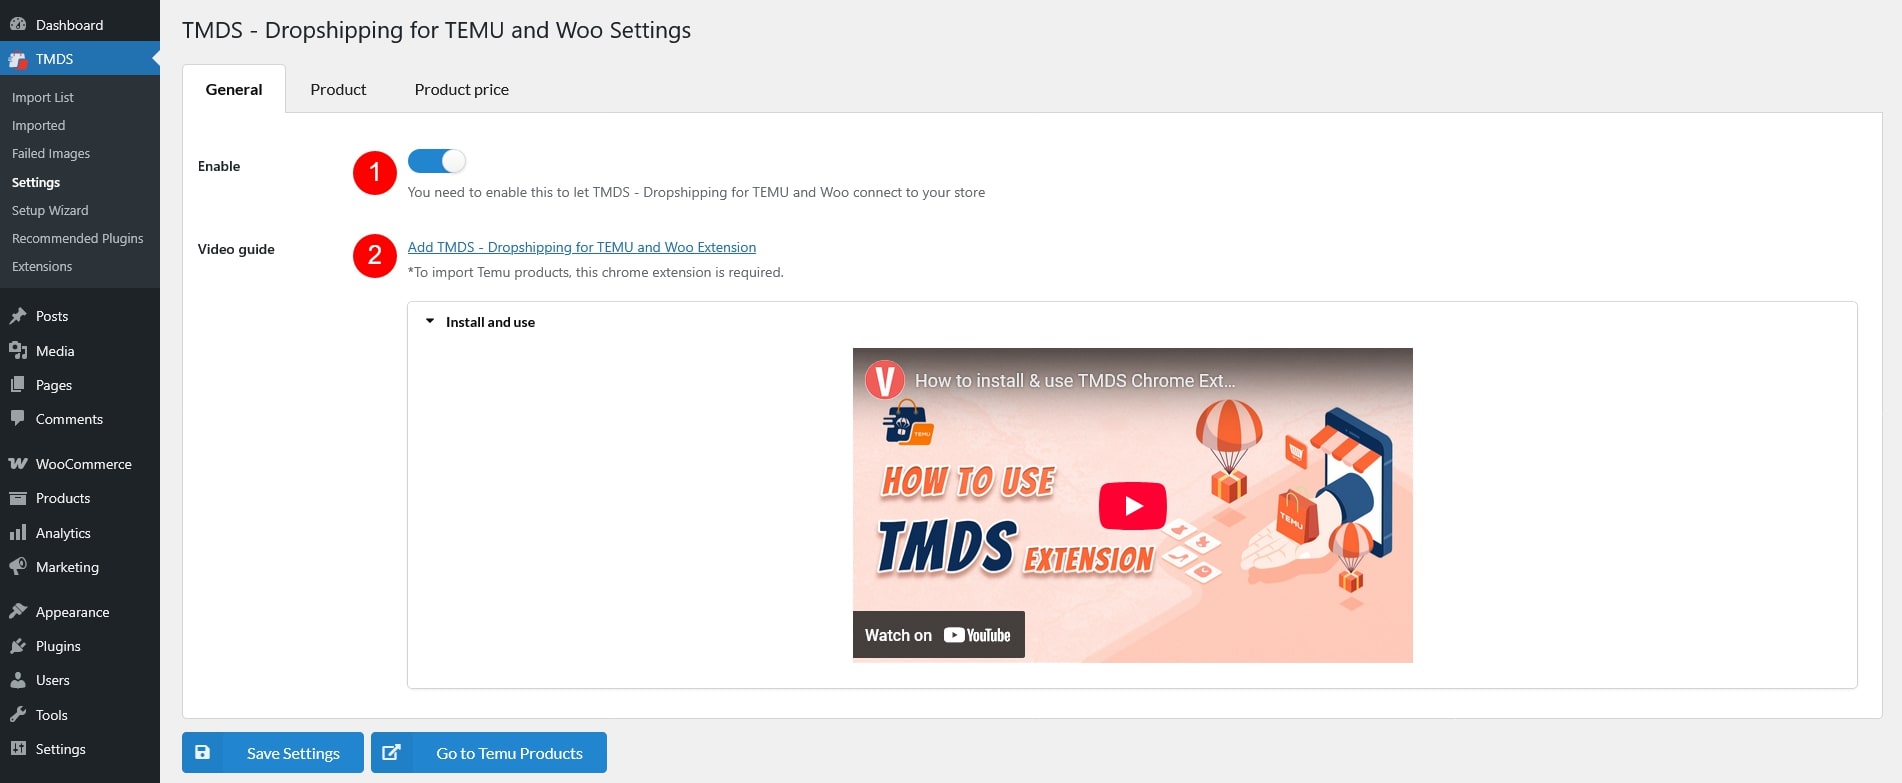
- Settings – General
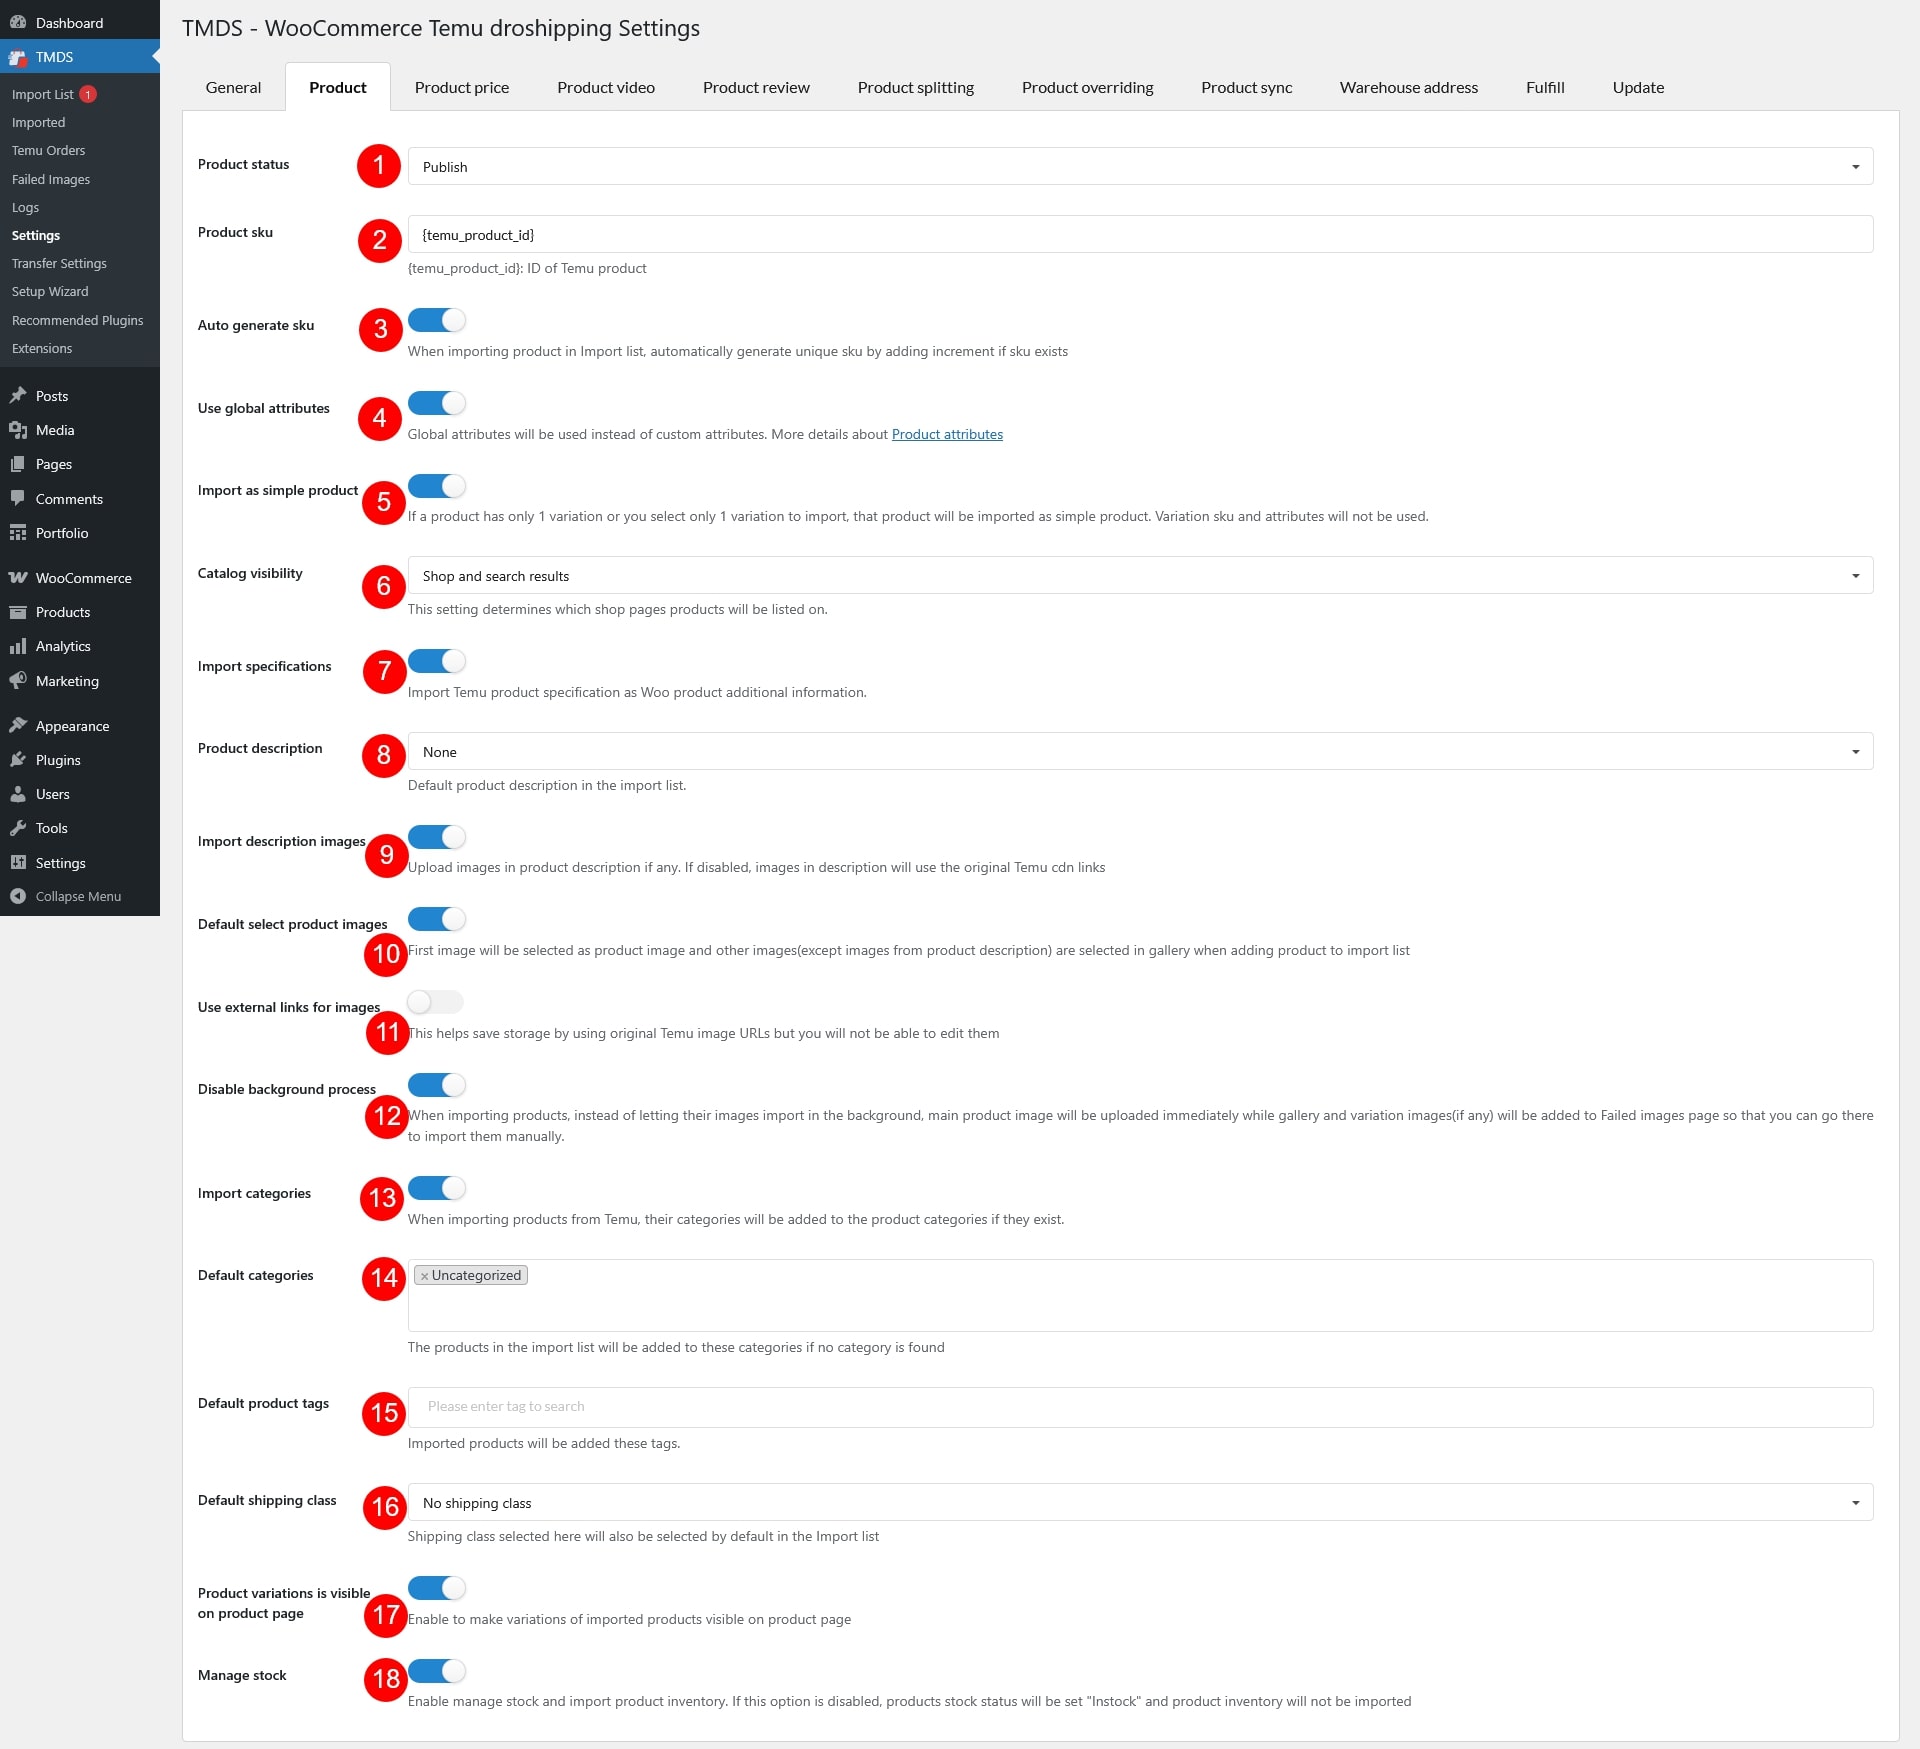
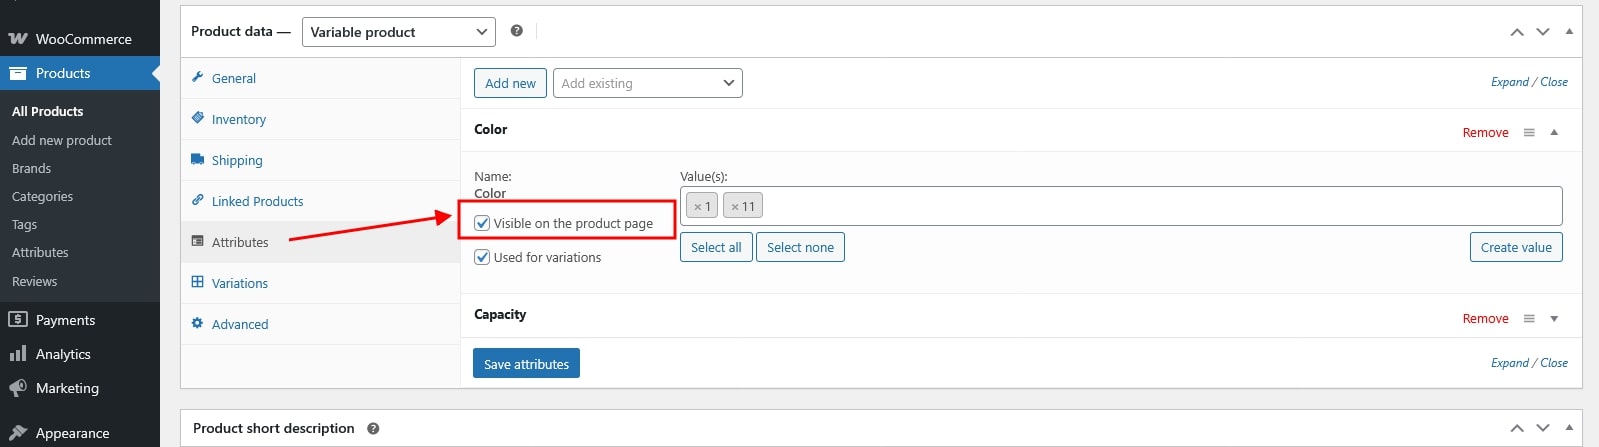
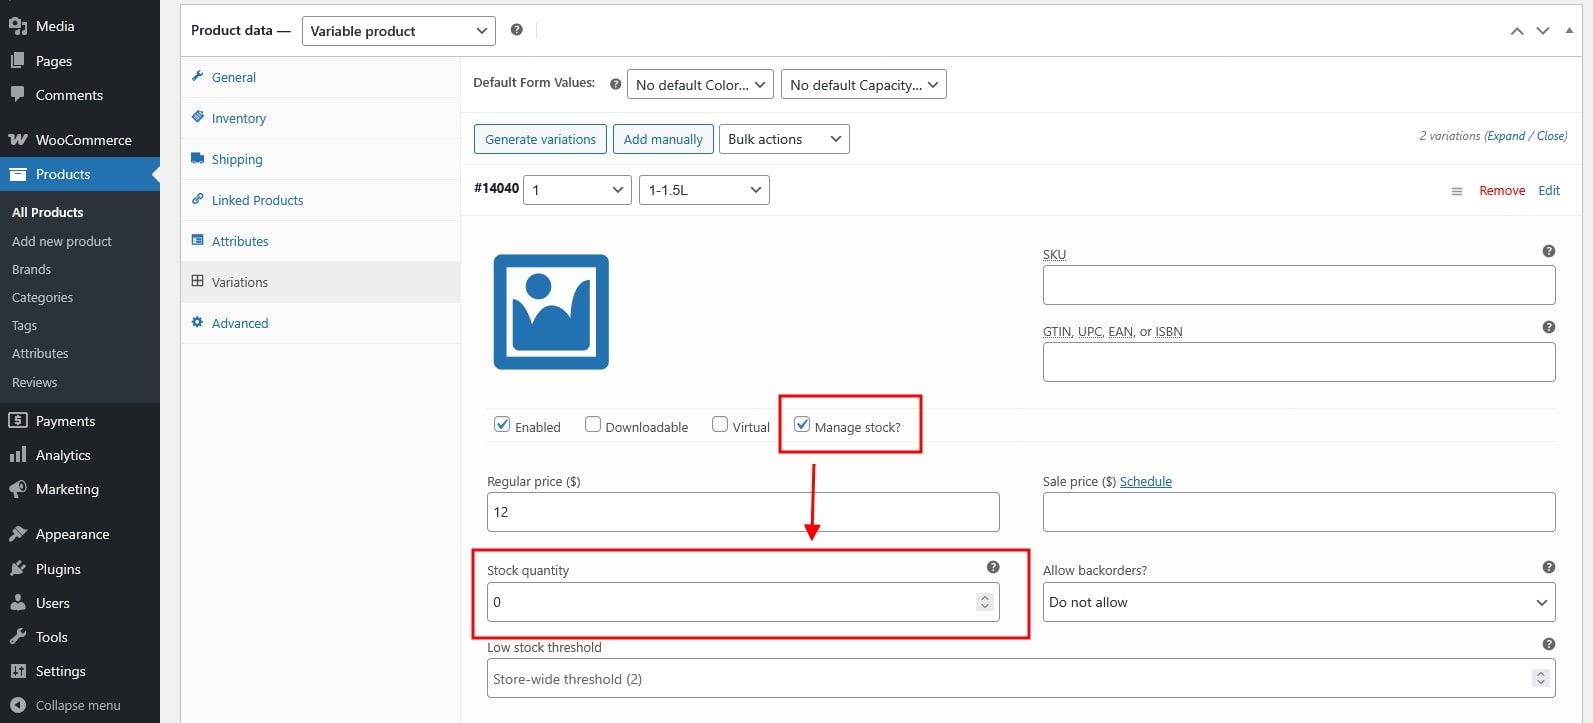
- Settings – Product
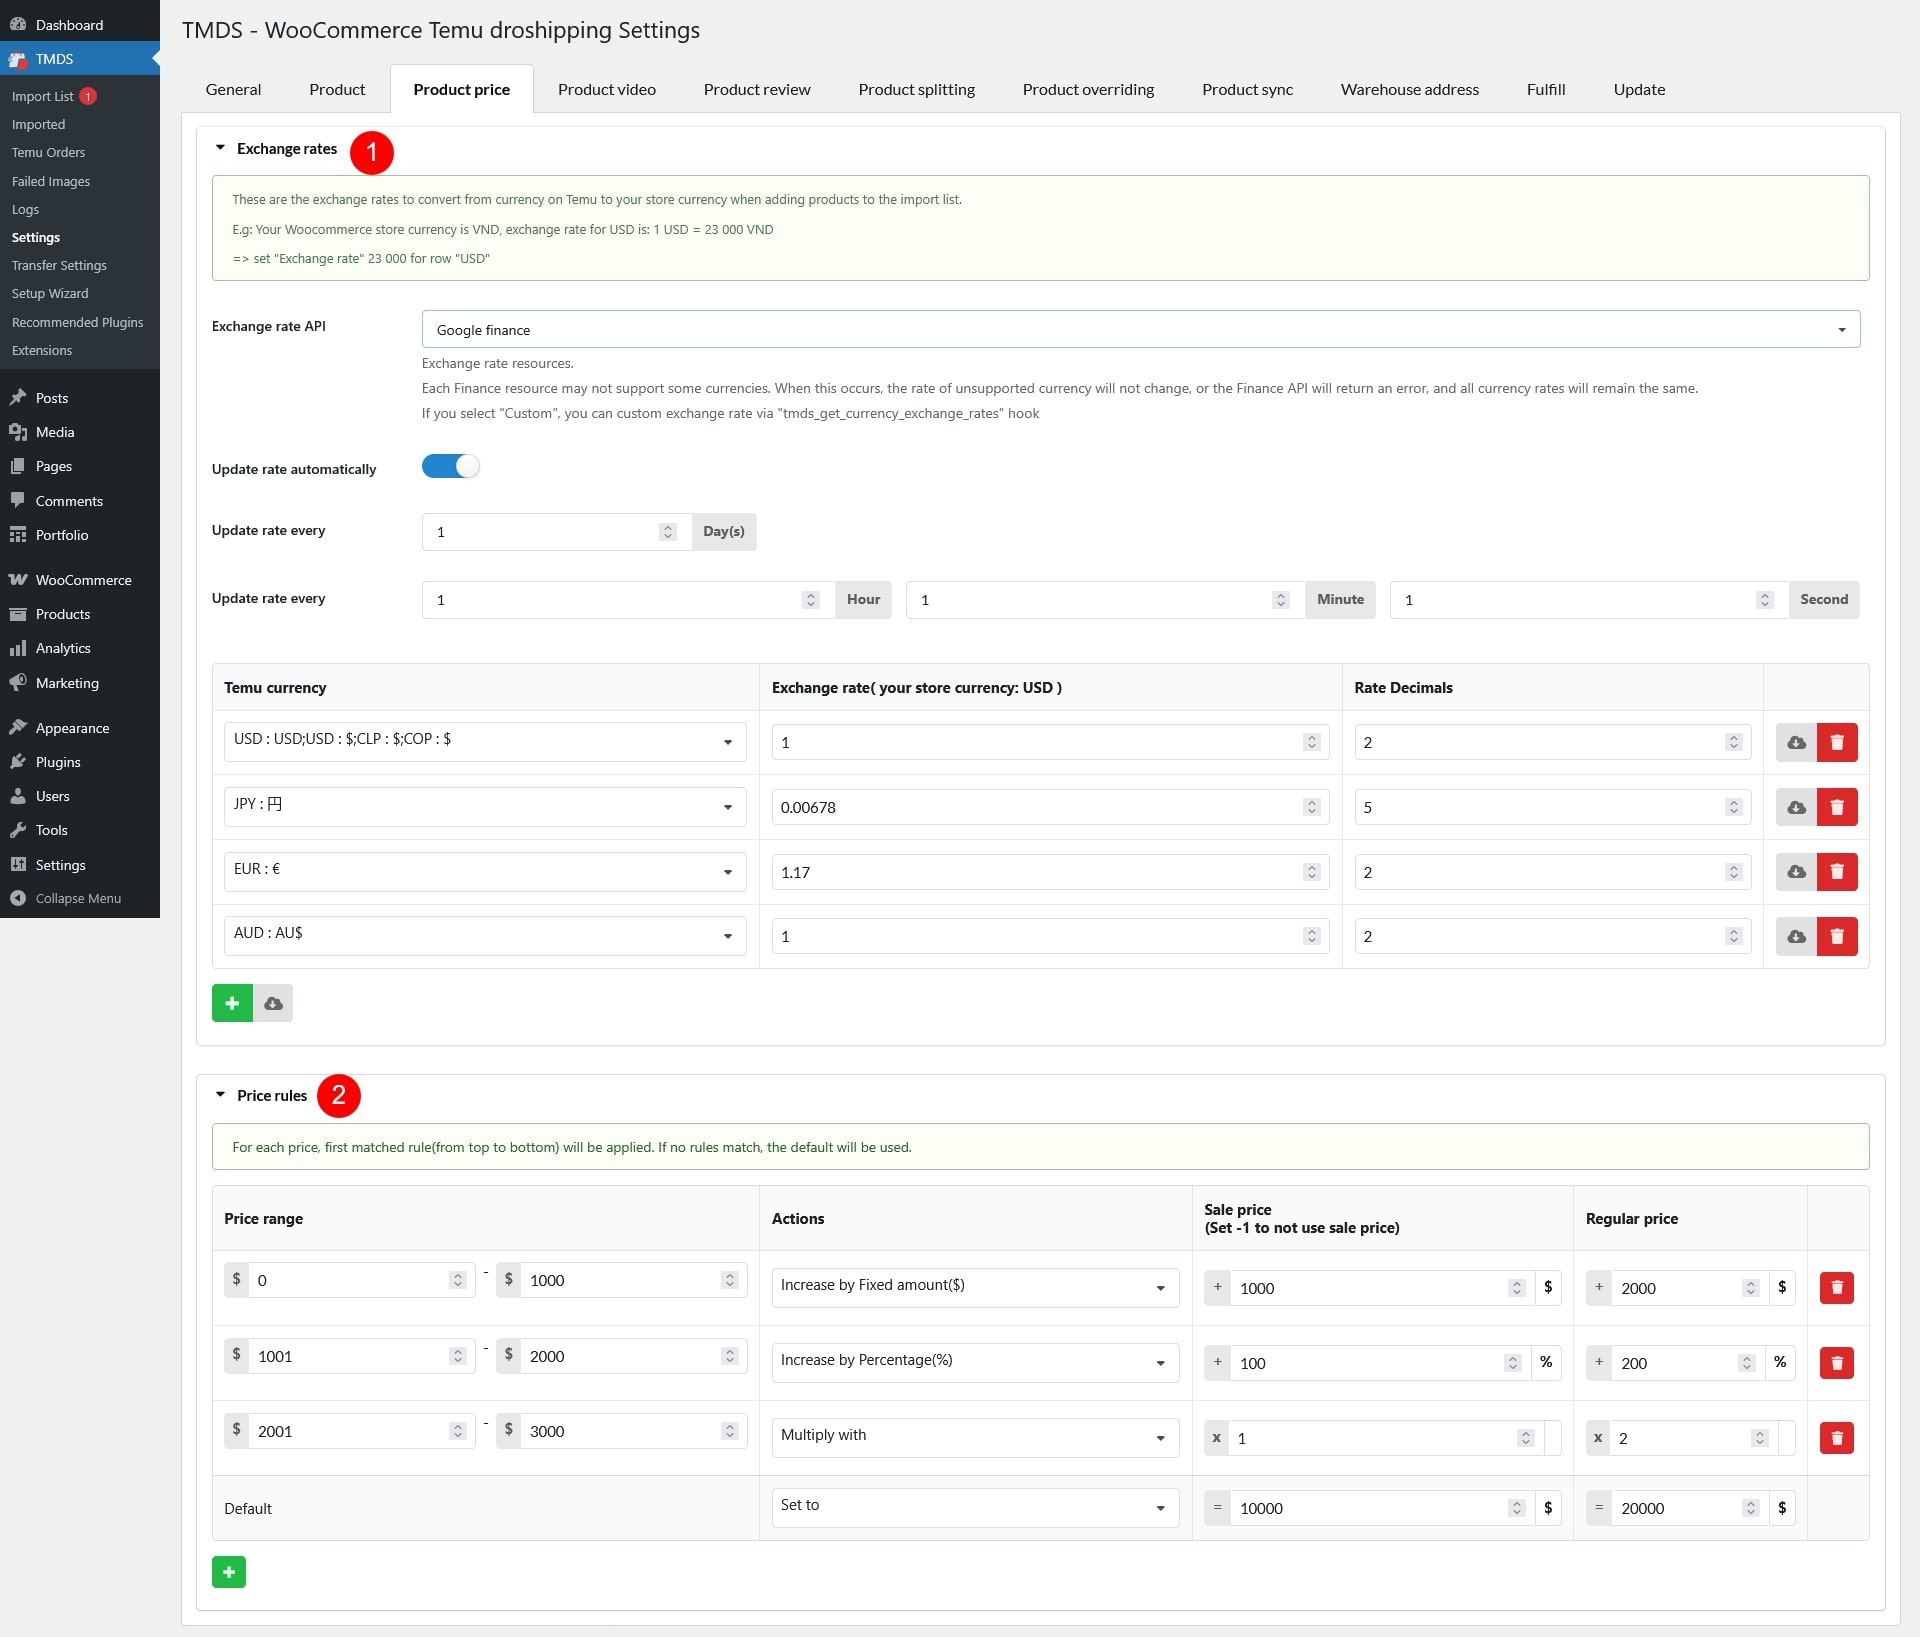
- Settings – Product price
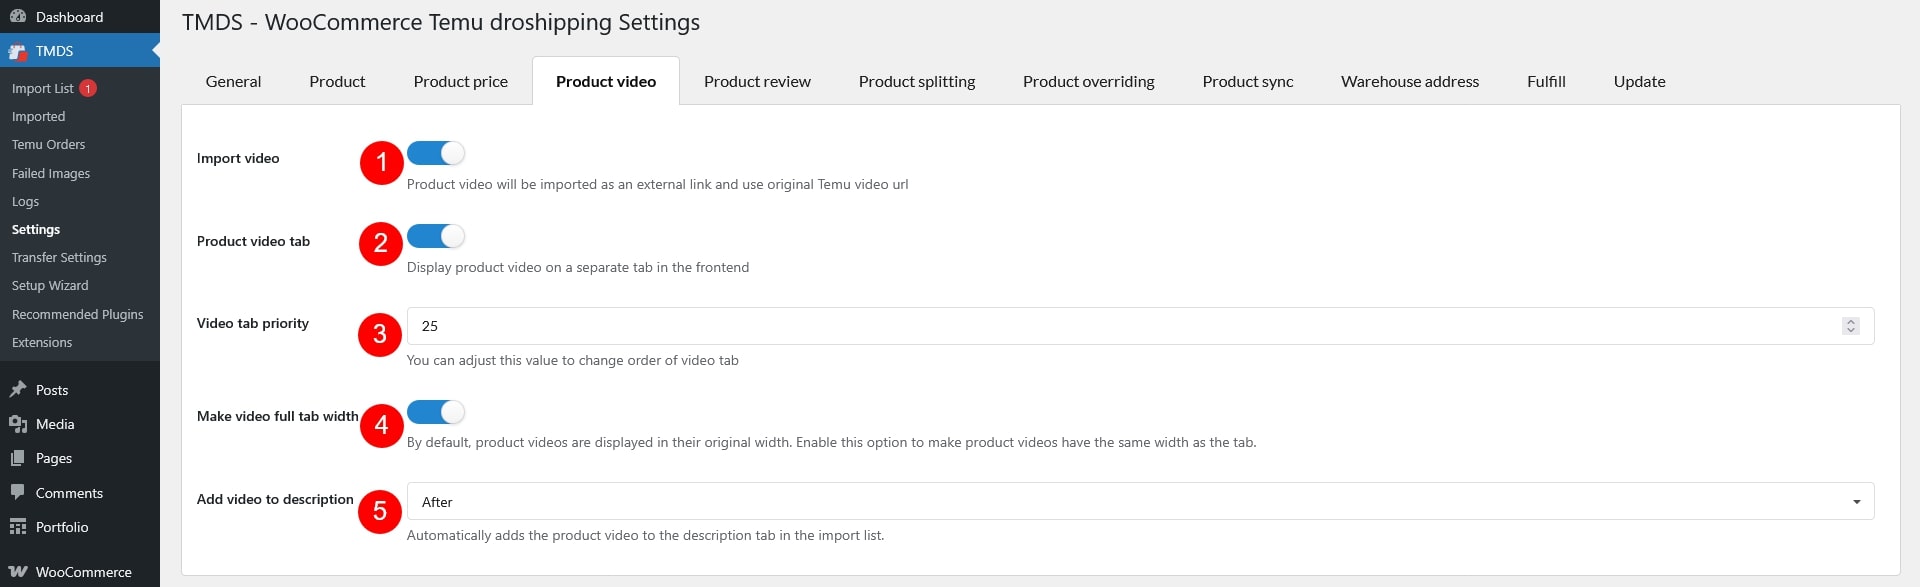
- Settings – Product video
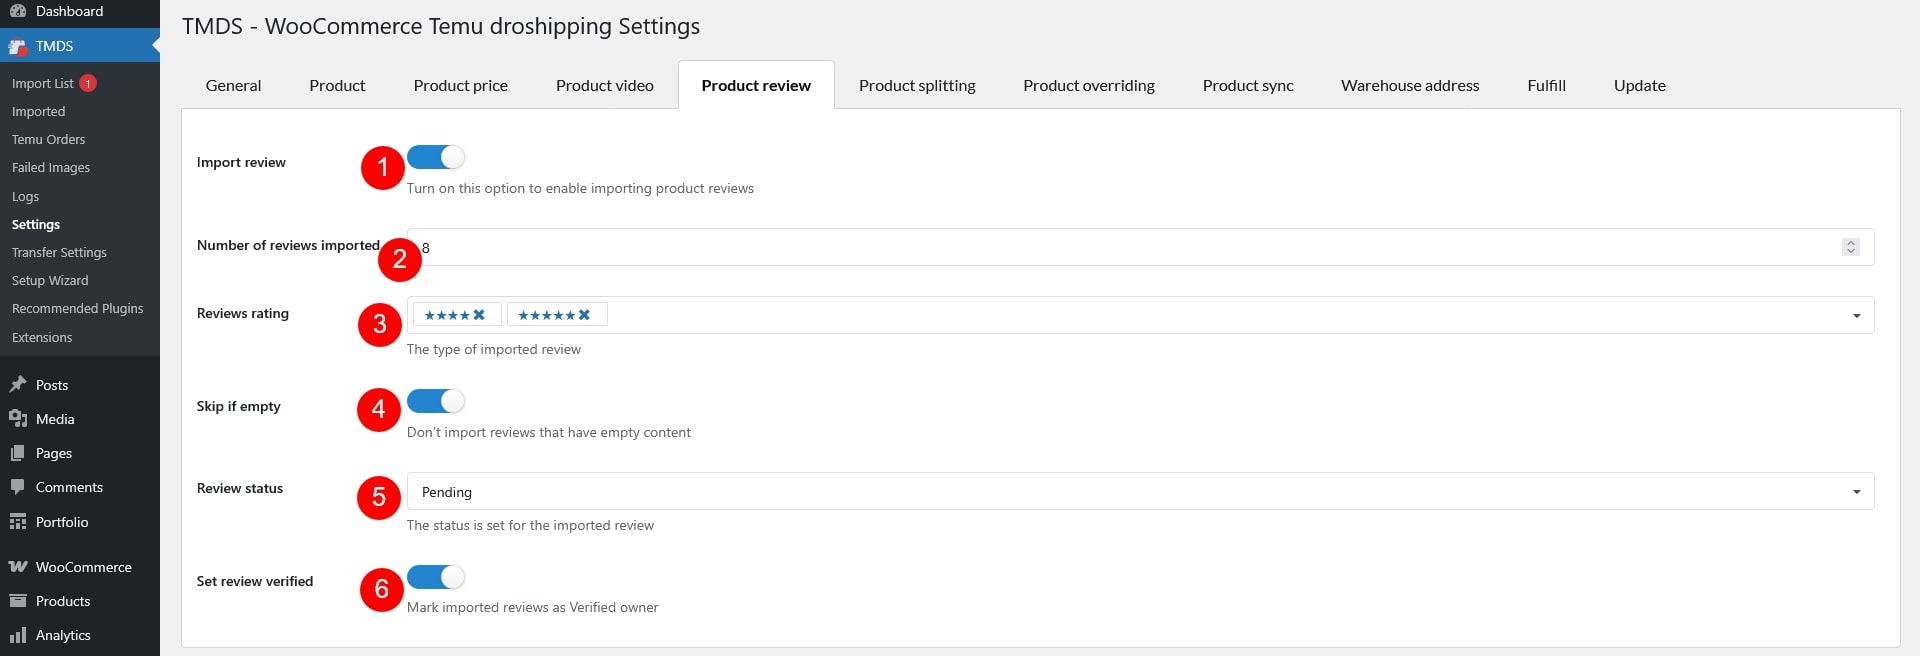
- Settings – Product review
- Settings – Product splitting
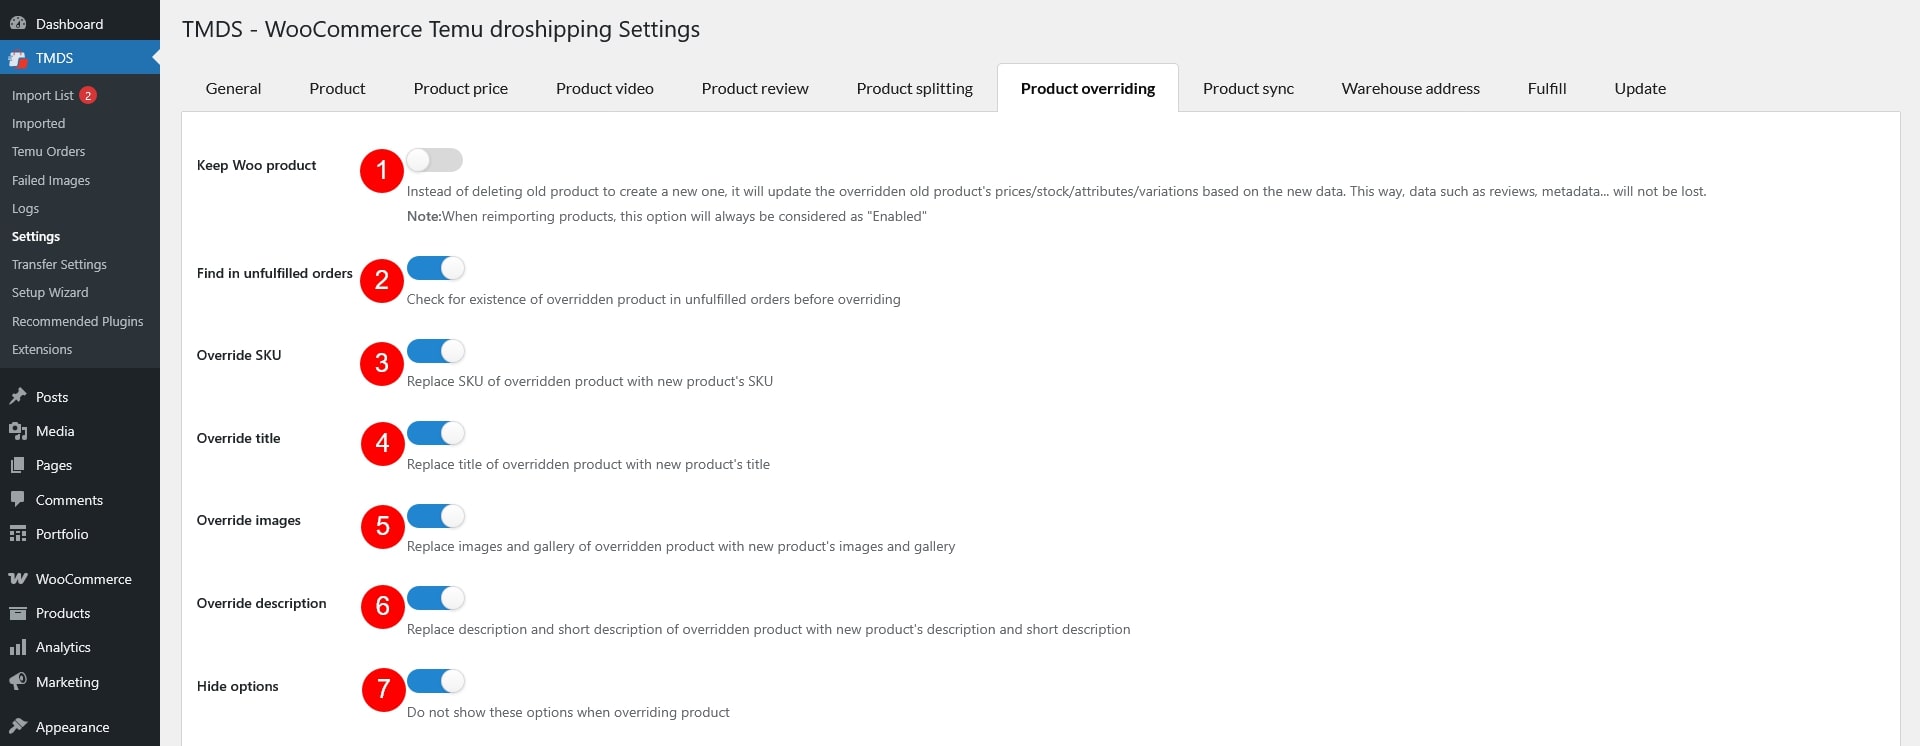
- Settings – Product overriding
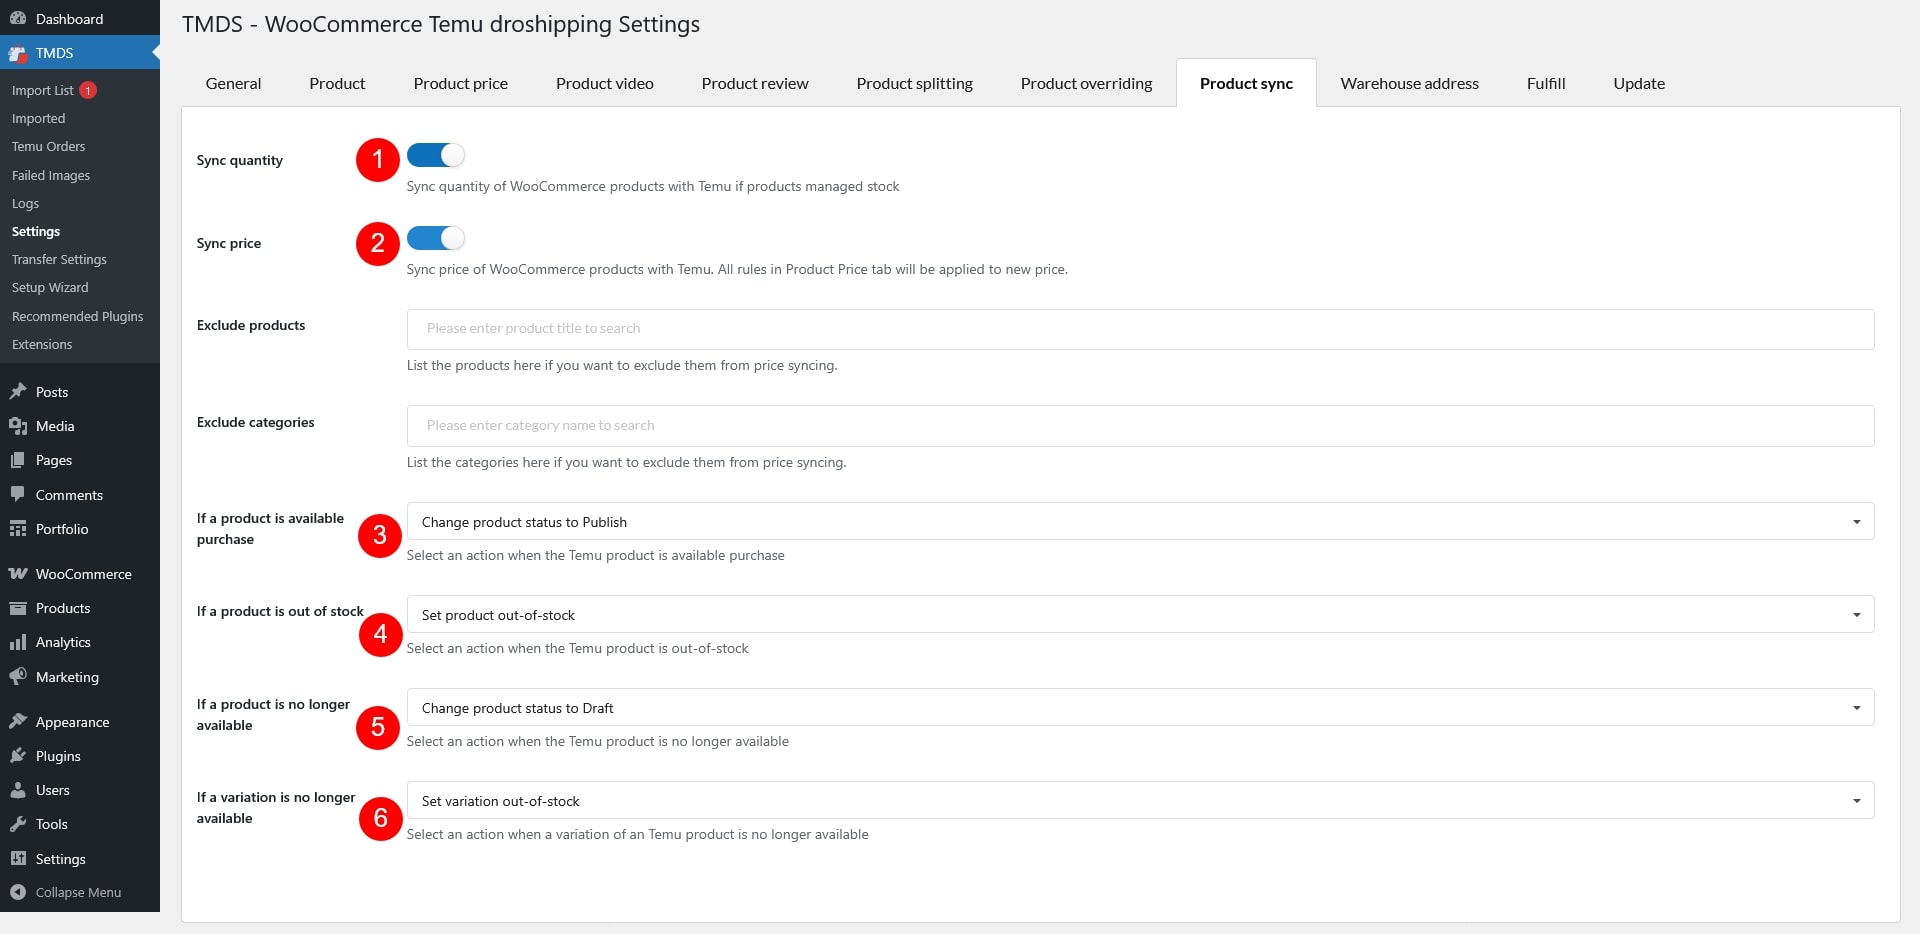
- Settings – Product sync
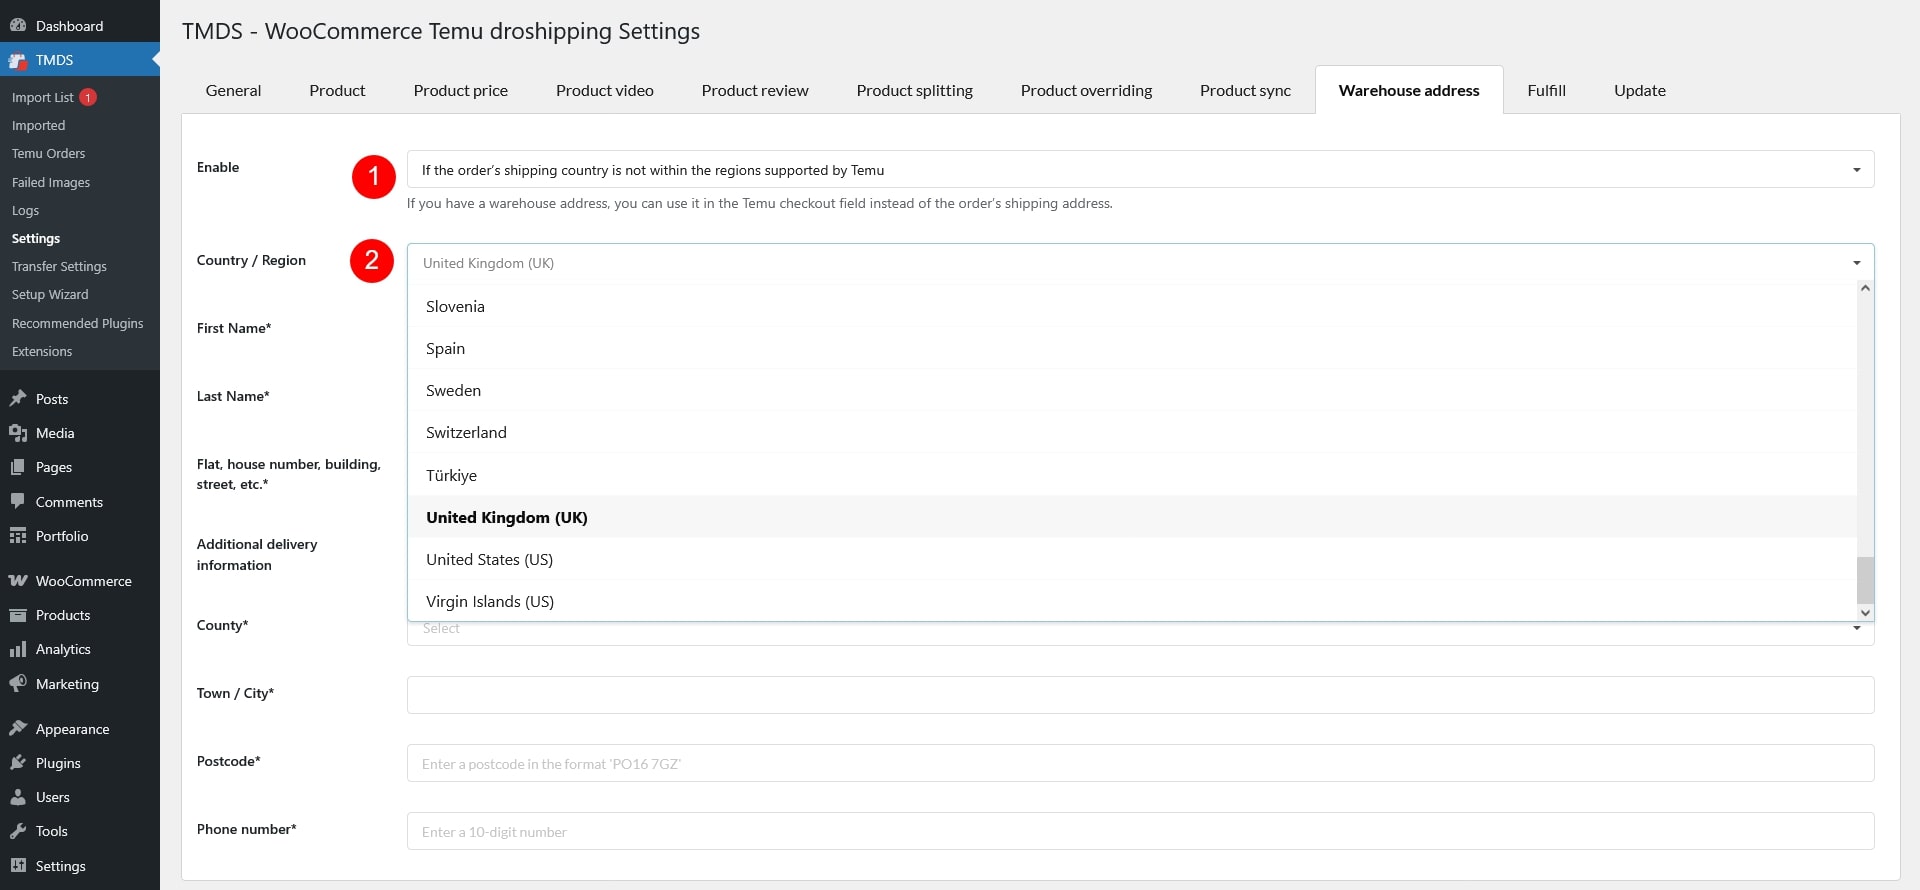
- Settings – Warehouse address
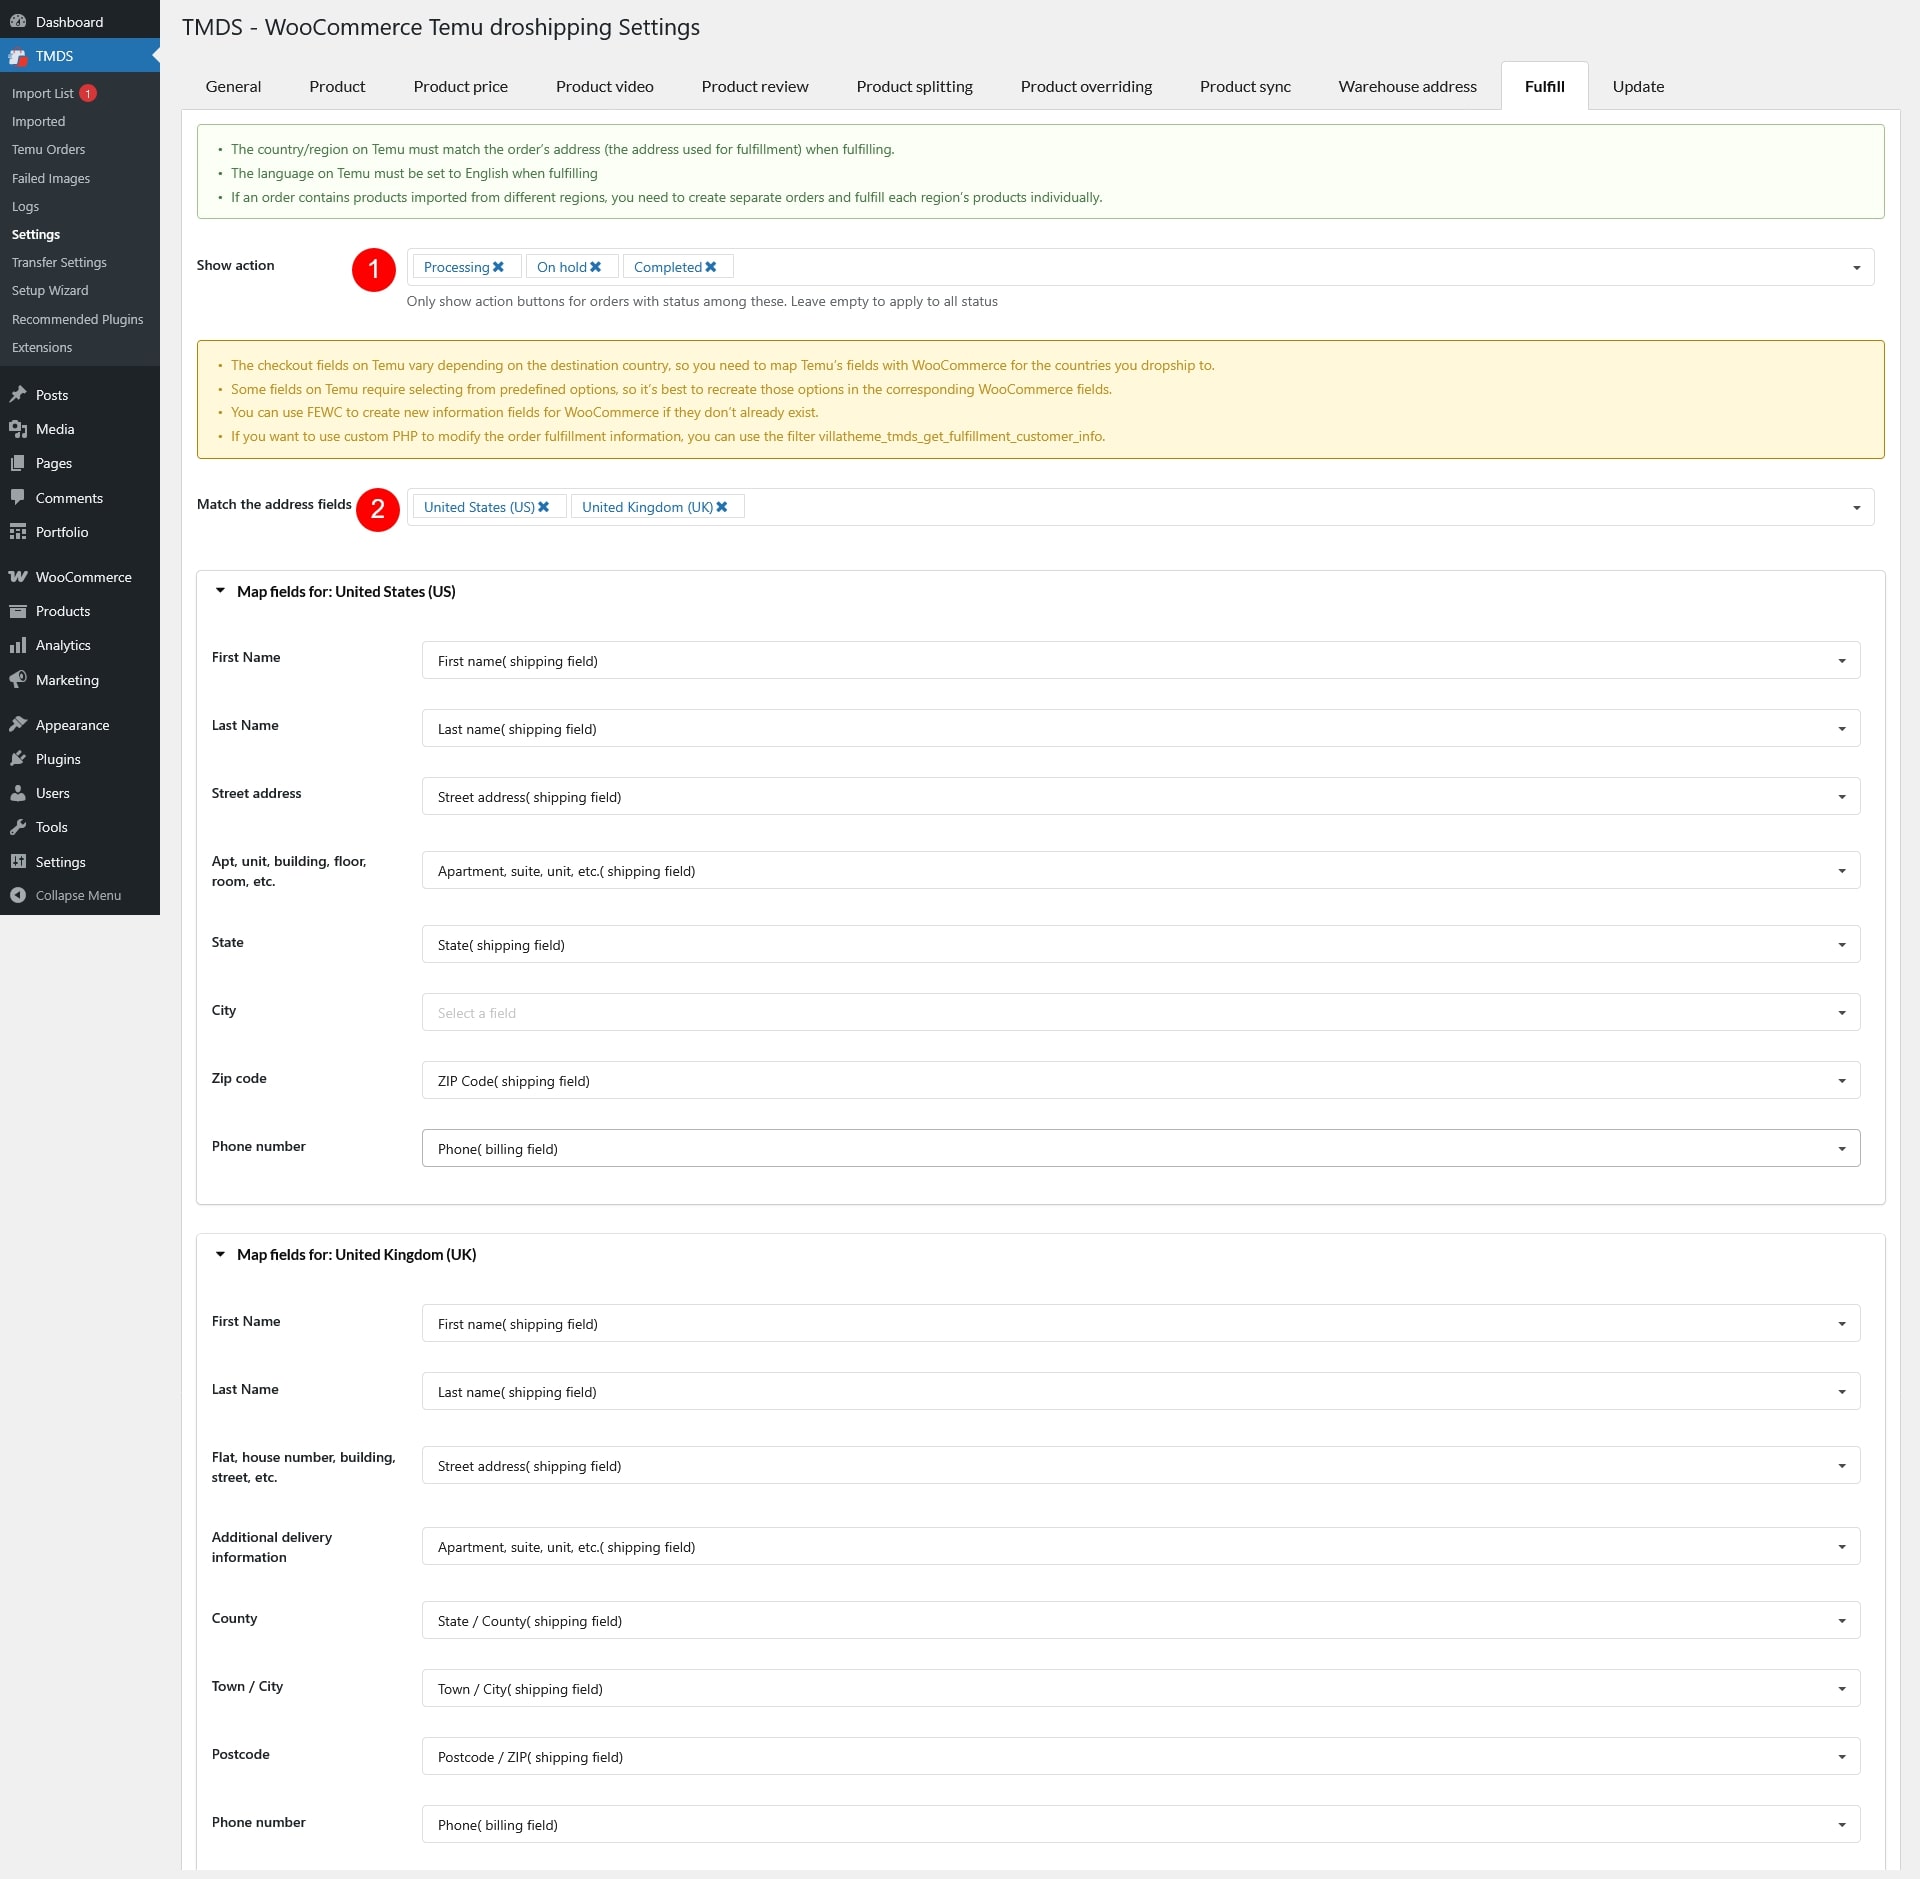
- Settings – Fulfill
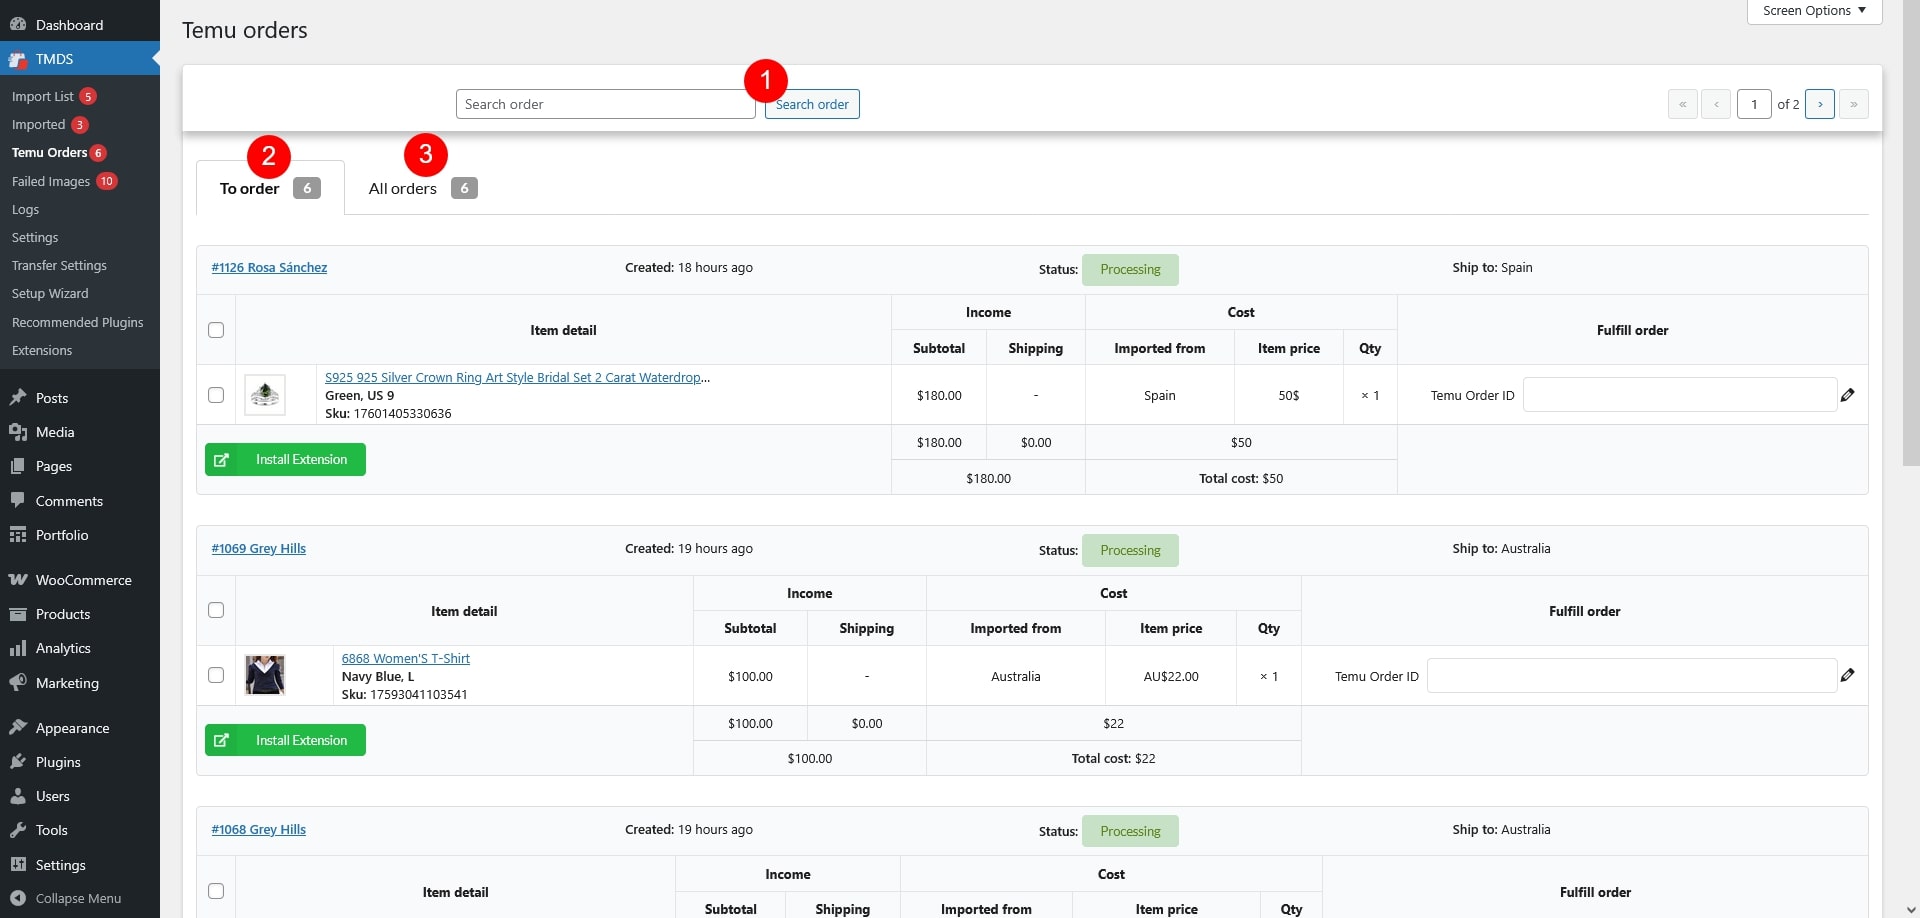
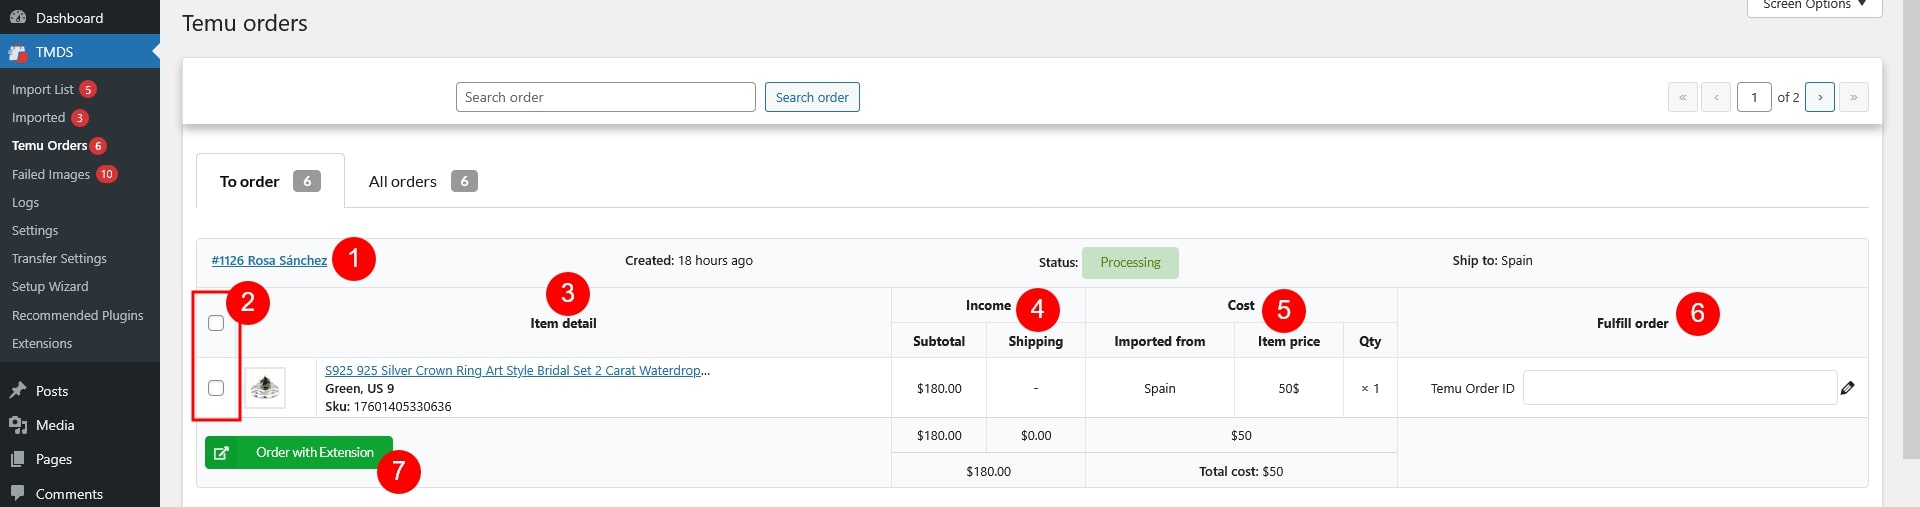
- Temu Orders
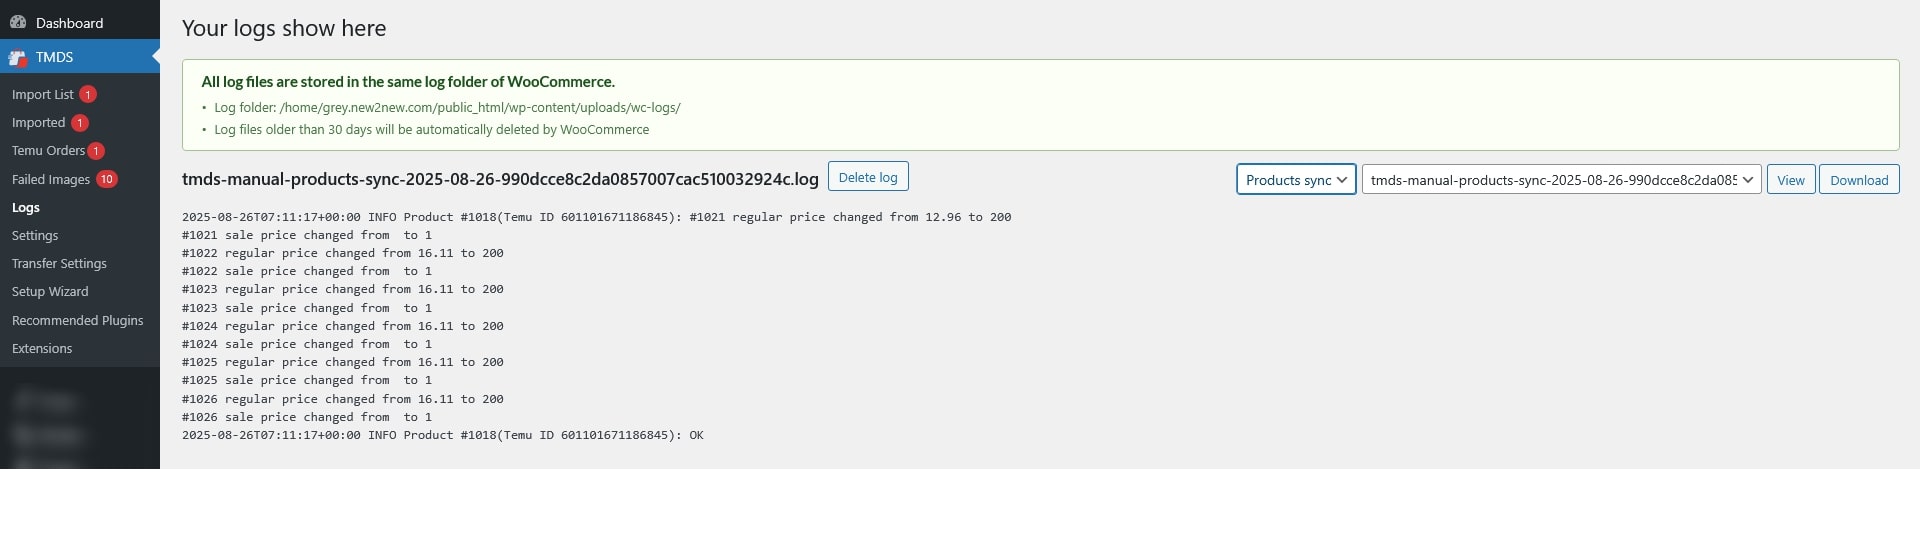
- Logs
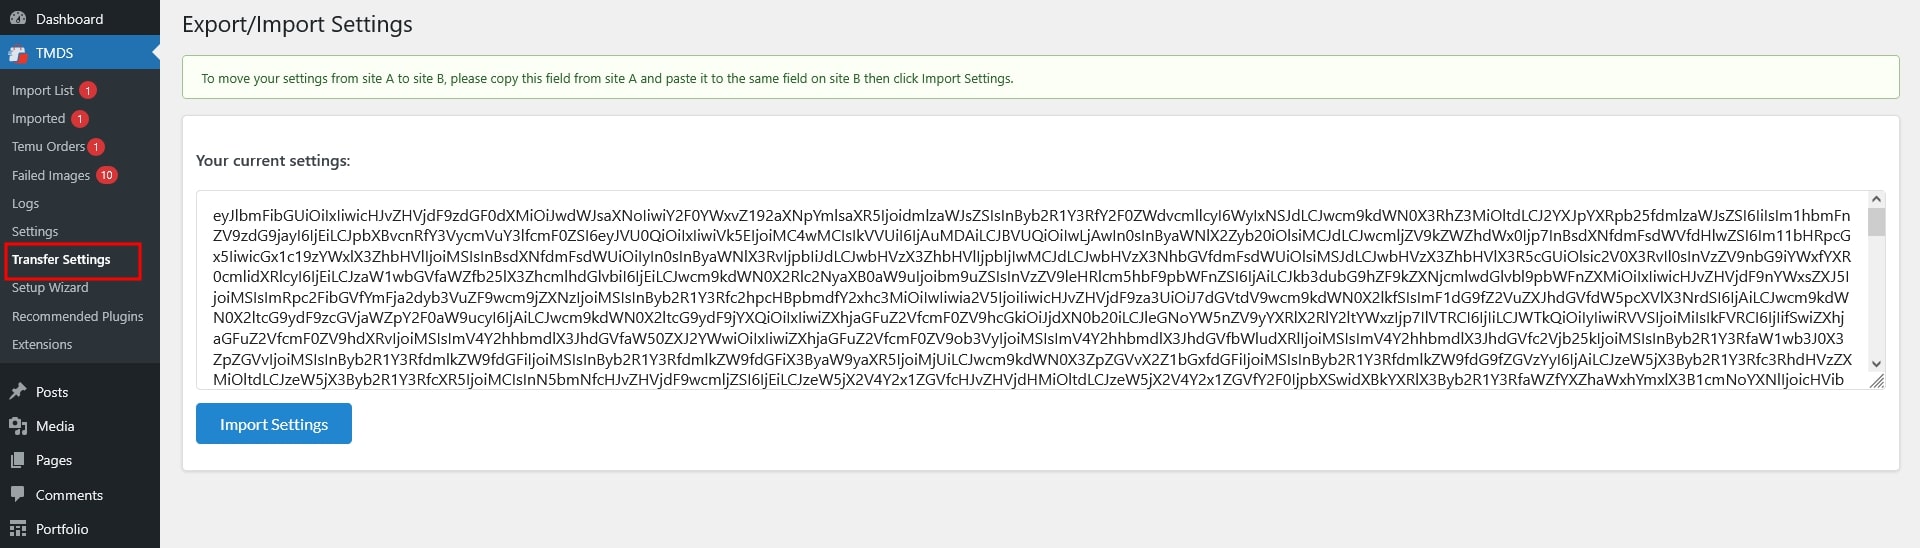
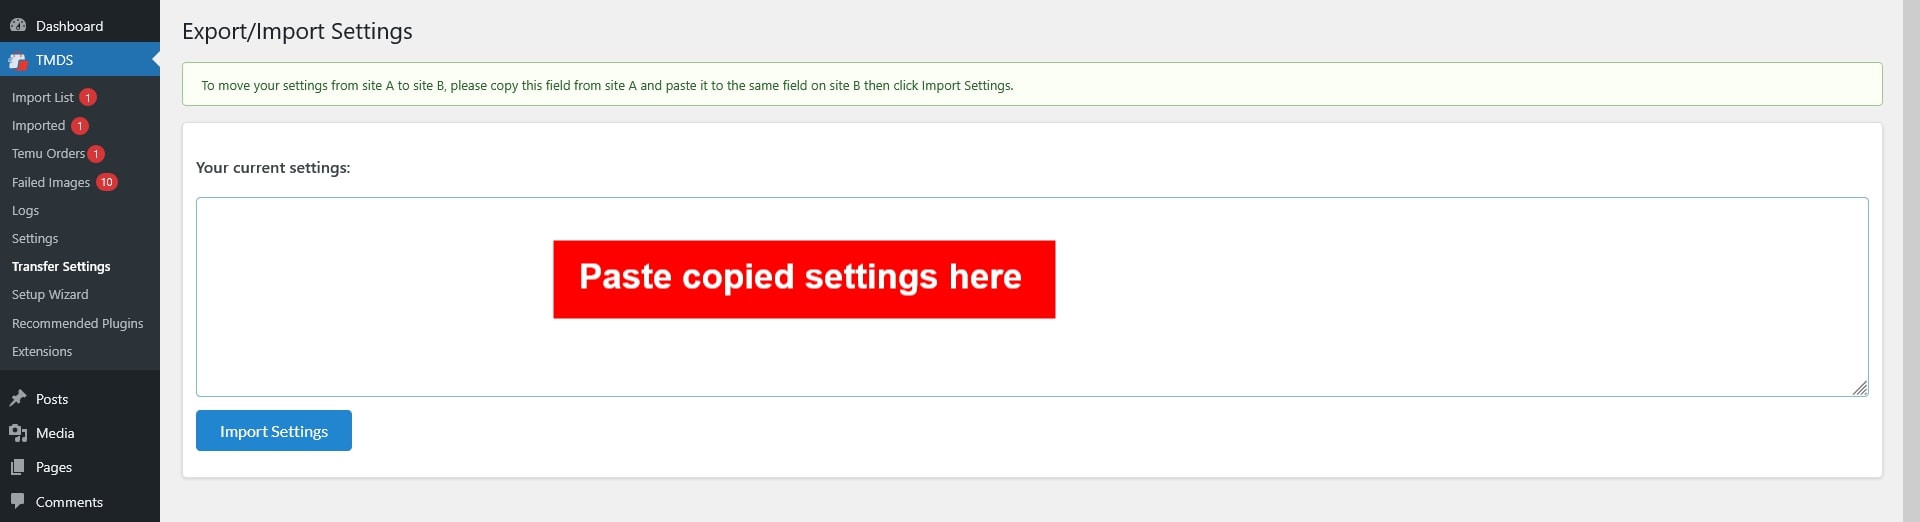
- Transfer Settings
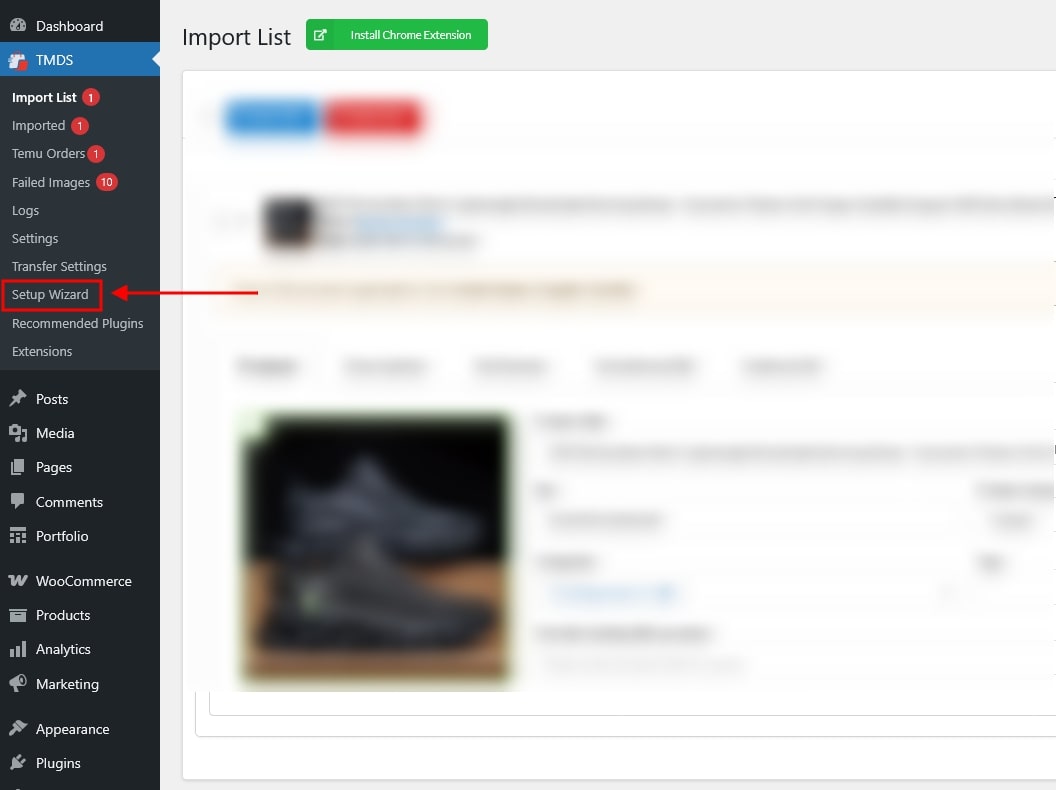
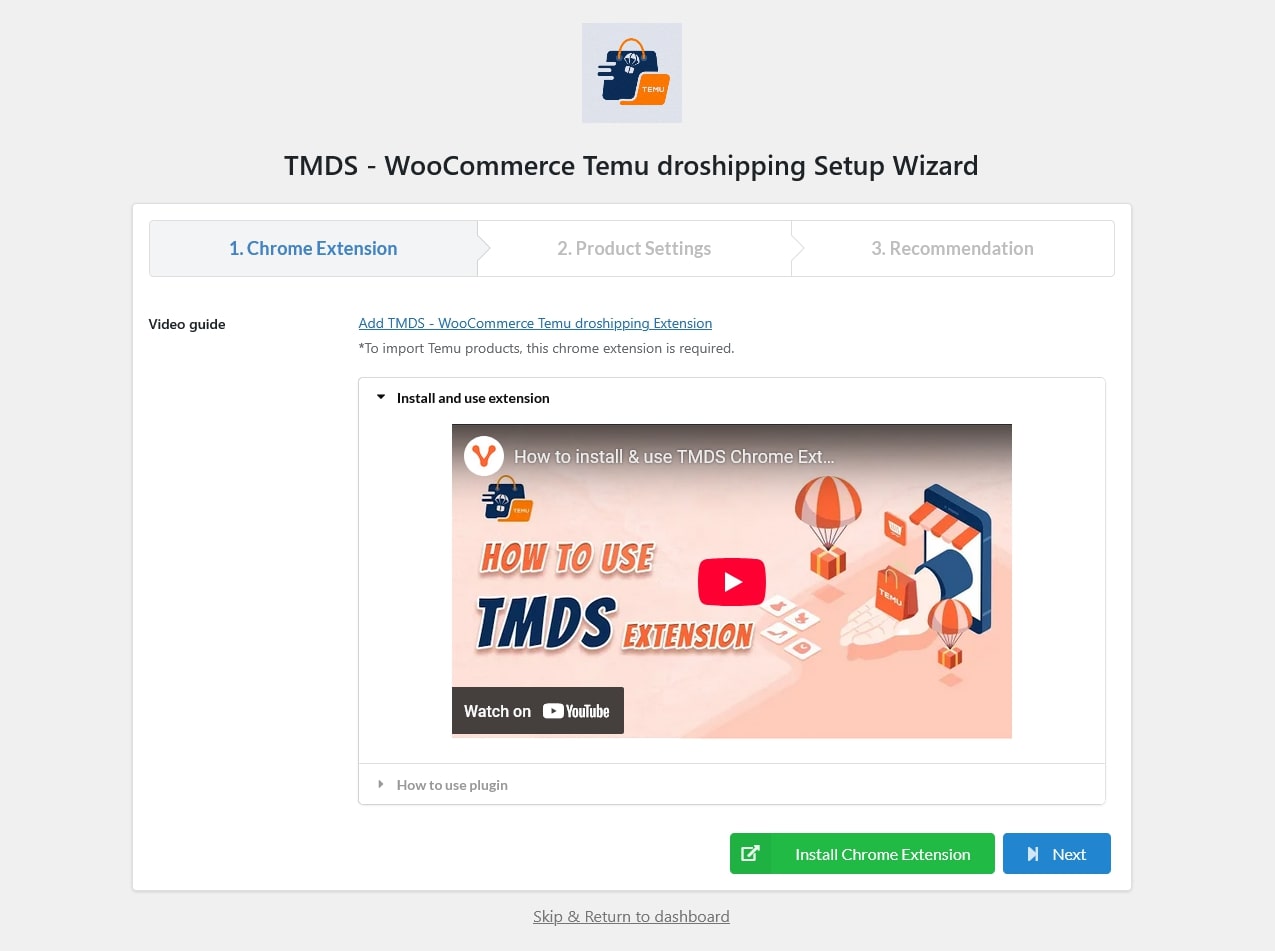
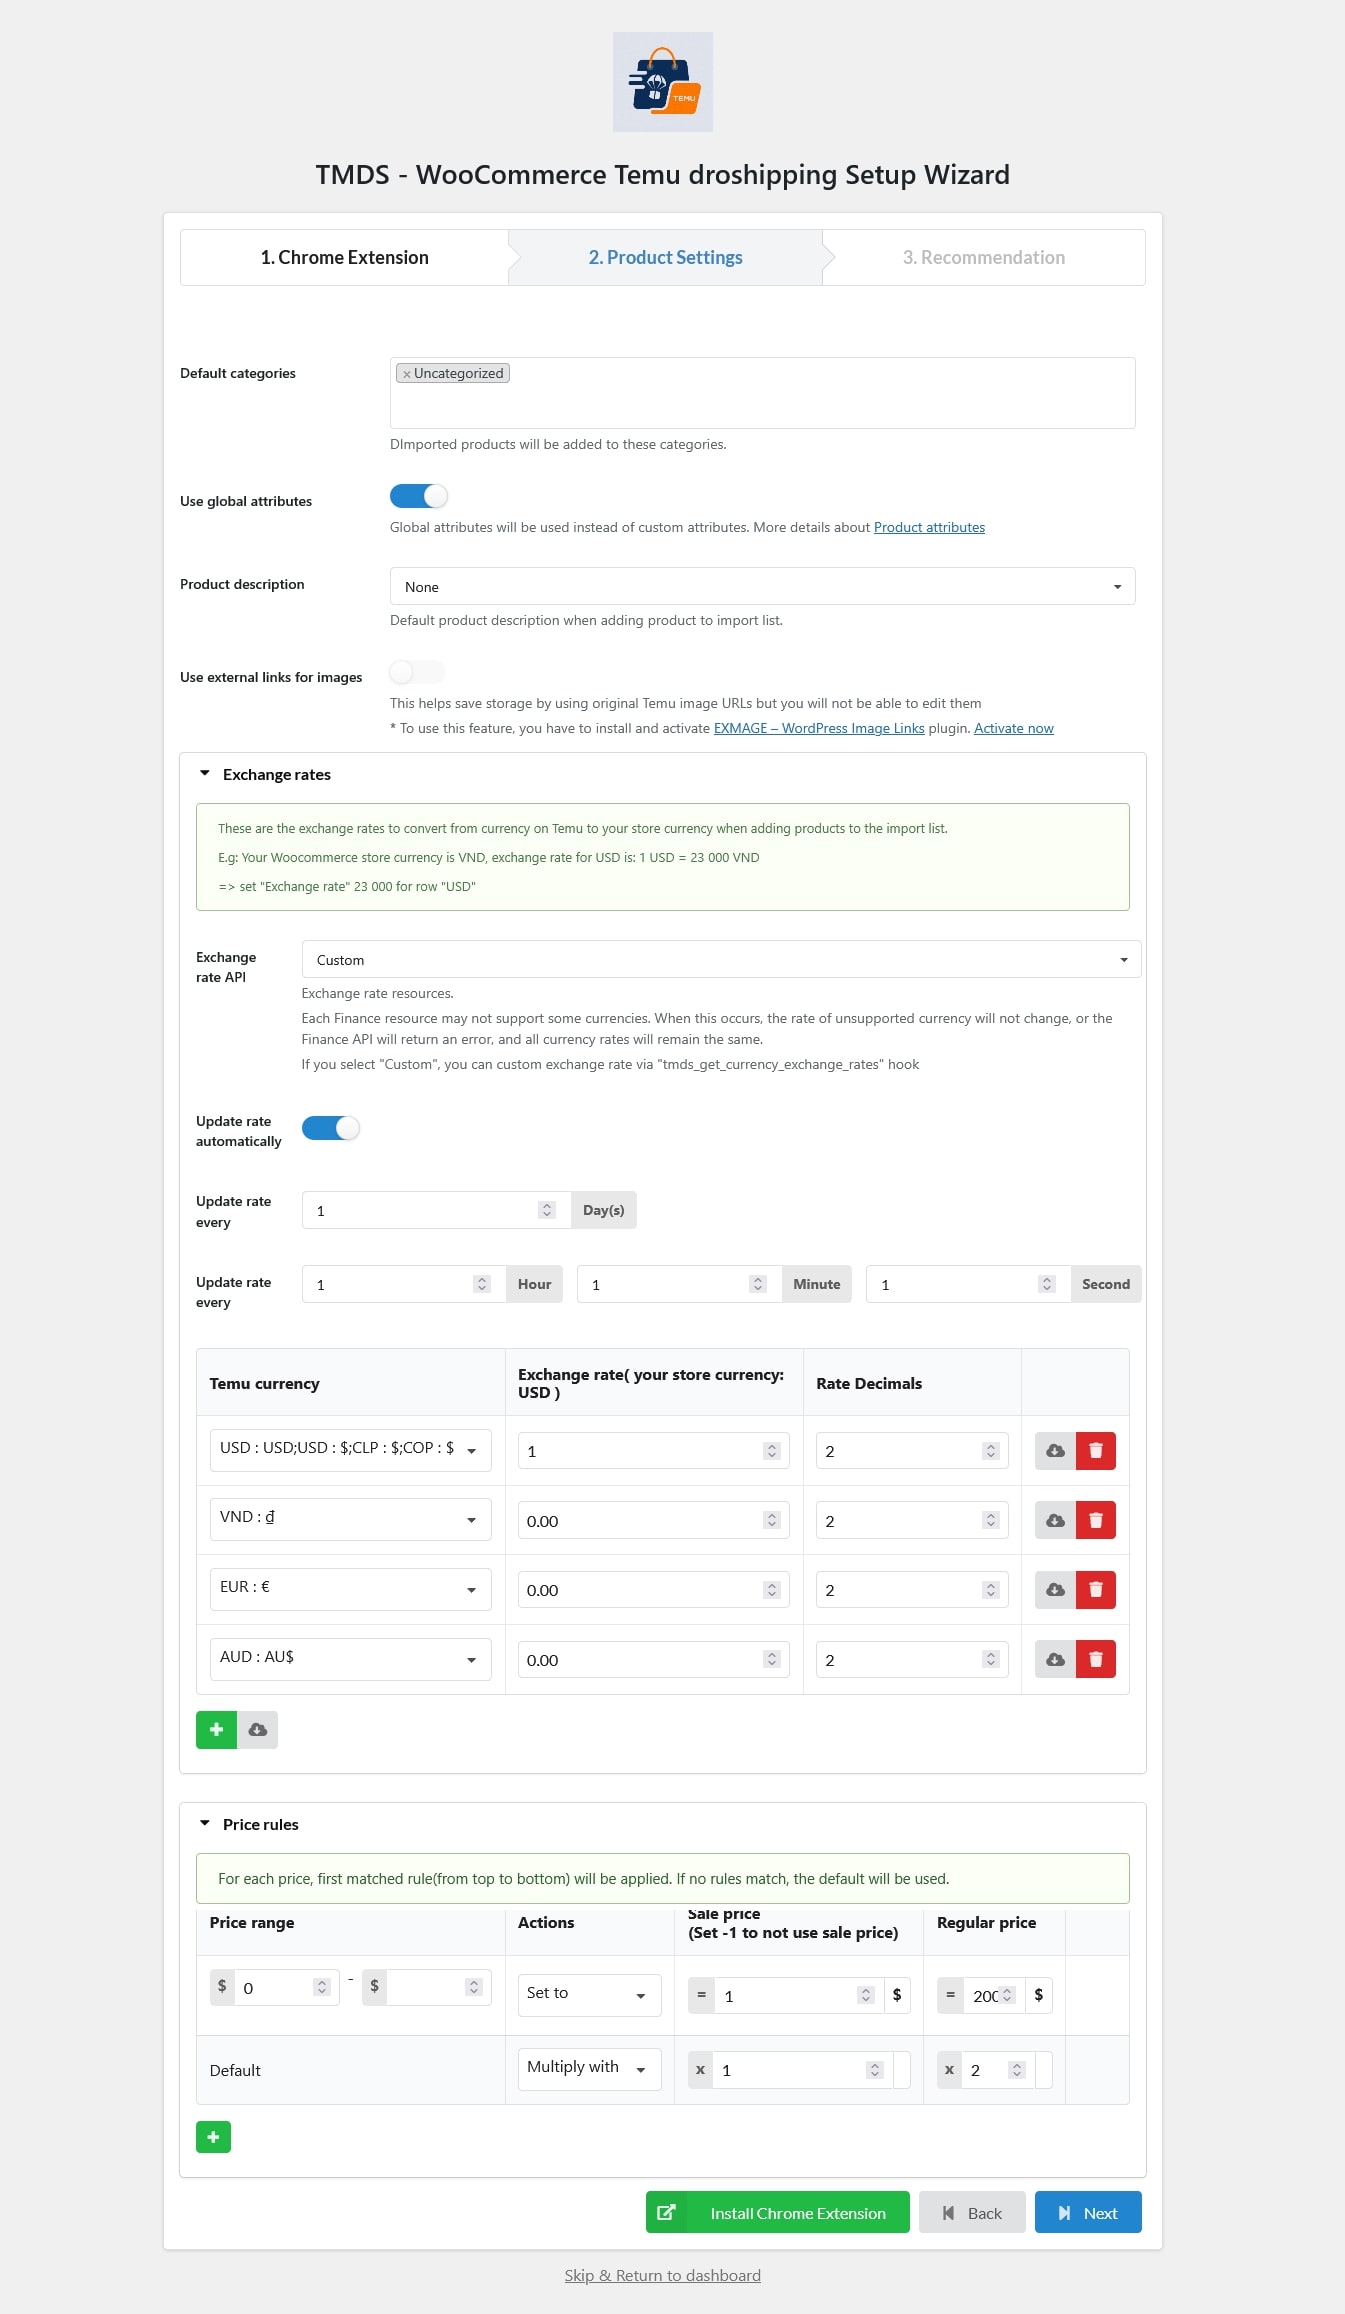
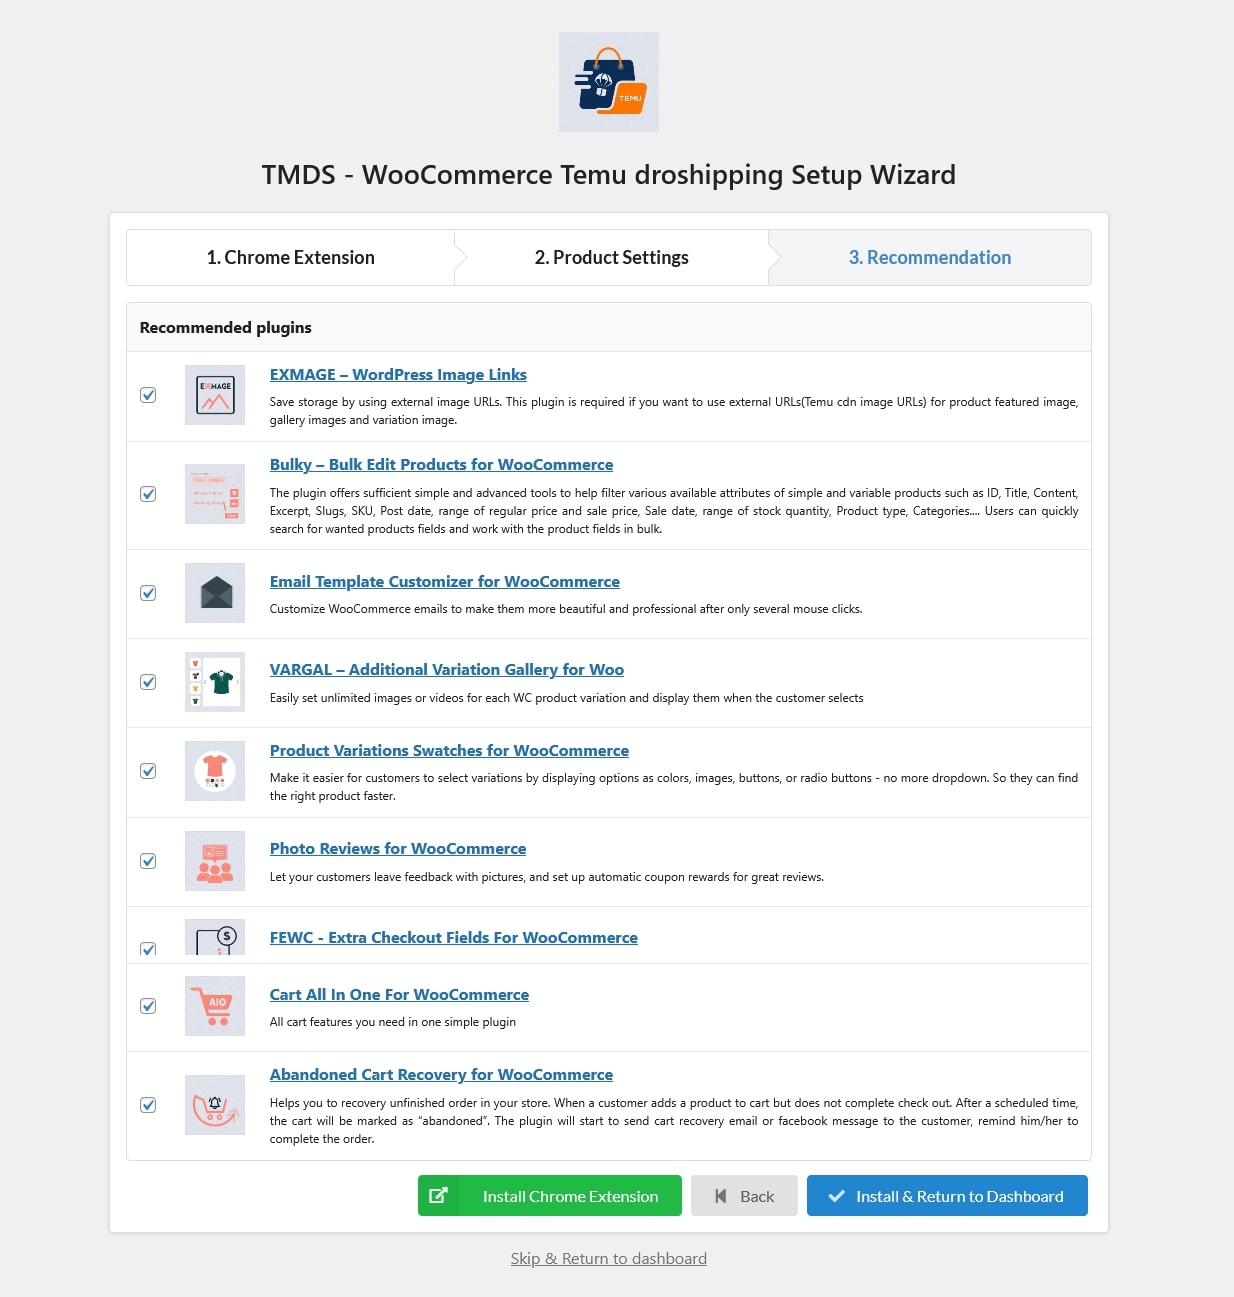
- Setup Wizard
- Fulfill orders
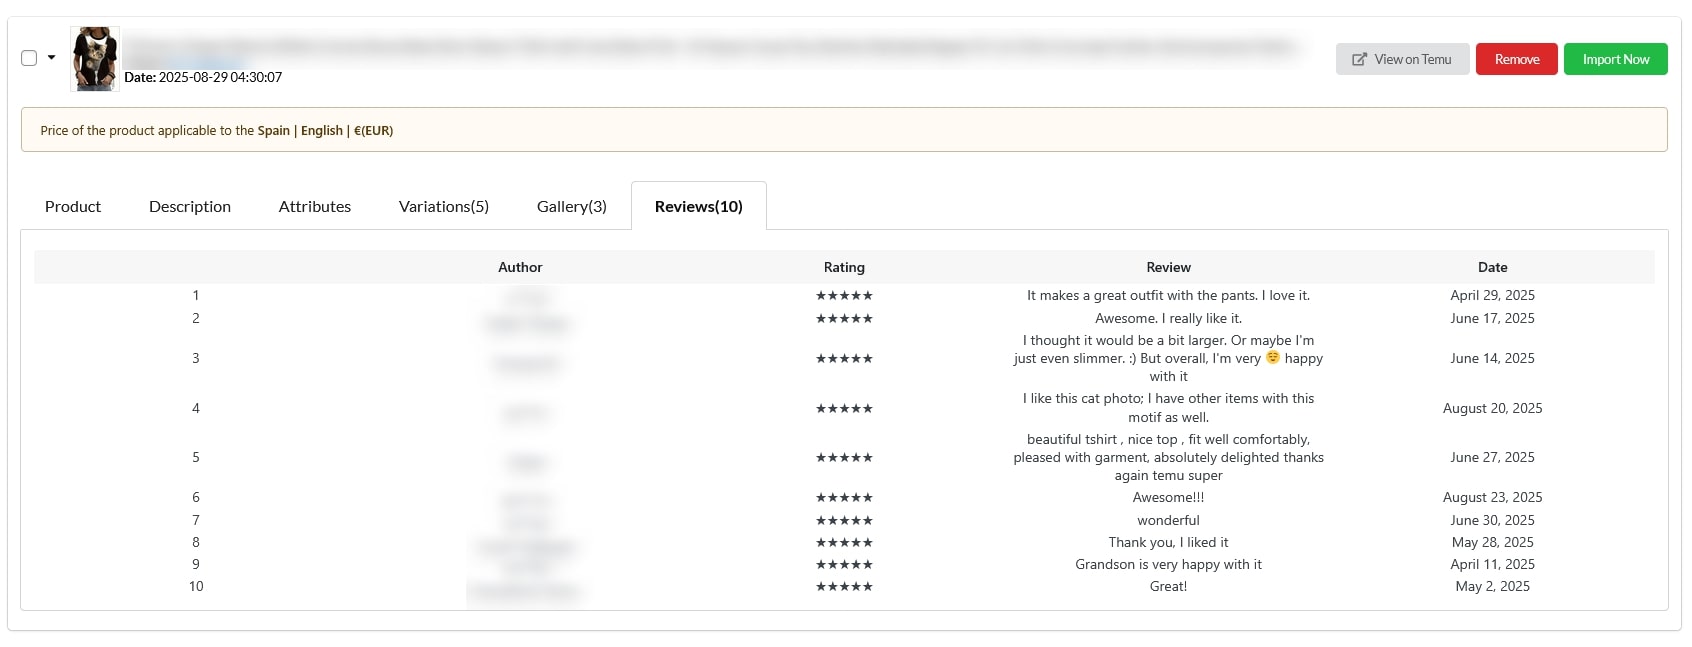
- Import reviews
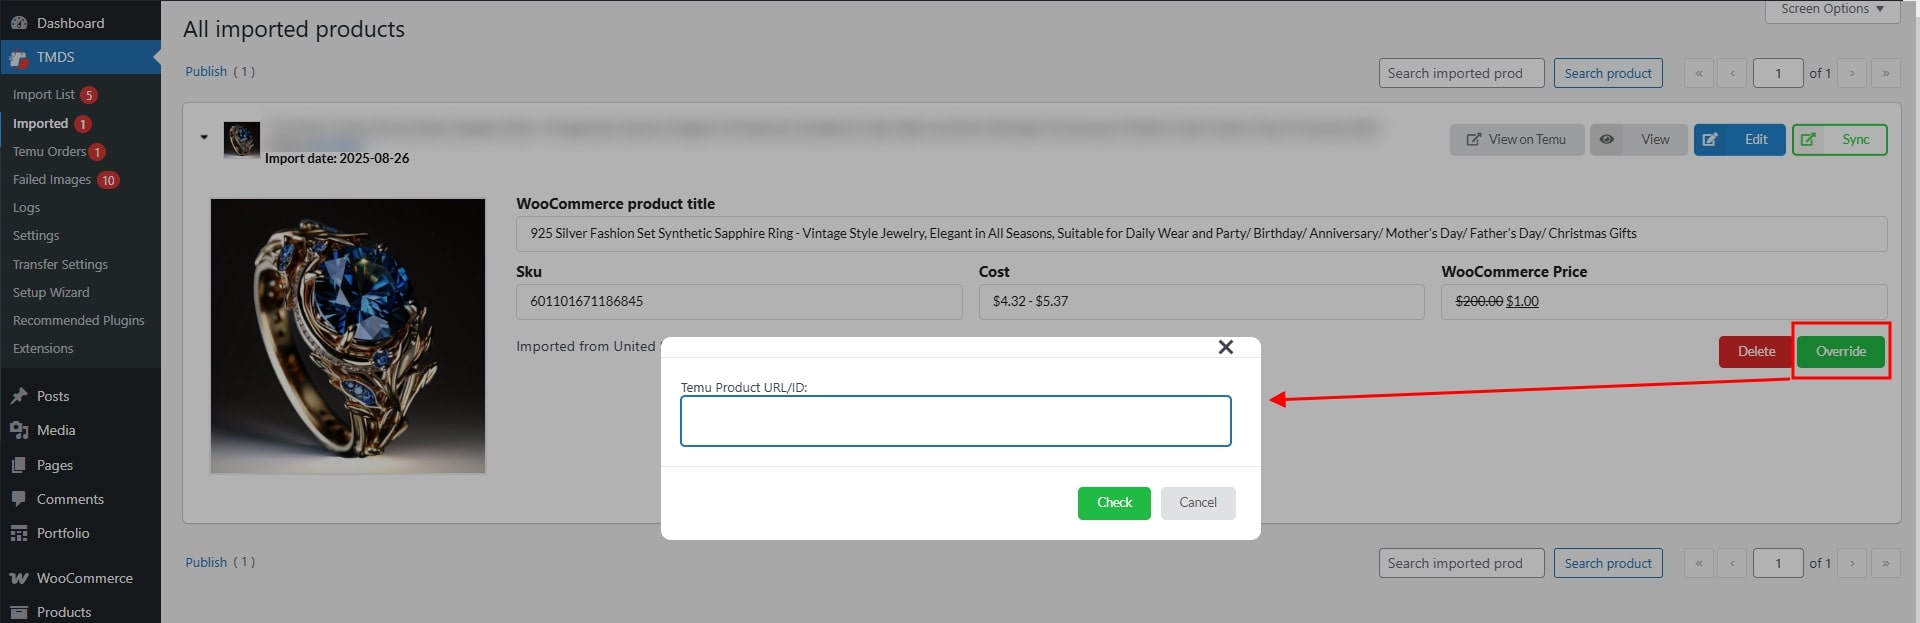
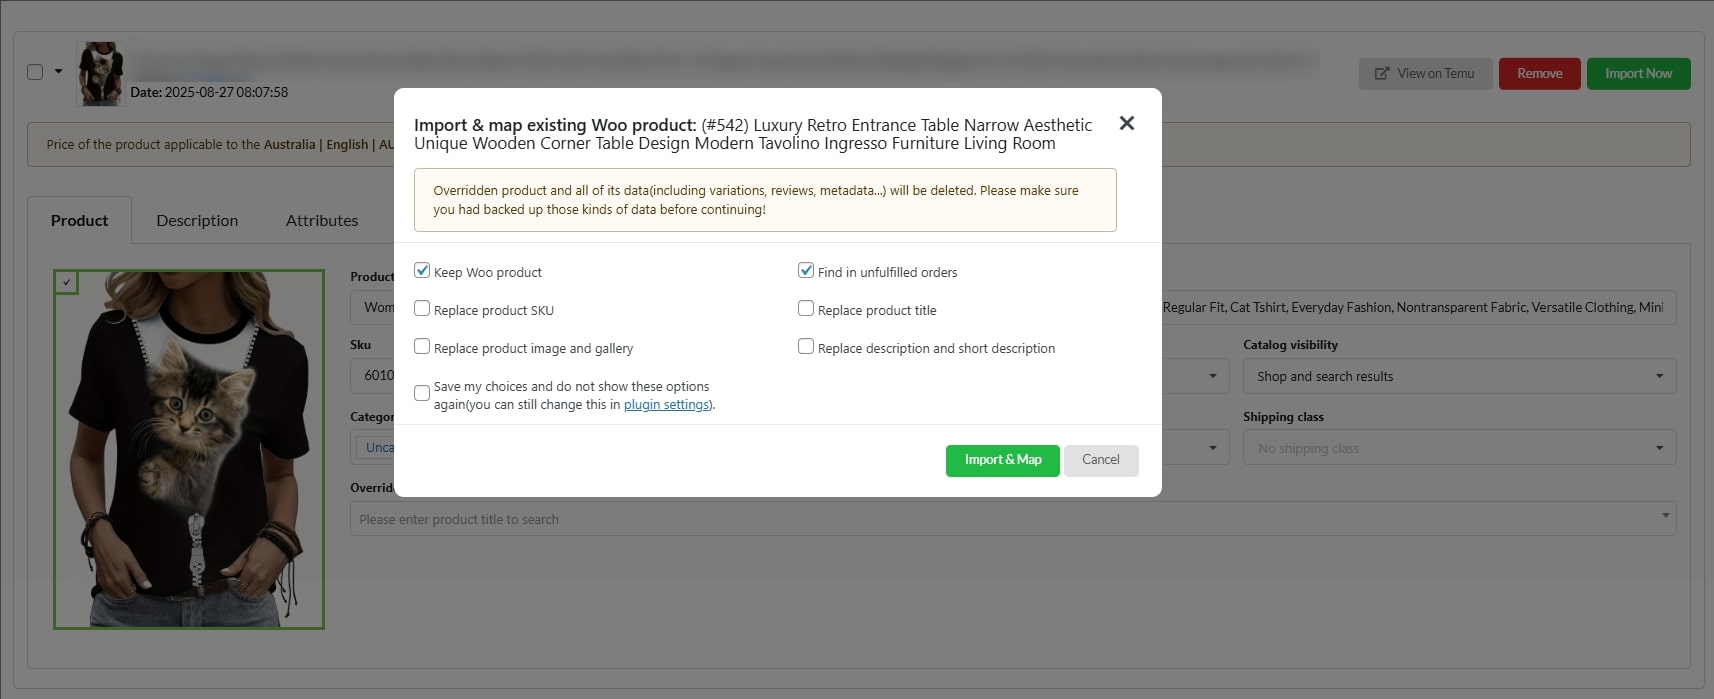
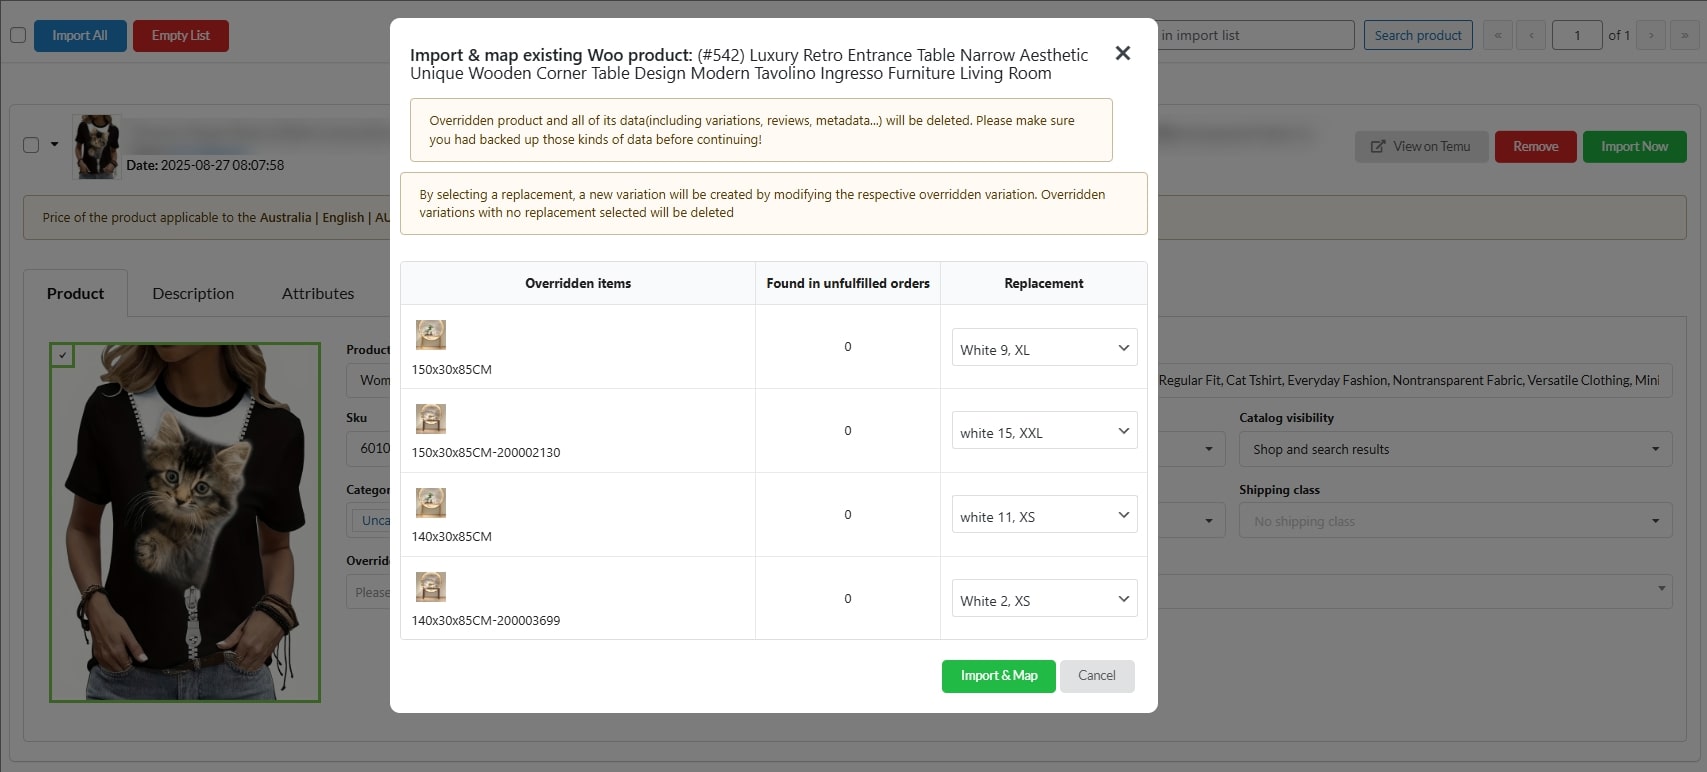
- Override products
- Extra Information
Copyright Villatheme 2015-2026